
SC45W0 - Vacuum Cleaner SAMSUNG - Free user manual and instructions
Find the device manual for free SC45W0 SAMSUNG in PDF.

| Brand | Samsung |
| Model | SC45W0 |
| Product type | Standard vacuum cleaner |
| Nominal input power | 650 W |
| Annual energy consumption | 28.0 kWh/year |
| Noise level | 80 dBA |
| Vacuum cleaner type | Bagless (dust container) |
| Filtration | Washable micro filter |
| Included accessories | Furniture brush, flat nozzle, telescopic tube |
| Power adjustment | Slide switch (Min / Max) with air vent |
| Dust container emptying | Yes, by release button |
| Filter maintenance | Wash with water, dry for at least 12 hours |
| Filter replacement | Exhaust filter accessible at the back, available from Samsung |
| Usage | Indoor only |
| Safety | Do not vacuum water, hot or sharp objects; unplug before maintenance |
| Cord length | Approximately 6 meters |
Frequently Asked Questions - SC45W0 SAMSUNG
User questions about SC45W0 SAMSUNG
0 question about this device. Answer the ones you know or ask your own.
Ask a new question about this device
Download the instructions for your Vacuum Cleaner in PDF format for free! Find your manual SC45W0 - SAMSUNG and take your electronic device back in hand. On this page are published all the documents necessary for the use of your device. SC45W0 by SAMSUNG.
USER MANUAL SC45W0 SAMSUNG
Vacuum Cleaner user manual
* Before operating this unit, please read the instructions carefully.
* For indoor use only.
English
imagine the possibilities
Thank you for purchasing a Samsung product.
SAMSUNG
safety information
SAFETY INFORMATION

- Before operating the appliance, please read this manual thoroughly and retain it for your reference.

- Because these following operating instructions cover various models, the characteristics of your vacuum cleaner may differ slightly from those described in this manual.
CAUTION/WARNING SYMBOLS USED
| WARNING | Indicates that a danger of death or serious injury exists. |
| CAUTION | Indicates that a risk of personal injury or material damage exists. |
OTHER SYMBOLS USED
| Represents something you must NOT do. | |
| Represents something you must follow. | |
| Indicates that you must disconnect the power plug from the socket. |
2_ safety information
safety information
IMPORTANT SAFEGUARDS
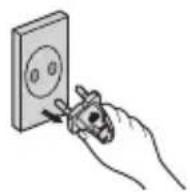
- Read all instructions carefully. Before switching on, make sure that the voltage of your electricity supply is the same as that indicated on the rating plate on the bottom of the cleaner.
- WARNING: Do not use the vacuum cleaner when rug or floor is wet. Do not use to suck up water.
- Close supervision is necessary when any appliance is used by or near children. Do not allow the vacuum cleaner to be used as a toy. Do not allow the vacuum cleaner to run unattended at any time. Use the vacuum cleaner only for its intended use as described in these instructions.
- Do not use the vacuum cleaner without a dust bin. Empty the dust bin before it is full in order to maintain the best efficiency.
- Slide to the Stop(or Min)position before inserting a plug into the electrical outlet.
- Do not use the vacuum cleaner to pick up matches, live ashes or cigarette butts. Keep the vacuum cleaner away from stoves
and other heat sources. Heat can deform and discolour the plastic parts of the unit.
-
Avoid picking up hard, sharp objects with the vacuum cleaner as they may damage the cleaner parts. Do not stand on the hose assembly. Do not put weight on the hose. Do not block the suction or the exhaust port.
-
Switch the vacuum cleaner off on the body of the machine before unplugging from the electrical outlet. Disconnect the plug from the electrical outlet before changing the dust bag or dust container. To avoid damage, please remove the plug by grasping the plug itself, not by pulling on the cord.
-
This appliance can be used by children aged from 8 years and above and persons with reduced physical, sensory or mental capabilities or lack of experience and knowledge if they have been given supervision or instruction concerning use of the appliance in a safe way and understand the hazards involved. Children shall not play with the appliance. Cleaning and user maintenance shall not be made by children without supervision.
-
Children should be supervised to ensure that they do not play with the appliance.
4_ safety information
- The plug must be removed from the socket outlet before cleaning or maintaining the appliance.
- The use of an extension cord is not recommended.
- If your vacuum cleaner is not operating correctly, switch off the power supply and consult an authorized service agent.
- If the supply cord is damaged, it must be replaced by the manufacturer or its service agent or a similarly qualified person in order to avoid a hazard.
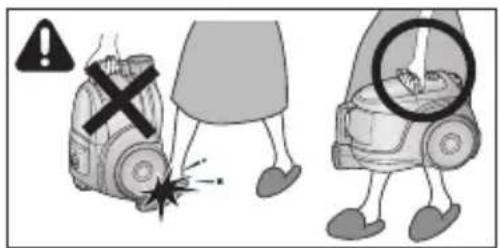
- Don't carry the vacuum cleaner by holding the hose. Use the handle on the vacuum cleaner set.
- Unplug the cleaner when not in use. Turn off the power switch before unplugging.
- Do not use to suck up water.
- Do not immerse in water for cleaning.
- The hose should be checked regularly and must not be used if damaged.
- The vacuum cleaner handle contains electrical connections the handle is not a serviceable part.
- The current carrying hose handle contains
safety information _5
electrical connections is not a serviceable part by user.
-
Please contact the manufacturer or service center for a replacement.
-
For information on Samsung's environmental commitments and product specific regulatory obligations e.g. REACH (WEEE, Batteries) visit: samsung.com/uk/aboutsamsung/samsungelectronics/corporatecitizenship/data_corner.html
contents
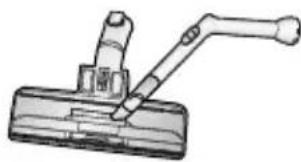
ASSEMBLING THE CLEANER
08 Assembling the Cleaner

09 On/Off Switch
09 Power cord
10 Power control
MAINTAINTOOLSANDFILTER

11 Using accessory
12 Maintain floor tools
13 Emptying the dust bin
14 When to clean the dust pack
15 Cleaning the dust pack
16 Cleaning the outlet filter
TROUBLESHOOTING

contents _7
assembling the cleaner
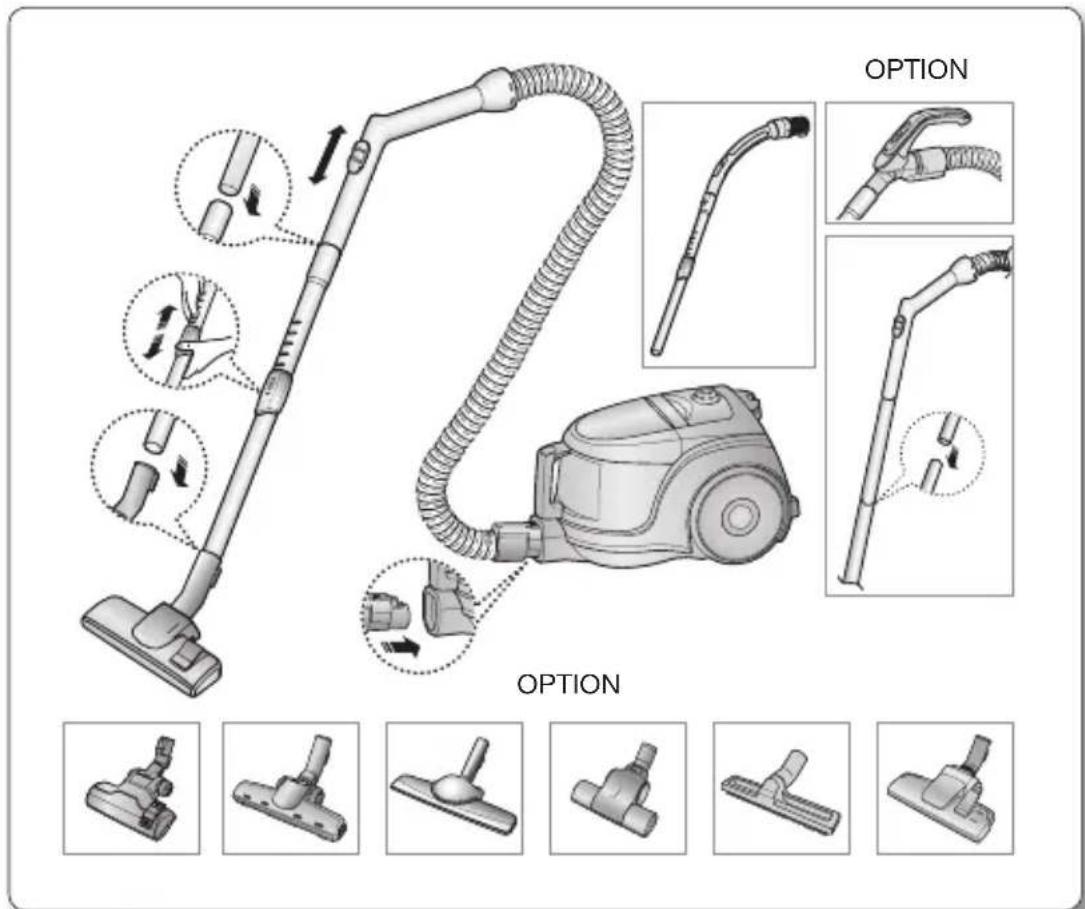

- Please do not press the button of dust bin handle when carrying machine.

- For storage, park the floor nozzle.

natural_image
Technical illustration of two different mechanical devices, one front view and one side view, with no visible text or symbols.8_ assembling the cleaner
operating the cleaner
ON/OFF SWITCH
1) BODY CONTROL TYPE 2) ON/OFF TYPE
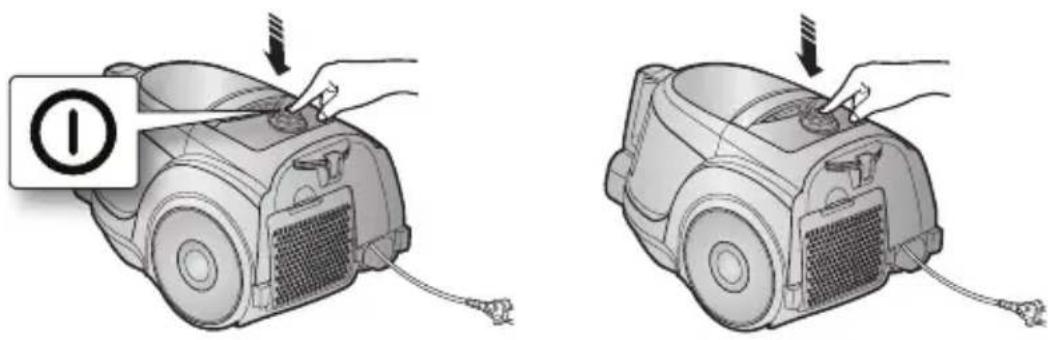

- When removing the plug from the electrical outlet, grasp the plug, not the cord.
POWER CORD
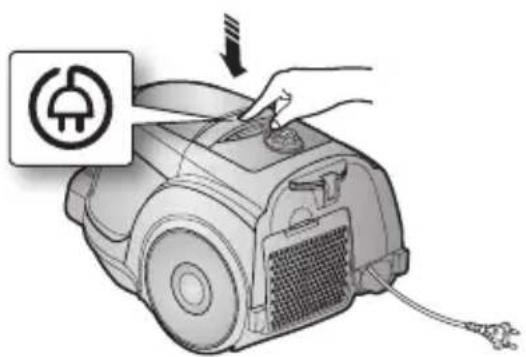
operating the cleaner _9
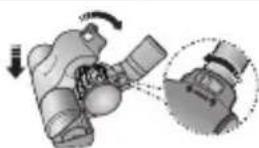
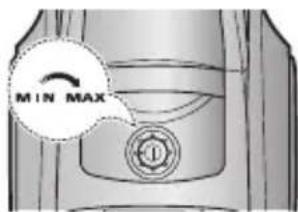
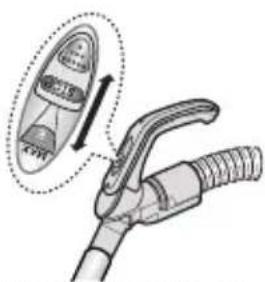
POWER-CONTROL
1) SLIDE CONTROL TYPE ONLY (OPTION)
- SLIDE TO THE STOP POSITION Vacuum-cleaner switches off (stand by mode)
- SLIDE FORWARD TO MAX Suction capacity increases smoothly up to maximum.
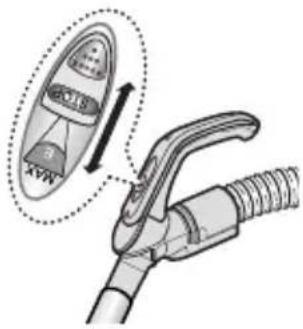
2) BODY-CONTROL TYPE / ON/OFF TYPE
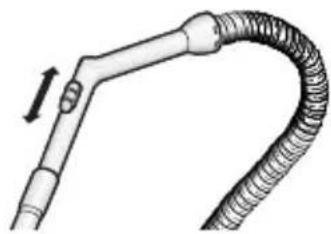
- HOSE
To reduce suction for cleaning draperies, small rugs, and other light fabrics, pull the tap air until the hole is open.
natural_image
Diagram of a flexible hose with a curved tube and a directional arrow indicating motion (no text or symbols)- BODY (BODY-CONTROL TYPE ONLY)
MIN = For delicate surface e.g. net curtains.
MAX = For hard floors and heavily soiled carpets.

10_ operating the cleaner
maintain tools and filter
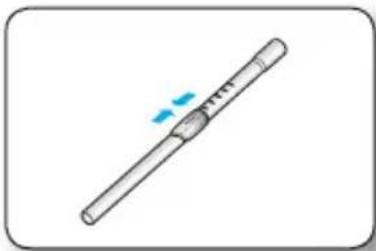
USING ACCESSORY
PIPE (OPTION)
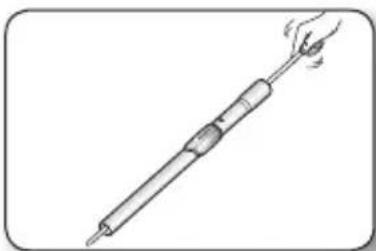
- Adjust the length of the telescopic pipe by sliding the length control button located in the center of the telescopic pipe back and forth.
natural_image
Simple line drawing of a cylindrical tool with a blue motion indicator (no text or symbols)- To check for blockages, separate the telescopic pipe and adjust to shorten. This allows for easier removal of waste clogging the tube.
natural_image
Illustration of a hand holding a cylindrical tool with a handle and central knob (no text or symbols)ACCESSORY (OPTION)
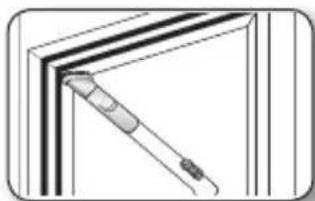
• Dusting brush for furniture. shelves, books, etc.
natural_image
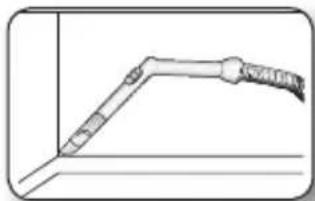
Pure diagram of a mechanical component without any text, numbers, or symbols- Crevice tool for radiators, crevices, corners, between cushions.
natural_image
Pure diagram of a pipe or tube with no text, numbers, or symbolsmaintain tools and filter _11
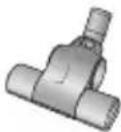
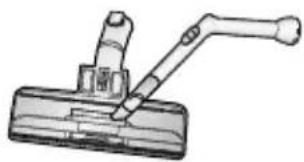
MAINTAIN FLOOR TOOLS
2-STEP BRUSH (OPTION)
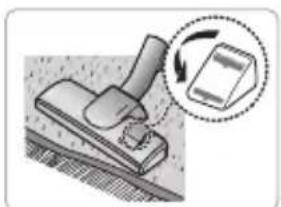
- Adjust the inlet lever according to the floor surface.
- Remove waste matter completely if the inlet is blocked.
natural_image
Illustration of a mechanical press or clamp with a magnified inset showing rotational motion (no text or symbols)Carpet Cleaning

natural_image
Diagram of a mechanical device with a lever and a box, showing motion direction (no text or symbols)Floor Cleaning
natural_image
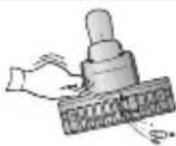
Mechanical lever assembly diagram (no text or symbols)PET BRUSH (OPTION)
For improved pick-up of pet hair and fibre on carpets.
Frequent vacuuming of hair or pet fur may cause a falling-off of the rotation due to matters tangled around the drum. In this case, clean the drum with care.

natural_image
Sequence of six mechanical assembly diagrams showing a lever mechanism with no text or symbolsBLANKET BRUSH (OPTION)
Clogs on turbine keep brush from turning, thus need to be unclogged as follows.
For picking up pet hair and fibre on upholstery and bed linen.
Remove waste matter completely when inlet is blocked.
Turn the lock button to 'UNLOCK', and remove waste matter.
Turbine
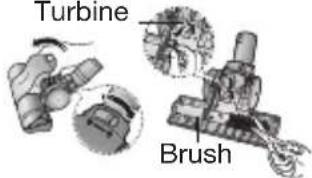
To reassemble, align the cover to the front of the main body and close. After closing the cover, ensure that the lock button is turned to the 'LOCK' position.

Use for bedclothes only. Be cautious not to damage brush during unclogging.
12_ maintain tools and filter
maintain tools and filter
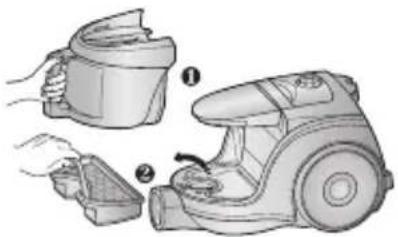
EMPTYING THE DUST BIN
1: 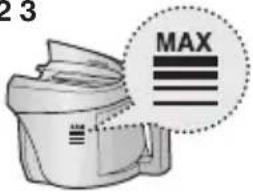 Once dust reaches the dust full mark, or sution is noticeably reduced during cleaning, empty the dust bin. Once dust reaches the dust full mark, or sution is noticeably reduced during cleaning, empty the dust bin. | 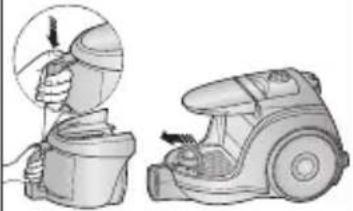 Take the dust bin out by pressing the button. Separate the dust bin cover. Take the dust bin out by pressing the button. Separate the dust bin cover. | 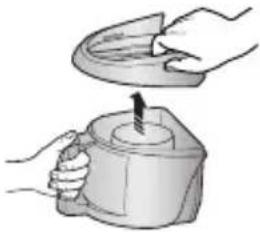 |
4 5 6  Throw away dust into the bin. Throw away dust into the bin. | 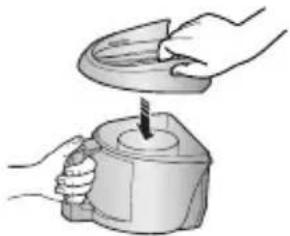 Close the dust bin cover. Close the dust bin cover. | 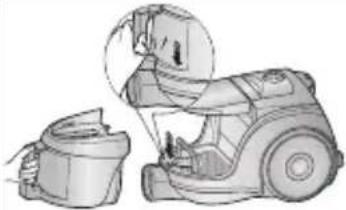 Before use, push the dust bin into the main body of the vacuum cleaner until you hear the “click” sound. Before use, push the dust bin into the main body of the vacuum cleaner until you hear the “click” sound. |
- Empty into a plastic bag (recommended for asthma/allergy sufferers)

natural_image
Illustration of three steps to remove a container with contents, showing mechanical deformation (no text or symbols)
You may rinse the dust bin with cold water.
natural_image
Illustration of hands using a tool to spray or spray over a container (no text or symbols)
maintain tools and filter _13
maintain tools and filter
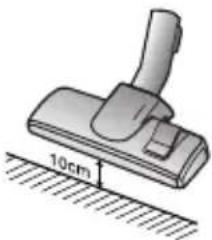
WHEN TO CLEAN THE DUST PACK
- If suction is noticeably reduced during cleaning, please check the dust pack as indicated below.
Turn the vacuum power to 'MAX'.
natural_image
Illustration of a welding torch with a magnified inset showing the blade (no text or symbols)HANDLE CONTROL
If suction is noticeably reduced with the inlet floating 10cm above flat floor, clean it.
natural_image
Illustration of a mechanical clamp or fixture with a 10cm scale indicator (no text or symbols present)
When suction is noticeably reduced continuously, please cleaning the Dust Pack as shown in the following illustration.
14_ maintain tools and filter
CLEANING THE DUST PACK
- Remove the dust bin and dust pack as shown.
natural_image
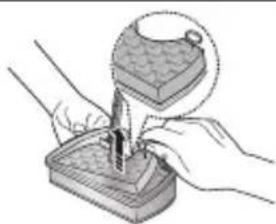
Illustration of a hand holding a small container and a hand holding a tray, next to an open vacuum cleaner (no text or symbols present)- Remove the sponge and filter from the dust pack.
natural_image
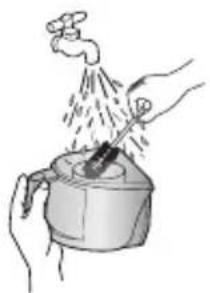
Illustration of hands using a tool to apply material to a container (no text or symbols visible)- Wash the sponge and the filter of the dust pack with water.
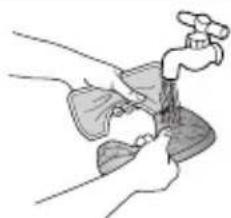
natural_image
Illustration of hands cleaning a faucet with a bag (no text or symbols)- Let the sponge and filter dry in the shade for more than 12 hours.
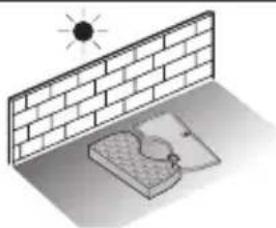
natural_image
Isometric illustration of a sun shining on a brick wall and a textured surface (no text or symbols)- Put the sponge and filter into the dust pack.
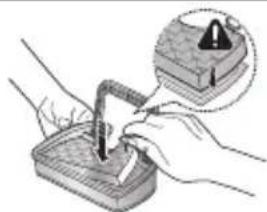
natural_image
Illustration of hands using a tool to apply material to a container, with an inset showing a warning symbol (no text or labels present)- Put the assembled dust pack into the main body.
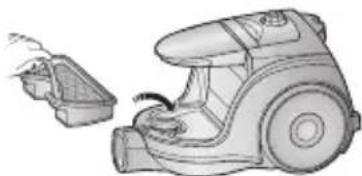
natural_image
Illustration of a vacuum cleaner with a smaller device nearby (no text or symbols)
Make sure the filter is completely dry before putting it back into the vacuum cleaner. Allow 12 hours for it to dry.


maintain tools and filter
maintain tools and filter
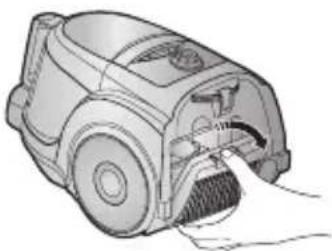
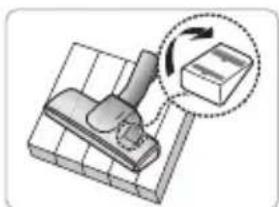
CLEANING THE OUTLET FILTER
natural_image
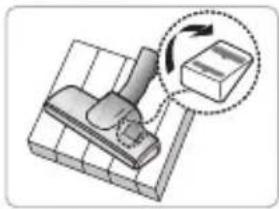
Illustration of a hand inserting a component into a device (no text or symbols visible)Press the fixed frame part at the back of the main body to remove.
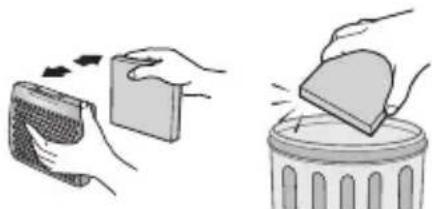
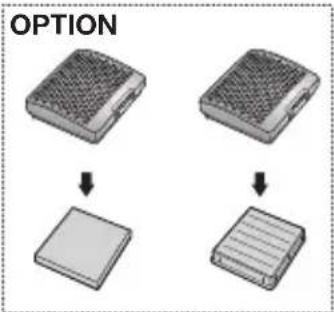
OPTION - MICRO FILTER
natural_image
Illustration showing two hand gestures: one applying a rectangular object to a speaker, the other pressing down on a trash can (no text or symbols present)Remove and replace the blocked outlet filter.

Replacement filters are available at your local Samsung distributor.
16_ maintain tools and filter
troubleshooting
| PROBLEM SOLUTION | |
| Motor dows not start. | Check cable, plug and socket.Leave to cool. |
| Suction force is gradually decreasing. | Check for blockage and remove. |
| Cord does not rewind fully. | Pull the cord out 2-3m and push down the cord rewind button. |
| Vacuum cleaner dows not pick up dirt. | Check hose and replace if required. |
| Low or decreasing suction | Please check filter and, if required, clean as illustrated in the instructions. if filters are out of condition change them to new ones. |
| Body overheating | Please check filters, If required clean as illustrated in the instruction. |
| Static electricity discharge | Please decrease power suction. |
This Vacuum cleaner is approved the following.
EMC Directive : 2004/108/EC
Low Voltage Directive : 2006/95/EC
Product information
[English]
According to Commission Regulation (EU) No 666/2013
| A Supplier Samsung Electronics Co., Ltd. | ||
| B Model SC45S0 SC45W0 | ||
| C Annual Energy Consumption (kWh/yr) 61.0 | 28.0 | |
| D Sound Power Level (dBA) 87 80 | ||
| E Rated Input Power (W) 1300 650 | ||
| F Type General purpose vacuum cleaner | ||
1) Indicative annual energy consumption (kWh per year), based on 50 cleaning tasks.
Actual annual energy consumption will depend on how the appliance is used.
2) Measurements for power consumption and performance are based on methods in EN 60312 - 1 and EN 60704.
Memo
SAMSUNG
If you have any questions or comments relating to Samsung products, please contact the SAMSUNG customer care center.
| Country | Customer Care Center 📞 | Web Site |
| AUSTRIA | 0800 72 67 864(0800-SAMSUNG) | www.samsung.com/at/support |
| SWITZERLAND | 0800 726 786(0800-SAMSUNG) | www.samsung.com/ch/support(German)www.samsung.com/ch_fr/support(French) |

SC45** Serie

natural_image
Technical illustration of two different mechanical devices, one front view and one side view, with no visible text or symbols.VORSICHT
natural_image
Diagram of a flexible hose with a curved tube and a directional arrow indicating motion (no text or symbols)natural_image
Simple line drawing of a cylindrical tool with a handle and a blue arrow indicating motion (no text or symbols)natural_image
Illustration of a hand holding a pen-like tool with a handle and central grip (no text or symbols)ZUBEHÖR (OPTION)
natural_image
Pure technical line drawing of a mechanical component without any text, numbers, or symbolsnatural_image
Simple line drawing of a bent pipe or tube with a label 'POTELA' at the end (no other text or symbols)natural_image
Illustration of a mechanical press or clamp with a magnified inset showing rotational motion (no text or symbols)Teppichreinigung
natural_image
Diagram of a mechanical device with a lever and a box, showing motion direction (no text or symbols)Hartbodenreinigung
natural_image
Mechanical component diagram showing a lever and handle assembly (no text or symbols)TIERHAARBÜRSTE (OPTIONAL)
natural_image
Sequence of six mechanical component diagrams showing assembly steps (no text or symbols)POLSTERBÜRSTE (OPTIONAL)
natural_image
Illustration of three steps to handle a container with contents, showing mechanical lifting and pouring (no text or symbols)natural_image
Illustration of hands using a tool to spray water from a container (no text or symbols)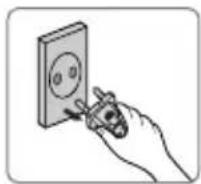

natural_image
Illustration of a welding torch with a magnified inset showing the blade (no text or symbols)GRIFF-STEUERTASTE
natural_image
Illustration of a mechanical clamp or fixture with a 10cm scale indicator (no text or symbols present)
natural_image
Illustration of a hand holding a small container and a hand holding a second container, both showing a cleaning or cleaning process (no text or symbols present)natural_image
Illustration of hands using a tool to apply material, showing a magnified view of the object (no text or symbols present)natural_image
Illustration of hands cleaning a faucet with a bag (no text or symbols)natural_image
Isometric illustration of a brick wall with a sun symbol above it, and a small grid-patterned object below (no text or symbols)natural_image
Illustration of hands using a tool to apply a component, with a warning symbol and magnified view (no text or labels)natural_image
Illustration of a vacuum cleaner with a hand pump and a small container nearby (no text or symbols)
natural_image
Illustration of a hand inserting a component into a device (no text or symbols visible)natural_image
Illustration showing two hand gestures: one moving a rectangular object, the other placing a wedge-shaped object on a cylindrical base (no text or symbols)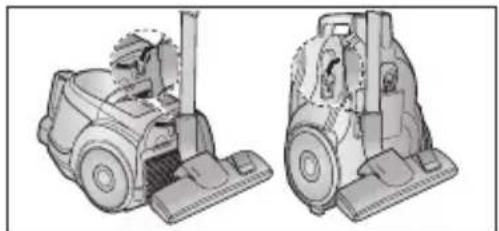
natural_image
Technical illustration of two different mechanical devices, one front view and one side view, with no visible text or symbols.2) TYPE MARCHE/ARRÊT

natural_image
Illustration of a hand using a power tool to press down a vacuum cleaner's air vent (no text or symbols present)
natural_image
Illustration of a hand using a power adapter to press down an electric vacuum cleaner's air vent (no text or symbols present)2) TYPE COMMANDE SUR L'APPAREIL / MARCHE/ARRÊT
- TUYAU
natural_image
Diagram of a flexible hose with a curved tube and a directional arrow indicating motion (no text or symbols)- CORPS DE L'APPAREIL (TYPE COMMANDE SUR L'APPAREIL UNIQUEMENT)
natural_image
Simple line drawing of a cylindrical tool with a handle and a blue arrow indicating motion (no text or symbols)natural_image
Illustration of a hand holding a pen-like tool with a handle and central grip (no text or symbols)ACCESSOIRE (EN OPTION)
natural_image
Pure diagram of a mechanical component without any text, numbers, or symbolsnatural_image
Simple line drawing of a bent pipe or tube with a cable, no text or symbols presentnatural_image
Two vertical color blocks, one gray and one black, with no text or symbols.ENTRETIEN DES BROSSES
BROSSE 2 POSITIONS (EN OPTION)
natural_image
Illustration of a mechanical device with a magnified inset showing a rotating component (no text or symbols)Nettoyage de tapis

natural_image
Diagram of a mechanical component with an arrow indicating rotation, no text or symbols presentNettoyage sol
natural_image
Mechanical switch or lever assembly diagram (no text or symbols visible)BROSSE SPÉCIALE POILS D'ANIMAUX (EN OPTION)
natural_image
Sequence of industrial pipe fittings and clamps, showing mechanical assembly steps (no text or symbols)BROSSE SPÉCIALE TISSU (EN OPTION)
natural_image
Illustration of three steps to handle a container with contents, showing mechanical lifting and pouring (no text or symbols)natural_image
Illustration of hands using a tool to spray or spray liquid onto a container (no text or symbols)
natural_image
Illustration of a mechanical clamp or fixture with a 10cm scale indicator (no text or symbols present)
natural_image
Illustration of a hand holding a small container and a second-hand washing machine (no text or symbols present)natural_image
Illustration of hands using a tool to apply material to a container (no text or symbols visible)natural_image
Illustration of hands cleaning a faucet with a bag (no text or symbols)natural_image
Isometric illustration of a brick wall with a sun symbol above it, and a small grid-patterned object below (no text or symbols)natural_image
Illustration of hands using a tool to apply material to a container, with an inset showing a warning symbol (no text or labels present)natural_image
Illustration of a vacuum cleaner with a hand holding a small fan, next to a smaller fan (no text or symbols present)
natural_image
Illustration of a hand inserting a component into a device (no text or symbols visible)natural_image
Illustration showing two hand gestures: one moving a rectangular object, the other placing a wedge-shaped object on a cylindrical base (no text or symbols)
natural_image
Technical illustration of two different mechanical devices, one front view and one side view, with no visible text or symbols.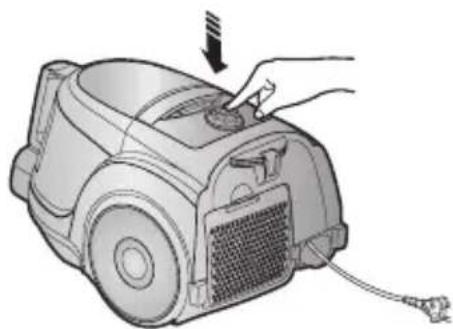
natural_image
Illustration of a hand inserting a plug into a vacuum cleaner's air vent (no text or symbols)AVVERTENZA
2) MODELLI CON CONTROLLO DELLA POTENZA SULL'APPARECCHIO / MODELLI ON/OFF
- TUBO
natural_image
Diagram of a flexible hose with a curved tube and a pull arrow, no text or symbols present- APPARECCHIO (SOLO MODELLI CON CONTROLLO DELLA POTENZA SULL'APPARECCHIO)
natural_image
Simple line drawing of a cylindrical tool with a handle and a blue-green motion indicator (no text or symbols)natural_image
Illustration of a hand holding a pen-like tool with a handle and spout (no text or symbols)natural_image
Pure diagram of a mechanical component with no text, numbers, or symbols visiblenatural_image
Simple line drawing of a bent pipe or tube with a cable, no text or symbols presentMANUTENZIONE STRUMENTI PER PAVIMENTI
SPAZZOLA A DUE VIE (OPZIONALE)
natural_image
Illustration of a mechanical press or clamp with a magnified inset showing a device (no text or symbols present)Pulizia tappeti
natural_image
Diagram of a mechanical device with a rotating arrow and a box, no text or symbols presentPulizia pavimenti
natural_image
Technical line drawing of a mechanical lever assembly (no text or symbols)SPAZZOLA PER PELI ANIMALI (OPZIONALE)
natural_image
Sequence of mechanical assembly steps showing a T-shaped component being folded into a housing, with no visible text or symbols.SPAZZOLA PER COPERTE (OPZIONALE)
natural_image
Mechanical assembly diagram showing a hand holding a device with a magnified inset view (no text or symbols)
natural_image
Illustration of three steps to remove a container with contents, showing mechanical deformation (no text or symbols)
natural_image
Illustration of hands using a tool to spray or spray liquid onto a container (no text or symbols)
natural_image
Illustration of a handheld electric shock absorber with a magnified inset showing internal components (no text or symbols)CONTROLLO SULLA MANIGLIA
natural_image
Illustration of a mechanical clamp or fixture with a 10cm scale indicator (no text or symbols present)
natural_image
Illustration of a hand holding a small container and a second-hand vacuum cleaner (no text or symbols present)natural_image
Illustration of hands using a tool to apply material to a container (no text or symbols visible)natural_image
Illustration of hands cleaning a faucet with a bag (no text or symbols)natural_image
Isometric illustration of a brick wall with a sun symbol above it, and a small grid-patterned object below (no text or symbols)natural_image
Illustration of hands using a tool to apply material to a container, with an inset showing a warning symbol (no text or labels present)natural_image
Illustration of a vacuum cleaner with a hand holding a small fan, next to a smaller device (no text or symbols visible)
natural_image
Illustration of a hand inserting a component into a device (no text or symbols visible)natural_image
Illustration showing two hand gestures: one applying a rectangular object to a speaker, the other pressing down on a trash can (no text or symbols)- Vacuum Cleaner user manual
- safety information
- IMPORTANT SAFEGUARDS
- contents
- ASSEMBLING THE CLEANER
- MAINTAINTOOLSANDFILTER
- TROUBLESHOOTING
- operating the cleaner
- ON/OFF SWITCH
- POWER-CONTROL
- 1) SLIDE CONTROL TYPE ONLY (OPTION)
- 2) BODY-CONTROL TYPE / ON/OFF TYPE
- maintain tools and filter
- USING ACCESSORY
- PIPE (OPTION)
- ACCESSORY (OPTION)
- MAINTAIN FLOOR TOOLS
- 2-STEP BRUSH (OPTION)
- PET BRUSH (OPTION)
- BLANKET BRUSH (OPTION)
- EMPTYING THE DUST BIN
- WHEN TO CLEAN THE DUST PACK
- CLEANING THE DUST PACK
- CLEANING THE OUTLET FILTER
- Product information
- [English]
- Memo
- SAMSUNG
- ZUBEHÖR (OPTION)
- TIERHAARBÜRSTE (OPTIONAL)
- POLSTERBÜRSTE (OPTIONAL)
- 2) TYPE COMMANDE SUR L'APPAREIL / MARCHE/ARRÊT
- ACCESSOIRE (EN OPTION)
- ENTRETIEN DES BROSSES
- BROSSE 2 POSITIONS (EN OPTION)
- BROSSE SPÉCIALE POILS D'ANIMAUX (EN OPTION)
- BROSSE SPÉCIALE TISSU (EN OPTION)
- MANUTENZIONE STRUMENTI PER PAVIMENTI
- SPAZZOLA A DUE VIE (OPZIONALE)
- SPAZZOLA PER PELI ANIMALI (OPZIONALE)
- SPAZZOLA PER COPERTE (OPZIONALE)
Brand : SAMSUNG
Model : SC45W0
Category : Vacuum Cleaner