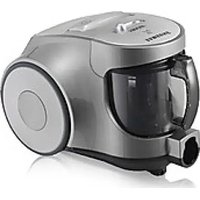
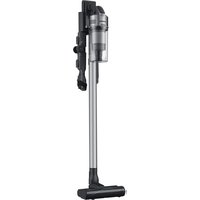
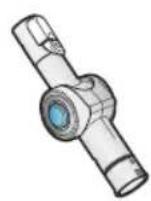
SC8451 - Vacuum Cleaner SAMSUNG - Free user manual and instructions
Find the device manual for free SC8451 SAMSUNG in PDF.

User questions about SC8451 SAMSUNG
0 question about this device. Answer the ones you know or ask your own.
Ask a new question about this device
Download the instructions for your Vacuum Cleaner in PDF format for free! Find your manual SC8451 - SAMSUNG and take your electronic device back in hand. On this page are published all the documents necessary for the use of your device. SC8451 by SAMSUNG.
USER MANUAL SC8451 SAMSUNG
natural_image
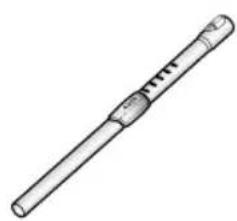
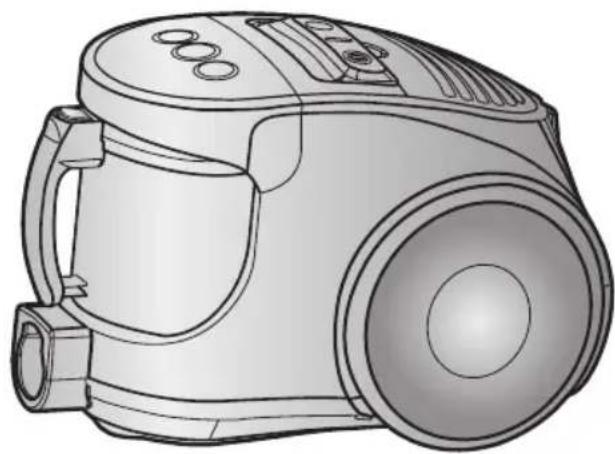
Line drawing of a vacuum cleaner device with no visible text or symbols* Before operating this unit, please read the instructions carefully.
* Indoor use only.
Register your product at www.samsung.com/global/register
IMPORTANT SAFEGUARDS
- Read all instructions carefully. Before switching on, make sure that the voltage of your electricity supply is the same as that indicated on the rating plate on the bottom of the cleaner.
- WARNING: Do not use the vacuum cleaner when rug or floor is wet.
Do not use to suck up water. - Close supervision is necessary when any appliance is used by or near children. Do not allow the vacuum cleaner to be used as a toy. Do not allow the vacuum cleaner to run unattended at any time. Use the vacuum cleaner only for its intended use as described in these instructions.
- Do not use the vacuum cleaner without a dust bin. Empty the dust bin before it is full in order to maintain the best efficiency.
- Do not use the vacuum cleaner to pick up matches, live ashes or cigarette butts. Keep the vacuum cleaner away from stoves and other heat sources. Heat can deform and discolour the plastic parts of the unit.
- Avoid picking up hard, sharp objects with the vacuum cleaner as they may damage the cleaner parts. Do not stand on the hose assembly. Do not put weight on the hose. Do not block the suction or the exhaust port.
- Switch the vacuum cleaner off on the body of the machine before unplugging from the electrical outlet. Disconnect the plug from the electrical outlet before changing the dust bag or dust container. To avoid damage, please remove the plug by grasping the plug itself, not by pulling on the cord.
- This appliance is not intended for use by young persons or infirm persons without supervision unless they are adequately supervised by a responsible person to ensure that they can use the appliance safely.
Young children should be supervised to ensure that they do not play with the appliance. - The plug must be removed from the socket outlet before cleaning or maintaining the appliance.
- The use of an extension cord is not recommended.
- If your vacuum cleaner is not operating correctly, switch off the power supply and consult an authorized service agent.
- If the supply cord is damaged, it must be replaced by the manufacturer or its service agent or a similarly qualified person in order to avoid a hazard.
- Don't carry the vacuum cleaner by holding the hose.
Use the handle on the vacuum cleaner set.
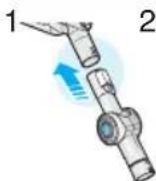
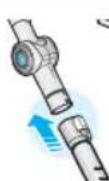
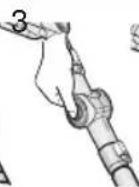
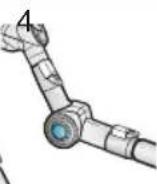
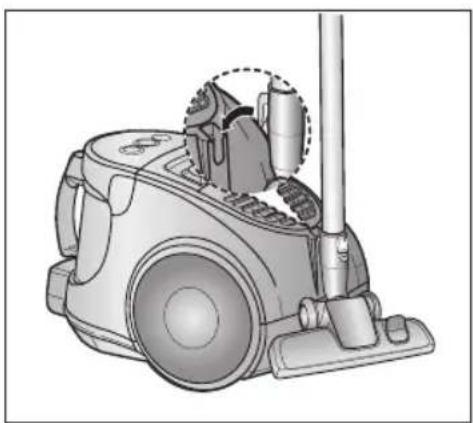
1 ASSEMBLING THE CLEANER
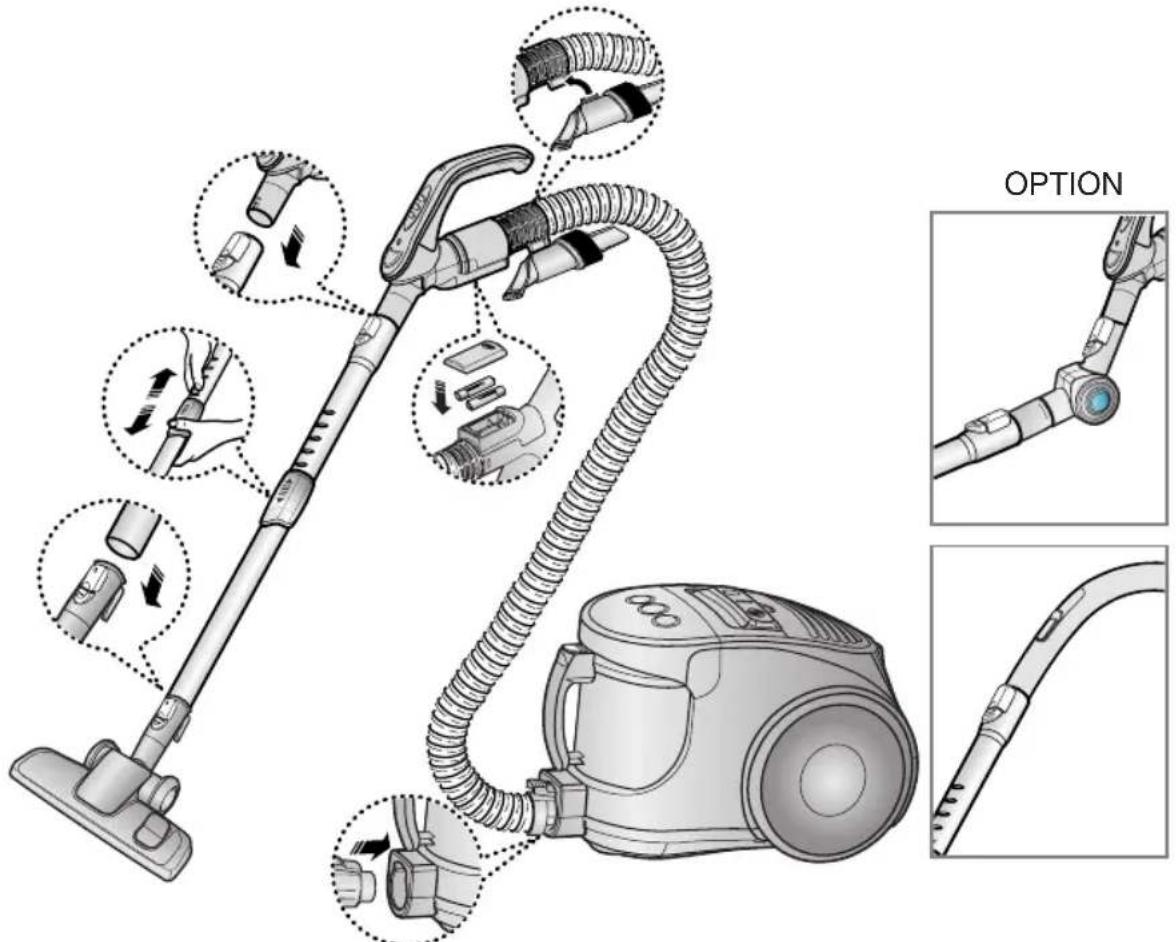
text_image
OPTIONOPTION

natural_image
Five technical illustrations of different vacuum cleaner components, shown from different angles (front, top, side, front, and back) without any text or symbols.▶ Features may vary according to model.
text_image
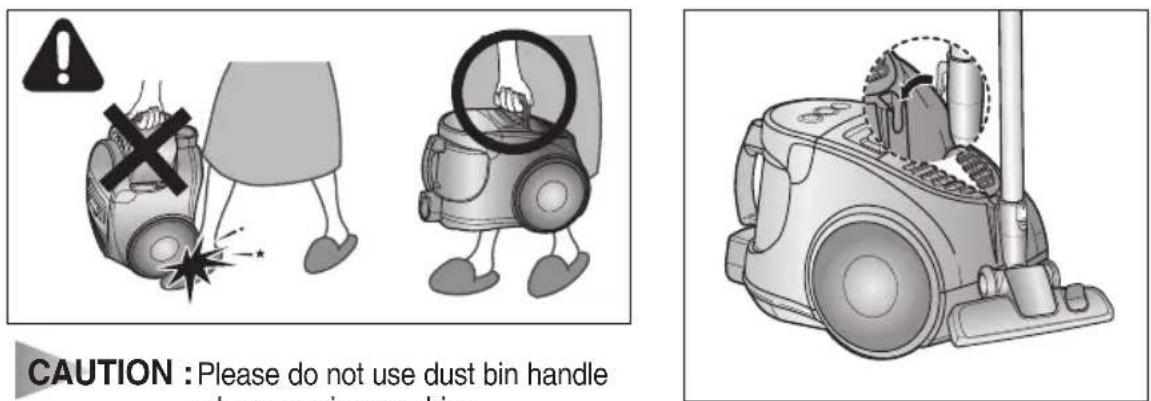
CAUTION : Please do not use dust bin handle when carrying machines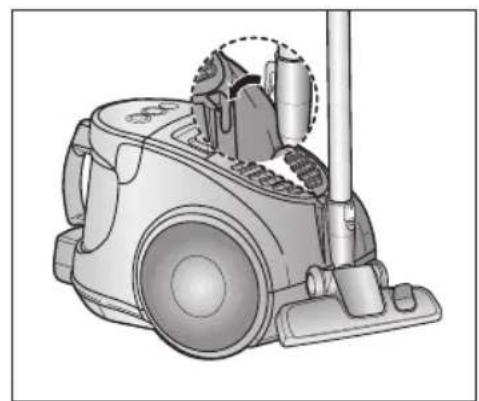
natural_image
Illustration of a vacuum cleaner with handle and control panel (no text or symbols)For storage, park the floor nozzle.
text_image
Diagram showing two steps of a car charging device, with one labeled '①' and the other with an electrical plug icon.
text_image
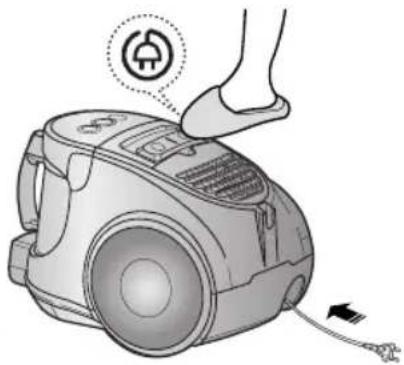
NOTEWhen removing the plug from the electrical outlet, grasp the plug, not the cord.
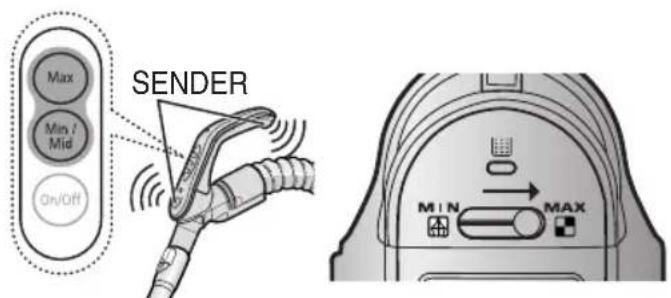
2-3 POWER CONTROL (INFRARED CONTROL)
1) REMOTE CONTROL TYPE
- HOSE
text_image
Max Min / Mid On/Off SENDERHANDLE CONTROL
- Vacuum cleaner ON/OFF
Press the ON/OFF button to operate the vacuum cleaner.
Press again to stop the vacuum cleaner.
- Vacuum cleaner MIN/MID
Press the MIN/MID button to operate the vacuum at a low level (for curtain cleaning, etc.).
Press again to operate the vacuum in a MID mode.
- Using at MAX
Press the MAX button to operate the vacuum at maximum intake.
- BODY
OPTIONAL - DIGITAL SIGNAL
text_image
POWER CONTROL RECEIVERPress the power control button repeatedly to select the correct mode.
$$ (\text { ON(MIN) } \rightarrow \text { MID } \rightarrow \text { MAX } \rightarrow \text { OFF }) $$
NOTE : If the remote handle control is not working, the cleaner can be operated using the control button on the body of the machine.
2) BODY-CONTROL TYPE
- HOSE
natural_image
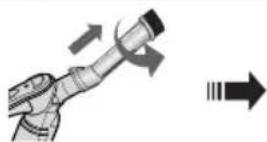
Diagram of a curved pipe with directional arrows indicating motion or force (no text or symbols)To reduce suction for cleaning draperies, small rugs, and other light fabrics, pull the tap air until the hole is open.
- BODY
text_image
MIN MAXMIN = For delicate surface e.g. net curtains.
MAX = For hard floors and heavily soiled carpets.
2-4 HOW TO USE AND MAINTAIN THE ACCESSORIES
▶ Features may vary according to model.
PIPE
natural_image
Line drawing of a cylindrical mechanical tool or probe with a central handle and flange (no text or symbols)
natural_image
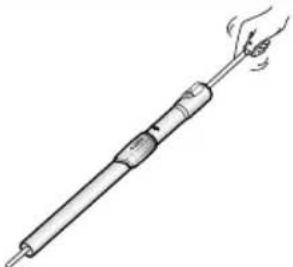
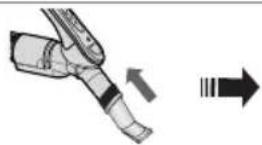
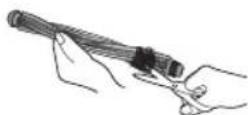
Illustration of a cylindrical tool with a handle and a blue arrow indicating motion (no text or symbols)Adjust the length of the telescopic pipe by sliding the length control button located in the center of the telescopic pipe back and forth.
natural_image
Line drawing of a hand holding a soldering iron with a handle and tip, emitting steam (no text or symbols)To check for blockages, separate the telescopic pipe and adjust to shorten. This allows for easier removal of waste clogging the tube.
ACCESSORY
natural_image
Diagram of a robotic arm with directional arrows indicating movement or force (no text or symbols)
Push the accessory on to the end of the hose handle.
Pull out and turn the dust- ing brush for cleaning deli- cate areas.
To use the upholstery tool, push the accessory on to the end of the hose handle in the opposite direction.
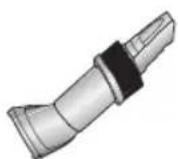
ELBOW EXTENDING TUBE (OPTION)
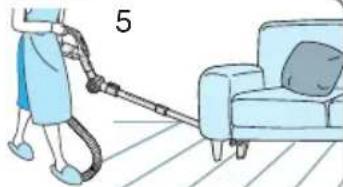
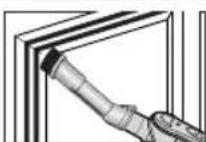
natural_image
Illustration of a person cleaning a sofa with a hose and cushion (no text or symbols)- Connect the elbow extending tube to connecting part for hose knob and telescopic pipe.
- Fit the telescopic pipe to the lower part of the elbow extending tube.
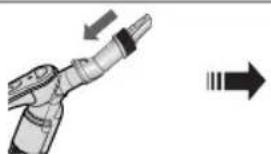
- Press the PUSH button.
- With the PUSH button pressed, the elbow extending tube is folded.
- Using the elbow extending tube allows hard to reach areas (e.g. under furniture) to be cleaned without having to kneel down.
OPTION
natural_image
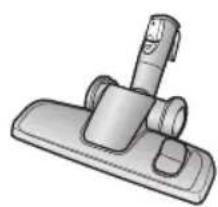
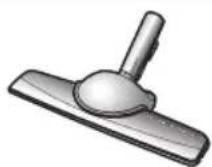
Illustration of a handheld vacuum cleaner with lever and base (no text or symbols)▶ Carpet Cleaning
▶ Floor
Cleaning
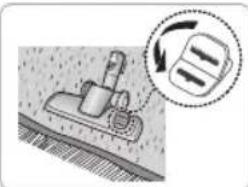
natural_image
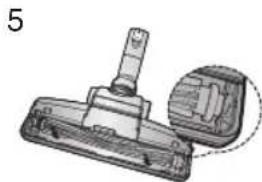
Illustration of a vacuum cleaner on a textured surface with a magnified inset showing the gear shift (no text or symbols)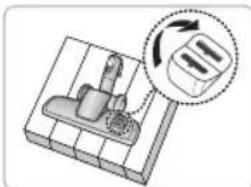
natural_image
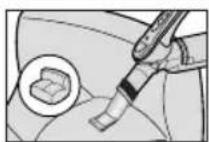
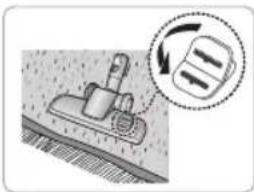
Diagram of a mechanical device with a lever and a close-up inset showing a rotating component (no text or symbols)Adjust the inlet lever according to the floor surface.

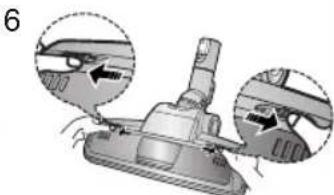
natural_image
Illustration of a hand using a tool to press or install a mechanical component (no text or symbols visible)Remove waste matter completely if the inlet is blocked.
OPTION
Vacuum dust in wide area at once
natural_image
Illustration of a hand using a tool to cut or mark a wooden ruler, with no visible text or symbols.Remove waste matter completely if the inlet is blocked.
OPTION
natural_image
Illustration of a vacuum cleaner (no text or symbols visible)For improved pick-up of pet hair and fibre on carpets
Frequent vacuuming of hair or pet fur may cause a falling-off of the rotation due to matters tangled around the drum. In this case, clean the drum with care.
text_image
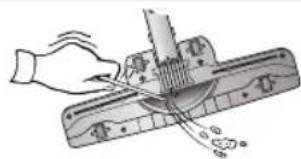
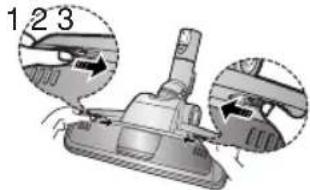
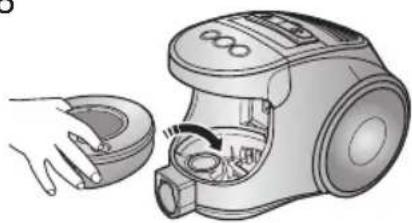
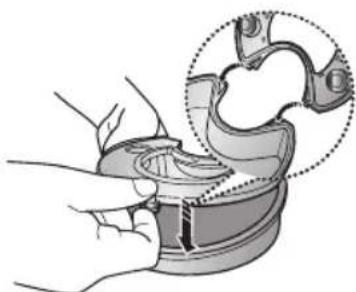
1 2 3Push the Open button of the transparent screen cover to separate the cover.
Remove the brushbar from the transparent screen.
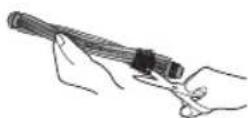
Remove waste matter such as dust and hair tangled around the brushbar using scissors.
natural_image
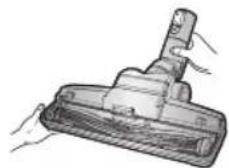
Illustration of a handheld vacuum cleaner with attached tubing (no text or symbols)Remove dust inside the brush housing using a dry duster or crevice tool.
natural_image
Technical illustration of a mechanical component with a highlighted section (no text or symbols)Insert brushbar into rotating belt and assemble.
natural_image
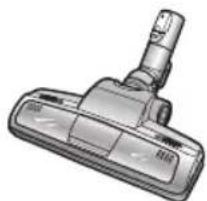
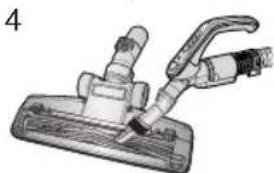
Illustration of a vacuum cleaner with two close-up insets showing mechanical components (no text or symbols)Click the transparent screen cover back into place to reassemble.
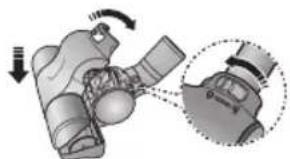
OPTION
Brush for blanket
For picking up pet hair and fibre on upholstery and bed linen.
Clogs on turbine keeps brush from turning, and in this case, take care of it.
Remove waste matter completely when inlet is blocked.
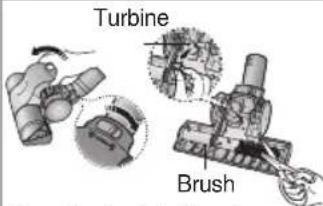
text_image
Turbine BrushTurn the lock button to 'UNLOCK', and remove waste matter.
natural_image
Mechanical assembly diagram showing a motor with rotating components and a close-up inset of the gear (no text or symbols)To reassemble, align the cover to the front of the main body and close. After closing the cover, ensure that the lock button is turned to the 'LOCK' position.
Warning : Use for bedclothes only. Be cautious not to damage brush during unclogging.
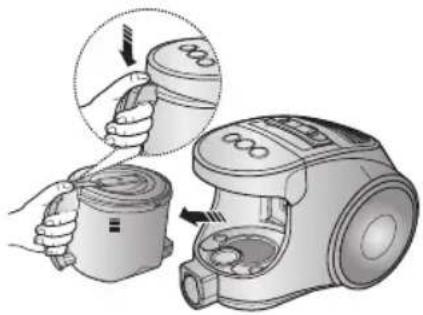
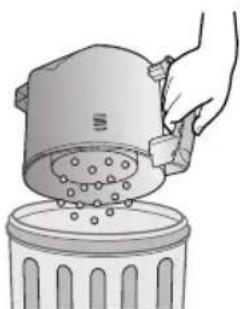
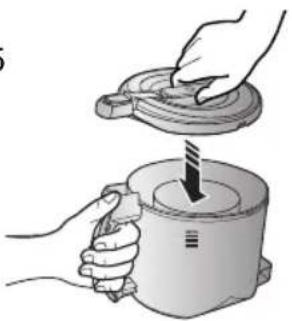
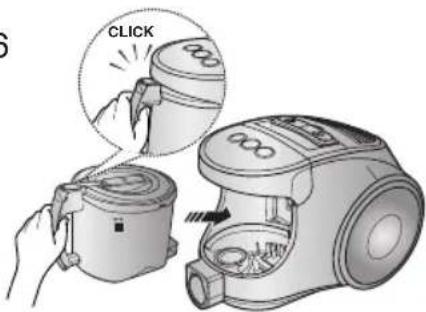
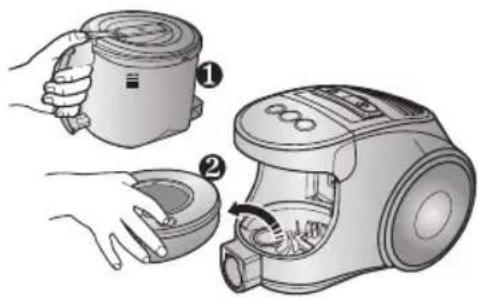
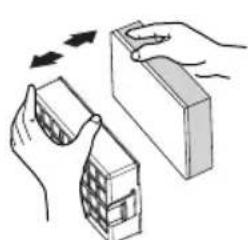
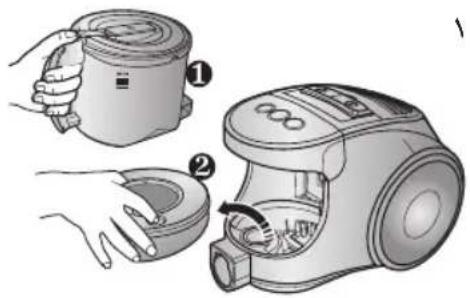
3 EMPTYING THE DUST BIN
123

natural_image
Illustration of a microwave oven and its internal components with a highlighted sensor icon (no text or symbols)Once dust reaches the dust full mark, or once the dust full light is on, empty the dust bin.
natural_image
Illustration of a hand using a vacuum cleaner to adjust the interior of a device (no text or symbols visible)Take the dust bin out by pressing the button.
natural_image
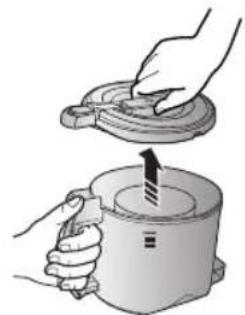
Illustration of hands holding a lid and a cup with an arrow indicating motion (no text or symbols)Separate the dust bin cover.
4
natural_image
Illustration of a hand pouring liquid into a trash bin with granular material (no text or symbols)Throw away dust in the bin.
5
natural_image
Illustration of hands using a tool to lift a cylindrical container (no text or symbols present)Close the dust bin cover.
6
text_image
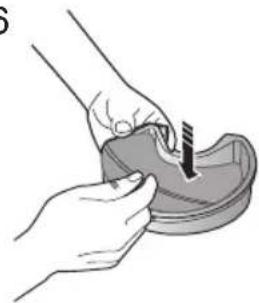
CLICKBefore use, push the dust bin into the main body of the vacuum cleaner until you hear the "click" sound.
- Empty into a plastic bag
(recommended for asthma/allergy sufferers)
natural_image
Illustration of hands holding a rope above a mug filled with food items (no text or symbols visible)
natural_image
Illustration of hands holding a portable device with a lid and a textured surface (no text or symbols)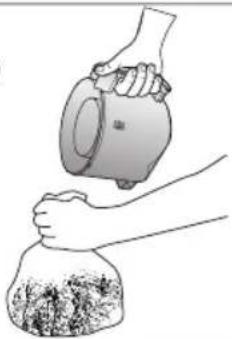
natural_image
Illustration of a hand pouring liquid into a bag with a lid (no text or symbols)
text_image
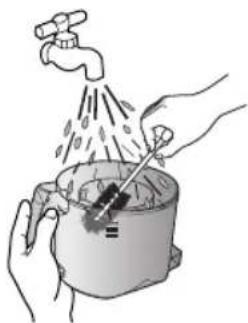
Safety warning symbol and electrical diagram showing a hand using a tool to mark installation or repair.NOTE
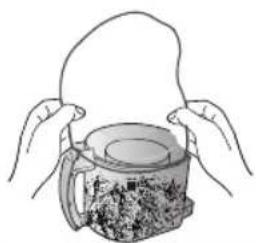
You may rinse the dust bin with cold water
natural_image
Illustration of hands using a tool to clean water from a pot (no text or symbols)4 CLEANING THE DUST PACK
4-1. WHEN TO CLEAN THE DUST PACK
- If suction is noticeably reduced during cleaning, please check the dust pack as indicated below.
text_image
Max Min / Mid On/Off SENDER MIN MAXHANDLE CONTROL
Turn the vacuum power to 'MAX'
natural_image
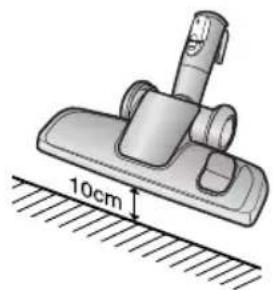
Illustration of a mechanical clamp or fixture mounted on a base with a 10cm scale indicator (no text or symbols present)If the filter check indicator turns red with the inlet floating 10 cm above flat floor, clean it.

natural_image
Illustration of a portable device with three circular buttons and a dotted circle containing a grid icon (no text or symbols)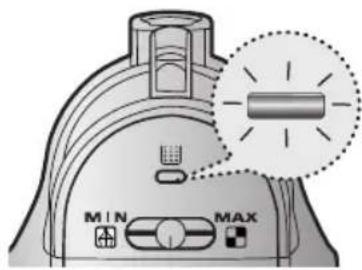
text_image
MIN MAXWhen the indicator light comes on, please empty the Dust Pack(4-2) as shown in the following illustrations.
4-2 CLEANING THE DUST PACK
1
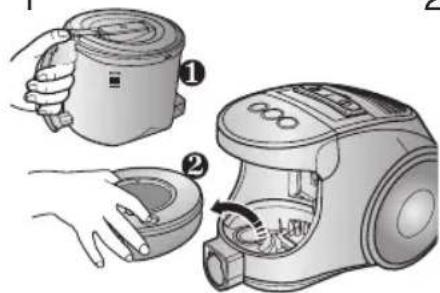
text_image
Illustration showing two steps of a hairdryer tool: opening the brush and opening the main device, with numbered instructions for each step.Remove the dust bin and dust pack as shown.
2

natural_image
Illustration of hands assembling a mechanical component with a magnified inset showing the detail (no text or symbols)Remove the fixed frame of the dust pack cover.
3
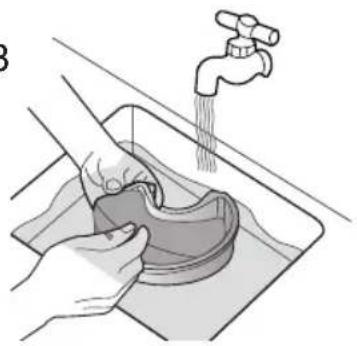
natural_image
Illustration of hands washing a shoe into a sink with a faucet above (no text or symbols)Remove the sponge pad from the dust pack
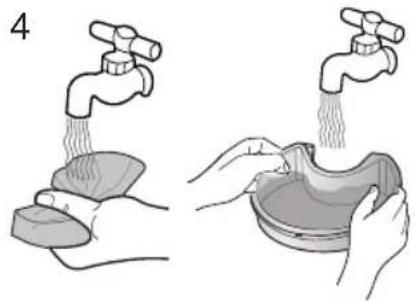
natural_image
Illustration showing two hands washing a faucet and pouring liquid from a bowl (no text or symbols)Wash the sponge and the filter of the dust pack with water.
5

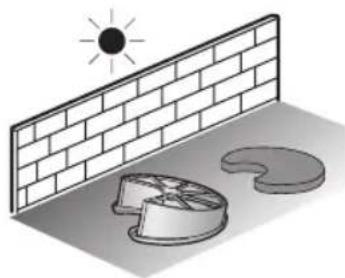
natural_image
Illustration of a sun shining on a brick wall next to a circular object with a lid, no text or symbols present.Let the sponge and dust pack dry in the shade for more than 12 hours.
6
natural_image
Illustration of hands using a tool to apply material to a small container (no text or symbols visible)Put the sponge into the dust pack.

natural_image
Illustration of a hand using a tool to adjust or install a mechanical component, with no visible text or symbols.Before reassembly, align the dust pack cover and dust pack correctly.
8
natural_image
Illustration of a hand holding a small appliance with a handle, showing internal components and motion arrows (no text or symbols)Put the assembled dust pack into the main body.

NOTE : Make sure the filter is completely dry before putting it back into the vacuum cleaner. Allow 12 hours for it to dry.
5 CLEANING THE MOTOR PROTECTION FILTER
text_image
Illustration showing two steps of a hand holding a cup and a vacuum cleaner, with numbered instructions for each step.Take out both the dust bin and the dust pack.
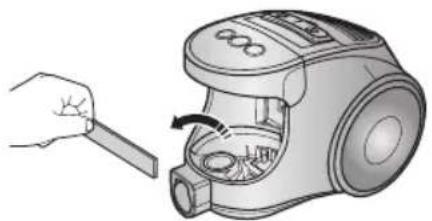
natural_image
Illustration of a hand using a tool to clean or adjust the interior of a vacuum cleaner (no text or symbols present)Remove the motor protection filter from the vacuum cleaner.
Shake and tap the dust from it and put back in machine.
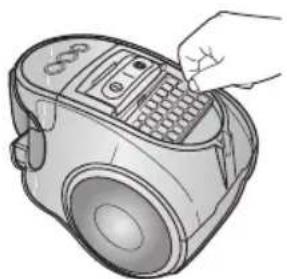
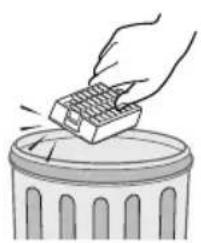
6 CLEANING THE OUTLET FILTER
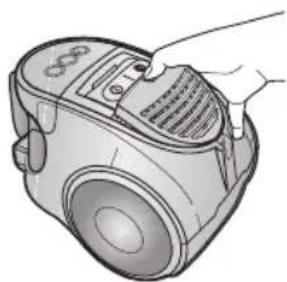
natural_image
Illustration of a hand holding a vacuum cleaner device with a textured grille (no text or symbols visible)Press the fixed frame part at the back of the main body to remove.
natural_image
Illustration of a hand operating a vacuum cleaner with a keypad and control panel (no text or symbols visible)Pull out the HEPA Filter using the tab.
natural_image
Illustration of a hand using a gridded tool to remove or brush over a trash can (no text or symbols)Dust the HEPA filter.
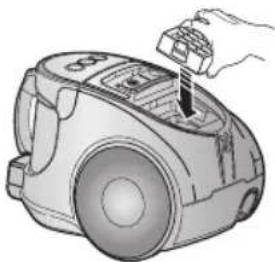
natural_image
Illustration of a hand using a vacuum cleaner to press or install components (no text or symbols visible)Put the HEPA filter into the main body until you hear a 'click' sound.
OPTION - MICRO CARBON FILTER
natural_image
Illustration of hands assembling a small block with a checkered pattern, showing mechanical assembly (no text or symbols)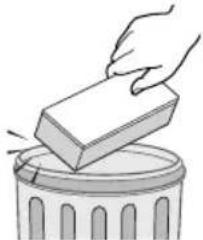
natural_image
Illustration of a hand placing a rectangular block onto a trash bin (no text or symbols)Remove and replace the blocked outlet filter.
NOTE : Replacement filters are available at your local Samsung distributor.
7 CHANGE THE BATTERY(OPTIONAL)
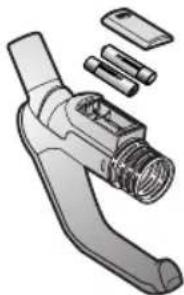
natural_image
Exploded view diagram of a mechanical tool with no visible text or symbolsBATTERY TYPE : AA Size
NOTE
- When the vacuum cleaner does not work, replace the batteries. If the problem persists, please contact our authorized dealer.
- Use 2 batteries of size AA.

WARNING
- Never disassemble or recharge the batteries.
-
Never heat up the batteries or throw them into fire.
-
Do not reverse (+),(-) poles.
- Dispose of the batteries properly.
- IF YOU HAVE A PROBLEM
| PROBLEM CAUSE REMEDY | ||
| Motor does not start. | No power supply. Thermal cut-out. | Check cable, plug and socket. Leave to cool. |
| Suction force is gradually decreasing. | Nozzle, suction hose or tube is blocked. | Check for blockage and remove it. |
| Cord does not rewind fully. Check that the cord is not twisted or wound unevenly. | Pull the cord out 2-3m and push the cord rewind button. | |
| Vacuum cleaner does not pick up dirt. | Crack or hole in hose. | Check hose and replace if required. |
| Low or decreasing suction | Filter is full of dust. | Please check filter and, if necessary, clean as illustrated in the instructions. |
SAMSUNG
المكنسة الكهربائية
natural_image
Line drawing of a vacuum cleaner device with handle and front panel (no text or symbols)natural_image
Illustration of a vacuum cleaner (no text or symbols visible)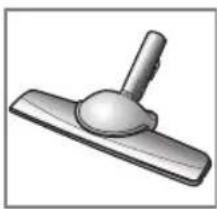
natural_image
3D rendered image of a mechanical lever or pivot component (no text or symbols visible)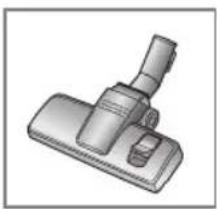
natural_image
3D rendered image of a mechanical clamp or lever component (no text or symbols visible)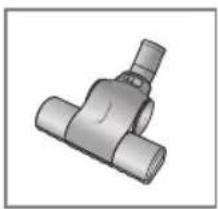
natural_image
3D rendering of a metallic T-shaped pipe fitting (no text or symbols visible)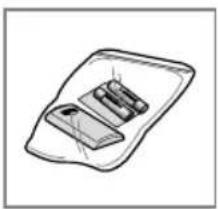
natural_image
Simple line drawing of a tray with two rectangular objects, one with an arrow indicating direction (no text or symbols)◀ف المو
natural_image
Illustration of a vacuum cleaner with handle and control panel (no text or symbols)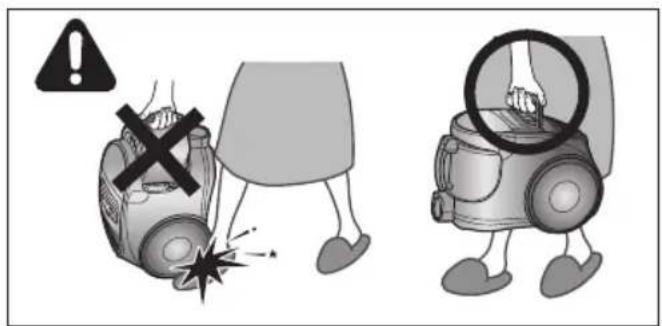
text_image
Safety warning illustration showing a person using a device to prevent accidents, with a warning symbol and hazard symbol.natural_image
Illustration of a hand pressing down on a small vacuum cleaner with a power plug, no text or symbols present
natural_image
Illustration of a hand pressing down on a small vacuum cleaner's device (no text or symbols present)natural_image
Diagram of a mechanical device with hoses and a triangular component, no visible text or symbolsالتدكم بالالم tight
natural_image
Illustration of hands using a tool to lift a cup (no text or symbols present)natural_image
Illustration of a hand holding a vacuum cleaner with a close-up view of the lid (no text or symbols present)natural_image
Illustration of a portable device with a sun icon and control buttons, no text or symbols presentnatural_image
Illustration of two hands using a tool to lift a cylindrical object into a container (no text or symbols present)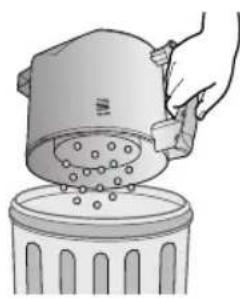
natural_image
Illustration of a hand pouring liquid into a trash bin with scattered particles (no text or symbols)text_image
Safety warning symbol and electrical diagram showing a hand using a screwdriver to adjust an electrical outlet with warning sign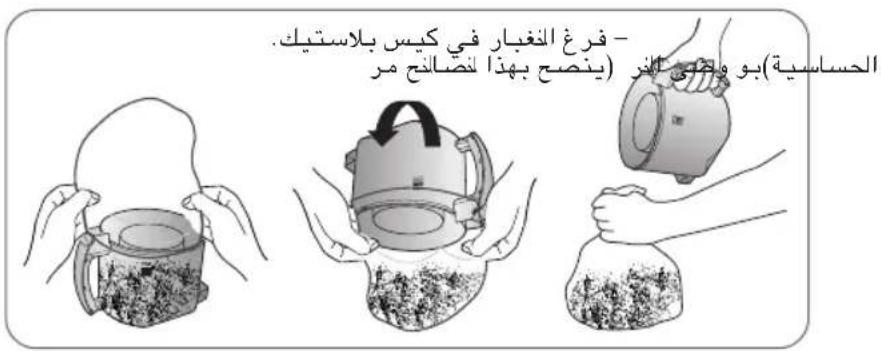
natural_image
Illustration of hands washing a pot with a faucet, no text or symbols presentnatural_image
Illustration of a cleaning tool with a 10cm height measurement on a surface (no text or symbols)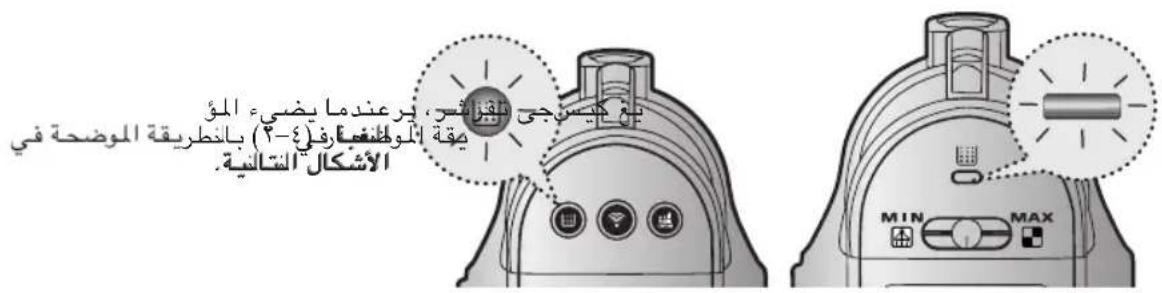
text_image
يَعْ كِيمَجِي تَلَقِزَّبُسِ، يَرْعَنْدِمَا يَضِيَّةِ الْمُؤْ يَمْقَةِ الْمُوْتُغْمَارِ فِلَىٍ (٢) بِانطُرِيقَةِ المُضْحَةِ فِي الْأُشْكَالِ الْتَالِّيةِ MIN MAXnatural_image
Illustration of hands washing a sink with a faucet above (no text or symbols)r
natural_image
Illustration of hands assembling a shoe component with a magnified inset showing the detail (no text or symbols)7
text_image
Illustration showing two steps of a hand holding a vacuum cleaner, labeled with numbers ① and ②.natural_image
Illustration of hands holding a small object with a tool, no text or symbols present7
natural_image
Illustration of a sun shining on a brick wall and a broken floor with a circular object, no text or symbols present.0

natural_image
Illustration of hands washing a bowl and a sink with two faucet heads (no text or symbols)3
natural_image
Illustration of a hand holding a small device with a curved handle, showing internal components (no text or symbols)^
natural_image
Illustration of a hand holding a mechanical component with a magnified inset showing internal structure (no text or symbols)V
natural_image
Illustration of a handheld device with exploded view showing internal components (no text or symbols)natural_image
Illustration of a hand using a tool to clean or remove a small appliance (no text or symbols visible)text_image
Diagram showing two steps of a vacuum cleaner's usage, labeled with numbered instructions for each step.natural_image
Illustration of a hand inserting a component into a vacuum cleaner's airbag (no text or symbols)natural_image
Illustration of a hand using a gridded tool to lift a trash can (no text or symbols present)natural_image
Line drawing of a hand inserting a component into a vacuum cleaner (no text or symbols)natural_image
Illustration of a hand holding a vacuum cleaner device (no text or symbols visible)natural_image
Illustration showing two steps: hand pressing a block onto a trash can, and hand using a cube to press or swap a container (no text or symbols)natural_image
Line drawing of a vacuum cleaner device with no text or symbolsnatural_image
Five technical illustrations of different vacuum cleaner designs, shown from different angles (front, top, side, front, and back) with no visible text or symbols.text_image
Safety warning illustration showing a person using a device to stop a vehicle with a cross symbol and warning symbolsnatural_image
Illustration of a vacuum cleaner with handle and control panel (no text or symbols)natural_image
Illustration of a hand using a vacuum cleaner to press or install an air vent, with no visible text or symbols.2-2 CORDON
D'ALIMENTATION
natural_image
Illustration of a hand pressing down on a small electric vacuum cleaner with a power plug icon (no text or symbols)!
natural_image
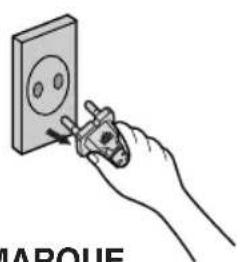
Hand using a power tool to switch an electrical outlet (no text or symbols visible)REMARQUE
natural_image
Diagram of a curved pipe with directional arrows indicating flow or movement (no text or symbols)MIN = Pour tissus fragiles (rideaux, etc.).
natural_image
Line drawing of a cylindrical tool or probe with a central handle and flange (no text or symbols)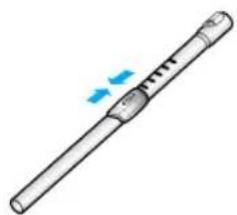
natural_image
Illustration of a cylindrical tool with a handle and a blue arrow indicating motion (no text or symbols)natural_image
Line drawing of a soldering iron with a hand holding the tip (no text or symbols)natural_image
Illustration of a robotic arm joint with directional arrows indicating movement (no text or symbols)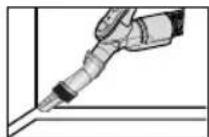
natural_image
Illustration of a robotic arm with directional arrows indicating movement (no text or symbols)
text_image
Diagram showing four steps of a mechanical joint or clamp operation, labeled 3, 4, and 5 with arrows indicating motion.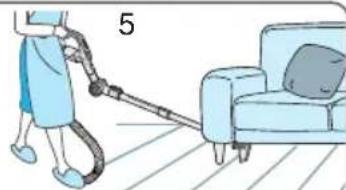
natural_image
Illustration of a person using a handheld vacuum cleaner to clean a sofa (no text or symbols)natural_image
Illustration of a vacuum cleaner with handle and mounting bracket (no text or symbols)▶ Nettoyage des tapis
▶ Nettoyage des car-relages
natural_image
Illustration of a mechanical device on a textured surface with an arrow indicating rotation (no text or symbols)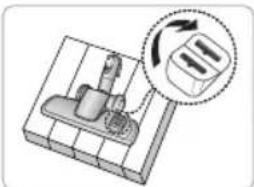
natural_image
Diagram of a mechanical device with a rotating button and directional arrow (no text or symbols)natural_image
Illustration of a hand using a tool to press or install a mechanical component (no text or symbols visible)natural_image
Illustration of a hand using a tool to clean or brush the surface of a wooden board (no text or symbols)natural_image
Illustration of a vacuum cleaner (no text or symbols visible)text_image
Diagram showing a vacuum cleaner with three labeled parts and directional arrows indicating motion or assembly.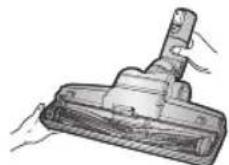
natural_image
Illustration of a handheld tool with a handle and connector (no text or symbols visible)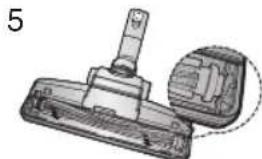
natural_image
Technical illustration of a mechanical component with a pin and housing (no text or symbols)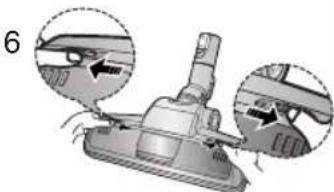
natural_image
Mechanical component diagram showing assembly steps with arrows indicating motion (no text or symbols)natural_image
Mechanical assembly diagram showing a hand operating a device with a close-up inset of the handle (no text or symbols present)natural_image
Illustration of a portable kitchen appliance with a highlighted solar panel and three control buttons (no text or symbols)natural_image
Illustration of a hand using a vacuum cleaner to adjust the cup (no text or symbols present)natural_image
Illustration of hands using a tool to lift a cylindrical component (no text or symbols present)natural_image
Illustration of a hand pouring liquid into a trash bin with granular material (no text or symbols)natural_image
Illustration of hands using a tool to lift a cup (no text or symbols present)natural_image
Illustration of two hands holding a piece of dough over a mug filled with granular material (no text or symbols)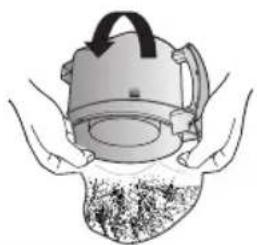
natural_image
Illustration of hands holding a helmet with a textured surface (no text or symbols)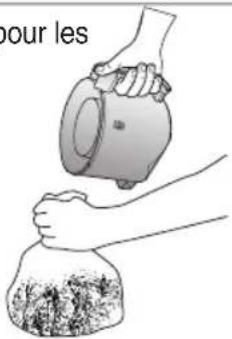
text_image
pour les
text_image
Safety warning symbol and electrical diagram showing a hand using a tool to mark installation or repair.NOTE
natural_image
Illustration of hands using a water tap to clean or store items in a pot (no text or symbols)natural_image
Illustration of a mechanical clamp or fixture with a 10cm scale indicator (no text or symbols on the diagram itself)natural_image
Illustration of a portable device with three circular buttons and a dotted circle highlighting a grid icon (no text or symbols)
text_image
MIN MAXtext_image
Illustration showing two steps of a hairdryer tool: opening the brush and opening the main device, with numbered instructions.natural_image
Illustration of hands assembling a shoe component with a magnified inset showing the detail (no text or symbols)natural_image
Illustration of hands cleaning a sink with a faucet, showing water flowing from the drain (no text or symbols)natural_image
Illustration showing two hands washing a faucet and pouring liquid from a bowl (no text or symbols)natural_image
Illustration of a sun shining on a brick wall and a circular diagram with a fan, no text or symbols present.natural_image
Illustration of hands using a tool to apply material to a small object (no text or symbols visible)natural_image
Illustration of a hand using a tool to adjust or install a mechanical component, with no visible text or symbols.natural_image
Illustration of a hand holding a small appliance with a handle, showing internal components and motion arrows (no text or symbols)text_image
Illustration showing two steps of a hand holding a cup and a vacuum cleaner, with numbered instructions for each step.natural_image
Illustration of a hand using a brush to clean or adjust the interior of a vacuum cleaner (no text or symbols present)natural_image
Illustration of a hand holding a vacuum cleaner device (no text or symbols visible)natural_image
Illustration of a hand inserting a small electronic device into a vacuum cleaner (no text or symbols visible)Retirez le mentonnet du filtre HEPA.

natural_image
Illustration of a hand using a gridded tool to remove or brush over a trash can (no text or symbols)natural_image
Illustration of a hand using a vacuum cleaner to press or install components (no text or symbols visible)natural_image
Illustration of hands assembling a 3D block structure with arrows indicating motion (no text or symbols)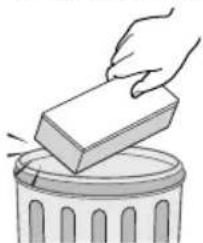
natural_image
Illustration of a hand placing a rectangular block onto a trash can (no text or symbols)natural_image
Illustration of a handheld tool with attached components (no text or symbols)TYPE DE PILES : Taille AA