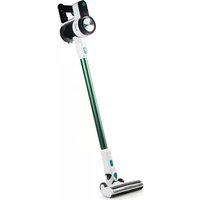
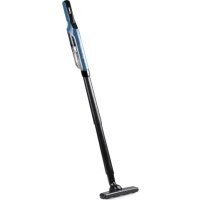
DO7295S - Vacuum Cleaner DOMO - Free user manual and instructions
Find the device manual for free DO7295S DOMO in PDF.
Download the instructions for your Vacuum Cleaner in PDF format for free! Find your manual DO7295S - DOMO and take your electronic device back in hand. On this page are published all the documents necessary for the use of your device. DO7295S by DOMO.
USER MANUAL DO7295S DOMO
I PRODUCTSPECIFIEKE WAARSCHUWINGEN
I AVERTISSEMENTS SPÉCIFIQUES AU PRODUIT
WARRANTY Dear client , All of our products are always submitted to a strict quality control before they are sold to you. Should you nevertheless experience problems with your device, we sincerely regret this. In that case, we kindly request you to contact our customer service. Our sta will gladly assist you. +32 14 21 71 91 info@linea2000.be Monday – Thursday: 8.30 – 12.00 and 13.00 – 17.00 Friday: 8.30 – 12.00 and 13.00 – 16.30 This appliance has a two year warranty period. During this period the manufacturer is responsible for any failures that are the direct result of construction failure. When these failures occur the appliance will be repaired or replaced if necessary. The warranty will not be valid when the damage to the appliance is caused by wrong use, not following the instructions or repairs executed by a third party. The guarantee is issued with the original till receipt. All parts, which are subject to wear, are excluded from the warranty. If your device breaks down within the 2-year warranty period, you can return the device together with your receipt to the shop where you purchased it. The guarantee on accessories and components that are liable to wear-and-tear is only 6 months. The guarantee and responsibility of the supplier and manufacturer lapse automatically in the following cases:
- If the instructions in this manual have not been followed.
- In case of incorrect connection, e.g., electrical voltage that is too high.
- In case of incorrect, rough or abnormal use.
- In case of insucient or incorrect maintenance.
- In case of repairs or alterations to the device by the consumer or non-authorised third parties.
- If the customer used parts or accessories that are not recommended or provided by the supplier / manufacturer. SAFETY INSTRUCTIONS When using electrical appliances, basic safety precautions should always be taken, including the following:
- Read all instructions carefully. Keep this manual for future reference.
- Make sure all packaging materials and promotional stickers have been removed before using the appliance for the rst time. Make sure children cannot play with the packaging materials.
- This appliance is intended to be used in household and similar applications such as:
- sta kitchen areas in shops, oces and other working environments;
- by clients in hotels, motels and other residential type environments;
- bed and breakfast type environments.
- Children should be supervised to ensure that they do not play with the appliance.
- This appliance can be used by children aged from 16 years and above and persons with reduced physical, sensory or mental capabilities or lack of experience and knowledge if they have been given28 DO7295S
supervision or instruction concerning use of the appliance in a safe way and understand the hazards involved. Children shall not play with the appliance. Cleaning and user maintenance shall not be made by children unless they are older than 16 and supervised.
- Keep the appliance and its cord out of reach of children younger than 16 years.
- All repairs should be carried out by the manufacturer or its aftersales service.
- Any injury or damage caused by failure to comply with these rules are at your own risk. Neither the manufacturer, importer, or the supplier may be held liable.
I ELECTRICAL WARNINGS
- In order to avoid a hazard this appliance must not be supplied through an external switching device, such as a timer or a separate remote control, or connected to a circuit that is regularly switched on and o by the utility.
- The appliance must be disconnected from its power source when not in use, during service and when replacing parts. Allow to cool before putting on or taking o parts, and before cleaning the appliance. To disconnect, turn controls to “OFF” or “0” position, then remove the plug from the wall. Never pull the cord or appliance to remove the plug from the socket.
- Check carefully that the voltage and frequency of the power net match the indications on the rating label of the appliance.
- The plug must be plugged into an appropriate outlet that is installed and grounded in accordance with all local standards and requirements.
- Do not let the power supply cord hang over the edge of a counter, or touch hot surfaces.
- Keep the power cord away from hot parts and don’t cover the appliance.
- Unwrap the cord completely to prevent overheating of the cord. Do not allow the power cord supply to run underneath or around the unit.
- The appliance may not be used with an extension lead or a multiple socket.
- Do not operate this appliance with a damaged cord or plug or in the event the appliance malfunctions or has been damaged in any manner. Return the appliance to the DOMO Service Department or its service agent for examination, repair, or electrical or mechanical adjustment. Do not try to repair the appliance yourself. I INSTALLATION
- Do not place near ammable materials, gases or explosives.
- Do not use or store this appliance outdoors.
- Always use the appliance on a steady, dry and level surface.
- Never place this appliance near a gas stove or electrical stove or in a place where it may come into contact with a warm appliance. I USE
- Do not use this appliance for other than intended use.
- Only use the appliance for domestic use. The manufacturer cannot be held responsible for accidents that result from improper use of the appliance or not following the instructions described in this manual.
- Never leave the appliance unattended while it is functioning.
- Do not operate the appliance with wet hands.
- The use of accessories that are not recommended or sold by the manufacturer can cause re, electrical shock or injuries. Only use the utensils delivered with the appliance.29 DO7295S www.domo-elektro.be
I CLEANING AND MAINTENANCE
- To protect against electrical shock or burns, do not immerse unit, cord, or plug in water or other liquid.
- Failure to maintain this appliance in a clean condition could adversely aect the life of the appliance and possibly result in a hazardous situation.
I PRODUCT-SPECIFIC WARNINGS
- Do not pull the cord. Do not use the cord as a handle. Do not jam the cord between a door or do not pull it around corners or sharp edges. Do not run the vacuum cleaner over the cord. Keep the cord away from hot surfaces.
- Do not touch the plug or the vacuum cleaner when you have wet hands.
- Do not put any objects in the openings of the vacuum cleaner. Do not use the appliance when an opening is blocked.
- Keep hair, loose clothing, ngers and other body parts away from openings of the vacuum cleaner and from moving parts.
- Be extra careful when cleaning stairs.
- Never use the vacuum cleaner to pick up any water, combustible or inammable liquids like gasoline, or do not use the appliance in places where such substances might be present.
- Remove large and sharp objects from the oor before vacuuming it to prevent possible damage.
- Hold the plug while rewinding the cord onto the cord reel. Do not let the plug whip back and forth during rewinding.
- Unplug the appliance before connecting the hose.
- Do not pick up any burning or smoking objects, like cigarettes, matches or hot ashes.
- Do not use the vacuum cleaner without dust bag and/or lter.
3. Button for cord roll-up
5. Dust reservoir with handle
7. Connection for hose
9. Handle for hose with valve
17. Air outlet with HEPA lter
Always unplug the appliance from the socket before removing or connecting parts. Make sure that the dust reservoir is always in the correct position. FLEXIBLE HOSE
- Assembly: Insert the exible hose connector into the connection opening at the front of the vacuum cleaner and click into place.
- Disassembly: to disconnect, press the button on the connector to release the exible hose from the connection opening at the front of the vacuum cleaner.
1. Put the handle of the hose into the telescopic tube.
2. Set the telescopic tube to the desired length. For this, push the slide on the wand downwards and
pull on the upper part of the wand to extend it. Release the slide button and let the tube snap into place.
3. Attach the oor nozzle to the telescopic tube by rmly sliding the tube into the nozzle.
1. Crevice nozzle: for hard to reach areas like radiators, crevices, corners, in
2. Furniture nozzle: for easy, quick and thorough cleaning of upholstered
1. Unwind the cord to a substantial length and plug in the vacuum cleaner. The yellow label on the cord
indicates the maximum length of the cord, that should not be exceeded.
2. To turn the vacuum cleaner on and o, press the foot pedal with the symbol.
3. The suction can be controlled using the valve on the handle of the hose. The vacuum has a suction
power of 17 kPa, which means that the appliance has very strong suction power. This could cause the end of the oor nozzle to become attached to the oor. If you want to reduce the suction force, you can slide open the valve on the handle of the hose. Slide the switch on the oor nozzle to ‘deep clean’ to eectively remove deeply-ingrained dust from all types of oor.
- Carpets: ensure that the switch on the oor nozzle is set to (A).
- Hard oors: ensure that the switch on the oor nozzle is set to (B).
4. When you have nished vacuuming, now switch o the vacuum cleaner, unplug the vacuum cleaner
and automatically rewind the cord by pressing the foot pedal with the symbol. Make sure that the plug does not whip back and forth while rewinding the cord, by guiding the cord with your hand. This to prevent possible damage.
CLEANING AND MAINTENANCE
EMPTYING AND CLEANING THE DUST RESERVOIR
Empty the dust reservoir regularly. Make sure that the dust in the dust reservoir does not exceed the maximum level.
1. Hold the handle of the dust container and press the button to remove the dust reservoir (A).
Carefully remove the dust container from the vacuum cleaner with an upward movement (B).
2. Remove the cover of the dust reservoir and tip the dust into a dustbin.
3. If necessary, wipe the dust reservoir clean with a soft, damp cloth.
4. Replace the dust container in the vacuum before using the vacuum again.
To prevent losing suction after emptying the dust container, it is essential that the lter be cleaned regularly.
1. Remove the lter from the dust container.
2. Remove the sponge and clean both parts thoroughly under running water. Allow them to dry
completely before replacing them in the vacuum cleaner.
1. At the back of the appliance there is a grille for the HEPA lter. You can easily remove it by pushing
to the left on the cover and taking the grille out of the appliance.
2. You remove the HEPA lter from the appliance by pressing the button on top of the lter and pulling
it towards you. Clean the lter under running water or replace it if necessary.
3. Make sure that the parts are completely dry before replacing them in the vacuum and the using the
MOTOR FILTER The motor lter is located in front of the motor. Remove the dust reservoir. Take out the lter. Clean it thoroughly. Allow it to air-dry properly. Replace it in the vacuum. ATTENTION
- In a normal cleaning session, it is sucient to tap out the lters. It is recommended that you thoroughly clean the lters under tepid running water 3 to 4 times per year. Make sure that it is completely dry before putting it back in the appliance. You can also replace them if necessary. Avoid direct sunlight or intense overheating. Never put the lters in the washing appliance to prevent deformation. Do not use abrasive or cleaning products and wash from the bottom of the lter.
- Make sure that all components are correctly assembled before using the vacuum cleaner again.
- Always use the vacuum cleaner with the lters intact. If you do not do this, you may lose suction force or damage the motor.
- Unplug the plug before cleaning the lters.
- Do not use a hairdryer to dry the lters.
FREQUENTLY ASKED QUESTIONS
Problem Cause Solution The appliance does not start. The appliance is not plugged in. Put the plug in the socket. The appliance is not turned on. Press the on/o switch. The appliance stops working. The appliance has overheated, so the safety was tripped. This can be caused by dirty lters or a blockage. Allow the appliance to cool completely. When the appliance has cooled down, it will function again. Clean the lters and check that the hose is not clogged. The suction is too weak. The appliance is not correctly assembled, so the suction is being lost. Check that everything is assembled correctly. Remove all of the accessories and then replace them step by step in their place. The dust reservoir is full. Empty the dust reservoir and make sure that it does not exceed the maximum level. The hose is clogged. Insert the hose in the reverse manner (with the handle) in the suction opening of the appliance. The clog will be suctioned to the other side, which will free the hose. The lters are dirty. Carefully clean the lters as described in this manual. It is very important that you already thoroughly clean the lters. The valve on the handle of the hose is open. Close the valve. The lters are congested. Over time, the pores in the lters will become congested. Replace the lters.34 DO7295S
There is a burning smell from the appliance. The appliance is overheated. Immediately switch o the appliance and let the appliance cool down. Clean the dust reservoir and the lters. ENVIRONMENTAL GUIDELINES This symbol on the product or on its packaging indicates that this product may not be treated as household waste. Instead it must be brought to the applicable collection point for recycling of electrical and electronic equipment. By ensuring this product is disposed of correctly, you will help prevent potential negative consequences for the environment and human health, which could otherwise be caused by inappropriate waste handling of this product. For more detailed information about recycling of this product, please contact your local city oce, your household waste disposal service or the shop where you purchased the product. The packaging is recyclable. Please treat the packaging ecologically.35 DO7295S www.domo-elektro.be