34035 - Alarm system CHACON - Free user manual and instructions
Find the device manual for free 34035 CHACON in PDF.

User questions about 34035 CHACON
0 question about this device. Answer the ones you know or ask your own.
Ask a new question about this device
Download the instructions for your Alarm system in PDF format for free! Find your manual 34035 - CHACON and take your electronic device back in hand. On this page are published all the documents necessary for the use of your device. 34035 by CHACON.
USER MANUAL 34035 CHACON
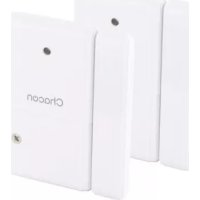
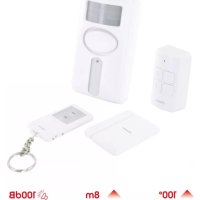
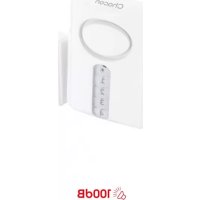
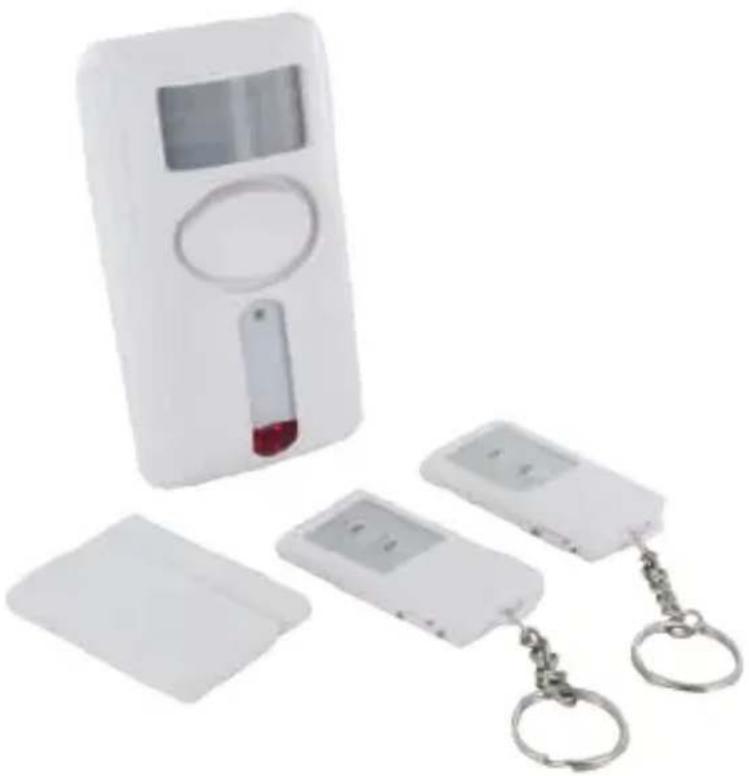
Wireless alarm kit - Apartment
Kit alarme sans fil - Appartement Draadloze alarmkit - Appartement Kit de alarma inalámbrico - Apartamento Kit de alarme sem fios - Apartamento Kit di allarme senza fili - Appartamento
natural_image
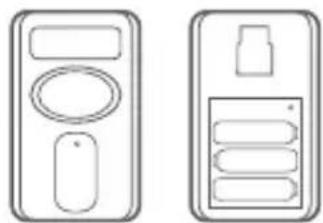
White electronic device with digital display and three remote control devices linked by metal keys (no visible text or symbols)Mode d'emploi / Gebruiksaanwijzing / Manual de uso Manual de instruções / Istruzioni per l'uso / User manual


1x
2x
1x

1x

3x

Non inclus
FR Enregistrer la garantie
EN Registering the guarantee
To register your warranty, fill in the online form at www.chacon.com/warranty
Présentation du produit / Productpresentatie / Presentación del producto / Apresentação do produto / Presentazione del prodotto / Product overview
FR
natural_image
Pure electrical circuit lines without any symbols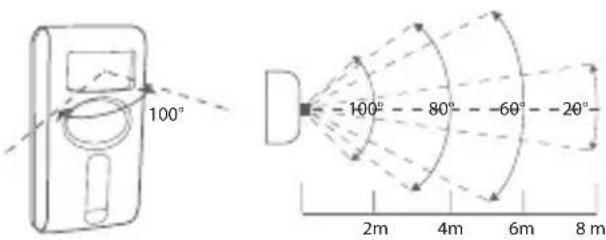
natural_image
Two identical line drawings of electronic devices or modules, each with a rectangular panel and internal components (no text or symbols)
Aanbevolen montagehoogte: maximaal 160 cm en minimaal 30 cm.
Support www.chacon.com/support
0. Introducción
natural_image
Two identical line drawings of electronic devices or modules, one with a circular button and the other with a rectangular device (no text or symbols)natural_image
Pure technical line drawings of mechanical components without any text, numbers, or symbols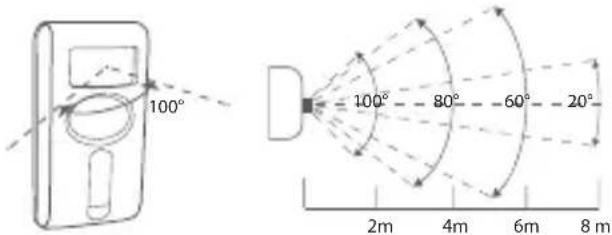
natural_image
Two identical line drawings of electronic devices or modules, no text or symbols present.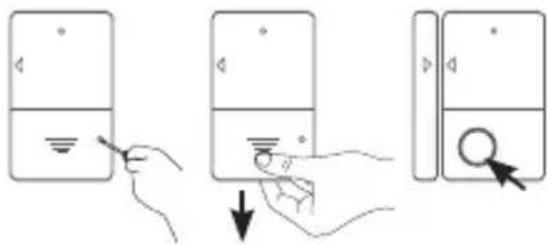
natural_image
Two identical line drawings of electronic devices or modules, each with a control panel and display (no text or symbols)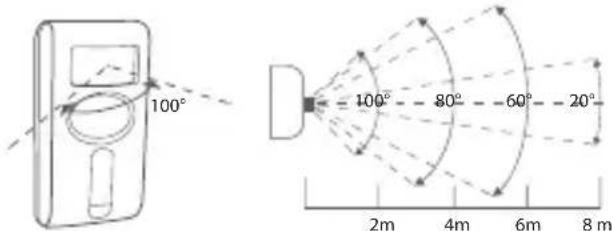
natural_image
Two identical line drawings of electronic devices or modules, no text or symbols present.Thank you for using this product.
- Please read all instructions carefully before using the product.
- Don't attempt to disassemble or repair the product yourself, as this will invalidate the warranty.
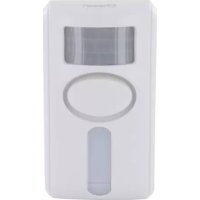
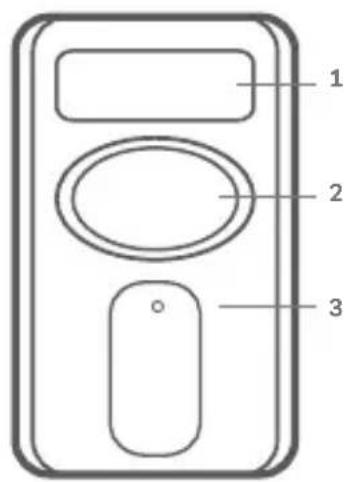
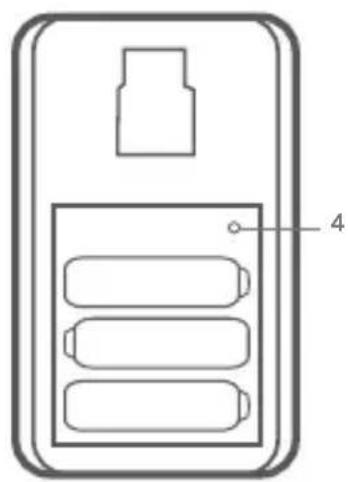
1.1. Battery installation: Central alarm unit with motion detector
- Using a crosshead screwdriver, remove the screw from the back of the motion detector.
- Slide the cover down to access the battery compartment.
- Insert the batteries, ensuring correct polarity (+/-).
- Close the compartment with the cover and screw.
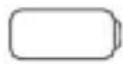
Note: When the battery is low, the LED indicator will flash slowly (3s/flash)
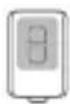
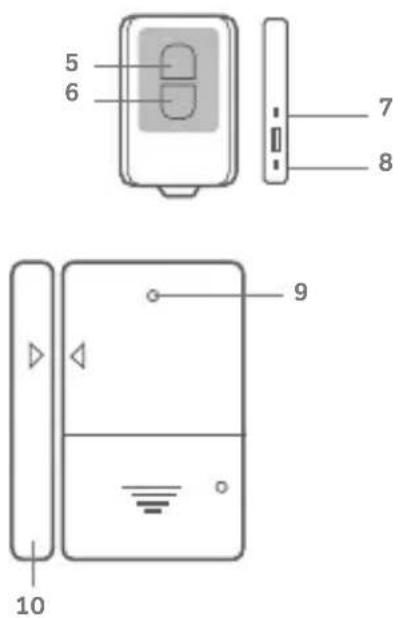
1.2. Battery installation: remote control
- Using a crosshead screwdriver, remove the screw on the back of the remote control.
- Slide the cover to the left to access the battery compartment.
- Insert the battery, making sure that the polarity is correct (+/-)
- Close the compartment with the cover and screw.
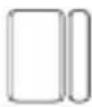
1.3. Battery Installation: Door Opening Sensor
- Using a crosshead screwdriver, remove the screw on the front of the opening detector
- Slide the cover down to access the battery compartment.
- Insert the battery, ensuring correct polarity (+/-)
- Close the compartment with the cover and screw.
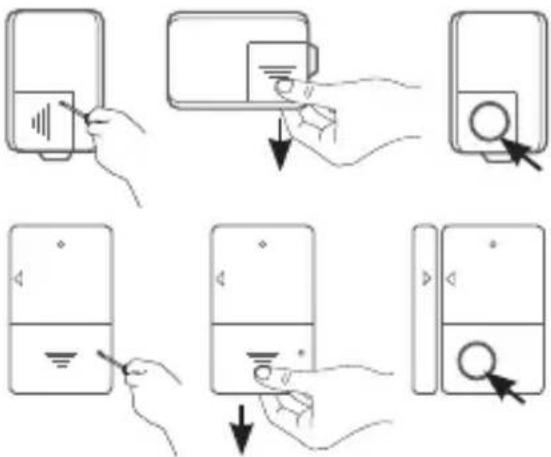
2. Synchronisation of devices
- Using a screwdriver, open the battery compartment of the main unit.
- Press and hold the learn button until you hear a «beep». The unit enters pairing mode.
- Separate the two parts of the opening detector to send a signal to the main unit. You will hear a «beep» sound to indicate that the pairing was successful.
- Press any button on the remote control. You will hear a «beep» sound to indicate successful pairing.
- To exit pairing mode, press and hold the learn button for 3 seconds. You will then hear a double «beep».
NOTE: A maximum of 32 transmitters can be paired to a main unit.
3. Wall installation of the control unit
-
Once you have installed the batteries, choose a location for your motion detector.
-
Fix the bracket to the wall using the supplied dowels and screws.
-
Fit the sensor onto the bracket and then choose the best angle for the sensor to have the best possible field of view.
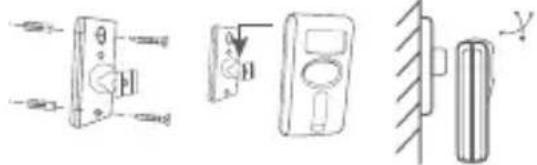
Recommended installation height: Maximum 160cm and minimum 30cm.
NOTE: Adjust the installation angle so that it faces downwards.
4. Mode on the remote control
The remote control has an «On» button to activate the alarm and an «Off» button to deactivate it. On the side of the remote control there are two inscriptions «HOME» and «AWAY».
a) Home mode: When you select «HOME» mode with the switch, it means that you are at home and don't want to be disturbed. Slide the switch on the remote control marked «HOME» and press the «On» button.
b) AWAY mode: When you select the «AWAY» mode with the switch, it means that you are leaving your home and want to turn off your alarm. Slide the switch on the remote control marked «AWAY» and press the «On» button
NOTE: In «home» mode, all motion detectors are disabled.
4. Reset pairing
In order to reset your entire alarm, remove the batteries from your device. Then press and hold the learning button (see diagram point 1.). When you reinsert the batteries, you will hear two «beeps» indicating that the reset was successful.
5. Problem solving
- False alarms from the main unit
a) Check that there are no animals near the motion detector.
b) In hot weather, moving shadows may also activate the alarm. Also ensure that the detector is not installed near a radiator or heat source.
EN
c) Check that there are no devices with strong electromagnetic fields near the door/window sensor. Strong electromagnetic fields can cause false alarms.
- The main unit doesn't receive a signal from the transmitter
a) Check if the pairing between the transmitter and the main unit was successful.
b) If pairing was successful, check the battery voltage of the main unit and transmitter. Low voltage will result in product failure.
- No alarm sounds after a detection
a) Check if the low battery indicator is flashing (please replace the batteries immediately).
b) If the unit is armed and set to HOME mode and the PIR sensor detects an intrusion, the alarm will not sound. The PIR sensor is disabled in HOME mode. Check if the main unit is installed correctly.
6. Add a device to your existing alarm
We have created a 100% compatible alarm system to meet your needs. Here, we offer accessories that can work alone but also as a kit. This allows you to personalise your alarm and to associate several accessories but also several alarms between them. For example, when a person triggers the opening detector, all your alarms will sound. You can deactivate your alarm using the code units, remote control or the remote keyboard.
More information on our website: https://chacon.com/fr/
flowchart
graph TD
    A["Node 1"] --> B["Node 2"]
    B --> C["Node 3"]
    C --> D["Node 4"]
    D --> E["Node 5"]
    E --> F["Node 6"]
    F --> A
    style A fill:#f9f,stroke:#333
    style B fill:#f9f,stroke:#333
    style C fill:#f9f,stroke:#333
    style D fill:#f9f,stroke:#333
    style E fill:#f9f,stroke:#333
    style F fill:#f9f,stroke:#333
Compatible products: 34036, 34038, 34043, 34044, 34045, 34046, 34048
7. Safety advice
- Don't mix new and used batteries.
- Don't mix alkaline, standard (zinc carbon) or rechargeable (ni-cad, ni-mh, etc.) batteries.
- Please use only the type of battery specified in the manual.
- Don't leave used batteries lying around in the unit, as this may damage the unit.
- Incorrect use of the battery may damage nearby objects and result in fire or serious injury.
- Please keep batteries away from children. If you suspect that batteries have been ingested, seek medical attention immediately. Swallowing the battery can lead to serious consequences; internal burns within 2 hours or death.
- Recycle used batteries in accordance with environmental protection practices
- Don't place the unit near a heat source, where it may be exposed to direct sunlight, rain or strong light.
EN
- The unit is not waterproof. Don't expose it to rain or immerse it in water.
- Don't attempt to disassemble or repair the product yourself.
- Please keep this manual in a safe place.
- The reception distance may be affected if a strong interference signal exists in the area of use.
8. Technical specifications
- Can be switched on or off remotely via the controls provided
- Easy to install
- Compatible products: 34036, 34038, 34043, 34044, 34045, 34046, 34048
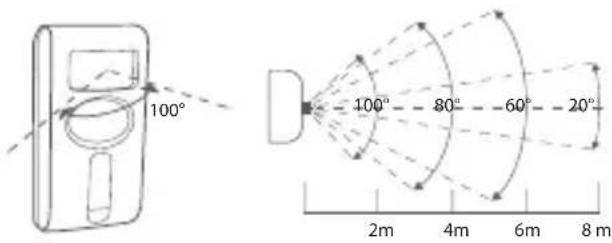
- Motion detector:
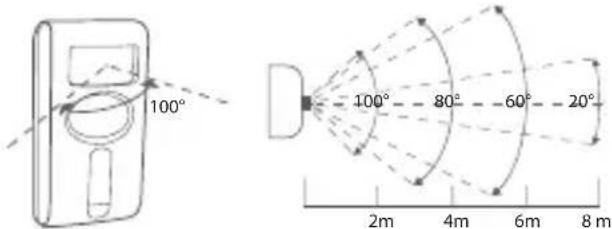
• Detection distance: 8 m (free field)
• Detection angle: 100
• Alarm volume: 100 dB
• Standby current: ≤ 350uA
• Alarm current: ≤ 150mA
- Battery: 3x AA 1.5V (not included)
- Remote control:
- Battery: 1x CR2032 (included)
• Standby current: ≤ 3uA
• Alarm current: ≤ 25mA
- Opening detector:
- Battery: 1x CR2032 (included)
• Standby current: ≤ 3uA
• Alarm current: ≤ 15mA
- Box content: motion detector + 2 remote controls + door opening detector + battery (3x) + manual
Support
www.chacon.com/support
EN

EN: For indoor use only
This product must be treated in accordance with European Directive 2002/96/EC with the aim of being recycled or dismantled to minimise its impact on the environment. For further information, please contact your local or regional authorities.

FR :
Hereby, Chacon declares that the radio equipment type 34035 is in compliance with Directive 2014/53/EU.
The full text of the EU declaration of conformity is available at the following internet address: www.chacon.com/conformity
v1 210809
Chacon S.A. – Avenue Mercator 2 – 1300 Wavre – Belgium Made in PRC