
DR 70 - Radio ALBRECHT - Free user manual and instructions
Find the device manual for free DR 70 ALBRECHT in PDF.
| Product Type | Portable DAB+ and FM digital radio |
| Brand | Albrecht |
| Model | DR 70 |
| Dimensions (L x W x H) | 120 x 80 x 28 mm |
| Weight (with batteries) | Approx. 274 g |
| Power supply | 5 V / 0.5 A DC mains adapter or 3 AA batteries |
| Battery life | Approx. 10 h (speaker) / 20 h (headphones) |
| Frequency bands | DAB+ Band III (174-240 MHz) / FM 87.5-108 MHz (RDS) |
| Speaker output power | 1.5 W RMS at 4 Ω |
| Headphone output power | 0.1 W at 32 Ω |
| Number of presets | 20 for DAB+ and 20 for FM (including 5 direct access) |
| Main functions | Automatic and manual search, preset, service information (Radiotexte, RDS), sleep timer, choice of display color, LED lamp |
| Display | LCD with adjustable backlight and color selection |
| Antenna | Built-in telescopic |
| Connections | 3.5 mm headphone jack, 5 V mains adapter input |
| Safety | Do not expose to water, excessive heat; use original accessories; do not open the device |
| Maintenance and cleaning | Wipe with a dry cloth; remove batteries if not used for a long time |
| Spare parts and repairability | Contact the dealer or authorized service center; 2-year warranty |
| General information | Complies with Directive 2014/53/EU; mandatory WEEE recycling |
Frequently Asked Questions - DR 70 ALBRECHT
User questions about DR 70 ALBRECHT
0 question about this device. Answer the ones you know or ask your own.
Ask a new question about this device
Download the instructions for your Radio in PDF format for free! Find your manual DR 70 - ALBRECHT and take your electronic device back in hand. On this page are published all the documents necessary for the use of your device. DR 70 by ALBRECHT.
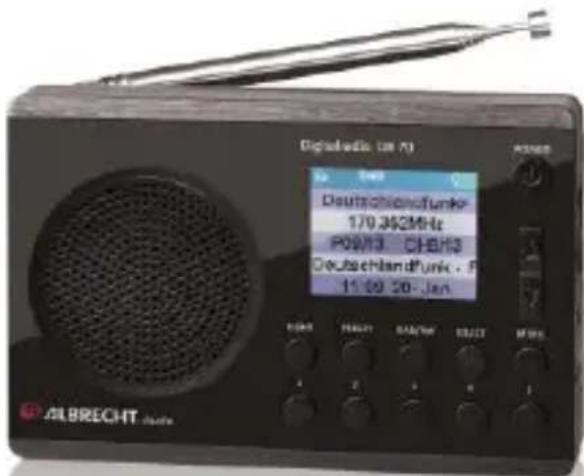
USER MANUAL DR 70 ALBRECHT
Portable Digital DAB+ and FM Radio Receiver
User Manual English
Please read carefully before using this product
1 Table of Contents
1 Table of Contents. 16
2 Safety Instructions: 17
3 Specification: 17
4 Controls and Attributes. 18
4.1 Speaker: 19
4.2 Headphones: 19
4.3 Radio Antenna: 20
4.4 LED Torch Light: 20
5 First Steps 20
5.1 Power up the radio: 20
5.2 Operating your radio: 20
5.3 DAB+/FM Band Select: 20
6 DAB Mode 21
6.1 Search and select channels 21
6.2 Direct Preset Button 1-5 21
6.3 Preset 21
6.4 Service Information 22
7 FM Mode 22
7.1 Search and select channels 22
7.2 Manual tuning 22
7.3 Service Information 22
7.4 Direct Preset Button 1-5 23
7.5 Preset 23
8 Menu 24
8.1 Sleep mode: 24
8.2 Select Language: 24
8.3 Backlighting: 24
8.4 LCD Colour Selection: 25
8.5 Factory Reset: 25
9 Power Off and Maintenance: 25
10 Warranty and Recycling Information. 26
2 Safety Instructions:
- Do not use this radio near water.
- Clean with dry cloth.
- Do not block any ventilation openings.
- Do not use near heat objects.
- Use accessories provided by manufacturer.
- Do not allow this unit to be exposed to water, steam, sand or other environmental hazards.
- Do not leave your radio where excessive heat could cause damage such as expose to direct sunlight in a parked car where the heat from the sun may damage the unit.
3 Specification:
Model: DR 70
Radio: Digital DAB+ & FM
Dimension: 120 × 80 × 28 mm
Weight: Approx. 274g (Included battery)
DAB+ Frequency: Band III (174.0-240.0MHz)
FM Frequency: 87.5-108MHz with RDS
Number of Presets: 20 for DAB+ and 20 for FM
Speaker Output: 1.5W (RMS) 4 Ω
Output Power: 32Ω 0.1W (headphone)
Power Source: DC Adaptors (5V, 0.5A)
Battery Source: 3 x AA batteries
Usage Time: Approx 10 Hours (Speaker mode) /
20 Hours (Headphone mode)
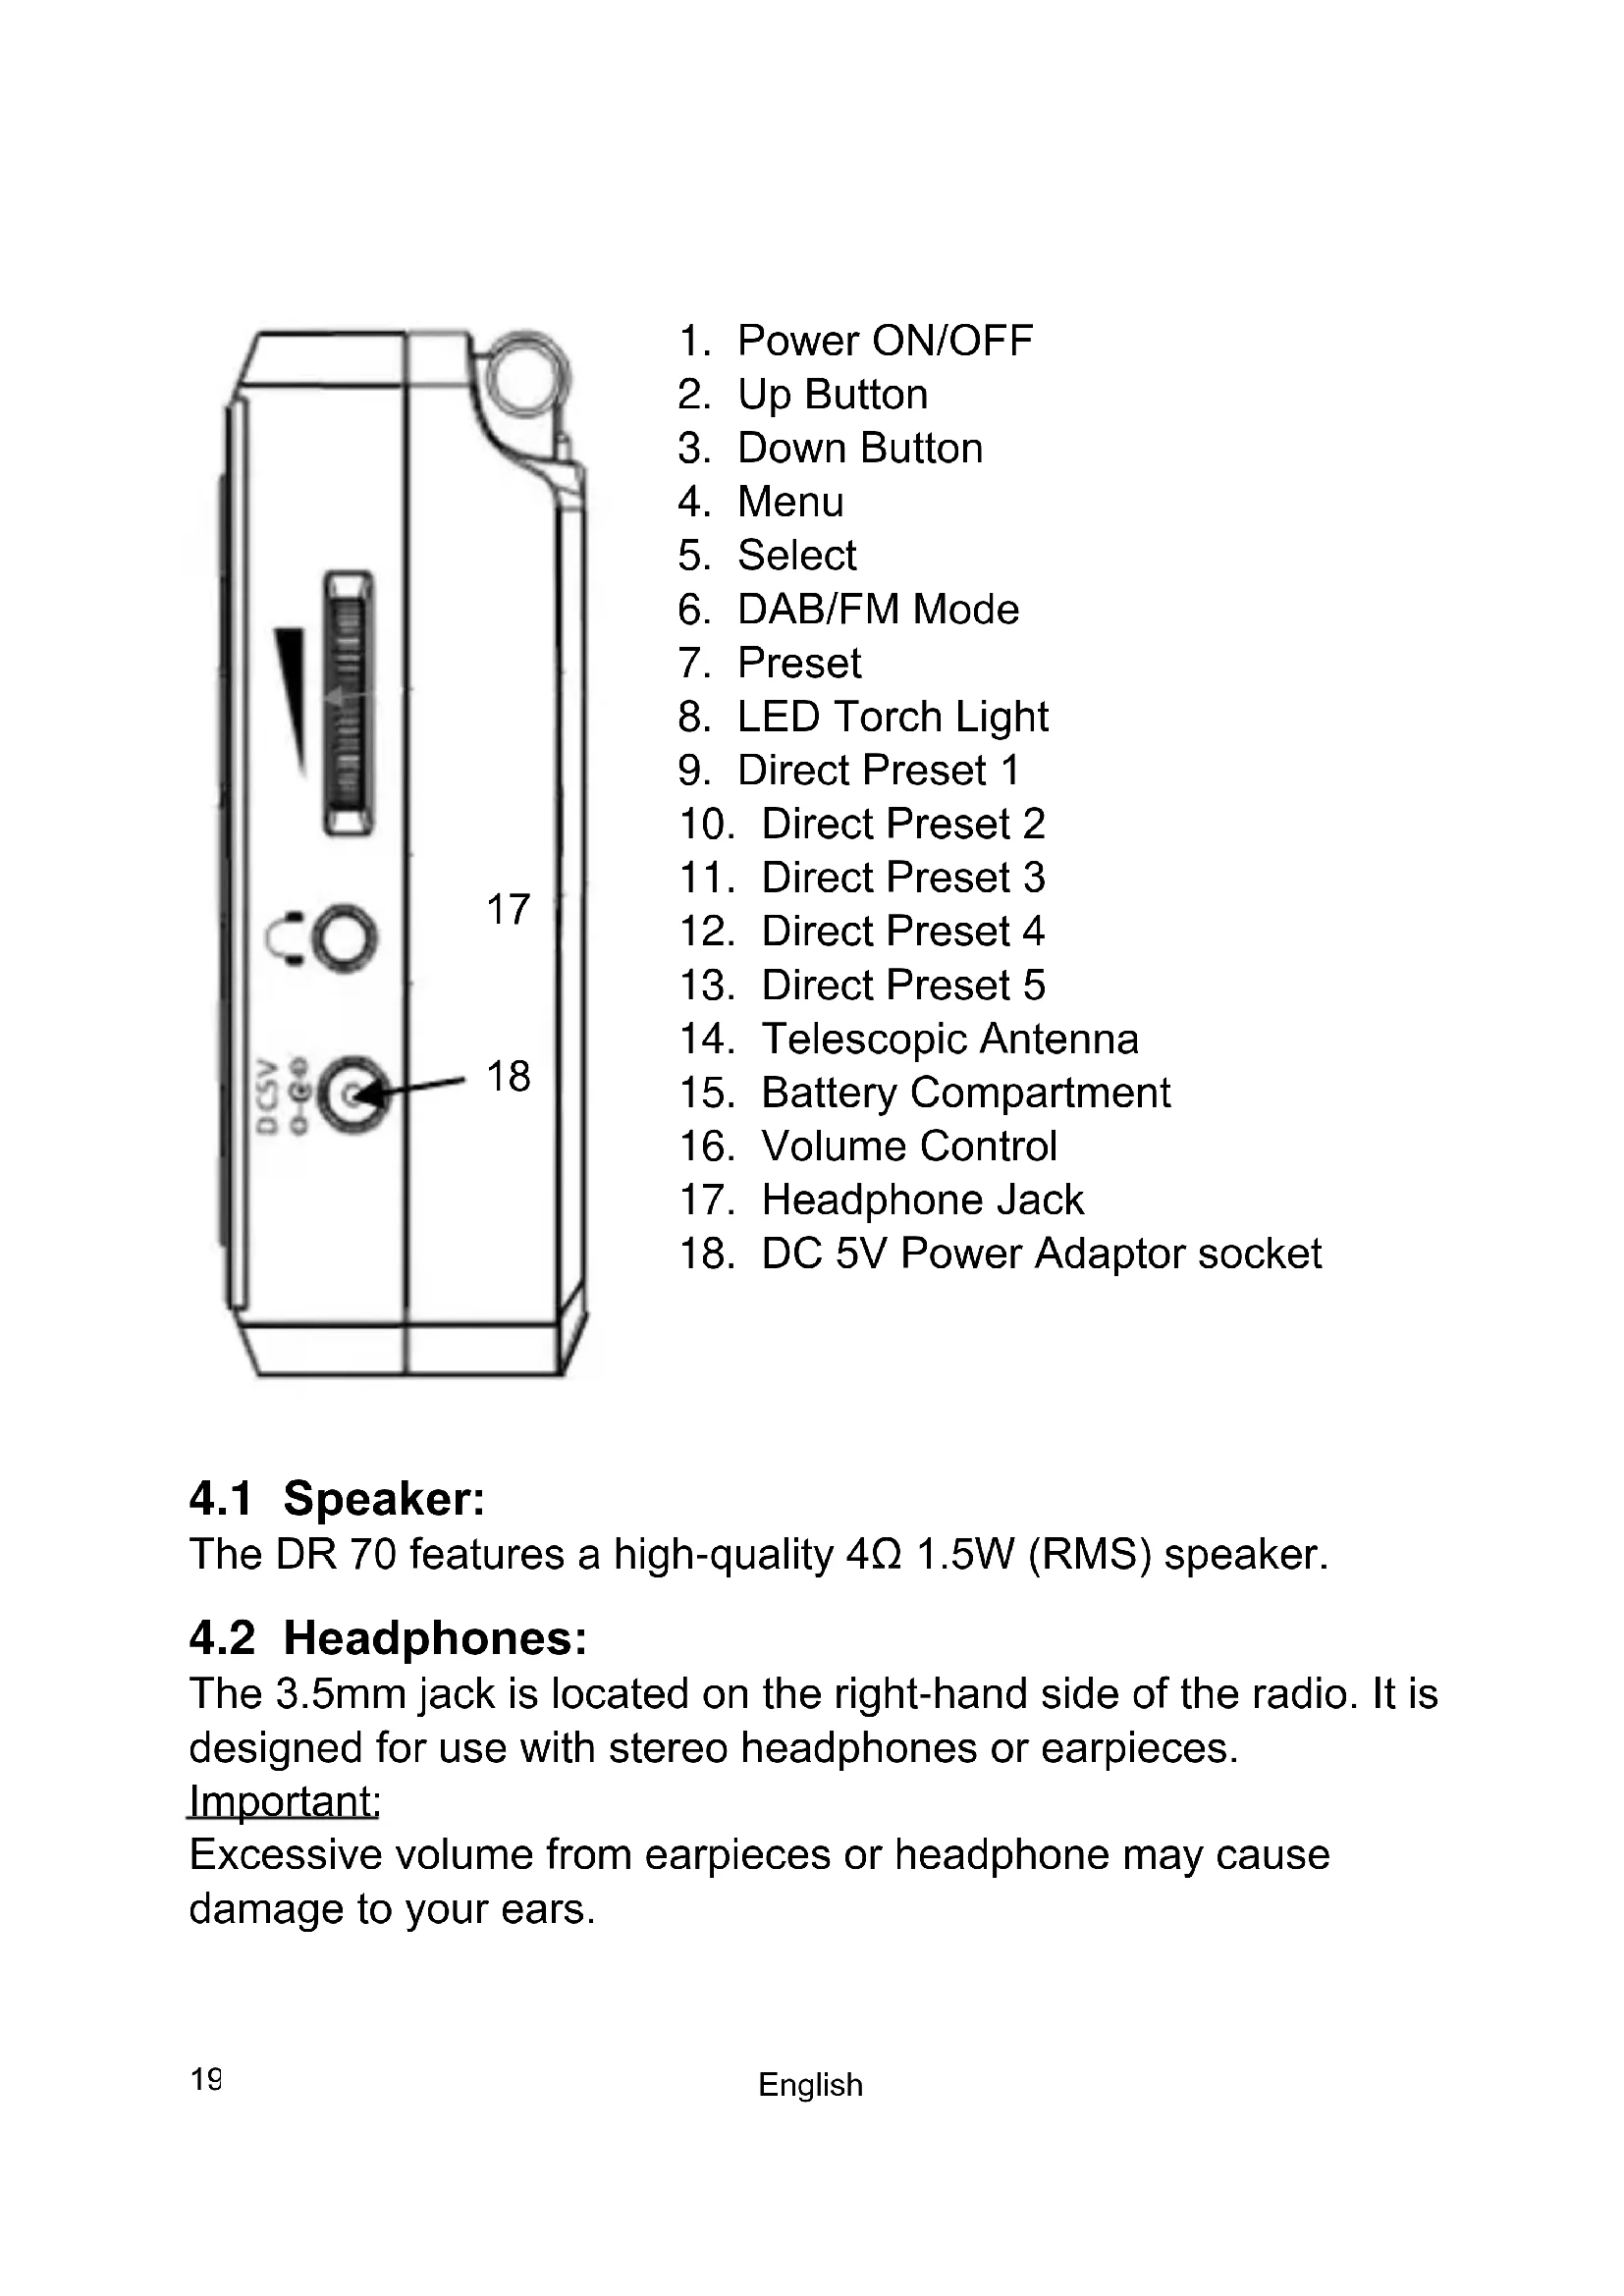
4 Controls and Attributes
- Power ON/OFF
- Up Button
- Down Button
- Menu
- Select
- DAB/FM Mode
- Preset
- LED Torch Light
- Direct Preset 1
- Direct Preset 2
- Direct Preset 3
- Direct Preset 4
- Direct Preset 5
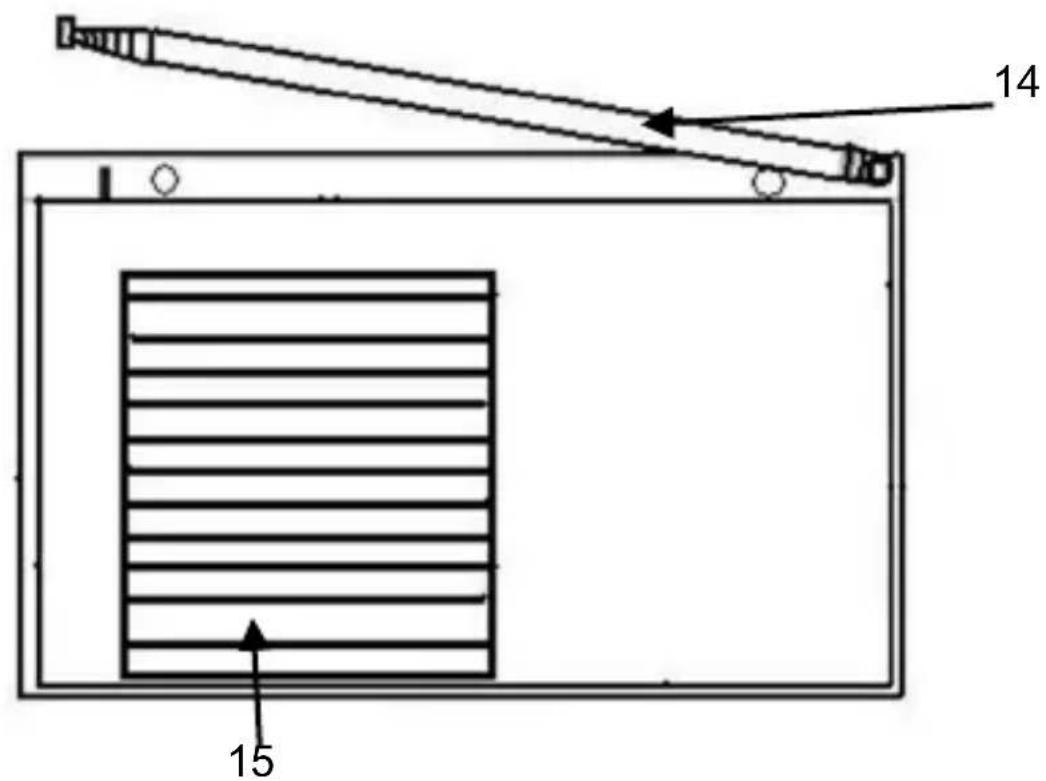
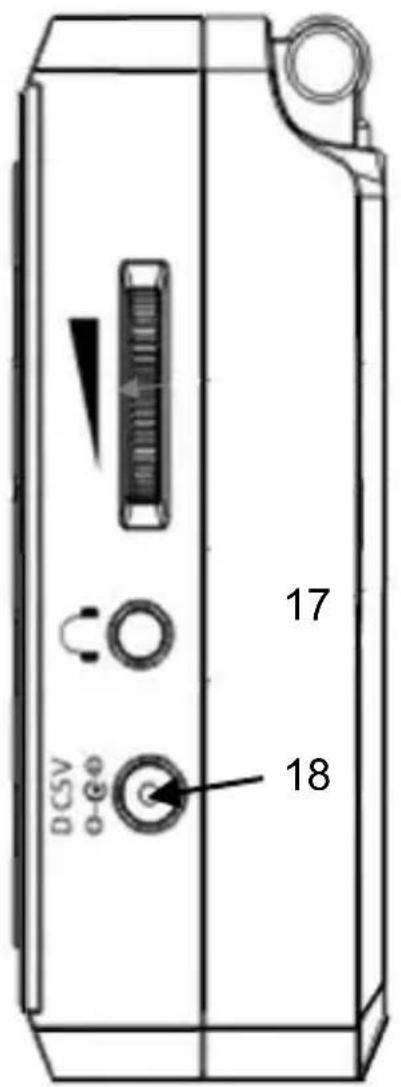
- Telescopic Antenna
- Battery Compartment
- Volume Control
- Headphone Jack
- DC 5V Power Adaptor socket
4.1 Speaker:
The DR 70 features a high-quality 4 1.5W (RMS) speaker.
4.2 Headphones:
The 3.5mm jack is located on the right-hand side of the radio. It is designed for use with stereo headphones or earpieces.
Important:
Excessive volume from earpieces or headphone may cause damage to your ears.
4.3 Radio Antenna:
- For DAB+ and FM reception there is a built-in telescopic antenna at the rear of the unit.
- Extend the antenna and move it around to obtain the best reception.
- If the reception is still unsatisfactory, pull the antenna as long as possible.
4.4 LED Torch Light:
- A bright LED is built-in for lighting purpose. To turn ON the LED light, press once the "LIGHT" button or press again to turn it OFF.
5 First Steps
5.1 Power up the radio:
The DR 70 can be operated by either 3 × AA batteries or a DC 5V power adaptor.
5.2 Operating your radio:
- Make sure the batteries are inserted or the DC 5V power adaptor is connected.
- Press and hold the button to turn on the radio.
- The display will flashing with 'Starting DAB' and enter DAB mode (or FM mode if you selected FM before turning off).
- If the radio is switched on for the first time, the DR 70 will perform a DAB station scan automatically.
- Adjust the volume to a comfortable level.
5.3 DAB+/FM Band Select:
- Press "DAB/FM" button to select DAB+ or FM mode.
- When you turn off the radio, the last selection is saved.
6 DAB Mode
6.1 Search and select channels
- Make sure the radio is in DAB+ mode.
- Press the "MENU" button once to enter menu mode,
- Press "UP or DN" button to select "DAB Autoscan" and confirm by pressing "SELECT" button to activate the full scan of all available DAB+ radio channels and all the scanned channels will be saved in a channel list.
- Press the "UP" or "DN" button to select the desired channels from the list.
6.2 Direct Preset Button 1-5
- Tune to your favorite DAB+ channel with the "UP" or "DN" button, then long press "1" button to store the current DAB+ channel as Preset 1. Repeat the same procedure for other direct presets 1-5. A message of "Preset Stored" will be displayed on the LCD screen if the preset is stored successfully. Remark: if this preset already has stored a station this action will overwrite the memory.
- To play the direct preset channels, short press the "1" to "5" preset button once to recall your favorite channel
- 5 direct preset channels are available for the DAB+ radio mode.
6.3 Preset
-
Tune to your favorite DAB+ channel with the "UP" or "DN" button, long press "PRESET" button, then "Null Memory 01" will show on the display if the position is empty whereas it will show the name of the channel if it is already occupied. Press the "UP" or "DN" button to select the position to save, then press "SELECT" button to confirm. A message of "Preset Stored" will be displayed on LCD screen if stored successfully.
-
To load the preset channels, short press the “PRESET” button and select the preset channel (the name of channel will be displayed) by pressing the “UP” or “DN” button, then press “SELECT” button to confirm.
- 20 preset channels are available for the DAB+ radio mode.
6.4 Service Information
The Service Information display - Technical information on the current status of the station being broadcast.
While listening to DAB+, the display will show the followings if applicable:
- DLS information
- Multiplex Frequency
- Time and Date
- Channel Name
- Number of Channels
- Signal Strength
- Battery Level
7 FM Mode
7.1 Search and select channels
- Press and hold the button to turn the radio on.
- Make sure the radio is in FM mode.
- Press and hold the "UP" or "DN" button to search the nearest FM channel automatically.
7.2 Manual tuning
Short press the "UP" or DN" button to tune the frequency step by step.
7.3 Service Information
While listening to FM radio, the display will show the following if applicable
- Program type
- Channel Frequency
- Channel Name
- Signal Strength
- Battery Level
7.4 Direct Preset Button 1-5
- Tune to your favorite FM channel by "UP" or "DN" button, then long press "1" button to store the current FM channel as Preset 1. Repeat the same procedure for other direct presets 1-5. A message of "Preset Stored" will be displayed on the LCD screen if the preset is stored successfully.
Remark: if this preset already has stored a station this action will overwrite the memory.
- To play the direct preset channels, short press the "1" to "5" preset button once to recall your favorite channel
- 5 direct preset channels are available for the FM radio mode.
7.5 Preset
Tune to your favorite FM channel by "UP" or "DN" button, long press "PRESET" button, then "Null Memory 01" will show on the display if the position is empty whereas it will show the name of the channel if it is already occupied. Press the "UP" or "DN" button to select the position to save, then press "SELECT" button to confirm. A message of "Preset Stored" will be displayed on LCD screen if stored successfully.
To load the preset channels, short press the "PRESET" button and select the preset channel (the name of channel will be displayed) by pressing the "UP" or "DN" button, then press "SELECT" button to confirm.
20 preset channels are available for the FM radio mode.
8 Menu
8.1 Sleep mode:
- In the DAB+ or FM Mode, press once the "MENU" button to enter menu mode, press "UP or DN" button to "SLEEP" and confirm by pressing "SELECT" button to activate the sleep function. A flashing sleep timer will be shown on the top of LCD, press "UP" or "DN" to select the sleep time with each step 5 minutes (from 0 minutes to 90), then press "SELECT" to confirm and the flashing will stop.
- The radio will automatically power off when the timer reaches zero.
- To cancel the sleep function select the "SLEEP" menu again and set it to "0" minute and confirm by pressing "SELECT".
8.2 Select Language:
- Press the "MENU" button to enter LCD menu, use "UP" or "DN" to scroll to the "Language" item, press "SELECT" button to confirm, then "Language" menu will show on the display, press the "UP" or "DN" button to select Language.
- Press the "SELECT" button to confirm and save. Press "MENU" to exit.
8.3 Backlighting:
- Set how long LCD backlighting remains on.
- Press the "MENU" button to enter LCD menu, use "UP" or "DN" to scroll to the "Backlight" item, press "SELECT" button to confirm, then "Backlight" menu will show on the display, press the "UP" or "DN" button again to select LCD backlight timer from 20s, 40s, 60s to Always On.
- Press the "SELECT" button to confirm and save. Press "MENU" to exit.
8.4 LCD Colour Selection:
- Set the background colour of the LCD display.
- Press the "MENU" button to enter LCD menu, use "UP" or "DN" to scroll to the "Color Select" item, press "SELECT" button to confirm, then "Color Select" menu will show on the display, and then use the "UP" or "DN" button to select the desired LCD background colour.
- Press the "SELECT" button to confirm and save. Press "MENU" to exit.
8.5 Factory Reset:
- Press the "MENU" button to enter LCD menu, use "UP" or "DN" to scroll to the "Factory Reset" item, press "SELECT" button to confirm, then "Factory Reset" menu will show on the display, then use the "UP" or "DN" button to select "YES" or "NO". Factory reset function will clear all the preset radio channels if you select "YES".
- Press the "SELECT" button to confirm and save. Press "MENU" to exit.
9 Power Off and Maintenance:
- Please shut down the radio when it is not in use and remove the batteries if it is not used for a longer period of time.
- Please do not attempt to open the product or change inner parameter.
*Information of this user manual is subject to change without prior notice.
10 Warranty and Recycling Information
2-Year Warranty From Date Of Purchase
The manufacturer/retailer guarantees this product for two years from date of purchase. This warranty includes all malfunctions caused by defective components or incorrect functions within the warranty period excluding wear and tear. Defects due to unintended use are also excluded from the warranty.
Please contact your local dealer for warranty claims. The dealer will repair or exchange the product or forward it to an authorized service center.
You can also contact our service partner directly. Please include your proof of purchase with the product and describe the malfunction as clearly as possible.
WEEE And Recycling
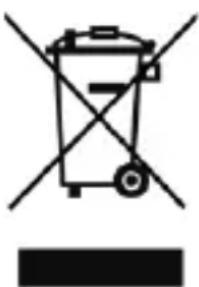
The European laws do not allow any more the disposal of old or defective electric or electronic devices with the household waste. Return your product to a municipal collection point for recycling to dispose of it. This system is financed by the industry and ensures environmentally responsible disposal
and the recycling of valuable raw materials.
Service Address And Technical Hotline (for units sold in Germany)
Contact our service hotline by phone +49 (0) 6103 / 9481 - 66 (regular costs for German fixed network) or e-mail at service@alan-electronics.de
Conformity Declaration
Hereby, Alan Electronics GmbH declares that the radio equipment type DR 70 is in compliance with Directive 2014/53/EU.
The full text of the EU declaration of conformity is available at the following internet address:
www.alan-electronics.de/download.aspx

Printing errors reserved.
Information in this user manual are subject to change without prior notice.
5 Principales operations 34