Dr. Beef II - Grill plate OneConcept - Free user manual and instructions
Find the device manual for free Dr. Beef II OneConcept in PDF.
User questions about Dr. Beef II OneConcept
0 question about this device. Answer the ones you know or ask your own.
Ask a new question about this device
Download the instructions for your Grill plate in PDF format for free! Find your manual Dr. Beef II - OneConcept and take your electronic device back in hand. On this page are published all the documents necessary for the use of your device. Dr. Beef II by OneConcept.
USER MANUAL Dr. Beef II OneConcept
Berlin Brands Group UK Ltd
PO Box 1145
Oxford, OX1 9UW
United Kingdom
Member of Berlin Brands Group
Handwerkerstr. 11
15366 Dahlwitz-Hoppegarten
Deutschland
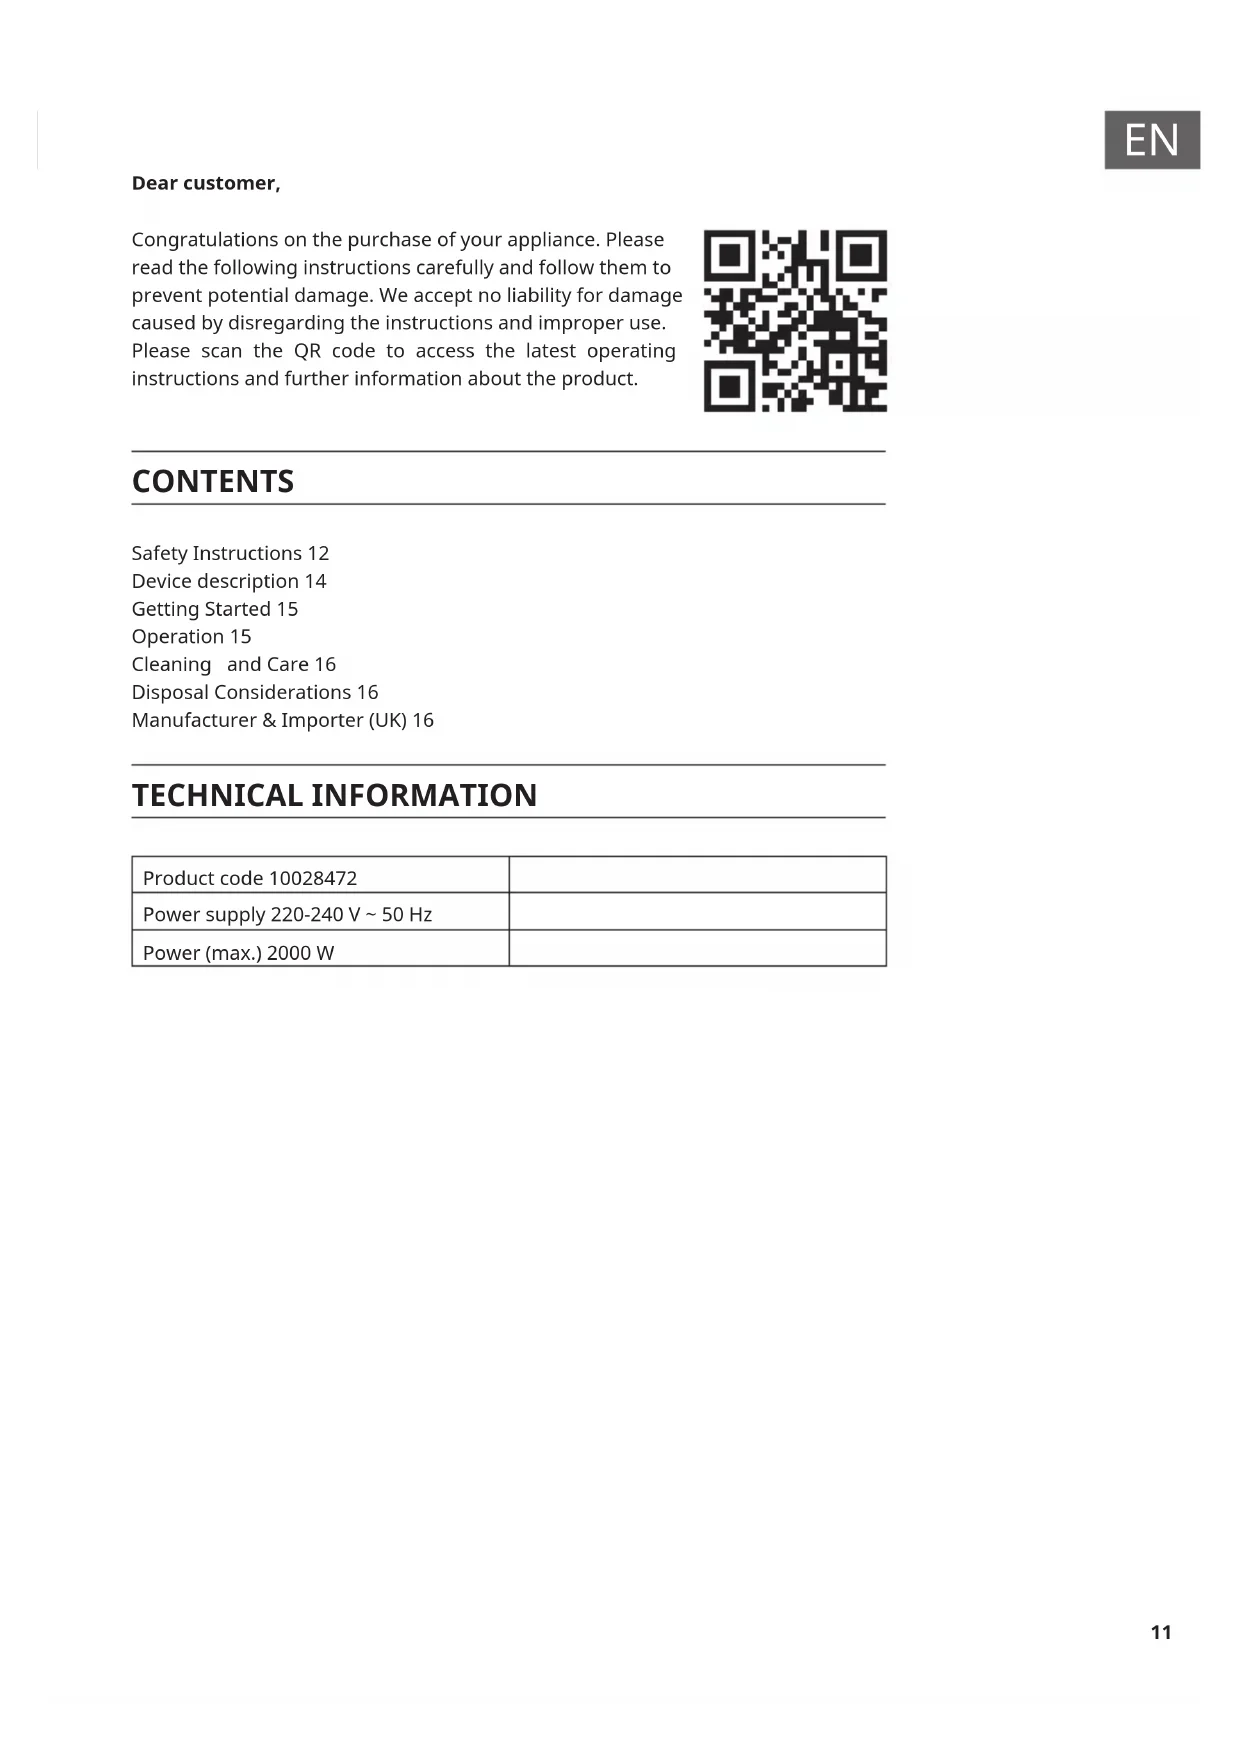
Congratulations on the purchase of your appliance. Please read the following instructions carefully and follow them to prevent potential damage. We accept no liability for damage caused by disregarding the instructions and improper use. Please scan the QR code to access the latest operating instructions and further information about the product.

CONTENTS
Safety Instructions 12
Device description 14
Getting Started 15
Operation 15
Cleaning and Care 16
Disposal Considerations 16
Manufacturer & Importer (UK) 16
TECHNICAL INFORMATION
| Product code 10028472 | |
| Power supply 220-240 V ~ 50 Hz | |
| Power (max.) 2000 W |
SAFETY INSTRUCTIONS
- Connect the unit so that the power cord plug is easily accessible at all times.
- Check the power cord regularly for damage. If the power cord is damaged, it must be replaced by the manufacturer, an authorised specialist company or a similarly qualified person.
- Repairs may only be carried out by qualified personnel; do not attempt to repair the unit yourself.
- Do not connect the appliance to a timer or a remote-controlled socket.
- Never immerse the device, the power cord and the plug in water or other liquids.
- Do not touch the plug with wet hands.
- Do not pull the plug out of the socket by the cable. Instead, hold it securely with your hand while unplugging it.
- Do not use the cable as a handle.
- Lay the cable so that no one can trip on it.
- Do not let the cable run over sharp edges.
- Do not use the unit in wet rooms or in the rain.
- Set up the unit so that it cannot fall into water. If it does fall into water, unplug the appliance immediately and only then touch the appliance.
- Unplug the device when not in use.
- Keep the device away from open flames and sources of heat.
- Children over 8 years as well as mentally, sensory and physically impaired persons may only use the device if they have been informed in detail about the functions and safety precautions by a supervisor responsible for them beforehand and understand the associated risks.
- Keep children away from the grill and do not leave the appliance unattended while it is in use.
- Place the device on a stable, level surface.
- Make sure that there are no easily flammable objects and materials around the grill.
- Keep at least 30~cm away from walls.
- Do not touch the grill grate or other hot surfaces during operation.
- Do not move the unit until it has cooled down completely. Only hold the appliance by the handles provided.
- Only place the appliance on surfaces that are not sensitive to heat. Set up the unit so that it is not too close to the edge.
- To avoid heat build-up, do not place the appliance directly under kitchen cabinets or shelves.
- Do not place the appliance on or near a cooker.
Special safety precautions
- The unit can be used outdoors in dry weather. However, it must not get wet.
- During grilling, the appliance must be placed on a firm, flat surface and have a minimum distance of 30cm from the wall and flammable objects.
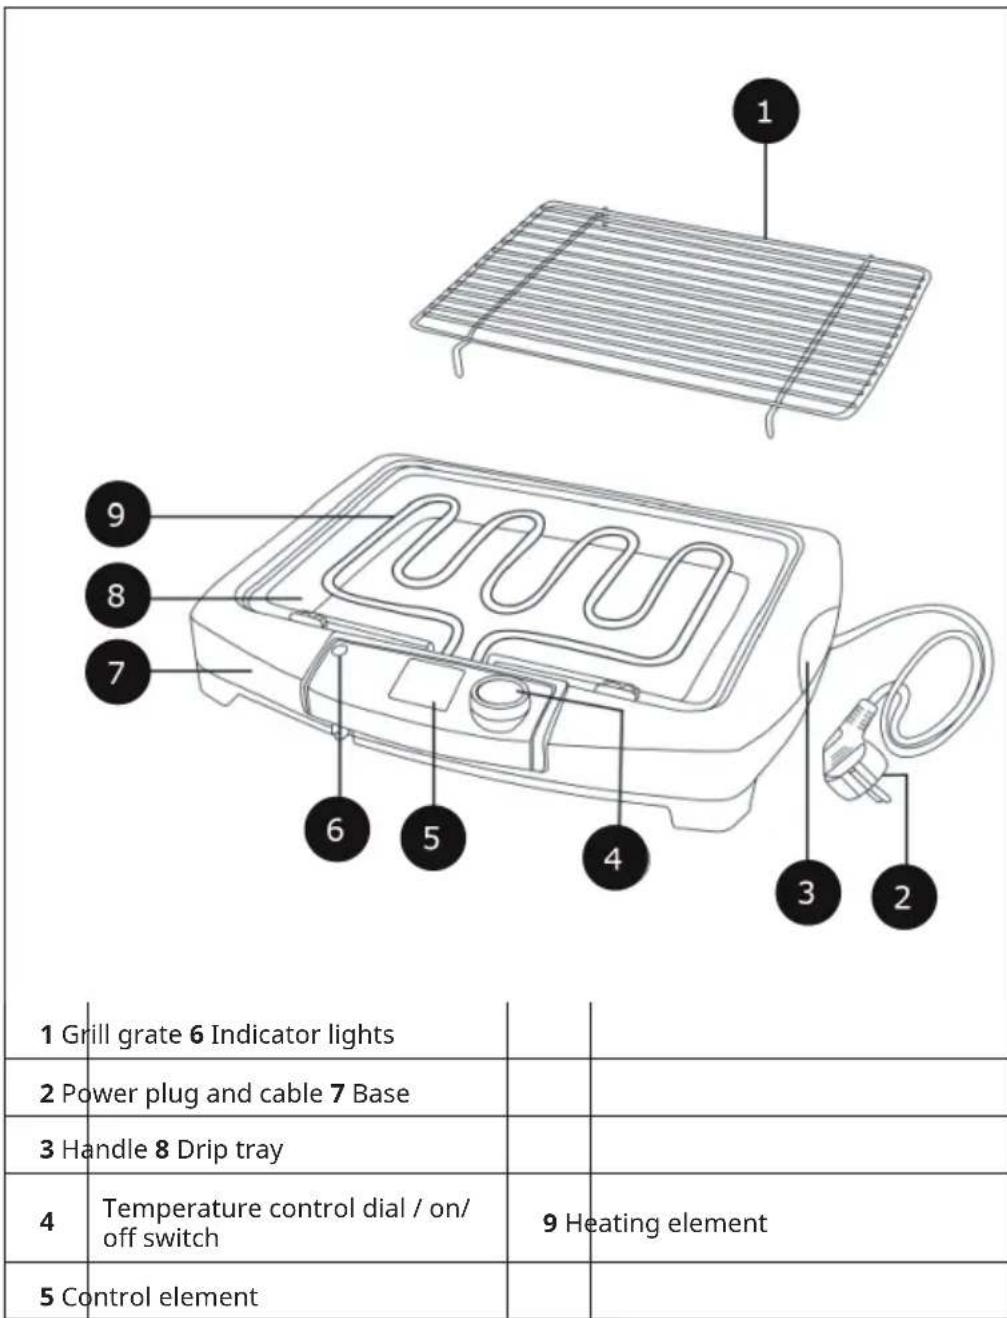
- Caution! The unit becomes very hot. You must let it cool down completely before touching its surfaces. Also, the removal of the grate (1), the base (7), the drip tray (8) and the cleaning must only be done after the appliance has cooled down completely.
- Do not move the grill during grilling.
- The control panel (5) is equipped with a safety switch. This prevents the heater from operating outside the base.
DEVICE DESCRIPTION
GETTING STARTED
Remove all packaging material.
Clean the unit as described (see Maintenance and Cleaning).
- Place the drip tray in the appliance from above.
- The temperature controller should be switched off. Insert the control unit with the heating element into the unit.
- Fill the drip tray (8) with cold water so that there is a distance of approx. 1 cm between the water surface and the heating rods.
- Place the grill grate on the appliance.
- Then connect the power plug to a mains outlet.
Note: The grill grate must not touch the heating elements.
OPERATION
- Turn the temperature control knob (4) to the desired position. The indicator light (6) lights up. The heating element (9) heats up immediately. Let the appliance warm up for 5-10 minutes before you start grilling.
- Now you can place the food on the grill rack (1). Deep-frozen food must first be defrosted before grilling.
- To grill the food evenly, it should be turned frequently. The grilling time depends on the food being grilled.
- To switch off the grill, turn the temperature control knob to the OFF position.
- You must not remove the grill grate (1), the control unit (5) and the drip tray (8) until the appliance has cooled down completely.
Grill times
| Meat type Grill time (in minutes) | |
| Fillet of beef 8-15 | |
| Hamburger 8-15 | |
| Veal escalope 5-8 | |
| Pork chop 12 | |
| Lamb chop 4-8 |
Note: For safety reasons, the unit switches off automatically when you remove the control unit from the base.
CLEANING AND CARE
- Before cleaning, allow the device to cool down completely and pull out the mains plug (2).
- Use a slightly damp cloth to clean the outer areas.
- You can clean the grill grate (1) and the drip tray (8) with hot water and a gentle washing solution.
- Do not use sharp or abrasive materials.
Note: Do not immerse the control unit (5) in water or any other liquid.
DISPOSAL CONSIDERATIONS
If there is a legal regulation in your country regarding the disposal of electrical and electronic equipment, this symbol on the product or on the packaging indicates that this product must not be disposed of with household waste. Instead, it must be taken to a collection point for the recycling of electrical and electronic equipment. By disposing of this product in accordance with the regulations, you protect the environment and the health of those around you from negative consequences. For information on recycling and disposal of this product, contact your local government or household waste disposal service.
MANUFACTURER & IMPORTER (UK)
Manufacturer:
Chal-Tec GmbH, Wallstraße 16, 10179 Berlin, Germany.
Importer for Great Britain:
Berlin Brands Group UK Ltd
PO Box 1145
Oxford,OX1 9UW
United Kingdom
Estimado cliente:
Berlin Brands Group UK Ltd
PO Box 1145
Oxford, OX1 9UW
United Kingdom
Cher client, chere clientele,
Berlin Brands Group UK Ltd
PO Box 1145
Oxford, OX1 9UW
United Kingdom
Gentile clientele,
PRODUTTORE E IMPORTATORE (UK)
Produttore:
Chal-Tec GmbH, Wallstraße 16, 10179 Berlin, Germania.
Berlin Brands Group UK Ltd
PO Box 1145
Oxford,OX1 9UW
United Kingdom


KLARSTEIN