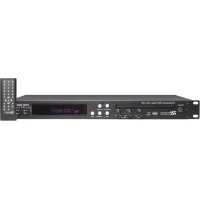
PDC150 - Mp3 player Power Dynamics - Free user manual and instructions
Find the device manual for free PDC150 Power Dynamics in PDF.



User questions about PDC150 Power Dynamics
0 question about this device. Answer the ones you know or ask your own.
Ask a new question about this device
Download the instructions for your Mp3 player in PDF format for free! Find your manual PDC150 - Power Dynamics and take your electronic device back in hand. On this page are published all the documents necessary for the use of your device. PDC150 by Power Dynamics.
USER MANUAL PDC150 Power Dynamics
Power Dynamics Professional Audio
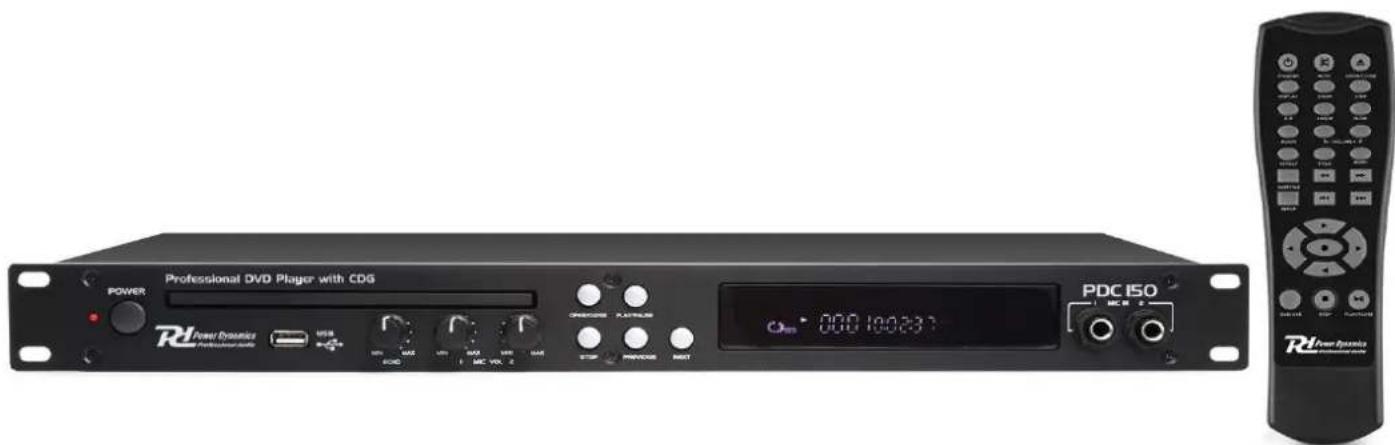
PDC150 19" DVD/CD Player
Ref. nr.: 172.708
text_image
POWER Professional DVD Player with CDG PDC ISO Power Dynamics Professional Audio USB ECO COM SOS MAC MINI STOCK RHO PROMS PROMS 000 100000 000 100000 MC IN 2 MC IN 2 MC IN 2 MC IN 2 MC IN 2 MC IN 2 MC IN 2 MC IN 2 MC IN 2 MC IN 2 MC IN 2 MC IN 2 MC IN 2 MC IN 2 MC IN 2 MC IN 2 MC IN 2 MC IN 2 MC IN 2 MC IN 2 MC IN 3 MC IN 3 MC IN 3 MC IN 3 MC IN 3 MC IN 3 MC IN 3 MC IN 3 MC IN 3 MC IN 3 MC IN 3 MC IN 3 MC IN 3 MC IN 3 MC IN 3 MC IN 3 MC IN 3 MC IN 3 MC IN 3 MC IN 3 MC IN 4 MC IN 4 MC IN 4 MC IN 4 MC IN 4 MC IN 4 MC IN 4 MC IN 4 MC IN 4 MC IN 4 MC IN 4 MC IN 4 MC IN 4 MC IN 4 MC IN 4 MC IN 4 MC IN 4 MC IN 4 MC IN 4 MC IN 4 MC IN 5 MC IN 5 MC IN 5 MC IN 5 MC IN 5 MC IN 5 MC IN 5 MC IN 5 MC IN 5 MC IN 5 MC IN 5 MC IN 5 MC IN 5 MC IN 5 MC IN 5 MC IN 5 MC IN 5 MC IN 5 MC IN 6 MC IN 6 MC IN 6 MC IN 6 MC IN 6 MC IN 6 MC IN 6 MC IN 6 MC IN 6 MC IN 6 MC IN 6 MC IN 6 MC IN 6 MC IN 6 MC IN 6 MC IN 6 MC IN 6 MC IN 6 MC IN 7 MC IN 7 MC IN 7 MC IN 7 MC IN 7 MC IN 7 MC IN 7 MC IN 7 MC IN 7 MC IN 7 MC IN 7 MC IN 7 MC IN 7 MC IN 7 MC IN 7 MC IN 8 MC IN 8 MC IN 8 MC IN 8 MC IN 8 MC IN 8 MC IN 8 MC IN 8 MC IN 8 MC IN 8 MC IN 8 MC IN 8 MC IN 8 MC IN 8 MC IN 8 MC IN 8 MC IN 8 MC IN 8INSTRUCTION MANUAL GEBRUIKSAANWIJZING BEDIENUNGSANLEITUNG MANUAL DE INSTRUCCIONES MANUEL D'INSTRUCTIONS
V1.4
Congratulations to the purchase of this Power Dynamics product. Please read this manual thoroughly prior to using the unit in order to benefit fully from all features.
Read the manual prior to using the unit. Follow the instructions in order not to invalidate the warranty. Take all precautions to avoid fire and/or electrical shock. Repairs must only be carried out by a qualified technician in order to avoid electrical shock. Keep the manual for future reference.
- Prior to using the product, please ask advice from a specialist. When the product is switched on for the first time, some smell may occur. This is normal and will disappear after a while.
- The product contains voltage carrying parts. Therefore do NOT open the housing.
- Do not place metal objects or pour liquids into the product. This may cause electrical shock and malfunction.
- Do not place the product near heat sources such as radiators, etc. Do not place the product on a vibrating surface. Do not cover the ventilation holes.
- The product is not suitable for continuous use.
- Be careful with the mains lead and do not damage it. A faulty or damaged mains lead can cause electrical shock and malfunction.
- When unplugging the product from a mains outlet, always pull the plug, never the lead.
- Do not plug or unplug the product with wet hands.
- If the plug and/or the mains lead are damaged, they need to be replaced by a qualified technician.
- If the product is damaged to such an extent that internal parts are visible, do NOT plug the product into a mains outlet and DO NOT switch the unit on. Contact your dealer. Do NOT connect the product to a rheostat or dimmer.
- To avoid fire and shock hazard, do not expose the product to rain and moisture.
- All repairs should be carried out by a qualified technician only.
- Connect the product to an earthed mains outlet (220-240Vac/50Hz) protected by a 10-16A fuse.
- During a thunderstorm or if the product will not be used for a longer period of time, unplug it from the mains. The rule is: Unplug it from the mains when not in use.
- If the product has not been used for a longer period of time, condensation may occur. Let the unit reach room temperature before you switch it on. Never use the product in humid rooms or outdoors.
-
To prevent accidents in companies, you must follow the applicable guide lines and follow the instructions.
-
Do not repeatedly switch the product on and off. This shortens the life time.
- Keep the product out of the reach of children. Do not leave the product unattended.
- Do not use cleaning sprays to clean switches. The residues of these sprays cause deposits of dust and grease. In case of malfunction, always seek advice from a specialist.
- Do not force the controls.
- If this product is with speaker inside which can cause magnetic field. Keep the product at least 60cm away from computer or TV.
- If the product has built-in lead-acid rechargeable battery. Please recharge the battery every 3 months if you are not going to use the unit for a long period of time. Or the battery may be damaged.
- If the battery is damaged please replace with same specifications battery. And dispose the damaged battery environment friendly.
- If the product has fallen, always have it checked by a qualified technician before you switch the product on again.
- Do not use chemicals to clean the unit. They damage the varnish. Only clean the product with a dry cloth.
- Keep away from electronic equipment that may cause interference.
- Only use original spares for repairs, otherwise serious damage and/or dangerous radiation may occur.
- Switch the product off prior to unplugging it from the mains and/or other equipment. Unplug all leads and cables prior to moving the product.
- Make sure that the mains lead cannot be damaged when people walk on it. Check the mains lead before every use for damages and faults!
- The mains voltage is 220-240Vac/50Hz. Check if power outlet match. If you travel, make sure that the mains voltage of the country is suitable for this product.
- Keep the original packing material so that you can transport the product in safe conditions.

This mark attracts the attention of the user to high voltages that are present inside the housing and that are of sufficient magnitude to cause a shock hazard.

This mark attracts the attention of the user to important instructions that are contained in the manual and that he should read and adhere to.
The unit has been certified CE. It is prohibited to make any changes to the unit. They would invalidate the CE certificate and their guarantee!
NOTE: To make sure that the unit will function normally, it must be used in rooms with a temperature between 5^ C/41°F and 35^ C/95°F.

Electric products must not be put into household waste. Please bring them to a recycling centre. Ask your local authorities or your dealer about the way to proceed. The specifications are typical. The actual values can slightly change from one unit to the other. Specifications can be changed without prior notice.
Do not attempt to make any repairs yourself. This would invalid your warranty. Do not make any changes to the unit. This would also invalid your warranty. The warranty is not applicable in case of accidents or damages caused by inappropriate use or disrespect of the warnings contained in this manual. Power Dynamics cannot be held responsible for personal injuries caused by a disrespect of the safety recommendations and warnings. This is also applicable to all damages in whatever form.
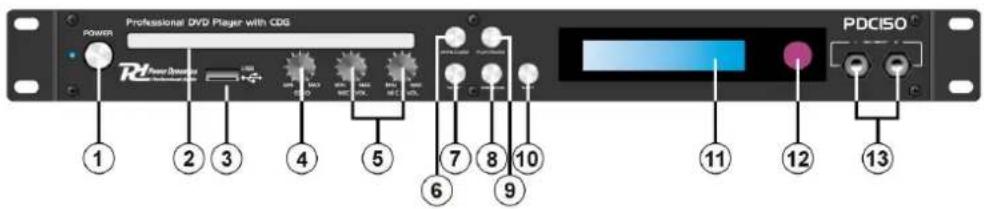
FRONT PANEL
- Power
- CD/DVD tray
- USB
- Echo
- Microphone volume
- Open / Close
- Stop
- Previous
- Play / Pause
- Next
- Display
- Infrared receiver
- Microphone 1 & 2, Jack 6.3mm ( 14 ) input
text_image
Professional DVD Player with CDG Power PDCISO 1 2 3 4 5 6 7 8 9 10 11 12 13BACK PANEL
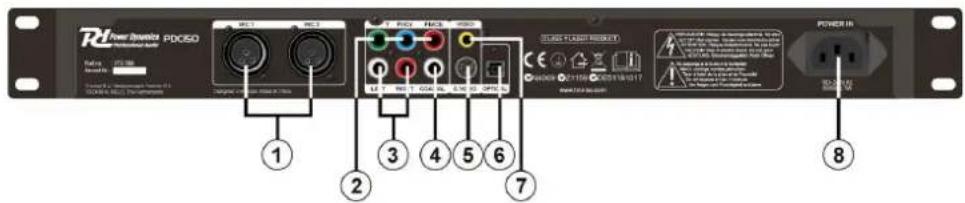
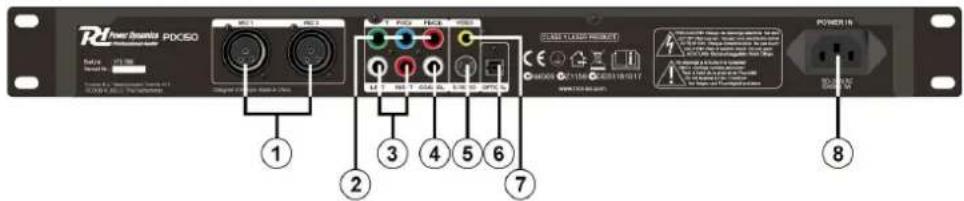
- Microphone 1 & 2 XLR input connector
- Component video output
- Audio output
- Coaxial output
- S-video output
- Optical output
- Composite video output
- Main power input
text_image
PDC50 Power Source PDC50 1 2 3 4 5 6 7 8 POWER INCONNECTION
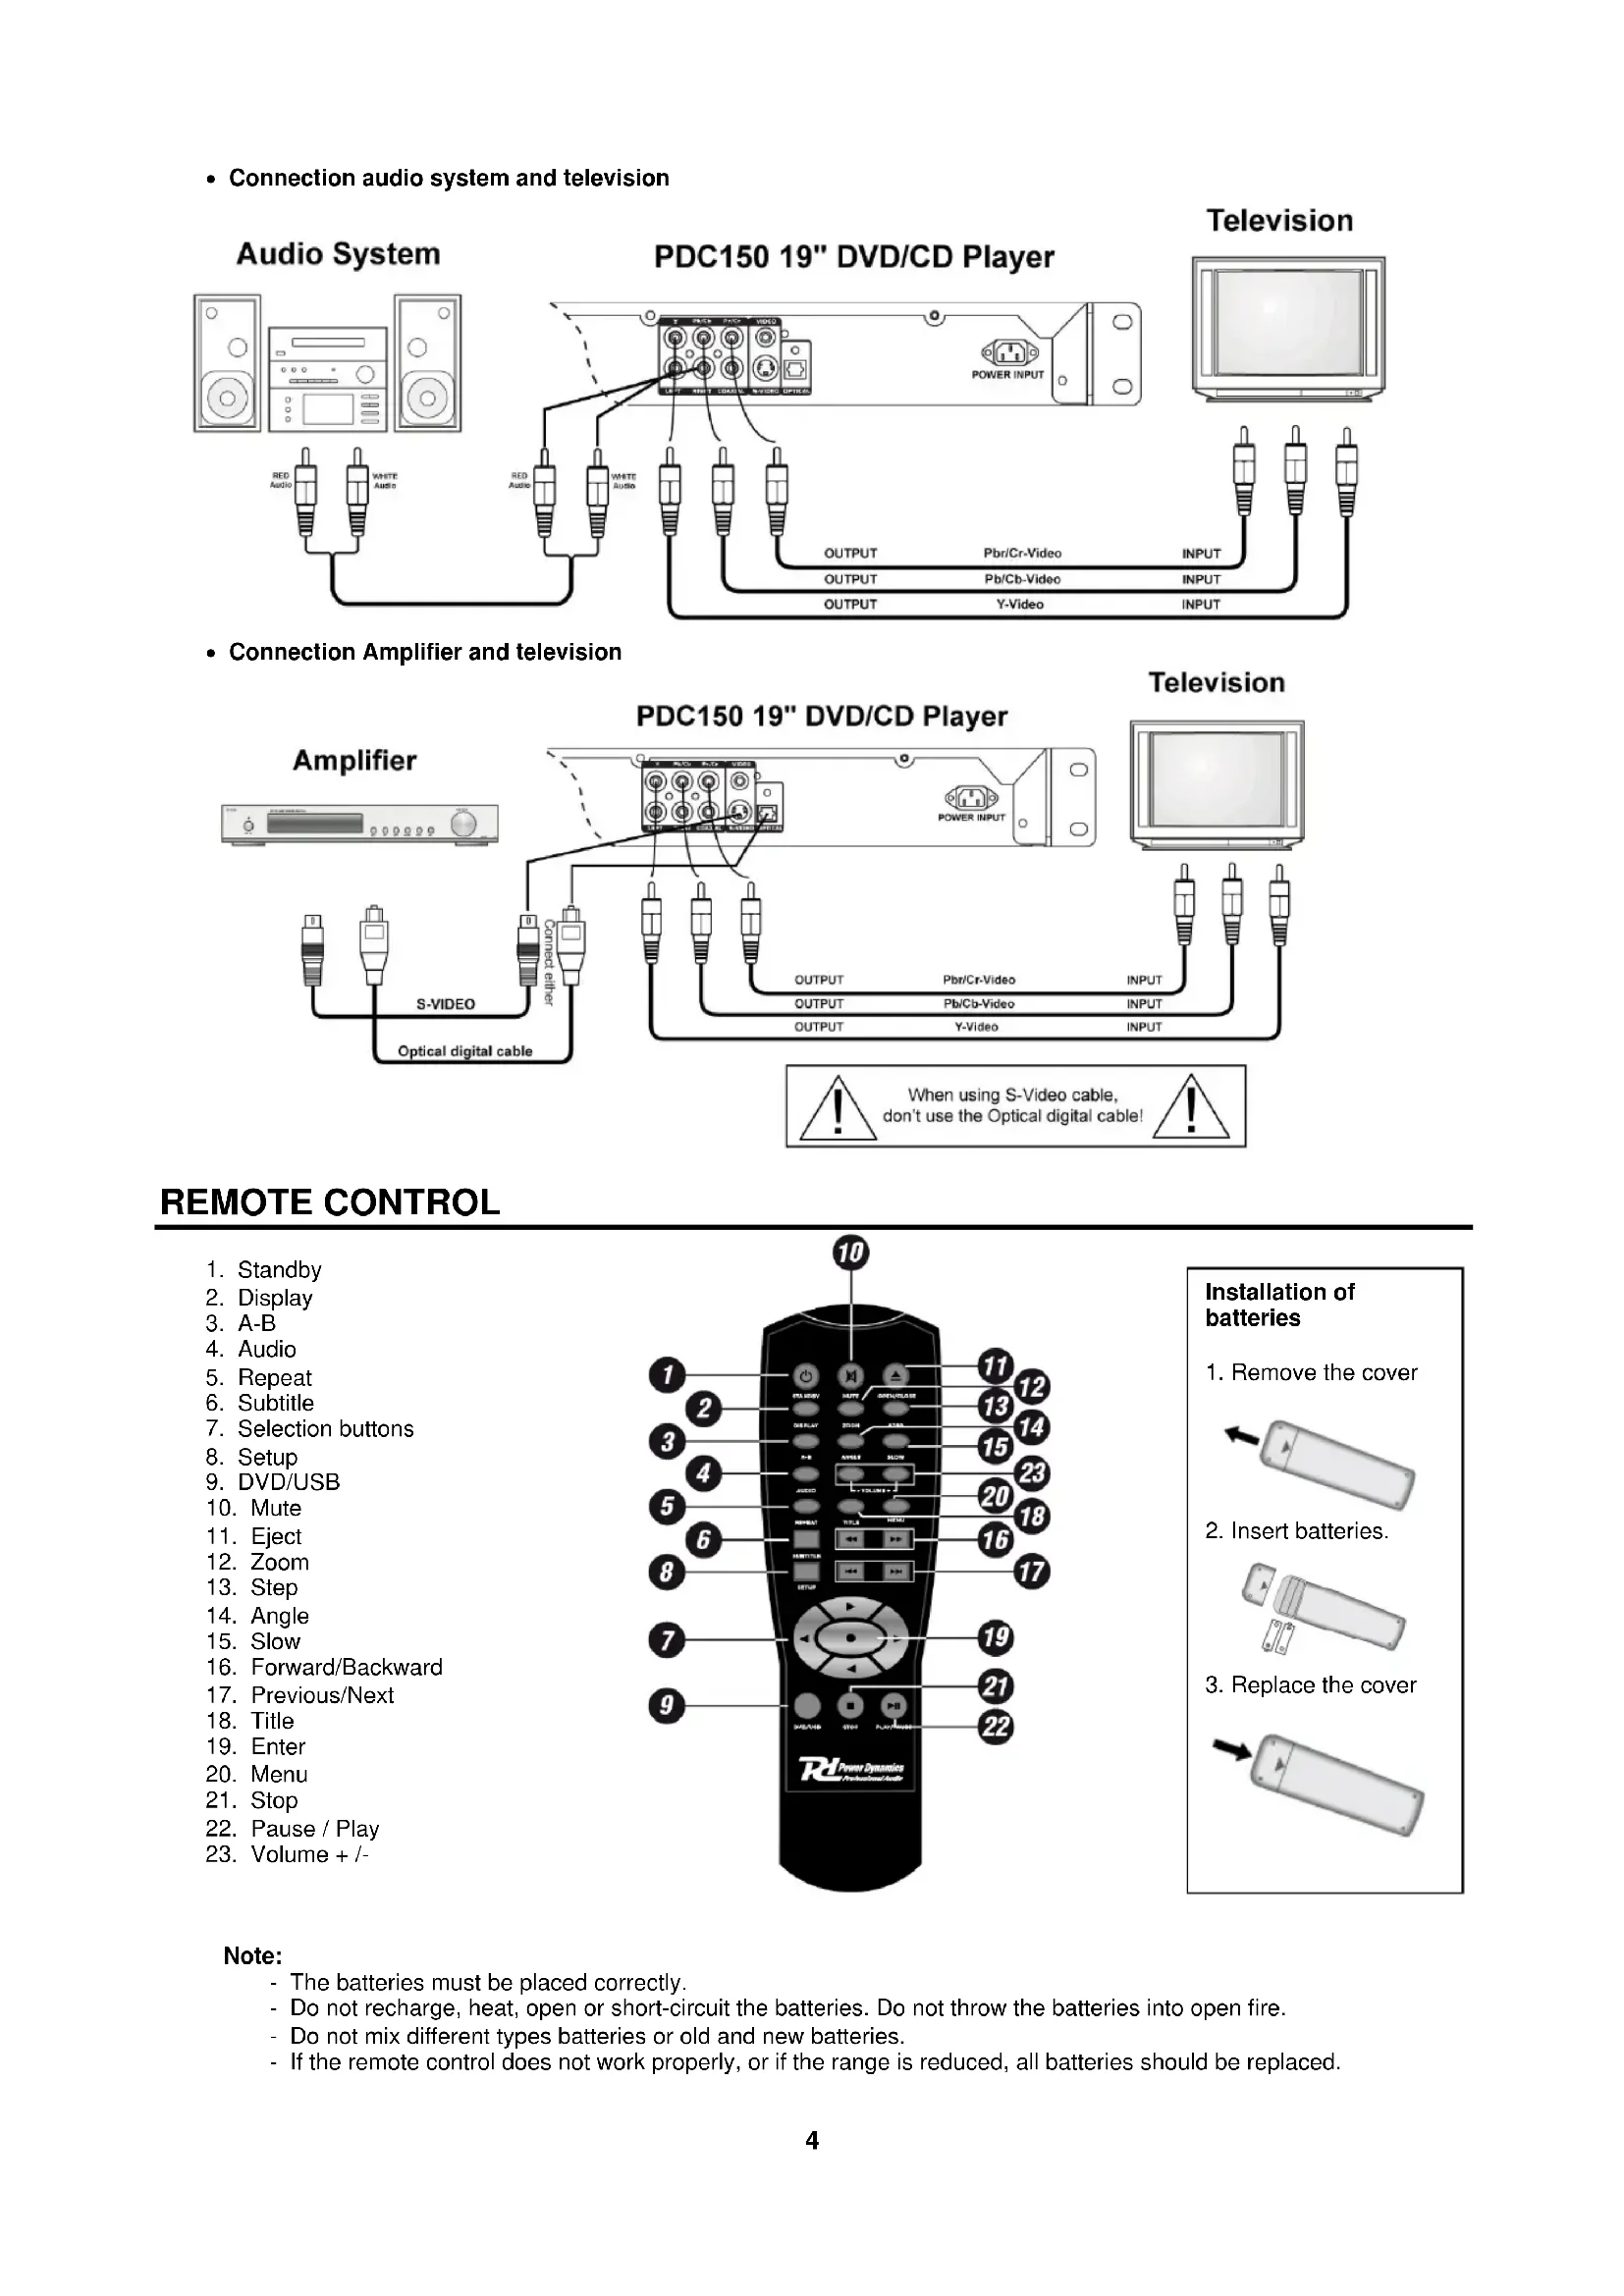
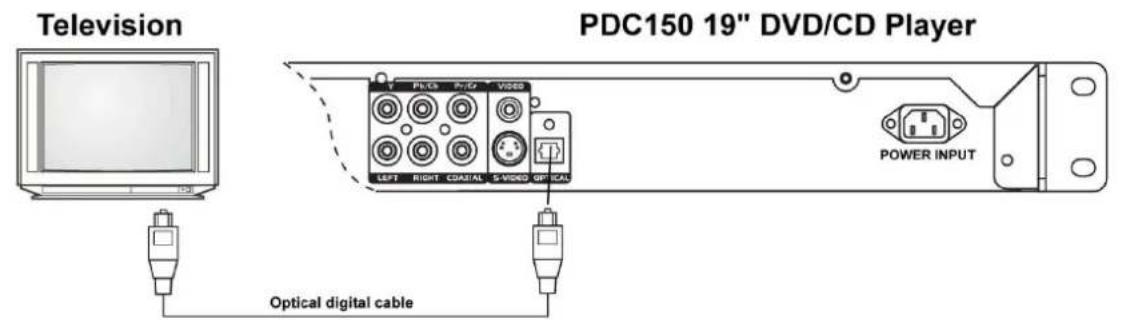
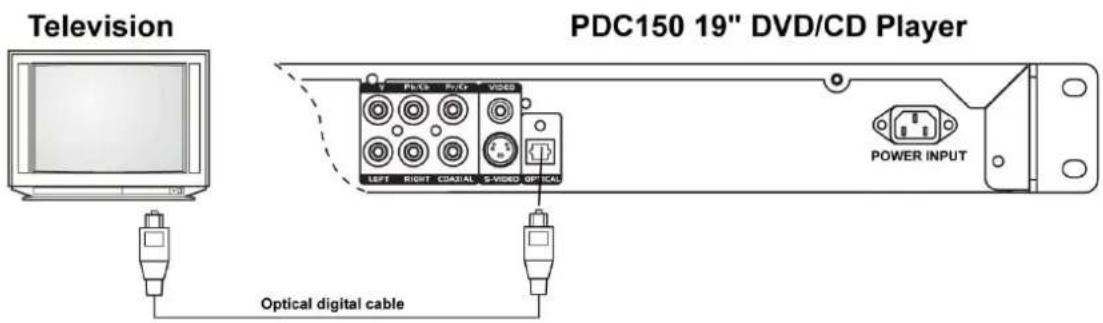
- Connection television optical cable
text_image
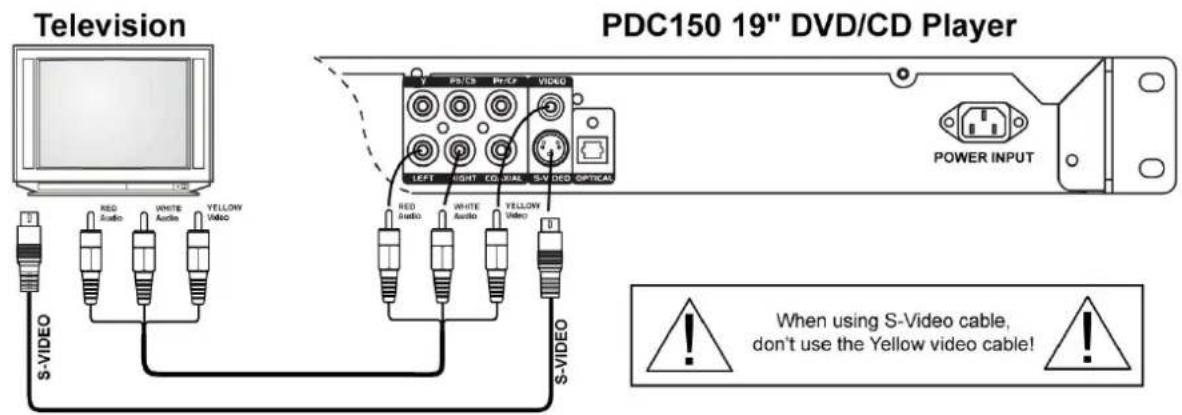
Television PDC150 19" DVD/CD Player LEFT RIGHT CAPITAL S-VIDEO GP-ICN POWER INPUT Optical digital cable- Connection television set through A/V-cable
text_image
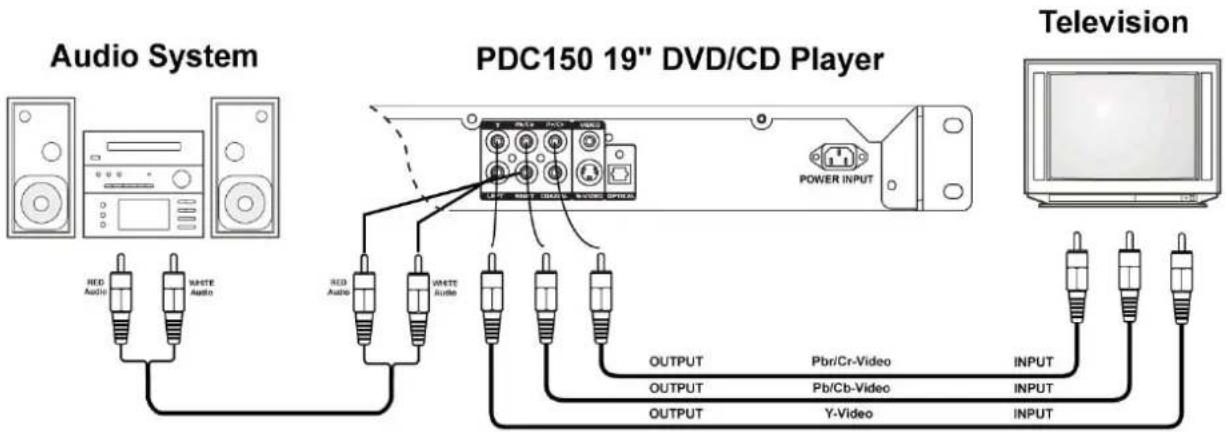
Television PDC150 19" DVD/CD Player S-VIDEO RED Audio WHITE Audio YELLOW Video S-VIDEO LEFT RIGHT CD S-V DEC OPTICAL RED Audio WHITE Audio YELLOW Video S-VIDEO POWER INPUT When using S-Video cable, don't use the Yellow video cable!- Connection audio system and television
text_image
Audio System PDC150 19" DVD/CD Player Television RED Audio WHITE Audio OUTPUT Pbri/Cr-Video INPUT OUTPUT Pb/Cb-Video INPUT OUTPUT Y-Video INPUT- Connection Amplifier and television
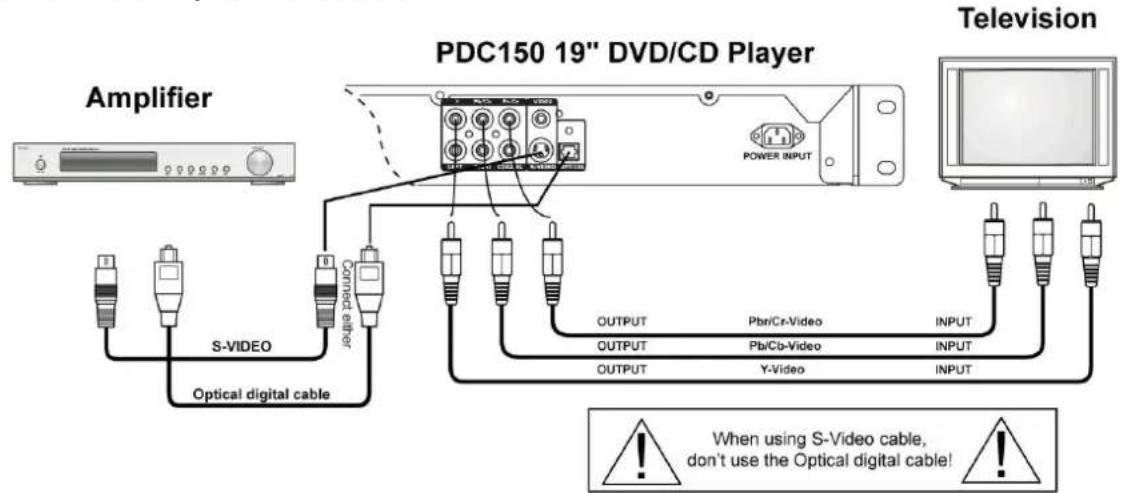
text_image
Amplifier PDC150 19" DVD/CD Player Television S-VIDEO Connect either Optical digital cable OUTPUT Pbn/Cr-Video OUTPUT Pbn/Cu-Video OUTPUT Y-Video INPUT INPUT OUTPUT Pbn/Cr-Video OUTPUT Y-Video OUTPUT When using S-Video cable, don't use the Optical digital cable!REMOTE CONTROL
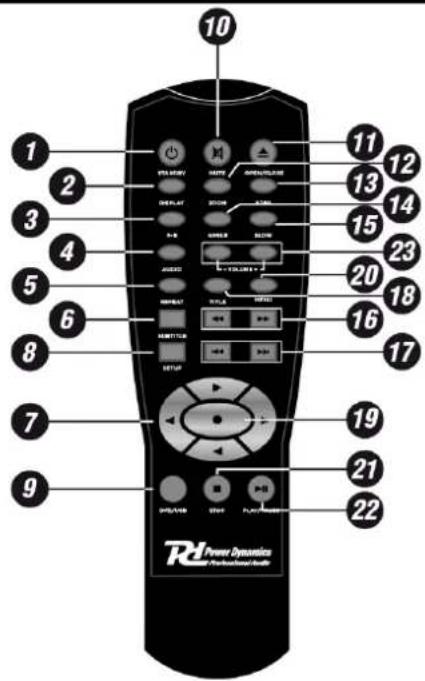
- Standby
- Display
- A-B
- Audio
- Repeat
- Subtitle
- Selection buttons
- Setup
- DVD/USB
- Mute
- Eject
- Zoom
- Step
- Angle
- Slow
- Forward/Backward
- Previous/Next
- Title
- Enter
- Menu
- Stop
- Pause / Play
- Volume + /-
text_image
10 1 2 3 4 5 6 7 8 9 10 11 11 12 13 13 14 15 15 23 20 20 18 16 17 19 21 22 RD Power Dynamics Rd Power Dynamics Rd Power DynamicsInstallation of batteries
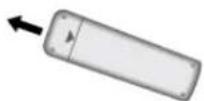
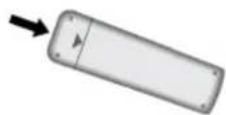
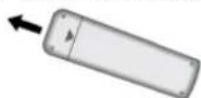
- Remove the cover
- Insert batteries.
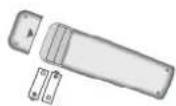
- Replace the cover
Note:
- The batteries must be placed correctly.
- Do not recharge, heat, open or short-circuit the batteries. Do not throw the batteries into open fire.
- Do not mix different types batteries or old and new batteries.
- If the remote control does not work properly, or if the range is reduced, all batteries should be replaced.
When you press the "Setup"-button on the remote control, the setup menu will be displayed.
When you have entered the setup menu, press the Scroll buttons to navigate and select the item desired. When you have selected an item press ENTER to confirm the entry and go to the sub-menu.
GENERAL SETUP
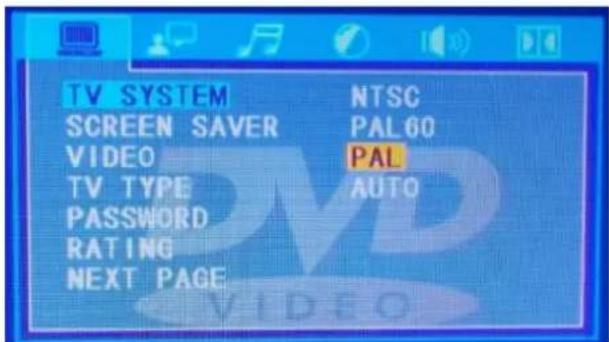
TV SYSTEM
Select PAL or NTSC to match the region setting of your TV type. Select AUTO to have the PDC150 detect the format.
Screen saver is used to protect your TV/video monitor when the player is idle for a signify cant period of time.
ON: A screen saver will appear after the PDC150 is idle for a period of time.
OFF: There will be no screen saver.
VIDEO
Select the type of output you are using to connect the PDC150 to your TV system: S-video, YUV and RGB.
TV TYPE
Select the format of the TV to which the PDC150 is connected.
• 4:3PS Pan & Scan for a normal TV
• 4:3LB Letterbox for a normal TV
• 16:9 Wide screen for a widescreen TV
text_image
TV SYSTEM SCREEN SAVER VIDEO TV TYPE PASSWORD RATING NEXT PAGE NTSC PAL60 PAL AUTO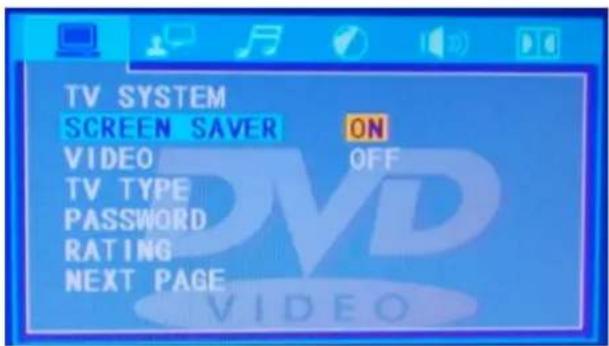
text_image
TV SYSTEM SCREEN SAVER ON VIDEO OFF TV TYPE PASSWORD RATING NEXT PAGE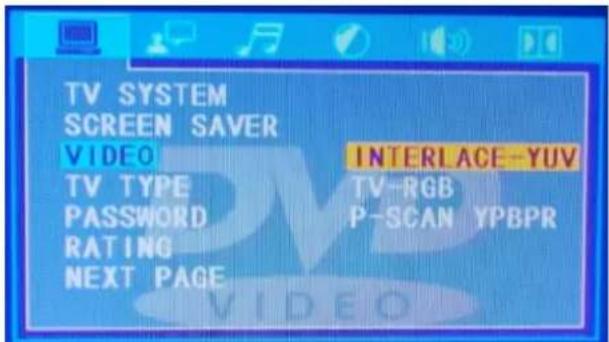
text_image
TV SYSTEM SCREEN SAVER VIDEO TV TYPE PASSWORD RATING NEXT PAGE INTERLACE-YUV TV-RGB P-SCAN YPBPR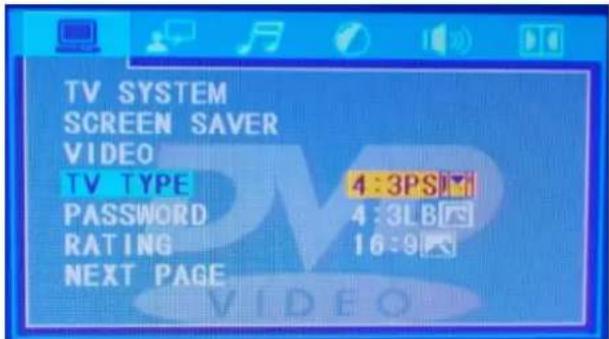
text_image
TV SYSTEM SCREEN SAVER VIDEO TV TYPE 4:3PS PASSWORD 4:3LB RATING 16:9 NEXT PAGEPASSWORD
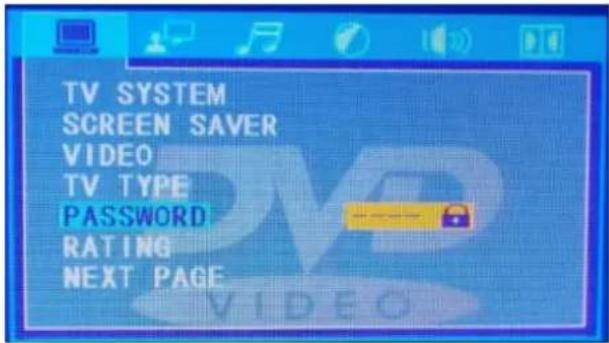
Here the password function can be activated. If the password function is not "ON", the parental control settings can easily be changed.
Note: The default password is "8888"
text_image
TV SYSTEM SCREEN SAVER VIDEO TV TYPE PASSWORD RATING NEXT PAGERATING
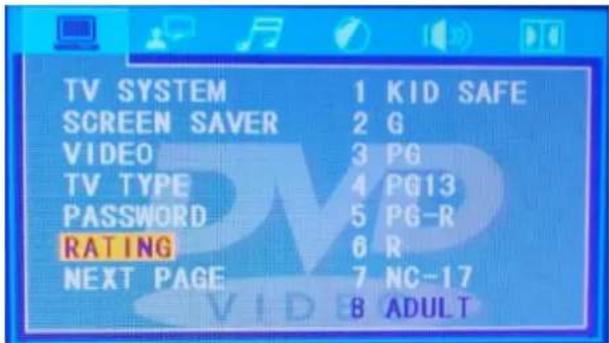
This function is used to limit children's watching of films with "adult scenes". Parental control varies from film to film and is indicated on the film cover.
There are eight Parental control levels from 1 to 8. When the parental control level is set to 8, all films can be watched.
Note: The password setting must be "OFF" before the parental control settings can be changed.
| KID SAF | Kids material, recommended especially for children and viewers of all ages. |
| G | General audiences, recommended as acceptable for viewers of all ages. |
| PG | Parental guidance suggested. |
| PG-13 | Material is unsuitable for children under age 13. |
| PGR | Parental Guidance – Restricted, recommended that parents restrict children under 17 from viewing or allow to view only when supervised by a parent or adult guardian. |
| R | Parental guidance suggested for children under 17 |
| NC-17 | No children under age 17; not recommended viewing for children under age 17. |
| Adult | Mature materials; should be viewed only by adults due to graphic sexual material, violence or language. |
text_image
TV SYSTEM 1 KID SAFE SCREEN SAVER 2 G VIDEO 3 PG TV TYPE 4 PG13 PASSWORD 5 PG-R RATING 6 R NEXT PAGE 7 NC-17 8 ADULTDEFAULT
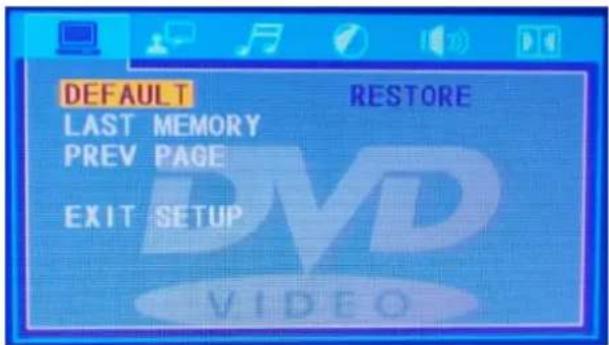
This function is used to reset the settings of the unit to the factory settings.
Note: If you activate this function, all the settings that you have made will be lost.
text_image
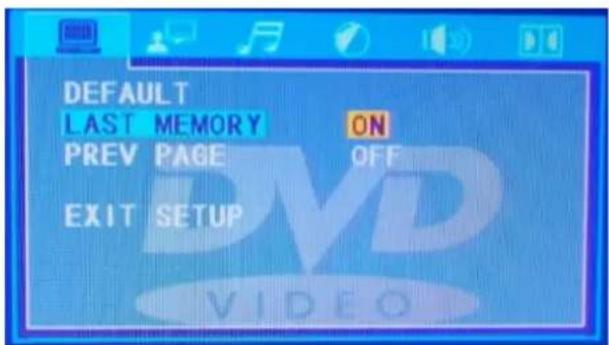
DEFAULT LAST MEMORY PREV PAGE EXIT SETUP RESTORE VIDEOLAST MEMORY
When this mode is enabled, the PDC150 will store the point that your disc was stopped, and return to that point when the disc is resumed. The disc can be removed from the player and the LAST MEMORY function will still play from the last point.
text_image
DEFAULT LAST MEMORY ON PREV PAGE OFF EXIT SETUPLANGUAGE
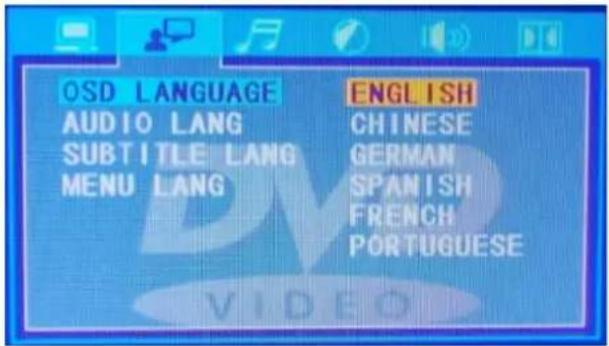
OSD LANGUAGE
This function allows you to select a language for the setup menu and for the screen display.
You can choose between English, Chinese, German, Spanish, French and Portuguese.
AUDIO LANGUAGE
Used to select the desired dubbing/audio language for the DVD film.
You can choose between English, Chinese, Japan, French, Spanish, Portuguese, German, Latin.
Note: This is only possible if the DVD supports the audio language in question.
SUBTITLE LANGUAGE
Used to select the desired subtitle language for a DVD film.
You can choose between English, Chinese, Japan, French, Spanish, Portuguese, German or switch off.
Note: This is only possible if the DVD supports the subtitle language in question.
MENU LANGUAGE
This function allows you to select menu language.
You can choose between English, Chinese, Japan, French, Spanish, Portuguese, German, Latin.
text_image
OSD LANGUAGE AUDIO LANG SUBTITLE LANG MENU LANG ENGLISH CHINESE GERMAN SPANISH FRENCH PORTUGUESE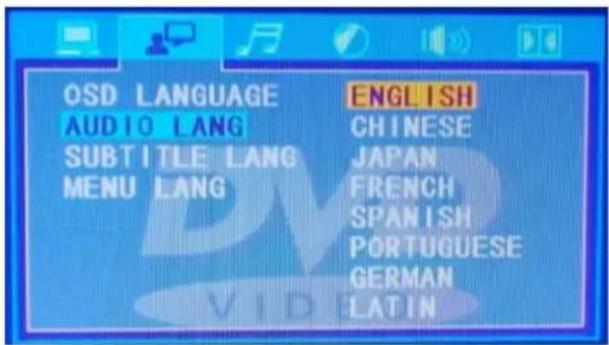
text_image
OSD LANGUAGE AUDIO LANG SUBTITLE LANG MENU LANG ENGLISH CHINESE JAPAN FRENCH SPANISH PORTUGUESE GERMAN LATIN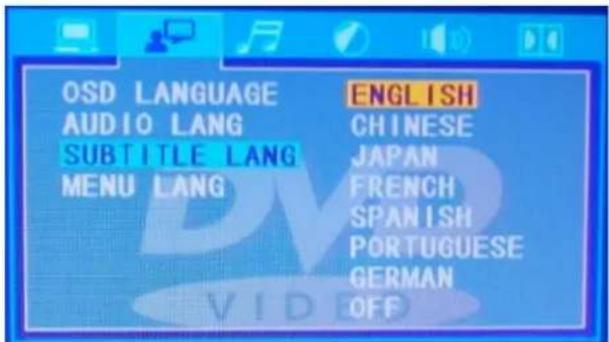
text_image
OSD LANGUAGE AUDIO LANG SUBTITLE LANG MENU LANG ENGLISH CHINESE JAPAN FRENCH SPANISH PORTUGUESE GERMAN OFF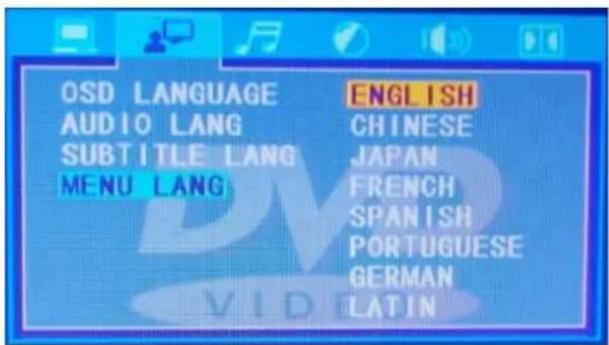
text_image
OSD LANGUAGE AUDIO LANG SUBTITLE LANG MENU LANG ENGLISH CHINESE JAPAN FRENCH SPANISH PORTUGUESE GERMAN LATINAUDIO
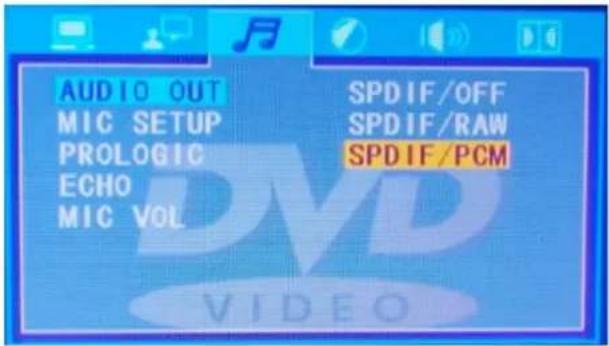
AUDIO OUTPUT
Here you set up the digital sound format that comes from the coaxial or optical output on the back panel. This signal is used when the unit is connected to a digital surround receiver.
OFF: Closes the digital outputs
RAW: Opens for the pure, non-modulated digital signal.
PCM: Stands for Pulse Code Modulation. It may be necessary to activate this function if the digital surround receiver cannot recognise the sound format.
MICROPHONE SETUP
Adjust the microphone setup.
text_image
AUDIO OUT MIC SETUP PROLOGIC ECHO MIC VOL SPDIF/OFF SPDIF/RAW SPDIF/PCM VIDEO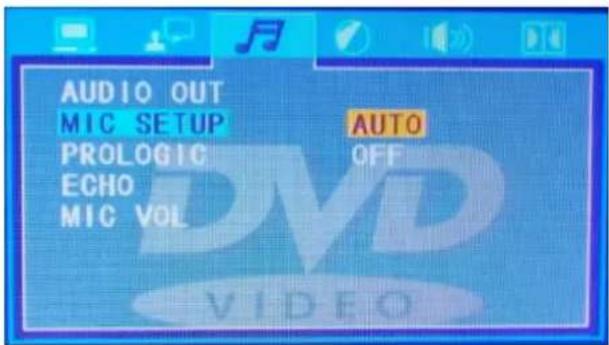
text_image
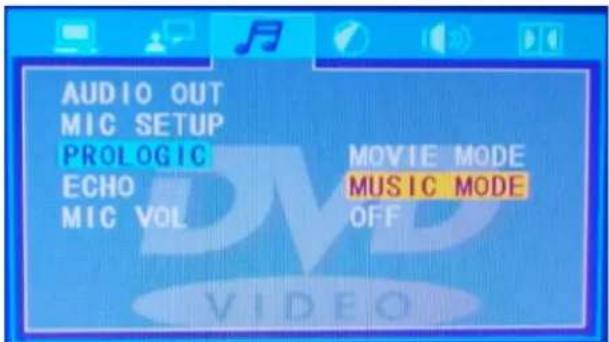
AUDIO OUT MIC SETUP PROLOGIC ECHO MIC VOL AUTO OFF VIDEOPROLOGIC
Adjust the prologic sound modus.
text_image
AUDIO OUT MIC SETUP PROLOGIC ECHO MIC VOL MOVIE MODE MUSIC MODE OFFECHO
Adjust the echo effect of the microphone.
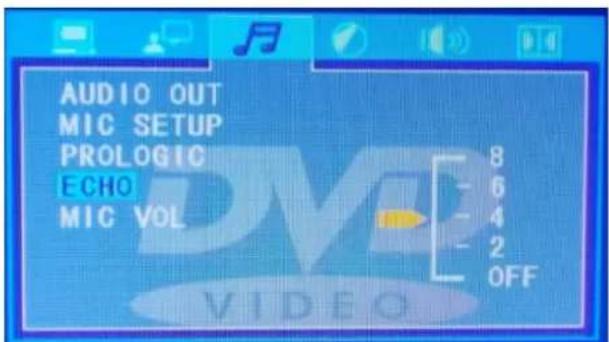
text_image
AUDIO OUT MIC SETUP PROLOGIC ECHO MIC VOL 8 6 4 2 OFFMICROPHONE VOLUME
Adjust the volume of the microphone.
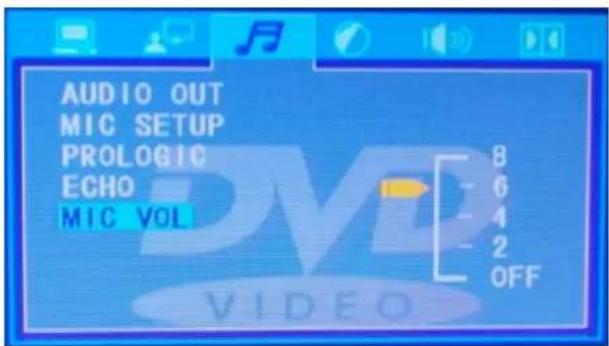
text_image
AUDIO OUT MIC SETUP PROLOGIC ECHO MIC VOL 8 6 4 2 OFFBRIGHTNES
BRIGHTNESS
Increase or decrease the brightness of your on-screen image.
CONTRAST
Adjust the contrast of your on-screen image.
HUE
Adjust the HUE variance of the on-screen image.
SATURATION
Adjust the saturation of the on-screen image.
SHARPNESS
Set the level of sharpness of your on-screen image.
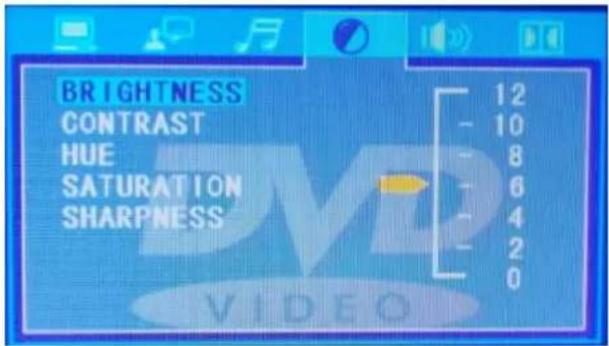
text_image
BRIGHTNESS CONTRAST HUE SATURATION SHARPNESS 12 10 8 6 4 2 0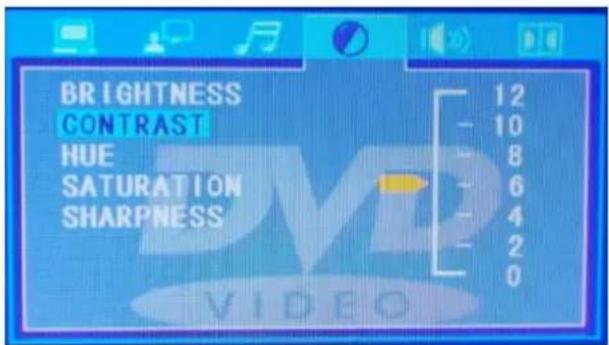
text_image
BRIGHTNESS CONTRAST HUE SATURATION SHARPNESS 12 10 8 6 4 2 0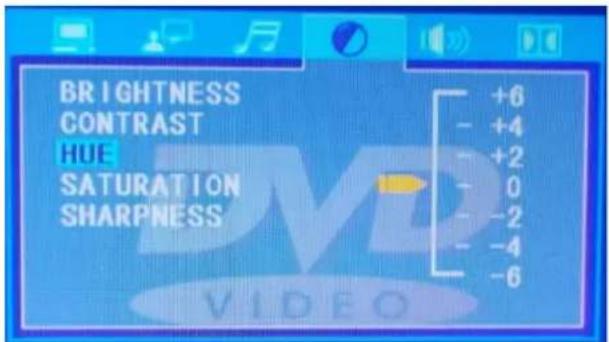
text_image
BRIGHTNESS CONTRAST HUE SATURATION SHARPNESS +6 - +4 - +2 - 0 - -2 - -4 - -6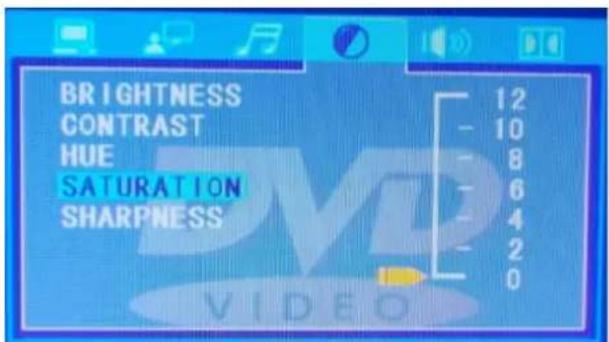
text_image
BRIGHTNESS CONTRAST HUE SATURATION SHARPNESS 12 10 8 6 4 2 0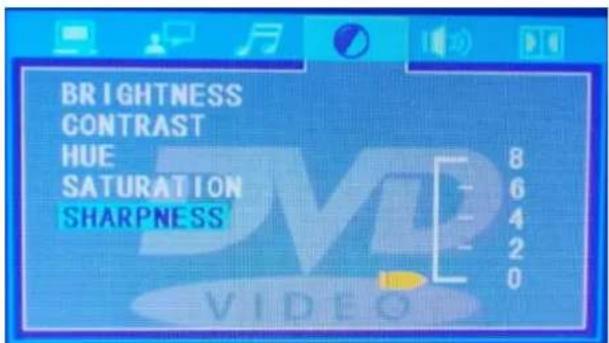
text_image
BRIGHTNESS CONTRAST HUE SATURATION SHARPNESS 8 6 4 2 0DOWNMIX
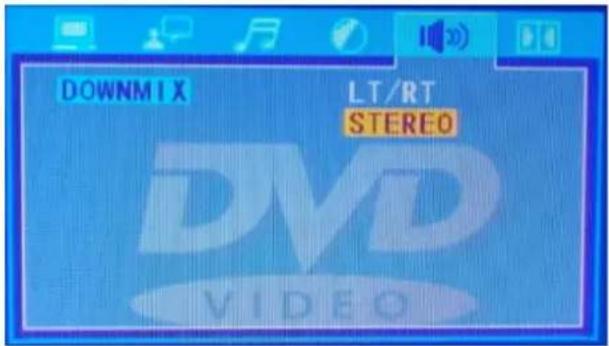
DOWNMIX
Select analogue sound format.
LT/RT: It's used when the unit is connected to a Pro Logic receiver through stereo RCA cables.
Stereo: Used when the unit is connected via amplifier through stereo RCA cables.
text_image
DOWNMIX LT/RT STEREO DVD VIDEODOLBY SURROUND
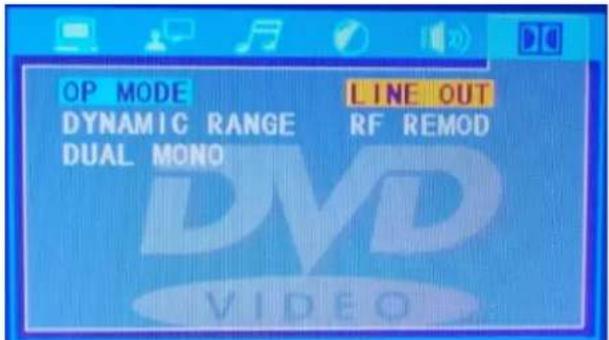
OP MODE
Select Line Out or RF Remodulation.
text_image
OP MODE DYNAMIC RANGE DUAL MONO LINE OUT RF REMOD DVD VIDEODYNAMIC RANGE
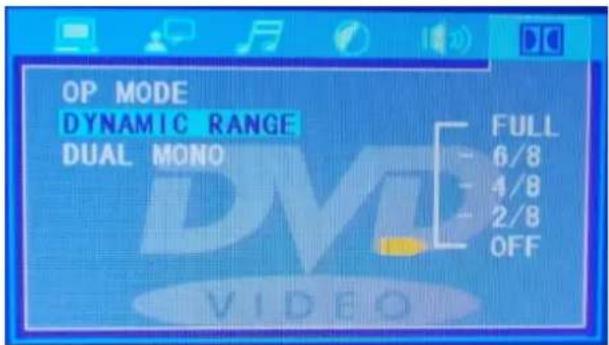
To avoid disturbing the neighbours at night, you can use this function to reduce the sound effects volume without changing the original tone.
- OFF No Compression
• 2/8 High compression, late night use
• 4/8 Medium compression for general use - 6/8 Low compression
• FULL Full-volume, cinematic sound
text_image
OP MODE DYNAMIC RANGE DUAL MONO FULL 6/8 4/8 2/8 OFFDUAL MONO
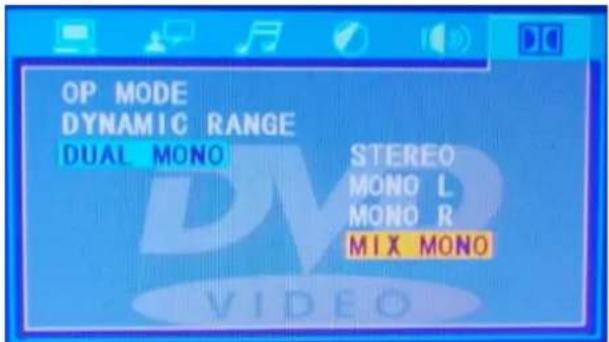
Here you can choose between stereo, left channel mono, right channel mono or mixed mono. This function can e.g. be used for a VCD with two languages. (e.g. English on the left side and French on the right side)
text_image
OP MODE DYNAMIC RANGE DUAL MONO STEREO MONO L MONO R MIX MONOStereo output: Outputs audio in stereo.
L-mono: Plays the Left side only through both Left and Right speaker outputs.
R-mono: Plays the Right side only through both the Left and Right speaker output.
Mix-mono: Plays virtual stereo with Left and Right Mono coming out of the Left and Right speaker outputs.
| Problem | Possible solution |
| No power supply | Check that the plug has been inserted properly into the socket. |
| No picture | Check the connection between DVD player and TV set.Check that the TV set is working properly |
| No sound | Check the connection between DVD-player and any other connected unitsCheck that the TV set and amplifier are working properly and adjusted correctly. |
| The CD/DVD won’t play | Check that the CD/DVD has been inserted correctly.Clean the CD/DVD. |
| CD/DVD-player doesn’t react to signal from remote control | Remove any objects blocking the signal between remote control and CD/DVD-player.Check that the remote control is aimed at the front panel sensor on the CD/DVD-player.Check the batteries in the remote control and replace as necessary. |
| Picture has interference | Check the CD/DVD for dust and scratches.Clean or replace the CD/DVD.Turn off the device, wait for then seconds and turn it on again. |
| Nothing happens when CD/DVD-player unit buttons are pressed | Possible power drop out or power cut.Turn off the device, wait for ten seconds and turn it on again. |

Warning!
This device is equipped with a class 1 laser diode. To ensure a safe operation do not remove any covers or attempt to access the inside of the product. There are no serviceable parts inside the device. Maintenance and service operations are only to be carried out by authorized dealers.
text_image
Professional DVD Player with CDG POWER PDC150 1 2 3 4 5 6 7 8 9 10 11 12 13ACHTERPANEEL
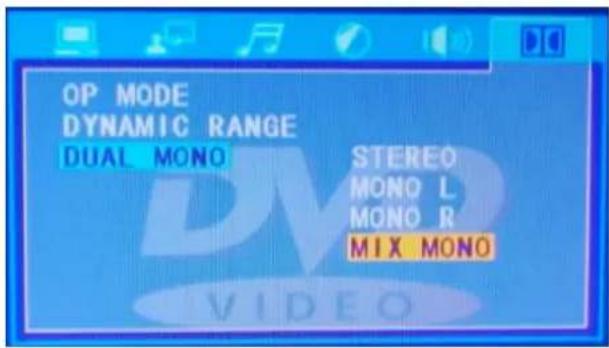
Selecteer Line Out of RF Remodulatie.
text_image
OP MODE DYNAMIC RANGE DUAL MONO STEREO MONO L MONO R MIX MONODYNAMIC RANGE
text_image
Professional DVD Player with CDG Power PDCISO 1 2 3 4 5 6 7 8 9 10 11 12 13RÜCKSEITE
text_image
Professional DVD Player with CDG PDCISO 1 2 3 4 5 6 7 8 9 10 11 12 13PANEL TRASERO
- Conector entrada Micrófono 1 & 2 XLR
- Salida video componente
- Salida Audio
- Salida Coaxial
- Salida S-video
- Salida Optica
- Salida video Compesta
- Toma corriente principal
text_image
Rd Power Bracket PDC50 1 2 3 4 5 6 7 8 POWER INCONEXIÓN
- Conectar la television por cable optico
text_image
Television PDC150 19" DVD/CD Player POWER INPUT Optical digital cabletext_image
10 1 2 3 4 5 6 7 8 9 10 11 11 12 13 14 15 15 23 20 18 16 17 19 21 22 RD Power Dynamics by Professional Healthtext_image
Professional DVD Player with CDG POWER RL Power Driver 1 2 3 4 5 6 7 8 9 10 PDCISO 11 12 13FACE ARRIERE
text_image
PDC50 Power Source: PDC50 Aurora 21.00V Analog: 1.0V Power 3.0V (Current Power) 1.0V 1.0V (Current Power) 1.0V 2.0V 3.0V 4.0V 5.0V 6.0V 7.0V 8.0V POWER IN START CANDRIDGE ©A4009-CT150-CD5181017 www.pdc50.comBRANCHEMENTS
text_image
10 1 2 3 4 5 6 7 8 9 STRAWBUSH HAPPY ONION/OFFICE HOLD/FLAT BEET/FLAT AVEL/FLAT AVEL/FLAT AVEL/FLAT AVEL/FLAT AVEL/FLAT AVEL/FLAT AVEL/FLAT AVEL/FLAT AVEL/FLAT AVEL/FLAT AVEL/FLAT AVEL/FLAT AVEL/FLAT AVEL/FLAT AVEL/FLAT AVEL/FLAT AVEL/FLATInstallation des batteries
- Retirez le couvercle.
Power Consumption : 10W
VF Signal system : NTSC / PAL
Frequency Response : 4Hz-22KHz
Audio S/N ratio : > 92dB
Suitable Disc : DVD Audio, DVD Video, Video CD, Audio CD, HDCD, MP3, JPEG, Kodak CD, CD-R, CD-RW, WMA
Weight (per unit) : 2.7 Kg
Dimensions per unit : 480 x 45 x 280mm
The specifications are typical. The actual values can slightly change from one unit to the other. Specifications can be changed without prior notice.
The products referred to in this manual conform to the European Community Directives to which they are subject:
European Union
Tronios B.V.,
7602KR Almelo, The Netherlands
2014/35/EU
2014/30/EU
2011/65/EC

United Kingdom
Tronios Ltd.,
130 Harley Street,
London W1G 7JU, United Kingdom
S.I. 2016:1101
S.I. 2016:1091
S.I. 2012:3032

Specifications and design are subject to change without prior notice.
www.tronios.com
Copyright © 2022 by TRONIOS the Netherlands