GBTUR120BK - Turntable AIWA - Free user manual and instructions
Find the device manual for free GBTUR120BK AIWA in PDF.
| Product type | Vinyl turntable all-in-one |
| Brand | Aiwa |
| Model | GBTUR120BK |
| Dimensions (turntable) | 420 x 105 x 376 mm |
| Net weight | 4.1 kg |
| Power supply | 100-240 V AC, 50/60 Hz |
| Power consumption | 5 W |
| Audio output power | 2 x 5 W RMS |
| Speeds | 33 1/3, 45, 78 rpm |
| Drive | Belt drive |
| Cartridge | Ceramic with ruby stylus |
| Automatic arm stop | Yes |
| Built-in speakers | Yes, stereo |
| Bluetooth | Version 2.1+EDR, range 10 m |
| FM radio | Yes, with auto search |
| USB/SD recording | Yes, MP3 format |
| Ports | USB 2.0, SD/TF card (up to 32 GB) |
| Audio output | RCA (L/R) |
| Included accessories | 45 rpm adapter, USB cable, mat, manual |
| Stylus maintenance | Clean with soft brush, replace every 250 h |
| Device cleaning | Damp cloth, unplug before cleaning |
| Safety | Do not expose to water, do not open, use in ventilated area |
Frequently Asked Questions - GBTUR120BK AIWA
User questions about GBTUR120BK AIWA
0 question about this device. Answer the ones you know or ask your own.
Ask a new question about this device
Download the instructions for your Turntable in PDF format for free! Find your manual GBTUR120BK - AIWA and take your electronic device back in hand. On this page are published all the documents necessary for the use of your device. GBTUR120BK by AIWA.
USER MANUAL GBTUR120BK AIWA
Read these safety instructions before using your device and store them for possible future reference.
-
If the cord is damaged, have it repaired by the manufacturer, its service or a similarly qualified person in order to avoid any hazard.
-
The power supply must be replaced by a new one in case of malfunction, because this power supply is not repairable.
-
The socket-outlet should be installed near the equipment and should be easily accessible.
-
The product is not intended for use by persons (including children) with reduced physical, sensory or mental capacity. Persons who have not read the manual, unless they have received explanations by a person responsible for their safety and supervision should not use this unit.
-
Children should be monitored to ensure that they do not play with the product.
-
When connected the cord should always be readily accessible.
-
The apparatus should not be exposed to dripping or splashing of water or liquids and no objects filled with liquids such as flowers vases shall be placed on the product.
-
Do not impede the normal ventilation of the product when intended to use.
-
Always leave a minimum distance of 10 cm around the unit to ensure sufficient ventilation.
-
Open flame sources, such as candles, should not be placed on top of the device.
-
The device is intended for use only in a temperate climate
12. CAUTION:
Danger of explosion if battery is incorrectly replaced or not replaced by the same type or equivalent.
- The battery should not be exposed to excessive heat such as sunshine, fire or similar.
- Different types of batteries, new and used batteries should not be mixed.
- The battery must be installed according to the polarity.
- If the battery is worn, it must be removed from the product.
- The battery must be disposed off safely. Always use the collection bins provided (check with your dealer) to protect the environment.
- At full volume, prolonged listening to the audio device may damage the user's hearing and cause hearing troubles (temporary or permanent deafness, hearing drone, tinnitus, hyperacusis).
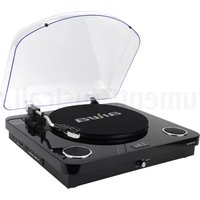
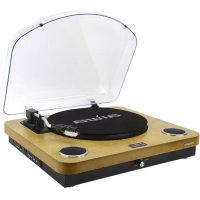
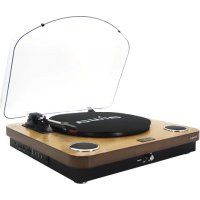
Thank you for purchasing GBTUR-120: All-in-one stereo turntable.
This is your assurance of quality, performance and value. Our engineers have included many useful and convenient features in this product. Please be sure to read this instruction Manual completely to make sure you are getting the maximum benefit from each feature.
This product was manufactured using the highest quality components and standards of workmanship. It was tested by inspectors and found to be in perfect working order before it left our factory.
Model N: GBTUR-120
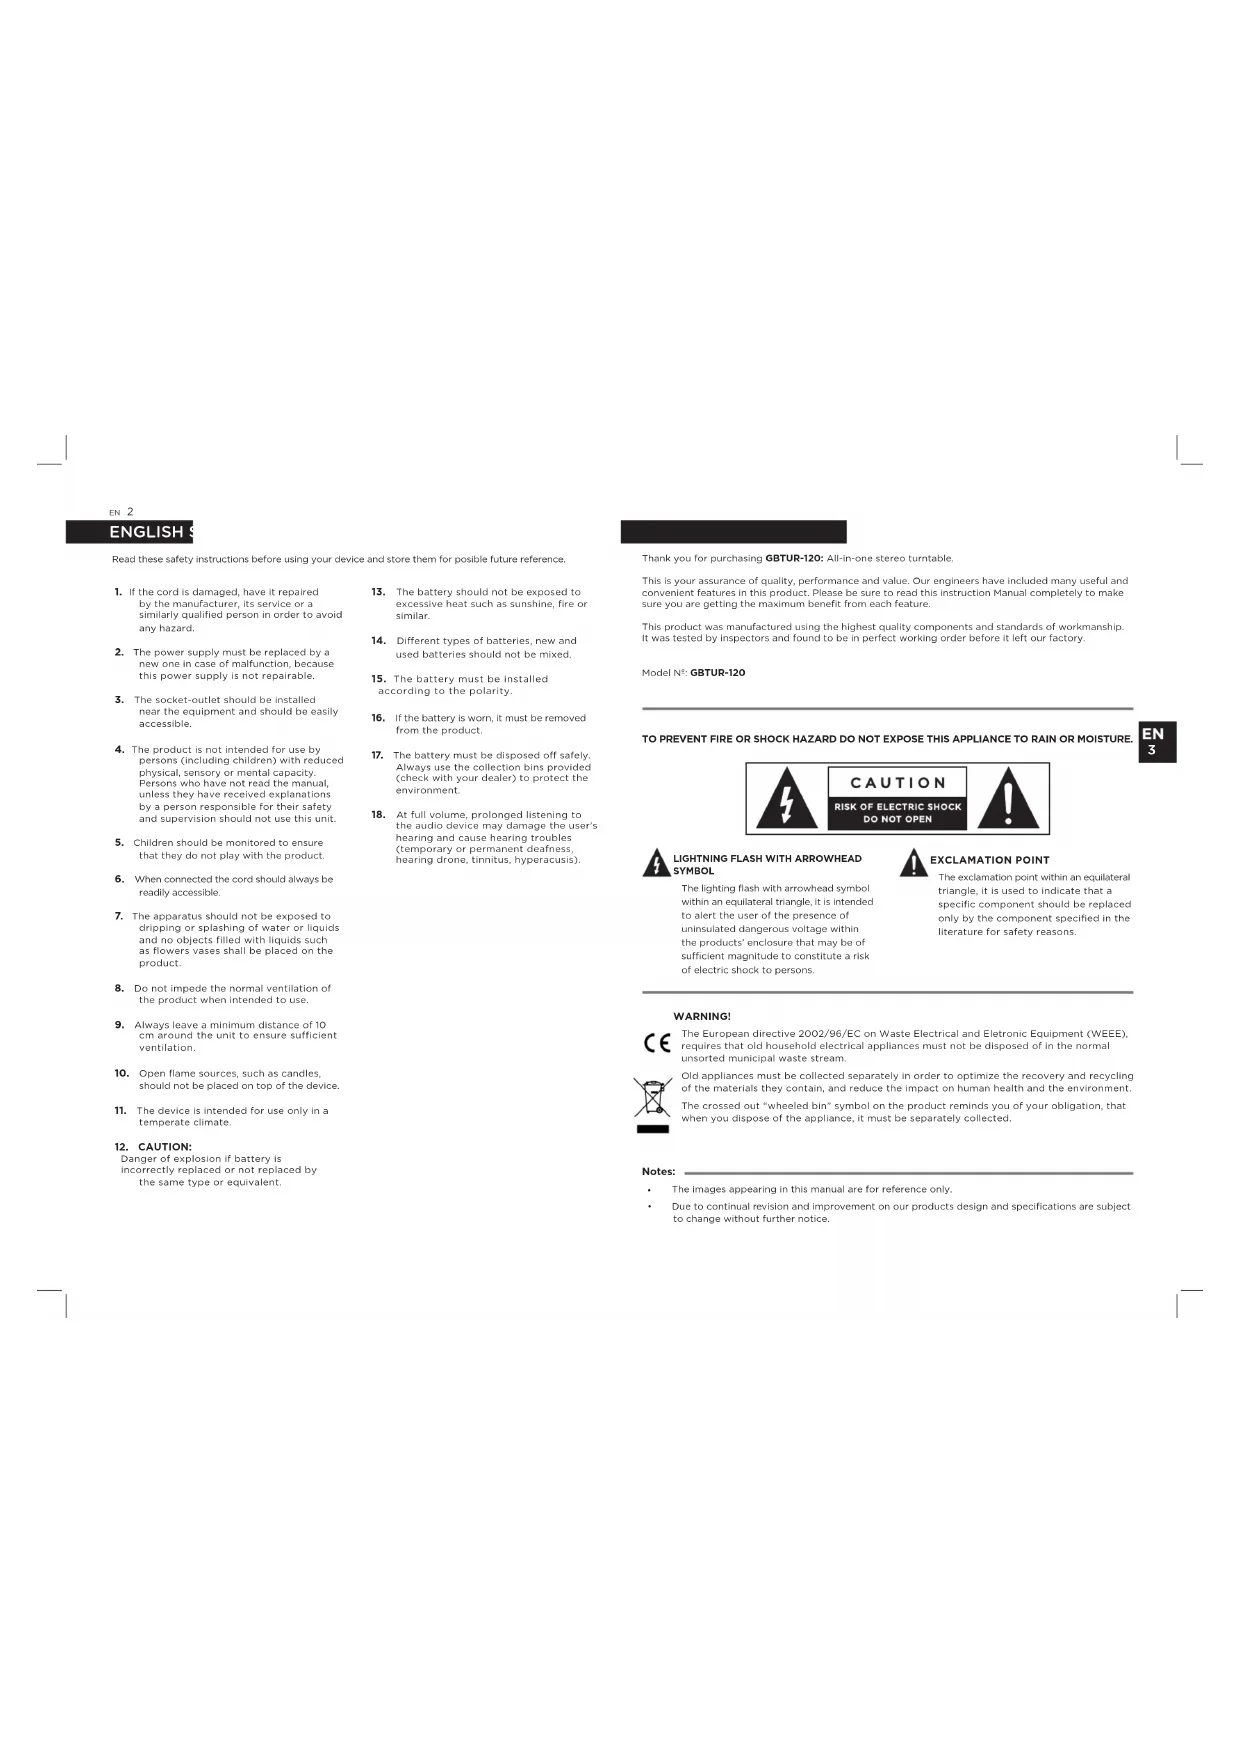
TO PREVENT FIRE OR SHOCK HAZARD DO NOT EXPOSE THIS APPLIANCE TO RAIN OR MOISTURE.


LIGHTNING FLASH WITH ARROWHEAD SYMBOL
The lighting flash with arrowhead symbol within an equilateral triangle, It is intended to avert the user of the presence of uninsulated dangerous voltage within the products' enclosure that may be of sufficient magnitude to constitute a risk of electric shock to persons.

EXCLAMATION POINT
The exclamation point within an equilateral triangle, it is used to indicate that a specific component should be replaced only by the component specified in the literature for safety reasons.
WARNING!

The European directive 2002/96/EC on Waste Electrical and Electronic Equipment (WEEE), requires that old household electrical appliances must not be disposed of in the normal unsorted municipal waste stream.

Old appliances must be collected separately in order to optimize the recovery and recycling of the materials they contain, and reduce the impact on human health and the environment. The crossed out "wheeled bin" symbol on the product reminds you of your obligation, that when you dispose of the appliance, it must be separately collected.
Notes:
The images appearing in this manual are for reference only.
- Due to continual revision and improvement on our products design and specifications are subject to change without further notice.
EN 4
SAFETY PRECAUTIONS
1. READ INSTRUCTIONS:
All the safety and operating instructions should be read before the product is operated.
2.REETAIN INSTRUCTIONS:
The safety and operating instructions should be retained for future reference.
3. HEED WARNINGS:
All warnings on the product and in the operating instructions should be adhered to.
4. FOLLOW INSTRUCTIONS:
All operating and use instructions should be followed.
5. CLEANING:
- Turn Off the unit if it's On before cleaning.
-
Unplug the unit from the wall outlet before cleaning.
-
Do not use liquid cleaners or aerosol cleaners. Use a clean cloth for cleaning.
6.WATER AND MOISTURE:
Do not use this product near water.
For example:
Near a bath tub, wash bowl, kitchen sink, or laundry tub; in a wet basement; or near a swimming pool; and the like.
7. ACCESSORIES:
Do not place this product on an unstable cart, stand, tripod, bracket, or table. The product may fall, causing serious injury to a child or adult and serious damage to the product.
Use only with a cart, stand, tripod, bracket, or table recommended by the manufacturer, or sold with the product. Any mounting of the product should follow the manufacturer's instructions, and should use a mounting accessory recommended by the manufacturer.
A product and cart combination should be moved with care - quick stops, excessive force and uneven surfaces may cause the product and cart combination to overturn.
8. VENTILATION:
Slots and openings in the cabinet are provided for ventilation and to ensure reliable operation of the product and to protect it from overheating, and these openings must not be blocked or covered. The openings should never be blocked by placing the product on a bed, sofa, rug or other similar surface. This product should not be placed in a built-in installation, such as a bookcase or rack, unless proper ventilation is provided or the manufacturer's instructions have been adhered to.
9. POWER SOURCES:
This product should be operated only from the type of power source indicated on the marking label. If you are not sure of the type of power supply of your homo, consult your product dealer or local power company. For products intended to operate from battery power, or other sources, refer to the operating instructions.
10. POWER-CORD PROTECTION:
Power-supply cords should be routed so that they are not likely to be walked on or pinched by items placed upon or against them, paying particular attention to cords at the power plug and jack plug socket. During movement, please take care of the power cord set.
For example:
Tie up the power cord set with cable tie.
11. NON-USE PERIODS:
The power cord of the product should be unplugged from the outlet when left unused for long periods of time.
if the speaker have to be left unused for a long time, please let the battery fully charged, otherwise it will cause damage to the battery.
12. LIGHTNING:
For added protection for this product during a lightning storm, or when it is left unattended and unused for long periods of time, unplig it from the wall outlet and disconnect the antenna or cable system. This will present damage to the product due to lightening and power-line surges.
13. POWER LINES:
An outside antenna system should not be located in the vicinity of overhead power lines or other electric light or power circuits, or where it can fall into such power lines or other electric light or power circuits, or where it can fall into such power lines or circuits. When installing an outside antenna system, extreme care should be taken to keep from touching such power lines or circuits as contact with them might be fatal.
14. OVERLOADING:
Do not overload wall outlets, extension cords, or integral convenience receptacles as this can result in a risk of fire or electric shock.
15. OBJECT AND LIQUID ENTRY:
Never push objects of any kind into this product through openings as they may touch dangerous voltage points or short-out parts that could result in a fire or electric shock. Never spill liquid of any kind on the product.
16. SERVICING:
Do not attempt to service this product yourself as opening or removing covers may expose you to dangerous voltage or other hazards. Refer to all servicing to qualified service personnel.
17. DAMAGES REQUIRING SERVICE:
Unplug this product from the wall outlet and refer servicing to qualified service personnel under the following conditions.
a) When the power-supply cord, battery or plug is damaged.
b) If the product has been exposed to rain or water.
c) If liquid has been spilled, or objects have fallen into the product.
d) If the product does not operate normally by following the operating instructions, adjust only those controls that are covered by the operating instructions, as an improving adjustment of other controls may result in damage and will often require extensive work by a qualified technician to restore the product to its normal operation.
0) When the product exhibits a distinct change in performance, it indicates a need for service.
18. REPLACEMENT PARTS:
When replacement parts are required, be sure the service technician has used replacement parts specified by the manufacturer or have the same characteristics as the original part, unauthorized substitutions may result in fire electric shock and other hazards.
19. HEAT:
The product should be situated away from sources such as radiators, heat registers, stovos or other products that produce heat.
HN 6
PREPARATION FOR USE
Carefully remove all the components from the carton and remove all packing materials from the components. Make sure that nothing is accidentally discarded with the packing materials.
If possible, save the carton and packing materials for the unlikely event that the product ever needs to be returned for service. Using the original carton and packing materials is the only proper way to protect the unit from shipping damage.

Turntable x1 45-RPM adapter x1


Power adapter and USB cable x1


Turntable mat x1
Warranty card x1
FEATURES OF THE TURNTABLE
3-speed (331/3,45 and 78 RPM).
Built-in stereo speakers for great sound.
- Ceramic cartridge with ruby stylus.
- Belt driven turntable mechanism.
Auto-return tone arm.
RCA audio out
Play 7^ ,10^ \& 12^ Records
-Bluetooth2.1+EDR
- SD/TF card reader & USB flash drive.
- Record vinyl to SD/TF card or USB Drive.
FM radio.
DESCRIPTION OF THE TURNTABLE

TOP VIEW
TURNTABLE PLATTER
ONEARM LIFT LEVER
Raise the lever to raise the tonearm.
Lower the lever to lower the tonearm
3 ONEARM REST/LOCK
SPEED SELECTOR
Switch the button to adjust the turntable platter speed between 33/3, 45 and 78 RPM.
5 TONEARM
CARTRIDGE/STYLUS
7 SPEAKERS
845-RPM ADAPTER
Used for adapt the piatter to an 45-RPM record.
HN 8
DESCRIPTION OF THE TURNTABLE

FRONT VIEW
REARVIEW

SIDE VIEW

DESCRIPTION OF CONTROLS
POWER ON/OFF & VOLUME
Turn the unit ON or OFF by turning the knob.
Once turned to ON, keep turning the
knob to adjust the volume.
LED INDICATOR
When the turntable is ON the LED
indicator brights.
PEAKER OUT (L-R)
RCA audio out.
4C5VIN
Power supply Jack
PREVIOUS
Change to previous song
Change to previous channel in EM
Radio input mode.
In play mode, press to suspend playing
songs. Press this button again to continue play.
Keep pressing in order to cancel a
recording on Record mode.
During the USB or SD/TF card playback
keep the button press in order to delete the playing song.
NEXT(
Change to next song.
Change to next channel in FM Radio
input mode.
MODE SELECTION (MODE/REC)
Using brief presses select the mode
between: USB / SD/TF card, FM Radio or Bluetooth mode
While listening to a disc, press and
hold the button for 2 seconds to start a recording.
To stop recording, press and hold the button again for 2 seconds.
USB(USBPORT)
Insert USB, to play the music or storage the recording files.
SD/MMC CARD (TF CARD PORT)
Insert SD/TF Card, to play the music or storage the recording files.
EN 10
CONNECTIONS
MAINS CONNECTION
Ensure that the mains voltage of your home corresponds to the operating voltage of the unit. Your unit is ready to be connected to a mains voltage of 5V DC adaptor.
AMPLIFIER CONNECTION (If required)
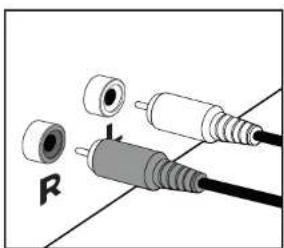
Whilst you can listen to your new turntable using the built in speakers you may wish to connect it to your existing Hi FI system. Connect the audio plugs to the Line input on your mixer or amplifier using an RCA cable (not supplied).
- Red plug into R/H channel input.
- White plug into L/H channel input.
USB AND SD/TF CARD
Connect a USB flash drive or a SD/TF card reader with MP3 music files to the turntable's aside USB or SD/MMC CARD port. Then press the MODE/REC button, the first recoding song will play.
QUICK PLAY FLASH will scan through the drive's folders for playable music files in the following order:
- Songs recorded by the turntable that are located in the "RECOOD" folder (RECOOOO, RECOOOO, RECOOOO).
- Songs in the root directory,
- Songs in other folders/subfolder (including any hidden or Trash folders).
Note if there's no recorded files, the playing sequence on the turntable is based on the alphabetical order. If the file name has numbers at the beginning for e.g. 01, 02 or 03... The turntable will play 01 file first.
Turn the ON/OFF & VOLUME knob on the turntable to adjust the volume level.
FUNCTIONS
PLAYING A RECORD
- Place the record of your choice on the turntable. If required, do not forget to place the adaptor on the record spindle.
-
Choose the desired playing speed using the speed selection switch between 33 1/3.45 and 78 RPM.
-
Turn ON the ON/OFF & VOLUME knob. Note that this also controls volume.
- Release the tonearm lock.
- Raise the tonearm with the tone lever.
- Place the stylus vertically over the first track of the record, the turntable will start turning automatically.
- Put down the stylus slowly on to the record to play.
- When a record comes to the end the tonearm is returned to the tone arm rest automatically.
- Replace the protective cap on the stylus and close the tonearm lock.
- Turn off power at mains.
RECORDING FUNCTION
- Insert a USB flash drive or a SD/TF card reader to the tumbledie's aside USB or SD/MMC CARD port.
- Lower tonsarm onto the record; the record will play.
- To start recording, press and hold the MODE/REC for about 2 seconds; The beep indicates recording.
- When finished, press MODE/REC for about 2 seconds to stop recording. Twice beep indicates stop, and the song will be recorded.
- When you finished, raise the tonearm and return it to the arm clip.
DELETE RECORDED MUSIC
You can erase individually every song playing by keep pressing the DEL button until 2 seconds. Twice beep indicates that the file has been removed properly. (Note that the USB original documents can be removed too).
FM FUNCTION
Briefly press the MODE/REC button until you reach the FM RADIO function. Press DEL button for searching once finished searching it will play the first radio station.
Switch channels, by pressing 和 on the unit to choose your favorite station.
Notes:
The USB flash drive or SD/TF card should be formatted as FAT32 format on your computer before their use.
It is advisable to remove unnecessary files and the file catalog in order to read faster and reduce reading error when playing songs.
Notes:
- If the duration of a 7-day disc is longer than standard, the arm may automatically rise and return before the end of playback.
The turntable will storage on the USB or SD/TF card the recordings inside a created folder by the name of RECORDO
HN 12
BLUETOOTH OPERATION
IMPORTANT:
Prior to use Bluetooth function, your turntable should be paired firstly with your Bluetooth device. ("PaTeC" means establish connection between Bluetooth devices such as MOBILE PHONE, TABLETS, PC, ETc).
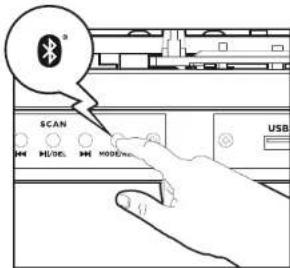
- Lift up the tonearm and put it on the rest. Then press the MODE/REC button to switch into the Bluetooth mode. (fig. 1)
- In Bluetooth mode, the turntable will search automatically for Bluetooth devices.
- Turn on Bluetooth functionality on your device and make it discoverable (see your devices instructions to add or setup a bluetooth device).
- Search for Bluetooth equipment: aiwa GBTUR-120, that's your turntable's identification: (fig. 2)
A sound indication will announce that Bluetooth devices are successfully paired. (During the pairing, if a password is required, you need to input code "0000"). Your Bluetooth device stores the turntable unique identification at the same time.
(图1)

(1g2)
Notes:
- Under this function, the turntable function will be stopped automatically.
The Bluetooth reproduction can be controlled by the use of the Bluetooth device, or the turntable's buttons.
The effective range of Bluetooth devices is 10 meters. Once paired, your device should connect to the GBTUR-120.
This unit supports iPad, Samsung, HTC, Motorola, Nokia, and other Bluetooth devices wirelessly transmitting audio.
CARE AND MAINTENANCE
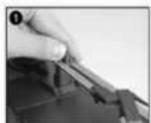
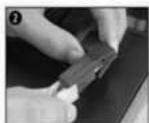
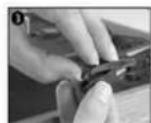
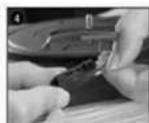
REPLACING THE STYLUS
- Push the arm lock to release the tonearm
- Take off cap of cartridge to expose the needle out.
- Take off the audio-line from the cartridges completely.
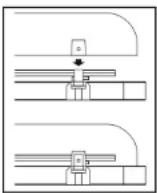
- Separate the cartridge from the socket lightly.
- To fit a new one just in opposite deals, insert the audio-line accordingly, and install the cartridge to the socket lightly.
- It is recommended to clean the discs before and after listening.
- Clean your discs periodically with a soft anti-static cloth, you can also moisten it with cleaning fluid.
- Always clean the discs in circular motions following the direction of the grooves.
- While cleaning, place it on a clean, soft cloth on a flat surface. It is also advisable to use a special mat and cleaning kit.
- Never use detergents or abrasive cleaners to clean the disc.
- Discs should be stored in their sleeves after each use to avoid damage.
- Never store the discs supported diagonally or flat! Always keep the discs in a vertical position to avoid deformation.
- Do not expose discs to direct sunlight, high humidity, high temperatures, or dust, etc. Prolonged exposure or extreme temperatures can warp the disc.
- Do not stick or write anything on either side of the disc: Sharp writing instruments or the ink would damage the surface.
TRANSPORTING THE UNIT
When transporting your record player do not forget to:
- Replace the protective cap on the stylus.
- Put the rest clip into the pick-up arm.
Notes:
Please exercise extreme care whilst replacing the stylus so as to avoid the tonearm and audio line wires from any damage.
- Dust the stylus from time to time using a very soft brush dipped in alcohol (brushing from back to front of the carriings).
We would also point out that for the same reason your stylus should be replaced periodically (approximately every 250 hours).
EN 14
CARE AND MAINTENANCE

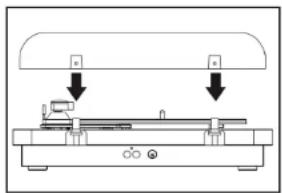
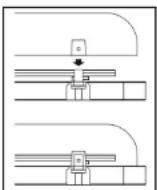
Notes:
Take care when fitting, do not press down too hard.
- Remove the dust cover in the same manner but pull the cover upwards. Take extra care when removing the cover so you do not break the pins holding the cover in place.
TROUBLE SHOOTING GUIDE
If a fault occurs, first check the points listed below before taking the speaker to repair.
Do not open the speaker as there is a risk of electric shock.
If you are unable to remedy a problem by following these hints, consult your dealer or service center.
SYMPTOM CAUSE CORRECTION
| General | ||
| The unit doesn't work AC Power | cord is not connected. | Connect to an AC outlet at the back of the unit. |
| Tonearm doesn't move Tonearm | hold down clip was not released. | Release the tonearm hold down clip. |
| Sound | ||
| No sound The protective needle | cover was not removed. | Carrefully remove the protective cover. |
| No volume or volume too low. | Adjust the volume. | |
| MP3 | ||
| MP3 does not play The song format | mat in the USB disc is incorrect. | Transform song format into MP3 format. |
| USB disk/ SD/TF Card is disconnected. | Insert USB disc/ SD/TF properly. | |
WARNING!
Under no circumstances should you try to repair the set yourself, as this will invalidate the warranty.
TECHNICAL SPECIFICATION
MODEL
Rated Voltage:
Power consumption:
Audio output power (L + R) :
Power supply
DC5VJIN
RADIO SECTION
Frequency ranges
USB & SD/TF CARD SECTION
USB
SD/TF Card
Maximum storage allowed:
BLUETOOTH:
AMPLIFIER
Output power:
Input sensitivity:
Frequency response:
Audiq S/N:
ACCESSIONS:
45 RPM adaptor x1
Power adapter with USB cable x1
User manual x1
Warranty sheet x1
DIMENSIONS & STUFFING
Dimensions of the unit:
Dimensions of the turntable:
Dimensions of the Giftbox:
Net weight:
GBTUR-120
100V-AC240V,60/50Hz
5W
2x5W RMS
AC100V-AC240V,60/50Hz 0.15A
DC5V CHARGING INTERFACE (for adaptor)
100-20KHZ
USB COMPATIBLE PORT 2.0
MMC/SD/SDHC
USB 32GB - MMC/SD/SDHC 32GB
2.1+EDR
<8W
70dB
2.4GHz
48dB
W 420° D 105° H 376°mm
O/275mm
W 468° D 175° H 451°mm
4.1Kgs
ESPANOL
REPRODUICIR / PAUSAR / ELIMINAR
Durante la reproduction, presione paraPGAusar la cancion.
CUIDADO E MANUTENCAO
Anotacoes:
W 420° D 105° H 376°mm
O/275mm
W 468* D 175* H 451*mm
4.1Kgs
NOTES 86
NOTES / NOTAS / NOTES / NOTIZEN / NOTE / NOTAS
S/NOTAS/NOTES/NOTIZEN/NOTE/NOTAS
aiwa
JAPANESE ENGINEERING SINCE 1951
Follow us! aiwaEU


AIWA CO., LTD.
TOKYO, JAPAN
www.eu-aiwa.com
Printed in P.R.C.