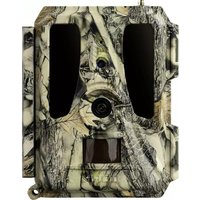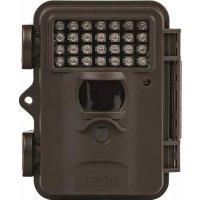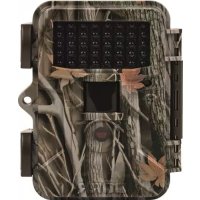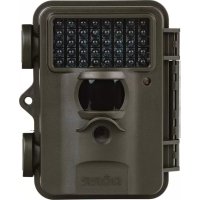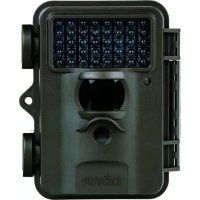
SnapShot Black 8MP TFT - Camera Dörr - Free user manual and instructions
Find the device manual for free SnapShot Black 8MP TFT Dörr in PDF.



User questions about SnapShot Black 8MP TFT Dörr
0 question about this device. Answer the ones you know or ask your own.
Ask a new question about this device
Download the instructions for your Camera in PDF format for free! Find your manual SnapShot Black 8MP TFT - Dörr and take your electronic device back in hand. On this page are published all the documents necessary for the use of your device. SnapShot Black 8MP TFT by Dörr.
USER MANUAL SnapShot Black 8MP TFT Dörr
SnapShot Limited 8 MP TFT & Limited Black 8 MP TFT
SnapShot Limited 8 MP TFT & SnapShot Limited Black 8 MP TFT
Modell Snapshot Limited 8 MP TFT Snapshot Limited Black 8 MP TFT
SnapShot Limited 8 MP TFT & SnapShot Limited Black 8 MP TFT
Game & Surveillance Camera
THANK YOU for choosing this DORR quality product.
Please read the instruction manual and safety hints carefully before first use. Keep this instruction manual together with the device for future use. If other people use this device, make this instruction manual available. This instruction manual is part of the device and must be supplied with the device in case of sale.
DOR is not liable for damages caused by improper use or the failure to observe the instruction manual and safety hints.
- Your camera is fitted with a weatherproof housing according to protection class IP54 (dust and splash waterproof). So the camera can be used outdoors. Nevertheless protect the camera from extreme weather conditions and direct sunlight.
- Make sure to use fresh batteries of the same type and brand only. When inserting the batteries please respect the correct polarity (+/-) . Please remove batteries when device is not in use for a longer period. Also note capture "Safety Hints for Batteries".
- LED bulbs cannot be replaced.
- Do not drop the camera onto a hard surface. Do not use the camera if it has been dropped. In this case a qualified electrician should inspect the camera before you use it again.
- Do not attempt to repair the devise by yourself. Risk of electrical shock! When service or repair is required, contact qualified service personnel.
- Do not open the camera housing (except the protective cover and the battery cover). The warranty will become void. In case of defect contact an authorized service agent.
Do not use the camera nearby mobile phones and devices that generate strong electromagnetic fields (e.g. electric engines). - People with physical or cognitive disabilities should use the camera with supervision.
- People with cardiac pacemakers, defibrillators or any other electrical implants should maintain a minimum distance of 15 to 20cm , as the device generates magnetic fields.
- Avoid touching the camera lens with your fingers.
- Protect the camera against extensive dirt. Never use aggressive cleansing agents or benzine to clean the camera. We recommend a soft microfiber cloth to clean the outer parts of the camera and the camera lens. Make sure to remove batteries before cleaning.
- Store the camera in a dust-free, dry and cool place.
- This device is not a toy. To prevent accidents and suffocation keep the device, the accessories and the packing materials away from children and pets.
- If the camera is defective or without any further use, dispose of the camera according to the Waste Electrical and Electronic Equipment Directive WEEE. For further information, please contact your local authorities.
Only use high-quality batteries of popular brands. When inserting the batteries, please respect the correct polarity (+/-) . Do not insert batteries of different types and always replace all batteries at the same time. Do not combine used batteries with fresh batteries. Please remove batteries when device is not in use for a longer period. Do not throw the batteries into fire, do not short-circuit and do not disassemble them! Never charge non-rechargeable batteries - risk of explosion! Remove empty batteries immediately from the device to avoid the leaking of battery acid. Remove leaking batteries from the device immediately. Clean the contacts before inserting fresh batteries. Risk of battery acid burn! In case of contact with battery acid, rinse the affected area immediately with water and contact a doctor. Batteries can be dangerous to life if swallowed. Keep batteries away from small children and pets. Do not dispose of batteries in household waste (see also capture "Disposal of Batteries/Accumulators").
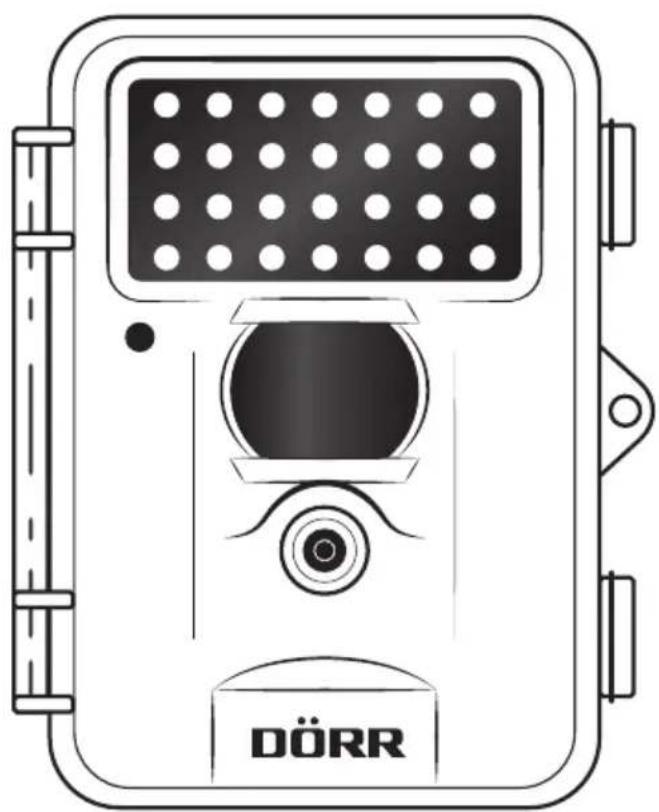
1 Infrared flash
2 LED indicator
3 PIR Motion Sensor
4 Camera lens
5 LCD display
6 Menu Button
7 Arrow buttons (menu control)
8 OK button
9 ON/OFF switch + setup
10 DC 6V connection
11 Mini USB port
12 SD card slot
13 Battery compartment
14 14 " thread mount
15 Eyelet for U-lock
16 Tension locks
04 | FIRST USE
- Open the camera releasing the lateral tension locks (16).
- Make sure that the On/O switch (9) is on OFF position.
CAUTION
To avoid camera damages always make sure that camera is switched off (9=OFF) when inserting batteries or changing SD card.
- Insert 8 × AA / 1,5V batteries into battery compartment. Respect correct polarity (+/-) .
CAUTION
Do not use re-chargeable batteries. They may lead to malfunction.
- Insert a SD card with the label facing upwards into the SD card slot (12). Make sure that the SD card is unlocked and formatted.
- Slide the On/O switch (9) to "SETUP" position. The Display shows the basic settings:
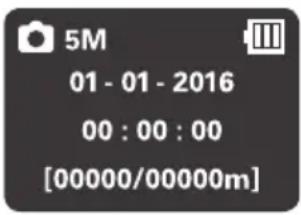
Camera symbol Single picture mode
5M (Factory setting) Resolution 5 Mega Pixels (3 MP / 5 MP / 8 MP selectable)
Battery symbol Battery status
[00000/00000m] Stored pictures/free capacity
05 | SETUP
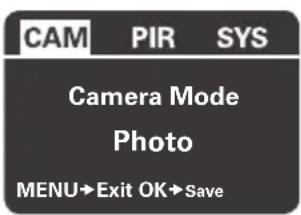
In order to change the camera settings slide the On/OFF switch (9) to ""SETUP" position and press the "MENU" button (6). The LCD display (5) shows a list of various menu options:
- Press the arrow buttons (7) to switch between the registers (CAM, PIR, SYS).
- Press the arrow buttons (7) or to select the menu point. The selected menu point is marked white.
- Press the arrow buttons (7) or to change the menu point.
- To save your settings press the the "OK" button (8). To leave setup without saving, press the "MENU" button (6).
CAMERA/VIDEO MODE
Select between single photo or video shooting.
- Press the arrow button (7) to select "Camera Mode".
- Press the arrow buttons (7) or select "Photo" or "Video".
- Save with "OK" button (8).
Video quality 640 x 480 Pixels
Video length 5 - 60 seconds selectable
PICTURE RESOLUTION
Select between 3 MP, 5 MP or 8 MP picture resolution.
- Press the arrow button (7) to select Photo Size "5MP".
- Press the arrow buttons (7) or to select "3MP" or "8MP".
- Save with "OK" button (8).
NUMBER OF SHOTS
Select number of shots per motion.
- Press the arrow button (7) to select "Photo burst".
- Press the arrow buttons (7) or to select "1 Photo" "2 Photos" or "3 Photos".
- Save with "OK" button (8).
07 | MOTION SENSOR SETTINGS PIR
SENSITIVITY
Choose the sensitivity of the motion sensor or turn the sensor off.
- Press the arrow button (7) to select "Sensitivity".
- Press the arrow button (7) oder select "Normal", "High", "Low" or "Off".
- Save with "OK" button (8).
TRIGGERINTERVAL
Select time (1 sec to 60 min) when PIR sensor is deactivated after a shot.
- Press the arrow button (7) to select "Trigger Interval".
- Press the arrow buttons (7) or to select time.
- Save with "OK" button (8).
TIME LAPSE
Set the interval of continuous photo shooting. Camera shoots photos during this time setting (5 sec to 8 h) regardless of the motion sensor. If selected "OFF" the camera triggers upon motion. This setting is useful e.g. for observing a larger area in a certain period.
- Press the arrow button (7) to select "Time Lapse".
- Press the arrow buttons (7) or to select time.
- Save with "OK" button (8).
TIMER (START-STOP)
The camera only takes photos/videos within the selected time frame. In the remaining time camera does not take photos/videos and does not react to motion (same for "Time Lapse" mode).
- Press the arrow button (7) to select "Start-Stop"
- Press the arrow button (7) or to select "Off" or "On".
- To deactivate select "Off" and confirm with "OK" button (8).
-
To activate select "On" and confirm with "OK" button (8). Display shows two fields to enter the start and stop time:
-
With the arrow buttons (7) enter the start time.
-
With the arrow button (7) switch to the "Stop" field. With the arrow buttons (7) or enter the stop time.
-
After setting save with "OK" button (8). Now the camera only works in the selected time frame.
08 | SYSTEM SETTINGS SYS
DATE AND TIME
The date has to be set in the format dd.mm/yyyy. Time has to be set in 24 hours format.
- Press the arrow button (7) to select "Enter". Press the "OK" button (8) to enter the setting mode:
- With the arrow buttons (7) ▲ or enter the date.
- With the arrow button (7) switch to the next number.
- After setting save with "OK" button (8).
TIME STAMP
Choose if time and date are shown on pictures.
- Press the arrow button (7) to select "Time Stamp".
- Press the arrow buttons (7) or to select "On" or "Off".
- Save with "OK" button (8).
password
Secure the camera with password, to avoid misuse. The password is needed every time the camera is switched on. Default password is 0000. With the arrow buttons (7) and select "On" or "Off". Press the "OK" button (8) to display the default password. The individual numbers can be changed with the arrow keys (7) or To save your new password press the "OK" button (8). The next time the camera will be switched on, the password will be requested.
Note your password carefully, without the password the camera cannot be operated.
LANGUAGE
Choose either German, English or French language for the camera menu.
- Press the arrow button (7) to select "Language".
- Press the arrow buttons (7) or to select "English", "German" or "French".
- Save with "OK" button (8).
BEEP TONE
Activate or deactivate the beep tone for the control buttons.
- Press the arrow button (7) to select "Beep".
- Press the arrow buttons (7) or to select "Off" or "On".
- Save with "OK" button (8).
OVERWRITE FUNCTION
Camera may overwrite old pictures with new ones when SD card is full or alternatively quit function.
- Press the arrow button (7) to select "Over Write".
- Press the arrow buttons (7) or to select "Off" or "On".
- Save with "OK" button (8).
FORMATTING
This function deletes all files from the SD card and reformats the card.
Before formatting make sure that there are no fi les on the SD card you might need!
- Press the arrow button (7) to select "Format".
- Press the "OK" button (8) to select "Enter".
- Press the arrow buttons (7) or to select "Yes"
- To start formatting press the "OK" button (8).
While formatting LCD display (5) shows "Please wait".
FACTORY SETTING
This sets all parameters to "factory defaults" except date & time.
- Press the arrow button (7) to select "Default Set".
- Save with "OK" button (8).
When settings are completed, press "MENU" (6) to return to start menu.
09 | WATCHING PHOTOS/VIDEOS ON DISPLAY
Press the "OK" button (8) while in "SETUP" mode (9) to watch the latest photo. Press the arrow buttons (7) or to browse through your photos and video recordings. For videos the video preview image will be displayed only - the video cannot be played.
Press the OK button (8) to get back to start screen.
DELETE PHOTO OR VIDEOS:
Press the "MENU" button (6) to delete files. Press the arrow button (7) the "OK" button (8).
or to select "Delete One" or "Delete All". Confirm with
CAUTION
Deleted images cannot be restored!
FILE NAME
Pictures and videos will be named continuously, starting with IMG0001.jpg (picture) or IMAG0001.avi (video).
TEST SHOOTING
To take a test shot manually enter the setup mode (9), press the arrow button (7) and release with "OK" button (8).
MOUNTING
Mount the camera to a tree, pole or any suitable object using the supplied fixing belt. Do not fix the belt finally at this stage. For security reasons you may obtain cable lock optionally. Best distance to object is 3 - 10 meters. Larger distances are also possible, however with less reliability of motion sensor. We recommend to take a few test shots and to finally fix the camera afterwards.
DIRECTING
The camera needs to be well directed for proper pictures.
- Hang up camera in about 0,75 - 1 m height, slightly tilting ahead. The camera lens (4) should now point to where the photographic object is expected to show-up.
- Set the On/Off switch (9) to "SETUP" and close the camera housing. If you move in front of the camera the LED indicator (2) is flashing red and the motion sensor is active. The red LED (2) will flash as long as you are moving within the detection area.
- We recommend taking several test photos to see the area covered by the camera. For this purpose, turn the camera off first. Then slide the On/Off switch (9) to "ON" position and close the camera. After 15 - 30 seconds the camera is ready.
- Move with normal speed through detection area. The camera triggers now.
- The picture can be viewed on the LCD display (5) directly (please refer to capture 09) or with a Laptop or PC. There are 2 options:
a) Connect the camera directly to computer using the supplied USB cord. Plug the USB cord into the Mini USB port
(11) of the camera and connect with USB port at your computer.
b) Remove the memory card from the camera and read out pictures with an external card reader (optional).
- We recommend to direct the camera in a way that the object will be in the center of the picture. You may have to re-adjust the camera and take another test shot.
Tip To change the camera angle you can use e.g. a small wooden wedge between camera and trunk.
- Once the camera position is correct, the fixing belt can be tightened to hold the camera firmly
- Switch the camera off after test shooting.
START SURVEILLANCE
Slide the On/O button (9) to "ON" position and close the camera housing. After 15 - 30 seconds camera is ready and it records according to your settings and upon movement.
CAMERA CHECK UP
Options to check if the camera has taken pictures:
- Open the camera housing and turn o camera. After about 2 seconds slide the On/Off button (9) to "SETUP" position.
- The LCD display (5) shows the start screen. The lower line shows the number of pictures taken and the remaining memory. Example: [0034/1846].
- It is recommended to check the battery status as well. When capacity goes down, it will be more difficult to achieve correctly illuminated night shots. In case of doubt, replace batteries by new ones.
Model Snapshot Limited 8 MP TFT Snapshot Limited Black 8 MP TFT
| Item No 204473 204474 | |
| Display LCD 3,5 cm / 1/4" | |
| Housing Protection class IP54 (dust and splash waterproof) | |
| Picture resolution 3.0 MP, 5.0 MP or 8.0 MP | |
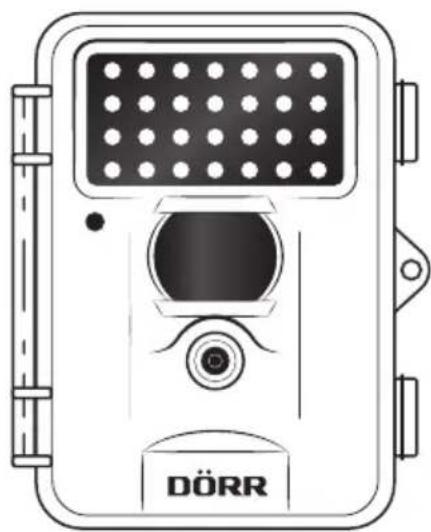
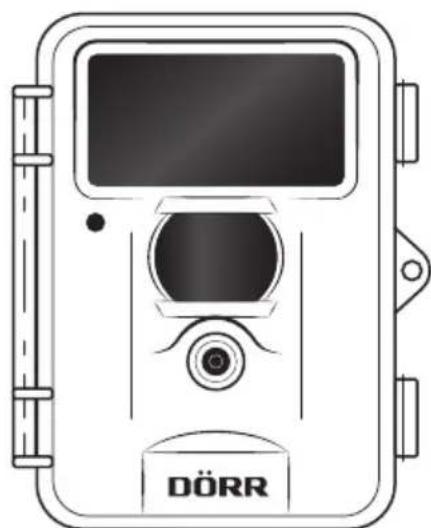
| Flash Infrared / 28 LEDs Infrared / 40 LEDs Black Vision | |
| Motion sensor range up to approx. 20 m | |
| Flash range up to 12 m up to 8 m | |
| Functions | Photo, video, continuous shooting mode |
| Trigger time | 1,3 sec |
| Power source | 8x AA batteries (optional)DC 6V port for external battery (optional) |
| Memory card | SD memory card up to 32 GB (optional) |
| Operation temperature | -10 to +40°C |
| Dimensions | 125 x 100 x 70 mm |
| Weight | 252 g (w/o batteries) |
| Memory card | The camera only works with an SD card. There are SD cards which may not harmonize with the DÖRR Snapshot and may affect function of camera. Usually it already helps to use another SD card of different brand or different capacity. The camera supports SD cards up to 32 GB. |
| Lens rattles | The camera lens is covered with a filter which allows coloured pictures at daylight and black & white shots at night. When camera is turned off the fi lter is not fi xed which can cause the rattle noise. However, this is no defect! |
| Weather protection | Although the camera is weatherproof and well-suited for outdoor use, we recommend to mount it at a secured place, so not on the weather side or in the direct sunshine. After long periods of humidity, caused by rain or fog, the camera should be stored in a dry area for a few days. Dust and splash waterproof according to protection class IP54. |
| Motion sensor | The motion sensor will react under certain circumstances and within a certain range. In general the range of recognition is slightly larger than the range covered by the image. The recognition of the objects depends on temperature, vegetal cover, reflecting surfaces and more circumstances. Under optimum conditions, a perfectly oriented camera and high sensitivity level adjustment, the recognition range can be up to 12 - 15 m. Usually, you may expect a range of 10 m. It can take a few attempts to find the proper position for your camera. When you test the motion sensor reaction, be aware of the facts that animals are usually remarkably smaller than human beings. So they may not be recognized. |
| Light conditions | Avoid direct back light, as you do in normal photography. When you choose the camera position, make sure that there will be no direct back light and also that the camera will not be placed in the shadow. |
| Technical changes | Specifications and design are subject to change without notice. Latest manuals please download here: http://download.doerrfoto.info/manuals/Snapshot_20manuals/ |

DISPOSAL OF BATTERIES/ACCUMULATORS
Batteries are marked with the symbol of a crossed out bin. This symbol indicates that empty batteries or accumulators which can no longer be charged, should not be disposed of with household waste. Waste batteries may contain harmful substances that can cause damage to health and to the environment. Please use the return and collection systems available in your country for the disposal of the waste batteries.

WEEE INFORMATION
The Waste Electrical and Electronic Equipment Directive (WEEE Directive) is the European community directive on waste electrical and electronic equipment, which became European law in February 2003. The main purpose of this directive is to prevent electronic waste. Recycling and other forms of waste recovery should be encouraged to reduce waste. The symbol (trash can) on the product and on the packing means that used electrical and electronic products should not be disposed of with general household waste. It is your responsibility to dispose of all your electronic or electrical waste at designated collection points. Disposing of this product correctly will help to save valuable resources and it is a signifi cant contribution to protect our environment as well as human health. For more information about the correct disposal of electrical and electronic equipment, recycling and collection points please contact your local authorities, waste management companies, your retailer or the manufacturer of this device.
ROHS CONFORMITY
This product is compliant with the European directive 2011/65/EU of June 08, 2011 for the restriction of use of certain hazardous substances in electrical and electronic equipment (RoHS) and its amendments.

CE MARKING
The CE marking complies with the European directives. You can download the relative EU declaration of conformity with following link: http://www.doerrphoto.de/info/EG-Konformitätserklärungen
SnapShot Limited 8 MP TFT & SnapShot Limited Black 8 MP TFT
SnapShot Limited 8 MP TFT & SnapShot Limited Black 8 MP TFT
Modello Snapshot Limited 8 MP TFT Snapshot Limited Black 8 MP TFT
SnapShot Limited 8 MP TFT
Articlel Nr 204473
SnapShot Limited Black 8 MP TFT
Articlel Nr 204474
DORR GmbH · Messerschmittstr. 1 · D-89231 Neu-Ulm · Fon: +49 731 97037-0 · Fax: +49 731 97037-37 · info@doerrfoto.de