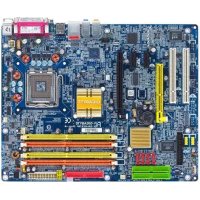
GA8I915P DuoA - Motherboard GIGABYTE - Free user manual and instructions
Find the device manual for free GA8I915P DuoA GIGABYTE in PDF.



| Product type | Motherboard |
| Brand | Gigabyte |
| Model | GA8I915P DuoA |
| Chipset | Intel 915P |
| Processor socket | LGA775 |
| Supported processors | Intel Pentium 4 / Celeron |
| Memory types | DDR400 / DDR333 / DDR266 |
| Number of memory slots | 4 (max 4 GB) |
| Expansion slots | 1 PCI Express x16, 2 PCI Express x1, 3 PCI |
| Storage | 4 SATA ports, 2 IDE ports (ATA 100/66/33) |
| USB connectors | 8 USB 2.0 (4 on back panel, 4 via headers) |
| Network | Integrated Gigabit Ethernet |
| Audio | 8-channel HD Audio (Realtek ALC880) |
| Form factor | ATX standard (305 x 244 mm) |
| Weight | Approximately 0.8 kg |
| Required power supply | ATX 24-pin + 4-pin CPU power supply |
| Operating temperature | 0°C to 40°C |
| Maintenance | Dry cleaning, avoid liquids |
| Safety | Unplug before installation, ESD protection |
| Spare parts | Available on Gigabyte website |
Frequently Asked Questions - GA8I915P DuoA GIGABYTE
User questions about GA8I915P DuoA GIGABYTE
0 question about this device. Answer the ones you know or ask your own.
Ask a new question about this device
Download the instructions for your Motherboard in PDF format for free! Find your manual GA8I915P DuoA - GIGABYTE and take your electronic device back in hand. On this page are published all the documents necessary for the use of your device. GA8I915P DuoA by GIGABYTE.
USER MANUAL GA8I915P DuoA GIGABYTE
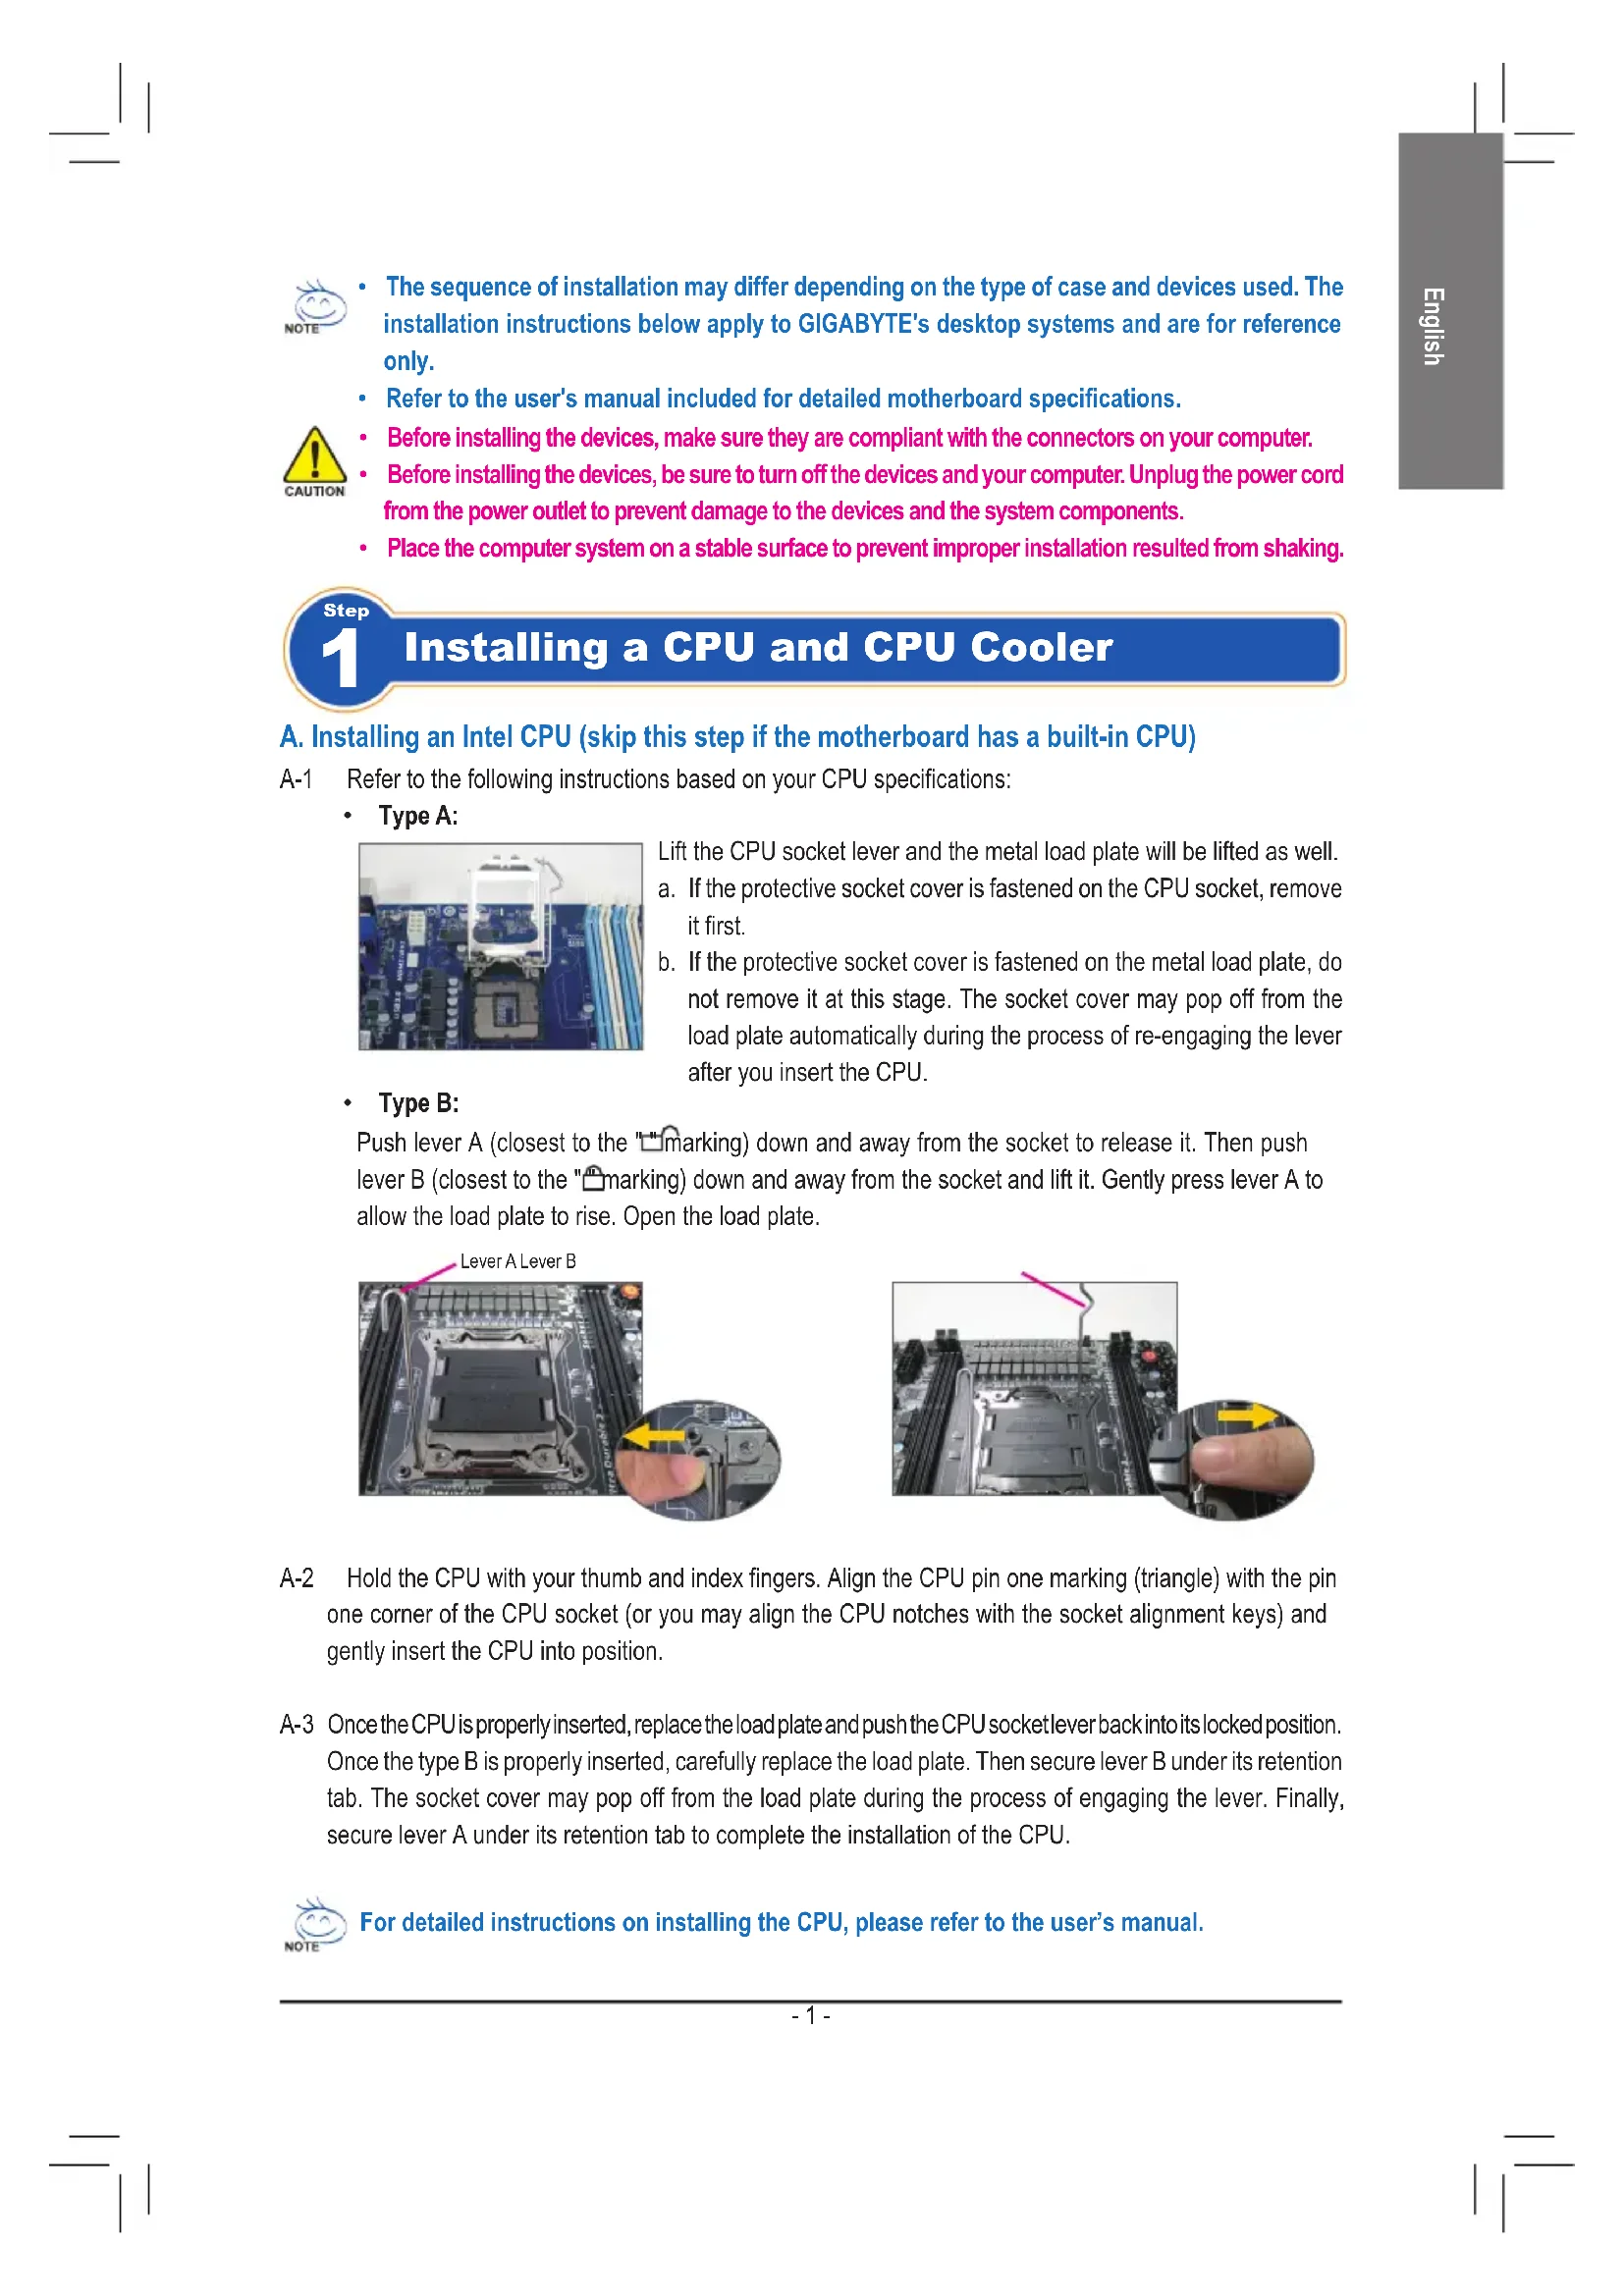
- The sequence of installation may differ depending on the type of case and devices used. The installation instructions below apply to GIGABYTE's desktop systems and are for reference only.
Refer to the user's manual included for detailed motherboard specifications. - Before installing the devices, make sure they are compliant with the connectors on your computer.
- Before installing the devices, be sure to turn off the devices and your computer. Unplug the power cord from the power outlet to prevent damage to the devices and the system components.
- Place the computer system on a stable surface to prevent improper installation resulted from shaking.

Installing a CPU and CPU cooler
A. Installing an Intel CPU (skip this step if the motherboard has a built-in CPU)
A-1 Refer to the following instructions based on your CPU specifications:
Type A:
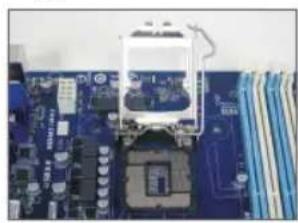
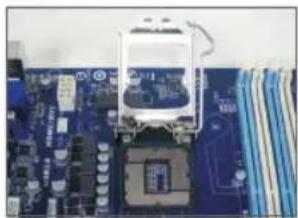
Lift the CPU socket lever and the metal load plate will be lifted as well. a. If the protective socket cover is fastened on the CPU socket, remove it first.
b. If the protective socket cover is fastened on the metal load plate, do not remove it at this stage. The socket cover may pop off from the load plate automatically during the process of re-engaging the lever after you insert the CPU.
Type B:
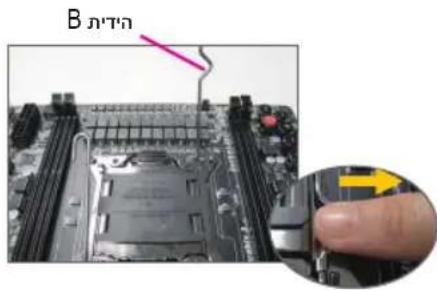
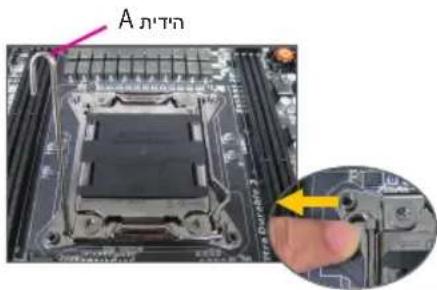
Push lever A (closest to the "marking) down and away from the socket to release it. Then push lever B (closest to the "marking) down and away from the socket and lift it. Gently press lever A to allow the load plate to rise. Open the load plate.
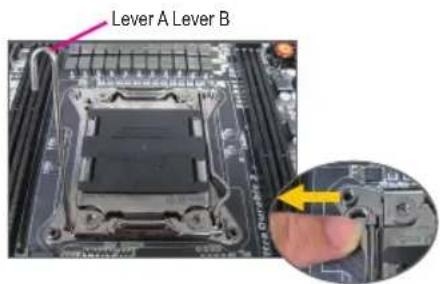
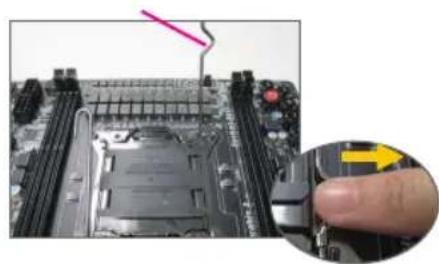
A-2 Hold the CPU with your thumb and index fingers. Align the CPU pin one marking (triangle) with the pin one corner of the CPU socket (or you may align the CPU notches with the socket alignment keys) and gently insert the CPU into position.
A-3 Once the CPU is properly inserted, replace the load plate and push the CPU socket lever back into its locked position. Once the type B is properly inserted, carefully replace the load plate. Then secure lever B under its retention tab. The socket cover may pop off from the load plate during the process of engaging the lever. Finally, secure lever A under its retention tab to complete the installation of the CPU.

For detailed instructions on installing the CPU, please refer to the user's manual.
B. Installing an AMD CPU (skip this step if the motherboard has a built-in CPU)
B-1 Completely raise the CPU socket lever. Align the CPU pin one (small triangle marking) with the triangle marking on the CPU socket and gently insert the CPU into the socket. Make sure that the CPU pins fit perfectly into their holes.
B-2 Once the CPU is positioned into its socket, place one finger down on the middle of the CPU, lowering the socket lever and latching it into the fully locked position.
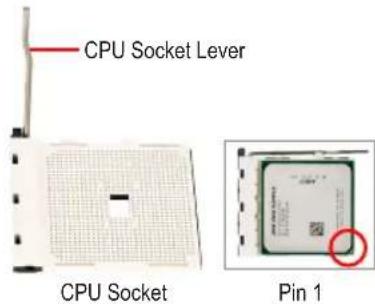

- Do not force the CPU into the CPU socket. The CPU cannot fit in if oriented incorrectly. Adjust the CPU orientation if this occurs.
- DO NOT touch socket contacts. To protect the CPU socket, always replace the protective socket cover when the CPU is not installed.
C. Installing the CPU cooler
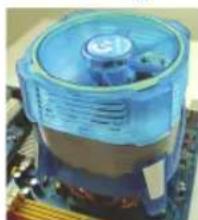
C-1 Before installing the CPU cooler, please first add a thin layer of heat sink paste on the surface of the CPU. Then install the cooler (refer to the installation manual for your CPU cooler).
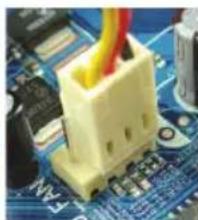
C-2 Connect the CPU cooler cable to the CPU_FAN connector located on the motherboard so that the cooler can properly function to prevent the CPU from overheating.

Installing Memory
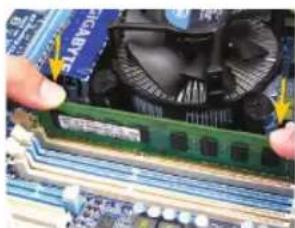
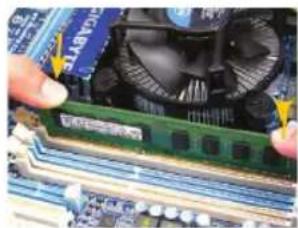
Note the orientation of the memory module. Spread the retaining clips at both ends of the memory socket. Place the memory module on the socket. As indicated in the picture on the left, place your fingers on the top edge of the memory, push down on the memory and insert it vertically into the memory socket. The clips at both ends of the socket will snap into place when the memory module is securely inserted.

Preparing the Case and Installing a Power Supply
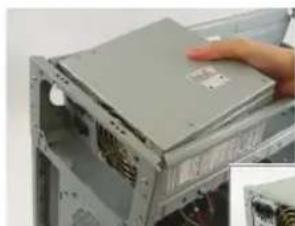
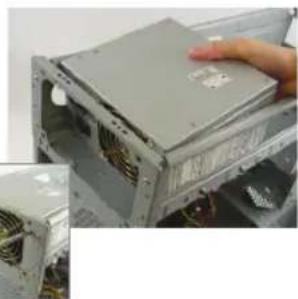
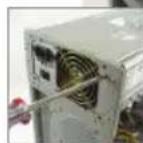
Using the GIGABYTE desktop system as the demonstration example, please first remove both sides and the lid of the case in order to install the power supply. Place the power supply in the correct place in the case and secure it with screws. Installation and placement of the power supply may differ depending on the type of case used.

To ensure sufficient power can be supplied to your system, it is recommended that a power supply of good quality be used. If a power supply is used that does not provide the required power, the result can lead to an unstable or unbootable system.
Step 4
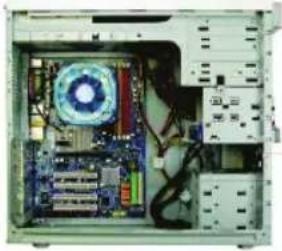
Installing the Motherboard
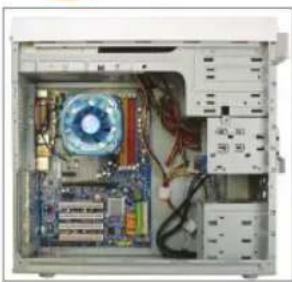
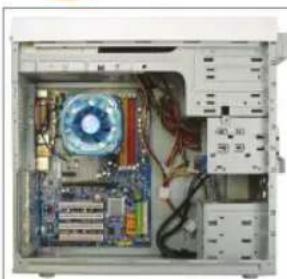
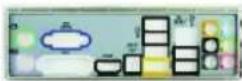
Remove the original I/O shield from the back of the case and replace it with the motherboard I/O shield. Place the motherboard within the case by positioning it into its I/O shield. Align the mounting screw holes on the motherboard with their corresponding mounting holes on the case. Secure the motherboard in place with screws.
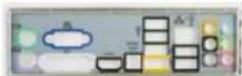
I/O Shield
Step 5
Installing an Expansion Card
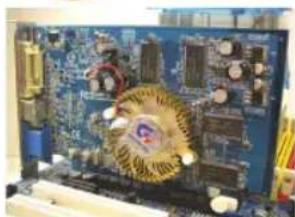
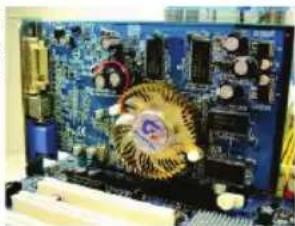
PCI Express Graphics Card
Locate an expansion slot that supports your card and remove the slot cover from the case back panel. Then insert the expansion card into the slot. Secure the expansion card's bracket to the case back panel with a screw.

- Before purchasing an expansion card, check the length of the card, making sure it can fit into your case.
Make sure that the expansion card is fully seated in its slot.
Step 6
Installing IDE and SATA Devices
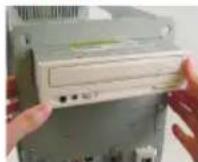
Installing an Optical Drive
6-1 Install your optical drives, such as DVD-ROM and CD-ROM drives.
Remove the 5.25" drive bay cover from the front of the case. Mount the optical drive in the 5.25" drive bay and secure it with screws.
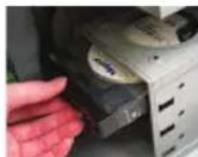
Installing a Hard Drive
6-2 Install your IDE and SATA hard drives.
Install the hard drive into a drive bay within the case and secure it with screws.
C
One motherboard IDE connector can connect up to two IDE devices. Prior to installation, check the jumper settings (master and slave) on your IDE devices.
If more than one hard drive is installed, enter system BIOS Setup to set the hard drive boot sequence.
Step 7
Connecting Cables to Internal Connectors
7-1 Connect cables to internal connectors and headers on the motherboard, including IDE/SATA connectors, and front panel audio, USB, IEEE 1394 headers, etc.
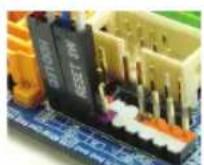
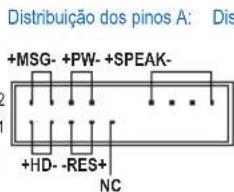
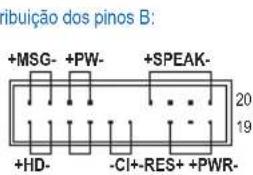
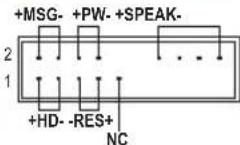
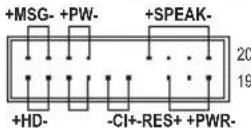
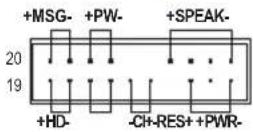
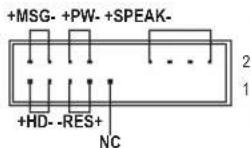
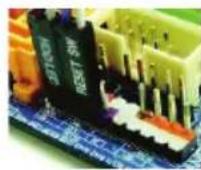
7-2 Attach the front panel module (differs depending on the case design, consisting of power indicator, hard drive activity indicator, speakers, reset switch, power switch, etc.) from the case to the front panel header (F PANEL) on the motherboard.
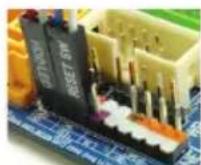
Front Panel Header
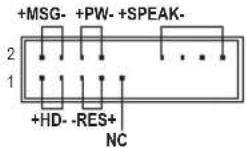
Pin Assignments A:
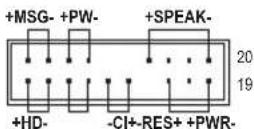
Pin Assignments B:
MSG: Message/Power/Sleep LED
PWR: Power LED
PW: Power Switch
SPEAK:Speaker
HD: Hard Drive Activity LED
RES: Reset Switch
Cl: Chassis Intrusion Header
(Note) The pin assignments for the front panel header may differ by model. Refer to the motherboard user's manual for the actual pin assignments.
Step
8
Connecting Peripherals
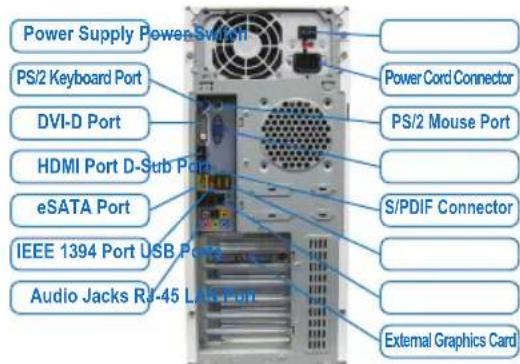
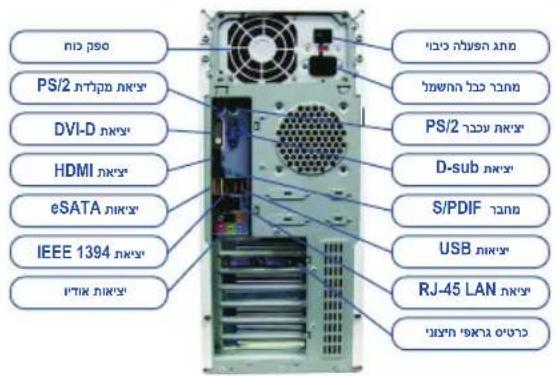
Back Panel of the Case
Once the steps above have been completed, connect the peripheral devices to the computer, such as the keyboard, mouse, monitor, etc. Then connect the power, turn on the system, and install all required software.

Conector do painel frontal
YCTaHOBka CnCTeMHoN nIaTbI
CHIMNE 3aIpykny pa3bEmOB BBOda/BbIBOda Ha 3aIHe IaHEI KOpnyca
UYCTAHOBITE HA ee MEcTO NaHEIb PA3bEMOB BBODA/BbIBOda N3 KOMNKeTaNOCtABKN CnCTeMHOn PnATbI. YCTAHOBITE CNCTeMHy O nAty B Kopnyce, COBMECTNB pa3bEmbl Ha 3aIHeI NaHEI CNCTeMHOn PnATe C OTBepCTHmN H aNaHEI BBODa/BbIBOda.COBMeCTNTE KpeENKhIE OTBepCTHn CNCTeMHOn PnATbIC COOTBeTCTByUOIMN OTBepCTHmN KOpnyca. 3akpeHnTe CNCTeMHy PnATy B KOpnyce PI K c NOMOuB BuHTOB.
3aŋnyuka pa3bEmOB BBOda/BBBObda
war 5
YcTaHOBKa nJaTbI pacShnPeHn
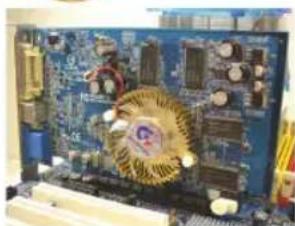
TpaMuecka PCI Express nIata
OnpeDenTe pa3bem pacwnpeHn, coBmecTmbi C yctaHaBnBaEmo nnatoi pacwnpeHn. YdaIte 3arnyk npa3bema Ha 3adHe naneNn Kopnyca. YcTaHOBnTE pIaTy pacwnpeHn B pa3bem. 3akpenTe PnaHky nIaTbI paunpeHn Ha 3adHe naneHn Kopnyca C nOMOsbIO BNHTa.

- Пара д поуклков палы расирени Вьяснite ee ra6apntbI (ДИИНУ) И убдптесь, чTO данhoe yctpoiCTBO MOXHO yctahOBNTB B KOPNYC Baшero ПК.
- y6eHntecb,уTo nIaTa paCunpeHnBOWna Bpa3bEmdoynopa.
war 6
YctaHOBka IDE- n SATA-yctpoiCTB
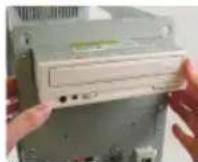
YctahobKa OTTIyueckoRo HAKONITIEN
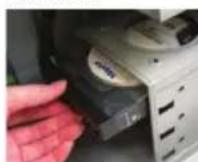
YcTaHOBKa JKeCTKOrO DnCKa
6-1 YcTaHOBKa ONTnueckoro HakoNtTeRi (DVD-ROM n CD-ROM).
YdannTe 3aRnyuKy 5,25-IOm OTeCeKa Ha nepeHne NaHeN KOpNyca. YcTaHOBnTe ONTnueckn HAKONNTeB OTCek N 3akpeInTe yCTpOJCTBO BNHTAMn.
6-2 YctaHOBka KecTKoro IDE- n SATA-dncka
YcTaHOBnTe JecTkn DnCK BOTCEK DnA JceTkoR Oncka N3aKePnTe erO BnHTamN.

- Odn pa3bem IDE ha cnctemno nnaTe noDepxmbaet dBa IDE-ycTpoNCTBa. Npeed yctahOBKOI DE-ycTPOINCTB ONpeDeHnTE C NOMOuIO nepeMbueK COOTBeTCTByoU pexm pa60tbl (master nn slave).
- Ecnn Bbl yctahOBnB N KOMNBIOTep HeckOJIbKO JcEeTKNX DnCKOB, BB13OBNTe MeHIO HAcTpoek BIOS Setup n onpeJeNTe JcEeTKN DnCK, C KOTOPORo 6ydt 3arpykaTbca CnCTema.

Pokkquenne Kaene K BnytpenHnM pa3bemam
7-1 IopKnIOUHTe INTEPpeChbIe Ka6eN K BHyTpeHHM pa3bEmaM Ha CnCTeMHoI nIaTe: IDE/SATA, Audio Na nepeHne NaHeN, USB, IEEE 1394 n T.n.
7-2Поdkноче anemte ha nepeDnei naHEn KOpnyca PIK (KoJIueCTBO np pacnoJoxeHne anemetOB 3aBnCIT OT MOdEiN KOpnyca; obIHyO, Ha nepeDnei naHEn npcCyTCTByOT INdNKaTOP nHTAHN, INdNKaTOp AKTNBHOCTH JECTKORO DnCKA, DNHAMK KOpnyca, KHONKa nepe3arpy3KN I KNOKa NITAHN) K pa3bemy nepeDnei naHEn (F PANEL)Ha cnCTEmHO nnate.
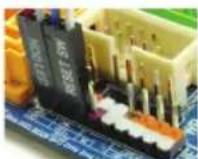
Pa3bem nepeDne naHen
Pa3MeueHHe KOHTAKTOB; BapnAHT A Pa3MeueHHe KOHTAKTOB; BapnAHT B
MSG: INDnkaTOp coo6eHn/ nHTaHn/OxuDaHn
PWR: INDINKAtop nHTaHn
PW: KhoNka BKnOyehn NtTaHn
SPEAK:ДинамкКорпуca
HD: INHINKATOPAKTNBHOCTW KECTKORO DNCKA
RES: Khonka nepe3atpy3k
Cl: DaTnK BCKpbTnK Kopnyca
(Примочи) PacnoJoxeHne KOHTaKTOB pa3bema nepedHe naneHnI pya3nHybIX moTeNe I nIAT MOxET pa3nUaTbcra. Ha3NaueHne KOHTaKTOB pa3bema F_PANEL npNBedeHO B PyKOBOcCTBe NOJIb3OBAteTn CnCTeMHo IIaTbl.

PoiKIOueHne nepnOpepnHbIX yCTpOInCTB
PacnoIoxKeHne pa3bEmOB Ha 3aDHe nHaHei
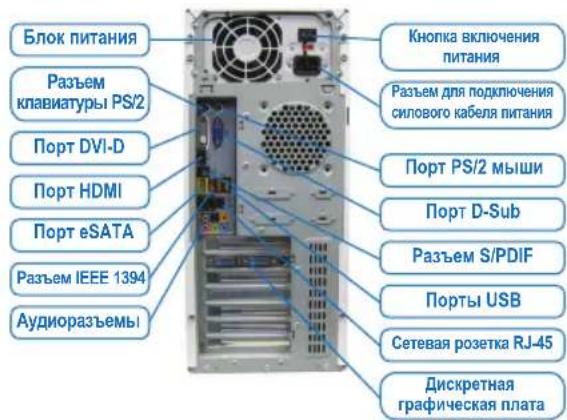
BbnoHnB Cbe nepeucnHbIe DeIcTBn, nOKnIOHTe K KOMNbIoTepy nepupepnHbIe yCTpoCTBa:KnabNAtpy,MbIb,MOHITOp nT.I. IOnKnIOHTe BnIKy CnIOBOrO Ka6eNBA CcTeByo po3ETK, BKNIOHTe NK uYctaHOBtE Heo6xOdHMoe nporpamMHOe ObecneueHne.

Push lever A (closest to the "marking) down and away from the socket to release it. Then push lever B (closest to the "marking) down and away from the socket and lift it. Gently press lever A to allow the load plate to rise. Open the load plate.
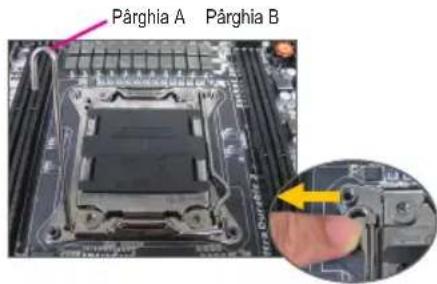
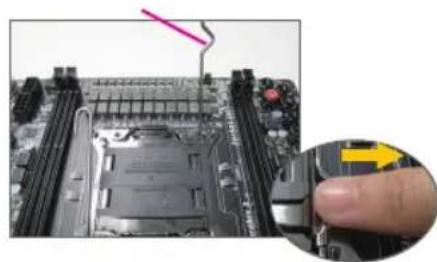
A-2 Hold the CPU with your thumb and index fingers. Align the CPU pin one marking (triangle) with the pin one corner of the CPU socket (or you may align the CPU notches with the socket alignment keys) and gently insert the CPU into position.
PWR: LED pornography
PW: Intrurupator de alimentare
SPEAK: Difuzor
HD:LED activate hard disk
RES: Intrerupator de reinitializare
PWR: Auxvia LED Aetroupyias
PW: Aiaokottnpopo0oocic SPEAK: Hyxio
HD: Auxvia LED aieroupyia 0kAnpou bikou
RES: DIAKONTN ES TAVEKKIVNONS
Cl:EuVdEtnpaTnpaiaQouIou
(Enjeiwoj) Oi avotheoeic akidow yia to mtpoovio paoio evexetai va diaepouv avaloayo ie ooytelo.
AvatpeETo 0yExpiio xpnTn ts mntpikic yia t cuykeepievec avaotei ackiow.

nW/nnw/nnnLED nW nW:MSG
nW LED nW nW:PWR
nW nW nW:PW
nW nW:SPEAK
nW nW nW LED nW HD
nW nW nW:RES
nW nW nW:CI
B:
A:
Tn
n nnnn nn nnnnnnnnnnnnnnnnnnnnnnnnnnnnnnnnnnnnnnnnnnnnnnnnnnnnnnnnnnnnnnnnnnnnnnnnnnnnnnnnnnnnn
D'97nn D'7nn nn
功
8
n nn nnnn nn nnnn nn nnnn nn nnnn nn nnnn nn nnnn nn nnnn nn nnnn nn nnnn nn nnnn nn nnnn nn nnnn nn nnnn nn nnnn nn nnnn nn nnnn nn nnnn nn nnnn nn nnnn nn nnnn nn nnnn nn nnnn nn nnnn nn nnnn nn nnnn nn nannn nn nnnn nn nnnn nn nnnn nn nnnn nn nnnn nn nnnn nn
TANN NNNN
Dn n
4
nniin nnnn nn nnnn (I/O shield) nnnnnn nnnn nnnn nnnn nnnn nnnn nnnn nnnn nnnn nnnn nnnn nnnn nnnn nnnn nnnn nnnn nnnn nnnn nnnn nnnn nnnn nnnn nnnn nnnn nnnn nnnn nnnn nnnn nnnn nnnn nnnn nnnn nnnn nnnn nannn nnnn nnnn nnnn nnnn nnnn nnnn nnnn nnnn nnnn nnnn nnnn nnnn nnnn nnnn nnnn nnnn nnnn nnnn nnnn nnnn nnnn nnnn nnnn nnnn nnnn nnnn nnnn nnnn nnnn
(I/O shield)
nann oovnn
5
n nn nnnnnnnnnnnnnnnnnnnnnnnnnnnnnnnnnnnnnnnnnnnnnnnnnnnnnnnnnnnnnnnnnnnnnnnnnnnnnnnnnnnnnnnnnnnnnnnnnnnnnnnnnnnnnnnnnnn
Aaannnnn nnnnnnnnnnnnnnnnnnnnnnnnnnnnnnnnnnnnnnnnnnnnnnnnnnnnnnnnnnnnnnnnnnnnnnnnnnnnnnnnnnnnnnn
nienenrn
yannnnn nn nnnn nn nnnn nn

PCI Express
SATA-IDE nnnn
6
6-1.CD-ROM-DVD-ROM
n 5,25- n 10n
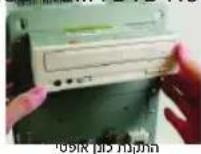
.SATA-IDE 62
nnnnnnnnnnnnnnnnnnnnnnnnnnnnnnnnnnnnnnnnnnnnnnnnnnnnnnnnnnnnnnnnnnnnnnnnnnnnnnnnn
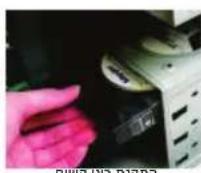
n#p# npnn
IDE- n (Jumper) (slave-master)

NOTE
(nnnn nn nnnn nn nnnn nn nnnn nn
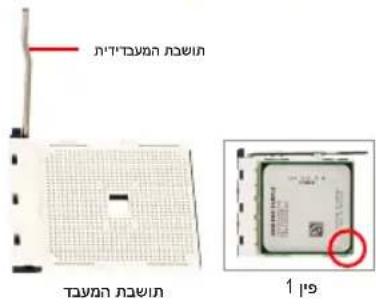
TNNN NNNN ON NNNN TNNN NNNN NNNN NNNN NNNN NNNN NNNN NNNN NNNN NNNN NNNN NNNN NNNN NNNN NNNN NNNN NNNN NNNN NNNN NNNN NNNN NNNN NNNN NNNN NNNN NNNN NNNN NNNN NNNN NNNN NNNN NNNN NNNN NNNN N
yun,ynnnn nnynnnn nnnnnnnnnnnnnnnnnnnnnnnnnnnnnnnnnnnnnnnnnnnnnnnnnnnnnnnnnnnnnnnnnnnnnnnnnnnnnnnnnnnnnnnnnnnnnnnnnnnnnnnnn
nnn nnnn nn nnnn nnnn nnnn nnnn nnnn nnnn nnnn nnnn nnnn nnnn nnnn nnnn nnnn nnnn nnnn nnnn nnnn nnnn nnnn nnnn nnnn nnnn nnnn nnnn nnnn nnnn nnnn nnnn nnnn nnnn nnnn nnnn nnnn nnnn

Tynnn npnnn .
y nnnn nn nnnn nn nnnn nnnn nnnn nnnn nnnn nnnn nnnn nnnn nnnn nnnn nnnn nnnn nnnn nnnn nnnn nnnn nnnn nnnn nnnn nnnn nnnn nnnn nnnn nnnn nnnn nnnn nnnn nnnn nnnn nnnn nnnn nnnn nnnn nnnn nn
1-
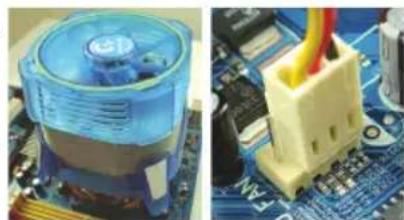
H
2
n nn nnnn nn nn nn nn nn nn nn nn nn nn nn nn nn nn nn nn nn nn nn nn nn nn nn nn nn nn nn nn nn nn nn nn nn nn nn nn nn nn nn nn nn nn nn nn nn nn nn nn nn nn nn nn nn nn nn nn nn nn nn nn nn nn nn nn nn nn nn nn nn nn nn nn nn nn nn nn nn nn nn nn nn nn nn nn nn nn nn nn nn nn nn nn nn nn nn nn nn nn nn nn
nD 90 nnnn nn
3
GIGABYTE wunwnn nn nnnn nn nnnn nn nnnn nn nnnn nn nnnn nn nnnn nn nnnn nn nnnn nn nnnn nn nnnn nn nnnn nn nnnn nn nnnn nn nnnn nn nnnn nn nnnn nn nnnn nn nnnn nn nnnn nn nnnn nn nnnn nn nnnn nn nnnn nn nnnn nn nnnn nn nannn nn nannn nn nannn nn nannn nn nannn nn nannn nn
peoennnneynnnn no neeepn nnnnnae nnnoe eannn

nni nnnn nn nnnn nnnn nnnn nnnn nnnn nnnn nnnn
GIGABYTE
n nn nnnn nn nnnn nn nnnn nn nnnn nn nnnn
- Jw ananrnnn nn n 3nnn nnnnn
n nn nnnn nn nn nn nn nn nn nn nn nn nn nn
nannnnnn
n nn nnnnnnnnnnnnnnnnnnnnnnnnnnnnnnnnnnnnn
TAYAN TAYAN
1
(nnnn nn nnnn nn nnnn) Intel nnnnn nnnn.
1
:A
n nn nnnnnnnnnnnnnnnnnnnnnnnnnnnnnnnnnnnnnnnnnnnnnnnnnnnnnnnnnnnnnnnnnnnnnnnnnnnnnnnnnnnnnnnnnnnnnnnnnnnnnnnnnnnnnnnnnnnnnnnnnnnnnnnnnnnnnnnnnnnnnnnnnnnnnnnnn
:Bao
Bn n n n n nn nnnnnnnnnnnnnnnnnnnnnnnnnnnnnnnnnnnnnnnnnnnnnnnnnnnnnnnnnnnnnnnnnnnnnnnnnnnnnnnnnnnnnnnnnnnnnnnnnnnnnnnnnnnnnnnnnnnnnnnnnnnnnnnnnnnn
n nn nnnnnnnnnnnnnnnnnnnnnnnnnnnnnnnnnnnnnnnnnnnnnnnnnnnnnnnnnnnnnnnnnnnnnnnnnnnnnnnnnnnnnnnnnnnnnnnnnnnnnnnnnnnnnnnnnnnnnnnnnnnnnnnnnnnnnnnnnnnnnnn
2-
ynnn nn nnnnnnnnnnnnnnnnnnnnnnnnnnnnnnnnnnnnnnnnnnnnnnnnnnnnnnnnnnnnnnnnnnnnnnnnnnnnnnnnnnnnnnnnnnnnnnnnnnnnnnnnnnnnnnnnnnnnnnn
Tnna nna
wnnnn nn nnnnnnnnnnnnnnnnnnnnnnnnnnnnnnnnnnnnnnnnnnnnnnnnnnnnnnnnnnnnnnnnnnnnnnnnnnnnnnnnnnnnnnnnnnnnnnnnnnnnnnnnnnn

- Installing a CPU and CPU cooler
- Installing an Intel CPU (skip this step if the motherboard has a built-in CPU)
- Installing an AMD CPU (skip this step if the motherboard has a built-in CPU)
- Installing the CPU cooler
- O Installing Memory
- Preparing the Case and Installing a Power Supply
- Step 4
- Installing the Motherboard
- Step 5
- Installing an Expansion Card
- Step 6
- Installing IDE and SATA Devices
- C
- Step 7
- Connecting Cables to Internal Connectors
- Step
- 8
- Connecting Peripherals
- YCTaHOBka CnCTeMHoN nIaTbI
- war 5
- YcTaHOBKa nJaTbI pacShnPeHn
- war 6
- YctaHOBka IDE- n SATA-yctpoiCTB
- Pokkquenne Kaene K BnytpenHnM pa3bemam
- PoiKIOueHne nepnOpepnHbIX yCTpOInCTB
- PacnoIoxKeHne pa3bEmOB Ha 3aDHe nHaHei
- D'97nn D'7nn nn
- Dn n
- 4
- nann oovnn
- 5
- SATA-IDE nnnn
- 6
- (nnnn nn nnnn nn nnnn nn nnnn nn
- Tynnn npnnn .
- 1-
- H
- 2
- nD 90 nnnn nn
- 3
- TAYAN TAYAN
- 1
- (nnnn nn nnnn nn nnnn) Intel nnnnn nnnn.
Brand : GIGABYTE
Model : GA8I915P DuoA
Category : Motherboard