Jumbo - Stroller Foppapedretti - Free user manual and instructions
Find the device manual for free Jumbo Foppapedretti in PDF.
| Product type | Stroller |
| Brand | Foppapedretti |
| Model | Jumbo |
| Recommended age | From birth to 4 years (up to 22 kg) |
| Maximum child weight | 22 kg |
| Product weight | Approximately 11.5 kg |
| Dimensions (unfolded) | Approximately 110 cm (L) x 60 cm (W) x 100 cm (H) |
| Dimensions (folded) | Approximately 80 cm (L) x 60 cm (W) x 35 cm (H) |
| Basket capacity | 2 kg (evenly distributed load) |
| Wheel type | Swivel front wheels (lockable), fixed rear wheels |
| Brake | Foot parking brake |
| Restraint system | 5-point harness with waist and crotch strap |
| Backrest adjustment | Reclining (multiple positions, horizontal position mandatory for -6 months) |
| Leg rest | Adjustable |
| Canopy | With Velcro flap, extendable (zipper) |
| Leg cover | Included, removable |
| Armrest | Removable, side opening possible |
| Rain cover | Optional, sold separately |
| Folding mechanism | Automatic folding (buttons), trolley mode transport |
| Maintenance | Cleaning with lukewarm water and neutral detergent; silicone lubrication of moving parts |
| Warranty | 12 months (standard warranty) |
Frequently Asked Questions - Jumbo Foppapedretti
User questions about Jumbo Foppapedretti
0 question about this device. Answer the ones you know or ask your own.
Ask a new question about this device
Download the instructions for your Stroller in PDF format for free! Find your manual Jumbo - Foppapedretti and take your electronic device back in hand. On this page are published all the documents necessary for the use of your device. Jumbo by Foppapedretti.
USER MANUAL Jumbo Foppapedretti
PUSHCHAIR - Assembly instructions
BUGGY - Montageanweisungen
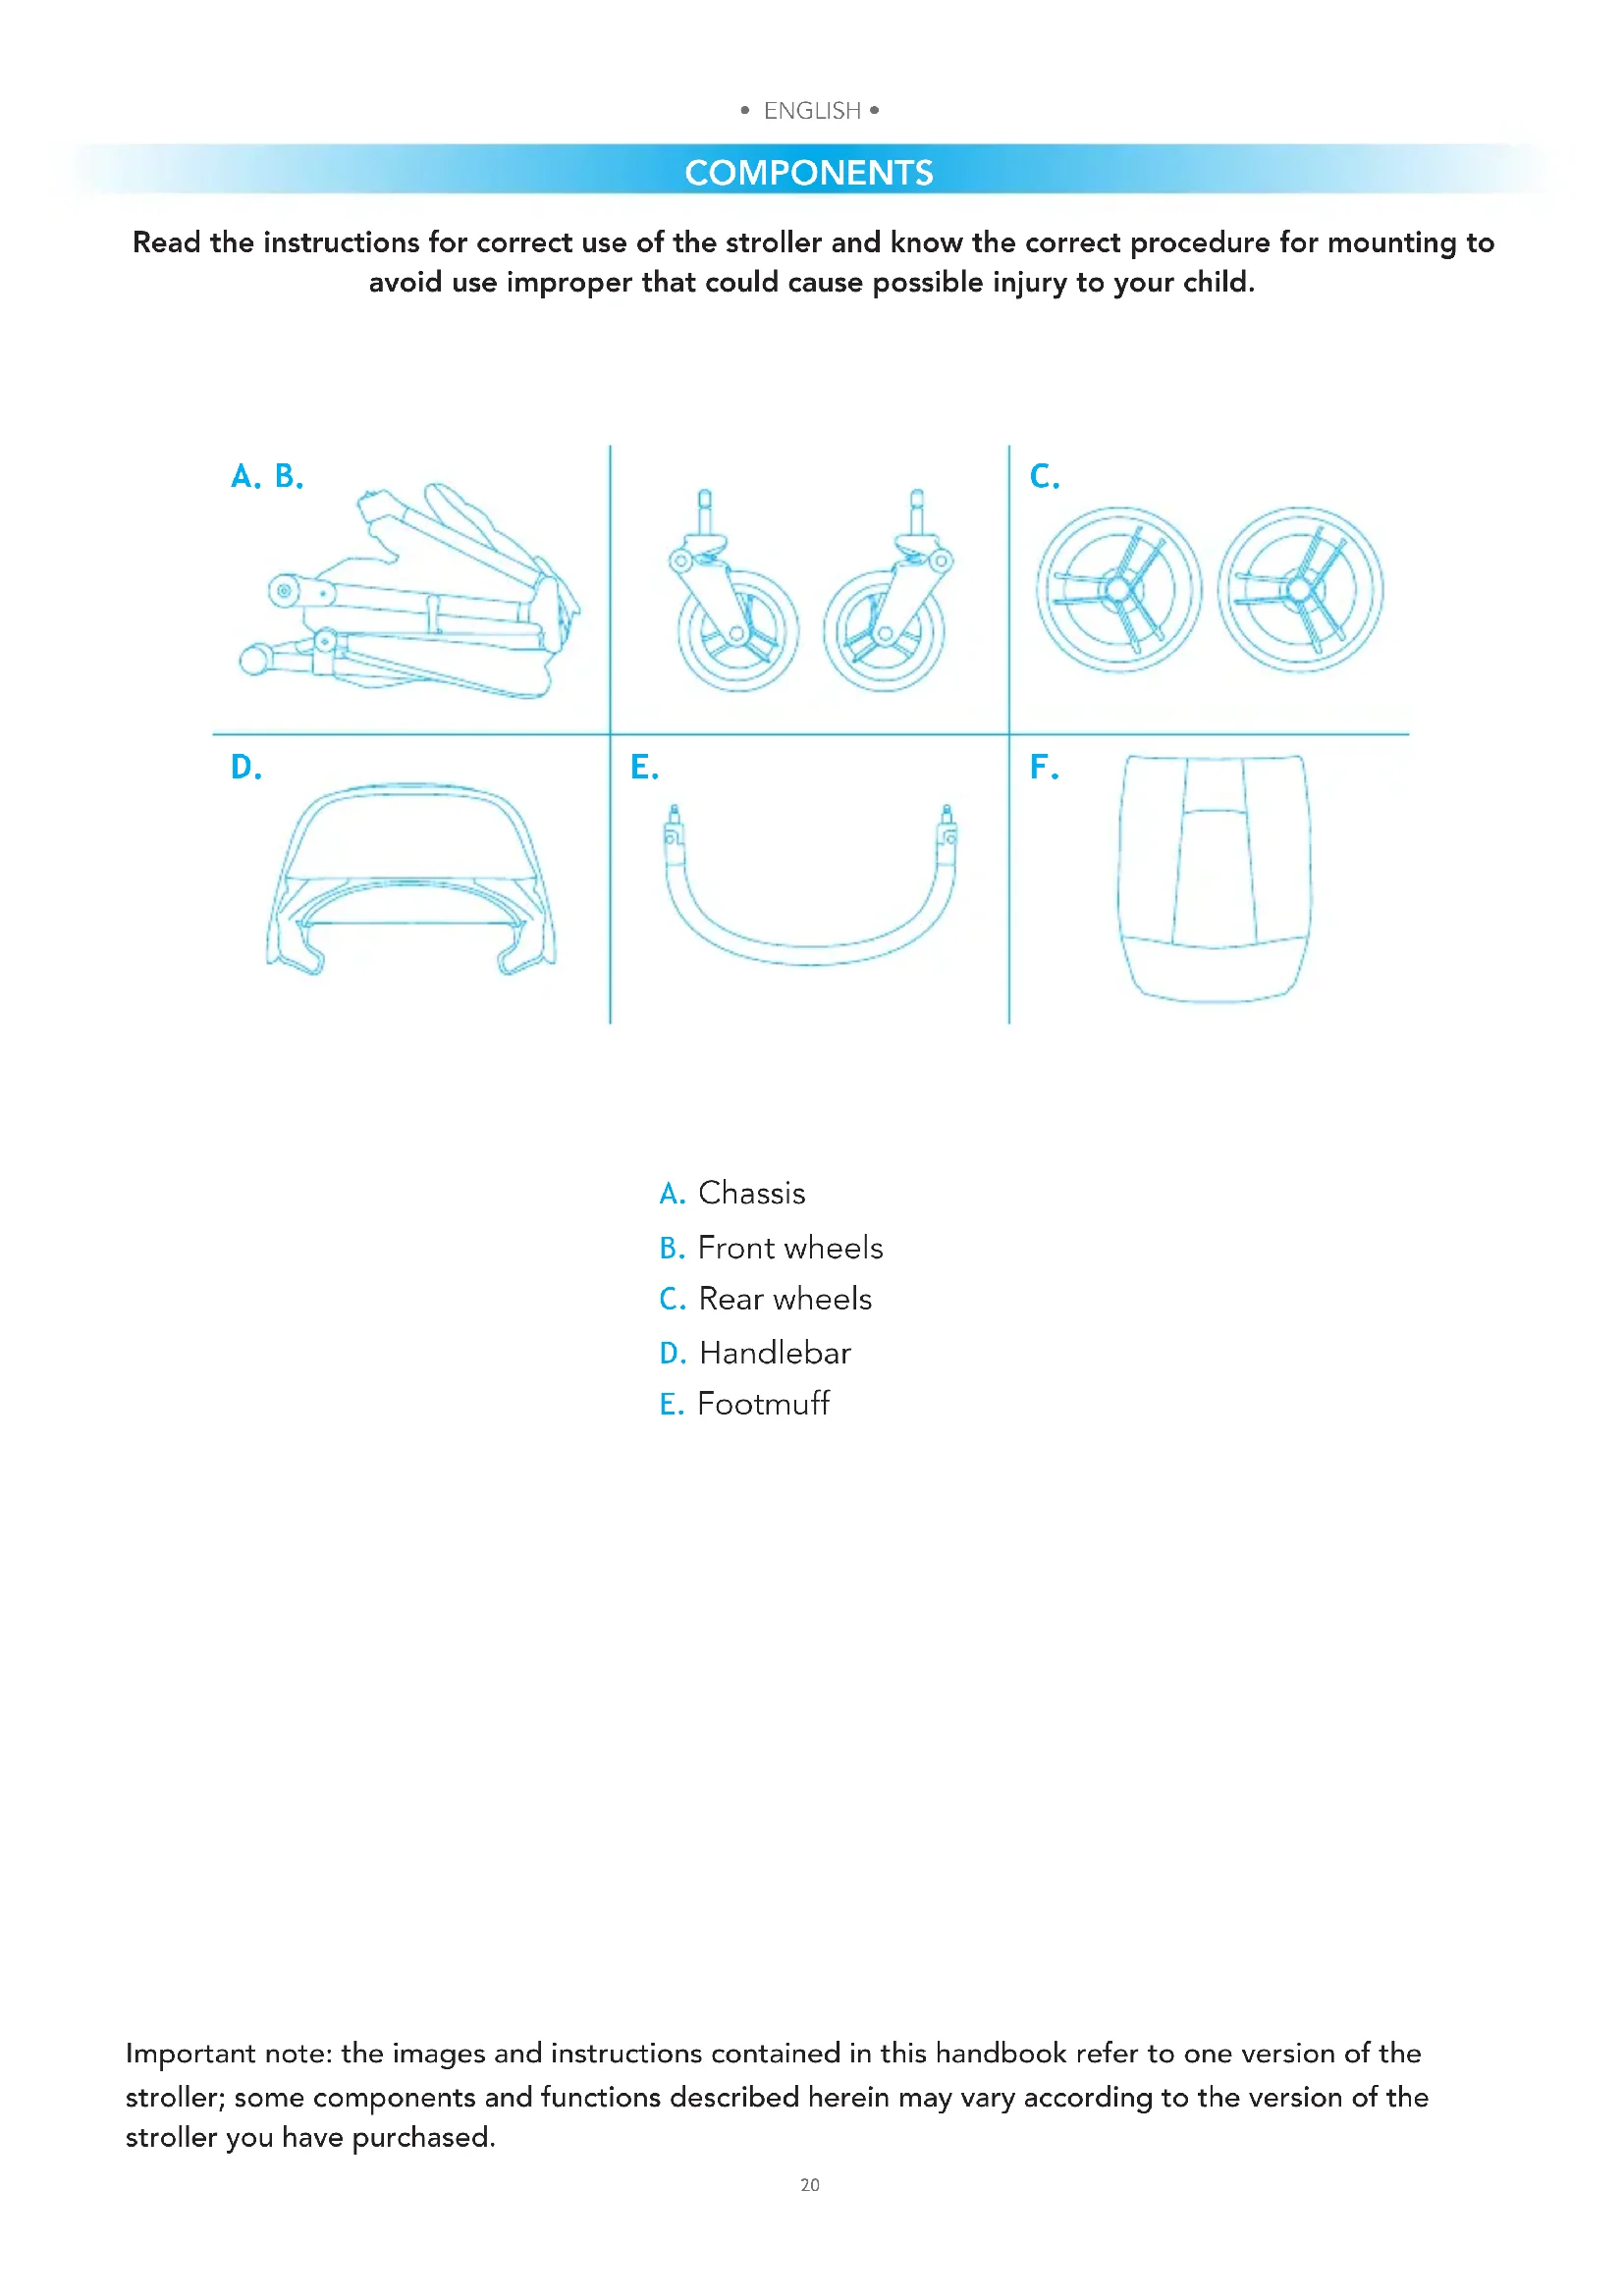
Read the instructions for correct use of the stroller and know the correct procedure for mounting to avoid use improper that could cause possible injury to your child.
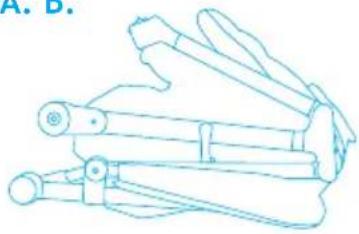
A. B.
C.

D.
E.
F.
A. Chassis
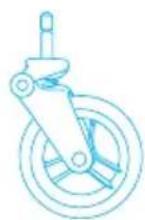
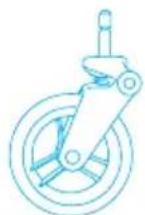
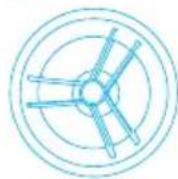
B. Front wheels
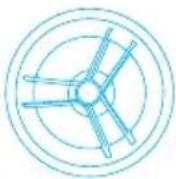
C. Rear wheels
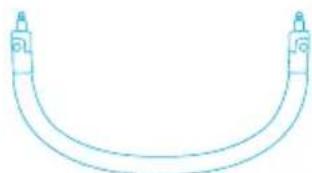
D. Handlebar
E. Footmuff
Important note: the images and instructions contained in this handbook refer to one version of the stroller; some components and functions described herein may vary according to the version of the stroller you have purchased.
WARNING
- IMPORTANT - READ CAREFULLY AND KEEP FOR FUTURE REFERENCE.
- WARNING: NEVER LEAVE THE CHILD UNATTENDED.
- WARNING: ENSURE THAT ALL THE LOCKING DEVICES ARE ENGAGED BEFORE USE.
- WARNING: TO AVOID INJURY, ENSURE THAT THE CHILD IS KEPT AWAY WHEN UNFOLDING AND FOLDING THIS PRODUCT.
- WARNING: DO NOT LET THE CHILD PLAY WITH THIS PRODUCT.
- WARNING: ALWAYS USE THE RESTRAINT SYSTEM.
- WARNING: THIS PRODUCT IS NOT SUITABLE FOR RUNNING OR SKATING.
- WARNING: A CHILD'S SAFETY IS YOUR RESPONSIBILITY.
- WARNING: Ensure that all the locking devices are engaged before use.
- WARNING: Always keep child in view when in stroller.
- WARNING: This product is suitable for child from birth up to 22kg or 4 years, whichever comes first.
- For babies under 6 months of age, only use the pushchair with the backrest fully reclined.
- For new born baby, do not recline seat back to sitting position (should be in full reclining position) as the baby doesn't have ability to control its head.
- WARNING: Use seat belt, avoid serious injury from falling or sliding out Always.
- Verify regularly that the safety belts are correctly fastened, not damaged or frayed.
- WARNING: Ensure your child wears a correctly fitted and adjusted harness at all times.
WARNING: Only one child for one stroller. - WARNING: This product is not suitable for running or skating.
- WARNING: Check that the seat unit attachment devices are correctly engaged before use.
- WARNING: Do not place or hang parcels, bags or accessories on any part of the stroller including the handle. Failure to comply with this warning may cause hazardous, unstable conditions to exist.
- WARNING: Always make sure that the brake is engaged when positioning the child into the stroller seat or taking him/her out.
- WARNING: Always use the parking brake, even when standing still for only a few moments.
- WARNING: When parking check if the brake is properly engaged by moving forward/ rearward the stroller.
- WARNING: Never fold the stroller, not even partly, when your child is in it.
- A basket is provided for the carriage of 2kg of goods, evenly distributed.
- The product must be assembled by an adult.
- Only the minder can operate the recline adjuster.
- Never use the stroller if any part of it is damaged or any component is missing.
- Do not allow children to play with or hang onto the stroller.
- This vehicle requires regular maintenance by the user.
- Do not use replacement parts or accessories other than those approved by the supplier as they may render the pushchair unsafe.
- Any load applied to the handle and/or the backrest and/or laterally to the product can compromise the stability of the product.
WARNING
- Do not overload this pushchair with additional children, goods or accessories. Bags and other items must not be hung from the handle.
- Ensure all users are familiar with the products operation. It should always open and fold easy. If it does not, do not force the mechanism - stop and read the instructions.
- Do not use your pushchair in a manner for which it is not designed.
- Do not allow your child to climb unassisted into, play with or hang onto your pushchair.
- Hold on to your pushchair when close to moving road vehicles or trains. Even with the brake on the draught from the vehicle may move the pushchair.
Exercise caution when mounting or dismounting a kerb. - Remove your children and fold the pushchair when ascending or descending stairs or escalators.
- Ensure the folded pushchair is stored away from children so that it does not fall and cause injury.
- Do not use replacement parts or accessories, e.g. child seats, bags, hooks, trays, rain covers etc. other than those approved by the supplier, they may render the pushchair unsafe.
- Never carry a second child on your pushchair.
- Do not use any platforms or attachments that allow transportation of the child.
- CARE: Your pushchair has been designed to meet safety standards and with correct use and maintenance will give many years of trouble free performance.
- The chassis is strong but will weaken should the back wheels be bumped down stairs or kerbs. continual impact will cause damage.
- If your child wears hard shoes these might damage the soft fabric.
- Storing a damp pushchair will encourage mildew to form.
- After exposure to damp conditions, dry off with a soft cloth, open fully and allow to dry thoroughly before storing.
- Store your pushchair in a dry, safe place.
- Do not leave the pushchair in sunlight for prolonged periods - some fabrics may fade.
RAINCOVER optional, sold separately
FITTING THE PUSHCHAIR RAINCOVER
Fit the raincover over the hood.
Fasten the edges at the back of the raincover using the Velcro tabs.
Attach the flaps with the press studs, to the chassis of the pushchair using the Velcro tabs.
WARNING!
- Use under an adult surveillance.
- When in use make sure the rain cover does not come in contact with the face of the child as it may cause suffocation
- Don't use the raincover on the product without a hood that can hold it.
- Never leave rain covers on indoors, in a hot atmosphere or near a heat source as the baby could overheat.
- Do not use on products other than those recommended by the Manufacturer.
- Hand wash at 30^ C.
ASSEMBLY -USE
UNFOLD THE STROLLER
CAUTION: make sure that the child, and any other children, are at a safe distance away when carrying out this step.
The moving parts of the stroller must not for any reason come into contact with the child's body.
Move the closing lever "a", as shown in the figure (fig.1).
Lift the handlebar until the chassis opens completely. A click will indicate that is has been fastened (fig.2).
Before using the stroller, make sure it is opened properly and the mechanisms are properly locked.
INSTALL FRONT WHEELS
Fitting the front wheels (fig. 3): A click will indicate that it is inserted correctly.
Check that both the wheels have been fastened correctly, if they are pulled downwards they should not be released.
Move lever "a" downward to block the swivel movement, and upward to activate the swivel movement (fig. 4).
Removing the front wheels (fig.5): Press the steel button "b" front wheel released.
REAR WHEELS
Insert the wheel pin in the hole, a click will indicate it has been fastened in place. Make sure that the wheel has been secured correctly, it should not come away when it is pulled outwards.
Removing the rear wheels (fig. 7): Press the metal lever "a" on the wheel hub and, at the same time, remove the wheel.
ASSEMBLING THE HOOD (fig. 9)
Assembly: Insert the front arch of the canopy into the support: you will hear a "click" when it is attached correctly. Repeat on both sides (fig. 10).
Insert the front arch of the canopy into the front hinge: you will hear a "click" when it is attached correctly. Repeat on both sides (fig. 11).
Fasten the Velcro flaps to the side and back of the seat (fig 12).
Fitting the bumper bar (fig. 13, 14): Lift up the two attachment points for the handlebar, a Click will indicate that they are locked. Line the bumper bar up with the slots and press on both sides. A click indicates that it has been fastened correctly.
Removing the bumper bar (fig. 15): press button "a" on both sides of the bumper bar and at the same time pull to remove it.
Opening the bumper bar on just one side (fig. 16): press button "a" on one side of the bumper bar and pull to open it like a gate.
FITTING THE FOOTMUFF (fig. 17, 18)
Insert the lower part of the footmuff on the seat of the chassis.
Fold the upper part of the footmuff around the bumper bar.
Secure the footmuff to the chassis of the pushchair using the press fasteners. Attach the press studs on both sides.
ASSEMBLY -USE
THE BACKREST CAN BE ADJUSTED FREELY
As picture 19, pull the belt with one hand, hold the backrest adjustment part with the other hand, then push it airwards, the backrest can be adjusted higher.
Pull the backrest adjustment part outward, then the backrest can be adjusted lower.
Please don't adjust the backrest when the child is in the stroller.
IMPORTANT: For babies under 6 months of age, the backrest must only be regulated in the fully reclined, horizontal position at all times (fig. 20).
PARKING BRAKE (fig. 21)
To apply the brake: Press the brake lever, push the pushchair forward gently to ensure the brake has been applied correctly.
To release the brake: lift the lever.
FOOTREST ADJUSTMENT (fig. 22)
Press the lever "A", under the footrest, and adjust the footrest to the chosen position.
ADJUSTING THE CANOPY (fig. 23-24)
Extend the canopy by unzipping as needed to protect baby from the sun.
NOTE: babies' skin is very delicate. NEVER leave baby under direct sunlight. Always make sure that the hood has been adjusted correctly.
SAFETY HARNESS
Apply the brake before placing your baby in the pushchair.
Release the buckle (fig. 27): press button "a" and remove the components.
Fasten the buckle (fig. 28): by inserting part A in part B, a click will indicate that it has been fastened correctly.
WARNING: Never use the crutch strap without the lap belt.
WARNING: for babies under 6 months of age, the backrest must be only in the fully reclined, horizontal position at all times, seat reaward facing (fig. 20).
WARNING: If baby is less than 6 months old, the harness belts must first be inserted through the lower slots and then through the rings of the harness regulating buckle (fig. 25, 26).
CAUTION: make sure that the child, and any other children, are at a safe distance away when carrying out this step.
The moving parts of the stroller must not for any reason come into contact with the child's body.
- Move button "a" to the left, as shown in the figure, while pressing button "b" at the same time (fig.30).
- The stroller will close automatically (fig. 31).
- Make sure it is closed properly (fig. 32).
- Ensure the swivel front wheels have been locked (fig. 33).
- The stroller can be wheeled along luggage-style when closed (fig. 34).
- Lock the stroller in the closed position with the locking device located on the side. This operation prevents the accidental opening of the stroller (fig. 32).
DISASSEMBLY THE HOOD
Unfasten the Velcro flaps and release the back lateral side of the hood from the fastener on the handle to remove the hood (fig. 35-38).
With a flat-tipped tool, pry open and slightly lift up tab "1" on the front canopy support and, at the same time, remove the front arch (fig. 36). Repeat on both sides.
With a flat-tipped tool, pry open and slightly lift up tab "1" on the rear canopy support and, at the same time, remove the rear arch (fig. 37). Repeat on both sides.
STORAGE BASKET
Disassembly: unhook the 3 rear press studs as shown in fig. 45.
Remove the rear harness from the buckles as shown in fig. 46.
Unscrew the screws in the lower part of the footrest fig. 47
Assembly: repeat this process in reverse order.
PRODUCT MAINTENANCE
The user is required to clean and maintain the product regularly.
The cleaning and maintenance of the stroller must only be carried out by an adult.
CLEANING
- The fabric may be cleaned by sponging lightly using warm water and a mild detergent.
- Follow the instructions shown on the washing label of the product.
- Clean the plastic parts regularly with a damp cloth.
- When the stroller has been in contact with water, dry the metal parts to prevent rusting.
MAINTENANCE
- Lubricate the moving parts only when strictly necessary, using a silicone-based lubricant.
- Check the condition of the wheels and movable parts regularly.
- Prevent dust, dirt and sand from infiltrating the wheels and moving parts.
- Stowing the stroller when wet can cause mould.
- If the stroller is exposed to moisture or gets wet, dry it with a soft cloth, open the stroller fully and let it dry before storage.
- Keep your stroller in a dry, safe place.
- Carry out a careful inspection to check
The contents of this document as stated below will come into effect as from 01.01.2005 and replace, on every account and in full, any previous message referring to the guarantee provided by Foppa Pedretti S.p.A.
FORMAL GUARANTEE
Foppa Pedretti S.p.A. the head office of which is located at n. 11 Via Volta, Grumello del Monte (Italy), guarantees directly to the Consumer that this brand new product is free of faults with regard to the materials, design and manufacture and that it complies with the characteristics as declared by the manufacturer.
This formal guarantee is valid in all Member Countries of the European Union and it neither excludes nor limits the Consumer's rights in accordance with mandatory measures provided for by the law with regard to the Retailer of the Product.
To take advantage of this formal guarantee, the Consumer must return the faulty product to the Retailer, presenting to the same the proof of purchase of the Product which must clearly show the Retailer's address, the date of purchase of the Product with the Retailer's stamp and signature and an indication of the Product itself or, alternatively, the receipt which must not have been altered and which must clearly show the same information as that referred to above. The formal guarantee is valid for twelve (12) months from the date of purchase of the Product. During this period, Foppa Pedretti S.p.A. will repair or replace the faulty product, at its own discretion. The formal guarantee is granted to the end buyer of the Product (Consumer) and it neither excludes nor limits the mandatory rights of the Consumer as provided for by the law and/or the rights that the Consumer may have with regard to the Dealer/Retailer of the Product.
EXCLUSIONS TO THE FORMAL GUARANTEE.
The formal guarantee is excluded in the case of damage caused to the Product for the following reasons: if the product is used in a way that does not comply with the information contained in the use and assembly instruction sheet, if the product is knocked or dropped, if the Product is exposed to humidity or extreme heat or environmental conditions, or to sudden changes in the same, corrosion, oxidation, unauthorized alterations or repairs to the Product, repairs using unauthorised spare parts, improper use, improper maintenance or failure to carry out the same, improper maintenance compared to the information given on the use and assembly instruction sheet, incorrect assembly, accidents, damage caused by food or drink, damage caused by chemical products, cases of force majeure.
In any case, Foppa Pedretti S.p.A. declines all responsibility for damage caused to persons or to property, other than the Product, when such damage is caused by a failure to comply with the instructions/advice/warnings cont a ined in the manua I or, alternatively, in the use and assembly instruction sheet provided with each Product for the owner/user. (Purely as an example, in the case of a cot: "Check your baby constantly. Make sure that the sheets and blankets do not cover the baby's head...").
Furthermore, Foppa Pedretti S.p.A. declines all responsibility for damage to persons and to property when the breakage of its products is due to a deterioration in the components of the Product that are subject to wear. All the components of the Product made of plastic are considered to be components subject to wear.
COMPOSANTS
EXCLUSIONS DE LA GARANTIE CONVENTIONNELLE.
TONOOTHsH KOYKOYAAZ (E1K.9)
ToioeTnon: EoxwpnoTe to pnpovtio otnpiyma (to) tnc koukoulaoc otn Baon. 'Eva klik unodekvuei oti n aoqalion eivie oomega (10).
ToioeTeTo mpoov too tnc Koukoulaoc oynu pooivn appwoon, 0a akouste i eva klik nou onmuivei otexikoumpwoei oomega. Enavaabete tn diaikosaia kai ano tic duo nleupec (EK.11).
SYNTHPHH TOY IPOIONTO
O xpnoTns npenla kathetai kai va ouvtnpia taktka to npoiov.
Oi epyaiec kaapioou kai ouvtnponctou kapotoiu npetie va npaymuatoiouvtaa okaia ano evnlaika.
KAΘΑPIΣΜΟΣ
I P E A O C T E P E X E H N I
XpaHnte BaUy nporylouHyIO KOJACKy B cyxOM HaJeKHom MecTe.
He octablan Te nporylouHyo KolaCky HadoIro nOd BO3deNCTBHeM npAmbix cOnHeHbIX Lyuei - HeKOTopbie TkaH NMOrT BbiUBeCTn.
DOXDEBnK onu, npoTaetc oTaeIbHo
MOHTAX KANOTA OT DOXDA
HaTeb KaNOT OToDoxJa Ha KaIIOwoH.
3akpenntb kpa cJeHToN-lnnykoB 3aDHeuactn KaNoTa OTdoKJa.
KhoNkamn npHcTeHnTe Kpa, B BepxHeu cactn KaNoTa ot DoJxJa 3a CtpyKtpy npOryLooHOn KOJIaCKn.
NPEyPPEXdEHHa!
- Pa3pe7aetcHcNoIb30BaHHe TOnbKO NpIpcMOTpOM B3pOcLOrO LInca.
CleIte 3a Tem, TTo6bI BO BpeMn HcNoIb3OBAHnA DoJKeBnK He KacaIcra Iuca pe6eHka, NocKoJIbKy OH MOxET CTAb npUHHoYyUWeHn.
He nCnoB3OBaTb DoXKeBnK Ha H3DeJInn 6e3 KaIIOoHa, KOToPbI erO ydepKINBaET. - HNKoRda He octaBnaIte pe6eHka B KOJIaCKe C yCTaHOBJIeHHbIM KaOTOM OT DoXdI Doma, INI B OtaJIINBaEMOM NOMEseHnN I BO3Je IcTOUHNKOB TeIIa, pe6eHOK MOKeT CInuKOM nepepeTbcra.
He nCnoJIb3OBaTb Ha npIyInx I3dEJIINx, He peKOMeHIOBaHHbIX npOIN3BOIDTeJIeM. - Puchna CTnnpa npn 30^
MOHTAK - INCIOAb3OBAHNE
PACKJIADbIBAHNE IPOrIyIoUHOn KOJIaCKN
BHIMAHHE: npn BbinoJHHeHH DaHHo Jepaun cJeIte 3a Tem, TTo6bI BaW pe6eHok n dpyrHe Detn (ecn npncytCTByOT) OCTaBaJIncb Ha ONpeJeHHom paccTOrHnn.
Двикшеся DeТаПИ KОЛСКИ ИВ KOЕМ CLYУАЕ He ДOLЖНБI COРпИКасТСС TЕЛOM pe6eHka.
OTeHnTb pbIar-3aIeJIky "a", KaK noka3aHo Ha pncyHke (pnc. 1).
IodHb pyKoTky do noHoro oKpbTnpaMbI. UeJyOK yKa3bBaet Ha npaBnBHO BblnoHeHoe 3auePJIeHne.
IOnHnMnte cnndHe do IeJUKA (pnc. 2).
IpeNd NcnoJb3OBaHnem CJeDyET y6eDntbcra, YTO npOryNoUHa KOLrCKa NOJIHOCTbIO pa3IoXeHa, a MexaHN3MbI npaBnJbHo 3aΦNKcnpoBaHbl.
MOHTAXIPEdHIX KOJIc
MOnTaX nepeDnHex Kolec (pnc. 3): BCTaBbTe wTnΦT Koneca Bo Btynky no ueHTpy dePkataeKoneca.
Pn npabHbHom coeHHenn npo3ByuHT ueJyok.
PpOBepbTe HaedKHOCTb 3aKpenJIeHnO60nx KOJIc: NotAHyB BHN3, OHn He DOJIxHbI CHImaTbcra.
YTo6bl 3a6IoknpoBaTb NOBOPOTHe DBHXeHne, nepemecHTe pbIar "a" B HAnpaBLeHN BBepx; YTo6bl AKTHBnPOBaTb NOBOPOTHe DBHXeHne, nepemecHTe erO BHN3 (pnc. 4).
TEXHINUeCKOE OBCJYXUBAHNE
Cma3bIbTaB DnKyuIeScr DeTaN CJeDyET TOnbKO B CnyaE KpaHHe HEO6XoDMOCTH; PpN 3TOM NOJb3yIteCb Cma3KoHa CNIIKHOBOO OCHOBe.
- Perylarpno npoBepaIte coCTOHNHe KOleN n DnKxxCsJeTaJIeN.
He donyckaIte nonadaHn IbIIN, rpr3n n necka B KOleca N DBNKyuuece deTaII.
- CknaIbIbAHne BlaXHoi KOJIaCKn MOKeT npNBecT K o6pa3OBAHIO nIeCEH.
- EcIn KOLaCKa 6bla nOdBeprHyTa BO3dEiCTBnIO BlaIg Nl6o HAMOKla, BbITpIte ee cyXoTkAhbIO, NOJIHOCTbIO paKPOITE, daIte KOJAcKe BblCOxHyTB N IINb 3aTeM y6ePHTe ee.
XpaHnte KOLaCKy B cyXOM n 6e3oNaChOM MeCTe.
TAPAHNTINHbIEOB3ATEbCTBA
Hnkeyka3aHHbIe nIOJKeHnB BCTyNAOT B DeiCTBne c 01.01.2005 r. n noJIHoCTbIO 3aMeHnT JIO6yIO dpyryIO INΦOpMaUNO, qTO Kacaetra rapaHTIN, npedocTaBnaEmoK KomnHneF Foppa Pedretti S.p.A., ABnAcb KOMnAHnn.
TAPAHINHbIEOB3ATEJIbCTBA
Foppa Pedretti S.p.A., OΦιημαλβHo
3apernctpnpoBAHno no aDpecy: Grumello del Monte (Italia) Via Volta 11, kotopar rapaHTnpuyet HenocpeCTBeHHO IOTpe6nteJIIO, yTo DaHHoe n3dJIne, TOLbKO yTO BbIpyeHHoe C a6pnK, He IMeET DeEeKTOB HN MaTePnaJIOB, HN npoeKTIPOBaHnI, HN pON3BOcTBeHHbIX, N COOTBeTCTByET 3aRbIeHHbIM XapaKTepNCtIKaM.
. Hactoia rapaHTna DeiCTBnTeJIbHa BO BcexCtpaHax- YHeHX E3C n He NCKIIOyAE t HeOrpaHnUHbAe IpaBa POnb3OBAteJIa, B COOTBeTCTBnC 3aKHOJaTeJIbCTBOM, perJaMeHTnpYIOuHMB3aHMOOTHOWeHnC pOn3BOJnTeJem N3dEJIa.
YTo6bI BOCNoJIb3OBAbCra DaHHoI rapaHTneH,
IpTe6nteBdoJKeH npHeCTn DeΦeKTHoe N3dEInne
PpOaBuNy,ppeOCTaBnBDOkUMeHT,yOcTOBepAIOuNn o pnpO6PeTeHNn N3dEIny, c neaTbIO n POnnCbIO
PpOaBaN u Yka3aHHeM Ha3BaHn y N3dEIny nII,
KaK aJIbTePHaTNaB, fNCKaJIbHbI KaccOBbI Yek,
6e3 KaKnx-ll6o N3MeHEnn, n3 KOtOporo YETKO
BnDHa BcR yka3aHHa NO 3TORO INHOpMaun.
rapaHTnI NMeet cpoK DeiCTBnRA DBeHaAduatb (12)
MeCAUEB C DaTbI pnpO6PeTeHNn N3dEIny. B TeueHne
Bblweyka3aHHOrO cPoKa KOMnaHn Foppa Pedretti S.p.A. O63yETcR OTpeMOHTnpoBaT bINn 3AmEHtB,
Ha CBOI Bbl6Op, DeΦeKTHoe N3dEInye. rapaHTnI
ppeOCTaBnAE TcKHeCHOMy POKyNaTeLIO N3dEIny
(Plb3OBaTeLIO) n He NcklIoUaET n He orpaHnUbaET
npab DaHHORO POnb3OBaTeNIA, ppeDyCMOTpeHHbIX
DeiCTByIOUIM 3akOHODaTeNbCTBOM n/INn npaBAMn
P0lb3OBaTeN, Ha ppeDbAbeHne CBOx npAB B
aDpec DInlepa/ PpOaBa U3dEIny.
HE NOKPbIBAOTCRAPAHTNEI.
. TapaHTne He NOKpbIbAeTc8 yUepe6, CByaHHbIc HcNoJIb3OBaHHe M3dEInra, BO3HNKUnn NO cLeyIOUmm npuHnAM: HnPaBnIbHOe HcNoJIb3OBaHne, He COOTBeTCTBYIOoee yKa3aHnMa, CoDEpKaaUMCRA BO BKlaDbIiue C INHCTpyKUmaM IIO MOHTaJy U KcNlYaTaUIN, YdApbl I NaJeHnR I3dEInra, I3dEInne POnBepraIOscB BO3DeIcTBIO BLnJXOCTn IIN 3KCTpeMaJIbHbIM TeMnepaTypam I He6LaoropnraTHbIM ycIOBnM OkpyKaHOse CpeDc I NocToHHoI CMeHOI 3TNX YcIOBn, KoppO3nn I OKncJIeHIO, a TaKxhe HecAHKUHOHPOBaHHOMy peMOHTy IIN MoDfNkauIN, I3dEInne HcNoJIb3OBaIOcB He No Ha3NaYeHnIO nII IN He npaBnIbHO, 6e3 co6JIouDeHnry Yka3aHn B INHCTpyKUnx IO MOHTaJy I KcNlYaTaUIN, npn IILOXOM YXoJe IINI OTCyTCTBnT TaKOBTO, peMOHTe C INcNoJIb3OBaHHeM HeOprInHaJIbHbIX 3anJaCTei, IIO npuHnHe HnpaBnIbHO n6OpKn, abapnn, BO3dEInCTBnI pNUs nIIN HAnNTKOB, XmMHueCKNX BeueCTB, a TaKxteBCJeIDCTBne Ype3BbIuaHbIX o6ctOaTeJIbCTB.
BJIIO6OMcIyue, KOMnHnFoppa Pedretti S.p.A. He HecET HnKaKoI OTBeTCTBeHHocTH 3a yUeep6, npuHHeHHbI JIOdAM NII ppeMeTaM,OTINHbIM OT I3deJIIn, NO npuHHe HecO6JIOpDeHnY kA3AHn / npedncaHn / npedynpexKeHn, cOepKaunxCBA DAHHOMpyKOBoDCTBE NII, KaK aIbTePHaTnBa, B "NHCtpyKcHnNo MOHTaKy n EKcnLyaTauH", coNPoBOXdaIoUeJ Kaxdoe N3deJIne n npedHa3NaeHHoe Ira BlaJeNbua/ noIb3OBaTeJRA. (HanpIMep, YnCTO B KauEcTBe npimepa, B Clyuae DeTCKo KPOBaTK: "HnkOrJa He ocTabIyTe 6e3 npincMOtpa pe6Ehka. KOHTpOJIpyTe, YTObl roIoba pe6Ehka He OKa3aJIacb NOKpbITOn IpocTBHeI OJIIO nOJeIOM...").
KomnaHn Foppa Pedretti S.p.A., KpOme npooyero, He Hecet HNKaKoI OTBeTCTBHeHocTn 3a yUeP6, npuHHennbI JIOdAM NIN NmUyEcTBy, ecIn POLOMka eepnoDyKcN Cbra3aHa c pa3pyWeHem KOMNoHErTOB H3deJn, NOBepraEmbIX HopMaJIbHOMy n3HOcy. KOmNoHETamN, POnDBePraHouIMnCer HOpMaJIbHOMy n3HOcy, CHTaIOTcBCE nlaCTMaCCOBbie KOMNoHETbl sN3deJn.