RESTORE SC6100A - Vacuum Cleaner Sanitaire - Free user manual and instructions
Find the device manual for free RESTORE SC6100A Sanitaire in PDF.
| Product Type | Commercial Upright Carpet Cleaner |
| Brand | Sanitaire |
| Model | RESTORE SC6100A |
| Power Supply | 120 V, 60 Hz |
| Power Cord | 3-prong grounded |
| Usage | Indoor, commercial use |
| Brush Type | DirtLifter PowerBrush (cylindrical brush) |
| Clean Water Tank | Removable with fill line |
| Dirty Water Tank | Removable with float and red valve |
| Spray Trigger | Integrated into handle |
| Power Switch | On/Off |
| Adjustable Handle | With release lever and notch |
| Flow Indicator | Present on tank |
| Brush Circuit Breaker | Automatic shut-off in case of obstruction |
| Recommended Cleaning Solution | Original Sanitaire Ultimate |
| Post-Use Maintenance | Drain and rinse tanks |
| Belt Replacement | Possible, procedure described in manual |
| Brush Replacement | Possible, no special tools needed |
| Debris Filter (base) | Yes, removable for cleaning |
| Top Filter (body) | Yes, removable for cleaning |
| Warranty | 1 year limited |
| Customer Service | 1-800-800-8975 (Sanitaire) |
Frequently Asked Questions - RESTORE SC6100A Sanitaire
User questions about RESTORE SC6100A Sanitaire
0 question about this device. Answer the ones you know or ask your own.
Ask a new question about this device
Download the instructions for your Vacuum Cleaner in PDF format for free! Find your manual RESTORE SC6100A - Sanitaire and take your electronic device back in hand. On this page are published all the documents necessary for the use of your device. RESTORE SC6100A by Sanitaire.
USER MANUAL RESTORE SC6100A Sanitaire
6100 Series Commercial Upright Extractor
2.....Safety Instructions
3......Product View
3.....Assembly
4-5....Operations
6-7....Maintenance and Care
8.....Troubleshooting
9......Warranty
9.....Customer Service
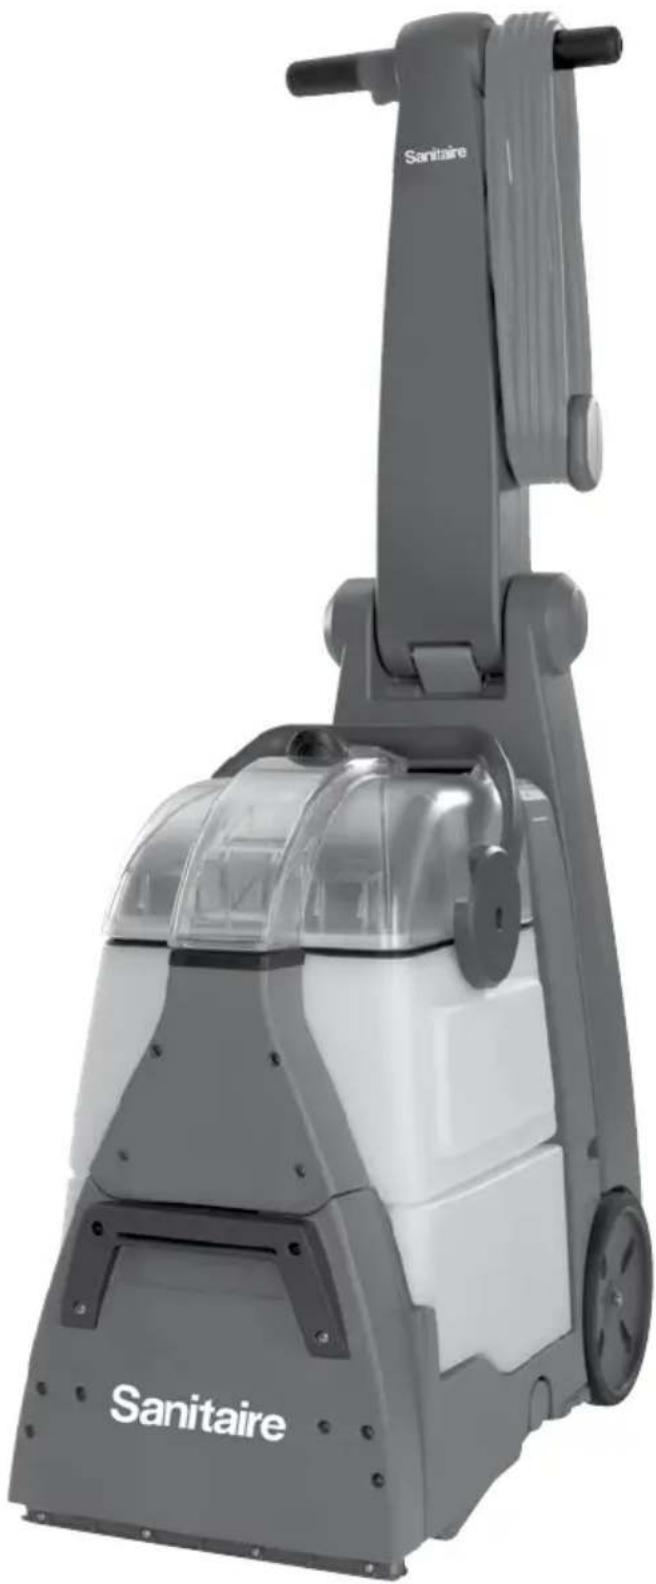
natural_image
Exterior view of a Sanitaire vacuum cleaner with gray and white casing (no text or symbols visible beyond branding)IMPORTANT SAFETY INSTRUCTIONS
READ ALL INSTRUCTIONS BEFORE USING YOUR COMMERCIAL DEEP CLEANER.
When using an electrical appliance, basic precautions should be observed, including the following:
WARNING
TO REDUCE THE RISK OF FIRE, ELECTRIC SHOCK OR INJURY:
»Do not immerse.
»Use only on surfaces moistened by cleaning process.
»Always connect to a properly grounded outlet.
»See grounding instructions.
»Unplug from outlet when not in use and before conducting maintenance or troubleshooting.
»Do not leave machine when it is plugged in.
»Do not service machine when it is plugged in.
»Do not use with damaged cord or plug.
»If appliance is not working as it should, has been dropped, damaged, left outdoors, or dropped into water, have it repaired at an authorized service center.
»Use indoors only.
»Do not pull or carry by cord, use cord as a handle, close door on cord, pull cord around sharp corners or edges, run appliance over cord, or expose cord to heated surfaces.
»Unplug by grasping the plug, not the cord.
»Do not handle plug or appliance with wet hands.
»Do not put any object into appliance openings, use with blocked opening or restrict air flow.
»Do not expose hair, loose clothing, fingers, or other body parts to openings or moving parts.
»Do not pick up hot or burning objects.
»Do not pick up flammable or combustible materials (lighter fluid, gasoline, kerosene, etc.) or use in the presence of explosive liquids or vapor.
» Do not use appliance in an enclosed space filled with vapors given off by oil-based paint, paint thinner, some moth-proofing substances, flammable dust, or other explosive or toxic vapors.
»Do not pick up toxic material (chlorine bleach, ammonia, drain cleaner, gasoline, etc.).
»Do not modify the 3-prong grounded plug.
»Do not allow to be used as a toy.
»Do not use for any purpose other than described in this user guide.
»Do not unplug by pulling on the cord.
»Use only manufacturer's recommended attachments.
»Always install float before any wet pick-up operation.
»Use only cleaning products formulated by Sanitairéfor use in this appliance to prevent internal component damage. See the cleaning fluid section of this guide.
»Keep openings free of dust, lint, hair, etc.
»Do not point attachment nozzle at people or animals
»Keep appliance on a level surface.
»Do not use without intake screen filter in place.
»Turn OFF all controls before unplugging.
»Unplug before attaching the Upholstery Tool.
»Be extra careful when cleaning stairs.
»Close attention is necessary when used by or near children.
SAVE THESE INSTRUCTIONS
THIS MODEL IS FOR COMMERCIAL USE.
WARNING
Improper connection of the equipment-grounding conductor can result in a risk of electrical shock. Check with a qualified electrician or service person if you aren't sure if the outlet is properly grounded. DO NOT MODIFY THE PLUG. If it will not fit the outlet, have a proper outlet installed by a qualified electrician. This appliance is designed for use on a nominal 120-volt circuit, and has a grounding attachment plug that looks like the plug in the drawing to the right. Make certain that the appliance is connected to an outlet having the same configuration as the plug. No plug adapter should be used with this appliance.
GROUNDING INSTRUCTIONS
This appliance must be connected to a grounded wiring system. If it should malfunction or break down, grounding provides a safe path of least resistance for electrical current, reducing the
risk of electrical shock. The cord for this appliance has an equipment-grounding conductor and a grounding plug. It must only be plugged into an outlet that is properly installed and grounded in accordance with all local codes and ordinances.

text_image
Grounded Outlets Grounding Pin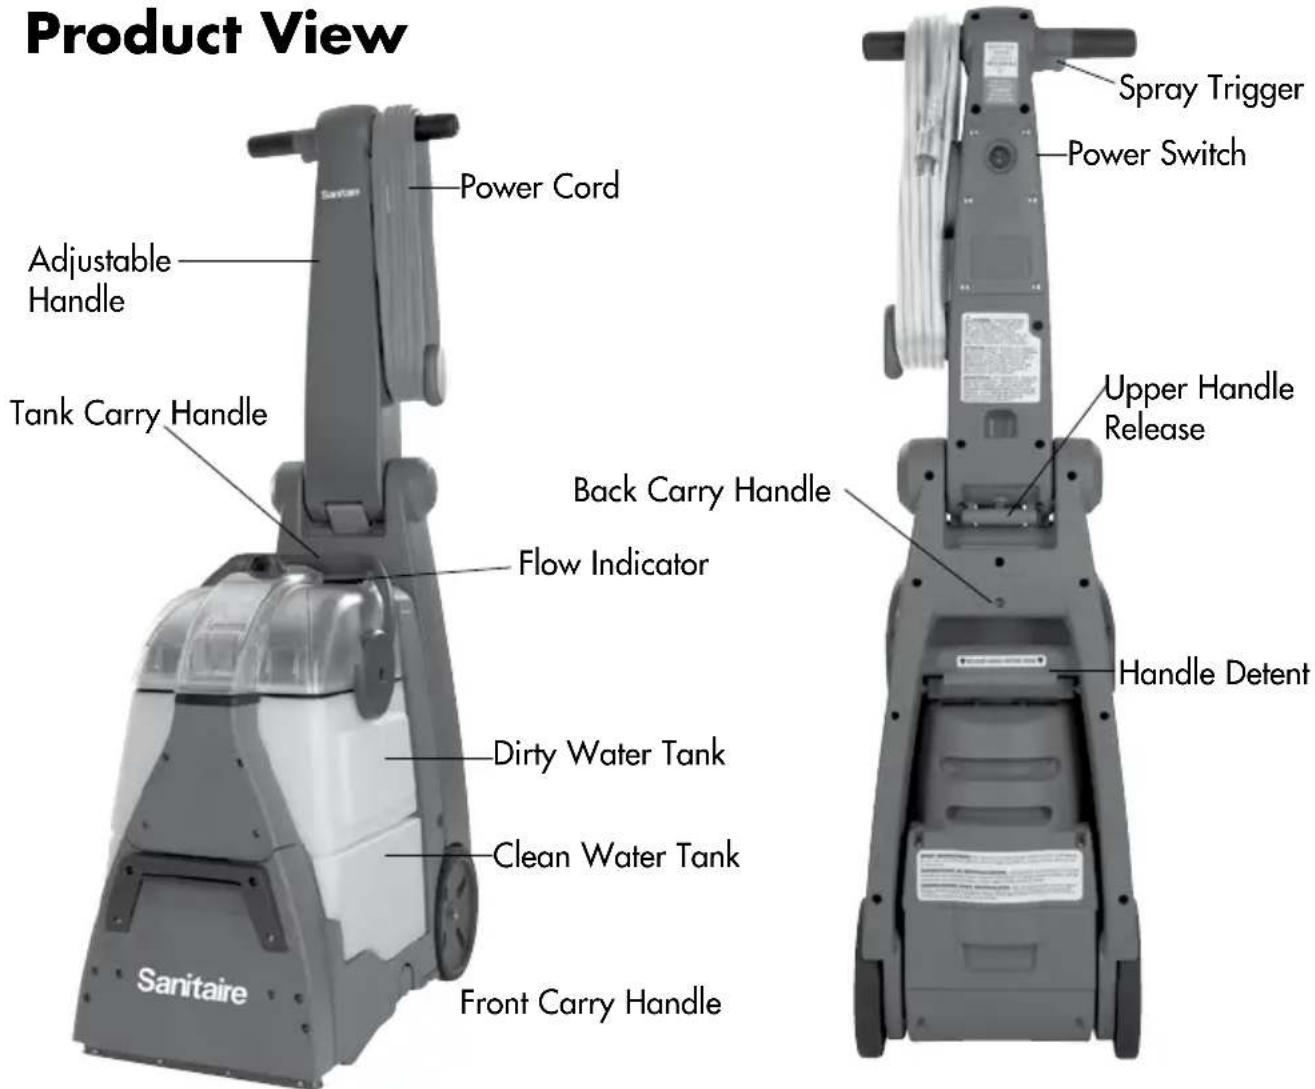
text_image
Product View Power Cord Adjustable Handle Tank Carry Handle Sanitaire Back Carry Handle Flow Indicator Dirty Water Tank Clean Water Tank Front Carry Handle Spray Trigger Power Switch Upper Handle Release Handle DetentAssembly
Your Sanitaire Commercial Carpet Extractor - SC6100A comes with no assembly required!
Cleaning Formula
Keep plenty of genuine Sanitaire® Ultimate Carpet Cleaner Formula on hand so you can clean and protect whenever it fits your schedule. Always use genuine Sanitaire deep cleaning formulas. Non-Sanitaire cleaning solutions may harm the machine and may void the warranty.

text_image
PRETREAT Pretreat spots and stains to improve carpet cleaning performance Ultimate Stain Remover Ulti 30-second stain removal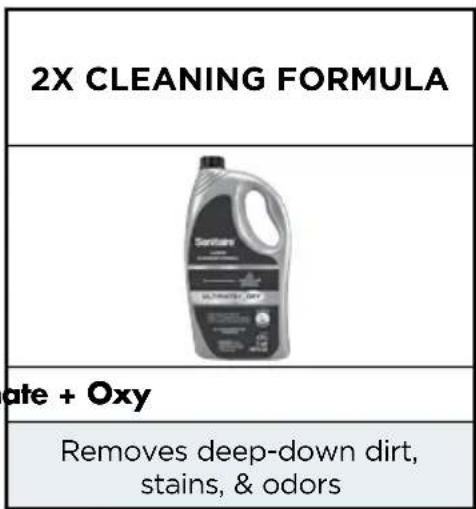
text_image
2X CLEANING FORMULA Santerra aate + Oxy Removes deep-down dirt, stains, & odorsOperations
Before You Clean
- Move furniture to another area if cleaning the entire room (optional).
- Vacuum area thoroughly before deep cleaning.
- Plan your cleaning route to leave an exit path. It is best to begin cleaning in the corner farthest from your exit.
Carpet Cleaning
- Remove Dirty Water Tank. Pull Dirty Water Tank handle to upright position and lift up to remove Dirty Water Tank.
- Lift Clean Water Tank from the base of machine.
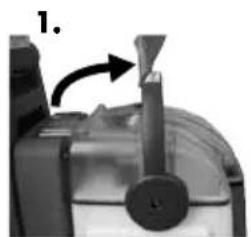
A. Unscrew cap on top of the Clean Water Tank. Fill tank to FILL line with clean, hot tap water.
B. Measure Sanitaire® formula using cap on tank. Fill cap to line twice for each full tank of water. Always use genuine Sanitaire formulas to maximize cleaning and for the safety of your machine
C. Screw cap back onto Clean Water Tank and place tank onto base of the machine.
- Replace Dirty Water Tank securely on top of the Clean Water Tank and push handle back to lock into place.
- Plug into a proper outlet and turn the Power Switch to the ON (1) position.
- Recline handle by pushing down on the green lever on the back of the machine while pulling back.
- Cleaning strokes. While pressing the trigger, make one slow forward wet pass and another back. Let the formula and DirtLifter® PowerBrushes do the work for you.
Note: Your machine is equipped with a circuit breaker that will automatically shut off the brush if a large or loose object is caught in the Brush Roll. If that happens, be sure to unplug your machine, remove the foreign object and then plug machine in to reset the circuit breaker.
ATTENTION
Some Berber carpets have a tendency to fuzz with wear. Repeated strokes in the same area with an ordinary vacuum or deep cleaner may aggravate this condition.
natural_image
Close-up of a mechanical device with a lever and handle, no visible text or symbols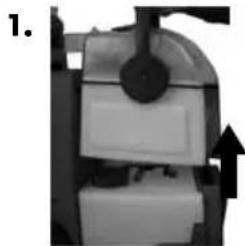
natural_image
Close-up of a mechanical component with a black arrow indicating direction (no visible text or symbols)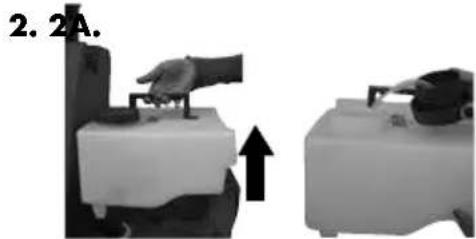
natural_image
Two grayscale images showing a hand operating a device with an arrow indicating upward motion (no text or symbols)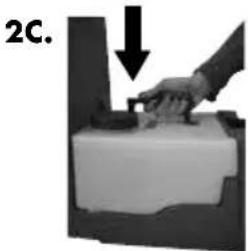
natural_image
Hand pressing a block on a surface, with a downward arrow indicating motion (no text or symbols)
natural_image
Two-step industrial machine operation: top view shows a cylindrical component being handled, bottom view shows a hand pressing a component (no text or symbols visible)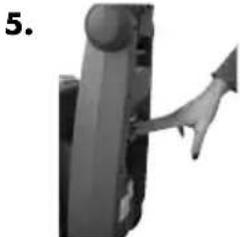
natural_image
Close-up of a mechanical component with a hand inserting a triangular arrow (no text or symbols visible)Operations
Carpet Cleaning (cont.)
-
Cleaning strokes. Release the trigger and make one slow forward and backward pass over the same area to remove any residual dirty water and aid in drying. Repeat cleaning passes until solution being pulled up appears clean. Continue passes without pressing the trigger until you can't see any more water being pulled up.
-
Remove the Dirty Water Tank by pulling the handle to the upright position and lift up. Carry the tank like a bucket to a utility sink or outside where you will dispose of the dirty water.
- Unlatch the top of the tank from the bottom by pushing the handle all the way forward and lifting the top off. Pour dirty water into the sink.
Note: You may notice hair and debris deposits on the carpet or in the tank that were loosened by the cleaning action (especially with newer carpets that have never been deep cleaned before). This debris should be picked up and thrown away.
- Fill the Clean Water Tank with clean hot tap water and follow instructions 2 - 7 to continue cleaning.
Maintenance and Care
Machine Storage
Once your cleaning is complete, make sure both the Dirty and Clean Water Tanks are emptied, rinsed out and dried before the next use.
Note: Store cleaner in a protected, dry area. Since this product uses water, it must not be stored where there is a danger of freezing. Freezing will damage internal components and void the warranty.
natural_image
Close-up of a mechanical device with a black cylindrical component and white base (no visible text or symbols)
natural_image
Close-up of a hand holding a transparent container with an arrow indicating rotation (no text or symbols visible)
natural_image
Hand pressing down on a device with an upward arrow indicating motion (no text or symbols)CAUTION:
Do not overwet. Take care not to run over loose objects or edges of area rugs. Stalling brush may result in premature belt failure.
Maintenance and Care
Machine Care
For best results, a few simple steps can assure your machine is well maintained after your cleaning is complete
-
Turn power OFF. Unplug the machine and wrap the Power Cord.
-
After emptying the Clean and Dirty Water Tanks, rinse them out with running hot tap water.
-
The top half of the Dirty Water Tank can also be rinsed clean through the nozzle area.
-
After carpet is dry, vacuum again to remove hair and fuzz.
WARNING:
To reduce the risk of fire, electric shock or injury, turn power OFF and disconnect plug from electrical outlet before performing maintenance or troubleshooting.
natural_image
Mechanical robotic arm component (no visible text or symbols)Belt Removal and Replacement
- Turn OFF the machine and unplug it from the outlet.
- Remove the Dirty and Clean Water Tanks from the base of the machine.
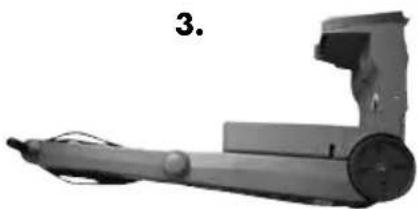
- While standing behind the unit, lay the unit on its side (cord side up).
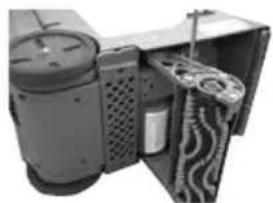
- Looking at the bottom of unit, find the back center of the brush carriage where the carriage latch is located. It is between the brush assembly and the front wheels.
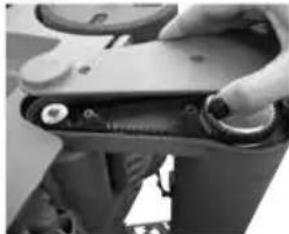
- Pull brush carriage towards you with one hand until it stops, then pinch the carriage latch with other hand while pulling the carriage towards you. The carriage should swing out to access belt cover.
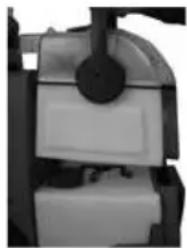
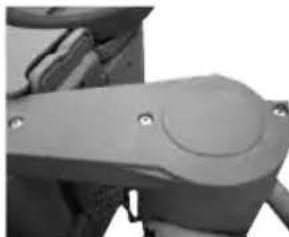
- Remove three screws from cover. Lift and remove to access brush carriage.
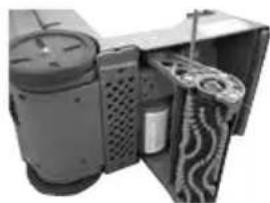
- Turn the belt inward towards the large pulley while lifting out.
- Place new belt over small pulley first and then slip the belt over the large pulley.
- Replace the brush carriage and screws.
-
Push brush carriage back into place making sure the carriage latch locks back into place.
-
natural_image
Close-up of a hand using a tool to inspect teeth and jawbone (no visible text or symbols)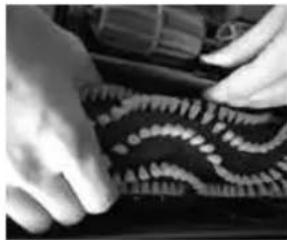
natural_image
Close-up of hands assembling a patterned fabric or textile (no visible text or symbols)6A.
natural_image
Close-up of a mechanical component with a circular feature and mounting holes (no visible text or symbols)6B.

natural_image
Close-up of a hand holding a mechanical component with circular parts (no visible text or symbols)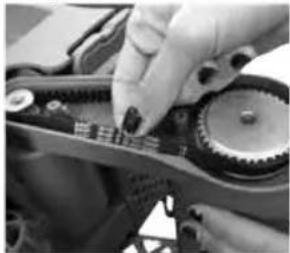
natural_image
Close-up of hands assembling a mechanical gear assembly (no visible text or symbols)
natural_image
Close-up of a hand holding a mechanical component with a circular end (no visible text or symbols)
natural_image
Close-up of a hand holding a mechanical component with circular ends and a small knob (no visible text or symbols)
natural_image
Close-up of a hand opening a door handle with a bag partially visible inside (no text or symbols)Maintenance and Care
Brush Removal and Replacement
-
Turn OFF the machine and unplug from the outlet.
-
Remove the Dirty and Clean Water Tanks from the base of the machine.
-
While standing behind the unit, lay the unit on its side (cord side down).
-
Looking at the bottom of the unit, find the center of the brush carriage where the carriage latch is located. It is between the brush assembly and wheels.
-
Pull the brush carriage towards you with one hand until it stops. Pinch the carriage latch with the other hand while pulling the carriage towards you. The carriage should swing out to access brush end cover.
-
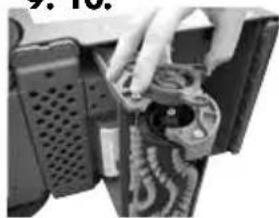
Remove three screws from endcap. Pull endcap off to release brush roll.
-
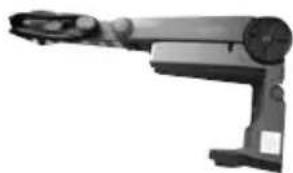
With cover removed, the brush comes out easily by tilting the loose end out of the carriage.
-
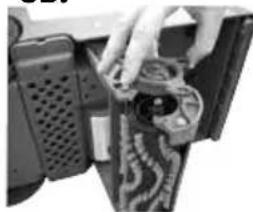
To replace the Brush Roll to the unit, place the large open end of the brush onto the carriage and tilt opposite end back into place.
-
With the brush sitting relatively straight up and down by itself, place endcap back on top and replace three screws. The brush will need to be held and centered to the cover while placing it back on.
-
Spin the brush by hand to make sure it turns freely with some minor resistance from the motor. Push brush carriage back into place with a light pull against the lock.
natural_image
Mechanical device with articulated arm and cylindrical body, labeled '3.' (no text or symbols on the device itself)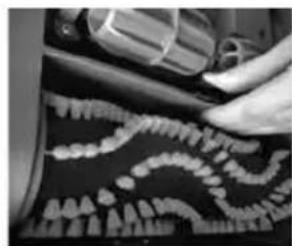
natural_image
Close-up of a hand using a tool to adjust or install a car tire with a tire shell (no visible text or symbols)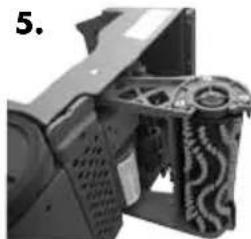
natural_image
Close-up of a mechanical device with visible gears and housing (no text or symbols)6A.
natural_image
Interior view of a mechanical device with internal components and ventilation ducts (no visible text or symbols)
natural_image
Close-up of a hand holding a cylindrical object with wavy patterns, next to a perforated device (no visible text or symbols)9.10.

natural_image
Close-up of a hand holding a mechanical component with visible wiring and components (no text or symbols)6B.
natural_image
Close-up of hands installing or adjusting a mechanical component with a circular component (no visible text or symbols)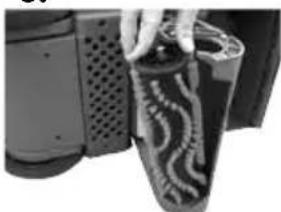
natural_image
Close-up of a hand opening a black textured object with wavy patterns (no visible text or symbols)
natural_image
Interior view of a mechanical device with gears and housing (no visible text or symbols)WARNING:
To reduce the risk of fire, electric shock or injury, turn power OFF and disconnect plug from electrical outlet before performing maintenance or troubleshooting.
| Problem Possible causes Remedies | ||
| Reduced Spray or No Spray | Clean Water Tank may be empty. Fill | Clean Water Tank with hot tap water. |
| Clean Water Tank may not be seated completely. | Turn power OFF. Remove and reseat tank. | |
| Pump may have lost prime. Turn power | OFF and then back ON.Wait one minute, then depress trigger. | |
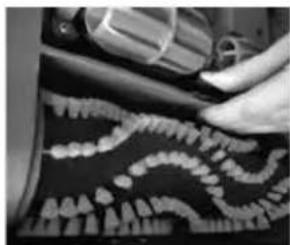
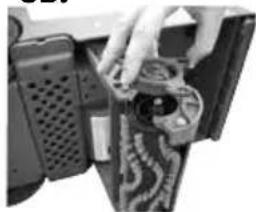
| Debris filter on base is clogged. Use hand to remove debris. | ||
| DirtLifter® PowerBrush does not turn | The belt is off or broken. Turn power | OFF and unplug unit from outlet. Follow instructions on page 6. |
| The unit is in the upright position. Brushes only rotate when unit is reclined using the detent pedal. | ||
| Circuit breaker on machine may have tripped. | Turn the machine OFF and unplug from outlet. Check to see if foreign object is caught in Brush Roll. Remove object. Plug machine in to reset circuit breaker. | |
| Cleaner not picking up solution | Tanks may not be seated properly Pick up the Clean and Dirty Water Tanks and reseat them so they fit snuggly on the unit. | |
| Clean Water Tank is empty Check fluid levels in Clean Water Tank and refill if necessary. | ||
| Dirty Water Tank has picked up the maximum amount | Empty Dirty Water Tank. Refill Clean Water Tank with water and formula. Place both tanks back onto unit. | |
| Red float “door” in the tank may have closed as a result of bumping an object or moving machine back and forth too quickly | Turn the machine OFF, allowing red float door to release into the open position. Turn the unit back ON to continue cleaning. Be sure your forward and backward strokes are completed at a slower pace. | |
| Front nozzle of machine is clogged Use fingers to remove any debris from this area. | ||
| Upper body filter is clogged Use fingers to remove any debris from this area. | ||
Warranty
This warranty gives you specific legal rights, and you may also have other rights which may vary from state to state. If you need additional instruction regarding this warranty or have questions regarding what it may cover, please contact Sanitaire® Customer Service by E-mail, telephone or regular mail as described below.
Limited One-Year Warranty
Subject to the *EXCEPTIONS AND EXCLUSIONS identified below, upon receipt of the product Sanitaire will repair or replace (with new, refurbished, lightly used, or remanufactured components or products), at Sanitaire's option, free of charge from the date of purchase by the original purchaser, for one year any defective or malfunctioning part.
See information below on "If your Sanitaire product should require service".
This warranty does not apply to fans or routine maintenance components such as filters, belts or brushes. Damage or malfunction caused by negligence, abuse, neglect, unauthorized repair, or any other use not in accordance with the user guide is not covered.
Some states do not allow the exclusion or limitation of incidental or consequential damages, so the above limitation or exclusion may not apply to you.
\*EXCEPTIONS AND EXCLUSIONS FROM THE TERMS OF THE LIMITED WARRANTY
THIS WARRANTY IS EXCLUSIVE AND IN LIEU OF ANY OTHER WARRANTIES, EITHER ORAL OR WRITTEN. ANY IMPLIED WARRANTIES WHICH MAY ARISE BY OPERATION OF LAW, INCLUDING THE IMPLIED WARRANTIES OF MERCHANTABILITY AND FITNESS FOR A PARTICULAR PURPOSE, ARE LIMITED TO THE ONE-YEAR DURATION FROM THE DATE OF PURCHASE AS DESCRIBED ABOVE.
Some states do not allow limitations on how long an implied warranty last so the above limitation may not apply to you.
NOTE: Please keep your original sales receipt. It provides proof of date of purchase in the event of a warranty claim.
Service
If your Sanitaire product should require service:
You will find the nearest Sanitaire Authorized Service Center in your area online at sanitairecommercial.com under service locator or contact Sanitaire Customer Service. If you need information about repairs or replacement parts, or if you have questions about your warranty, contact Sanitaire Customer Service.
Website:
Monday - Friday 9 a.m. - 8:30 p.m. EST
Sanitaire Customer Service
For information about repairs or replacement parts, or questions about your warranty, call:
Sanitaire Customer Service
1-800-800-8975
Monday - Friday 9 a.m. — 8:30 p.m. EST
Or visit the Sanitaire website:
When contacting Sanitaire, have model number of cleaner available.
Please record your Model Number: ____
Please record your Purchase Date: ____
NOTE: Please keep your original sales receipt. It provides proof of purchase date in the event of a warranty claim. See Warranty page for details.
Sanitaire®
THE ULTIMATE TIME MACHINE™
GUÍA DEL USUARIO
SC6100A
Extractor vertical serie comercial 6100
natural_image
Exterior view of a Sanitaire vacuum cleaner with gray and white casing (no text or symbols visible beyond branding)LEA TODAS LAS INSTRUCCIONES ANTES DE USAR SU LIMPIADORA PROFUNDA COMERCIAL.
natural_image
Close-up of a mechanical device with a funnel and lever mechanism (no visible text or symbols)
natural_image
Close-up of a mechanical device with a black arrow pointing to a component (no visible text or symbols)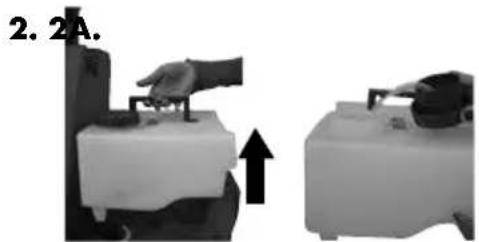
natural_image
Two grayscale images showing a hand operating a device with an arrow indicating upward motion (no text or symbols)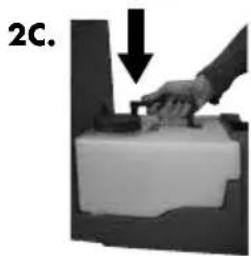
natural_image
Hand pressing a block with a downward arrow, labeled '2C.' (no text or symbols on the diagram itself)
natural_image
Two-step industrial machine operation: left shows a mechanical component with a circular knob, right shows a hand pressing a component (no text or symbols visible)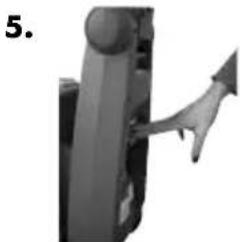
natural_image
Close-up of a mechanical component with a lever and handle, no visible text or symbolsOperaciones
natural_image
Close-up of a mechanical device with a black circular component and white base (no visible text or symbols)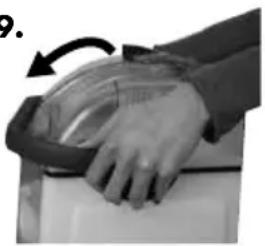
natural_image
Close-up of a hand holding a transparent dome-shaped object, with an arrow indicating rotation (no text or symbols visible)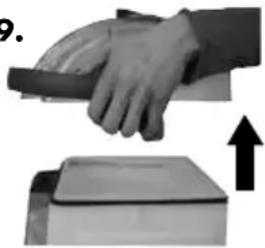
natural_image
Hand pressing down on a device with an upward arrow, no visible text or symbols⚠️PRECAUCIÓN:
natural_image
Mechanical robotic arm component (no visible text or symbols)natural_image
Close-up of a hand using a tool to trim teeth into jawbone (no text or symbols visible)6A.

natural_image
Close-up of a mechanical component with a circular feature and mounting holes (no visible text or symbols)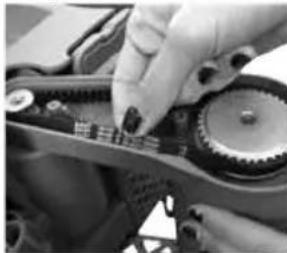
natural_image
Close-up of hands assembling a mechanical gear assembly (no visible text or symbols)
natural_image
Close-up of a hand holding a mechanical component with circular ends and a small knob (no visible text or symbols)
natural_image
Close-up of hands assembling a patterned fabric or plastic component (no visible text or symbols)6B.
natural_image
Close-up of a hand adjusting a mechanical component with circular components (no visible text or symbols)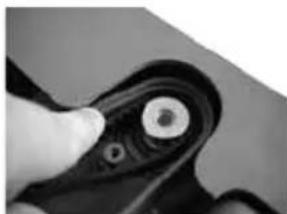
natural_image
Close-up of a hand holding a black mechanical component with a circular end (no visible text or symbols)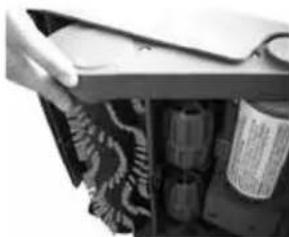
natural_image
Close-up of a hand opening a drawer with stacked containers and a paper clip (no visible text or symbols)natural_image
Mechanical device with articulated arm and cylindrical body, labeled '3.' (no text or symbols on the device itself)
natural_image
Close-up of a hand using a tool to adjust teeth into jawbone (no visible text or symbols)
natural_image
Close-up of a mechanical device with visible gears and housing (no text or symbols)6A.

natural_image
Interior view of a device with a cylindrical housing and textured panels, no visible text or symbols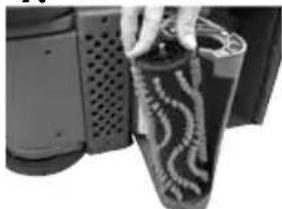
natural_image
Close-up of a hand holding a textured black object next to a device component (no visible text or symbols)9.10.

natural_image
Close-up of a mechanical component with hands holding wires and connectors (no visible text or symbols)6B.
natural_image
Close-up of a hand inserting a component into a device (no visible text or symbols)
natural_image
Close-up of a hand opening a textured object with patterned patterns (no visible text or symbols)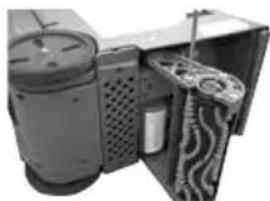
natural_image
Interior view of a mechanical device with visible gears and housing (no text or symbols)ADVERTENCIA:
natural_image
Exterior view of a Sanitaire vacuum cleaner with gray and white casing (no text or symbols visible beyond branding)CONSIGNES DE SÉCURITÉ IMPORTANTES
LISEZ TOUTES LES INSTRUCTIONS AVANT D'UTILISER VOTRE SHAMPOUINEUSE COMMERCIALE.
natural_image
Close-up of a mechanical component with a pointed tip and arrow indicator (no visible text or symbols)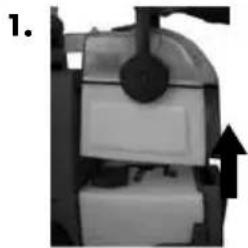
natural_image
Close-up of a mechanical device with a black arrow indicating upward motion (no visible text or symbols)
natural_image
Two grayscale images showing a hand operating a device with an arrow indicating upward motion (no text or symbols)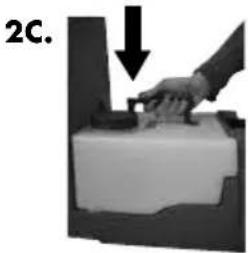
natural_image
Hand pressing a small object on a surface, with a downward arrow indicating motion (no text or symbols)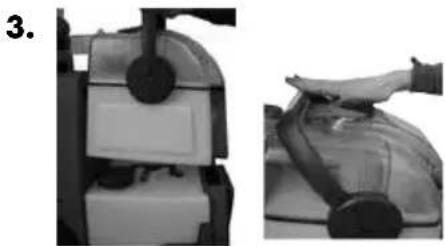
natural_image
Two-step industrial machine operation: left panel shows internal components, right panel shows hand pressing a component (no text or symbols visible)
natural_image
Close-up of a mechanical component with a curved arrow pointing upward (no text or symbols visible)Fonctionnement
natural_image
Close-up of a mechanical device with a black circular component and white base (no visible text or symbols)
natural_image
Close-up of a hand holding a transparent object with an arrow indicating rotation (no text or symbols visible)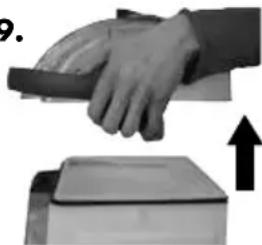
natural_image
Hand pressing down on a device with an upward arrow indicating motion (no text or symbols)⚠️ AVERTISSEMENT :
natural_image
Mechanical robotic arm component (no visible text or symbols)natural_image
Close-up of a hand using a tool to trim teeth into jawbone (no text or symbols visible)
natural_image
Close-up of hands assembling a patterned surface with wavy lines (no text or symbols visible)6A.

natural_image
Close-up of a mechanical component with a circular feature and mounting holes (no visible text or symbols)6B.

natural_image
Close-up of a hand adjusting a mechanical component (no visible text or symbols)
natural_image
Close-up of hands operating a mechanical gear assembly (no visible text or symbols)
natural_image
Close-up of a hand holding a mechanical component with a circular end (no visible text or symbols)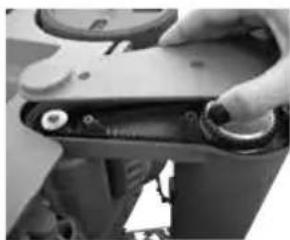
natural_image
Close-up of a hand adjusting a mechanical component with circular parts (no visible text or symbols)
natural_image
Close-up of a hand opening a mechanical device with internal components (no visible text or symbols)Entretien
natural_image
Mechanical device with articulated arm and cylindrical body, labeled '3.' (no text or symbols on the device itself)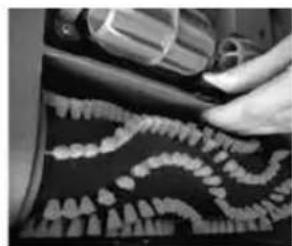
natural_image
Close-up of a hand using a tool to trim teeth into jawbone (no visible text or symbols)
natural_image
Close-up of a mechanical device with visible gears and housing (no text or symbols)6A.
natural_image
Close-up of a mechanical device with internal components and a metallic housing (no visible text or symbols)
natural_image
Close-up of a hand holding a patterned object next to a device component (no visible text or symbols)9.10.
natural_image
Close-up of hands holding a mechanical component with coiled springs and connectors (no visible text or symbols)6B.

natural_image
Close-up of hands installing or adjusting a mechanical component with a circular component (no visible text or symbols)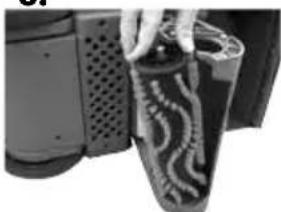
natural_image
Close-up of a hand opening a textured object with patterned patterns, next to a perforated device (no visible text or symbols)
natural_image
Interior view of a mechanical device with gears and ventilation ducts (no visible text or symbols)⚠️ AVERTISSEMENT :
\*EXCEPTIONS ET EXCLUSIONS DES CONDITIONS DE LA GARANTIE LIMITÉE
CETTE GARANTIE EST EXCLUSIVE ET REMPLACE TOUTE AUTRE GARANTIE, VERBALE OU ÉCRITE. TOUTES LES GARANTIES IMPLICITES POUVANT RÉSULTER DE L'APPLICATION D'UNE LOI, Y COMPRIS LES GARANTIES IMPLICITES DE QUALITÉ MARCHANDE ET DE CONVENANCE À UN USAGE PARTICULIER, SONT LIMITÉES À LA DURÉE D'UN AN À COMPTER DE LA DATE D'ACHAT, TEL QUE STIPULÉ CI-DESSUS.