CT6 - Surveillance Camera Tenda - Free user manual and instructions
Find the device manual for free CT6 Tenda in PDF.

| Product Type | IP Surveillance Camera |
| Connectivity | Wi-Fi 2.4 GHz, Ethernet 10/100 Mbps |
| Video Resolution | 1080p (estimated) |
| Night Vision | Yes, with color mode |
| Power Supply | AC adapter (power outlet) |
| Local Storage | microSD card (up to 128 GB, estimated) |
| Audio | Built-in microphone and speaker |
| Smart Features | Motion detection, alarm and continuous recording |
| Mobile App | TDSEE (iOS and Android) |
| Cloud Storage | Yes (subscription, 3 months free) |
| Installation | Ceiling, wall or pole (weatherproof kit included) |
| Security | Username and password protection |
| Web Interface | Yes (default IP address 192.168.1.203) |
| Reset | Reset button (5 seconds) |
| Indicator LED | Red/blue to indicate status |
| Surveillance Angle | Adjustable via orientation wheel |
Frequently Asked Questions - CT6 Tenda
User questions about CT6 Tenda
0 question about this device. Answer the ones you know or ask your own.
Ask a new question about this device
Download the instructions for your Surveillance Camera in PDF format for free! Find your manual CT6 - Tenda and take your electronic device back in hand. On this page are published all the documents necessary for the use of your device. CT6 by Tenda.
USER MANUAL CT6 Tenda
Outdoor Wi-Fi Camera

https://www.tendacn.com/service/default.html
English - Get support and services
For technical specifications, user guides and more information, please visit the product page or service page on www.tendacn.com. Multiple languages are available. You can see the product name and model on the product label.
OocTynHi KInbKa MOB.
Bn MoKeTe nO6aHTn Ha3By BInpOby Ta MoJeIb Ha eTtKetU npOdykTy.
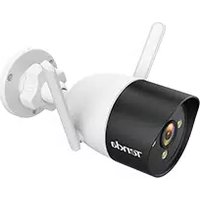
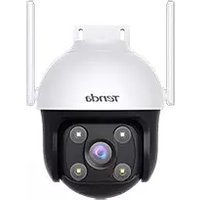
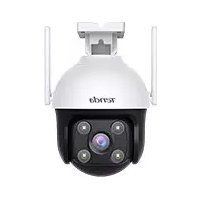
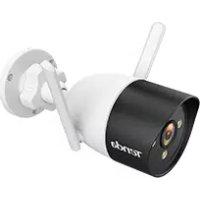
The camera appearance varies with models. Please refer to the camera you purchased.
| ① | Ethernet port | 10/100 Mbps auto-negotiation Ethernet port, used for connecting such devices as the router and switch. |
| ② | Power jack | Used to connect to the included power adapter. |
| ③ | Speaker | / |
| ④ ⑤ | Fill light | / |
| ⑥ | LED indicator | Solid red: Initializing and starting. Blinking red slowly: Disconnected from the network. Blinking red quickly: Connecting to the network. Solid blue: Connected to the network. Blinking blue slowly: Upgrading. Blinking blue quickly: Waiting to connect to the network. |
| ⑦ | Microphone | / |
| ⑧ | Micro SD card slot (Behind the cover) | Insert the Micro SD card to store the monitoring videos. |
| ⑨ | Reset button (Behind the cover) | Hold down the reset button for about 5 seconds and release it after the LED indicator blinks blue quickly or you hear a prompt tone. The camera is reset to factory settings successfully. |
| ⑩ | Orientation knob (if any) | Adjust the monitoring angle for the best view through your camera. |
Add the camera to TDSEE App

Tips
Before adding your camera, ensure that the router is connected to the internet successfully and the filter function is disabled.
- Power on the camera.
The LED indicator lights solid red after the camera is powered on. When the LED indicator blinks blue quickly, the camera is waiting to connect to a 2.4 GHz Wi-Fi network.
- Download the TDSEE App onto your mobile device by scanning the QR code or searching for TDSEE in the Google Play or App Store.


QR code
- Run the TDSEE App and follow the instructions to complete user registration. Enter the homepage, and tap Add a device or in the upper-right corner of the homepage.
- Scan the QR code on the top of the camera, and follow the instructions in the App.
After the settings are completed, you can see that the added camera is online on the homepage of the TDSEE App, and the camera has been managed by the TDSEE App.
Install the camera

Tips
- Make sure the ceiling is strong enough to withstand three times the weight of the camera.
- You may need a hammer drill, a drill bit (Diameter: 6 mm), a screwdriver, and a ladder for the installation.
Ceiling/wall mounting
- Place the template at the desired location.
- Drill screw holes and insert anchors into them. (Drill bit diameter: 6 mm; Hole depth: 28-32 mm)
- Fix the bracket (if any) to the desired location.
- Fix the camera using the screws.
Pole mounting
You can use this method if the bracket is provided.
- Pass the strap (self-prepared) through the holes in the bracket, and secure the bracket to the pole.
- Fix the camera using the screws.
Adjust the monitoring angle
Loosen the orientation knob (if any), adjust the orientation of the camera as required, then tighten the knob.
Install the waterproof kit

Tips
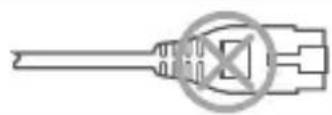
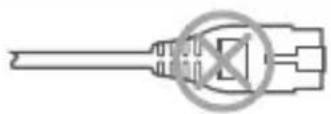
The included waterproof kit is not suitable for the Ethernet cable with protection cover on the crystal head. See the example on the right.
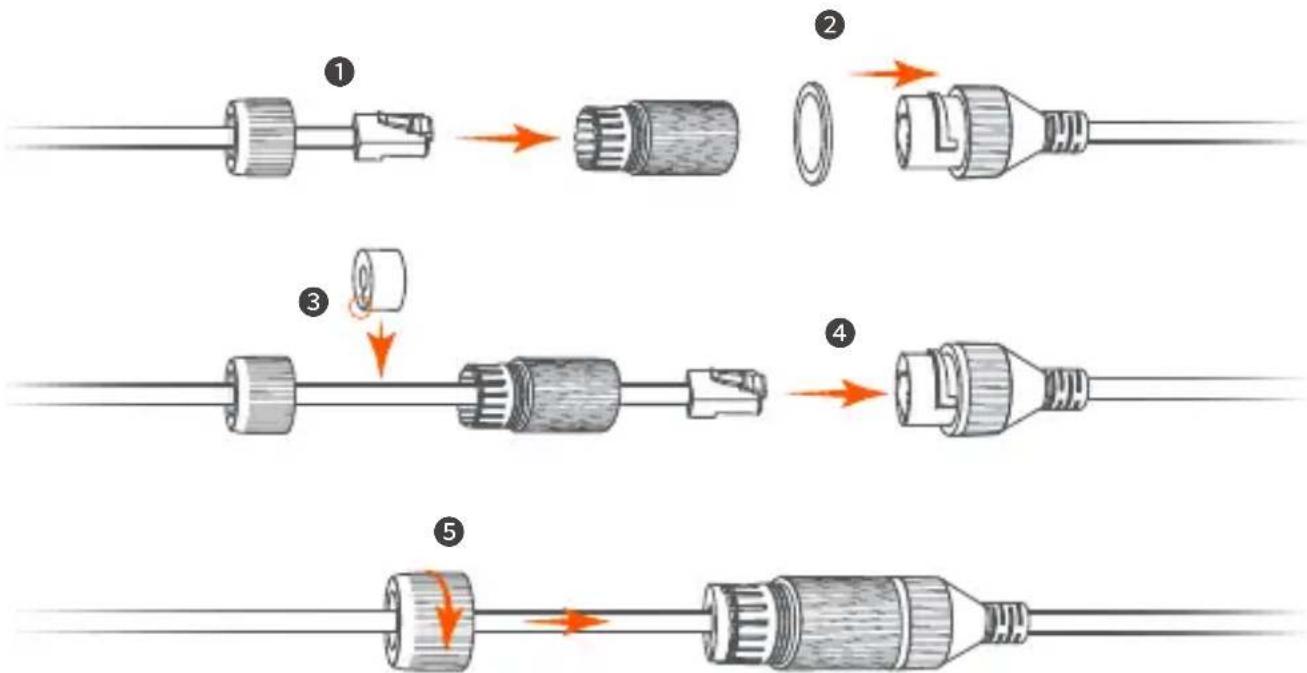
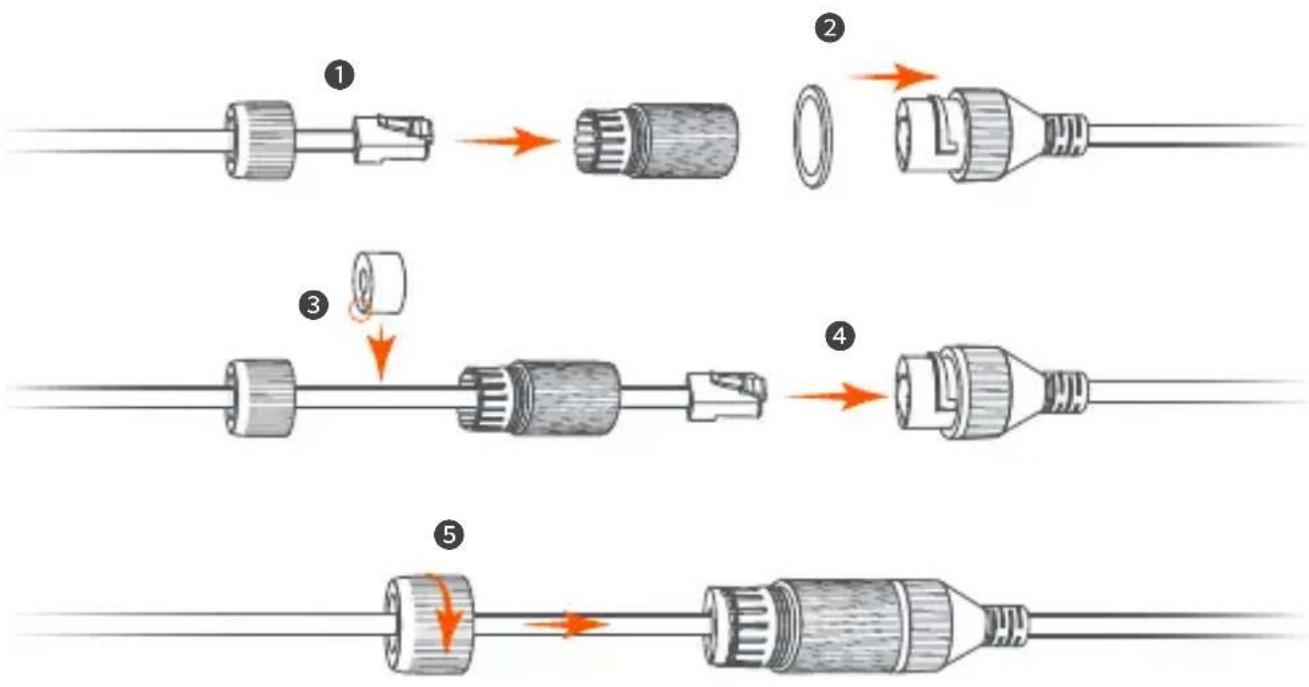
You can install the waterproof kit and wrap the end with waterproof tape for the Ethernet port as required. When you connect the Ethernet cable to the Ethernet port of the camera, the waterproof kit installation steps are as follows.
Power on the camera
Power on the camera after the camera is mounted. When the camera completes startup, it will automatically connect to the configured Wi-Fi network. When the LED indicator of the camera is solid blue, you can use the camera normally.
Log in to the web UI of the camera
After the camera works properly, you can manage the camera through TDSEE App or web UI (Some models of cameras support). (Please scan the QR code of Get support and services in this guide to obtain the related user guide.)
To log in to the web UI:
- Connect the computer to the router that is connected to the camera.
- Set the IP address of the computer to an unused one belonging to the same network segment as the IP address of the camera but different from the IP address of the camera.
By default, the login IP address of the camera is 192.168.1.203, and the DHCP function is enabled. If there is a DHCP server in the network, the IP address of the camera may be changed. Please refer to the actual IP address assigned to the camera by the DHCP server.
3.Start a browser and enter the IP address of the camera in the address bar to access the login page. Enter the LoginUsername (default: admin) and Login Password (default: admin123456), then click Login.

Tips
For network security, after you log in to the web UI, please modify your password in time.
05 After successful login, you can start to configure the camera as required.
FAQ
Q1: What should I do if I failed to add the camera?
A1: Try the following solutions:
- Ensure that the router is connected to the internet successfully.
- The camera only supports 2.4 GHz Wi-Fi network. When adding the camera, you need to connect the smartphone to a 2.4 GHz Wi-Fi network.
- Do not hide the Wi-Fi network of the router when adding the camera (After the camera is added successfully, you can hide the Wi-Fi network).
- Confirm whether the LED indicator of the camera blinks blue quickly. If not, please reset the camera and configure it again.
Reset method: Hold down the Reset button for about 5 seconds and release it when the LED indicator blinks blue quickly or you hear a prompt tone. The camera is reset successfully.
Q2: What should I do when the video preview is not smooth?
A2: Try the following solutions:
- Check if the Wi-Fi network of the router is smooth.
- Take the router closer to the camera and adjust the antenna angle of the camera to be vertical.
- When previewing the video with cellular mobile data, make sure that the internet connection of the smartphone is smooth.
- Auto (if supported), Fluent and HD are supported for video preview. You can switch the video clarity according to the internet status.
Q3: How to store the video?
A3: Try the following solutions:
Method 1: Install the micro SD card to the camera. The recording mode of the Micro SD card supports Alarm Recording and All Day Recording. By default, the recording mode is Alarm Recording, you can modify the recording mode according to the actual conditions.
Method 2: Subscribe to the Cloud Storage Service on TDSEE App.
Procedure: Run the TDSEE App, choose the camera on the homepage, then tap Cloud in the lower left corner. You can enjoy free cloud storage service (7-days continuous detection recording) for 3 months upon the first activation.
Method 3: Connect the camera to the NVR. The camera supports the ONVIF protocol and can be added to the NVR either wired or wireless method for recording storage. The default user name and password of the camera are admin and admin123456 respectively, you can change the default password on the web UI (some models of cameras support). The specific configuration method of the NVR is subject to the manufacturer's instructions.
Q4: How to get full-color monitoring video through the camera no matter in the daytime or at night?
A4: Set Night Vision Mode of the camera to Full-color Mode.
Method: Run the TDSEE App, choose the camera on the homepage, then tap Settings (the upper right corner) > Night Vision Mode, and choose Full-color Mode.

Q5. How to view the videos stored in the Micro SD card of the camera on the computer?
A5: If you remove the Micro SD card installed in the camera and view the videos from your computer, it is recommended to use VLC media player or Potplayer to play the videos.
Udseende
CTeJIbOBn/HaCTiHHN MOHTaX
- Po3MiCiTiB Ia6JIoH y NOTpi6Homy MiCi.
2.Прсевердлтб OTВОРИДЯ ГИNTIIB I BCТАВTe B HIX aHKePи.(ДiAmeTp CBepДla:6 MM; TlIbHnHa OTBOPY:28-32 MM) - 3akpiitb kpoHtTeH (aKo e) y noTpiHOMy Mici.
- 3akpiitb kamepy 3a dOnomorOTo rBnHTiB.
MOHTAX CTOBNa
Bn MoXeTe BnKOpNCToBbATN UeN MeTOn, JkUo E KPOHHTeH.
A3: CnpobuTe TaKi MeToDiN:
Cnoci6 1. BcTaHOBITb KapTKy micro SD y kamepy. PexIM 3aIncy kapTn Micro SD nItpmye Alarm Recording (3aInc TpIBoRi) i All Day Recording (3aInc npotraGM ycboro dHЯ). 3a 3aMOuByBaHHaM BcTaHOBLeHo pexIM 3aIncy Alarm Recording (3aInc TpIBoRi), BN MOKeTe 3MiHTn peKIM 3aIncy BiIOBIDHO Do foakTuHInx yMOB.
Cnoci6 2. Пдпшить са Na Cloud Storage Service (слжбухмарно сховицa) у пограTi TDSEE.
A4: YcTaHOBiTb Night Vision Mode (Pexm HiyHoro 6aueHn) kamepn Ha Full-color Mode (NoBHOKoJIbOpOBu n peXm).
Cnoci6: 3anyctitb nporpaMy TDSEE, BnBepiTb kamepy Ha roJOBHni CTopiHci, NOTIM HATNCHiTb Settings (HaIaStyBaHHa) ( y BepxHbOMy npabOMy KyTi)> Night Vision Mode (Pexm HiHoRo 6aueHHa) iBnBepiTb Full-color Mode (IOBHOKoJIbOpOBu IpeXm).
Q5:Якпергелянту bideo3annci,збержени на кapт i Micro SD kamepi,на komn'tepi?
A5:Якwo BV BnHЯлн KapTky Micro SD, BcTaHOBHeHy B KaMepi, i neperIaHyIb BiDeo 3 KOMn'IoTepa, ДяВiДТВОрЕнna BiDeo peKOMeHdyeTbcS BnKOpNCTOByBaTn MediAnIeep VLC a6o Potplayer.
BbHsEHN BnD
BbHnHnT BnHa KaMePa Ta Bapnpa Cnopei MoJeIte. MoJI, oBpHeTe ce KbM KaMePaTa, KoTo CTe 3akynnn.
yctpoNCTBO INI B TropHnA DeceH bTbI Ha HauaHaTa CtpaHnca.
4.СанрайTe QR кда оТROpe Ha KaMepaTaNcIeBaITe INHCTpyKUInTe B npINOxKeHEnTo.
CneI KaTo HAcTpoNKeTe ca 3aBbPseHn, MoXeTe Da BnITE, Ye IobabHeHaTa KaMepa e OHnaH Ha NaHaJHaTa CTrpaHnUca Ha npIoXeHneTo TDSEE nYe KaMepaTa ce ynpabJIbRa oT npIoXeHneTo TDSEE.
Инстаирaite kamepaTa

CbbETN
-Mon, yBepTe ce, ye TaBaHbTe eoCTaTbUHO 3npa, 3da n3Dbpxn Tpni nbTu TeFIOTo Ha KaMePaTa u OCHObaTa.
-3aMOHTaxa MoKe Da Ca Bn Heo6xoJIMM yIapHa 6opMaunHa, 6yprna (DnAmetbp: 6 MM), OTBepTKa n CtbJI6a.
TabaHeH/CTeHeH MOHTax
- NocTaBete Ⅲa6IOnHa Ha JxelaHOTo MrcTo.
- ПюбийTe OTBOPи 3a BINTObe И NOCTaBeTe anKepnВ Tяx. (ДиamEtbp Ha CBpeJIoTO: 6 mm; ДьлбочиHa Na OTBopa: 28-32 mm)
3.ФИКСИРаTe cKOBaTa(aKO ИмaТakaBa)HaЖeJIaHOTOMЯCTO.
4.ФИКСИРаTe KaMepaTa C NOMOHTa Ha BINTOBeTe.
MOHTaX Ha NIIJIOH
MoxkeTe Da n3no3BaTe To3n MeToD, aKO e npedeOctaBeHa cko6a.
PergunpaTe bTbJa Ha ha6JIoJeHne
Pa3xla6te KOnyTe 3a opneHTaun (aKo nMa TaKOBa), perylnpaTte opnEHTaunTaHa KaMepaTa, KaKTo e Heo6xOdImo, CLeD KoETo 3aTeTHeTe KOnyTe.
Инстаирaite BodoocToHb KOMnJIeK

CbbETN
BkIoueHnT BDOyOCToYnVB KOMnJIeKr He e noJxOJaU,3a Ethernet Ka6en Cbc 3aunTeH Kanak Ha KpncTaHaTa rnaBa. BIXTe npImepa BdACHO.
MoxTe Da INCTaJIpaTe BOOyCTOnuVBnKOMNJIeKT n Da yBnTe KpaC BOOyCTOnuVBa JeHTa 3a Ethernet nopTa, KaKTo e Heo6xOdmo. Korato cBbpxKeTe Ethernet Ka6ena KbM Ethernet npTa Ha KaMePaTa, CTbNKITE 3a INCTaJIpaHe Ha BOOyCTOnuVB KOMNJIeKT ca KaKTo CNeDbA.
Q2: KaKBO Tp86Ba Da HnpaB, KOraTO Bu3yauH3aunTa Ha BUnDeOT He e rJaKa?
A2:OnntaTe cneHnTe peWeHn:
-Поверете дал Ni-Fi Мржату рета e гnaда.
-Приблжete рутepа до камерати настpoite bгьla Ha aHTeha Na Kaemepata da 6bde. BepTnKaJIeH.
- Korato npereIeKdaTe Bndeoklnna C KneTbUH N MObInH DaHH, yBepTe ce, ye nHTepHe T Bpb3KaTa Ha cMapTfoHa e rlaJaKa.
- Auto (aKo ce noDbpx), Fluent HD ce noDbpxaT 3a Bn3yaIIN3aIINHa BnDeo. MoXeTe Da npeBkIIOuBaTe aCHOtaTa Ha BnDeOTo cNopei CbCTOHNrTO Ha INHTepHET.
Q3: KaK da cxbxpaHn BndeoTo?
A3:OnntaTe cneHnTe MeToDi:
Metod 1: Истелейу Te micro SD KapTa Ta KaMepa Ta. PekimbT ha 3anC Ha Micro SD KapTa Ta noDbpxa Alarm Recording (AnapMeH 3anC) n All Day Recording (LenoDHeBEN 3anC). Np noPra3bpaHpe pekimbT ha 3anC e Alarm Recording (AnapMeH 3anC), MOXeTe Da npomEnTe peKIMa Ha 3anC cnopeJ deiCTBnTEHnTe ycNoBn.
Metod 2: Абонирайтсе за Cloud Storage Service (Услуга за сьхсань овлak) в приложенeto TDSEE.
Пюцедура: Стартураи Te npиложенeto TDSEE, Изберete камера Т ha NaHaTa CTpaHnca, сед КоЕТ дOKОснeTe Cloud (O6laK) BdoHnЯяЯВ bIbI. MoжeTe da ce HacnaДITE Ha 6e3пlaTHa yClyra 3a CBxpaHEne B O6laK (7 ДнИ HeNPeKbСHAT 3aInc пri OTkpBvAHe) 3a 3 Meceua сеД nbpBOTO aKTINBvPaHe.
Metod 3: Cbpxte KaepaTa KbM NVR. KaepaTpoDbpxa npotoKoJa ONVIF mOxge da ce doabu KbM NVR ype3 kaBeIeH nII be3xUeH MeToD 3a cbXpaHene Ha 3aInc. Iotpe6ntckoto Ime n napolaT no npda3bnpaHe Ha KaepaTa ca cboTBetHo admin u admin123456 n napolaT moKe Ja ce npomeH b ye6 nHTepFeiCa. KoHKpeTHnT MeToD 3a KOHfNpypnaHe Ha NVR 3aBnCn OT INHCTpyKzInTe Ha npOn3BOIDTeJIa.
Q4: KaK da noLuyuHte nbInHOBETHO BVdeO 3a Ha6JIoDHeHne ppe3 KaMepaTa, He3aBnCmO npE3 DeHЯ nII npE3 HOU Ta?
A4: 3aJaTe Night Vision Mode (PexIM HOUHO BIXdHe) Ha KaMepaTa Ha Full-color Mode (TbJIHOuCBeTeH peXIM).
Meto: CtapTnpaTe npiloxeHneTo TDSEE, n36epTe KaMepaTa Ha NaHaHaTa cTpaHnca, cIeT TOBa DOKOcHeTe (HacTpoKn) (B roPnHa Decen bRbJ) > Night Vision Mode (Pexm 3a HOuHO BVXdAhe) n36epTe Full-color Mode (PbJHoCBeTeH pexm).
Q5: KaK da rIeJaTe BnDeoKlnNoBete, cxbpaHb Mlro SD kaPaTaHa KaMepaTa Ha KOMNIObpa?
A5: Ako n3BaJnte Micro SD KapTaTa, INcTaInpaHa B KaMepaTa, IN pperIeIaTe BVneOKJIINOBeTe oT BaIIra KOMIObP, IpeOpBHTeJIHo e da n3noJ3BaTe VLC media player IIN Potplayer 3a Bb3IpOn3BExKdAnHe Ha BVneOKJIINOBe.
Erscheinung
Meto: 3aIyCTnTe npInloXeHne TDSEE, BbIbepnte KaMepy Ha IJIaBHOJ CTpaHnue, 3aTeMHaxmITE Settings (HaCtpoNk) (BnpaBOM BepxHem yTny)> Night Vision Mode (PexIM HocHoro BVdeHnry) n Bblbepnte Full-color Mode (noJIHOuCBETbIy peXIM).
Q5: KaK npocMoTpeTb Bnideo, xpaHЯипеся Ha KapTe Micro SD kaMepbl, Ha KOMnbIOTepe?
A5: EcIIN Bbl n3BnkeaTe KapTy Micro SD, yCTaHOBJIeHHyU B KaMepe, INpOCMaTpINBaTe BnIeO co CBOero KOMNbIoTEpa, IJIY BOCPOn3BeJeHnRA BnIeO peKOMeHNyEtCra NcNoJIb3OBAtB MeDInaJIneep VLC nII Potplayer.
Wygliad
Wygliakameryroziwzaleznosciodmodelu.Zapoznajsi z zakupionkamera.
J. J. J. J. J. J. J. J. J. J. J. J. J. J. J. J. J. J. J. J. J. J. J. J. J. J. J. J. J. J. J. J. J. J. J. J. J. J. J. J. J. J. J. J. J. J. J. J. J. J. J. 3 Password Logging (Jgss: () (Jgss: )Username Login .(Jgss: ) Login (admin123456 : () (Jgss:
2
aalllg 1 g aegp dssessse

100000000000000000000000000000000000000
a
1
:1
2
J 2.4 W-Wi-Fi
2.4 Wi-Fi
()
(Wi-Fi
LED
0
Jaa 5 5 aal ae! Jc Jaaa:baa
LLED

Paaa yjaiy aie Lsie 2jj
:山
Wif
1
i 1
HHDFluent (AeD)Auto p
:3
::3
Micro SD 1
,
y
TDSEE 2
(Procedure)
Coud
3 7 7
ONVIFJRSsNVR 3
NVR
admin123456,admin
NVR

y 4
4
TDDEE 1
aLgjg jzj<(
M Micro SD 5
Jn Jnnnne nnnnne nnne nnnnne nnnnne nnnnne nnnnne nnnnne nnnnne nnnnne nnnnne nnnnne nnnnne nnnnne nnnnne nnnnne nnnnne nnnnne nnnnne nnnnne nnnnne nnnnne nnnnne nnnnne nnnnne nnnnne nnnnne nnnnne nnnnee
Potplayer VLC 1
.
Technical support
Shenzhen Tenda Technology Co., Ltd.
Floor 6-8, Tower E3, No.1001, Zhongshanyuan Road, Nanshan District, Shenzhen, China. 518052
Website: www.tendacn.com
E-mail: tendasecurity@tenda.cn
support.us@tenda.cn (North America)
support.uk@tenda.cn (United Kingdom)