Tracer SC7100A - Vacuum Cleaner Sanitaire - Free user manual and instructions
Find the device manual for free Tracer SC7100A Sanitaire in PDF.

| Product Type | Cordless Commercial Vacuum |
| Brand | Sanitaire |
| Model | Tracer SC7100A |
| Usage | Indoor, commercial use |
| Power Source | Rechargeable lithium battery (ref. 132A0002) |
| Charger | Model K12S270050U |
| Full Charge Time | 4.5 hours |
| Quick Charge | 1 hour for a quick clean |
| Charge Indicator | 4 green LED indicators |
| Collector Type | Removable dust collector |
| Collector Emptying | By dump lever |
| Filter | Washable with warm water |
| Filter Cleaning Frequency | At least once a week |
| Brush | Removable brush roll |
| Brush Jam Detection | Automatic shutoff with red LED indicators |
| Switch | Foot pedal on the cleaner head |
| Handle Length | Adjustable (telescopic) |
| Operating Temperature | -5°C to 30°C |
| Charging Temperature | 5°C to 30°C |
| Warranty | 1 year limited |
| Replacement Parts | Available at sanitairecommercial.com or by phone |
| Repairs | By authorized service agent |
| Maintenance | Wipe with a dry cloth; do not use water |
Frequently Asked Questions - Tracer SC7100A Sanitaire
User questions about Tracer SC7100A Sanitaire
0 question about this device. Answer the ones you know or ask your own.
Ask a new question about this device
Download the instructions for your Vacuum Cleaner in PDF format for free! Find your manual Tracer SC7100A - Sanitaire and take your electronic device back in hand. On this page are published all the documents necessary for the use of your device. Tracer SC7100A by Sanitaire.
USER MANUAL Tracer SC7100A Sanitaire
Commercial Cordless Vacuum
SC7100A
USER GUIDE
INDEX
Important safety information .....2-3
What's in the box 4
Assembly 5
Operation 6
Battery....7
Dirt bin....8
Filters....9
Brush roll .....10-12
Troubleshooting .....13
Warranty .....14
French user guide .....15-28
Spanish user guide .....29-42
How to order replacement parts . . .43
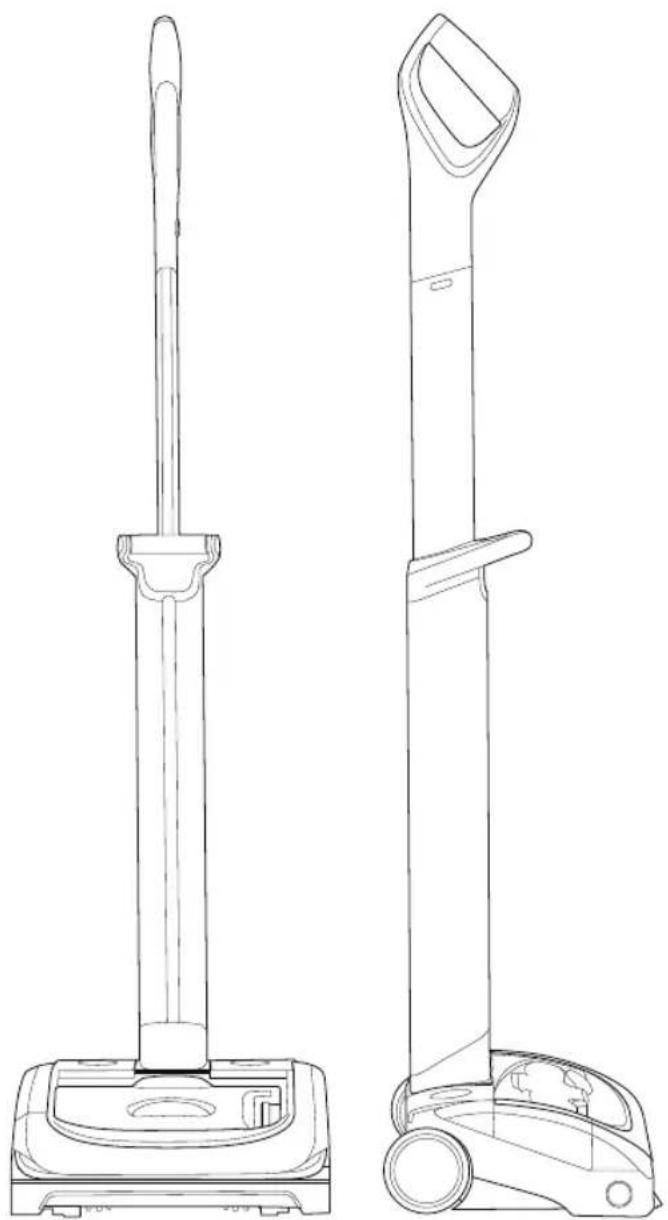
natural_image
Line drawing of two different vacuum cleaner designs, shown from top and side views (no text or symbols)IMPORTANT SAFETY INSTRUCTIONS

IMPORTANT: READ ALL INSTRUCTIONS BEFORE USE. RETAIN INSTRUCTIONS FOR FUTURE REFERENCE.

WARNING: Basic safety precautions should always be observed when using an electrical appliance, including the following to reduce the risk of fire, electrical shock, or injury:
Personal safety:
- Store indoors in a dry place out of the reach of children.
- Always use responsibly. This appliance can be used by children aged from 8 years and above and persons with reduced physical, sensory or mental capabilities or lack of experience and knowledge if they have been given supervision or instruction concerning use of the appliance in a safe way and understand the hazards involved.
- Don't let children play with the appliance; supervise children using or maintaining the appliance.
- Use only manufacturer's recommended attachments as described in this manual; misuse or use of any accessory or attachment other than those recommended, may present a risk of personal injury.
• Take extra care when cleaning stairs. - Keep the appliance and accessories away from hot surfaces.
- Do not block the appliances openings or hinder airflow; keep openings free of any objects including dust, lint, clothing, fingers (and all parts of the body).
• Particularly keep hair away from openings and moving parts. - Ensure the switch is in the off-position before connecting to battery pack, picking up or carrying the appliance.
- Disconnect the battery pack from the appliance before making any adjustments, changing accessories, or storing appliance.
Electrical safety:
- Only use batteries and chargers supplied by Sanitaire.
- Never modify the charger in any way.
- The charger has been designed for a specific voltage. Always check that the electrical voltage is the same as that stated on the rating plate. A charger that is suitable for one type of battery pack may create a risk of fire when used with another battery pack; never use the charger with another appliance or attempt to charge this product with another charger.
- Before use, check the charger cord for signs of damage or ageing. A damaged or entangled charger cord increases the risk of fire and electric shock.
- Do not abuse the charger cord.
- Never carry the charger by the cord.
- Do not pull the cord to disconnect from a socket; grasp the plug and pull to disconnect.
- Don't wrap the cord around the charger when storing.
- Keep the charger cord away from hot surfaces and sharp edges.
- The supply cord cannot be replaced. If the cord is damaged the charger should be discarded and replaced.
- Do not handle the charger or the appliance with wet hands.
- Do not store or charge the appliance outdoors.
- The charger must be removed from the socket before removing the battery, cleaning or maintaining the appliance.
FOR INDOOR USE ONLY
This model is for commercial use
Battery safety:
- This appliance includes Li-Ion batteries; do not incinerate batteries or expose to high temperatures above 265 degrees F.
- Do not use a battery pack or appliance that is damaged or modified.
- Liquid ejected from the battery may cause irritation or burns.
• In an emergency situation contact professional help immediately! - Leaks from the battery cells can occur under extreme conditions. Do not touch any liquid that leaks from the battery. If the liquid gets on the skin wash immediately with soap and water. If the liquid gets into the eyes, flush them immediately with clean water for a minimum of 10 minutes and seek medical attention. Wear gloves to handle the battery and dispose of immediately in accordance with local regulations.
- Shorting the battery terminals may cause burns or fire.
- When the battery pack is not in use, keep it away from paper clips, coins, keys, nails, screws or other small metal objects that could make a connection from one terminal to another.
- When you dispose of the appliance remove the battery and dispose of the battery safely in accordance with local regulations.
- Follow all charging instructions and do not charge the battery pack or appliance outside of the temperature range specified in the instructions. Charging improperly or at temperatures outside of the specified range may damage the battery and increase the risk of fire.
- For use: recommended ambient temp -5^ - 30^ For charging: recommended ambient temp 5^ - 30^
- Use only battery pack 132A0002
- Use only charger K12S270050U
Service:
- Before using the appliance and after any impact, check for signs of wear or damage and repair as necessary.
- Do not use the appliance if any part is damaged or defective.
• Repairs should be carried out by a service agent or a suitably qualified person in accordance with relevant safety regulations. Repairs by unqualified persons could be dangerous. - Never modify the appliance in any way as this may increase the risk of personal injury.
- Only use replacement parts or accessories provided or recommended by Sanitaire.
Intended use:
- This appliance has been designed for commercial dry vacuum cleaning only.
- Do not pick up liquids or use on wet surfaces.
- Do not pick up anything that is flammable, burning or smoking.
- Use only as described in this manual.
- Don't use on concrete, tarmacadam or other rough surfaces.
- The brush bar may damage certain floor surfaces. Before vacuuming flooring, rugs or carpets, check the flooring manufacturer's recommended cleaning instructions.
- May damage delicate fabrics or upholstery. Care should be taken on loose-weave carpets and coverings or where there are loose threads. If in doubt please test on an inconspicuous area first.
- The Sanitaire Commercial Cordless Upright has been designed to clean a wide variety of floor surfaces without the need to change settings.
WARNING:
- Do not use water, solvents, or polishes to clean the outside of the appliance; wipe clean with a dry cloth.
- Never immerse the unit in water and do not clean in a dishwasher.
- Never use the appliance without the filter in place.
Thanks for buying a Sanitaire vacuum!
In your industry, timing is everything. So is efficient, effective, reliable, and comfortable cleaning. We want to make sure the vacuum works well for you, so this guide has tips on using (pages 5-7), maintaining (pages 8-12), and if there is a problem, troubleshooting (page 14).
In just a few simple assembly steps, you'll be ready to vacuum. Let's get started!
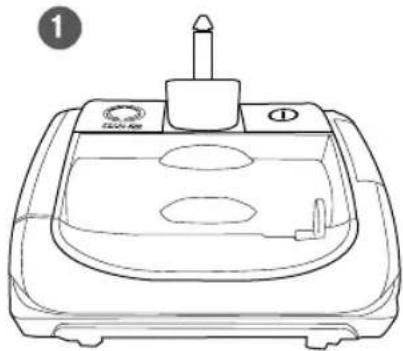
What's in the box
1 Head
2 Upper handle
3 Lower handle
4 Battery
5 Charger
6 Dirt bin
7 Washable filter
(Filter and bin are already in place)
natural_image
Line drawing of a washing machine with a cylindrical top and base (no text or symbols)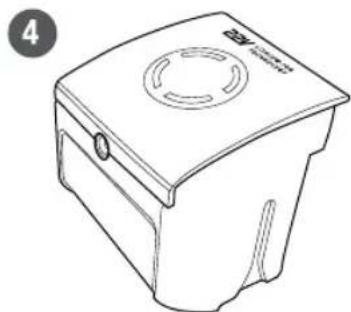
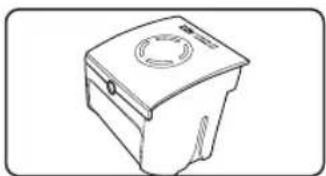
natural_image
Line drawing of a portable trash bin with a circular vent and handle (no text or symbols)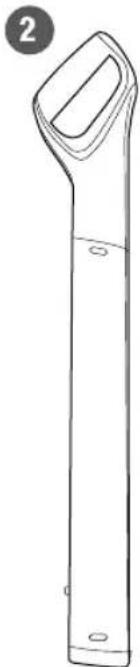
natural_image
Line drawing of a vertical cylindrical object with a handle and base, labeled with number 2 (no text or symbols on the object itself)
natural_image
Line drawing of a vertical rectangular object with a curved top and base, no text or symbols present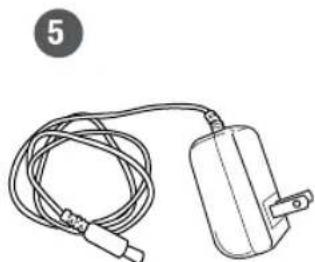
natural_image
Line drawing of a cable and plug device (no text or symbols)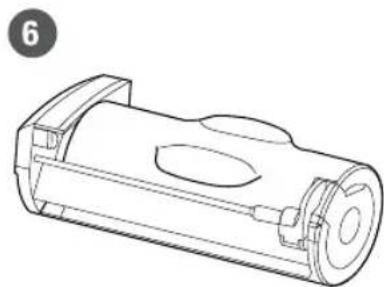
natural_image
Technical line drawing of a cylindrical mechanical component with internal cavities and mounting flanges (no text or symbols)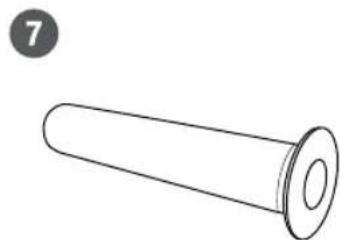
natural_image
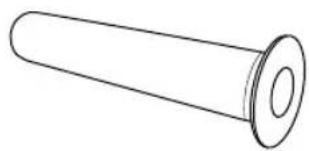
Simple line drawing of a cylindrical object with a flanged end (no text or symbols)Assembly

natural_image
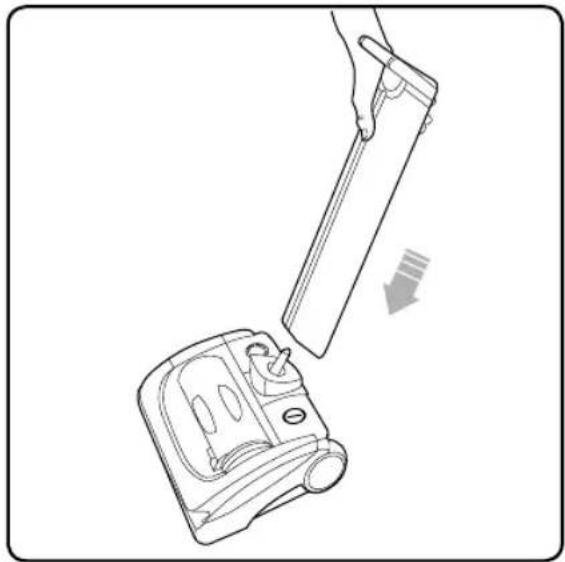
Line drawing of a hand holding a tool above a device with an arrow indicating motion (no text or symbols)Attach the lower handle onto the head of the vacuum.
text_image
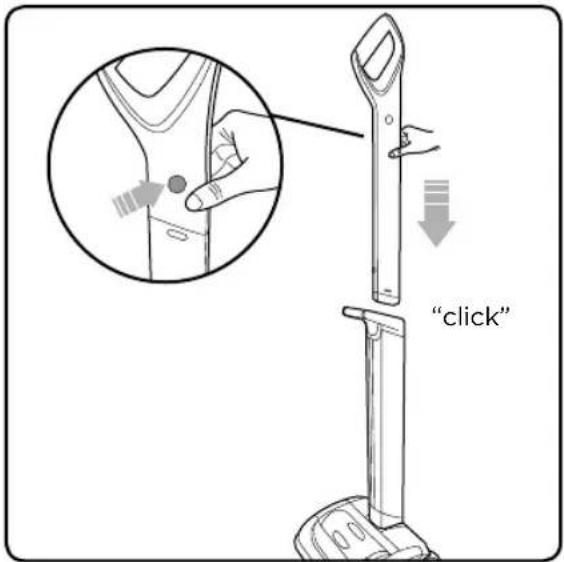
"click"Press the button at the top of the upper handle and slot it into the lower handle until it clicks.
text_image
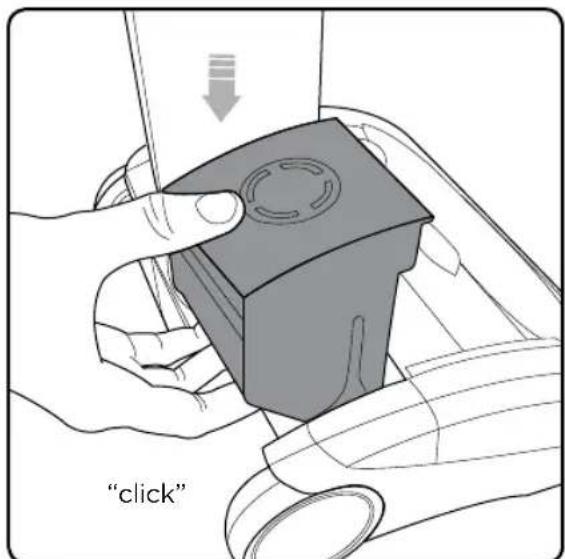
"click"Insert the battery by sliding it down. It will click into place.
text_image
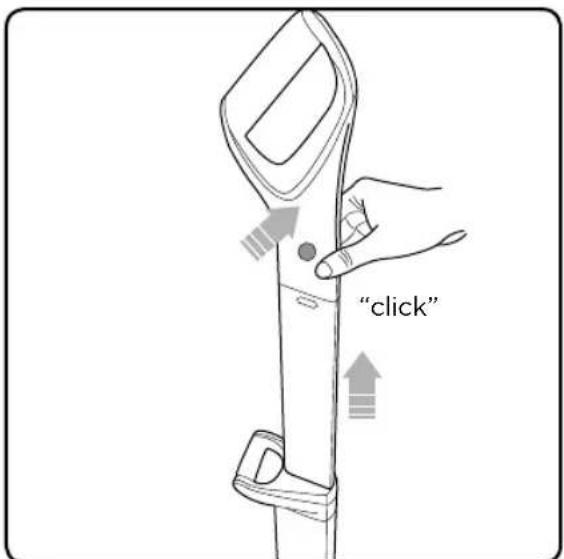
"click"To extend the upper handle, hold down the button on the left hand side and pull it up. It will click into place.
Operation
natural_image
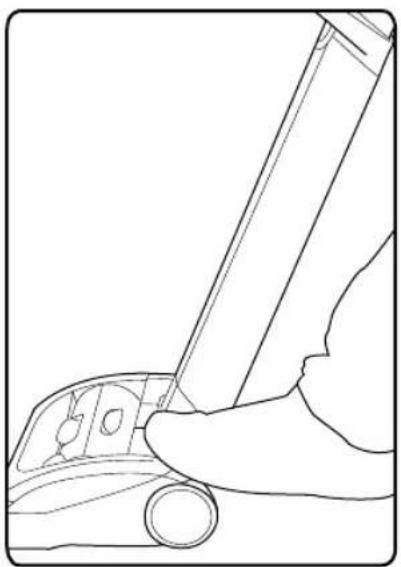
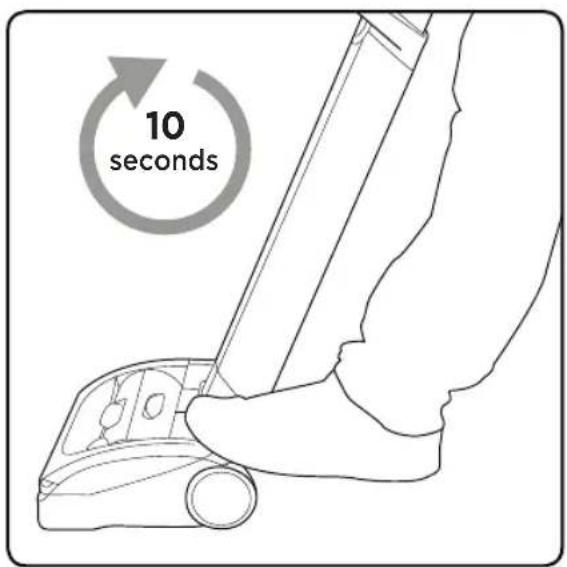
Line drawing of a hand pressing down on a device with directional arrows indicating motion (no text or symbols)Without pressing the power button, place your foot on the left side of the vacuum head and pull the handle back.
natural_image
Diagram of a car interior with a highlighted rectangular component (no text or symbols)The power button is located on the left hand side of the vacuum head. Step on button to start.
Storing your cordless upright
natural_image
Line drawing of a hand holding a pen over a car wheel (no text or symbols)The power button is located on the left hand side of the vacuum head. Step on button to stop.
natural_image
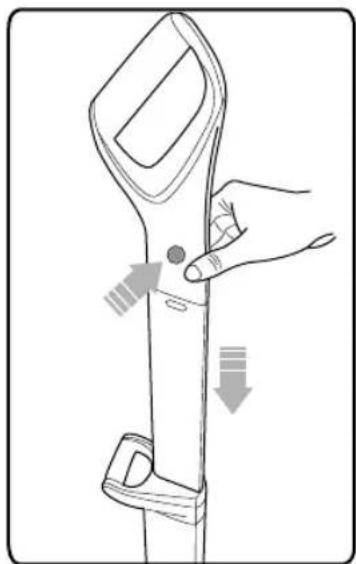
Line drawing of a hand holding a tool with directional arrows indicating movement or adjustment (no text or symbols)To lower the upper handle, simply press the button on the left hand side and push the handle down.
natural_image
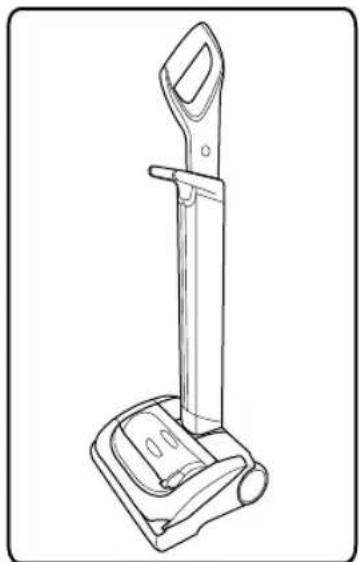
Line drawing of a vacuum cleaner device with handle and base (no text or symbols)The handle will now be fully retracted and the vacuum can be conveniently stored.
Battery charging
text_image
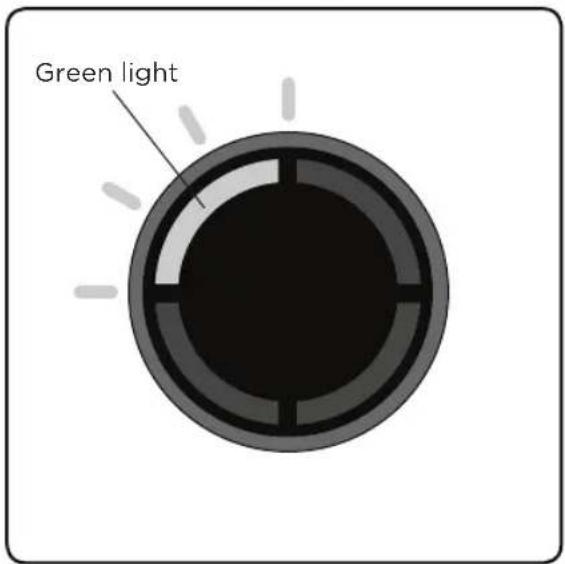
Green lightWhen the state of charge indicator starts to flash one green LED, recharge the battery.
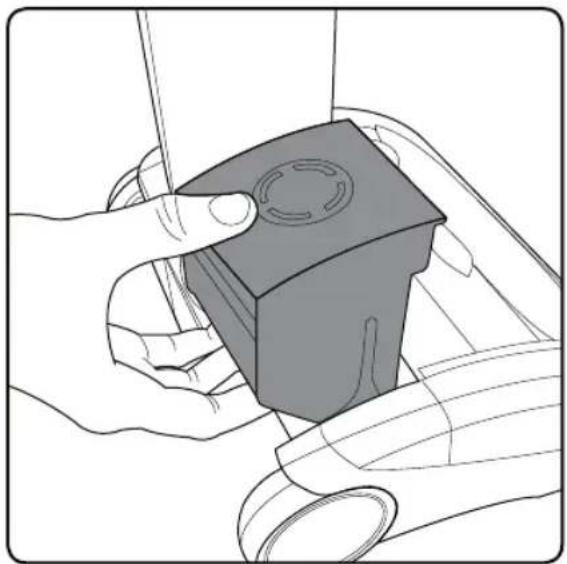
natural_image
Illustration of hands holding a small mechanical component with a circular feature, no text or symbols presentThe battery can be charged while it's in the vacuum, or when it's off the product. To remove the battery, squeeze the latch underneath and pull upwards.
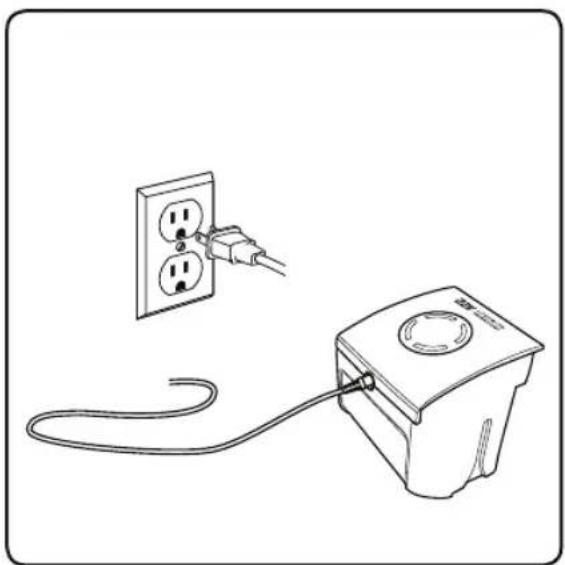
natural_image
Line drawing of a power outlet connected to a wall-mounted electrical socket (no text or symbols)Plug the charger in and connect it to the battery.
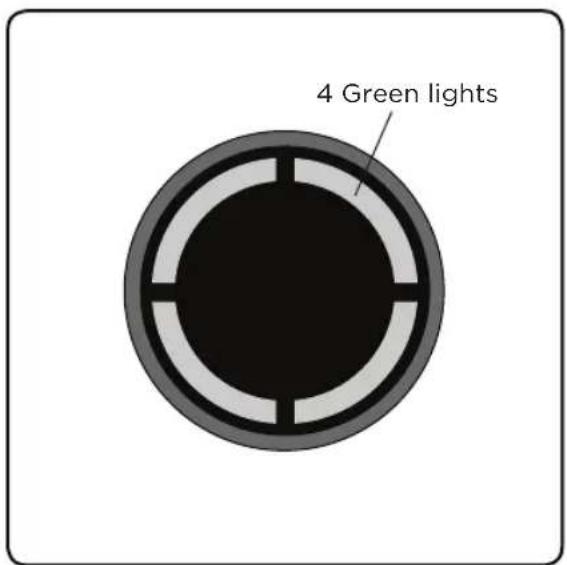
text_image
4 Green lightsThe battery can be charged from flat in 4.5 hours. The state of charge indicator will show 4 green lights when it is charged. It is OK to charge for 1 hour for a burst of cleaning.
Emptying the dirt bin
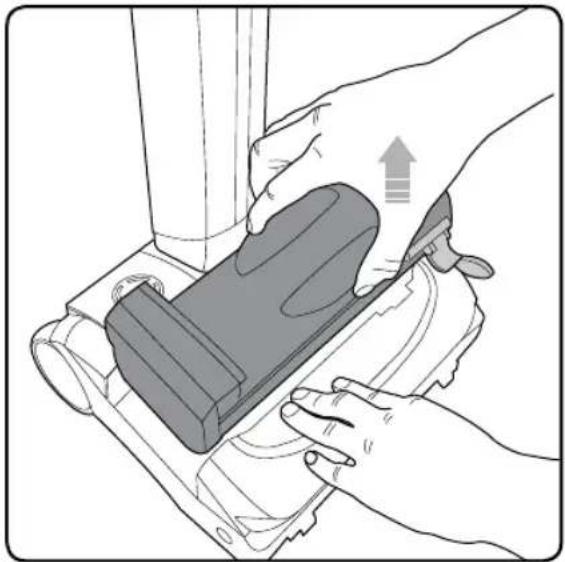
natural_image
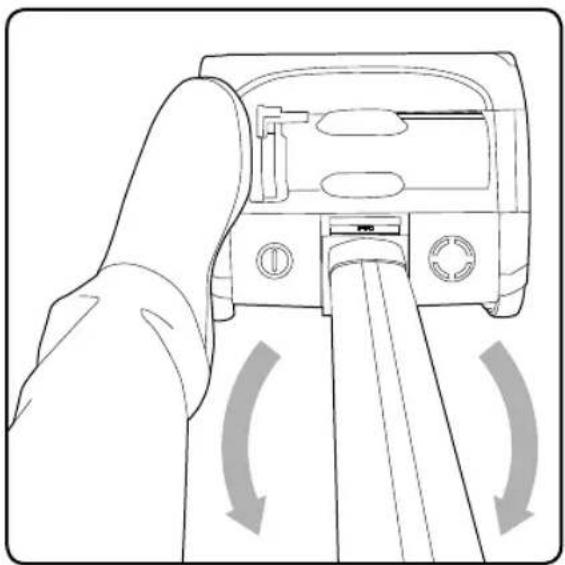
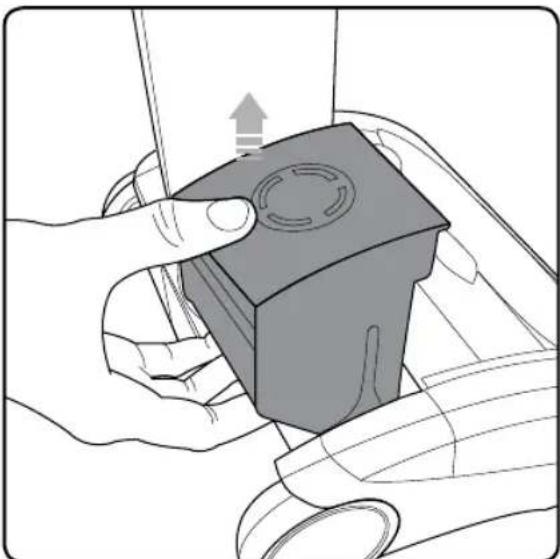
Illustration of hands using a handheld device to adjust or install a mechanical component (no text or symbols visible)Firmly hold the vacuum with one hand and pull the dirt bin handle and lift the dirt bin out.
natural_image
Line drawing of a hand holding a device with directional arrows indicating movement (no text or symbols)Release the latch with the green arrow, to pull open the bin lid.
natural_image
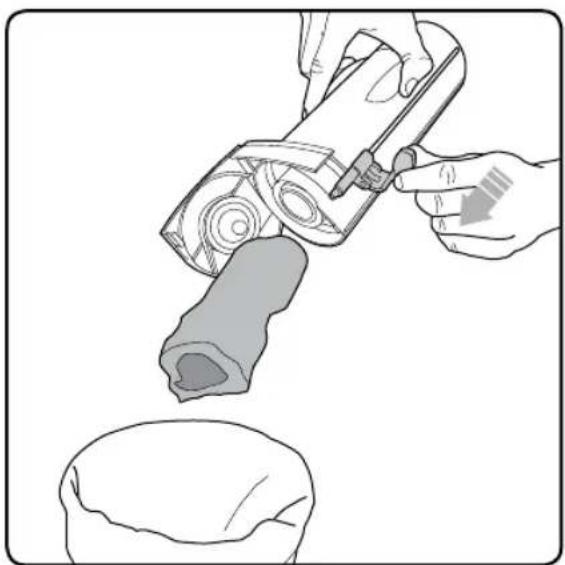
Illustration of a hand using a tool to lift a mechanical component, with a close-up view of the base (no text or symbols)Hold the vacuum's dirt bin over a wastebasket and push the lever towards the open lid to empty.
natural_image
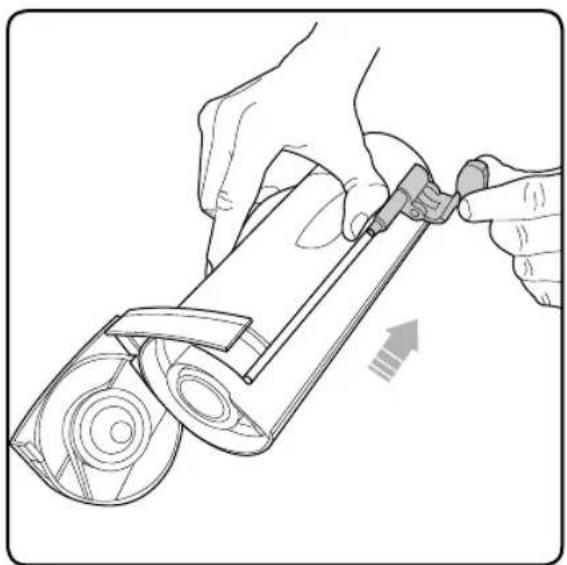
Illustration of hands using a tool to adjust or install a mechanical component (no text or symbols visible)Pull the lever back towards the bottom of the dirt bin. Close the dirt bin lid and reinsert into the vacuum.
NOTE: The lever must be back in its original position to properly close the lid and insert into the vacuum.
erstCleaning the fil

natural_image
Illustration of hands using a mechanical device to adjust a component (no text or symbols visible)Firmly hold the vacuum with one hand and pull the dirt bin handle and lift the dirt bin out.
natural_image
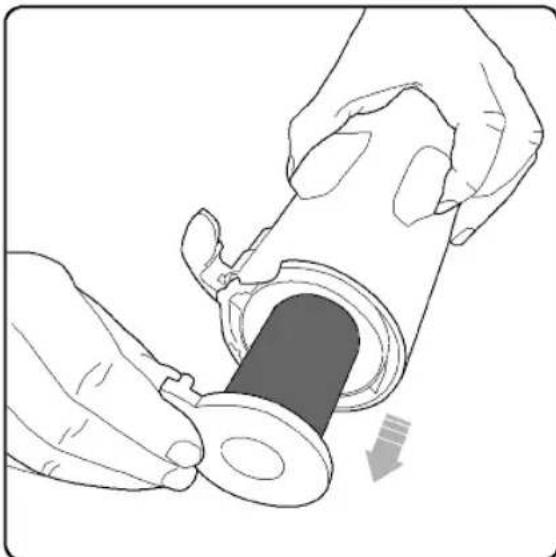
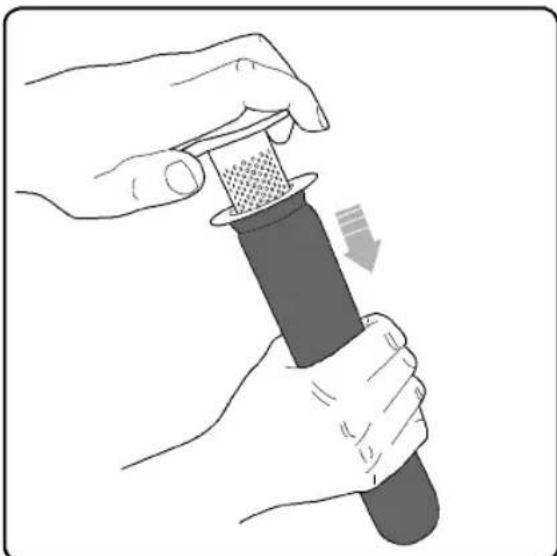
Illustration of hands installing a mechanical component into a cylindrical part (no text or symbols)Pull the filter out of the dirt bin. Tap the dirt from the filter and tip the filter housing to remove debris. Wash the filter if necessary.
natural_image
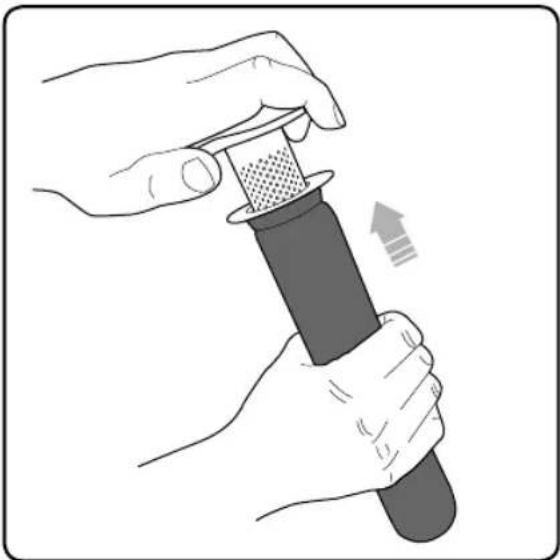
Illustration of hands using a pipette to press or adjust a textured object, with no visible text or symbols.Firmly hold the filter and with the other hand grasp the separator cap. Gently pull the filter and separator cap apart. (Gently twisting and pulling will help separate the two parts.)
natural_image
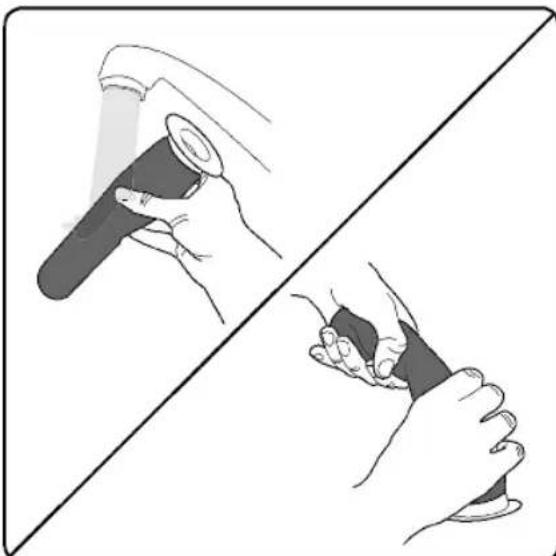
Illustration of two hands holding a pen, one open and one closed, separated by a diagonal line (no text or symbols)You may gently wash the filter under warm water. Do not use detergents or soaps. The filter must be completely dry before reinserting into the vacuum.
NOTE: Clean the filters at least once a week. More frequent filter cleaning may be necessary depending on your usage and environment.
Replacing the filters
natural_image
Illustration of hands using a micrometer to measure a textured surface (no text or symbols)
natural_image
Illustration of hands installing a mechanical component into a cylindrical part (no text or symbols)Slide the filter onto the separator. Slide the filter back into the dirt bin.
Removing and cleaning the brush roll
natural_image
Illustration of hands using a tool to press a small mechanical component (no text or symbols visible)
natural_image
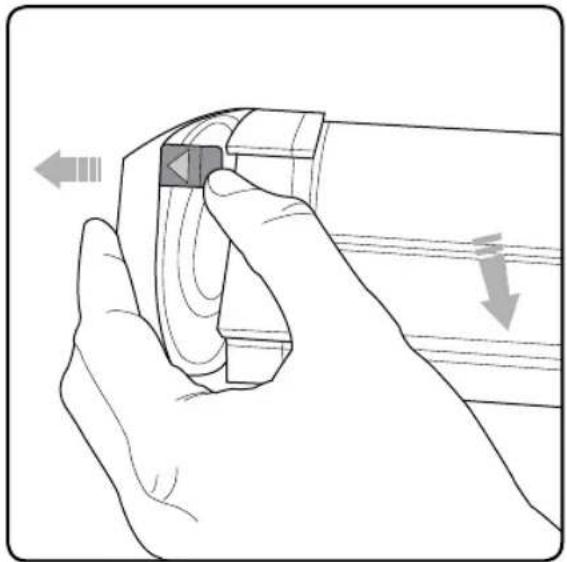
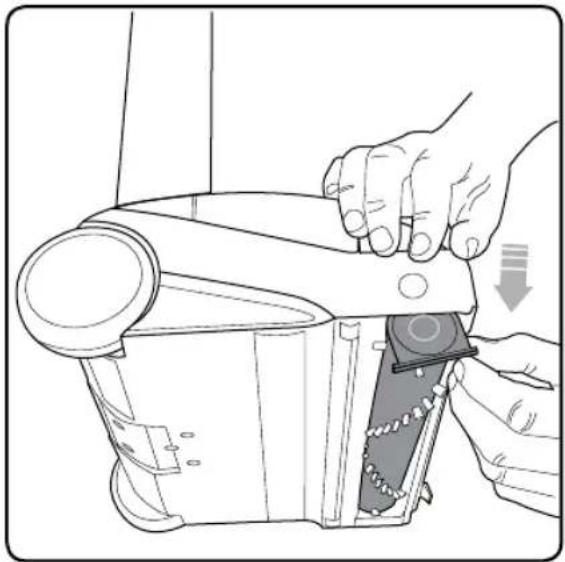
Line drawing of a hand using a screwdriver to press a device into a device (no text or symbols present)If the brush roll jams during use, the vacuum will stop and the LEDs will appear red. Before checking for a blockage, remove the battery.
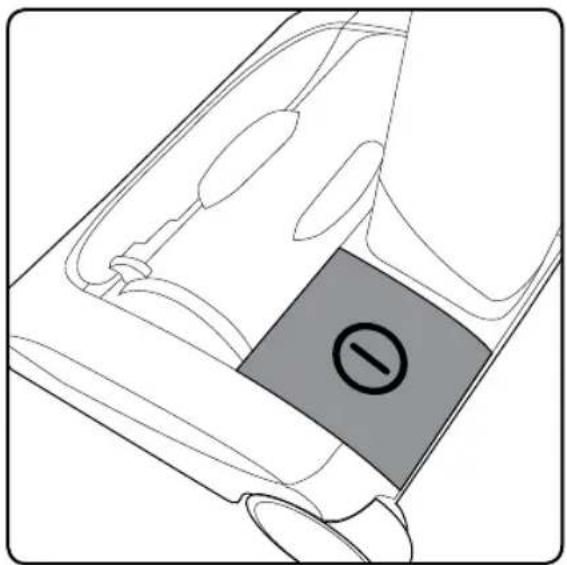
Rest the vacuum on its side and locate the brush roll release button. Press and hold the release button and pull out the brush roll.
NOTE: The brush roll should be pulled first from the side near the release button.
natural_image
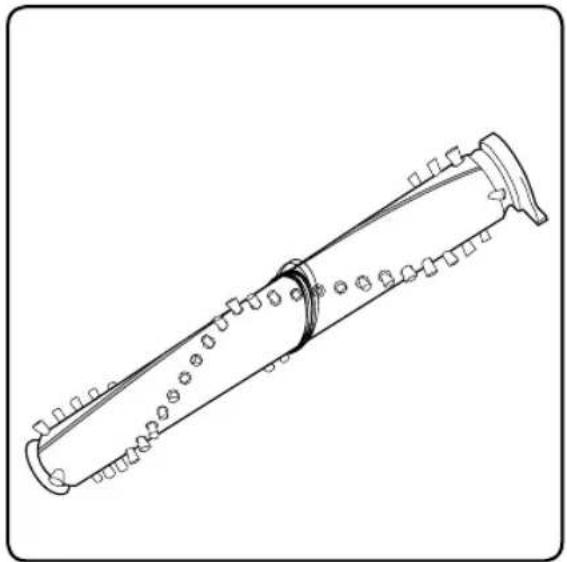
Line drawing of a hand using a tool to adjust or install a mechanical component, with no visible text or symbols.The brush roll can now be removed, starting at the button end.
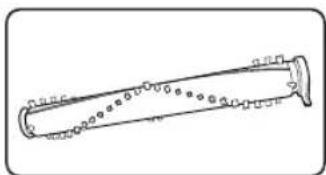
natural_image
Line drawing of a cylindrical mechanical component with evenly spaced holes and a curved end (no text or symbols)Clean the brush roll as needed.
natural_image
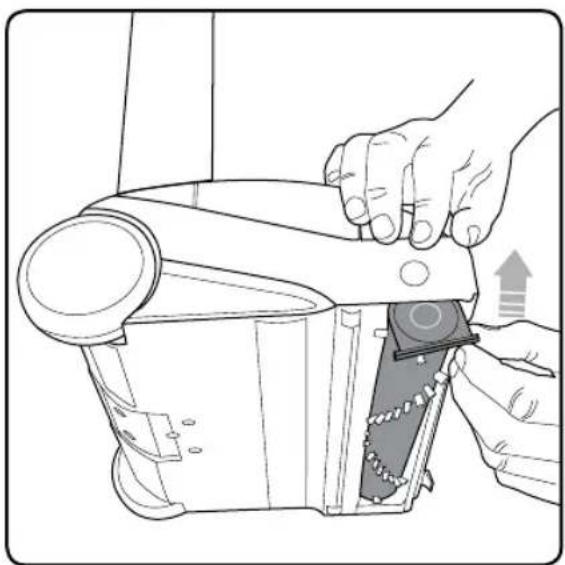
Illustration of hands using a tool to adjust or install a mechanical component (no text or symbols visible)Re-insert the brush roll, starting by locating the end furthest away from the button. Then push the brush roll into the vacuum until it clicks into place.
text_image
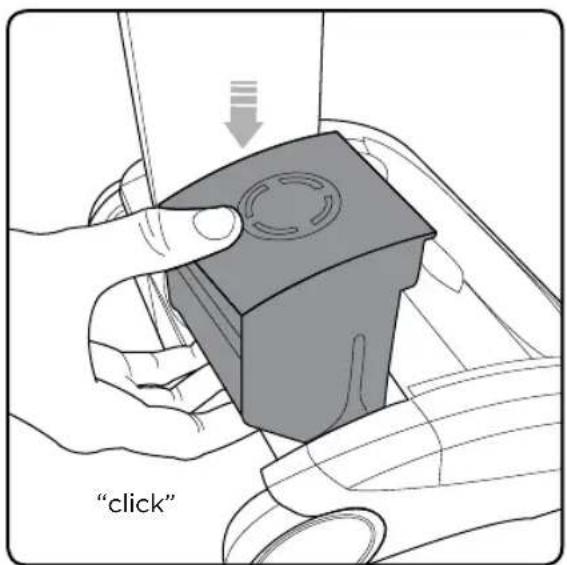
"click"Replace the battery by sliding it down. It will click into place.
text_image
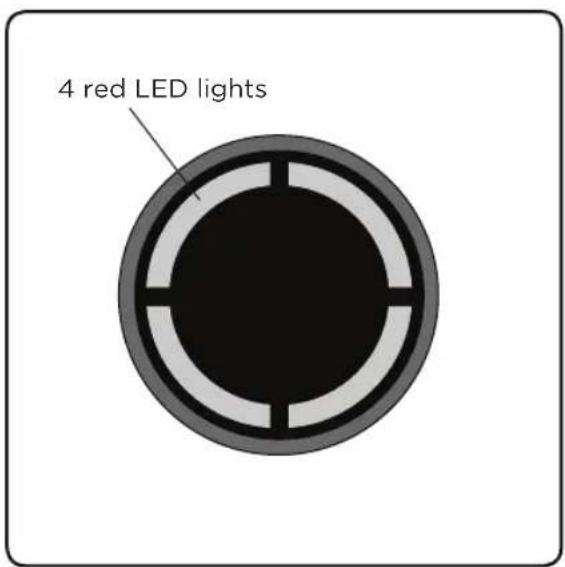
4 red LED lightsIf the brush roll jams during use, the vacuum will stop working and the 4 LED lights will appear red. You will need to remove the battery first, and then remove the brush roll to clean it.
text_image
10 secondsThe vacuum will not re-start until the red LED lights go out. It should take approximately 10 seconds for the red lights to turn off after the brush roll has been removed, cleaned, and the jam is cleared.
Product care
Your Sanitaire Commercial Cordless Upright doesn't need much maintenance: keep the filters clean, keep the brush roll tangle-free and charge the battery. Wipe it with a dry cloth if it gets dirty, including under the dirt bin. Never wash it with liquid, run it under a tap or use it without the filter.
Troubleshooting
WARNING
To reduce the risk of electric shock, turn power switch off and remove battery before performing maintenance or troubleshooting checks.
| Problem Possible causes Remedies | ||
| Vacuum stopped or won't work | Battery isn't fully charged | Charge battery following instructions on page 7 |
| Brush roll obstruction | Clear debris from the brush roll | |
| Vacuum is not cleaning well | Dirt bin is full | Empty dirt bin |
| Dirt bin is not installed properly | Position bin correctly and snap firmly into place | |
| Filters need cleaning | Follow filter cleaning instructions on page 9 | |
| Filters need replacing | Visit www.sanitairecommercial.com or call 1-800-800-8976 to order replacement filters | |
| Clog or obstruction | Clean the holes in the filter housing and check for blockages | |
| Battery will not charge | Connection failure | Check the plug and charger connections |
WARRANTY
This warranty gives you specific legal rights, and you may also have other rights which may vary from state to state. If you need additional instruction regarding this warranty or have questions regarding what it may cover, please contact Sanitaire® Customer Service by E-mail, telephone or regular mail as described below.
Limited One-Year Warranty
Subject to the *EXCEPTIONS AND EXCLUSIONS identified below, upon receipt of the product Sanitaire will repair or replace (with new, refurbished, lightly used, or remanufactured components or products), at Sanitaire's option, free of charge from the date of purchase by the original purchaser, for one year any defective or malfunctioning part.
See information below on "If your Sanitaire product should require service".
This warranty does not apply to fans or routine maintenance components such as filters, belts or brushes. Damage or malfunction caused by negligence, abuse, neglect, unauthorized repair, or any other use not in accordance with the user guide is not covered.
Some states do not allow the exclusion or limitation of incidental or consequential damages, so the above limitation or exclusion may not apply to you.
\*EXCEPTIONS AND EXCLUSIONS FROM THE TERMS OF THE LIMITED WARRANTY
THIS WARRANTY IS EXCLUSIVE AND IN LIEU OF ANY OTHER WARRANTIES, EITHER ORAL OR WRITTEN. ANY IMPLIED WARRANTIES WHICH MAY ARISE BY OPERATION OF LAW, INCLUDING THE IMPLIED WARRANTIES OF MERCHANTABILITY AND FITNESS FOR A PARTICULAR PURPOSE, ARE LIMITED TO THE ONE-YEAR DURATION FROM THE DATE OF PURCHASE AS DESCRIBED ABOVE.
Some states do not allow limitations on how long an implied warranty last so the above limitation may not apply to you.
NOTE: Please keep your original sales receipt. It provides proof of date of purchase in the event of a warranty claim.
SERVICE INFORMATION
If your Sanitaire product should require service
You will find the nearest Sanitaire Authorized Service Center in your area online at sanitairecommercial.com under service locator or contact Sanitaire Customer Service.
If you need information about repairs or replacement parts, or if you have questions about your warranty, contact Sanitaire Customer Service.
Website:
www.SanitaireCommercial.com
Call:
Sanitaire Customer Service 1-800-800-8975
Sanitaire®
THE ULTIMATE TIME MACHINE™
natural_image
Line drawing of two different vacuum cleaner designs, shown from top and side views (no text or symbols)CONSIGNES DE SÉCURITÉ IMPORTANTES

IMPORTANT : LISEZ TOUTES LES INSTRUCTIONS AVANT L'UTILISATION. CONSERVEZ LES INSTRUCTIONS POUR RÉFÉRENCE ULTÉRIEURE.

natural_image
Line drawing of a laboratory apparatus with a beaker, bulb, and control panel (no text or symbols)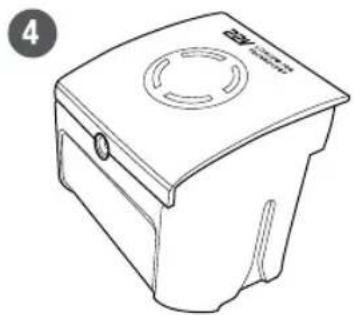
natural_image
Line drawing of a box with a circular vent and handle, no text or symbols present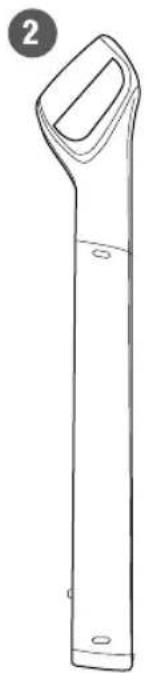
natural_image
Line drawing of a vertical cylindrical object with a handle and base, labeled with number 2 (no text or symbols on the object itself)
natural_image
Line drawing of a vertical mechanical component with a curved top and flange (no text or symbols)5

natural_image
Line drawing of a handheld electronic device with coiled cable and power plug (no text or symbols)6

natural_image
Technical line drawing of a mechanical component with cylindrical body and flanges (no text or symbols)7
natural_image
Simple line drawing of a cylindrical object with a flanged end (no text or symbols)Assemblage
natural_image
Line drawing of a hand holding a tool next to a device with an arrow indicating motion (no text or symbols)natural_image
Line drawing of a hand inserting a cable into a device with directional arrows indicating rotation (no text or symbols)natural_image
Diagram of a car interior with a highlighted rectangular component (no text or symbols)natural_image
Line drawing of a hand holding a pen, writing on a curved surface (no text or symbols present)natural_image
Line drawing of a hand holding a tool with directional arrows indicating movement or force (no text or symbols)natural_image
Line drawing of a vacuum cleaner device with handle and base (no text or symbols)natural_image
Illustration of hands holding a small mechanical component with a circular feature, no text or symbols presentnatural_image
Line drawing of a power outlet connected to a wall-mounted electrical socket (no text or symbols)natural_image
Illustration of hands using a handheld device to adjust or install a mechanical component (no text or symbols visible)natural_image
Line drawing of a hand holding a device with directional arrows indicating movement (no text or symbols)natural_image
Illustration of a hand using a tool to adjust or install a mechanical component, with no visible text or symbols.natural_image
Illustration of hands using a tool to adjust or install a mechanical component (no text or symbols visible)natural_image
Illustration of hands using a tool to adjust or install a mechanical component, no text or symbols presentnatural_image
Illustration of hands installing a mechanical component into a cylindrical part (no text or symbols)natural_image
Illustration of hands using a pipette to press or install a mechanical component, no text or symbols presentnatural_image
Illustration showing two hands holding a pen and a wrist, separated by a diagonal line (no text or symbols)natural_image
Illustration of hands using a micrometer to measure a textured surface (no text or symbols)
natural_image
Illustration of hands installing a mechanical component into a cylindrical part (no text or symbols)natural_image
Illustration of hands using a tool to press a small mechanical component (no text or symbols visible)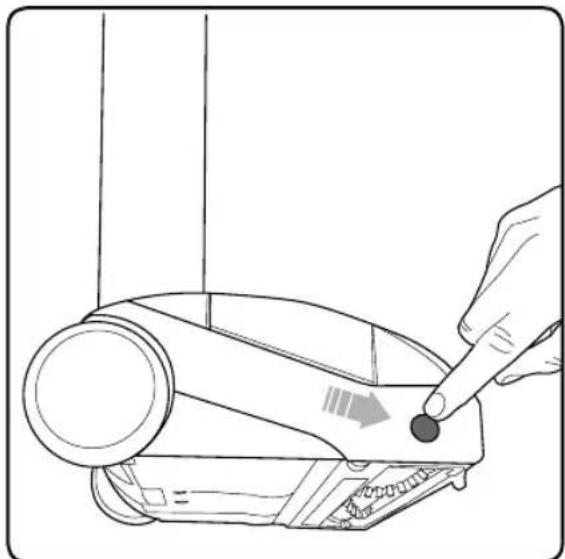
natural_image
Line drawing of a hand using a screwdriver to press a device into a device (no text or symbols present)natural_image
Line drawing of a hand using a tool to adjust or install a mechanical component, with no visible text or symbols.natural_image
Line drawing of a cylindrical mechanical component with evenly spaced holes and a curved end (no text or symbols)natural_image
Illustration of hands using a tool to adjust or install a mechanical component, showing no text or symbols present.text_image
10 seconds\*EXCEPTIONS ET EXCLUSIONS DES CONDITIONS DE LA GARANTIE LIMITÉE
CETTE GARANTIE EST EXCLUSIVE ET REPLACE TOUTE AUTRE GARANTIE, VERBALE OU ÉCRITE. TOUTES LES GARANTIES IMPLICITES POUVANT RÉSULTER DE L'APPLICATION D'UNE LOI, Y COMPRIS LES GARANTIES IMPLICITES DE QUALITÉ MARCHANDE ET DE CONVENANCE À UN USAGE PARTICULIER, SONT LIMITÉES À LA DURÉE D'UN AN À COMPTER DE LA DATE D'ACHAT, TEL QUE STIPULÉ CI-DESS.
natural_image
Line drawing of two different vacuum cleaner designs, shown from top and side views (no text or symbols)natural_image
Line drawing of a laboratory apparatus with a test tube and base (no text or symbols)
natural_image
Line drawing of a portable electronic device with a cylindrical top and two circular compartments (no text or symbols)
natural_image
Line drawing of a vertical cylindrical object with a handle and base, labeled with number 2 (no text or symbols on the object itself)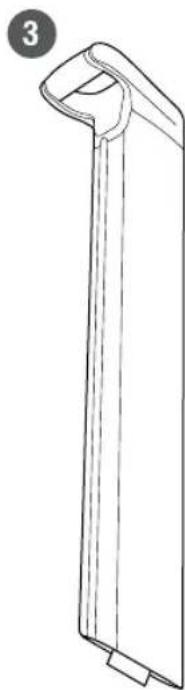
natural_image
Line drawing of a vertical rectangular object with a curved top and base, no text or symbols presentnatural_image
Line drawing of a portable trash bin with a circular vent and handle (no text or symbols)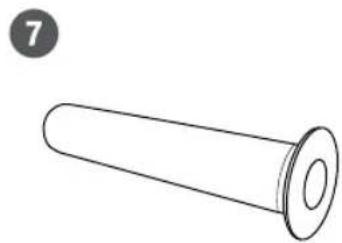
natural_image
Simple line drawing of a cylindrical object with a flanged end (no text or symbols)5
natural_image
Line drawing of a handheld electronic device with coiled cable and power plug (no text or symbols)6
natural_image
Technical line drawing of a cylindrical mechanical component with mounting flanges (no text or symbols)Ensemblar

natural_image
Line drawing of a hand holding a tool above a device with a downward arrow indicating motion (no text or symbols)natural_image
Line drawing of a hand inserting a cable into a device, showing directional arrows (no text or symbols)natural_image
Diagram of a car interior with a highlighted rectangular component (no text or symbols)natural_image
Line drawing of a hand holding a pen over a car wheel (no text or symbols)natural_image
Line drawing of a hand holding a tool with directional arrows indicating movement or change (no text or symbols)natural_image
Line drawing of a vacuum cleaner device with handle and base (no text or symbols)text_image
Luz verdenatural_image
Illustration of hands holding a small mechanical component with a circular feature, no text or symbols presentnatural_image
Line drawing of a power outlet connected to a wall-mounted electrical socket (no text or symbols)natural_image
Illustration of hands using a handheld device to adjust or install a mechanical component (no text or symbols visible)natural_image
Line drawing of a hand holding a small object with directional arrows indicating movement (no text or symbols)natural_image
Illustration of a hand using a tool to lift a mechanical component, with a separate view of a circular object below (no text or symbols)natural_image
Illustration of hands using a tool to adjust or install a mechanical component (no text or symbols visible)natural_image
Illustration of hands using a tool to adjust or install a mechanical component (no text or symbols visible)natural_image
Illustration of hands installing a mechanical component into a cylindrical part (no text or symbols)natural_image
Illustration of hands using a pipette to press or install a mechanical component (no text or symbols visible)natural_image
Illustration of two hands holding a pen, one open and one closed, separated by a diagonal line (no text or symbols)natural_image
Illustration of hands using a micrometer to measure a textured object, with an arrow indicating motion (no text or symbols)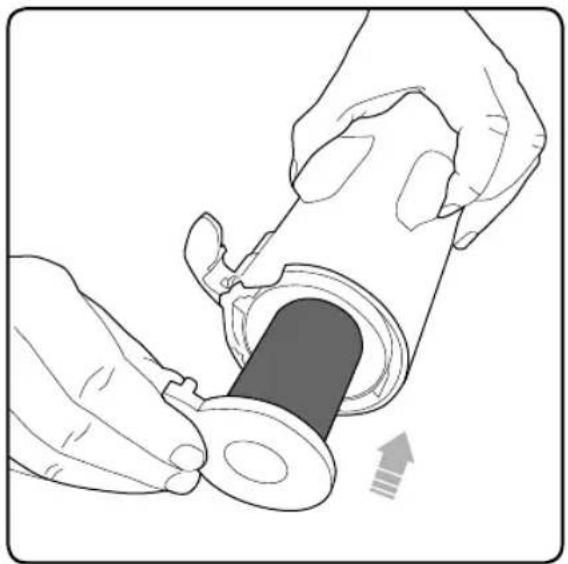
natural_image
Illustration of hands inserting a cylindrical device into a plastic housing (no text or symbols)natural_image
Illustration of hands using a tool to press a mechanical component with a circular feature (no text or symbols)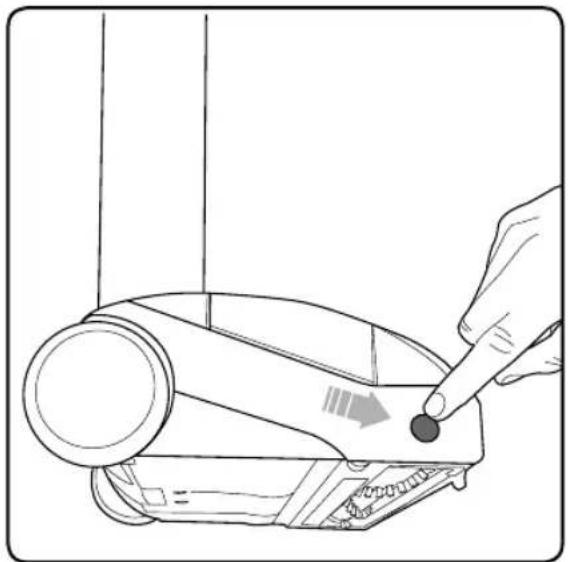
natural_image
Line drawing of a hand using a finger to press a device on a device (no text or symbols present)natural_image
Line drawing of a hand using a tool to adjust or install a mechanical component, with no visible text or symbols.natural_image
Line drawing of a cylindrical mechanical component with evenly spaced holes and a curved end (no text or symbols)natural_image
Illustration of hands using a tool to adjust or install a mechanical component, showing no text or symbols present.Order genuine Sanitaire replacement parts
natural_image
Simple line drawing of a cylindrical object with a flanged end (no text or symbols)Washable filter
Filtre lavable
Filtro lavable
3007
natural_image
Line drawing of a cylindrical object with evenly spaced circular holes, resembling a musical instrument or tool (no text or symbols)Brush roll
Cylindre brousseur
Cepillo de rodillo
1623180
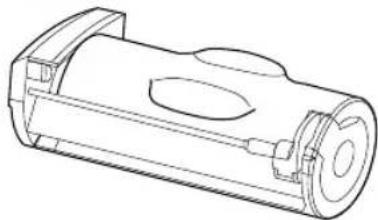
natural_image
Line drawing of a mechanical device with a circular top and side knob (no text or symbols)Battery
La pile
Batería
3006
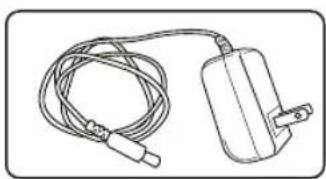
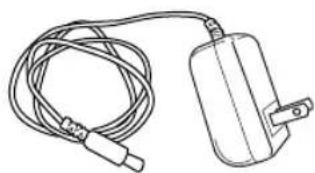
natural_image
Line drawing of a cable and electrical plug (no text or symbols)Battery charger
Charger la pile
Cargador de batería
3008
Sanitaire®
THE ULTIMATE TIME MACHINE™
© 2020 BISSELL Inc
Part Number PN 1622520_rev1 1/2020