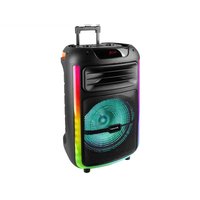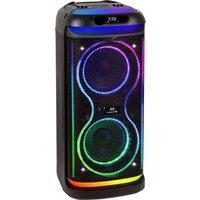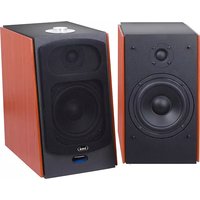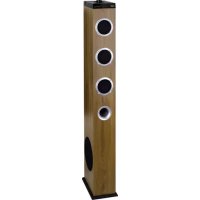
XT 10A8 BT - Speaker Trevi - Free user manual and instructions
Find the device manual for free XT 10A8 BT Trevi in PDF.


User questions about XT 10A8 BT Trevi
0 question about this device. Answer the ones you know or ask your own.
Ask a new question about this device
Download the instructions for your Speaker in PDF format for free! Find your manual XT 10A8 BT - Trevi and take your electronic device back in hand. On this page are published all the documents necessary for the use of your device. XT 10A8 BT by Trevi.
USER MANUAL XT 10A8 BT Trevi
AMPLIFIED TOWER SPEAKER WITH BLUETOOTH MP3/USB/SD/AUX-IN
Connection and Operation Manual
HAUT-PARLEUR AMPLIFIÉ AVEC BLUETOOTH MP3/USB/SD/AUX-IN
WARNING: DO NOT OPEN THE SET. NEITHER CONTROLS OR SPARE PARTS TO BE USED BY THE USER ARE TO BE FOUND INSIDE IT. APPLY TO AUTHORISED TREVICENTERS FOR SERVICE OPERATIONS.
GEFAHR ELEKTRISCHER
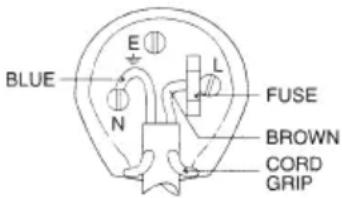
WIRES CONNECTIONS TO A UK THREE-PIN PLUG
The wires in this mains lead are coloured in accordance with the following wiring codes:
Blue: Neutral
Brown: .Live
The wires in this mains lead must be connected to the terminals in the plug as follows:
Blue wire: N or Black
Brown wire:............L or Red
Neither wire is to be connected to the earth (E or W) terminal of three-pin plug.
Should the fuse fail in the plug remove the plug form the wall socket and replace the fuse with a 3 Amp. ASTA approved BS 1362 fuse.
AVVERTENZE E NOTE D'USO
Consumo in Stand-by: <0,5W
This is a precision electronic appliance; avoid using it in the following cases:
- Place the device on a flat surface.
- Place the device so that its sides there is always enough space for air to circulate freely (at least 10 cm).
- Do not place anything on top of the unit.
- The apparatus shall not be exposed to dripping or splashing water. No objects filled with liquid, such as vases, should be placed on the unit.
- If liquids penetrate inside the device immediately disconnect the plug from the socket and take it to the nearest service center autorizzato TREVI.
- No naked flame sources, such as lighted candles, should be placed on.
- Cables should be hidden and protected in order to avoid stumbling from someone and the consequent fall of the appliance.
- Keep the unit away from the following places: near magnetic fields; near heat sources (radiators, stoves, direct sunlight, etc...); near wetlands (bathrooms, swimming pools, etc...); dusty areas; areas subject to strong vibration.
- Disconnect the power cord during storms or for long periods of inoperation.
- Unplug the power cable during thunderstorms or long periods of inactivity.
- Instruct the proper use children and people with little knowledge of the product.
- Do not close the ear to the loudspeaker during step setting and volume adjustments, and in particular keep the volume at idle during power-up.
- Listen at high volume for a long time, can damage your hearing.
- Keep the following user manual.
To prevent possible hearing damage, do not listen at high volumes levels for long periods.
CARE AND MAINTENANCE
Use a slightly damp soft cloth for cleaning. Do not use solvents and abrasive substances.
IMPORTANT
This appliance has been carefully built to ensure long-lasting perfect performance. However, should any inconvenience occur, please contact your local authorised TREVI Service Centre.
TREVI follows a policy of ongoing research and development. Therefore products may have different features from those described.
INSTALLATION
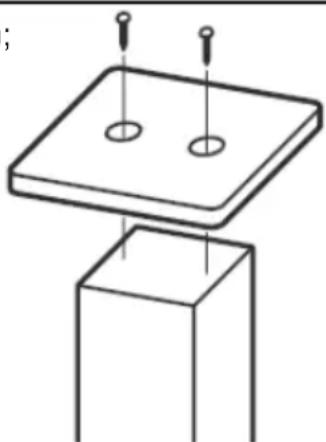
- Rotate the tower and locate the holes (in the opposite side of the keyboard);
- Fit the base with the body aligning the holes on the base with the holes on the tower;
- Screws the base into the body;
- Do not over tighten the screws to avoid damaging the cabinet;
- Place the speaker standing on the floor and it's ready to use.
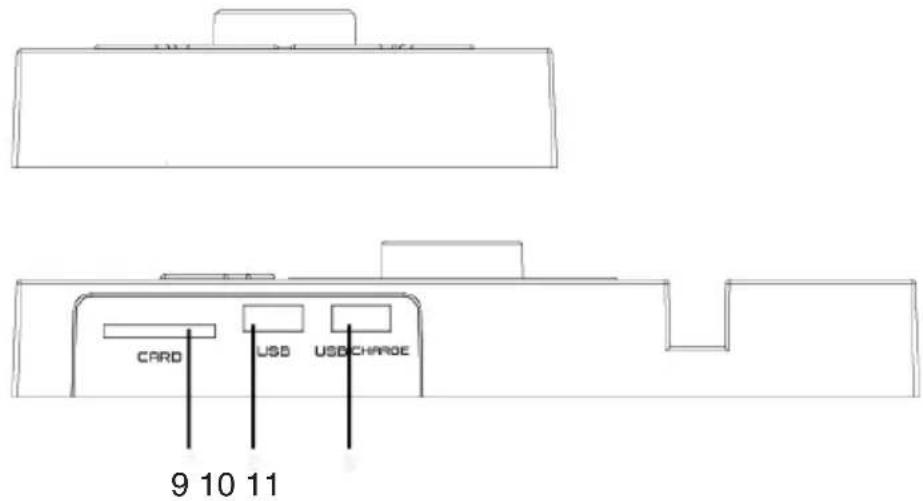
TOP PANEL AND REAR PANEL DESCRIPTIONS
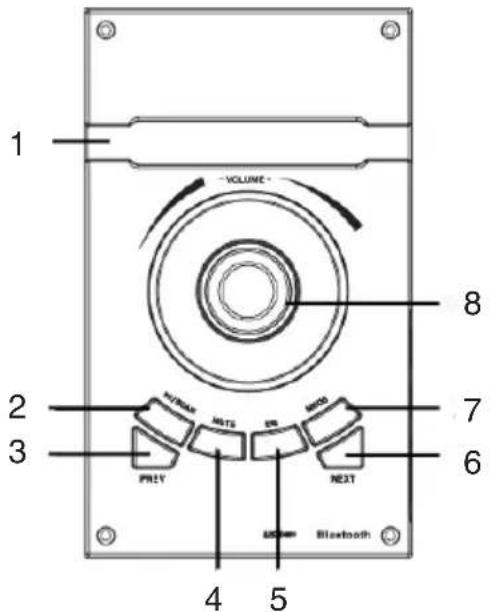
- Support for external devices.
- :PHy/Pause button.
- :skip to previous track.
- MUTE button.
- EQ button.
- : to next track.
- M button: MODE switching.
- VOLUME.
- SD Card slot.
- USB port for playback.
- USB port for charging external mobile device (5V, 1A).
- AC Input.
- Power Switch ON/OFF.
- AUX 3.5mm Jack input.
- AUX RCA input.

REMOTE CONTROL
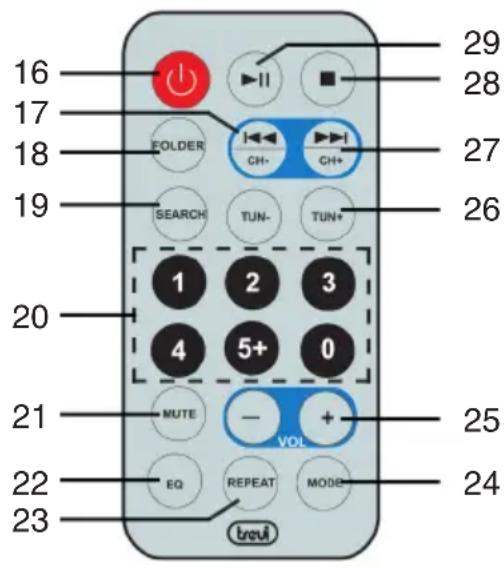
- button: Stand-by/ON.
- H- button: previous track /channel.
- FOLDER button.
- SEARCH button: automatic storage Radio stations.
- Numbers button.
- MUTE button.
- EQ button.
- REPEAT button.
- MODE button: function selection.
- VOL + /VOL - buttons.
- TUN +/TUN - buttons.
- + button: next track/channel.
- Button: Stop.
- button: play/pause.
POWER SUPPLY
Plug the power cord into the socket (12) on the device and plug into a power outlet.
BASIC FUNCTION
POWER ON/OFF
Press the POWER ON/OFF switch (13) and turn it to the "I" position to switch the appliance on. Press the POWER ON/OFF switch (13) and turn it to the "0" position to switch off the appliance.
STAND-BY
- Press the button (16) on the remote control to turn ON the unit.
- Press the button (16) on the remote control to turn OFF the unit.
MODE FUNCTION
To change the operating mode, press the M button (7) on the unit or press the MODE button (24) on remote control repeatedly.
VOLUME ADJUSTMENT
Turn the knob (8) on the unit or use the VOL + /VOL - buttons (25) on remote control to increase or decrease the volume of the appliance.
FM RADIO
AUTOMATIC SEARCH
- Switch on the appliance and press M button (7) on the unit several times or press the MODE button (24) on the remote control to select the RADIO function (the frequency indication will appear on the display);
- Hold the button 2 on the unit for a few seconds or press the SEARCH button (19) on remote control to start the automatic search of the stations (the radio starts searching for radio stations and will automatically save them in the memory). The number of stored stations depends on the radio signal in your area. The device can store up to 80 stations;
- Press (3) or (6) button on the unit, or CH- (17), CH+ (27) buttons on remote control to select the next or the previous radio channel.
- If the channel signal is not good, it can be fine tuned by pressing the TUN +/TUN - (26) button on the remote control to adjust the signal.
Note: For a better sound quality, please make sure that the FM Antennahas been fully extended.
USB/SD INPUT
- Insert a USB memory in the socket (10) or an SD card in the input (9);
- Turn on the unit, the playback of the tracks will start automatically, if this does not happen press the M button (7) on the unit several times and select the USB/SD Card function, or press MODE button (24) on the remote control;
- To pause playback, press button (2) on the unit, or button (29) on the remote control;
- To resume playback, press button again;
- Press (3) or (6) button on the unit, or CH- (17), CH+ (27) button on the remote control, while listening to move to the previous or next track.
Note:
- The player may not support some USB devices, this is due to the incompatibility of some processors.
- To avoid harmful interference, always connect USB devices directly to the unit, do not use extension cables.
- From the computer format the USB memory in FAT (16 or 32).
RECHARGE OF EXTERNAL DEVICES
The device can also be used to charge external devices such as smartphones, MP3 players, etc...
Make sure that the voltage and current supplied by the device are correct for the device to recharge.
Connect the external device to the USB CHARGE (11) jack.
BLUETOOTH
- Turn on the unit and press the M button (7) on the unit repeatedly, or press the MODE button (24) on the remote control and select the BLUETOOTH function;
- The "bt" word will appear on the display and the system will automatically enter pairing mode with external devices;
- Activate the Bluetooth functionality on the external device to be paired and start searching for the devices. At the end select the "XT 10A8 BT" device;
- Enter the "0000" password if required;
- Once paired, a short confirmation tone will sound;
- Press (2) button on unit, or (29) button on the remote control to start playback; press it again to stop playback temporarily;
- Press (3) or (6) button on the unit, or CH- (17), CH+ (27) button on the remote control, while listening to move to the previous or next track.
AUX-IN INPUT
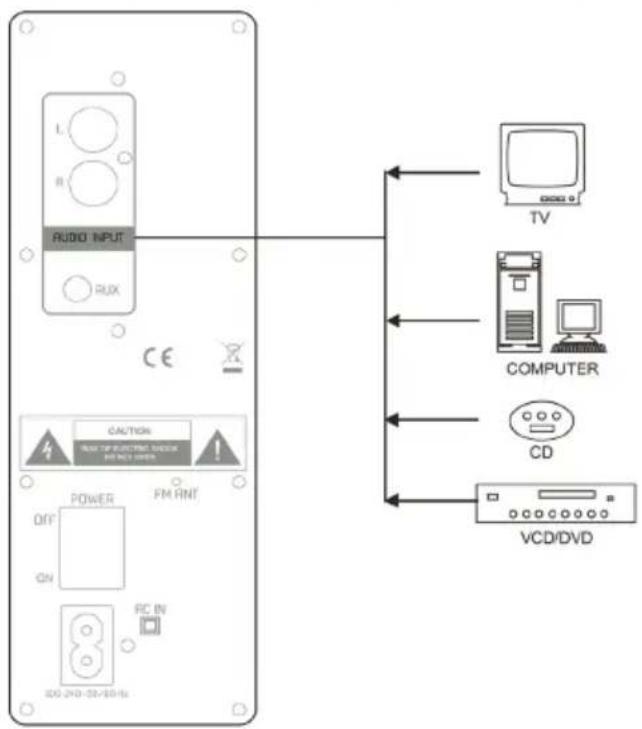
- Use a 3.5mm Stereo jack cable or an RCA cable to connect the AUX-IN inputs (14 and 15), located behind the unit, to the audio output of the TV, DVD or another device/source;
- Press the "Power" button to turn the speaker on;
- Press the M button (7) on the unit repeatedly, or press the MODE button (24) on the remote control and select AUX-In mode:
- Use the controls on the connected device to begin playing music.
TROUBLESHOOTING
If the Soundbar does not work properly, check this short list before taking it to a TREVI authorised service centre.
In any case, do not try to repair the device, this will void the warranty. Only TREVI authorised service centres are authorised to perform operations on this product.
No Sound:
- Check if MUTE function on AUX mode, or PAUSE function on USB or Bluetooth mode, are enabled.
- Check that the correct input has been selected.
- Check and adjust the volume of the Soundbar and the TV (or the device connected).
The unit does not turn on or turns off automatically:
- Check that you have properly connected the adapter jack.
Pairing problems with Bluetooth devices:
- If the audio quality is poor after pairing Bluetooth with an external device, bring the external device closer to the tower or remove any obstructions between them.
- If the connection between the tower and the device does not occur, check that the coupling function of the device is enabled; refer to the device manual to enable the function.
- If the coupling with the external device is activated and deactivated continuously, bring the external device closer to the tower or remove any obstacle between them. In some external devices, the Bluetooth pairing can be switched off automatically to safeguard the consumption of its battery, this is not a malfunction of the device.
I can't find the Bluetooth name of this unit on my Bluetooth device for Bluetooth pairing:
- Ensure that the unit is switched on.
- Ensure that the Bluetooth function is activated on your Bluetooth device.
The device does not react to any operation:
- Disconnect the power cable from the device for 30 seconds to reset it.
TECHNICAL FEATURES
Power source: 100-240V -50-60Hz
Stand-by consumption: <0,5W
Output power: 60W (15W x2 + 30W Sub-woofer)
Speaker drives: 3x 3inch +1x 5inch
FM Radio band reception: 87,5MHz - 108MHz
Bluetooth power transmission: 0,8mW
Bluetooth transmission: 2,4GHz
Unit size: 120x200x1000mm
Base size: 230x150x9,5mm
Weight: 5,9Kg
NOTES D'EMPLOI
Empfangsfrequency FM Radio: 87,5MHz - 108 MHz
Precautions for correct disposal of the act.
The symbol shown on the equipment indicates that waste must be disposed of in "separate collection" and so the product must not be disposed of together with urban waste. The user must take the product to special "separate waste collection centres" provided by local government, or deliver it to the retailer against the purchase of a new product.
Separate collection of waste and subsequent treatment, recycling and disposal operations promotes the production of equipment with recycled materials and limits negative effects on the environment and on health caused by improper handling of waste. Illegal disposal of the product leads to the enforcement of administrative penalties.
SIMPLIFIED EU DECLARATION OF CONFORMITY
Hereby TREVI Spa declares that the radio equipment type XT 10A8 BT is in compliance with directive 2014/53/EU.
The full EU text declaration of conformity is available at the following internet address: https://www.trevi.it/dms/zidi/TREVI/DOCXT10A8BTJ.pdf