
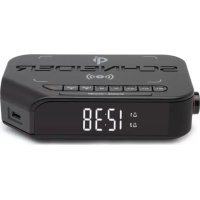
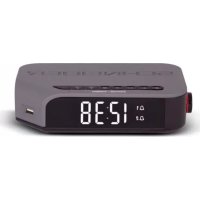
Diabolo SC420BBXBLK - Radio SCHNEIDER - Free user manual and instructions
Find the device manual for free Diabolo SC420BBXBLK SCHNEIDER in PDF.
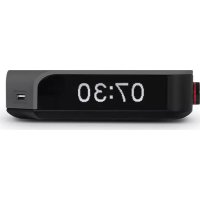
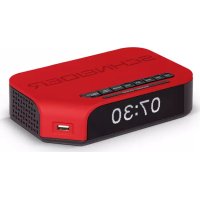
| Product type | Boombox Radio with CD/MP3 player, Bluetooth, USB and FM |
| Brand and model | Schneider Diabolo SC420BBXBLK |
| Dimensions (W x D x H) | 215 x 208 x 113 mm |
| Mains power supply | 100-240 V ~ 50/60 Hz |
| Power consumption | 11 W |
| Battery power supply | 6 type C / R14 / UM2 batteries (not included) |
| FM frequency range | 87.5 - 108 MHz |
| Bluetooth technology | Bluetooth 2.1, range approx. 10 m |
| Supported audio formats | CD, CD-R, CD-RW (MP3); MP3 files on USB |
| Main functions | FM radio, Bluetooth, CD/MP3 player, USB, auxiliary input (AUX), equalizer (Flat/Rock/Jazz/Pop/Classic), repeat, bass boost |
| Display | Backlit LCD screen |
| Speakers | Built-in stereo |
| Output power | Not specified, estimated 5-10 W RMS |
| Connectivity | USB port, AUX input (3.5 mm), telescopic FM antenna |
| Maintenance and cleaning | Unplug before cleaning; use a dry soft cloth. Do not use solvents. |
| Safety | Do not expose to water or moisture; do not open the device; use only on mains 230V~50Hz or compliant batteries. |
| Spare parts and repairability | Contact after-sales service ADMEA / LOGISAV, ZI du clos des charmes, 77090 COLLEGIEN, France |
| General information | Laser class 1; complies with RED directive 2014/53/EU |
Frequently Asked Questions - Diabolo SC420BBXBLK SCHNEIDER
User questions about Diabolo SC420BBXBLK SCHNEIDER
0 question about this device. Answer the ones you know or ask your own.
Ask a new question about this device
Download the instructions for your Radio in PDF format for free! Find your manual Diabolo SC420BBXBLK - SCHNEIDER and take your electronic device back in hand. On this page are published all the documents necessary for the use of your device. Diabolo SC420BBXBLK by SCHNEIDER.
USER MANUAL Diabolo SC420BBXBLK SCHNEIDER
natural_image
Simple line drawing of a trash bin with crossed lines indicating no waste or restriction (no text or symbols)

natural_image
Purple circular icon with a person walking, surrounded by curved arrows (no text or symbols)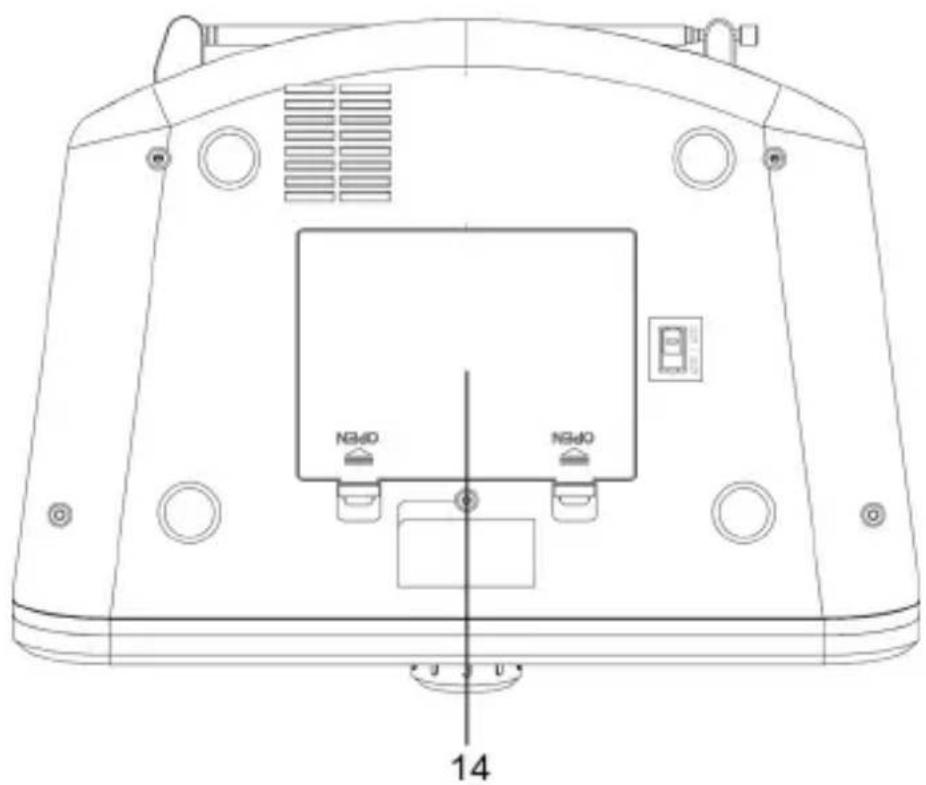
1.MARCHE/ARRÊT ET RÉGLAGE DU VOLUME SONORE
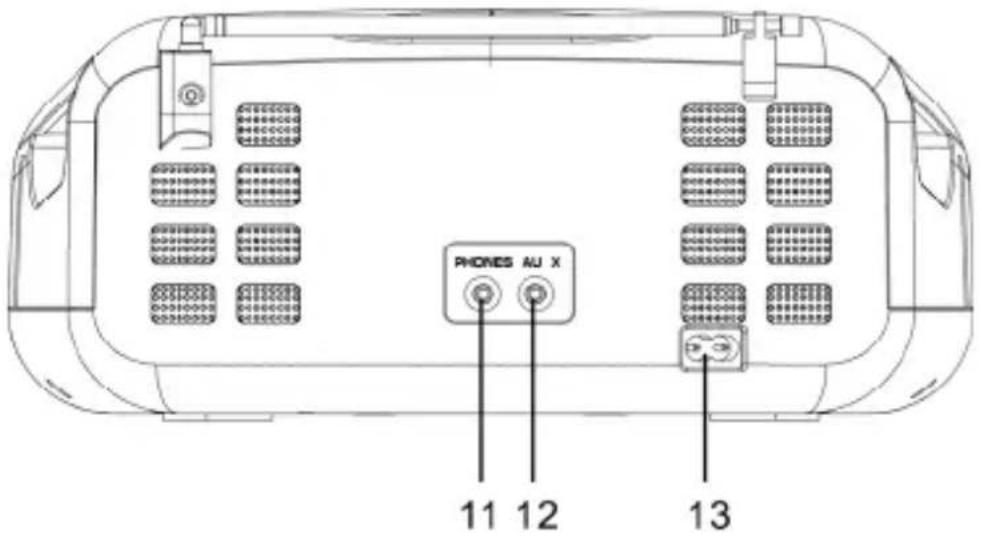
9.ANTENNE FM 10.COMPARTIMENT À CD
- SELECTEUR DE SOURCE
11.PRISE JACK POUR
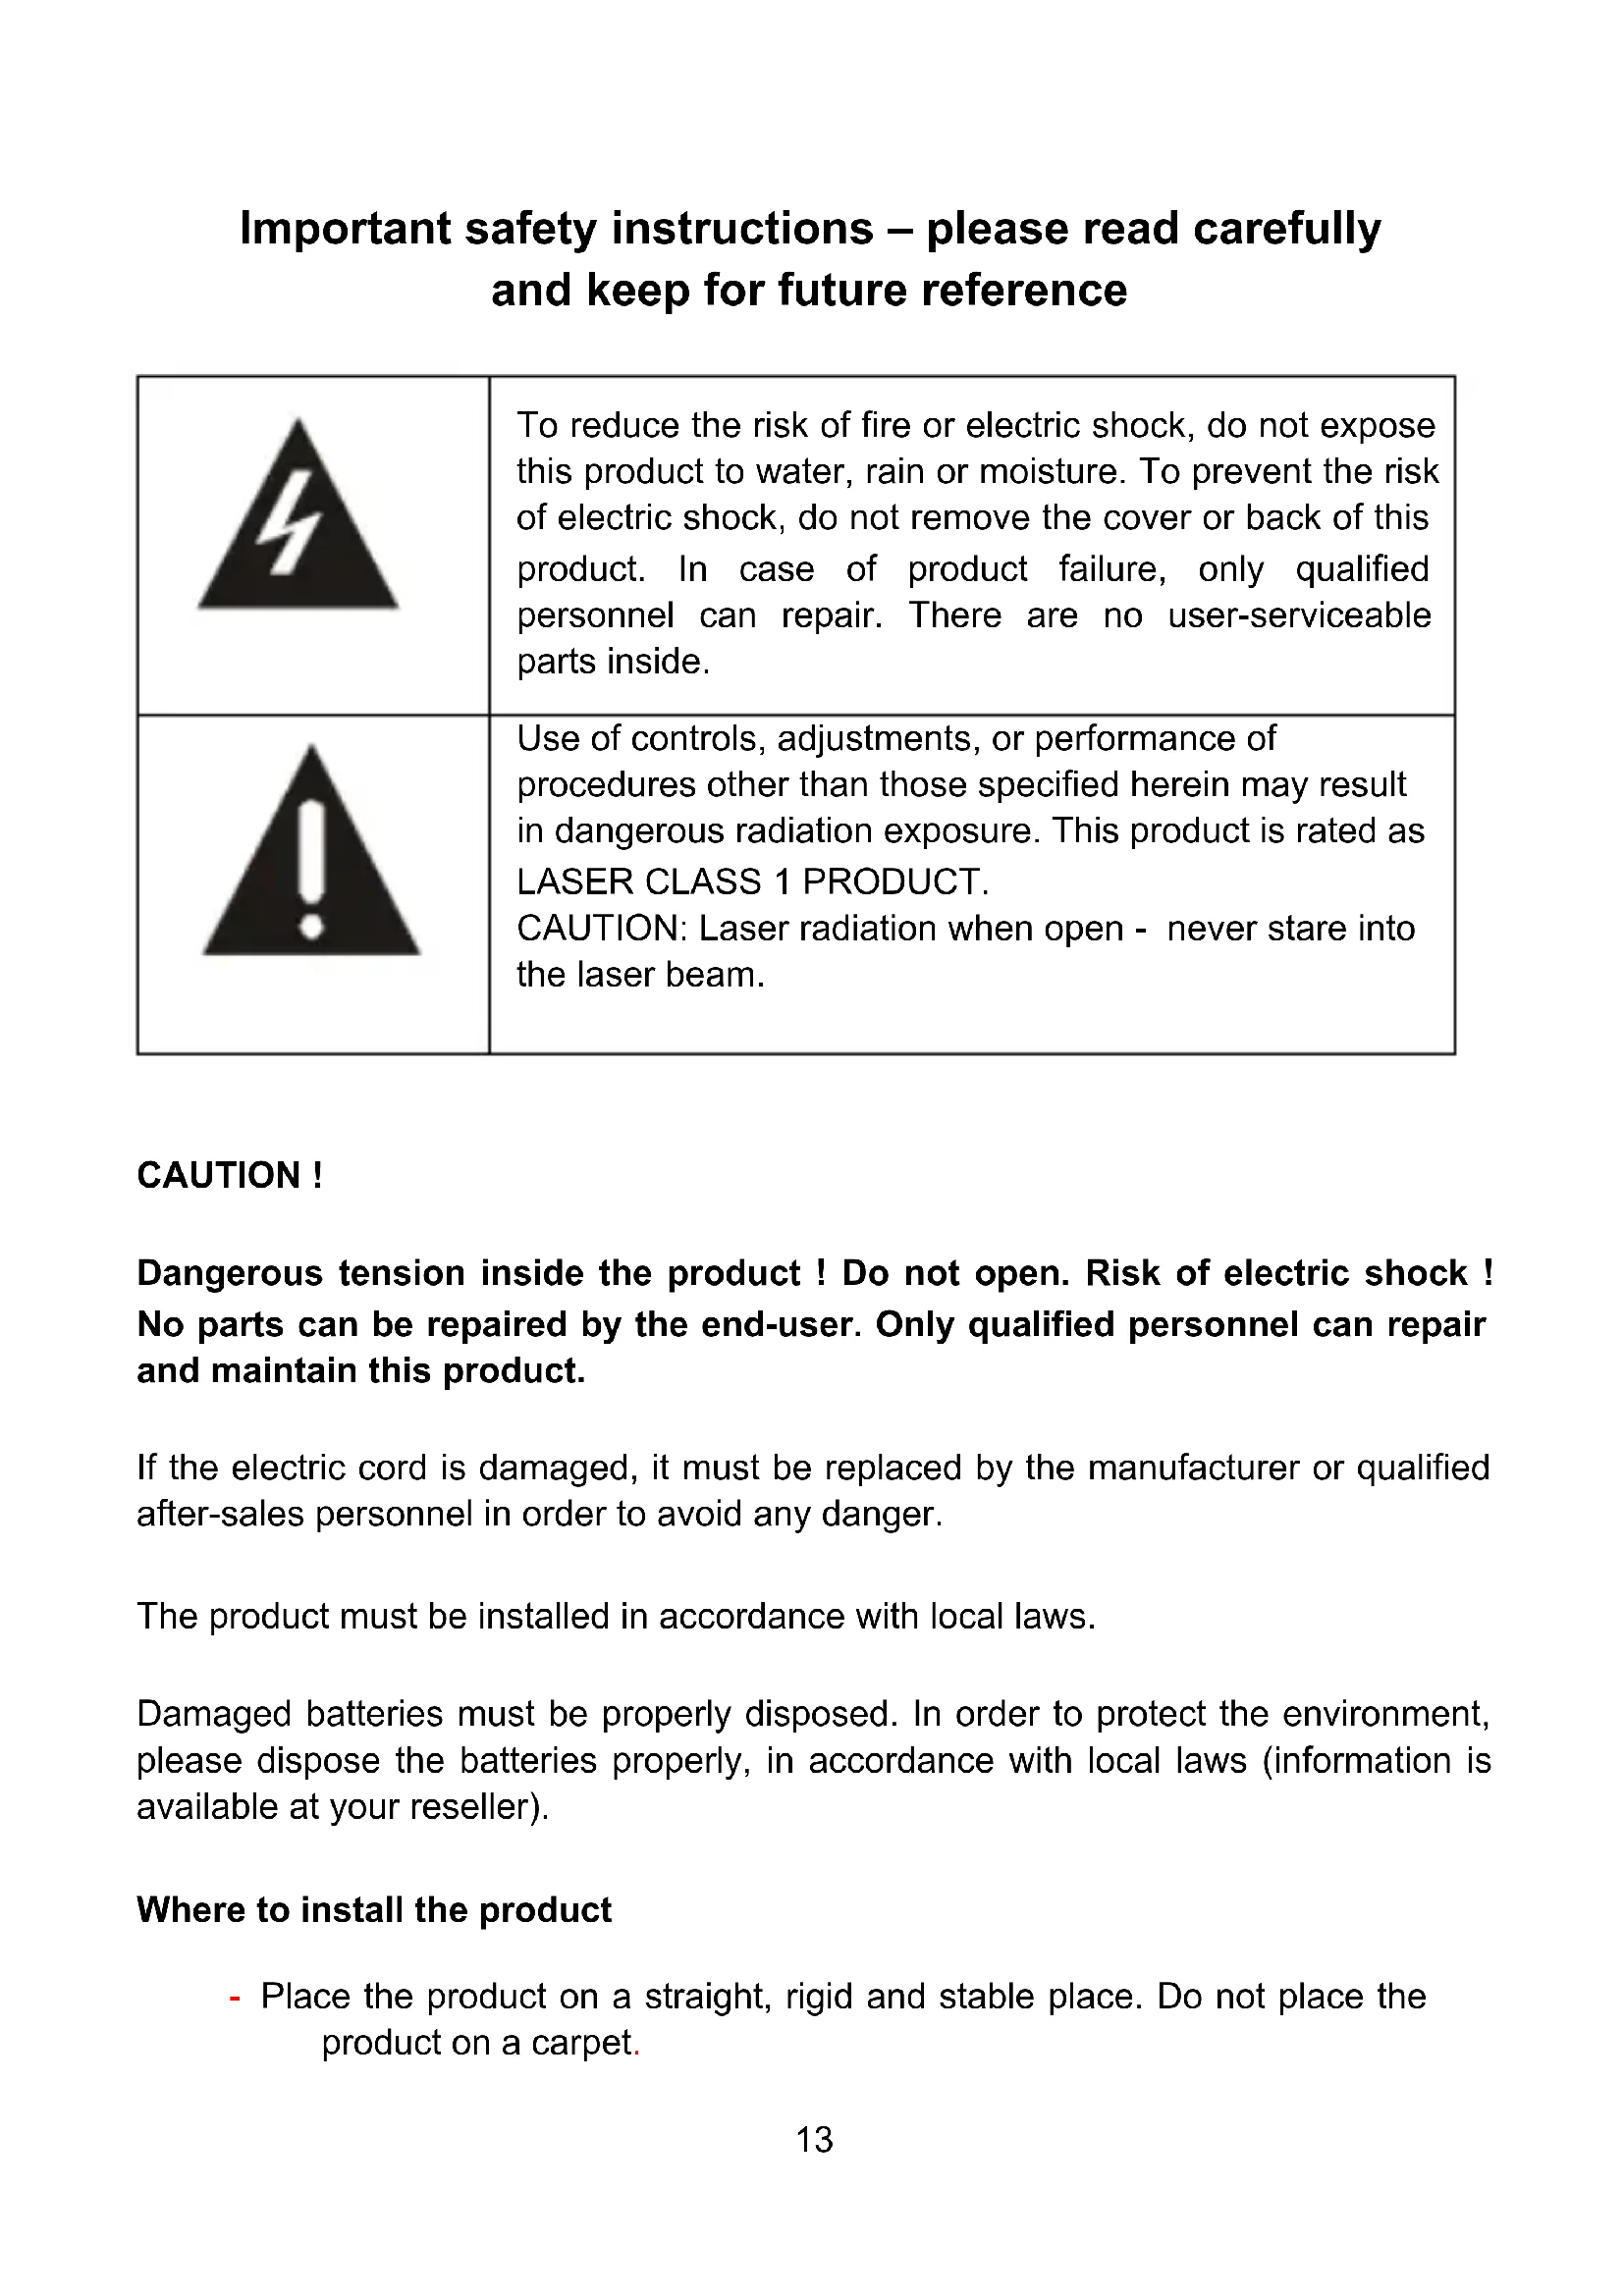
Important safety instructions – please read carefully and keep for future reference

natural_image
Black triangular warning symbol with a lightning bolt inside, no text or numbers present.To reduce the risk of fire or electric shock, do not expose this product to water, rain or moisture. To prevent the risk of electric shock, do not remove the cover or back of this product. In case of product failure, only qualified personnel can repair. There are no user-serviceable parts inside.

natural_image
Black triangular warning symbol with exclamation mark (no text or numbers)Use of controls, adjustments, or performance of procedures other than those specified herein may result in dangerous radiation exposure. This product is rated as LASER CLASS 1 PRODUCT.
CAUTION: Laser radiation when open - never stare into the laser beam.
CAUTION!
Dangerous tension inside the product ! Do not open. Risk of electric shock ! No parts can be repaired by the end-user. Only qualified personnel can repair and maintain this product.
If the electric cord is damaged, it must be replaced by the manufacturer or qualified after-sales personnel in order to avoid any danger.
The product must be installed in accordance with local laws.
Damaged batteries must be properly disposed. In order to protect the environment, please dispose the batteries properly, in accordance with local laws (information is available at your reseller).
Where to install the product
- Place the product on a straight, rigid and stable place. Do not place the product on a carpet.
- Do not place the product on top of another that may cause overheating (for example, a receiver or amplifier).
- Do not place anything underneath the product (for example, CDs or magazines).
Proper ventilation
- Place the product in a sufficiently-aerated place to avoid overheating. Allow at least 10cm spacing at the back and top of the product, and 5cm spacing on both sides to prevent overheating.
- Do not place items such as newspapers, tablecloth, curtains, in front of the ventilating openings.
Do not expose the product to high temperatures, moisture, water and dust.
- The apparatus shall not be exposed to dripping or splashing. No object filled with liquids, such as vases, shall be placed on the apparatus.
- Do not place other items close to this product that may damage it (for example, objects containing water or lightened candles).
- No naked flame sources, such as lighted candles, should be placed on the apparatus.
Electric supply
- Please unplug the product in case of prolonged non-use.
- If the supply cable is damaged, it must be replaced by the manufacturer or qualified after-sales personnel to avoid any danger.
- This product must be connected to an electrical supply 230V \~ 50Hz.
- The mains plug is used as the disconnect device, so the disconnect device shall remain readily operable
Technical Specification:
Name: BOOMBOX
Operation Frequency: 2402 MHz to 2480MHz (BT 2.1)
RF Transmission Power: 2dBm W (power per channel)
Operation Environment: 0 - 40 DegC
 | Declaration of ConformityThis appliance is BOOMBOX complies with the essential requirements and other provisions of and the Radio Equipment Directive (RED) 2014/53/EU that goes into effect on 12 June 2016.The declaration of conformity is available at:http://www.schneiderconsumer.com |
 - This logo set on the product means that the recycling of this apparatus comes within the framework of the directive 2012/19/EU of July 4, 2012 concerning the waste on electrical and electronic equipment (WEEE).- The presence of dangerous substances in the electrical and electronic equipments can have potential consequences on the environment and human health in the cycle of reprocessing this product.- Therefore, at the end of its lifetime, this product shall not be disposed with other non-recycled waste.- As the end user, your role is of prime importance in the cycles of re-using recycling, and other forms of valorization of this electrical and electronic equipment. Local authorities and resellers have set special procedures for the purpose of collecting and recycling this product.- You have the obligation to use the selective waste collection systems put in place by your local authorities. - This logo set on the product means that the recycling of this apparatus comes within the framework of the directive 2012/19/EU of July 4, 2012 concerning the waste on electrical and electronic equipment (WEEE).- The presence of dangerous substances in the electrical and electronic equipments can have potential consequences on the environment and human health in the cycle of reprocessing this product.- Therefore, at the end of its lifetime, this product shall not be disposed with other non-recycled waste.- As the end user, your role is of prime importance in the cycles of re-using recycling, and other forms of valorization of this electrical and electronic equipment. Local authorities and resellers have set special procedures for the purpose of collecting and recycling this product.- You have the obligation to use the selective waste collection systems put in place by your local authorities. | |
POWER SOURCE
AC POWER
You can power your portable system by plugging the detachable AC power cord into the AC inlet at the back of the unit and into a wall AC power outlet. Check that the rated voltage of your appliance matches your local voltage. Make sure that the AC power cord is fully inserted into the appliance.
Notes: Unplug the power cord from the wall outlet to protect your set during heavy thunderstorms.
BATTERY POWER (Batteries not included)
Insert 6 batteries into the battery compartment, type LR14, UM-2 or C cells, (preferably alkaline) with the correct polarity as indicated by “+” and “-” inside the compartment. Always remove the batteries when the set will not be used for a long period of time, as this will cause leakage to the batteries and subsequently damage to your set.
Notes:
-Use the batteries of the same type. Never use different types of batteries together.
-Disconnect the AC power cord when use the set with batteries.
-When inserting new batteries, do not try to mix old batteries with the new ones.
-Remove the batteries to turn off the unit.
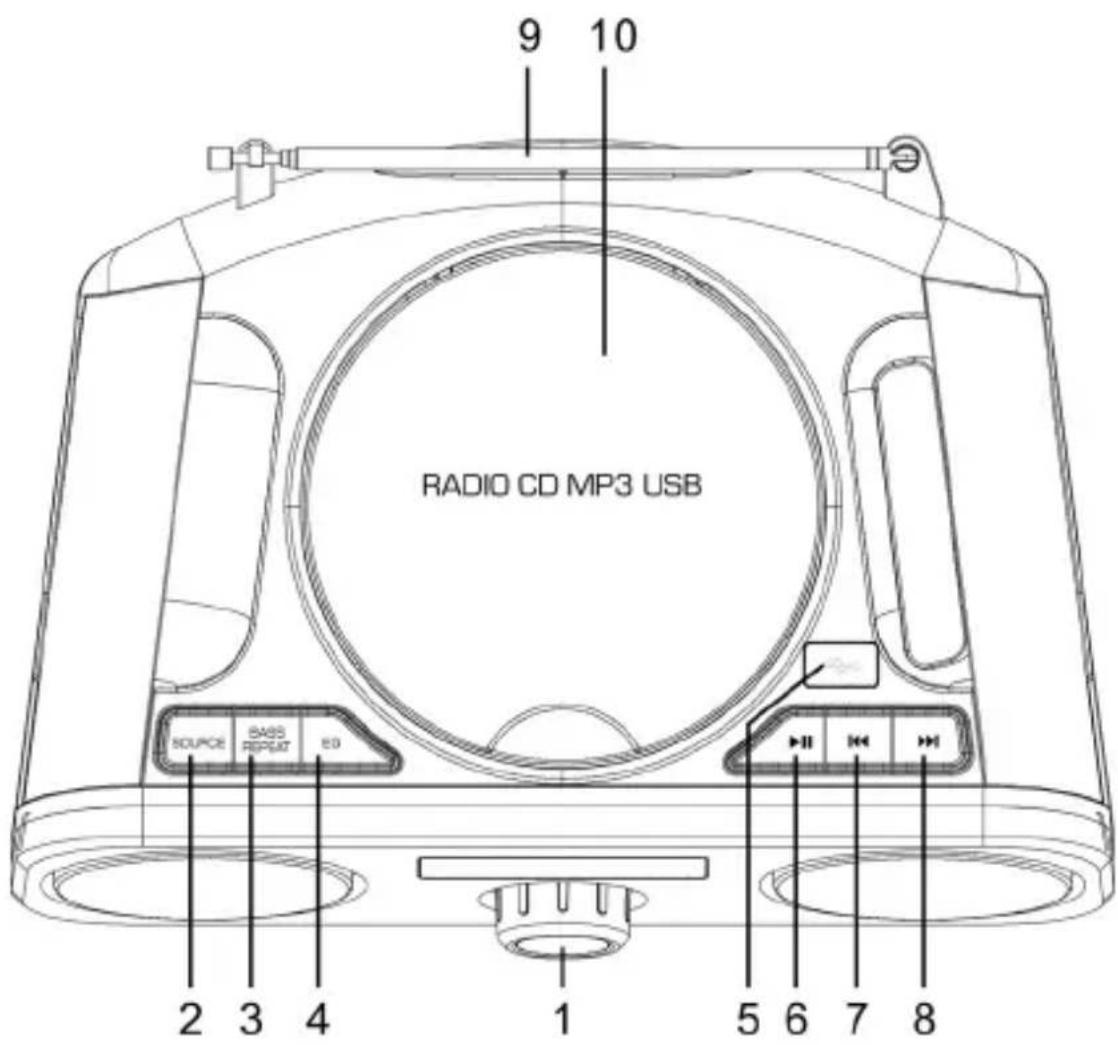
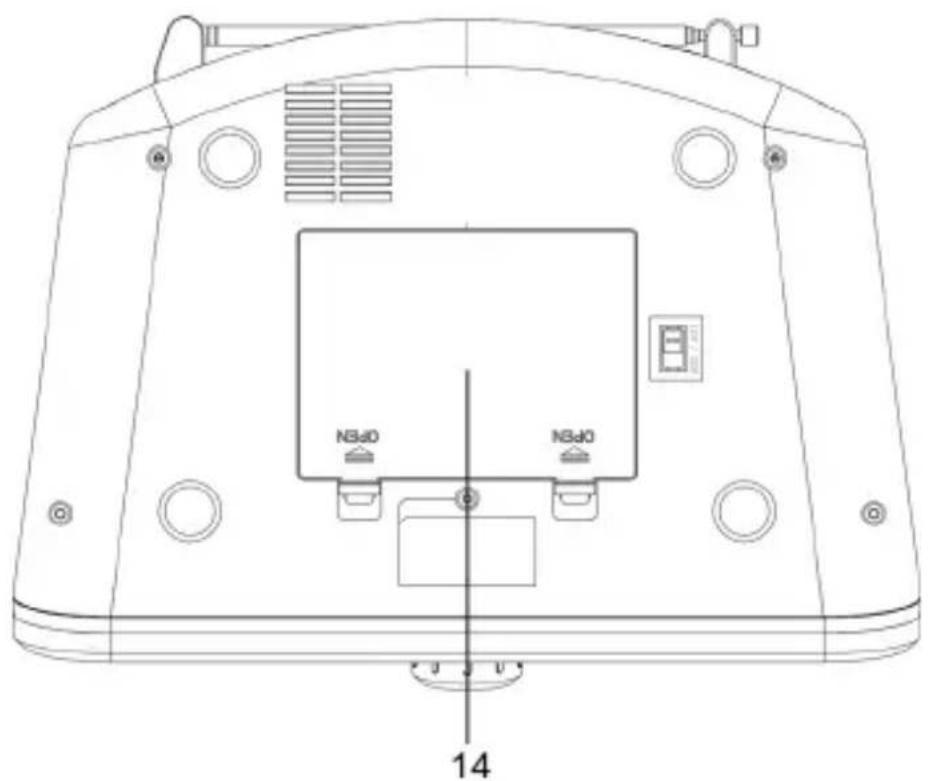
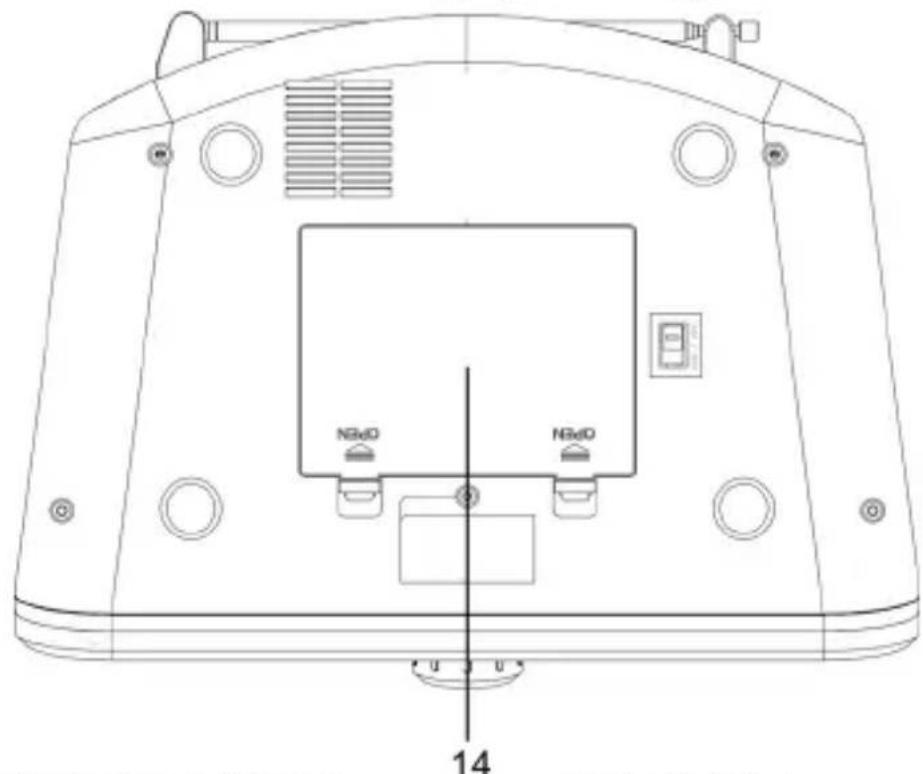
LOCATION OF CONTROL PANEL
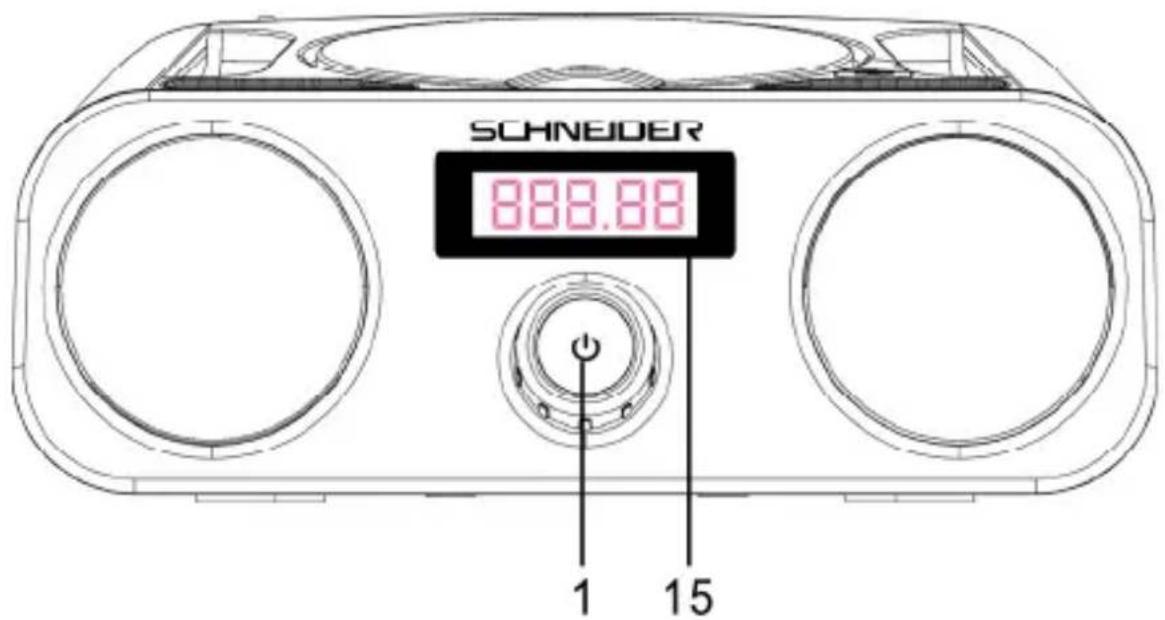
- VOLUME/POWER SWITCH
- FM ANTENNA
- SOURCE 10. CD DOOR
- BASS /REPEAT 11. EARPHONE JACK
- EQ BUTTON 12. AUX JACK
- USB JACK 13. AC SOCKET
- PLAY/PAUSE 14. BATTERY COMPARTMENT
- PREVIOUS 15. LCD DISPLAY
- NEXT
Power on/off
- Press ⏻ on the unit to switch the unit to ON mode.
- Press ⏻ again to switch the unit to STANDBY mode.
- Disconnect the mains plug from the mains socket if you want to turn off the unit.
Note: The unit will be in STANDBY mode when it is idle for around 15 minutes.
Selecting modes
Press SOURCE repeatedly on the unit to switch the modes among CD, USB, FM, AUX and BLUETOOTH.
Adjusting the volume
Turn the volume knob clockwise to increase the VOLUME; turn it counter clockwise to reduce the VOLUME.
Repeat Mode
Short Press REPEAT/BASS button before or during playing CD/MP3 disc, each press switches the mode function as follows:
1-REPEAT ONE: plays the current track continuously
2-REPEAT ALL: plays the entire CD continuously.
3-REPEAT FOLDER (*MP3 ONLY): plays the current FOLDER continuously.
Bass enhancement
Long press REPEAT/BASS to strengthen level of Bass.
EQ control
This system supports a variety of equalizers and sound effects. Press EQ button to select a desired music effect. Each time EQ is pressed, the sound effect will switch to next one as below: FLAT, ROCK, JAZZ, POP and CLASSIC.
RADIO OPERATION
Press SOURCE repeatedly to select FM mode.
Auto Scan
- Press and hold ▶/Ⅱ to scan all the FM stations and save the scanned stations automatically (up to 20 stations).
- Long press ◀ or ▶scan previous or next FM stations automatically, once a station has been found, the scanning will stop.
To play the saved FM stations
- Short press▶/II, then press K or to select the station number "P-xx",
- Press ▶/II to play the selected station.
Manual Scan
Short press ◀◀ or ▶▶b scan the FM stations manually until your desired frequency is searched
To get better reception
Pull out the telescopic antenna. Incline and rotate the antenna to get better reception. Reduce its length if the signal is too strong (very close to a transmitter).
BLUETOOTH OPERATION
- Press SOURCE button repeatedly and select BLUETOOTH mode, the display flashes "BLUE" when no Bluetooth connection is made.
- Enable the Bluetooth function on your smart phone and search for a device labelled "SC420BBX" in the available list.
- Select and enable pairing for the device "SC420BBX". If prompted for a password, enter "0000".
- You will hear one tone when the connection is successful and the indicator "BLUE" will stop flashing on the LED display.
Note: The operation range for Bluetooth is approximately 10 meters without obstacles between this Boombox and the Bluetooth device.
AUX IN OPERATION
- Press SOURCE button repeatedly to choose AUX mode if you want to play music from personal player.
- Connect your personal audio player to AUX IN jack with a cable (not included).
- Set the audio player to play.
- Adjust the volume level with VOLUMEKNOB.
CD/MP3 OPERATION
Music playback
- Place the CD with the label side up into the CD compartment, and then close the disc tray gently.
- If there is no disc or the disc can't be read, "NO" will show on the display.
- The total number of tracks will display on the display, and then play the first track of the CD/MP3 disc automatically.
- This unit can play CD, CD-R & CD-RW disc.
General operations
▶/II: Press to start playing CD/MP3 disc. Press again to stop playing CD/MP3 operation temporarily. Press again to resume playback.
Press once for previous or next track, press repeatedly until the desired track number appears in the LCD display press and hold 🐎 to perform fast forward/reverse playback.
USB OPERATION
Connecting a USB device
- When a USB device is connected to the unit, press SOURCE repeatedly on the unit to select USB mode.
- The unit will automatically display the total number of tracks.
- All playback features are the same as you are playing CD.
Note: This device can only be compatible with MP3 audio file format, without compression and anti-copy protection. Other audio (such as MP4A, OGG) or video formats (such as MP4, WMV, FLV) cannot be read.
The unit cannot read my USB device
- Once you have plugged your device to the unit, you may need to switch on the USB device before it can operate.
- This unit does not support a direct USB connection with a computer. You need to use a USB device, a MP3 player or a PMP (Portable Multimedia Player with hard disk).
- If you are using a USB external hard disk: you need to connect your device simultaneously to an external power source and to the unit. If you are using a self-powered PMP, make sure that the battery is sufficiently loaded.
- Check that the files system of your USB device is formatted into the FAT or FAT 32 format. USB device formatted into NTFS are not compatible with this unit. Caution: if you attempt to modify your file system, formatting your device will erase all data. Please refer to your USB device's instruction manual first.
- Warning: Connect your USB device directly to the USB port of the device. Using an extension cable is not recommended and may cause interference and failure of data transfer.
SPECIFICATIONS
| Power supply AC 100-240V~, 50-60Hz | |
| Power consumption 11Watts | |
| Dimensions of the unit 215mm(L) x 208mm(W) x 113mm(H) | |
| Frequency range FM 87.5~108MHz |
TROUBLESHOOTING
NO SOUND/POWER
- Check whether you have turned down the volume.
- Check whether the power cord is connected properly.
- Check whether the batteries have run down or are inserted incorrectly.
ABNORMAL FUNCTION OPERATION
- Turn off the power, and turn on again.
NO DISC INDICATION/CD PLAYBACK DOES NOT WORK PROPERLY
- Check whether the disc is put in the reverse side.
- Check whether the disc is stained or scratched badly.
- Check that the format of the disc is compatible with this player.
- Check whether the CD-R is blank or the disc is not finalized.
SAV
ADMEA / LOGISAV
KEIN SOUND/KEIN STROM
natural_image
Black triangular warning symbol with a lightning bolt inside, representing electrical hazard (no text)natural_image
Black triangular warning symbol with exclamation mark (no text or numbers)
- INTERRUTTORE
ACCENSIONE/MANOPOLA DEL VOLUME
-
ANTENNA FM
-
SPORTELLO CD
-
JACK CUFFIA
-
TASTO SOURCE (SORGENTE) 12. JACK AUX
-
TASTO BASS/REPEAT
(BASSI/RIPETIZIONE)
-
PRESA ALIMENTAZIONE
-
VANO BATTERIA
-
TASTO EQ (EQUALIZZATORE) 15. DISPLAY LCD
-
PORTA USB
-
TASTO RIPRODUZIONE/PAUSA
-
TASTO PRECEDENTE
-
TASTO SUCCESSIVA
8.VOLGENDE 9.FM-ANTENNE
- VOLUMEKNOP/POWERSCHAK ELAAR
2.BRON 10.CD-KLEPJE
3.BASS/HERHALEN 11.KOPTELEFOONSTEKKER
4.EQ-KNOP 12.AUX-INGANG
5.USB-POORT 13.STROOMAANSLUITING
6.AFSPELEN/PAUZE 14.BATTERIJCOMPARTIMENT
7.VORIGE 15.LCD-DISPLAY
ALGEMENE WERKING
In/Uitschakelen
natural_image
Abstract grayscale mountain range design with no text or symbols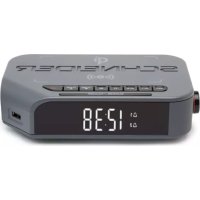
- Important safety instructions – please read carefully and keep for future reference
- CAUTION!
- Where to install the product
- Proper ventilation
- Do not expose the product to high temperatures, moisture, water and dust.
- Electric supply
- Technical Specification:
- POWER SOURCE
- AC POWER
- BATTERY POWER (Batteries not included)
- Notes:
- LOCATION OF CONTROL PANEL
- Power on/off
- Selecting modes
- Adjusting the volume
- Repeat Mode
- Bass enhancement
- EQ control
- RADIO OPERATION
- Auto Scan
- To play the saved FM stations
- Manual Scan
- To get better reception
- BLUETOOTH OPERATION
- AUX IN OPERATION
- CD/MP3 OPERATION
- Music playback
- General operations
- USB OPERATION
- Connecting a USB device
- The unit cannot read my USB device
- TROUBLESHOOTING
- NO SOUND/POWER
- ABNORMAL FUNCTION OPERATION
- NO DISC INDICATION/CD PLAYBACK DOES NOT WORK PROPERLY
- SAV
- KEIN SOUND/KEIN STROM
- ALGEMENE WERKING
- In/Uitschakelen
Brand : SCHNEIDER
Model : Diabolo SC420BBXBLK
Category : Radio