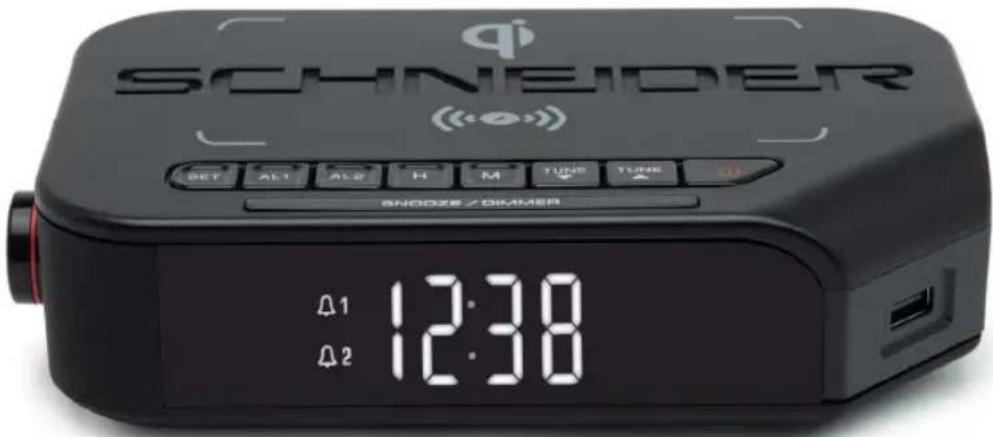
Viva GMSC310ACLQIBLK - Radio SCHNEIDER - Free user manual and instructions
Find the device manual for free Viva GMSC310ACLQIBLK SCHNEIDER in PDF.
| Brand | Schneider |
| Model | Viva GMSC310ACLQIBLK |
| Product type | Radio alarm clock with Qi wireless charger and USB port |
| Frequency bands | FM 87.5 - 108 MHz |
| Mains power supply | 230 V ~ 50 Hz |
| Power consumption | 6.6 W |
| Backup battery | Lithium CR2032 (supplied) |
| USB charging power | 500 mA max |
| Qi wireless charging | 10 W |
| Number of presets | 20 FM stations |
| Display | LED display with brightness adjustment |
| Alarm functions | 2 independent alarms (AL1/AL2), BUZZ or RADIO mode, snooze |
| Dimensions (approx.) | 20 x 15 x 10 cm |
| Weight (approx.) | 0.8 kg |
| Maintenance and cleaning | Unplug the device before cleaning. Use a soft, dry cloth. Do not use abrasive or liquid products. |
| Safety | Do not open the device, risk of electric shock. Do not expose to water, heat sources or naked flames. Keep a ventilation of at least 10 cm at the back and above. |
| Spare parts and repairability | No user-serviceable parts. Contact Schneider customer service in case of a fault. Backup battery replaceable (CR2032). |
| Warranty | 2 years (excluding improper use or normal wear) |
Frequently Asked Questions - Viva GMSC310ACLQIBLK SCHNEIDER
User questions about Viva GMSC310ACLQIBLK SCHNEIDER
0 question about this device. Answer the ones you know or ask your own.
Ask a new question about this device
Download the instructions for your Radio in PDF format for free! Find your manual Viva GMSC310ACLQIBLK - SCHNEIDER and take your electronic device back in hand. On this page are published all the documents necessary for the use of your device. Viva GMSC310ACLQIBLK by SCHNEIDER.
USER MANUAL Viva GMSC310ACLQIBLK SCHNEIDER
GMSC310ACLQIGRY / GMSC310ACLQIBLK

TABLE DES MATIERES
1 ALIMENTATION ELECTRIQUE
2 PRECAUTIONS RELATIVES A L'UTILISATION DES PILES
3 . . . . . . . . . . . . . . . . . . . . . . . . . . . . . . . . . . . . . . . . . . . . . . . . . . . . . . . . . . . . . . . . . . . . . . . . . . . . . . . . . . . . . . . .
DESCRIPTION DE L'APPAREIL
4 . . . . . . . . . . . . . . . . . . . . . . . . . . . . . . . . . . . . . . . . . . . . . . . . . . . . . . . . . . . . . . . . . . . . . . FONCTIONNEMENT
5 UTILISER LE PORT USB POUR RECHARGER DES APPAREILS
6 UTILISER LA BASE QIPOUR LE CHARGEMENT SANS FIL
7 . DÉPANNAGE
8 . . . . . . . . . . . . . . . . . . . . . . . . . . . . . . . . . . . . . . . . . . . . . . . . . . . . . . . . . . . . . . . . . . . . . . . . . . . . . . . . . . . . . . . . . .
9 . . . . . . . . . . . . . . . . . . . . . . . . . . . . . . . . . . . . . . . . . . . . . . . . . . . . . . . . . . . . . . . . . . . . . . GARANTIE
10. MENTIONS LÉGALES
Pg. 18 . . . . CE DECLARATION OF CONFORMITY

INSTRUCTIONS DE SECURITE IMPORTANTES CONSERVER AVEC LE PRODUIT MERCI DE LIRE ATTENTIVEMENT

ATTENTION
RISQUE DE CHOC ÉLECTRIQUE NE PAS OUVIR

ATTENTION!
RACCORDEMENT AU SECTEUR
Bluetooth logo/brand is a trademark or registered trademark of Bluetooth Sig Inc. All items contained herein are imported by GMS and are not manufactured, sponsored, endorsed or distributed by Bluetooth Sig Inc.

GMSC310ACLQIGRY / GMSC310ACLQIBLK

TABLE OF CONTENTS
1 ELECTRIC SUPPLY
2. .WARNING
3. LOCATION OF CONTROLS
4 . . . . . . . . . . . . . . . . . . . . . . . . . . . . . . . . . . . . . . . . . . . . . . . . . . . . . . . . . . . . . . .
5 TO USE THE USB PORT FOR CHARGING
6 TO USE THE QI BASE FOR WIRELESS CHARGING
7 TROUBLESHOOTING
8 SPECIFICATIONS
9 . . . . . . . . . . . . . . . . . . . . . . . . . . . . . . . . . . . . . . . . . . . . . . . . . . . . . . . . . . . . . . . . . . . . . . GARANTEE
10. LEGAL NOTICE
Pg. 18 . . . . . CE DECLARATION OF CONFORMITY
EN
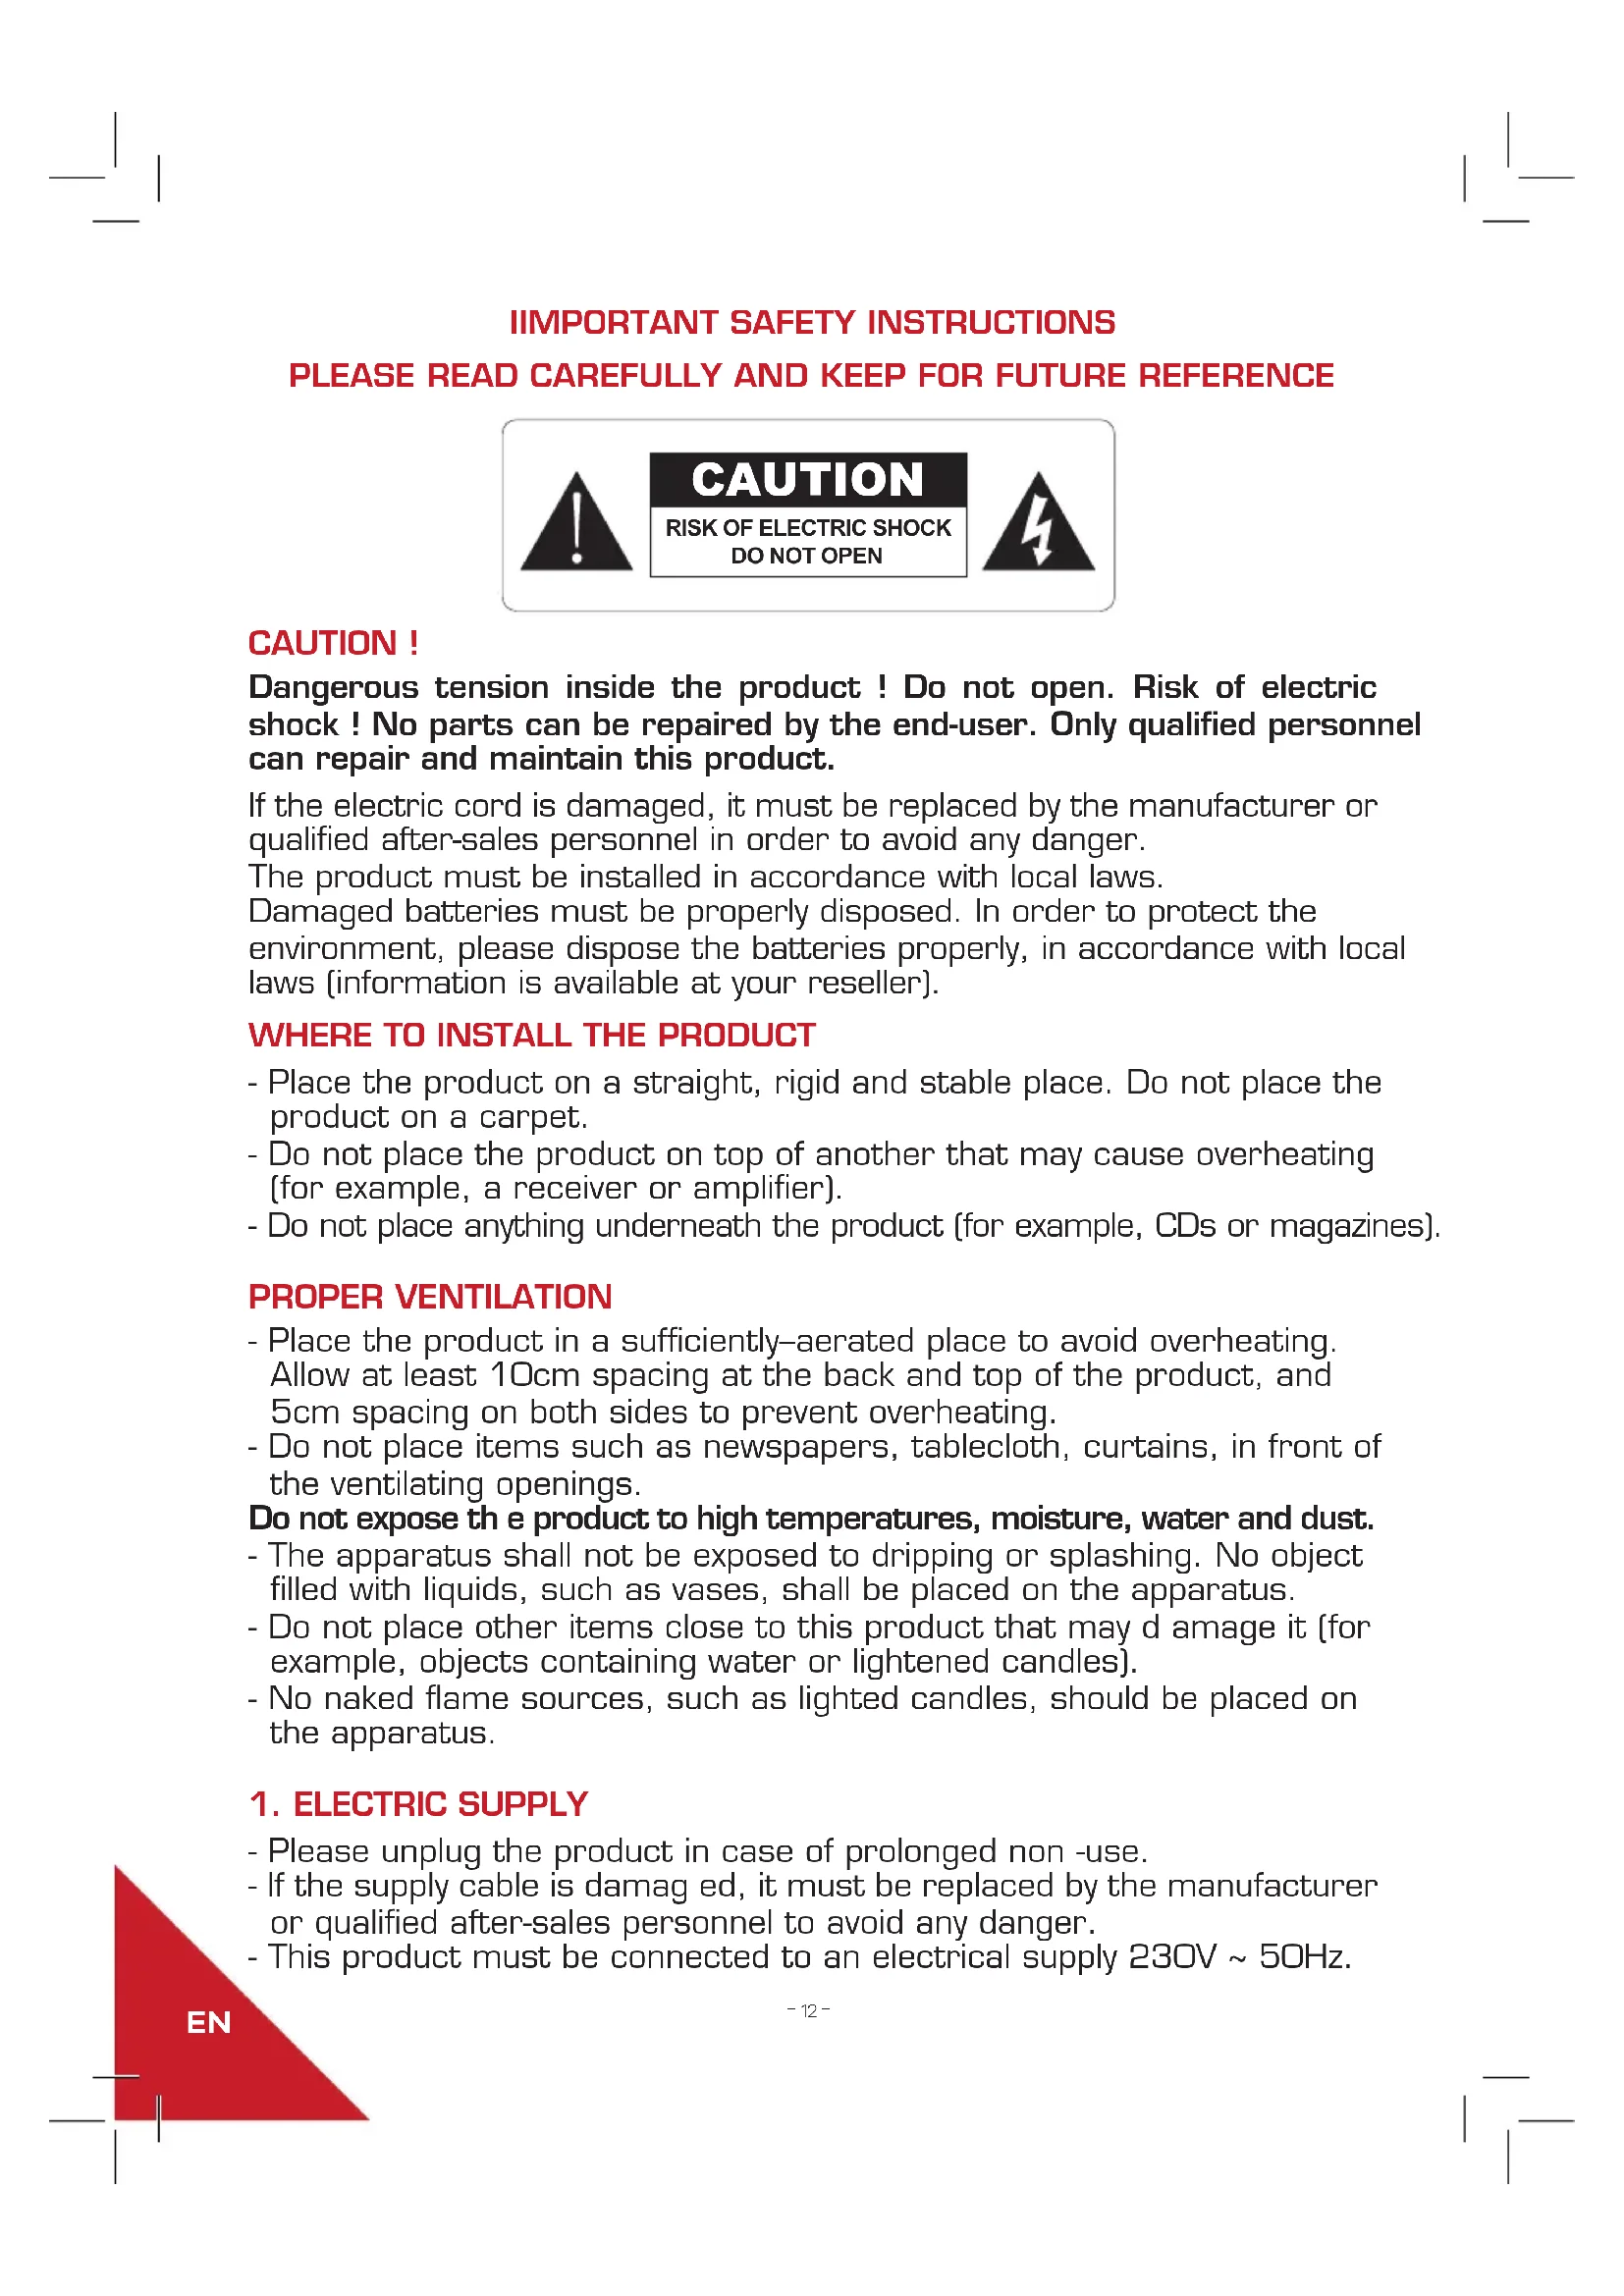
IIMPORTANT SAFETY INSTRUCTIONS
PLEASE READ CAREFULLY AND KEEP FOR FUTURE REFERENCE

CAUTION!
Dangerous tension inside the product! Do not open. Risk of electric shock! No parts can be repaired by the end-user. Only qualified personnel can repair and maintain this product.
If the electric cord is damaged, it must be replaced by the manufacturer or qualified after-sales personnel in order to avoid any danger.
The product must be installed in accordance with local laws.
Damaged batteries must be properly disposed. In order to protect the environment, please dispose the batteries properly, in accordance with local laws (information is available at your reseller).
WHERE TO INSTALL THE PRODUCT
- Place the product on a straight, rigid and stable place. Do not place the product on a carpet.
- Do not place the product on top of another that may cause overheating (for example, a receiver or amplifier).
- Do not place anything underneath the product (for example, CDs or magazines).
PROPER VENTILATION
- Place the product in a sufficiently-aerated place to avoid overheating. Allow at least 10cm spacing at the back and top of the product, and 5cm spacing on both sides to prevent overheating.
- Do not place items such as newspapers, tablecloth, curtains, in front of the ventilating openings.
Do not expose the product to high temperatures, moisture, water and dust. - The apparatus shall not be exposed to dripping or splashing. No object filled with liquids, such as vases, shall be placed on the apparatus.
- Do not place other items close to this product that may damage it (for example, objects containing water or lightened candles).
- No naked flame sources, such as lighted candles, should be placed on the apparatus.
1. ELECTRIC SUPPLY
- Please unplug the product in case of prolonged non -use.
- If the supply cable is damaged, it must be replaced by the manufacturer or qualified after-sales personnel to avoid any danger.
- This product must be connected to an electrical supply 230V 50Hz .
EN
- The mains plug is used as the disconnect device, so the disconnect device shall remain readily operable.
- Do not use the product with a battery different from the one provided.
2. WARNING
- Do not ingest the battery, Chemical Burn Hazard; this product contains a coin/button cell battery. If the coin/button cell battery is swallowed, it can cause severe internal burns in just 2 hours and can lead to death.
- Keep new and used batteries away from children.
- If the battery compartment does not close securely, stop using the product and keep it away from children.
- If you think batteries might have been swallowed or placed inside any part of the body, seek immediate medical attention.
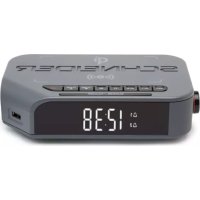
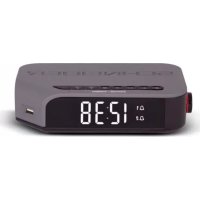
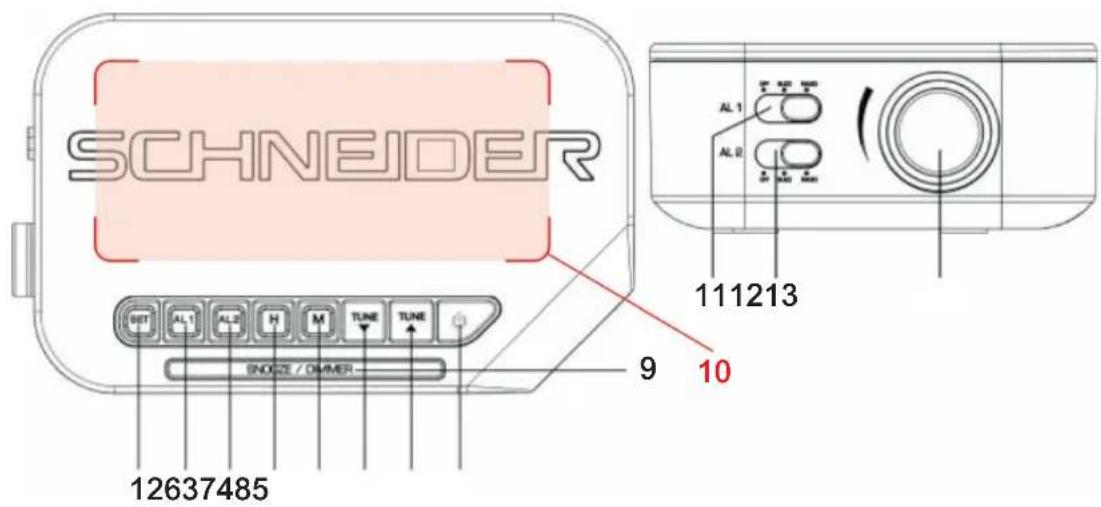
3. LOCATION OF CONTROLS
-
SET
-
SNOOZE/DIMMER
-
ALARM1
-
QI BASE FOR WIRELESS CHARGING
-
ALARM2
-
AL1 FUNCTION SELECTOR
-
HOUR
-
AL2 FUNCTION SELECTOR
-
MINUTE
-
VOLUME KNOB
-
TUNE BACKWARDS
-
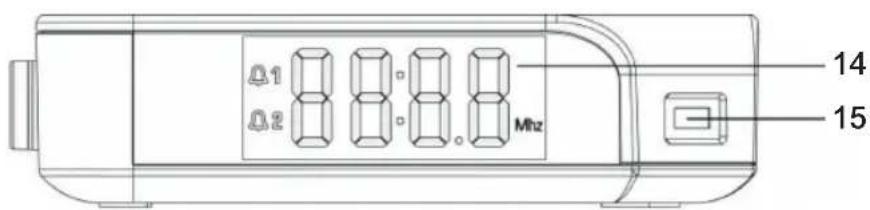
USB PORT FOR CHARGING
-
TUNE FORWARDS
-
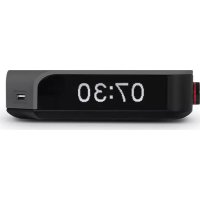
LED DISPLAY
-
STANDBY

4. OPERATIONS
CONNECTING MAINS POWER
Connect the AC power cord to the power supply outlet. Your clock radio is ready to work for you.
BACKUP BATTERY INSTALLATION
Your clock radio requires one CR2032 lithium battery (included) to provide backup power to the clock in the event of a temporary power interruption.
- Open battery cover located at the back of the unit. A screwdriver (not provided) is necessary in order to protect young children.
- Insert one CR2032 lithium battery into the battery compartment with the "+" side facing up.
- Close the battery cover.
If AC power is interrupted, the LED display will go off and both the radio and the
alarm will stop . The backup battery will keep the time and all settings of your unit.
Make sure a new CR2032 lithium battery is used.
Note: Do not use old battery for backup, which may lead to abnormal display appears. In case abnormal display appears, please take out the backup battery and then unplug the clock radio.
SETTING TIME
- In standby mode, long-press the SET button, the time digits flash.
- Press H button repeatedly to set the current hour.
- Press M button repeatedly to set the current minute.
- Short-press SET button again to confirm the setting.
SETTING THE ALARMS
- Long-press AL1 or AL2 till the time digits flash.
- Press H button repeatedly to set Alarm1 or Alarm2 hour.
- Press M button repeatedly to set Alarm1 or Alarm2 minute.
- Short-press AL1 or AL2 again to confirm the alarms setting.
- Move the AL1 or AL2 selector to position BUZZ or RADIO to select the alarm tone, the related alarm is turned on, and 1 or icon keep lighting up on the display.
STOPPING AND RESETTING THE ALARM TO COME ON THE NEXT DAY
When Alarm 1 or 2 is sounding, the related 1 or 2 icon flashes. Press button once to stop the alarm and reset it to come on the following day after that 1 or 2 icon keep lighting up on the display.
Note: When AL1 or AL2 selector is moved to position BUZZ, short-press AL1 or AL2 can stop the alarm also and reset it to come on the following day.
CANCEL THE ALARM
Move the AL1 or AL2 selector to position OFF, then the alarm function will be cancelled.
SNOOZE OPERATION (DEFAULT SNOOZE DURATION IS 6 MINUTES)
When alarm is sounding, short-press SNOOZE/DIMMER button once, the alarm will be silent and come on again after the defau It snooze duration.
Note: If your second alarm activates while the first alarm is sounding or it is in the snooze mode, the second alarm overrides the first alarm (the first alarm is reset to come on the next day).
When alarm is in the snooze mode, short-press / AL1/ AL2 can stop the snooze mode, alarm is reset to come on the next day.
USING THE DIMMER
Make a long press on the SNOOZE/DIMMER button to adjust the brightness of the LED display.
LISTENING TO FM RADIO
- To turn on the radio, press button once, the display shows radio frequency in Mhz.
- Press TUNE / to tune the radio to a desired station. Long-press TUNE / to scan the radio programs directly.
- To adjust the volume, turn the VOLUME knob to the position you want.
- Press button to turn off the radio.
Note: For better FM reception, there is a built-in FM antenna wire at the rear of the unit. Move the wire around to obtain the best reception.
USING THE PRESET MEMORY
This clock radio features a total of 2D preset memories of FM stations. These allow you to preset your favorite stations and access them quickly.
- Turn on the radio and select a radio station you like to memorize.
- Long-press the SET button until PO1 flashes. Short-press SET to store Memory 1.
- Press TUNE / to select another station you like to memorize. Then long-press SET until «P01» flashes. Press TUNE or once, «P02» appears. Press SET once to store Memory 02.
- Repeat Step 2 and 3 to preset memories 3 through 20.
- To access a preset station at any time, short-press the SET button at a time while the radio is on.
TO USE THE SLEEP TIMER (APPLICABLE IN RADIO MODE)
- Short-press the SNOOZE/DIMMER button repeatedly as needed to adjust the sleep timer from 120, 90, 60, 45, 30, 15 or OFF.
-
When the display changes back to show the time, short-press SNOOZE/ DIMMER button again to show the remaining sleep time.
-
The radio will play for the programmed sleep time and then shut off automatically.
- To turn off the radio before the sleep time has elapsed, press button once.
5. TO USE THE USB PORT FOR CHARGING
Connect your mobile phone with the USB port by a USB charging cable (not provided) to charge.
Note:
- The USB port is only for USB recharging function, and it cannot support USB player to play music
- When USB jack is recharging the mobile phone, the maximum current is 500MA. Please choose other device in case of fast recharge.
6. TO USE THE QI BASE FOR WIRELESS CHARGING
Put your QI-compatible wireless charging phone directly on the active QI induction zone ( marked with rectangular-shaped dotted lines ) on the top of the unit to charge wirelessly.
Note:
- Remove metal protective or magnetic case from the phone before charging. When charging the phone, do not place magnetic-striped or other metal objects on the charger. Doing so could damage the object or this unit. Qi-compatible phones with metallic finishes will charge normally.
- Put your phone to the active QI induction zone as centralized as possible. By doing so could make your wireless charging experience more smoothly.
7. TROUBLE SHOOTING
- If your clock displays irrelevant time or does not function properly, which may be caused by electro-static discharge or other interference, disconnect the AC power (and remove the backup battery). T he clock radio will reset to default settings and you need set it again.
- If abnormal display appears, please take out the backup battery and then unplug the clock radio. Replug the clock radio after 1-2 minutes.
- The USB port is only for recharging function, and it cannot support music playback with a USB key.
8. SPECIFICATIONS
FM Band: 87.5 to 108 MHz
Power Supply: 230V 50Hz
Power Consumption: 6.6W
Battery type : 1 x CR2032
USB charging Jack: maximum 500mA current
9. GARANTEE
All Schneider products benefit from after-sales service under the legal guarantee offered to the consumer. A defective product can be exchanged or refunded through a local distributor for 2 years after purchase, by presenting proof of purchase (dated invoice) and the original packaging of the product.
The warranty is excluded in the following situations:
- Malfunction, defect or damage other than defect or lack of conformity.
- The product [s] is / are damaged as a result of improper use (shock, fall, misuse, handling error, etc....).
- The product (s) is / are disassembled, rebuilt (s) and / or modified under unauthorized conditions.
- Parts which deteriorate as a result of normal wear and tear and which by their nature require frequent replacement.
10. LEGAL NOTICE
SCHNEIDER is a trademark of Schneider Consumer Group or its affiliates used under license by GMS GROUP. This product has been manufactured by and is sold under the responsibility of GMS GROUP. The brands cited are trademarks registered by their respective owners. Guarantee: 2 years. This warranty does not cover damage resulting from improper use or installation of the product.
Bluetooth logo/brand is a trademark or registered trademark of Bluetooth Sig Inc. All items contained herein are imported by GMS and are not manufactured, sponsored, endorsed or distributed by Bluetooth Sig Inc.

Destruction of electrical and electronic devices
The symbol on the product or on its packaging indicates that this product must not be treated as household waste. On the contrary, it must be dropped off at a collection point for recycling electrical and electronic equipment. By ensuring that this equipment is handled properly you will help prevent potential negative consequences to the environment and human health, which could otherwise be caused by improper handling of this product. Recycling materials will help preserve natural resources. For more information, please contact your town hall or your waste sorting center.
EN
DECLARATION OF CONFORMITY
We, GMS GROUP, declare under our responsibility that the product :
Designation: Alarm clock radio with wireless function
Brand: Schneider
Item number: GMSC310ACLQIGRY / GMSC310ACLQIBLK
Model number: A6QIG / A6QIB
Satisfied all the following union harmonized European standard:
- Directive EMC 2014/30/EU
- Directive CE RED 2014/53/EU
- Directive LVD 2014/35/EU
- Directive ERP EC No 1275/2008
- Directive RoHS 2015/863/EU
And conform with the following harmonized standard :
ETSI EN 303 345-3 V1.1.7 2017-03
EN62479:2010
EN 55032 2015
EN IEC 61000-3-2 2014
EN 61000-3-3:2013
EN 55035 2017
EN 62368-1:2014+A1:2017
- QI-PCO-PART3-V124
EN50564:2011
IEC 62321-3-1:2013
IEC 62321-4:2013
IEC 62321-5:2013
IEC 62321-6:2015
IEC 62321-7-1:2015
IEC 62321-8:2017
Luynes, July 12th, 2021
SCHNEIDER
RADIO RELOJ ALARMA
Viva
Manual de usuario
GMSC310ACLQIGRY / GMSC310ACLQIBLK

INDICE
1 ALIMENTACION ELECTRICA
2. ATENCLON
3. UBICACION DE LOS CONTROLES
4 . . . . . . . . . . . . . . . . . . . . . . . . . . . . . . . . . . . . . . . . . . . . . . . . . . . . . . . . . . . . . . . . . . . . . . . . . . . . . . . . . . . . . .
5 UTILIZAR EL PUERTO USB PARA CARGAR
6 . . . . . . . . . . . . . . . . . . . . . . . . . . . . . . . . . . . . . . . . . . . . . . . . . . . . . . . . . . . . . . . . . . . . . . . . . . . . . PARA USAR LA BASE QI PARA CARGA INALÁMBRICA
7 . RÉSOLUCION DE PROBLEMAS
8 . CHARACTERISTICAS
9 . . . . . . . . . . . . . . . . . . . . . . . . . . . . . . . . . . . . . . . . . . . . . . . . . . . . . . . . . . . . . . . . . . . . . . . . . . . . . . . . . . GARANTÍA
10. AVISO LEGAL

Pg. 18 . . . . CE DECLARATION OF CONFORMITY