Viva SC310ACLGRY - Radio SCHNEIDER - Free user manual and instructions
Find the device manual for free Viva SC310ACLGRY SCHNEIDER in PDF.
| Product type | FM clock radio |
| Brand | Schneider |
| Model | Viva SC310ACLGRY (also available in SC310ACLRED and SC310ACLWHT) |
| FM band | 87.5 to 108 MHz |
| Power supply | 230 V ~ 50 Hz |
| Power consumption | 6.6 W |
| Backup battery | 1 x CR2032 (lithium, included) |
| USB port | Smartphone charging (max. 500 mA) |
| Number of presets | 20 FM stations |
| Alarms | 2 independent alarms (AL1 and AL2) with choice of buzzer or radio |
| Snooze function | Yes, default snooze of 6 minutes |
| Auto sleep function | Yes, programmable (120, 90, 60, 45, 30, 15 min or OFF) |
| Brightness adjustment | Yes, via SNOOZE/DIMMER button (long press) |
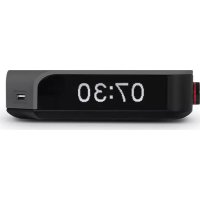
| Display | LED screen |
| Antenna | Built-in FM antenna wire |
| Care and cleaning | Unplug before cleaning; use a soft, dry cloth |
| Safety | Do not open, risk of electric shock; do not expose to moisture |
| Spare parts and repairability | Contact after-sales service: ZI du clos des charmes, 77090 COLLEGIEN, France |
Frequently Asked Questions - Viva SC310ACLGRY SCHNEIDER
User questions about Viva SC310ACLGRY SCHNEIDER
0 question about this device. Answer the ones you know or ask your own.
Ask a new question about this device
Download the instructions for your Radio in PDF format for free! Find your manual Viva SC310ACLGRY - SCHNEIDER and take your electronic device back in hand. On this page are published all the documents necessary for the use of your device. Viva SC310ACLGRY by SCHNEIDER.
USER MANUAL Viva SC310ACLGRY SCHNEIDER
Location of controls 25
Operations....27
Trouble shooting....32
Specifications....33
Nederlands
Specifications....49
Españ ol
natural_image
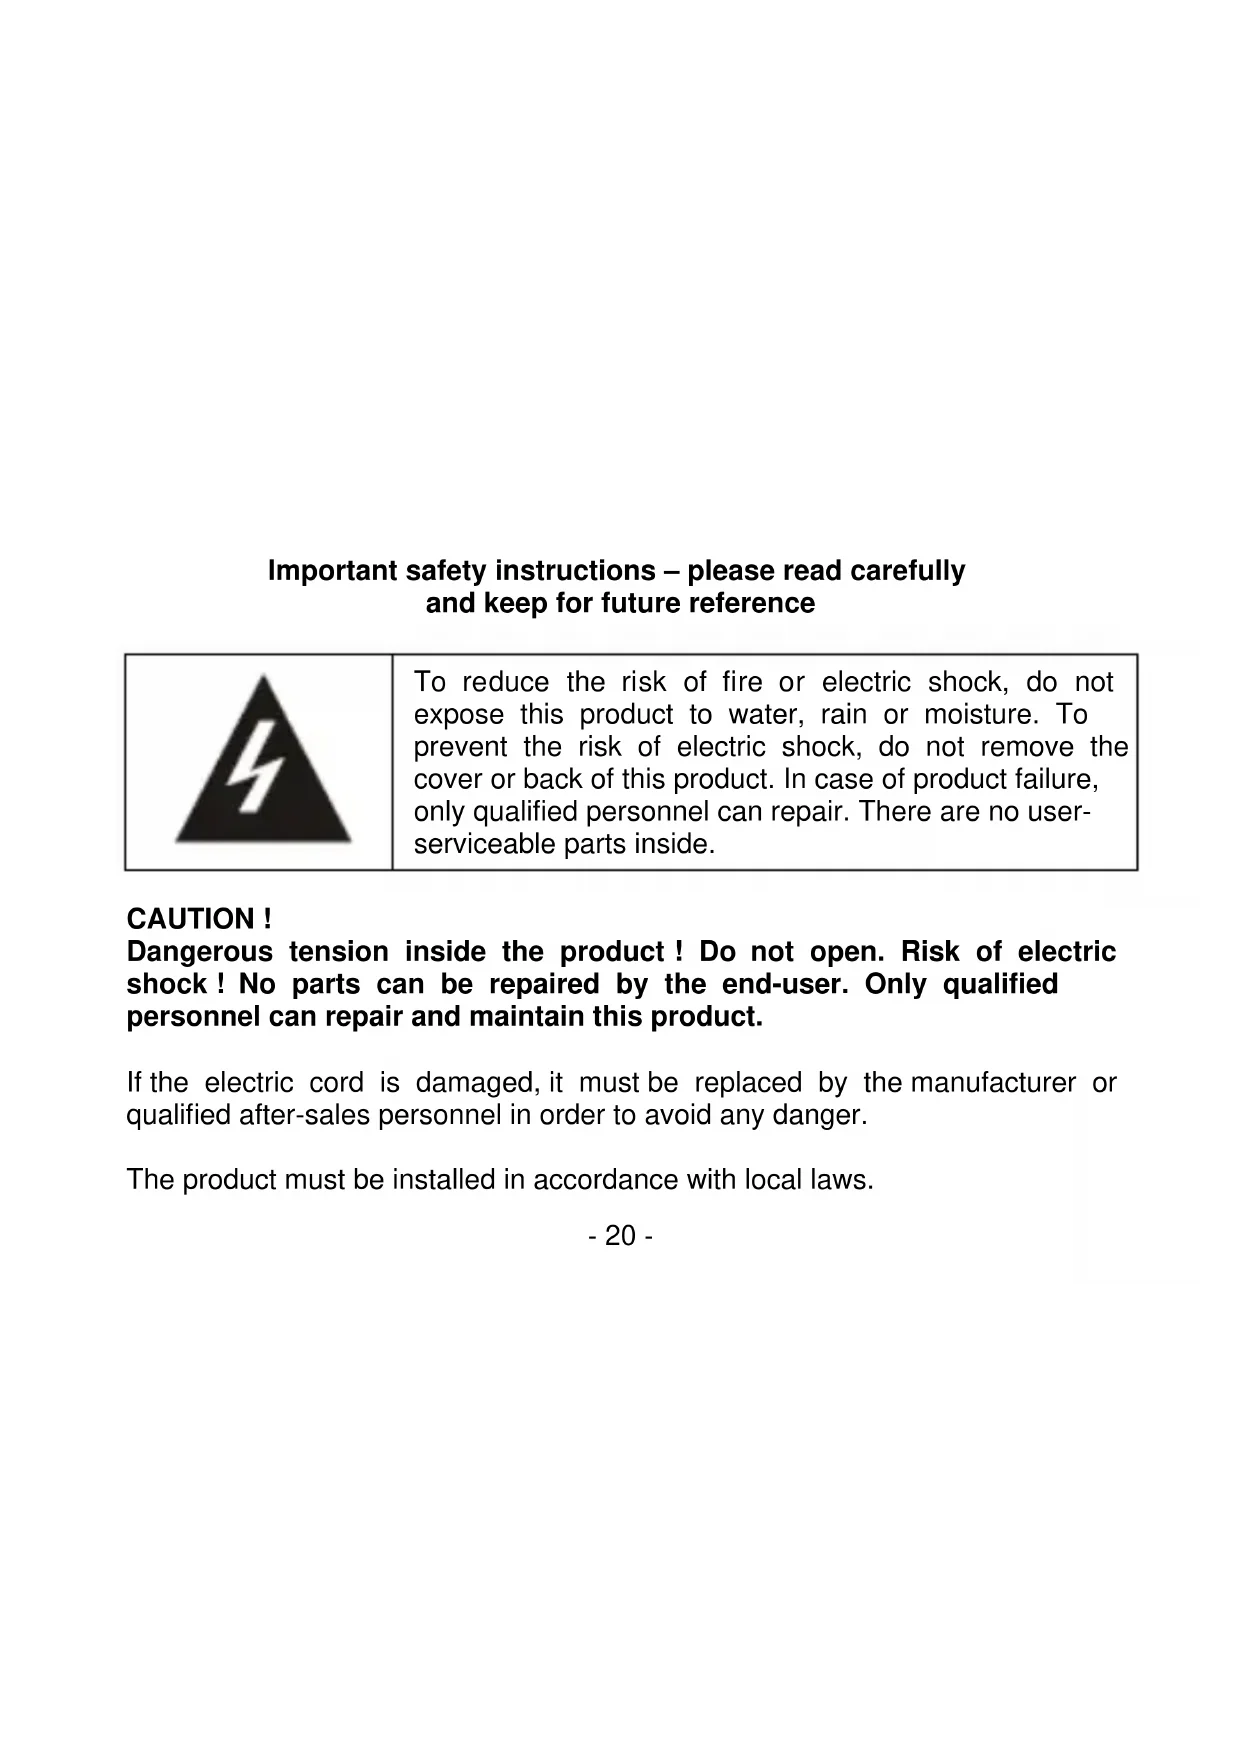
Black triangular warning symbol with a white lightning bolt inside, indicating electrical hazard (no text)natural_image
Symbol of a trash bin crossed with two crossed lines, no text or labels present
natural_image
Purple icon depicting a person walking with arrows, enclosed in a circle (no text or symbols)Important safety instructions – please read carefully and keep for future reference

natural_image
Black triangular warning symbol with white lightning bolt (no text or numbers)To reduce the risk of fire or electric shock, do not expose this product to water, rain or moisture. To prevent the risk of electric shock, do not remove the cover or back of this product. In case of product failure, only qualified personnel can repair. There are no user-serviceable parts inside.
CAUTION!
Dangerous tension inside the product! Do not open. Risk of electric shock! No parts can be repaired by the end-user. Only qualified personnel can repair and maintain this product.
If the electric cord is damaged, it must be replaced by the manufacturer or qualified after-sales personnel in order to avoid any danger.
The product must be installed in accordance with local laws.
Damaged batteries must be properly disposed. In order to protect the environment, please dispose the batteries properly, in accordance with local laws (information is available at your reseller).
Where to install the product
- Place the product on a straight, rigid and stable place. Do not place the product on a carpet.
- Do not place the product on top of another that may cause overheating (for example, a receiver or amplifier).
- Do not place anything underneath the product (for example, CDs or magazines).
Proper ventilation
- Place the product in a sufficiently-aerated place to avoid overheating. Allow at least 10cm spacing at the back and top of the product, and 5cm spacing on both sides to prevent overheating.
- Do not place items such as newspapers, tablecloth, curtains, in front of the ventilating openings.
Do not expose the product to high temperatures, moisture, water and dust.
- The apparatus shall not be exposed to dripping or splashing. No object filled with liquids, such as vases, shall be placed on the apparatus.
- Do not place other items close to this product that may damage it (for example, objects containing water or lightened candles).
- No naked flame sources, such as lighted candles, should be placed on the apparatus.
Electric supply
- Please unplug the product in case of prolonged non-use.
- If the supply cable is damaged, it must be replaced by the manufacturer or qualified after-sales personnel to avoid any danger.
- This product must be connected to an electrical supply 230V \~ 50Hz.
- The mains plug is used as the disconnect device, so the disconnect device shall remain readily operable.
- Do not use the product with a battery different from the one provided.
WARNING
- Do not ingest the battery, Chemical Burn Hazard; this product contains a coin/button cell battery. If the coin/button cell battery is swallowed, it can cause severe internal burns in just 2 hours and can lead to death.
- Keep new and used batteries away from children.
- If the battery compartment does not close securely, stop using the product and keep it away from children.
- If you think batteries might have been swallowed or placed inside any part of the body, seek immediate medical attention.
EU declaration of conformity
Hereby, SCHNEIDER CONSUMER GROUP declares that the radio equipment type Radio alarm clock is in compliance with the essential requirements and other provisions of and the Radio Equipment Directive (RED) 2014/53/EU. The full text of the EU declaration of conformity is available at the following internet address: http://www.schneiderconsumer.com


- This logo set on the product means that the recycling of this apparatus comes within the framework of the directive 2012/19/EU of July 4, 2012 concerning the waste on electrical and electronic equipment (WEEE).
- The presence of dangerous substances in the electrical and electronic equipments can have potential consequences
on the environment and human health in the cycle of reprocessing this product.
- Therefore, at the end of its lifetime, this product shall not be disposed with other non-recycled waste.
- As the end user, your role is of prime importance in the cycles of reusing, recycling, and other forms of valorization of this electrical and electronic equipment. Local authorities and resellers have set special procedures for the purpose of collecting and recycling this product.
- You have the obligation to use the selective waste collection systems put in place by your local authorities.
LOCATION OF CONTROLS
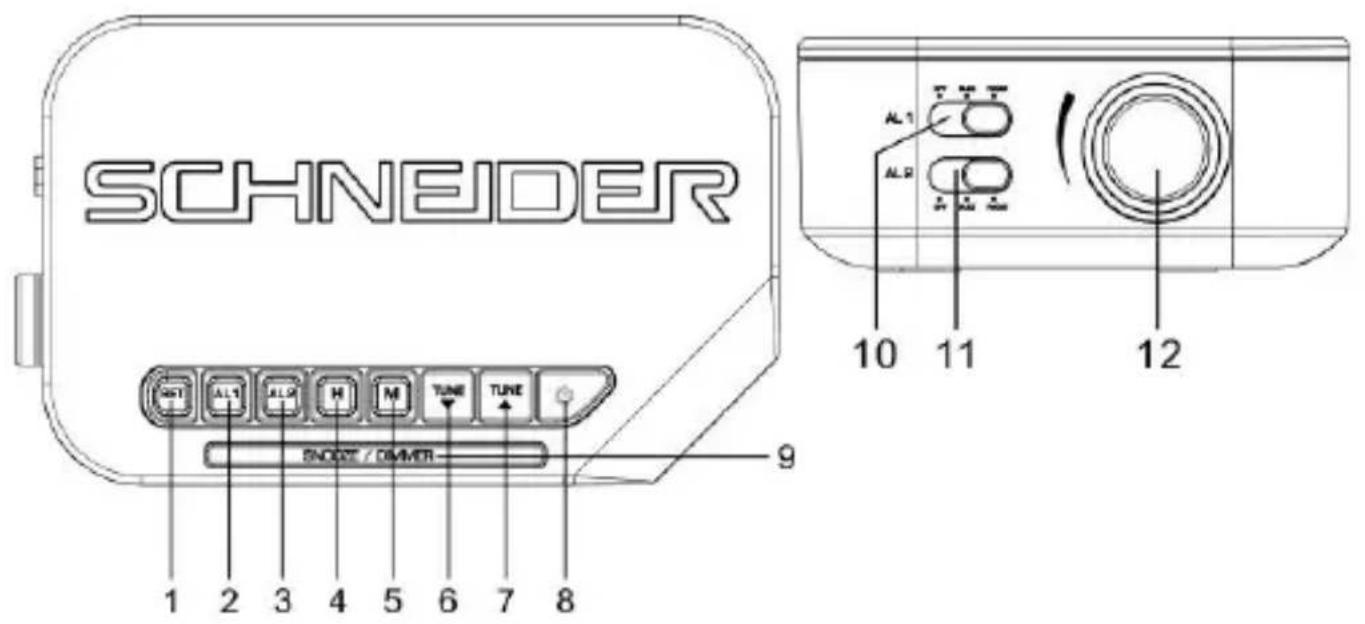
text_image
SCHNEIDER 1 2 3 4 5 6 7 8 SNDOT / DIMMER 9 AL1 AL2 10 11 12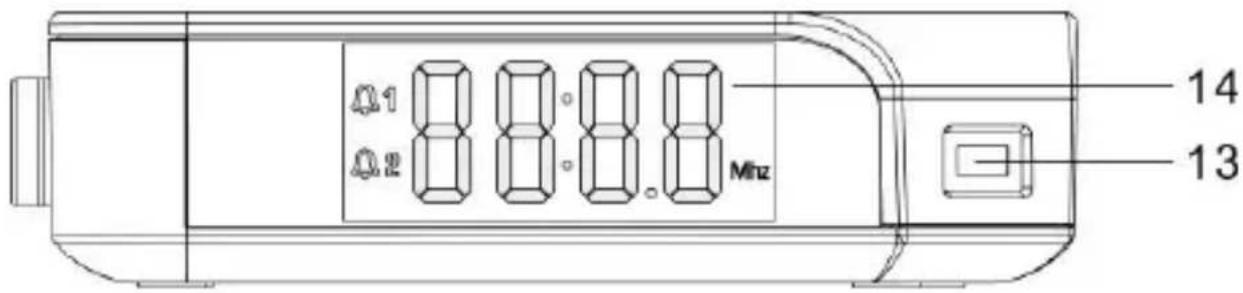
text_image
14 13 Ø1 8 8 8 8 Ø2 8 8 8 8 Mhz- SET
- ALARM1
- ALARM2
- HOUR
- MINUTE
- TUNE BACKWARDS
-
TUNE FORWARDS
-
STANDBY
- SNOOZE/DIMMER
- AL1 FUNCTION SELECTOR
- AL2 FUNCTION SELECTOR
- VOLUME KNOB
- USB PORT FOR CHARGING
- LED DISPLAY
OPERATIONS
Connecting mains power
Connect the AC power cord to the power supply outlet. Your clock radio is ready to work for you.
Backup battery installation
Your clock radio requires one CR2032 lithium battery (included) to provide backup power to the clock in the event of a temporary power interruption.
- Open battery cover located at the back of the unit. A screwdriver (not provided) is necessary in order to protect young children.
- Insert one CR2032 lithium battery into the battery compartment with the “+” side facing up.
- Close the battery cover.
If AC power is interrupted, the LED display will go off and both the radio and the alarm will stop. The backup battery will keep the time and all settings of your unit. Make sure a new CR2032 lithium battery is used.
Note: Do not use old battery for backup, which may lead to abnormal display appears. In case abnormal display appears, please take out the backup battery and then unplug the clock radio.
Setting time
- In standby mode, long-press the SET button, the time digits flash.
- Press H button repeatedly to set the current hour.
- Press M button repeatedly to set the current minute.
- Short-press SET button again to confirm the setting.
Setting the alarms
- Long-press AL1 or AL2 till the time digits flash.
- Press H button repeatedly to set Alarm1 or Alarm2 hour.
- Press M button repeatedly to set Alarm1 or Alarm2 minute.
- Short-press AL1 or AL2 again to confirm the alarms setting.
- Move the AL1 or AL2 selector to position BUZZ or RADIO to select the alarm tone, the related alarm is turned on, and or 1 icon keep lighting up on the display
Stopping and resetting the alarm to come on the next day
When Alarm 1 or 2 is sounding, the related or icon flashes. Press
button once to stop the alarm and reset it to come on the following day. After that t is t keep lighting up on the display.
Note: When AL1 or AL2 selector is moved to position BUZZ, short-press AL1 or AL2 can stop the alarm also and reset it to come on the following day.
Cancel the Alarm
Move the AL1 or AL2 selector to position OFF, then the alarm function will be cancelled.
Snooze operation (default snooze duration is 6 minutes)
When alarm is sounding, short-press SNOOZE/DIMMER button once, the alarm will be silent and come on again after the default snooze duration.
Note: If your second alarm activates while the first alarm is sounding or it is in the snooze mode, the second alarm overrides the first alarm (the first alarm is reset to come on the next day).
When alarm is in the snooze mode, short-press ⏻/ AL1/ AL2 can stop the snooze mode, alarm is reset to come on the next day.
Using the dimmer
Make a long press on the SNOOZE/DIMMER button to adjust the brightness of the LED display.
Listening to FM radio
- To turn on the radio, press ⏻ button once, the display shows radio frequency in Mhz.
- Press TUNE ▲ / ▼ to tune the radio to a desired station. Long-press TUNE ▲ / ▼ to scan the radio programs directly.
- To adjust the volume, turn the VOLUME knob to the position you want.
- Press button to turn off the radio.
Note: For better FM reception, there is a built-in FM antenna wire at the rear of the unit. Move the wire around to obtain the best reception.
Using the preset memory
This clock radio features a total of 20 preset memories of FM stations. These allow you to preset your favorite stations and access them quickly.
-
Turn on the radio and select a radio station you like to memorize.
-
Long-press the SET button until « P01 » flashes. Short-press SET to store Memory 1.
- Press TUNE ▲ or ▼ to select another station you like to memorize. Then long-press SET until « P01 » flashes. Press TUNE ▲ or ▼ once, « P02 » appears. Press SET once to store Memory 02.
- Repeat Step 2 and 3 to preset memories 3 through 20.
- To access a preset station at any time, short-press the SET button at a time while the radio is on.
To use the sleep timer (Applicable in radio mode)
- Short-press the SNOOZE/DIMMER button repeatedly as needed to adjust the sleep timer from 120, 90, 60, 45, 30, 15 or OFF.
- When the display changes back to show the time, short-press SNOOZE/DIMMER button again to show the remaining sleep time.
- The radio will play for the programmed sleep time and then shut off automatically.
- To turn off the radio before the sleep time has elapsed, press ⏻ button once.
To use the USB port for charging
Connect your mobile phone with the USB port by a USB charging cable (not provided) to charge.
Note:
- The USB port is only for USB recharging function, and it cannot support USB player to play music
- When USB jack is recharging the mobile phone, the maximum current is 500MA. Please choose other device in case of fast recharge.
TROUBLE SHOOTING
- If your clock displays irrelevant time or does not function properly, which may be caused by electro-static discharge or other interference, disconnect the AC power (and remove the backup battery). The clock radio will reset to default settings and you need set it again.
- If abnormal display appears, please take out the backup battery and then unplug the clock radio. Replug the clock radio after 1-2 minutes.
- The USB port is only for recharging function, and it cannot support music playback with a USB key.
SPECIFICATIONS
FM Band: 87.5 to 108 MHz
Power Supply: 230V \~ 50 Hz
Power Consumption: 6.6W
Battery type :1xCR2032
USB charging Jack: maximum 500mA current