IAN 273729 - Uncategorized Livarno Lux - Free user manual and instructions
Find the device manual for free IAN 273729 Livarno Lux in PDF.
Download the instructions for your Uncategorized in PDF format for free! Find your manual IAN 273729 - Livarno Lux and take your electronic device back in hand. On this page are published all the documents necessary for the use of your device. IAN 273729 by Livarno Lux.
USER MANUAL IAN 273729 Livarno Lux
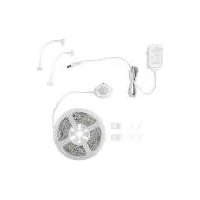
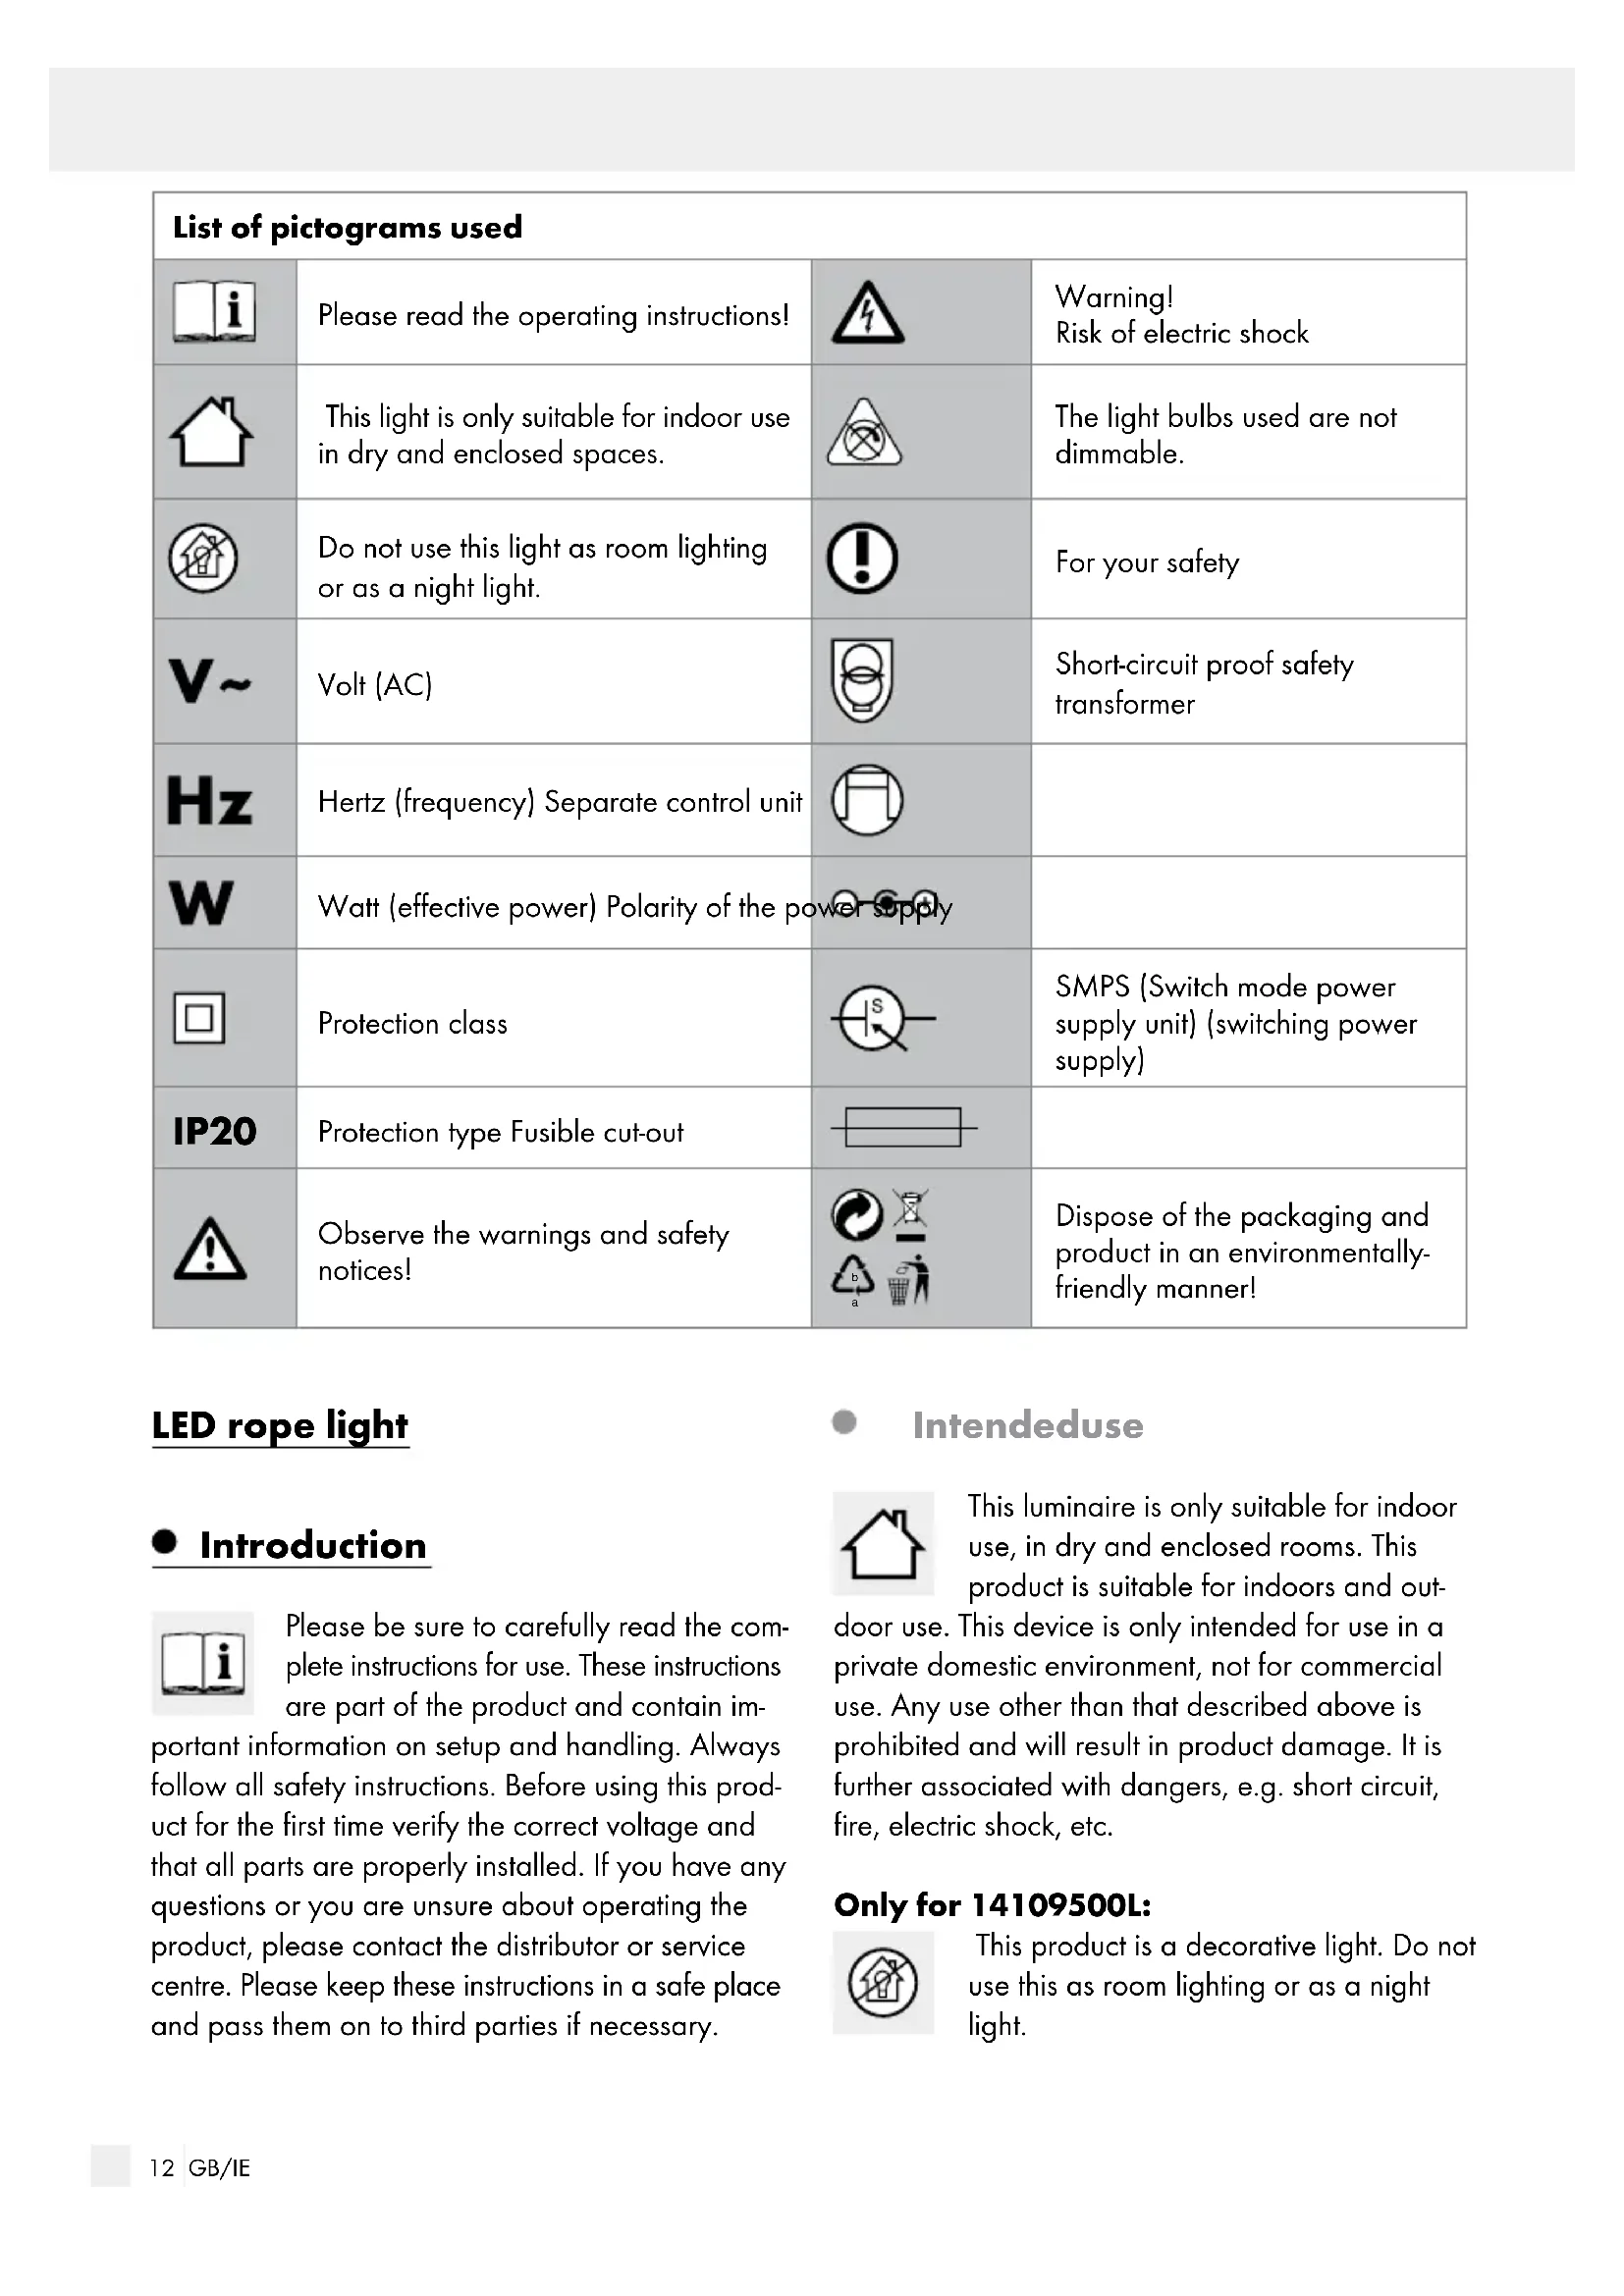
Dispose of the packaging and product in an environmentally- friendly manner! LED rope light Introduction Please be sure to carefully read the com- plete instructions for use. These instructions are part of the product and contain im- portant information on setup and handling. Always follow all safety instructions. Before using this prod- uct for the first time verify the correct voltage and that all parts are properly installed. If you have any questions or you are unsure about operating the product, please contact the distributor or service centre. Please keep these instructions in a safe place and pass them on to third parties if necessary. Intended use This luminaire is only suitable for indoor use, in dry and enclosed rooms. This product is suitable for indoors and out- door use. This device is only intended for use in a private domestic environment, not for commercial use. Any use other than that described above is prohibited and will result in product damage. It is further associated with dangers, e.g. short circuit, fire, electric shock, etc. Only for 14109500L: This product is a decorative light. Do not use this as room lighting or as a night light.13 GB/IE Introduction / SafetyIntroduction Scope of delivery Check immediately after unpacking that the parts are complete and that the product is in proper con- dition. 1 LED rope light 2 connectors 4 end caps 2 cable holder 1 adhesive strip 1 set of instructions for use Parts Description
50 / 60 Hz 14109500L: max. 7 W, 96 LED, max. length 3 m 14109606L: max. 9 W, 90 LED, max. length 3 m Protection class: II / Protection type: IP20 LED non-replaceable Safety Safety instructions Damage due to failure to comply with these instruc- tions for use will void the warranty! We assume no liability for consequential damages! We assume no liability for property damage or personal injury due to improper handling or failure to comply with the safety instructions! Avoid the risk of fatal injury from electric shock Check the LED strip for damage before every use. Never use the LED strip if any damage is detected. A damaged mains cable poses a risk of fatal injury from electrical shock. In the case of damage, repairs or other problems, please contact the service centre or a qualified electrician. The supply cable of this appliance cannot be replaced. If the cable is damaged, the appliance must be disposed of. The appli- ance contains no parts which may be serviced by the consumer. Make sure before use that the available supply voltage corresponds to the required operating voltage of the item (see "Technical Data"). Never allow the live power leads and contacts to come into contact with water or other liquids. Never open any of the components of the elec- trical equipment or insert any objects into the same components. This will pose a risk of fatal injury from electric shock. Do not install the lamp on damp or conductive surfaces. This LED strip must not be connected electroni- cally with other LED strips. Protect the product from sharp edges, mechani- cal loads and hot surfaces. Do not secure with sharp staples or nails. Always unplug the mains plug from the socket before assembly, disassembly or cleaning. Never catch hold of the mains plug or the LED strip with wet hands. Only use the individual parts supplied, other- wise all warranty claims will become invalid. This item must not be connected with the power supply while it is still in its packaging provided that the packaging has not been adjusted for exhibition purposes. Lay out the item completely before you connect it to the power supply.14 GB/IE Installing the ... / Maintenance and Cleaning / Disposal / Warranty and ServiceSafety / Initial use / Installing the LED strip Prevent fire and injury hazards This product does not contain any parts that can be serviced by the user. The LEDs cannot be replaced. If the LEDs cease to function at the end of their operational life, the entire item must be replaced. The installed LEDs are not suitable for dimmers or electronic switches. Do not look into the LED from a close distance during operation. Do not look at the LED with an optical instru- ment (e.g. magnifier). Safe working Do not leave the LED strip or packaging mate- rial lying unattended. The packaging material presents a suffocation hazard and there is a risk of loss of life from strangulation. Install the light so that it is protected from dirt and excessive heating. Always be attentive! Always pay attention to what you are doing and use common sense. Never use the LED strip if you are having diffi- culty concentrating or do not feel well. Before use, familiarise yourself with all the in- structions and diagrams in these instructions, as well as with the LED strip itself. To completely disconnect the LED strip from the power supply, the mains adapter must be removed from the mains socket. Initial use Remove all packaging materials before first use. Never connect the LED strip to the mains power supply whilst in the packaging. Trimming / connecting the LED tape The LED tape may be trimmed to size or connected.
DANGER TO LIFE BY ELEC-
TRIC SHOCK! Disconnect the lights from the power supply before performing any work on the LED strip
from the mains socket. Choose the desired LED strip length. Note Ensure that you cut the LED strip at the right place. The cutting point lies exactly between the plus and minus pole and is marked with a black line (Fig. B). Shorten the LED strip
using a pair of scissors. Then press both ends of the LED strip
at a time onto the ends of the plug connection
(See Fig. C). Check the correct positioning. Be sure to cover the open end of the LED tape
with the adhesive strip
if you do not wish to connect the end after trimming the tape (See Fig. D). Installing the LED strip Note: Ensure that the installation area is clean, grease-free and dry. Otherwise the functionality of the adhesive strip may be impaired. Note: Ensure that a plug socket is located in close proximity to the installation area. Choose a suitable installation area (window etc.). Remove the protective foil from the reverse side of the LED strip
with the adhesive strip onto the installation area and press it on firmly. Remove the protective foil from the reverse side of the cable hold
onto the desired posi- tion.15 GB/IE Installing the ... / Maintenance and Cleaning / Disposal / Warranty and Service Squeeze the mains cable
into the plug socket. Your light is now ready to use. Maintenance and Cleaning
DANGER TO LIFE BY ELEC-
TRIC SHOCK! Disconnect the lights from the power supply before performing any work on the LED strip
from the mains socket. Do not use solvents, benzene or similar sub- stances. They could damage the light. Use a dry, lint-free cloth to clean the LED strip
Disposal The packaging is made entirely of recy- clable materials, which you may dispose of at local recycling facilities. The Green Dot is not valid for Germany.