IK IK 55 - Cooker STEBA - Free user manual and instructions
Find the device manual for free IK IK 55 STEBA in PDF.
| Type of product | Induction cooktop |
| Brand | Steba |
| Model | IK 55 |
| Power supply | Grounded outlet, dedicated circuit recommended |
| Maximum power | 2000 W (10 levels of 200 W each) |
| Temperature range | 60 °C to 240 °C (in steps of 5, 10 or 20 °C) |
| Timer | Up to 2 h 59 min, adjustable in increments of 1 h and 1 or 5 min |
| Child safety | Yes, key lock (button Ⓐ) |
| Pan detection | Yes, automatic shutdown if no suitable pan |
| Surface material | Glass top (glass cooktop) |
| Cooking type | Induction: direct heating of the pan bottom |
| Energy saving | Up to 50% compared to classic cooktops |
| Dimensions (approx.) | 30 x 30 x 8 cm |
| Weight (approx.) | 3 kg |
| Cleaning | Damp cloth and mild detergent; do not use abrasive cream or steel wool |
| Included accessories | None |
Frequently Asked Questions - IK IK 55 STEBA
User questions about IK IK 55 STEBA
0 question about this device. Answer the ones you know or ask your own.
Ask a new question about this device
Download the instructions for your Cooker in PDF format for free! Find your manual IK IK 55 - STEBA and take your electronic device back in hand. On this page are published all the documents necessary for the use of your device. IK IK 55 by STEBA.
USER MANUAL IK IK 55 STEBA
natural_image
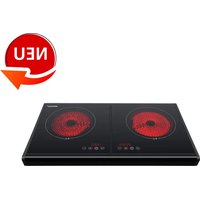
Exterior view of a black STEXO® electric stove with digital display and rotary controls (no text or symbols on main body)220 - 240V\~; 50/60Hz; 2000 W
Induktion
IK 55
Instructions for use 12
Mode d'emploi 20
Induction – the modern way of cooking
1 litre water boils within 4 minutes!
An electromagnetic field of force directly heats the pot bottom, thereby:
• up to 50% lower power consumption
• up to 30% shorter cooking time
- pot detection and power cut-off, if no pot on the device
Cookware
- Applicable are enamelled or induction-appropriate pots. Minimum diameter 12 cm, but not much larger as the printing on the glass plate. You can test with a magnet whether your cookware is suitable or not. If it sticks to the base of the pot, you can use the pot.
- Pots made of aluminium, copper, glass, ceramics and chrome nickel steel are not suitable.
- Make sure that the bottom of the pot is flat and not too thin, as this will influence the temperature regulation negatively.
- Place the appropriate pot / pan (minimum diameter 12 cm) on the plate.
- Caused by the composition of the materials of the pot, some noise might be heard during cooking.
Generally
This appliance is for private and indoor use only and must not be used commercially. Please read the instruction manual carefully and keep it at a safe place. When the appliance is given to another person the instruction manual should be passed to that person, too. Only use the appliance as described in the instruction manual and pay attention to the safety information. No liability for damages or accidents will be accepted, which are caused by not paying attention to the instruction manual. Remove all packaging and sticker. Wash up all parts carefully (see cleaning).
Safety information
- Persons with heart pacemakers should consult their doctor before using the device.
- Connect and operate the appliance in accordance with the specifications shown on the rating label.
- Because of radio interference from radio or TV, connect the device to a separate circuit.
- Do not use if the plug cord is damaged. Verify before every use.
- Do not plug with wet hands.
- Connect the power plug to a properly installed and easily accessible socket only.
- To unplug the power plug, always pull the plug – not the cable.
- Plug off the appliance after each use or in case of failure.
- Do not pull at the cord. Don't pull it over edges and don't bend it too much.
- Keep the cord away from hot parts.
The appliance can be used by children aged 8 and above and persons with limited physical, sensory or mental capabilities or lack of experience/knowledge, provided that are supervised or have been provided with instruction in the safe use of the appliance and have understood the resulting dangers. Children must not use the packaging as a toy. Cleaning and user maintenance must not be carried out by children unless they are 8 years or older and are supervised.
- Children under the age of 8 must be kept away from the appliance and the connecting cable.
- Children should be supervised to ensure that they do not play with the appliance or packaging material (e.g. Plastic Bags).
- The appliance must not be operated using a timer or a separate remote system!
- Never leave the appliance unattended when in use.
- Do not leave the appliance outdoors or in a damp area.
- Never place anything on top of the device and do not cover the ventilation slots.
- Never immerse the unit in water.
- Never use the device after a malfunction, e.g. if it felt down or has been damaged in any other manner.
- The manufacturer is not liable for damage which is occurring due to the usage of the appliance in a different way as described or a mistake in the handling has been made.
- To prevent injury, repairs such as replacing a damaged cord, should only be carried out by a customer service. Only original spare parts have to be used.
- The device gets hot, only transport after it cooled down and without cookware on top.
- Only use the device as described in this manual.
- This appliance is intended to be used in household and similar applications such as:
o staff kitchen areas in shops, offices and others working environments
o by clients in hotels, motels and other residential type environments
o bed and breakfast type environments.
- Before initial use: clean all parts and leave to dry.
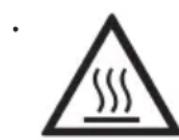
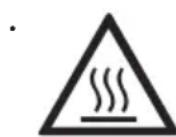
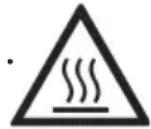
Attention! Device gets hot. Danger of burns!
While using the device, the surface can get very hot! Do not place the appliance on a sensitive surface (e.g. painted furniture) and keep a distance of at least 70cm to burnable materials.
- During operation steam emerge. Keep hands and face away. Keep in mind that steam might leave the cookware. Take appropriate distance to wall cupboards to avoid damage of the veneer.
- If an extension cable is used, it has to have a cross-section of 1,5mm^2 . A cable drum must always be unwound.
- If a GS-tested 16 A multi-pin extension is used, it may not be charged with more than 3680 watts due to fire hazard. This device has a power consumption of 3500 watts.
- Make sure that children do not tease the cable or that a trip hazard occurs.
- The device must always be disconnected from the power supply if it is not supervised and before assembling, disassembling or cleaning.
- Risk of electronic shock! Do not put any sharp objects into the ventilation slots. Do not use the device if there are cracks in the glass plate.
-
Never place empty pots, cutlery or other metallic objects onto the device. Those objects will get hot! Do not heat cans, they can explode.
-
Do not place a sheet of paper or metal foil between the pot or the pan and the device.
- Do not load the glass surface with more than 8kg.
- In order to protect the electronic parts, the ventilation runs for a couple of minutes after the device has been turned off.
The glass surface can have a residual heat after cooking.
- Do not use the device if unsupervised. Oil and fat can catch fire if they get too hot. In case of grease fire unplug and never extinguish with water! Cover the pot with a lid, plate, or similar.
- Do not place near objects which are affected by magnet. (e.g. automatic-banking cards).
Cleaning
Attention! Pull the plug before cleaning and allow the device to cool down.
- Never immerse the unit into water.
- Hygiene: Please always clean the device to avoid bacteria and mold formation.
- Pay attention that no liquids can get into the device through the air intakes.
- A discoloration or storing can be caused if pots are used which are not clean at the bottom.
• Use a damp cloth and some detergent for cleaning.
- Do not use any abrasive milk, polishing wool or solvent for cleaning.
- Use vacuum cleaner to suck up dirt from the air intake and exhaust vent.
Workplace
Important:
Never place this device on or next to hot surfaces (e.g. hot stoves). Only use it on a even, stable, non-metallic and a heat resisting surface. It is important that no inflammable items are near to the device. Do not place the device on the edge of the table so that it cannot be touched by children or fall down when touched.
Getting started
- Place the induction-appropriate cookware onto the device.
- Plug in the device to an earthed socket, a signal can be heard and all LED's light up shortly. The device is in stand-by mode.
Power Levels

- Press the On/Off button. The display shows - - -
- Press the menu button. The LED for the power levels is shining.
- Note: If no or inappropriate pot is recognised, E1 is flashing in the display, a signal can be heard and the device turns into stand-by mode.
- The device starts with a default level 1, this corresponds to 200W.
- The power level can be changed with the control dial from 0 to 10. Each level corresponds to a performance leap of 200W.
- The device stops working and turns automatically into stand-by mode after 5 seconds if the level 0 is chosen.
- Cooking with power levels is recommended for cooking large amounts of food or soups.
Temperature
- Press the menu button 📋 again. The LED for the temperature is shining.
- The device starts with a default temperature of 60^ .
- The temperature can be changed with the control dial from 60 to 240^ . it can be changed in the following steps:
o 60 – 120°C in steps of 5°C
o 120 – 180°C in steps of 10°C
o 180 – 240°C in steps of 20°C
- The device stops working and turns automatically into stand-by mode after 5 seconds if the temperature 0 is chosen.
- Cooking with temperature levels is recommended for frying in a pan.
Timer

- Press the timer button, the LED lights up.
- The device starts with a default setting of 0:00 hours.
- The timer can be changed with the control dial:
o 0 – 2 hours in steps of 1 hour. Confirm with the timer button.
o 0 – 59 minutes for increases in steps of 5 minutes, for decreases ins teps of 1 minute (max. timer: 2:59h)
- Confirm with the timer button. The display shows the set temperature or power level. In order to see the remaining time, press the timer button shortly.
- After the time run out, a signal sound can be heard and the device turns into standby mode.
- If the timer should be turned off prematurely, turn the hours and minutes to 0 or press the On/Of button ⏻.
In order to cool the electronic of the device, the ventilation runs for a couple of minutes after the device has been turned off. Unplug once the ventilation stopped. - During operation the timer can be changed by pressing the timer button. The display shows the current time. this can be changed with the control dial within 5 seconds.
- Attention: if no timer is set, the device will be turned off for safety reasons after 2 hours.
Child lock
- Press the buttons 🔒. All buttons are locked. The chosen program continues. The display shows "Loc".
- In order to unlock, press again for 3 seconds.
Troubleshooting
Dear Client,
Thank you for buying this STEBA product. The following table will help you with problems that may occur when using your device. For many problems there is a simple solution, because not everything that appears like a malfunction must be serious.
Please check the following list before contacting our customer service.
| Problem Reason | Solution | |
| No light after plug-in of the device | · No power· To many devices at one power cord | · Check is plug is plugged-in correctly· Check the fuse |
| A signal tone sounds and no heat occurs | · Pot not suitable for induction | · Use suitable cookware |
| Plate does not heat anymore | · Pot is empty?· Temperature too high?· Ventilation slot blocked?· Cooking time above 2 hours without timer? | · Refill pot· Lower temperature· Clean ventilation slots· Use timer, reset temperature/power mode |
| Error code „E0” | · Error in the circuit | · Contact service |
| Error code „E1” | · Pot not suitable for induction | · Use suitable cookware |
| Error code „E2” | · Overheat of the device | · Take the pot from the device and let it cool down, then restart |
| Error code „E3” | · Over-voltage | · Contact service |
| Error code “E4” | · Under-voltage | · Contact service |
| Error code “E5” | · Short circuit cooking plate | · Contact service |
| Error code “E6” | · Short circuit electronic | · Contact service |
| Error code “E7” | · Top plate overheat | · Let the device cool down, then restart |
Correct Disposal of this product
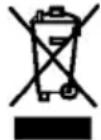
This marking indicates that this product should not be disposed with other household wastes throughout the EU. To prevent possible harm to the environment or human health from uncontrolled waste disposal, recycle it responsibly to promote the sustainable reuse of material resources. To return your used device, please use the return and collection systems or contact the retailer where the product was purchased. They can take this product for environmental safe recycling.
Packaging disposal: Do not throw away the package materials. Please put it in the recycling bin.


Gift box: Paper, should be put to the old paper collection point. Plastic packaging material and foils should be collected in the special collection containers.
Service and Repair:
If the appliance must be repaired, please get in touch with your trader or with the manufacturer:
o bed and breakfast miljøer