SHF 1400 A1 - Deep fryer SILVERCREST - Free user manual and instructions
Find the device manual for free SHF 1400 A1 SILVERCREST in PDF.

User questions about SHF 1400 A1 SILVERCREST
0 question about this device. Answer the ones you know or ask your own.
Ask a new question about this device
Download the instructions for your Deep fryer in PDF format for free! Find your manual SHF 1400 A1 - SILVERCREST and take your electronic device back in hand. On this page are published all the documents necessary for the use of your device. SHF 1400 A1 by SILVERCREST.
USER MANUAL SHF 1400 A1 SILVERCREST
Operating instructions
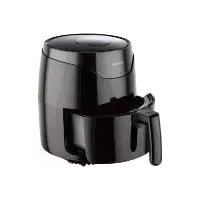
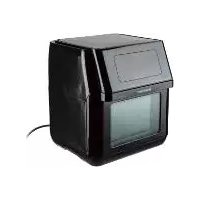
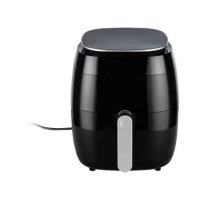
1 Housing 2 Heating element (at the top of the interior) 3 Touch display with indications and sensor buttons 4MAXMarking for the maximum filling level of the frying basket (maximum filling level is 2.3 litres, this corresponds to approx. 900 g of French fries) 5 Frying basket 6 Screen assembly 7 Safety catch 8 Button for unlocking the frying basket 9 Handle of the frying basket 10 Pan; the liquid from cooking collects here 11 Power cable with mains plug 12 Spacer with cable spool 13 Air outlet __334460_1910_Heissluftfritteuse_B6.book Seite 3 Montag, 20. Juli 2020 12:23 124
Thank you for your trust! Congratulations on your new hot air fryer. For safe handling of the product and in or- der to get to know the entire range of fea- tures:
- Read these user instructions thoroughly prior to initial use.
- Above all, observe the safety in- formation!
- The device should only be used as described in this copy of the user instructions.
- Keep this copy of the user in- structions for information pur- poses.
- If you pass the device on to someone else, please include this copy of the user instructions. The user instructions are a part of the product. We hope you enjoy using your new hot air fryer! Symbols on the device This symbol warns you against touching the hot surface. The food-safe material of devices with this symbol will not change the taste or smell of food.
The hot air fryer is intended for the cooking of food in hot air at a temperature of up to max. 200 °C. The hot air fryer is designed for private, do- mestic use. The hot air fryer must only be used indoors. This device must not be used for commercial purposes. Foreseeable misuse The hot air fryer is not suitable for heating liquids.
3. Safety information
Warnings If necessary, the following warnings are used in this copy of the user instructions: DANGER! High risk: failure to ob- serve this warning may result in inju- ry to life and limb. WARNING! Moderate risk: failure to ob- serve this warning may result in injury or se- rious material damage. CAUTION: low risk: failure to observe this warning may result in minor injury or mate- rial damage. NOTE: circumstances and specifics that must be observed when handling the de- vice. __334460_1910_Heissluftfritteuse_B6.book Seite 4 Montag, 20. Juli 2020 12:23 125
Instructions for safe operation ~ This device can be used by children from the age of 8 and peo- ple with restricted physical, sensory or intellectual abilities or people without adequate experience and/or understanding, if they are supervised or instructed on how to use this device safely and if they are aware of the resulting dangers. Children must not play with the device. Cleaning and user maintenance must not be performed by children unless they are older than 8 years and supervised. ~ Children under the age of 8 must be kept away from the device and the power cable. ~ Do not touch any hot parts of the device such as the air outlet on the back. The frying basket should only be touched at the handle. ~ During frying, hot steam escapes from the air outlet. Be careful not to put your hands into the steam. ~ If the mains power cable of this device should become damaged, it must be replaced by the manufacturer, the manufacturer's cus- tomer service department or a similarly qualified specialist, in or- der to avoid any hazards. ~ This device is not intended to be operated using an external timer or a separate remote control system. ~ Please take note of the chapter on cleaning (see “Cleaning” on page 15). __334460_1910_Heissluftfritteuse_B6.book Seite 5 Montag, 20. Juli 2020 12:23 126
DANGER for children ~ Please make sure that the hot air fryer can never be pulled down (e.g. with the power cable) by children. In cases of scalding there is danger to life! ~ Packing materials are not children's toys. Children should not be allowed to play with the plastic bags. There is a risk of suffocation. DANGER to and from pets and livestock
Electrical devices can represent a danger to pets and livestock. In addition, animals can also cause damage to the device. For this reason you should keep animals away from electrical devices at all times. DANGER for birds ~ Birds breathe faster, distribute the air differently in their bodies and are signif- icantly smaller than humans. For this reason, it may be dangerous for birds to inhale even the smallest smoke quan- tities, which develop while this device is in operation. When using this device, birds should be relocated into a differ- ent room. DANGER! Risk of electric shock due to moisture ~ Protect the device from moisture, water drops and water splashes. ~ The device, the power cable and the mains plug must not be immersed in wa- ter or any other liquids. ~ If liquid gets into the device, disconnect the mains plug immediately. Have the device checked before reusing.
If the device has fallen into water, pull out the mains plug immediately, and only then remove the device from the water. Do not use the device again, and have it checked by a specialist workshop. ~ Never touch the device with wet hands. DANGER! Risk of electric shock
Do not use the device if the device or the power cable has any visible damage, or if the device has previously been dropped. ~ If you use an extension cable, it must be sufficient for the technical data of this device. ~ Do not connect the device by using a multiple socket. By doing so the socket might be overloaded.
Lay the power cable such that no one can step on it, get caught on it, or trip over it. ~ Connect the mains plug only to a cor- rectly installed, easily accessible earthed wall socket with voltage corre- sponding to the rating plate. The wall socket must still be easily accessible af- ter connection. ~ Ensure that the power cable cannot be damaged by sharp edges or hot spots. Do not wrap the power cable around the device. ~ When setting up the device, make sure that the power cable is not trapped or crushed.
Even after it has been switched off, the device is not completely disconnected from the mains. In order to fully discon- nect it, pull out the mains plug. ~ To pull the mains plug out of the wall socket, always pull on the mains plug, and never on the power cable. ~ Disconnect the mains plug from the wall socket … … after every use, …if there is a fault, … when you are not using the device, … before you clean the device and … during thunderstorms. ~ To avoid any risk, do not make modifi- cations to the product. Repairs must be carried out by a specialist workshop or the Service Centre. __334460_1910_Heissluftfritteuse_B6.book Seite 6 Montag, 20. Juli 2020 12:23 127
DANGER - Fire hazard ~ Never leave the device unattended while it is plugged in. ~ Never leave the hot air fryer unattended during operation. You will thus be able to detect possible problems early on due to unusual smells or noises. ~ Never cover the device or place it on soft objects (e.g. towels). ~ Make sure that there is free space on all sides and above the device. ~ Do not use the hot air fryer directly un- der wall units or wall sockets and not near to any curtains, paper or any simi- lar flammable objects. ~ The hot air fryer should only be operat- ed on a stable, flat, non-slip, dry and non-flammable work surface, in order to prevent it from tipping over or slipping away. DANGER! Risk of injury through burning ~ Do not touch the hot surfaces of the de- vice or the interior. Use oven gloves or potholders. ~ Allow the device to cool down com- pletely before you clean it or put it away. ~ Do not move or transport the hot air fry- er while it is switched on. WARNING! Risk of material damage ~ Only use original accessories. ~ Never place the device on hot surfaces (e.g. hot plates) or near to heat sources or open fire. ~ Make sure that the surface under the de- vice is dry. ~ Make sure that the food will not touch the hot heating element at the top of the interior and become stuck there. ~ Do not clean using sharp objects or abrasive cleaning agents. ~ The device is fitted with non-slip plastic feet. As furniture is coated with a variety of different varnishes and acrylics, and treated with different cleaning agents, it cannot be completely ruled out that components are contained in some of these substances that could damage and soften the plastic feet. If necessary, place a non-slip mat under the device.
- Remove all packing material. The inte- rior in particular must be com- pletely free of packaging remains such as polystyrene particles. DANGER - fire hazard! On the back of the device you will find the air outlet
. Hot air escapes from the air outlet during operation. ~ Never cover the air outlet13. ~ Do not use the hot air fryer directly un- der wall units or wall sockets and not near to any curtains, paper or any simi- lar flammable objects. ~ Make sure that there is free space on all sides and above the device. ~ Remove the cardboard between frying basket5 and pan10. ~ Remove the sticker from the screen as- sembly6. NOTE: when in operation for the first time, some smoke and odour may be generated by the device. This is due to the assembly materials used for the heating element and is not a fault in the product. Ensure adequate ventilation.
- Remove protective films and adhesive strips from the device, but do not re- move the rating plate on the underside of the device.
- Check that all accessories are present and undamaged.
Clean the device and all accessories be- fore using for the first time (see “Clean- ing” on page 15).
- Place the device on a dry, level, non- slip, heat-resistant surface.
- Insert the mains plug11 into a wall socket corresponding to the specifica- tions of the rating plate. The wall socket must also be easy to reach after switch- ing on the device.
14 Program symbols (see “The programs at a glance” on page 10) 15 °C Temperature unit 16 Numbers display (e.g. temperature, cooking time) 17 min Cooking time unit 18 Button: display cooking temperature 19 Button: increase temperature / extend cooking time 20 Button: switching on/off / program Start/Stop 21 Button: reduce temperature / shorten cooking time 22 Button: display cooking time 23 Button: press repeatedly to select a program 24 Heating symbol: is lit when the device is heating 25 Fan symbol: flashes when the fan is in operation
7. The programs at a glance
The superscript numbers 1,2 have the following meaning:
: Shake or turn after one third and two thirds of the cooking time.
: Shake or turn halfway through the cooking time. NOTE: between 80 – 200 °C the temperature can be set in 5 °C steps. Symbol in the touch display Program/use preset temperature (adjustable range) preset time (adjustable range) Frozen French fries
8. The basics of frying
Preparation of the food
- All food must be as dry as possible when used for frying. Dry the food to be fried and remove any ice from frozen food.
- When using deep-frozen food, remove as much water and ice as possible be- fore you put the food into the hot air fry- er.
- In case of breaded food, please make sure that the breading sticks as tightly as possible to the food to be fried. Frying time and frying temperature
- For a tasty and healthy result, the infor- mation on the packaging should be ob- served very carefully when selecting the temperature and the frying time.
- Only small quantities should be fried at a time.
- The frying basket5 must not be filled more than the MAX4 marking.
- Acrylamide may be carcinogenic. In or- der to reduce the formation of acryla- mide as much as possible, browning the food too much should be avoided. For an even browning
: Shake or turn after one third and two thirds of the cooking time.
: Shake or turn halfway through the cook- ing time. If the food (e.g. French fries or chicken nug- gets) requires an even browning, give it 1 - 2 shakes during the frying process.
to- gether with the frying basket
and shake the contents. While shaking make sure that the French fries are being thoroughly mixed and that the still rawer ones at the basket centre will get to the outside. When the pan
with the frying basket
is taken out, the device is automatically switched off.
2. Reinsert the pan10 with the frying bas-
ket5 into the device. The device switch- es on again automatically until the cooking time has expired. Baking Dough may never be filled directly into the frying basket
. After preparing the dough put it into a baking tin or another heat-resist- ant pan (e.g. muffin liners). Then put the con- tainer holding the dough into the frying basket
~ During operation, the surfaces of the de- vice may become hot. Do not touch any hot parts of the device such as the air outlet13 on the back. ~ Use oven gloves or potholders to touch the pan10 and frying basket5. ~ During frying, hot steam escapes from the air outlet13. Be careful not to put your hands into the steam. ~ Do not move or transport the hot air fry- er while it is switched on. WARNING! Risk of material damage! ~ The device must not be operated under any circumstances without the frying basket5!
9.1 Power connection
- When the device is set up, plug the mains plug11 into an earthed wall socket that corresponds to the specifica- tions on the rating plate. The wall socket must also be easy to reach after switch- ing on the device. - All indications in the touch display3 light up briefly. - A double acoustic signal is triggered. - The symbol for the Start/Stop but- ton20 is lit. The device is in stand- by mode.
. The term ‘but- tons’ is used in this instructions for buttons and keys to make the text easier to read.
9.3 Switching on/off
switch on the device from standby mode. -The display3 shows the program symbols14 and the lower bar with the buttons18 –23. - The set temperature and cooking time are displayed alternately. NOTE: if you switch off the device with the Start/Stop button 20 immediately after switching on, the fan is switched on. It runs for approx. 1 minute, until the device is switched to standby mode.
- Press the Menu button 23 repeated- ly to select the desired program.
again in order to start the device with the select- ed settings or the selected program. - The heating symbol 24 is dis- played. - The fan symbol 25 flashes. - The set temperature and cooking time are displayed alternately. - The cooking time is counted down. - The selected program symbol14 flashes.
- While the device is running, press and hold the Start/Stop 20 button to stop the process. - An acoustic signal sounds. - The fan continues to run and the fan symbol 25 flashes. - After approx. 1 minute the fan stops. The device is in standby mode. Only the symbol
can be seen in the display
While the device is switched on, the dis- play3 shows the lower bar with the but- tons18 –23. You can use these to change the settings for temperature and cooking time whenever you like, e.g. even if a pro- gram is already running.
- Use the temperature button 18 and the setting buttons 19/ 21to set the temperature between 80 °C and 200 °C: - Press the temperature button 18. - Quickly press the setting buttons 19/ 21 for 5 °C steps. Keep pressed for fast forward/reverse.
- Use the cooking time button 22 and the setting buttons 19/ 21 to set the cooking time between 1 and 60minutes: - Press the cooking time button 22. - Quickly press the setting buttons 19/ 21 for 1-minute steps. Keep pressed for fast forward/re- verse.
NOTE: make sure that the food will not touch the hot heating element2 at the top of the interior and become stuck there. The device has preset programs for many foods and types of preparation. When you select a program, you can also carry out the following settings at any time: -Temperature - Cooking time
1. Prepare the foods and place them in the
2. Place the frying basket5 in the pan10.
3. Slide the pan10 into the housing1.
4. Select the desired program (see “The
programs at a glance” on page 10).
5. Switch on the device with the Start/Stop
ly to select the desired program. The corresponding symbol flashes.
7. If necessary, make manual adjustments
to the temperature and cooking time.
8. Start the cooking process with the Start/
9.6 Interrupting the
cooking process NOTE: to stop the cooking process com- pletely, e.g. in order to return to the basic setting, press and hold the Start/Stop button 20. You can interrupt the cooking process at any time, e.g. to check the degree of browning.
- Briefly press the Start/Stop 20 but- ton to interrupt the cooking process. - The button symbol 20 flashes. - The heating symbol 24 is no longer displayed. - A signal sounds. - Temperature and cooking time are displayed alternately for approx. 1minute. - When the frying basket5 is removed, the fan stops until the frying basket is pushed back in.
again to continue the cooking process.
9.7 End of the cooking
- An audio signal sounds when the pro- gram has finished. The fan continues to run for approx 1 minute before the de- vice is switched to standby.
- You need a heat-resistant surface and a plate or bowl (pre-heated if necessary).
- To disconnect the device from the mains pull the mains plug11 after use.
1. Use the handle9 to pull the pan10 out
of the housing1. Place the pan10 on the heat-resistant surface.
2. Figure A: slide the safety catch7 in
the direction of the arrow.
3. Press the button for unlocking the frying
basket8 and lift the frying basket5 up- wards out of the pan10.
4. Place the frying basket5 on the heat-re-
sistant surface. Place the food on the prepared plate / in the prepared bowl.
5. Allow the device and accessories to
cool down before cleaning them. NOTE: if, for example, the degree of browning does not yet meet your require- ments, you can adapt the cooking process manually (see “Manual settings” on page 13). Slide the pan10 with the filled frying basket5 back into the housing1 and restart the cooking process. Check the level of browning after a few minutes (see “Inter- rupting the cooking process” on page 14). __334460_1910_Heissluftfritteuse_B6.book Seite 14 Montag, 20. Juli 2020 12:23 1215
DANGER of burns! ~ Let the device cool down before moving or cleaning it. DANGER! Risk of electric shock! ~ Pull out the mains plug11 from the wall socket before cleaning the hot air fryer. ~ The hot air fryer must not be immersed in water. WARNING! Risk of material damage! ~ Do not clean using sharp objects or abrasive cleaning agents. Accessories
can be cleaned in the dishwasher. NOTE: you can also clean these parts by hand with warm water and detergent. Then rinse thoroughly with clean water.
- Soak burnt-in food leftovers beforehand.
- Clean the pan10 by hand with warm water and detergent. Then rinse thor- oughly with clean water.
- Let all parts dry completely before you put them away or use the device again. Housing
- Wipe the housing1 from the outside with a damp cloth and a little mild de- tergent.
- Dry with a tea towel. Interior
1. Clean the interior with a soft sponge, a
little water and mild detergent.
2. Wipe several times with a damp mi-
crofibre cloth which you should wash and wring out in between.
3. Dry with a tea towel.
- Before putting the hot air fryer away, make sure that ... … the mains plug11 has been pulled out, … the device has cooled down and … all parts are completely dry again.
- Wrap the power cable11 around the spacer with cable spool12.
This product is subject to the provisions of European Direc- tive 2012/19/EC. The sym- bol showing a wheelie bin crossed through indicates that the product requires sep- arate refuse collection in the European Un- ion. This applies to the product and all accessories marked with this symbol. Prod- ucts identified with this symbol may not be discarded with normal household waste, but must be taken to a collection point for recy- cling electric and electronic appliances. This recycling symbol marks e.g. an object or parts of the material as valuable for recy- cling. Recycling helps to re- duce the consumption of raw materials and protect the environment. Packaging When disposing of the packaging, make sure you comply with the environmental reg- ulations applicable in your country. __334460_1910_Heissluftfritteuse_B6.book Seite 15 Montag, 20. Juli 2020 12:23 1216
13. Trouble-shooting
If your device fails to function as required, please try this checklist first. Perhaps there is only a minor problem, and you can solve it yourself. DANGER! Risk of electric shock! ~ Do not attempt to repair the device your- self under any circumstances.
specifications Symbols used Subject to technical modifications. Fault Possible causes / Actions
- Has the device been connected to the pow- er supply?
- Check the connection. Food not yet ready after the recom- mended time
- Was the quantity too large or the pieces too thick?
- Was the temperature or cooking time set too low? Formation of thick smoke and strong smell
- Are there food residues on the heating ele- ment2 that can burn during heating? The fry- ing basket5 must not be filled more than the MAX4 marking. Model: SHF 1400 A1 Mains voltage: 220 – 240 V ~ 50 Hz Protection class: I Power rating: 1,400 W Geprüfte Sicherheit (certified safety). Devices must comply with the generally acknowledged rules of technology and the Ger- man Product Safety Act (Produkt- sicherheitsgesetz - ProdSG). (Not for UK.) With the CE marking, HOYERHandel GmbH declares the conformity with EU guide- lines. This symbol reminds you to dis- pose of the packaging in an envi- ronmentally friendly manner. Recyclable materials: cardboard (except corrugated cardboard) AC voltage The symbol identifies parts that can be cleaned in the dishwasher. __334460_1910_Heissluftfritteuse_6. Seite 16 ntag, 20. Juli 2020 12:23 1217
HOYER Handel GmbH Dear Customer, your device is provided with a 3 year war- ranty starting with the purchase date. In the event of product defects, you are entitled to statutory rights against the vendor. These statutory rights are not restricted by our war- ranty presented in the following. Warranty conditions The warranty period starts with the purchase date. Please keep the original purchase re- ceipt in a safe place. This document is re- quired to verify the purchase. If within three years from the purchase date of this product a material or factory defect occurs, the product will be repaired or re- placed by us – at our discretion – free of charge to you, or the purchase price will be refunded. This warranty implies that within the period of three years the defective de- vice and the purchase receipt are presented, including a brief written description of the defect and the time it occurred. If the defect is covered by our warranty, the repaired or a new product will be returned to you. No new warranty period starts with a repair or replacement of the product. Warranty period and statutory claims for defects The warranty period is not extended when the warranty has been claimed. This also ap- plies to replaced and repaired parts. Any damages and defects already existing at the time of purchase must be reported immedi- ately upon unpacking. Repairs arising after the expiration of the warranty period are subject to a charge. Warranty coverage The device was produced carefully according to strict quality guidelines and tested diligent- ly prior to delivery. The warranty applies to material or factory defects. Excluded from the warranty are wear parts subject to normal wear and damages to fragile parts, e.g. switches, batteries, lamps or other parts manufactured from glass. This warranty expires if the product is dam- aged, not used as intended or not serviced. For the proper operation of the product, all in- structions listed in the operating instructions must be observed carefully. Any form of use and handling that is advised against in the operating instructions or warned against must always be avoided. The product is only intended for private and not for commercial use. In the case of incor- rect and improper treatment, use of force and interventions not performed by our author- ised Service Centre, the warranty shall cease. Handling in case of a warranty claim In order to ensure prompt processing of your matter, please observe the following notes:
- Please keep the article number IAN: 334460_1910 and the purchase receipt as a purchase verification for all in- quiries.
- The article number can be found on the rating plate, an engraving, the title page of your instructions (in the bottom left), or as a label on the rear or under- side of the device.
- If faulty operation or other defects occur, first contact the Service Centre listed in the following by telephone or email.
- Then, you are able to send a product re- ported as defective free of charge to the service address specified to you, includ- ing the purchase receipt and the infor- mation on the defect and when it occurred. __334460_1910_Heissluftfritteuse_B6.book Seite 17 Montag, 20. Juli 2020 12:23 1218