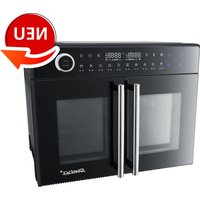
DG 30 - Oven STEBA - Free user manual and instructions
Find the device manual for free DG 30 STEBA in PDF.

| Product type | Multi-function oven with convection and steam |
| Brand | Steba |
| Model | DG 30 |
| Approximate capacity | 30 liters |
| Temperature range | 30 °C to 230 °C |
| Power | Approximately 2000 W (estimated) |
| Power supply | 220-240 V, 50/60 Hz |
| Approximate dimensions (W x H x D) | 45 x 35 x 35 cm (estimated) |
| Approximate weight | 15 kg (estimated) |
| Main functions | Steam cooking, baking, grilling, dehydrating, defrosting, yogurt, fermentation, preheating, top/bottom heat, hot air, convection, DIY mode |
| Included accessories | Rack, baking tray, water drip tray, water tank, oven mitt |
| Rotisserie | No (available on model DG 40) |
| Display and controls | LED display with navigation buttons, timer, delayed start |
| Child safety | Yes (activation by long press 3 seconds) |
| Auto shut-off | Yes (3 minutes without action) |
| Door | Glass, removable for cleaning |
| Maintenance and cleaning | Clean after each use; descale after 50 hours of steam; do not immerse; use a damp cloth |
| Water tank | Max capacity 1.2 L (approx. 2 hours of steam), min. 0.75 L |
| Error codes | ER1-ER8 (sensors, fan, steam) |
| Warranty | Manufacturer's warranty (see after-sales service) |
| Repairability | Repairs by authorized service only; original spare parts |
Frequently Asked Questions - DG 30 STEBA
User questions about DG 30 STEBA
0 question about this device. Answer the ones you know or ask your own.
Ask a new question about this device
Download the instructions for your Oven in PDF format for free! Find your manual DG 30 - STEBA and take your electronic device back in hand. On this page are published all the documents necessary for the use of your device. DG 30 by STEBA.
USER MANUAL DG 30 STEBA
natural_image
Exterior view of a Steba electric oven with digital display and control buttons (no text or symbols on main body)DG 40: 220 - 240 V\~; 50/60 Hz; 2100 - 2400 W
DG 30: 220 - 240 V\~; 50/60 Hz; 1900 - 2200 W
Instructions for use 22
Mode d'emploi 42
text_image
Labeled diagram of a microwave oven with numbered parts for identification


natural_image
Simple diagram of a grid-patterned plate with a circled number 4 above it (no text or symbols on the plate itself)
natural_image
Simple line drawing of a rectangular tray with a circled number 5 above it (no text or symbols on the tray itself)
natural_image
Simple line drawing of an open book with a circled number 12 on the right page (no text or symbols on the book itself)text_image
88:88 888 °C9) DIY Do It Yourself
text_image
Labeled diagram of a microwave oven with numbered parts for identification
natural_image
Simple diagram of a grid-patterned plate with a circled number 4 above it (no text or symbols on the plate itself)
natural_image
Simple line drawing of a rectangular tray with a circled number 5 above it (no text or symbols on the tray itself)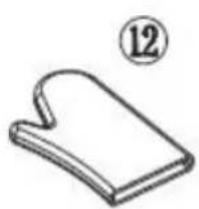
natural_image
Simple line drawing of a closed book with a bookmark and page number 12 (no text or symbols on the book itself)1 Display / Control Panel
2 Rotisserie spit (only for DG 40)
3 Spit handle
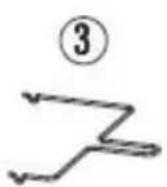
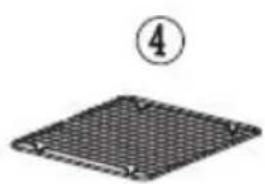
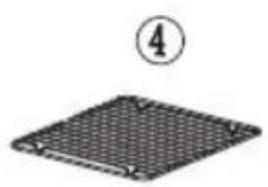
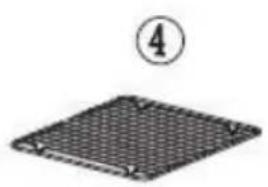
4 Wire grill
5 Baking tray
6 Water tank
7 Door handle
8 Glass door
9 Water drip pan
10 Housing
11 Microswitch
12 Glove
Generally
This insulated appliance is for private and indoor use only and must not be used commercially. It is suitable for grilling, baking, cook au gratin and warming of food. Please read the instruction manual carefully and keep it at a safe place. When the appliance is given to another person the instruction manual should be passed to that person, too. Only use the appliance as described in the instruction manual and pay attention to the safety information. No liability for damages or accidents will be accepted, which are caused by not paying attention to the instruction manual. Remove all packaging and sticker. Wash up all parts carefully (see cleaning).
Safety information
Hot surface! There is danger of burning when touching the surface during operation. Set the back of the device with a distance of 10cm to the kitchen wall.
- Connect and operate the appliance in accordance with the specifications shown on the rating label.
- This device is no built-in oven and cannot be used like this.
- Do not use if the plug cord is damaged. Verify before every use.
- Do not plug with wet hands.
- Connect the power plug to a properly installed and easily accessible socket only.
- To unplug the power plug, always pull the plug – not the cable.
- Plug off the appliance after each use or in case of failure.
- Do not pull at the cord. Don't pull it over edges and don't bend it too much.
- Keep the cord away from hot parts.
The appliance can be used by children aged 8 and above and persons with limited physical, sensory or mental capabilities or lack of experience/knowledge, provided that are supervised or have been provided with instruction in the safe use of the appliance and have understood the resulting dangers. Children must not use the packaging as a toy. Cleaning and user

maintenance must not be carried out by children unless they are 8 years or older and are supervised.
- Children under the age of 8 must be kept away from the appliance and the connecting cable.
- Children should be supervised to ensure that they do not play with the appliance or packaging material (e.g. Plastic Bags).
- The appliance must not be operated using a timer or a separate remote system!
- Never leave the appliance unattended when in use.
- Do not leave the appliance outdoors or in a damp area.
- Never place anything on top of the device and do not cover the ventilation slots.
- Never immerse the unit in water.
- Leave a space of about 10cm around the device.
- Never use the device after a malfunction, e.g. if it felt down or has been damaged in any other manner.
- The manufacturer is not liable for damage which is occurring due to the usage of the appliance in a different way as described or a mistake in the handling has been made.
- To prevent injury, repairs such as replacing a damaged cord, should only be carried out by a customer service. Only original spare parts have to be used.
• The device gets hot, only transport if it cooled down.
- Only use the device as described in this manual.
- You must not wrap the grill with tin foil (accumulation of heat).
- You must not put any materials such as paper, cardboard, plastic etc. into the appliance.
- This appliance is intended to be used in household and similar applications such as:
o staff kitchen areas in shops, offices and others working environments
o by clients in hotels, motels and other residential type environments
o bed and breakfast type environments.
- Before initial use: clean all parts carefully and leave to dry. Heat up the device for about 15 min. to eliminate the smell of newness.
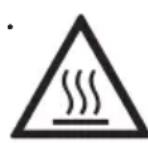
Attention! Device gets hot. Danger of burns! Touchable surfaces will be hot during operation! Place the device on a flat and insensitive surface with and keep a distance of at least 70cm to burnable materials.
- During operation steam emerge. Keep hands and face away.
- If an extension cable is used, it has to have a cross-section of 1.5mm^2
- If a GS-tested 16 A multi-pin extension is used, it may not be charged with more than 3680 watts due to fire hazard.
- Make sure that children do not tease the cable or that a trip hazard occurs.
- The device must always be disconnected from the power supply if it is not supervised and before assembling, disassembling or cleaning.
- Attention: as dripping fats can easily ignite the radiator, never grill without a pan! When removing the full pan, do not tip any grease on the radiator.
- Please use the enclosed handle to remove the wire grill and baking tray.
- Hygiene: Please always clean the device to avoid bacteria and mould formation.
Cleaning
Attention! Pull the plug before cleaning and allow the device to cool down.
- Never immerse the unit into water.
- Fat residues must be removed for reasons of hygiene and fire hazard.
- Remove soiling immediately after each use. The longer the remain in the device, the worse they can be removed.
- Do not use abrasives, oven spray or solvents.
- Clean the housing and the interior with a damp cloth with detergent, clean the glass with glass cleaner and dry.
- For easy cleaning of the interior ceiling, the radiator can be folded down by pressing the spring.
- Fold up the radiator again after cleaning.
- Clean the drip pan and trays in hot water and leave to dry.
- Clean the cooking chamber, door seal and glass door after each use. Remove water residues on the lower steam plate with a sponge.
- Dry all parts carefully, insert the drip pan again under the device. Close the door only if the interior has completely dried.
Workplace
Important: Never place this device on or next to hot surfaces (e.g. hot stoves). Only use it on an even, stable and a heat resisting surface. It is important that no inflammable items are near to the device. Do not place the device on the edge of the table so that it cannot be touched by children or fall down when touched.
Cookware
Only use heat-resistant cookware. Plastic dishes melt at higher temperatures. Closed cans or jars should not be heated as over-pressure can form and the cans can burst. For liquid food only 2/3 of the container may be filled.
With this universal device you can:
o Steam
o Bake
o Grill
o Dehydrate
o Roast
o Defrost
Similar to a built-in oven, food preparation can be done with this device. The pre-installed time and temperature programs can be used. With the DIY-program, individual values can be chosen. The results depend on individual taste, food quality, temperature etc.
Family-owned recipes or other recipes from the internet can be prepared perfectly in this device.
Further functions
Upper / lower heat
• Good results for most recipes
- Universal use
• For cooking with a baking tray
Upper / lower heat with hot air
- The intense temperature is distributed evenly within the device
• The use of several baking trays is possible - Intense heat generation
Upper heat / upper heat with convection
- For grilling flat pieces of meat and for cook au gratin
Hot air
• Even baking and roasting
- At low temperatures, food can be prepared at several levels
Steaming
- Preparation of tender food while remaining vitamins and minerals
Hot air with reduced steam
- For roasting, baking and defrosting
- The steam prohibits the drying-out of the food.
Hot air with rotisserie spit
• The hot air flows round the food
Energy saving
- For cooking with high temperatures, set the thermostat to a minimum temperature 5 minutes before the end of the cooking time and use the residual heat.
- A preheating of the oven is only necessary for a few recipes e.g. bread or cake with a short baking time.
text_image
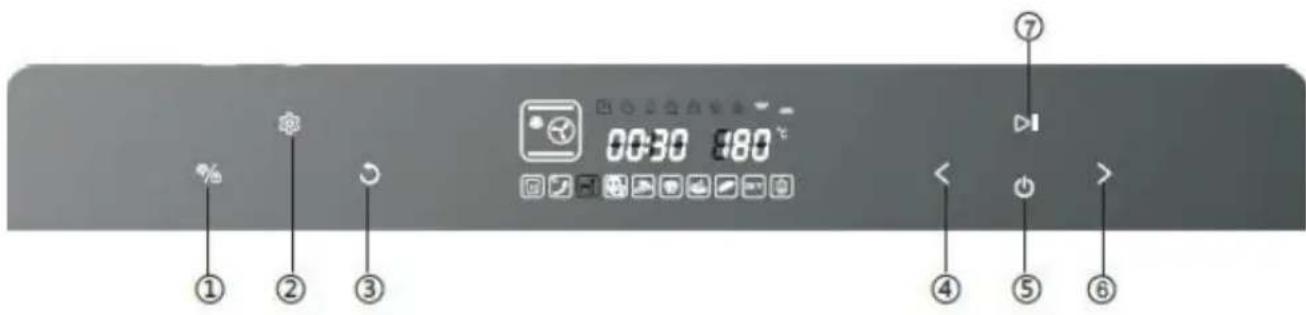
00:30 880 ° ① ② ③ ④ ⑤ ⑥1 Interior lighting / child lock
o The interior lighting can be turned on and off with this button
o The lamp shines for 3 minutes after the cooking process is finished or after the door has been opened.
o Child lock: keep this button pressed for 3 seconds to turn on the child lock. Press again to unlock.
2 Setting button time pre-setting
o Press this button to set at starting time of a program
3 Return button
o Press this button to return in the menu
4 Select button backwards
o Selection of the function and the 10 modes
o Timer setting
o Temperature setting
5 ON / OFF
o Press the button, all symbols are shining
o Press the button to stop a program
o The devise turns into standby
6 Select button forwards
o Selection of the function and the 10 modes
o Timer setting
o Temperature setting
7 Enter button
o Start / pause / enter
Set the time pre-setting
With this function you can chose at which time a program e.g. steaming should start (e.g. 2 hrs, 20 min).
Press ⏻ and ⏱ The hour setting flashes, set the desired hours (2 hours) with the
< > buttons and confirm with . 30 min flashes.
Set the desired minutes (20 minutes) with the < > buttons and confirm with . ▷ || Then, select the desired program out of the main menu, e.g. steaming code E-4 and confirm with ▷ || .
After the pre-set time run out, the device starts the desired program steaming E - 4.
text_image
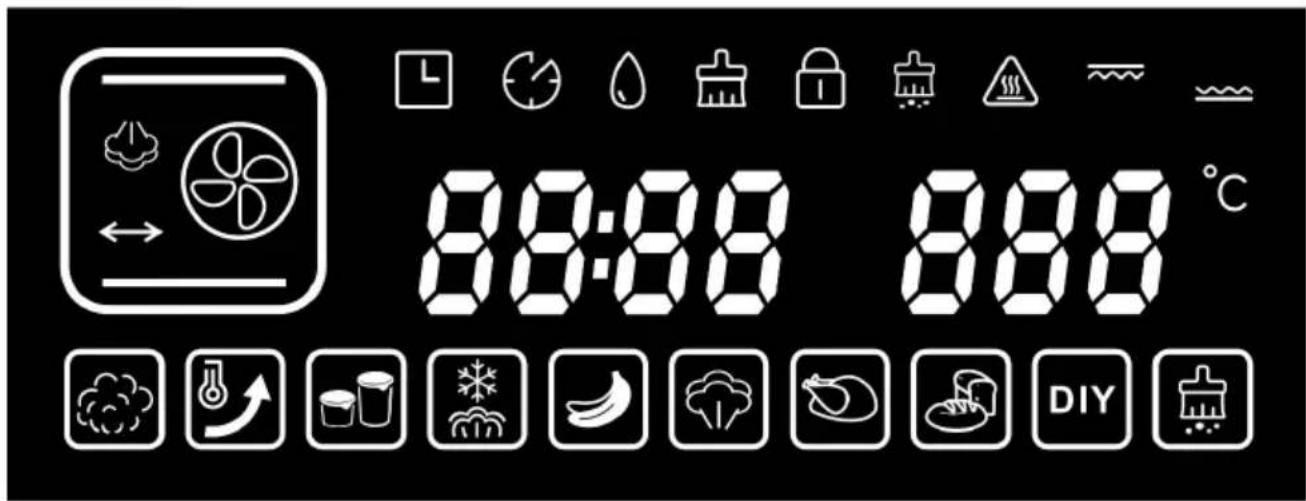
88:88 888 °C| Symbol | Function Description | ||
| 1 |  | Time The first two LED show | the hours (0-12)The second two LED show the minutes (0-59) |
| 2 | 888^ | Temperature Adjustable scope 30 – | 230°C |
| 3 |  | Delay-function | |
| 4 |  | Working time prolongation | |
| 5 |  | Water tank Amount of water max. | 1,2 ltr. |
| 6 |  | Prompt to clean the water tank | |
| 7 Child | loc | ||
| 8 |  | Prompt to descale | |
| 9 |  | Upper heat | |
| 10 |  | Lower heat | |
| 11 |  | Symbol for high temperature | |
| 12 |  | Ferment | |
| 13 |  | Preheat 180°C | |
| 14 |  | Defrost | |
| 15 |  | Yoghurt | |
| 16 |  | Dry fruit | |
| 17 |  | Steam | |
| 18 |  | Roast | |
| 19 |  | Bake | |
| 20 |  | Do It Yourself | |
| 21 |  | Descale |
Water Tank
The maximum capacity of 1.2 liters is sufficient for approx. 2 hours of steam at 100^ C. The minimum capacity of 0.75 liters is sufficient for about 60 minutes. The maximum capacity must not be exceeded. After use, drain the water tank and clean the cooking chamber. The tank must not be cleaned in the dishwasher. The tank must always be pushed completely into the device. Use only tap or distilled water, but no mineral water!
If there is no water in the tank, the unit beeps and the symbol lights up. Fill the water tank and push in again. The device automatically continues the selected program.

Due to the high temperatures during operation, the water tank must always be filled and put into the device during each program, otherwise it will be damaged!
Put into operation
- Put the drip tray at the lowest level and the water drip pan under the device.
- Plug-in the device, it beeps and the ON/OFF button lights up.
• Pres the ON button, the complete display lights up. - If no setting is made within 3 minutes, the device returns into standby mode.
Settings


Select an individual program as described below. During operation. The numbers and symbols are shown in the display.
When the door is open, the program is interrupted and will be continued once the door is closed.
1)

eaming
Press ⏻ and use the buttons <> to select the symbol 📄. Press ▷∥, the code E-1 is flashing. Use the buttons to select the desired program E-1 up to E-9 and start with ▷∥.
• Vitamins, minerals and taste are preserved.
- When steaming, a maximum of about 100^ C is reached, in which almost all food can be cooked.
• The food is not browned.
- To guarantee that the steam can reach all sides of the food, a perforated tray or a perforated aluminium tray on the wire grill should be used.
- Always push the collecting tray at the lowest level so that dripping liquid can be collected.
- The other containers can be inserted at each level, but there must be a minimum distance of 3 cm to the ceiling in order to guarantee that enough steam can get into the container.
- When preparing frozen food, the cooking time must be extended accordingly.
Pre-set steaming time and temperatures:
The time begins to count down, once the temperature is reached.
| Code Time in min. Temperature in °C | |
| E-1 10 100 | |
| E-2 12 100 | |
| E-3 14 100 | |
| E-4 16 100 | |
| E-5 20 100 | |
| E-6 25 100 | |
| E-7 30 100 | |
| E-8 35 100 | |
| E-9 40 100 |
*Time and temperature can be individually adjusted with the DIY-program.
The given times and temperatures are approximate and depend on:
o Fresh or frozen food
o Cold or room temperature
o Consistency
o Eating habits
o Cooking container (thick-walled containers conduct heat worse)
Circa-Steaming times at 100°C:
| Fish Minutes Minutes | |||
| Codfish 10 Mussels | 10 – 12* | ||
| Salmon | 10 – 12 | Shrimps | 10 |
| Carp | 16 – 20 | Crabs | 6 - 8 |
| Monkfish | 10 - 12 |
*Mussels that are open before steaming or not open after steaming are spoiled. Do not eat in any case!
| Vegetable | Minutes | Minutes | |
| Cauliflower florets | 10 | Kohlrabi | 10 - 12 |
| Beans | 10 | Potatoes, quartered | 20 - 25 |
| Carrots, halved | 10 - 12 | Parsnips | 12 - 14 |
| Brussels sprouts | 14 - 16 | Asparagus | 16 - 20 |
Rice
Put the rice and the 1.5 times amount of water in a container.
Steaming time: 30 – 35 minutes
Eggs
The eggs do not need to be pierced as they are heated slowly in the steam. Place the eggs in the perforated plate or a perforated aluminium tray and insert them on the middle level.
Steaming time: Soft 10 minutes
Medium 12 minutes
Hard 15 minutes
Meat
Thaw frozen meat in the appliance (see chapter Defrosting).
The cooking time depends on the thickness and the temperature of the meat.
| Meat Minutes Minutes | |||
| Chicken breast 16 - 20 Vienna sausage 10 - 12 | |||
| Smoked pork chop, sliced 12 - 14 | |||
High performance steam
The steam is heated up to 230^ C by the additional hot air.
Press DIY and use the buttons to select the symbol. Press to start.
2) Roasting with upper heat and rotisserie (rotisserie only with DG 40!)
Press ⏻ and use the buttons <> to select the symbol 📞.
Press ▷∥, the code F-1 is flashing. Use the buttons ◀ to select the desired program F-1 up to F-9 and start with ▷∥.
| Code | Time in min. | Temperature in °C | Heat |
| F-1 | 60 | 230 | Upper heat + rotisserie |
| F-2 | 15 | 230 | Upper heat |
| F-3 | 25 | 230 | Upper heat |
| F-4 | 20 | 150 | Lower heat |
| F-5 | 25 | 230 | Upper / lower heat |
| F-6 | 20 | 200 | Upper / lower heat |
| F-7 | 25 | 230 | Hot air |
| F-8 | 30 | 200 | Hot air |
| F-9 | 30 | 180 | Hot air |
Rotisserie Spit (only with DG 40)
Fix a rotisserie fork at the spit. Put the tied meat or poultry on the spit and fix it with the second rotisserie fork. Be careful, that the meat is in the middle of the spit. Put the spit with the meat on the rotisserie handle and insert the top of the spit in the spit motor opening on the right side of the inner housing. Then put the other side of

the spit on the spit holder. To remove the ready cooked food, use the spit handle and the pan handle.
3) Baking
Press ⏻ and use the buttons <> to select the symbol 📣.
Press ▷∥, the code H-1 is flashing. Use the buttons to select the desired program H-1 up to H-9 and start with ▷∥.
| Code | Time in min. | Temperature in °C | Heat |
| H – 1 50 18 | 0 Upper / lower heat | ||
| H – 2 45 19 | 0 Upper / lower heat | ||
| H – 3 60 20 | 0 | Upper / lower heat | |
| H – 4 45 20 | 0 | Upper / lower heat | |
| H – 5 50 18 | 0 Hot air | ||
| H – 6 | 45 | 170 | Upper / lower heat + hot air |
| H – 7 45 16 | 0 Upper / lower heat + hot air | ||
| H – 8 | 25 | 230 | Hot air |
| H – 9 90 | 180 Hot air |
4) | Desiccation
Press ⏻ and use the buttons <> to select the symbol 📂.
Press ▷∥, the code L-1 is flashing. Use the buttons to select the desired program L-1 up to L-9 and start with ▷∥.
- Natural preservation of fruits and vegetables in a 55 - 70 °C warm air flow.
• Vitamins are retained, the taste is intensified. - There must be no residual moister in the food, as this would lead to mould formation while storing in containers.
- Cut the food into even pieces – thin slices dry faster – and spread with the cut side up on the tray.
- As different food has different times and temperatures to dry, similar food should always be dried together.
Pre-set Times:
| Code Time in hours | Temperature in °C | °C | Heat |
| L – 1 5 55 Hot air | |||
| L – 2 4 60 Hot air | |||
| L – 3 6 65 Hot air | |||
| L – 4 8 65 Hot air | |||
| L – 5 6:40 65 Hot air | |||
| L – 6 11:40 65 Hot air | |||
| L – 7 4 70 Hot air | |||
| L – 8 6 70 Upper / lower heat | |||
| L – 9 8 70 Upper / lower heat |
Vegetable
| Thickness in mm | Temp. in °C | Time in h | |
| Mushrooms | 5 – 6 | 55 | 6 – 8 |
| Zucchini | 3 – 4 | 65 | 6 – 8 |
| Pumpkin | 3 – 4 | 65 | 6 – 8 |
| Paprika | 3 – 4 | 65 | 6 – 8 |
| Tomatoes | 3 – 4 | 65 | 6 – 8 |
| Thickness in mm | Temp. in °C | Time in h | |
| Onion | 5 | 60 | 6 – 8 |
| Leek | 10 | 70 | 3 – 4 |
| Carrots | 5 | 70 | 4 – 5 |
| Celery | 5 | 70 | 5 – 6 |
Fruit
| Thickness in mm | Temp. in °C | Time in h | |
| Cherries | halved | 65 | 14 – 16 |
| Oranges | 3 | 65 | 6 – 8 |
| Lemons | 3 | 65 | 6 – 8 |
| Bananas | 3 70 10 - 12 |
| Thickness in mm | Temp. in °C | Time in h | |
| Apples | 2 – 4 | 70 | 8 – 10 |
| Pears | 2 – 4 | 70 | 5 – 6 |
| Apricots | 5 – 7 | 70 | 12 – 14 |
The given values are approximate values and can change considerably.
Dry state: herbs = brittle, fruit/vegetable = flexible, brittle
5) Yoghurt
Press ⏻ and use the buttons <> to select the symbol 📋. Press ▷∥ to start the program.
- The default program (45 °C / 8 hours) cannot be changed. The device works with light steam.
- Mix uncooled milk with 1.5 to 3.5% fat content with a starter culture from the health food shop and fill in clean, dry glasses with a lid.
- Do not move the glasses during the preparation time. Then store the glasses in the refrigerator. The storage period is a maximum of 10 days.
- The consistency of the yoghurt is determined by the fat content of the milk.
- Pure natural yoghurt can be used as starting culture, but the fat content should be the same.
6) Defrosting
Press ⏻ and use the buttons <> to select the symbol 📄. Press ▷∥, the hour display is flashing.
Use the buttons to set the desired hours (up to 6 hours) and confirm with 20 min are flashing.
Use the buttons <> to set the desired minutes (5 – 59 minutes) and confirm with ▷∥, 55°C is flashing.
Use the buttons to set the desired temperature (50 - 60°C) and start with . The device works with light steam.
- Risk of salmonella! Poultry tends to salmonella. Remove the frozen food from the packaging and rinse briefly. Place on the wire grill and put into the device with the pan underneath. The food should not come into contact with the collected liquid.
7) Preheating
Press ⏻ and use the buttons <> to select the symbol 📁. Press ▷∥ to start the program.
Once 180°C are reached, the device beeps and the display shows 180°C. Now the baking program can be started.
8) Ferment
Press ⏻ and use the buttons <> to select the symbol 📋. Press ▷∥, the hour display is flashing.
Use the buttons <> to set the desired hours (up to 6 hours) and confirm with , 30 min are flashing.
Use the buttons <> to set the desired minutes (5 – 59 minutes) and confirm with ▷∥, 40°C is flashing.
Use the buttons <> to set the desired temperature (30 – 50°C) and start with
9) DIY Do It Yourself
- You can choose from 9 functions: from low-temperature cooking at 80^ , over hot air, steaming, desiccation, upper/lower heat up to 230^ , the device can be programmed individually.

text_image
Press ⏻ and use the buttons to select the symbol . Press ▷∥ and use the buttons to select the desired program. Start with ▷∥.| Default Setting Function Adjustable Scope | ||||
| 1 | 30 min100°C | steaming 6 hrs | 59 min50 – 110°C | Time counts down once temperature is reached |
| 2 | 30 min180°C upper heat180°C lower heat | Upper / lower heat with hot air | 3 hrs 59 min100 – 230°C upper heat100 – 230°C lower heat | Different values for upper and lower heat can be set |
| 3 | 30 min180°C upper heat | Upper heat 3 hrs | 59 min100 – 230°C upper heat | |
| 4 | 30 min180°C upper heat180°C lower heat | Upper / lower heat | 3 hrs 59 min100 – 230°C upper heat100 – 230°C lower heat | Different values for upper and lower heat can be set |
| 5 | 30 min180°C upper heat | Upper heat with convection | 3 hrs 59 min100 – 230°C upper heat | |
| 6 | 30 min180°C hot air | Hot air 3 hrs 59 | min100 – 230°C | |
| 7 | 30 min180°C | Hot air with steam | 6 hrs 59 min120 – 230°C | |
| 8 | 30 min180°C | Hot air with rotisserie | 3 hrs 59 min100 – 230°C | Only for DG 40 |
| 9 | 30 min180°C | Upper heat with rotis-serie | 3 hrs 59 min100 – 230°C | Only for DG 40 |
The symbol indicates that the device works with steam.
Time and temperature setting
After a function has been chosen with the buttons , it has to be confirmed with in order to set the time and temperature.
00:30 : 80° those values should be changed to 0:40 200°
The display for the hours flashes, use the buttons to set the desired hours (1 hour) and confirm with ▷II, 30 min are flashing.
Use the buttons <> to set the desired minutes (40 minutes) and confirm with ▷II, 30°C is flashing.
Use the buttons <> to set the desired temperature (200°C) and confirm with ▷∥
0:40 200° is shown in the display. The device works in the DIY mode.
All time and temperature functions have to be programmed in this order. Fixed values for time and temperature are excluded.
10) Descaling
- After about 50 hours of steaming you will be reminded to descale the device. The display shows
- Put coffee machine descaler and water into the water tank.
- Press and use the buttons to select the symbol and press .
• The system heats up slowly to 85^ C.
- After 30 minutes, the device indicates that the tank with the descaler should be emptied and refilled with pure water.
• After another 10 minutes change the water again and restart.
- The default time of 50 minutes cannot be changed. At the end of the program, the device beeps 10 times and goes into standby mode.

Residual heat
This symbol indicates that the interior temperature is higher than 50^ C. the ventilation for cooling keeps running for about 3 minutes in order to cool the electronics.
Troubleshooting
Dear Client,
Thank you for buying this STEBA product. The following table will help you with problems that may occur when using your device. For many problems there is a simple solution, because not everything that appears like a malfunction must be serious.
Please check the following list before contacting our customer service.
| Problem Reason | Solution | |
| Device does not work | No powerTo many devices at one power cordDoor not closed | Check is plug is plugged-in correctlyCheck the fuseClose door |
| Display does not light up | Unplug the device for 1 minute | |
| Device does not heatER1 / ER2ER3 / ER 4 | Overheat of sensor | Open the door and leave 10 minutes to cool downContact our service |
| ER 7 | Steam sensor | Contact our service |
| ER 8 · Short circuit f steam sensor | Contact our service | |
| Ventilation does not work | Bad contactsVentilation is damaged | Contact our service |
| No steam · No water in tankWater tank nor inserted correctlySteam generator is damaged | Refill waterInsert tank correctlyContact our service | |
| Steam emerge the oven | Door not closed properlySeal has loosened or is damagedDoor is damaged | Contact our service |
| Noise of ventilation after turning off | Cooling of the electronics | Will turn off automatically |
| Heating up takes long | Steam generator limed | Descale the deviceUse distilled water |
Correct Disposal of this product
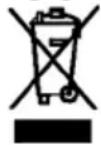
This marking indicates that this product should not be disposed with other household wastes throughout the EU. To prevent possible harm to the environment or human health from uncontrolled waste disposal, recycle it responsibly to promote the sustainable reuse of material resources. To return your used device, please use the return and collection systems or contact the retailer where the product was purchased. They can take this product for environmental safe recycling.
Packaging disposal: Do not throw away the package materials. Please put it in the recycling bin.


Gift box: Paper, should be put to the old paper collection point. Plastic packaging material and foils should be collected in the special collection containers.
Service and Repair:
If the appliance must be repaired, please get in touch with your trader or with the manufacturer:
text_image
Labeled diagram of a microwave oven with numbered parts for identification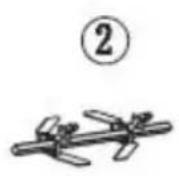

natural_image
Simple 3D diagram of a meshed rectangular plate with a circled number 4 above it (no text or symbols on the plate itself)
natural_image
Simple line drawing of a rectangular tray with a circled number 5 above it (no text or symbols on the tray itself)
natural_image
Simple line drawing of a closed book with a bookmark, no text or symbols presenttext_image
00:30:80°C ① ② ③ ④ ⑤ ⑥text_image
88:88 888 °Cnatural_image
Pure electrical circuit lines without any symbols


text_image
8:00:88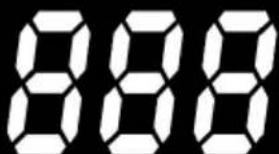
text_image
888


9) DIY Do It Yourself
text_image
Labeled diagram of a microwave oven with numbered parts for identification

natural_image
Simple diagram of a grid-patterned plate with a circled number 4 above it (no text or symbols on the plate itself)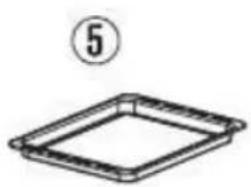
natural_image
Simple line drawing of a rectangular tray with a circled number 5 above it (no text or symbols on the tray itself)
natural_image
Simple line drawing of a closed book with a bookmark, no text or symbols present1 Display / Control Panel
2 Draaispit (DG 40)
3 Spit uitnemer
4 Grillrooster
5 Bakplaat
6 Water tank
7 Deurhendel
8 Glazen deur
9 Water drip bak
10 Behuizing
11 Microschakelaar
12 Ovenhandschoen
Algemeen
text_image
86:88 888 °C9) DIY Do It Yourself
text_image
Labeled diagram of a microwave oven with numbered parts for identification


natural_image
Simple diagram of a grid-patterned plate with a circled number 4 above it (no text or symbols on the plate itself)
natural_image
Simple line drawing of a rectangular tray with a circled number 5 above it (no text or symbols on the tray itself)