B032VUA2 - Switch Tripp Lite - Free user manual and instructions
Find the device manual for free B032VUA2 Tripp Lite in PDF.
User questions about B032VUA2 Tripp Lite
0 question about this device. Answer the ones you know or ask your own.
Ask a new question about this device
Download the instructions for your Switch in PDF format for free! Find your manual B032VUA2 - Tripp Lite and take your electronic device back in hand. On this page are published all the documents necessary for the use of your device. B032VUA2 by Tripp Lite.
USER MANUAL B032VUA2 Tripp Lite
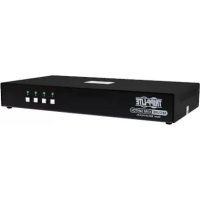
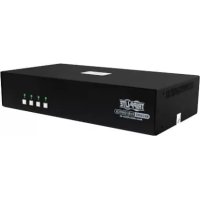
2 Port VGA/USB + Audio KVM Switch with Built-in Cables
Model: B032-VUA2
Register your product for quicker service and ultimate peace of mind.
You could also win an ISOBAR6ULTRA surge protector—a $100 value!
www.triplite.com/warranty


Manufacturing Excellence.
1111 W. 35th Street, Chicago, IL 60609 USA www.triplite.com/support
Copyright © 2017 Tripp Lite. All rights reserved.
Product Features
- Control two computers from a single USB keyboard, mouse and VGA monitor
- Compact design features built-in 4 ft. (1.2 m) cables for KVM and audio connections
- USB mouse port can be used to connect a USB 1.1 hub for peripheral sharing
Supports video resolutions up to 2048 x 1536 - Hotkey commands let you set OS and keyboard language
KVM stores the monitor's EDID information to optimize display resolution - Console mouse port emulation/bypass feature supports most mouse drivers and multi-function mice
Supports gaming keyboards and wireless keyboards/mice - Features Hotkey and Mouse Port Switching
Supports Windows, Mac, Sun and Linux
Sun/Mac keyboard support and emulation* - No external power required
*PC keyboard combinations emulate Sun/Mac keyboards. Sun/Mac keyboards only work with their own computers.
Package Contents
B032-VUA2
Owner's Manual
Optional Accessories
P502-Series VGA/SVGA Monitor Cables with RGB Coax
U222-004-R 4-Port USB 2.0 Hub
U222-007-R 7-Port USB 2.0 Hub
U222-010-R 10-Port USB 2.0 Hub
U022-Series USB 2.0 A/B Device Cables
U030-Series USB 2.0 Mini-B Cables
U050-Series USB 2.0 Micro-B Cables
System Requirements
VGA, SVGA or Multisync monitor
USB Keyboard
- USB Mouse
Computer with a VGA port
- Computer with USB ports
Installation
Note: Make sure the power to all devices is turned off prior to installation. You must unplug the power cords of any computers that have the Keyboard Power On Function.
- Plug your USB keyboard, mouse and VGA monitor into the console ports on the unit.
Note: If using a wireless keyboard and mouse, the dongle must be plugged into the unit's keyboard port in order to use the hotkey function.
- (Optional) A USB hub can be connected to the USB console mouse port, allowing you to add multiple USB peripherals to your installation.
Note: To ensure proper functionality, use a hub with an external power supply. The KVM's Mouse Emulation Mode must also be disabled (see the Keyboard Hotkey Commands table in this manual for details) when connecting a hub.
-
Plug your speakers into the 3.5mm speaker jack.
-
Plug the unit's built-in USB, VGA and audio cables into the computers' corresponding ports.
-
Power on your devices.
Note: The unit's default power on function will link to the first computer being powered on.
Operation
There are two ways of accessing computers and devices connected to the KVM switch; Mouse Port Switching and Keyboard Hotkeys.
Note: When switching ports, wait a few seconds for the selected computer's video to display on the console monitor prior to switching ports again. Do not switch ports when a USB peripheral device is in operation.
Mouse Port Switching Functionality
Note: Mouse port switching is disabled by default and must be enabled via keyboard hotkey command. In addition, it is only supported when the KVM's mouse emulation mode is enabled (KVM mouse emulation is enabled by default—see the Keyboard Hotkey Commands table for details).
Operation
When enabled, Mouse Port Switching Functionality allows users with scroll mice to simultaneously switch the focus of the KVM and Audio between ports by double-clicking the scroll wheel.
Port Switching Keyboard Hotkey
Hotkeys switch functionality focus between ports using only the keyboard, as well as perform other functions on the KVM switch. To switch the KVM and Audio between the two ports, press the [Scroll Lock] key twice. If the [Scroll Lock] [Scroll Lock] hotkey conflicts with other programs running on your computer, it can be switched to [Ctrl] [Ctrl] via Hotkey command. See the Keyboard Hotkey Commands table for details.
Performing Keyboard Hotkey Commands
All other hotkey operations are enabled by entering Hotkey Setting Mode. When in Hotkey Setting Mode, the [Scroll Lock] and [Caps Lock] keyboard LEDs flash in succession and ordinary keyboard and mouse functions are suspended. Only hotkey related keystrokes can be performed. To initiate Hotkey Setting Mode, perform the following command:
- Press and hold down the [Num Lock] key.
- While holding down the [Num Lock] key, press and release the minus [-] key.
- After releasing the minus [-] key, release the [Scroll Lock] key.
Note: If using [Num Lock] minus [-] conflicts with other programs, it can be changed to [Ctrl] [F12] via Hotkey Command, in which [Ctrl] takes the place of [Num Lock], and [F12] takes the place of the minus [-] key (See the Keyboard Hotkey Commands table).
Operation
Keyboard Hotkey Commands
The following table lists the keyboard hotkey commands available for use on the KVM switch.
| Combination Function | ||
| [Num Lock] plus minus [-] key Or [Ctrl] plus [F12] key | [H] Toggles between the default [Num Lock] [-] and the alternate [Ctrl] [F12] Hotkey Setting Mode invocation keys. | |
| [T] Toggles between the default [Scroll Lock] [Scroll Lock] and alternate [Ctrl] [Ctrl] port switching keyboard hotkey. | ||
| [F2] Activates Mac keyboard mapping. | ||
| [F3] Activates Sun keyboard mapping. | ||
| [F10] Auto detects keyboard operating platform. | ||
| [F4] Lists current switch settings via the paste function of a text editor.Note: To perform this hotkey command, you must first have a text editor or word processor (such as Microsoft® Word) open, with the cursor in the page window. Upon pressing this hotkey, the KVM's current settings will display. | ||
| [F5] Performs a USB keyboard and mouse reset. | ||
| [F6][nn][ENTER] Sets the keyboard language layout.Note: nn is a two-digit number that represents one of the following keyboard language codes: US English 33; French 08; Japanese 15. | ||
| [A] Initiates an Auto Scan. | ||
| [R][ENTER] Resets hotkeys to the default setting. | ||
| [M] Enables/Disables mouse emulation. This function is enabled by default.Note: In order for Mouse Port Switching to work, this function must be enabled. | ||
| [N] Enables/Disables keyboard emulation. This function is enabled by default. | ||
| [W] Enables/Disables mouse-port switching. This function is disabled by default. | ||
| [ESC] or [Space Bar] Quits hotkey setting mode. | ||
Specifications
| Computer Connections 2 | |
| Port Selection Hotkeys, Mouse | |
| Connectors (Console Ports) Key | Keyboard and Mouse: 2x USB Type-A Female (White) Video: HD15 Female (Blue) Speakers: 3.5 mm Mini-Stereo Female (Green) |
| Connectors (KVM Ports) Keyboard and Mouse: 2x USB Type-A Male (Black) Video: HD15 Male (Blue) Speakers: 3.5 mm Mini-Stereo Male (Green) | |
| LED Quantity and Color 2x Green | |
| Built-in Cable Length 4 ft. (1.2 m) | |
| Video Resolution 2048 x 1536 | |
| Scan Interval 5 seconds | |
| Power Consumption 0.33W | |
| Operating Temperature 32° to 122°F (0° to 50°C) | |
| Storage Temperature -4° to 140°F (-20° to 60°C) | |
| Humidity 0 to 80% RH, Non-Condensing | |
| Housing Material Plastic | |
| Weight 0.8 lb. (0.36 kg) | |
| Dimensions [L x W x H] 3.11 x 2.60 x 1.02 in. (7.9 x 6.6 x 2.6 cm) | |
Appendix
Mac Keyboard Emulation
The PC compatible (101/104 key) keyboard can emulate the functions of the Mac keyboard using the PC keystrokes in the table below.
Note: When more than one key is required on the PC Keyboard to emulate the Mac keyboard, press and release the first key, and then press and release the second key.
| PC Keyboard Mac Keyboard | |
| [Shift] [Shift] | |
| [Ctrl] [Ctrl] | |
| ✘ | |
| [Ctrl], [1] | |
| [Ctrl], [2] | |
| [Ctrl], [3] | |
| [Ctrl], [4] | |
| [Alt] [Alt] | |
| [Print Screen] [F13] | |
| [Scroll Lock] [F14] | |
| [=] | |
| [Enter] [Return] | |
| [Backspace] [Delete] | |
| [Insert] [Help] | |
| [Ctrl], | [F15] |
Appendix
Sun Keyboard Emulation
The PC compatible (101/104 key) keyboard can emulate the functions of the Sun keyboard using the PC keystrokes in the table below.
Note: When more than one key is required on the PC Keyboard to emulate the Sun keyboard, press and release the first key, and then press and release the second key.
| PC Keyboard Sun | Keyboard |
| [Ctrl], [T] [Stop] | |
| [Ctrl], [F2] [Again] | |
| [Ctrl], [F3] [Props] | |
| [Ctrl], [F4] | [Undo] |
| [Ctrl], [F5] | [Front] |
| [Ctrl], [F6] | [Copy] |
| [Ctrl], [F7] | [Open] |
| [Ctrl], [F8] [Paste] | |
| [Ctrl], [F9] [Find] | |
| [Ctrl], [F10] [Cut] | |
| [Ctrl], [1] | □ □ |
| [Ctrl], [2] | ○ - ○ |
| [Ctrl], [3] | ○ + ○ |
| [Ctrl], [4] | < |
| [Ctrl], [H] [Help] | |
| # | [Compose] |
| # | # |
Appendix
Factory Default Settings
| Setting Default | |
| Port Switching Hotkey [Scroll Lock], [Scroll Lock] | |
| Hotkey Setting Mode Invocation Command [Num Lock] plus minus [-] key | |
| Auto Scan Interval 5 seconds | |
| Keyboard Operating Platform | PC Compatible |
| Mouse Emulation | Enabled |
| Keyboard Emulation | Enabled |
| Mouse Port Switching | Disabled |
Warranty & Product Registration
1-Year Limited Warranty
TRIPP LITE warrants its products to be free from defects in materials and workmanship for a period of one (1) year from the date of initial purchase. TRIPP LITE's obligation under this warranty is limited to repairing or replacing (at its sole option) any such defective products. To obtain service under this warranty, you must obtain a Returned Material Authorization (RMA) number from TRIPP LITE or an authorized TRIPP LITE service center. Products must be returned to TRIPP LITE or an authorized TRIPP LITE service center with transportation charges prepaid and must be accompanied by a brief description of the problem encountered and proof of date and place of purchase. This warranty does not apply to equipment, which has been damaged by accident, negligence or misapplication or has been altered or modified in any way.
EXCEPT AS PROVIDED HEREIN, TRIPP LITE MAKES NO WARRANTYES, EXPRESS OR IMPLIED, INCLUDING WARRANTYES OF MERCHANTABILITY AND FITNESS FOR A PARTICULAR PURPOSE.
Some states do not permit limitation or exclusion of implied warranties; therefore, the aforesaid limitation(s) or exclusion(s) may not apply to the purchaser.
EXCEPT AS PROVIDED ABOVE, IN NO EVENT WILL TRIPP LITE BE LIABLE FOR DIRECT, INDIRECT, SPECIAL, INCIDENTAL OR CONSEQUENTIAL DAMAGES ARISING OUT OF THE USE OF THIS PRODUCT, EVEN IF ADVISED OF THE POSSIBILITY OF SUCH DAMAGE. Specifically, TRIPP LITE is not liable for any costs, such as lost profits or revenue, loss of equipment, loss of use of equipment, loss of software, loss of data, costs of substitutes, claims by third parties, or otherwise.
Product Registration
Visit www.triplite.com/warranty today to register your new Tripp Lite product. You'll be automatically entered into a drawing for a chance to win a FREE Tripp Lite product!*
- No purchase necessary. Void where prohibited. Some restrictions apply. See website for details.
Warranty & Product Registration
FCC Notice, Class B
This device complies with part 15 of the FCC Rules. Operation is subject to the following two conditions: (1) This device may not cause harmful interference, and (2) this device must accept any interference received, including interference that may cause undesired operation.
Note: This equipment has been tested and found to comply with the limits for a Class B digital device, pursuant to part 15 of the FCC Rules. These limits are designed to provide reasonable protection against harmful interference in a residential installation. This equipment generates, uses and can radiate radio frequency energy and, if not installed and used in accordance with the instructions, may cause harmful interference to radio communications. However, there is no guarantee that interference will not occur in a particular installation. If this equipment does cause harmful interference to radio or television reception, which can be determined by turning the equipment off and on, the user is encouraged to try to correct the interference by one or more of the following measures:
Reorient or relocate the receiving antenna.
- Increase the separation between the equipment and receiver.
- Connect the equipment into an outlet on a circuit different from that to which the receiver is connected.
- Consult the dealer or an experienced radio/TV technician for help.
Any changes or modifications to this equipment not expressly approved by Tripp Lite could void the user's authority to operate this equipment.
WEEE Compliance Information for Tripp Lite Customers and Recyclers (European Union)
Under the Waste Electrical and Electronic Equipment (WEEE) Directive and implementing regulations, when customers buy new electrical and electronic equipment from Tripp Lite they are entitled to:
- Send old equipment for recycling on a one-for-one, like-for-like basis (this varies depending on the country)
- Send the new equipment back for recycling when this ultimately becomes waste
Use of this equipment in life support applications where failure of this equipment can reasonably be expected to cause the failure of the life support equipment or to significantly affect its safety or effectiveness is not recommended.
Tripp Lite has a policy of continuous improvement. Specifications are subject to change without notice.


1111 W. 35th Street, Chicago, IL 60609 USA www.triplite.com/support
1111 W. 35th Street, Chicago, IL 60609 EE UU www.triplite.com/support
1111 W. 35th Street, Chicago, IL 60609 EE UU www.triplite.com/support
Manufacturing Excellence
1111 W. 35th Street, Chicago, IL 60609 USA www.triplite.com/support
1111 W. 35th Street, Chicago, IL 60609 USA www.triplite.com/support
PykoBODCTBO N0Ib30BaTeЯ
Manufacturing Excellence
1111 W. 35th Street, Chicago, IL 60609 USA www.triplite.com/support
OxpanyetcaabTOpcknmpaBOM © 2017 Tripp Lite. NepeneuataK3anpeaaetc.
XapakTepeNCTnKIpOdyKta
- 06ecneuBaet Bo3MoXHoCTb ynpaBHeHn yByma KOMnbIePam n c eINHO USB-KnaBnAtpybl, Mbln n VGA-MOnHTopa
KoMaKTHa KaHcTpkykun Co BCTpoEHbIMn KBM- n aynoka6eIaMn dInHo1 1,2 M - IopT USB ДЯ мьши может Испльзоваться Дя подкючени КонцentpaTopa USB 1.1 в сених COBmecTHORO Испльзованя пифериHoro obopydobahna
-Подержka Видаоразрешийdo 2048x1536 - Bo3MOxHocTh foOpMnpoBaHnKOMaHc nOMoUbIO "Toprux KnaBnU", N03BOJHOuX 3aJaBaTb 3bIK OC n KnaBnAtypbl
- KBM-nepeknioateIb coxpaHReT B namrnpaCsiupeHHbIe daHHbIe ndHTnphiKaun (EDID) moHntopa c ceIbIO ONTUMN3aUN EKpaHHOrO pa3peWeHn
-Функця Emylaцn/06xoda nopTa dЯMbIи obecneuBaet noДeprkky 6oIbUnHCTBa npaBepOB MbIи mHOrOfoYHKUHOHaJIbHbIX MbIwei - PoiodepKka irpoBbIX KlaBnAtyp 6ecnpoBoHbIX KlaBnAtyp/Mblwei
B03MOxHOCbI NCIOJIb3OBAHnE"TopaHx"KnaBnI NepeKIOUeHn NOPToB MbIbIO - Пдержka OC Windows, Mac, Sun Linux
- Повдержkaи Emyлaria Клаватyp Sun/Mac*
- OTCyTCTBnE Heo6xOaMOCtN BO BHeuHem NCTOuyHKe NHTAH
*Kombuauu KnaBuaTyp PK 3mynpyot KnaBuaTypb Sun/Mac. KnaBuaTypb Sun/Mac yHKuoHpyOT Toblko CO CBOUMC6CTBeHHbIMKoMnblTepaMn.
CopejxHmoe ynaKOBKn
- UCTPOINCTBO MoD. B032-VUA2
-PykoBoOCTBO nonb30BaTeNa
OngnohaNbHbIe KOMnKeKtYuOuNe
Ka6eHn cepnn P502 c koakcnabhbIM pa3bemamn RGB nnoKIOUeHn VGA/SVGA-MOHITopa
- 4-nopTobbKoHcHTpaTop USB 2.0, MoD. U222-004-R
-7-nopTobbIKOHcHTpaTop USB 2.0,MoD.U222-007-R
- 10-nopToBbI KOHcHTpaTOp USB 2.0, MoJ. U222-010-R
Ka6enbIy noKIOHueHn yCTpoBCTB cepu U022 cpa3beMaMu USB 2.0 A/B
Ka6eHn cepu U030 cpa3beMaMu USB 2.0 Mini-B
Ka6eenn cepnn U050 c pa3bemamu USB 2.0 Micro-B
CnCTeMHbIe Tpe6ObaHna
- MonHtop VGA, SVGA nn Multisync
USB-KnabnAtypa
USB-MbIUb
KoMnIbTeP c VGA-noptom
KOMnIbIOTeP c USB-noptamn
yctaHOBka
PnpmeaHne. PepeHaayanom yCTaHOBKn BCE yCTpOietBa dOnJXbI 6blt b oecToeHbI. Heo6xOIMo OTcoEINHTb shHypbI nTahnra IIO6bIX KOMNbIoTePob, MHeOuxx fYHKNU BKNIOeHnna NITAHn c KlaBnAtypbl.
1.ПодклочиTE USB-КлабиТур,MbIи VGA-MOHITOP K KOHCOJIbHbIM NOPaTm yCTpoiCTBa.
PpmeHne. Bcnyae nCnoB3OBAHn6bcnpoBOnHn KnaBnAtpybIMblnBpa3beM yCTpoiCTBa, npHa3NaeHHbI IaNoKJIooHeMa KnaBnAtpyb,IOnXeH 6bITb BCTabJeH 3aunTHbI KIOU, No3BOJIOuN INcNoB3OBaTbVHKUNo "ToprYx" KnaBnI.
- (Heo63aTeBho) B KOHc0nbHbI USB-nopT dIy Mblu MoXeT 6bITb BKIOueH USB-xa6, o6ecneuBaIOUIM BO3MOXHOCTb NOKIOUeHn K yCTaHOBKe HeCKOBHX nepHΦepMHBIX USB-yCTPOICTB.
PpmeHne. n oecneeyn Hndkxauey fHKuHOHaBbHOCTn CneyeT NcnoB3oBaTB xa6 CBHeHm MTOUHKOM pHTAHN. Kpome TOrO, npn noKIOeHN Xa6a IMeouncs B KBM- nepeKIOUaTepeKIM 3MyJauu Mblu dONKeH 6bITb 3a6NOKPOBaH (NoIpo6He cM. B Ta6NIue "KomAnDbI N3 Kom6Nau" ropayx"KnabH", PdctabJIeHH O daJIee B HactoIeM DYKOBoCTBe).
-
BkIIOUHTe KOLOHKn B IpeHa3HaueHHb IJRA HIN pa3beM.
-
BCTaBbTe USB-, VGA- n ayinopa3bembl BCTpoehhbx Ka6eNe B COOTBeTCTByIOuIne IopTby UCTaHaBJIbAeMOrO KOMNbIoTEpa.
5.BKIOHHTe NHTaHne yCTPOBCTB.
PnmuueHne. nTaHHe yctpoiCTBa IyMOnIaHIO NOaETc Ha NepBbIKOMMbIOTep, BKNIOaEmbIK HONIKOITaHm.
TapaHTnHbIe 06aTeJIbCTBa
HnphiMaNo BbInonHeHHIOpeBaHm DnpeKTHBbW EeE nnoKynatene N nepepa6OHTKOB npOdyKcMn KOMNaHH Tripp Lite (AraIooxca pe3ndentamn EbPoneckoro co103a)
Cornacno nooxhenm DnpekTbbl 06 ytnu3aun OTxoob 3neKtpueckoro n 3neKtpoHoro 6opdyobahna (WEEE) m cnoHNtBbIX paonopaxhen no ee npmeHENIO, pni NOKyNke NOptepuTeAMM HOBOrO 3neKtpueckoro m 3neKtpoHoro 6opdyobAHNA npOn3BODCTBA KOMNAHNI Tripp Lte OHn nOnyaHt npaboHa:
- PpOdaJy cIaporo 6OpOyDobAHnno npHnCmny "OINK OOnHOMy" n/nn Ha 3KBnBaIeHTHOOCHOBe (B 3aBNCIMOCTNOT KOHKpeTHoN CTpaHbI)
- Otnpabky HOBORO 606pyoBDAHnHa nepepa60Ky nocne okoHaTebHoB Bbipa60K er opecypca
He peKoMeHnyetc HcNoJIb3OBAHme DaHHoro 06OpyDObAHn B CNTeMax JxN3HeOBeCnepeHn, rIe erO BbxIOd N3 CTPOr npEiNoJIOXHTeBHO MoKeT npBecTu K nepe6oAM B pa6Ote 06OpyDobAHn JxN3HeOBeCnepeHn Nm B 3HaHTeBHO Mepe CHN3uTB erO 6e3OnaCHOCt bnn 3ΦΦeKTHBHOCTb.
KOMnHaHr TrippLite NoCToRHHo COBepueHcTByET CBOIO npOdykuHIO.B CBA3N C3TMM BO3MOxHO N3MeHeHneTexHnuecknx XapakTepeNTMK 6e3 npedBaPHTbHOrO yBeDoMLeHn.


Manufacturing Excellence.
1111 W. 35th Street, Chicago, IL 60609 USA
www.triplite.com/support
17-02-236 93-365E_RevC