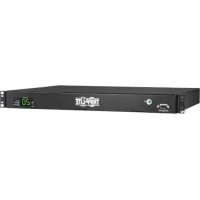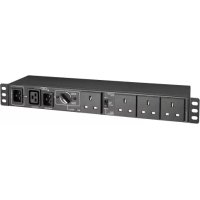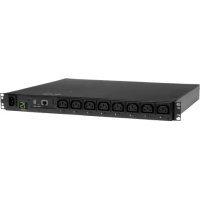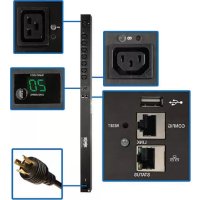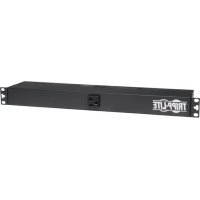
PDU1220T6 - Power strip Tripp Lite - Free user manual and instructions
Find the device manual for free PDU1220T6 Tripp Lite in PDF.


User questions about PDU1220T6 Tripp Lite
0 question about this device. Answer the ones you know or ask your own.
Ask a new question about this device
Download the instructions for your Power strip in PDF format for free! Find your manual PDU1220T6 - Tripp Lite and take your electronic device back in hand. On this page are published all the documents necessary for the use of your device. PDU1220T6 by Tripp Lite.
USER MANUAL PDU1220T6 Tripp Lite
Designed for Mounting in 19 in. Racks
(Series Numbers: AG-IP120V6IPRM, AG-IP120V20RM)
Important Safety Instructions 2
Installation 2
Features 3
Specifications 3
Warranty & Product Registration 4
Español 5
Français 9
WARRANTY REGISTRATION
Register your product today and be automatically entered to win an ISOBAR surge protector in our monthly drawing!
tripplite.com/warranty

text_image
QR code image containing encoded data, no visible human-readable text
text_image
TRIPP·LITE
1111 W. 35th Street, Chicago, IL 60609 USA • tripplite.com/support
Copyright © 2020 Tripp Lite. All rights reserved.
Important Safety Instructions
This manual contains information concerning the proper installation and use of Tripp Lite's Rackmount Power Strips.

SAVE THESE INSTRUCTIONS.
Do not connect your power strip to an ungrounded outlet. Do not use it with extension cords or adapters that eliminate its connection to ground. Your power strip is designed for indoor use only. Install it away from heat emitting devices such as radiators and heat registers. Do not install where excessive moisture or other conductive contaminants are present. Never install electrical wiring during a lightning storm.
The power requirement of each device connected to an outlet of your power strip must not exceed the Outlet Power Rating of your power strip (see Specifications). The total power requirements of all devices connected to your power strip must not exceed the Maximum Load Rating of your power strip (see Specifications).
Installation
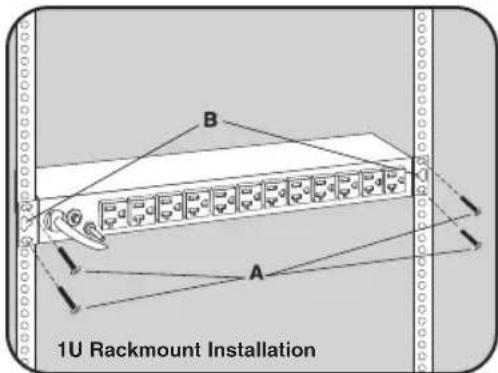
1U Rackmount Installation
To Mount Unit in Rack: Put four user-supplied rackmount screws (A) through the unit's mounting ears (B) and into the rack rails as shown. The user must determine the fitness of the rackmount screws to hold the unit in the rack before installation.
0U Rackmount Installation
-
Reorient Mounting Ears: Unscrew the screws (A) holding the unit's mounting ears (B) to the sides of the unit. Use the screws from Step 1 (A) to reattach the mounting ears (B) to the unit as shown. Use only the manufacturer-supplied screws or their equivalent (#6-32, 14 " flat head) to reattach the mounting ears.
-
Mount Unit on Outside of Rack Rails: Put four user-supplied screws (C) or similar mounting hardware through the unit's mounting ears (B) and into the side of the rack as shown. The user must determine the fitness of the user-supplied mounting hardware to support the unit before mounting.
text_image
B A 1U Rackmount Installation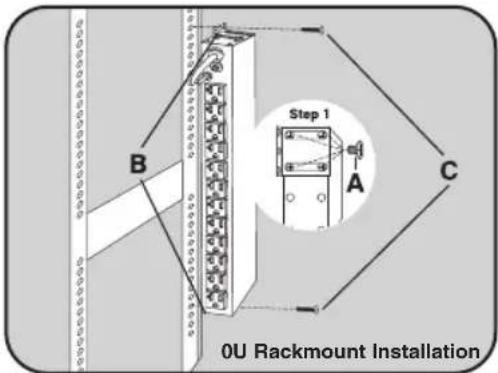
text_image
B Step 1 A C 0U Rackmount InstallationWallmount/Under Counter Installation
Reorient the unit's mounting ears as per the OU Rackmount Installation above, then put four user-supplied screws or similar mounting hardware through the unit's mounting ears and into the mounting surface. The user must determine the fitness of the user-supplied mounting hardware to support the unit before mounting.
Features
Circuit Breaker(s)
If the current draw of the equipment connected to your power strip exceeds your model's Maximum Load Rating (see Specifications) for longer than a few seconds, a circuit breaker will trip to prevent any possible damage. When a circuit breaker trips, its plunger will pop up. Remove excess equipment and allow the breaker to cool one minute before depressing its plunger to reset the breaker.
Grounding Lug
Use this screw (located by the power strip's receptacles) to connect your power strip to ground.
Input Receptacle (IEC Model Only)
The PDU12IEC has no power cord. Instead, it has a IEC320-C20 inlet receptacle. To connect a PDU12IEC to utility power, use a user-supplied detachable power cord with an IEC plug on one end and a plug appropriate to your local utility outlets on the other.
Specifications
| PDU1215 | PDU1220 | PDU2430 | |
| Nominal Voltage/Frequency: 120V/50 or 60 Hz 120V/50 or 60 Hz 120V/50 or 60 Hz | |||
| Output Power Rating (amps): 15 amps 20 amps 24 amps | |||
| AC Receptacles: 13 x NEMA 5-15R 13 x NEMA 5-15/20R 24 x NEMA 5-15R(12 rear/1 front) (12 rear/1 front) (12 rear/12 front) | |||
| AC Line Cord: | 15', w/NEMA 5-15P plug | 15', w/NEMA 5-20P plug | 15', w/NEMA L5-30P plug |
| Circuit Breaker(s) (Resettable): | 15 amps 20 amps 2 x 15 amps | ||
| Dimensions (HxWxD, inches): | 134 × 1714 × 334 | 134 × 1714 × 334 | 134 × 1714 × 334 |
| PDU121506 | PDU1226 | PDU1220T6 | |
| Nominal Voltage/Frequency | 120V/50 or 60 Hz | 120V/50 or 60 Hz | 120V/50 or 60 Hz |
| Output Power Rating (amps): 15 amps | 20 amps | 20 amps | |
| AC Receptacles(12 rear/1 front) | 13 x NEMA 5-15R(12 rear/1 front) | 13 x NEMA 5-15/20R | 13 x NEMA 5-15/20R |
| AC Line Cord: | 6', w/NEMA 5-15P plug | 6', w/NEMA 5-20P plug | 6', w/NEMA L5-20P plug |
| Circuit Breaker(s) (Resettable) | 15 amps | 20 amps | |
| Dimensions (HxWxD, inches): | 1^3/_4 × 17^3/_4 × 3^3/_4 | 1^3/_4 × 17^3/_4 × 3^3/_4 | 1^3/_4 × 17^3/_4 × 3^3/_4 |
| PDU12IEC | PDU1220T | |
| Nominal Voltage/Frequency: | 100V to 240V/50 or 60Hz | 120V/50 or 60 Hz |
| Output Power Rating (amps):16 amps for 208 to 240V | 15 amps for 100V to 120V or | 20 amps |
| AC Receptacles: | 4 x IEC-C13 (front),8 x IEC-C13/2 x IEC-C19 (rear) | 13 x NEMA 5-15/20R(12 rear/1 front) |
| AC Line Cord: | N/A (IEC320-C20 inlet) | 15', w NEMA L5-20P plug |
| Circuit Breaker(s) (Resettable): | 2 x 16 amps | 20 amps |
| Dimensions (HxWxD, inches): | 134 × 1714 × 334 | 134 × 1714 × 334 |
Warranty & Product Registration
Seller warrants this product, if used in accordance with all applicable instructions, to be free from original defects in material and workmanship for a period of 5 years (except internal UPS system batteries outside USA and Canada, 1 year) from the date of initial purchase. If the product should prove defective in material or workmanship within that period, Seller will repair or replace the product, in its sole discretion. Service under this Warranty can only be obtained by your delivering or shipping the product (with all shipping or delivery charges prepaid) to: Tripp Lite, 1111 W. 35th Street, Chicago, IL 60609 USA. Seller will pay return shipping charges. Visit tripplite.com/support before sending any equipment back for repair.
THIS WARRANTY DOES NOT APPLY TO NORMAL WEAR OR TO DAMAGE RESULTING FROM ACCIDENT, MISUSE, ABUSE OR NEGLECT. SELLER MAKES NO EXPRESS WARRANTIES OTHER THAN THE WARRANTY EXPRESSLY SET FORTH HEREIN. EXCEPT TO THE EXTEND PROHIBITED BY APPLICABLE LAW, ALL IMPLIED WARRANTIES, INCLUDING ALL WARRANTIES OF MERCHANTABILITY OR FITNESS, ARE LIMITED IN DURATION TO THE WARRANTY PERIOD SET FORTH ABOVE; AND THIS WARRANTY EXPRESSLY EXCLUDES ALL INCIDENTAL AND CONSEQUENTIAL DAMAGES. (Some states do not allow limitations on how long an implied warranty lasts, and some states do not allow the exclusion or limitation of incidental or consequential damages, so the above limitations or exclusions may not apply to you. This Warranty gives you specific legal rights, and you may have other rights which vary from jurisdiction to jurisdiction).
WARNING: The individual user should take care to determine prior to use whether this device is suitable, adequate or safe for the use intended. Since individual applications are subject to great variation, the manufacturer makes no representation or warranty as to the suitability or fitness of these devices for any specific application.
PRODUCT REGISTRATION
Visit tripplite.com/warranty today to register your new Tripp Lite product. You'll be automatically entered into a drawing for a chance to win a FREE Tripp Lite product!*
* No purchase necessary. Void where prohibited. Some restrictions apply. See website for details.
Tripp Lite has a policy of continuous improvement. Specifications are subject to change without notice. Photos and illustrations may differ slightly from actual products.

text_image
TRIPP·LITE
1111 W. 35th Street, Chicago, IL 60609 USA • tripplite.com/support
Manual del usuario
1111 W. 35th Street, Chicago, IL 60609 USA • tripplite.com/support
1111 W. 35th Street, Chicago, IL 60609 USA • tripplite.com/support
20-03-224 93-2120_RevC
1111 W. 35th Street, Chicago, IL 60609 USA • tripplite.com/support
1111 W. 35th Street, Chicago, IL 60609 USA • tripplite.com/support