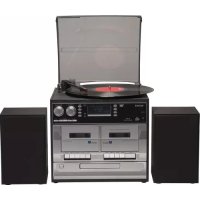
MRD166 - Hi-fi system DENVER - Free user manual and instructions
Find the device manual for free MRD166 DENVER in PDF.



| Product type | Hi-fi system with turntable, DAB/FM radio, CD player, cassette deck, USB/SD player, auxiliary input |
| Brand and model | Denver, MRD-166 |
| Power supply | Mains 230 V~50 Hz (power cord included) |
| Output power | 2 × 2 W RMS |
| Radio frequency ranges | FM: 87.5 – 108 MHz; DAB: 168 – 240 MHz |
| Compatible audio formats | Audio CD, MP3, WMA (USB/SD), cassette |
| Turntable speeds | 33, 45, 78 RPM |
| Connections | 3.5 mm headphone jack (front), auxiliary input (front), USB port (front), SD/MMC slot (front), right/left speakers (rear), line out L/R (rear), FM antenna (rear) |
| Main functions | CD, cassette, turntable playback, DAB/FM radio, MP3/WMA playback from USB/SD, recording (encoding) to USB/SD, remote control, automatic turntable stop |
| Package contents | Hi-fi system, 2 external speakers, remote control, 45 rpm adapter, power cable, user manual |
| Dimensions and weight | Not specified |
| Care and cleaning | Clean with a soft, dry cloth. Do not use abrasive products. Keep dry and dust-free. |
| Safety | Compliant with European directive 2014/53/EU. Do not expose to moisture, heat sources or shock. Disconnect before cleaning. |
| Spare parts and repairability | Spare parts are available from the manufacturer. Any repairs must be carried out by a qualified professional. |
| General information | Manufacturer: Denver Electronics A/S, Omega 5A, Soeften, DK-8382 Hinnerup, Denmark. Declaration of conformity available at www.denver-electronics.com. |
Frequently Asked Questions - MRD166 DENVER
User questions about MRD166 DENVER
0 question about this device. Answer the ones you know or ask your own.
Ask a new question about this device
Download the instructions for your Hi-fi system in PDF format for free! Find your manual MRD166 - DENVER and take your electronic device back in hand. On this page are published all the documents necessary for the use of your device. MRD166 by DENVER.
USER MANUAL MRD166 DENVER
CLASSICAL TURNTABLE WITH DAB/FM RADIO, CASSET PLAYER & USB/SD SLOT
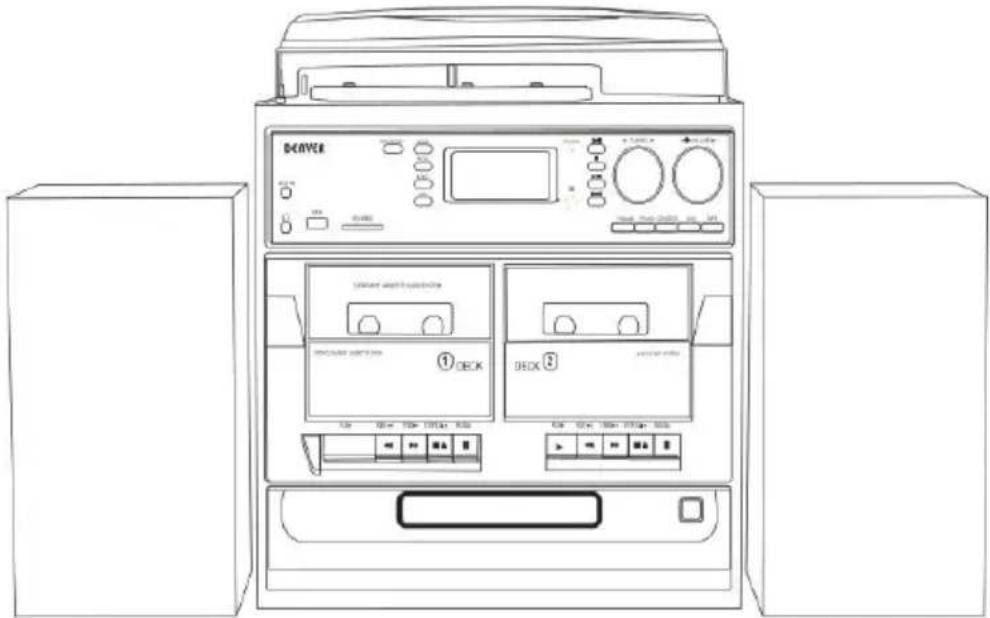
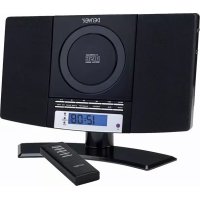
MRD-166 music centre with dual external speakers
Operating and Instruction Manual
LOCATIONS OF CONTROLS AND INDICATORS
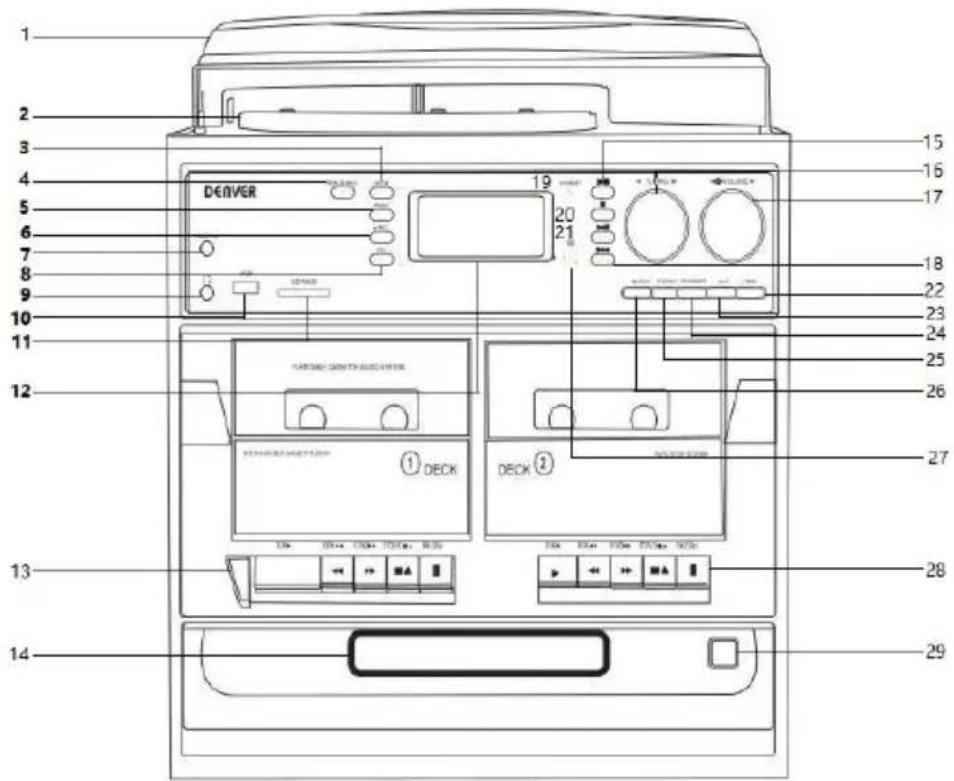
1 Dust cover
2 Turntable
3 Mode (EQ) button
4 Menu/Info button
5 Program button
6 Record button
7 Auxiliary input
8 Delete button
9 3.5mm headphone socket
10 USB socket
11 SD/MMC socket
12 LCD display
13 DECK 1 button
14 Disk tray door
15 Play/Pause button
16 FM Tuning knob
17 Power ON/OFF/Volume
18 Skip up button
19 Standby/power light (beside display)
20 Stop button (beside display)
21 Skip down button (beside display)
22 Tape button
23 Aux button
24 CD/USB/SD button
25 Phono button
26 FM/DAB button
27 Remote control receiver
28 Deck 2 button
29 CD open/close button
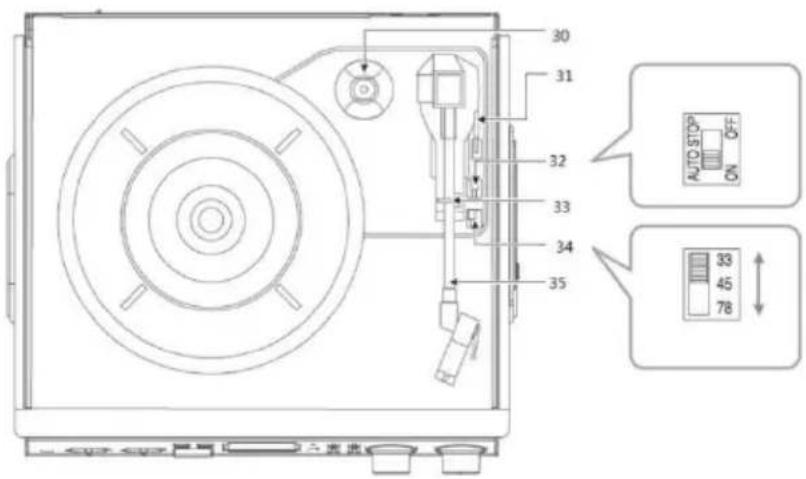
PHONOGRAPH
30 45 rpm adaptor
31 Lift lever
32 Auto stop control
33 Tone arm lock
34 Speed selector (33/45/78 rpm)
35 Tone arm
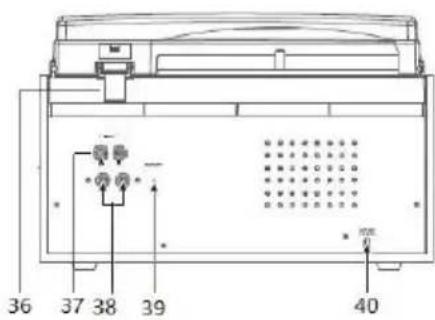
BACK PANEL
36 Dust cover hinge
37 Line out R/L
38 Speaker jack R/L
39 FM wire antenna
40 AC power cord
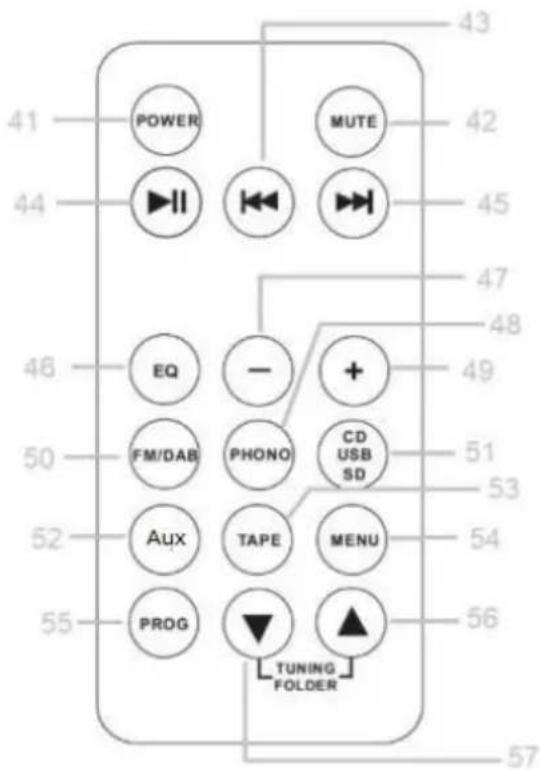
REMOTE CONTROL
41 Power
42 Mute
43 Skip down button
44 Play/Pause
45 Skip up button
46 EQ
47 volume down
48 Phono
49 volume up
50 FM/DAB+
51 CD/USB/SD
52 Aux-in
53 Tape
54 Menu
55 Prog
56 Tuning/folder up
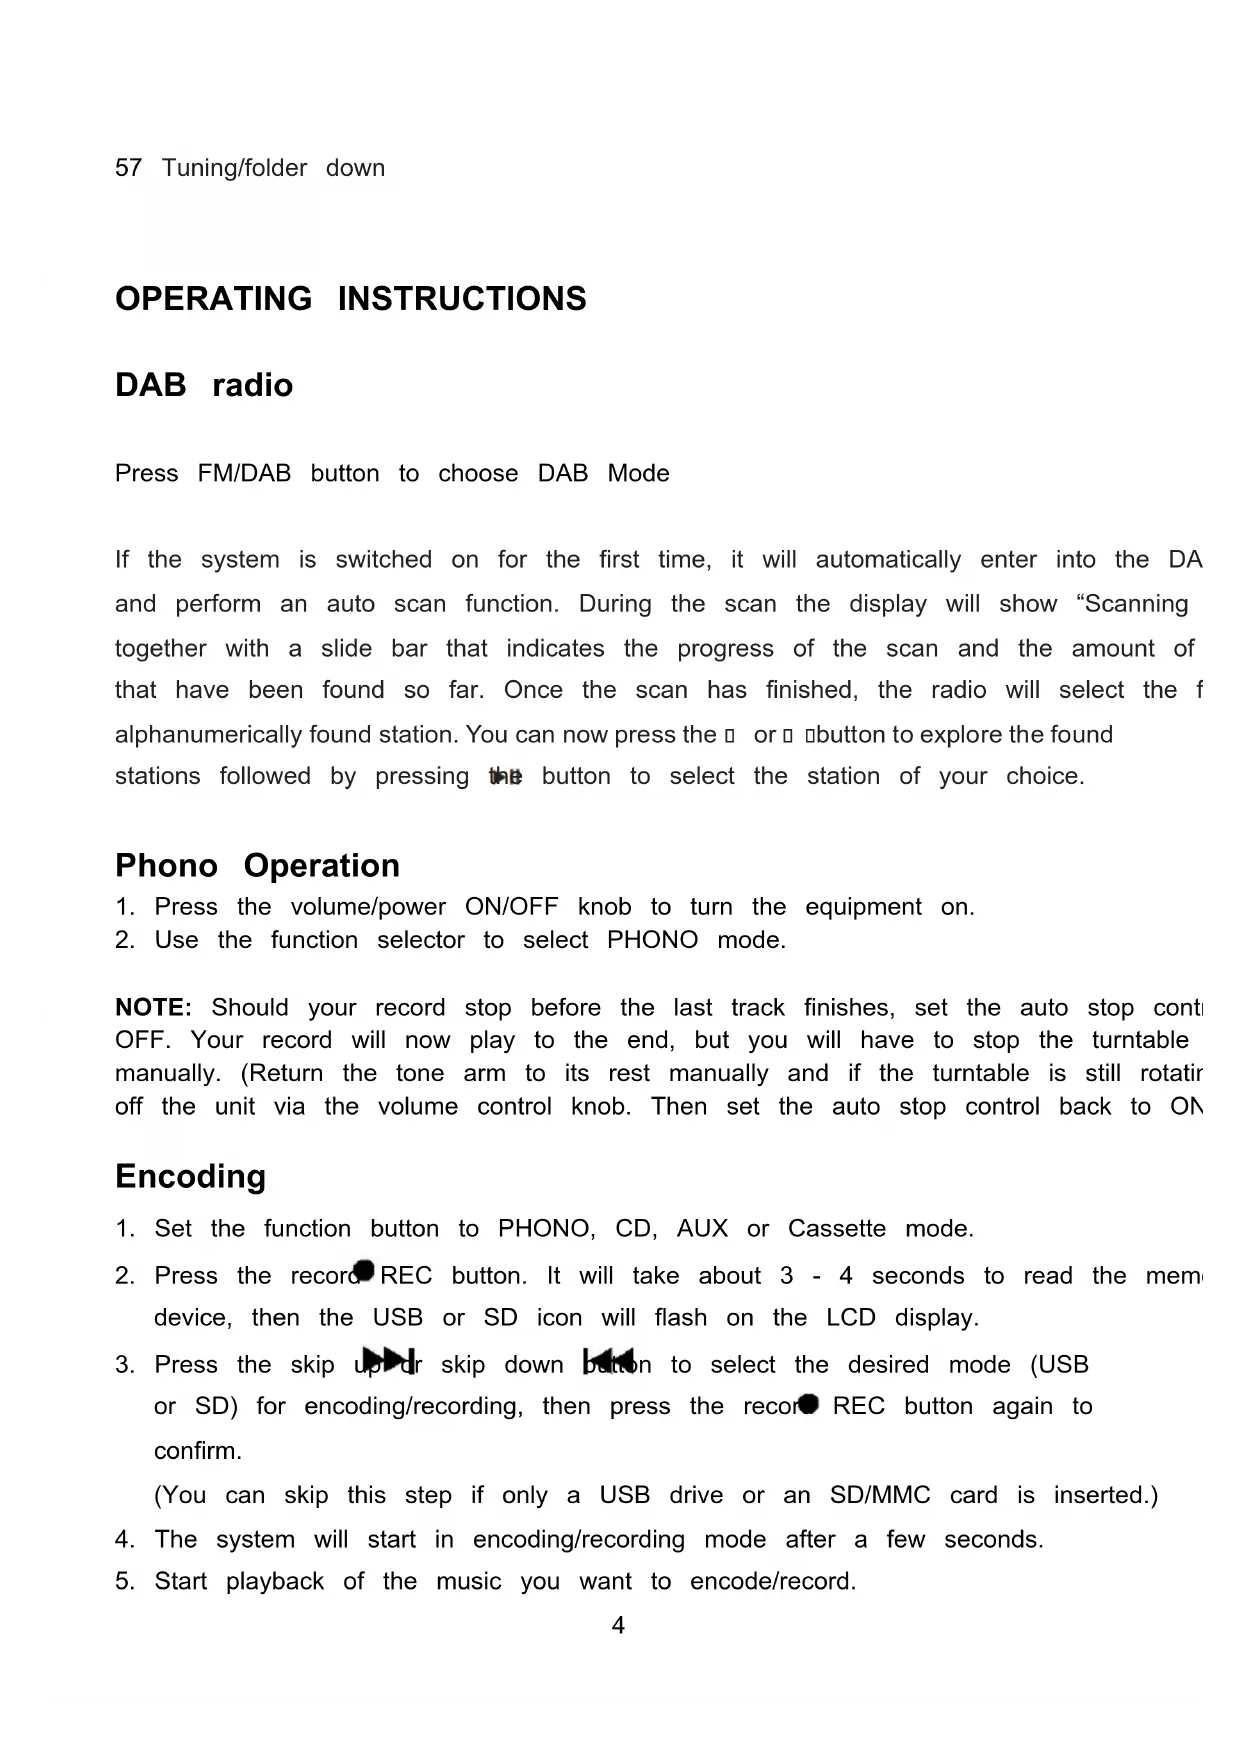
OPERATING INSTRUCTIONS
DAB radio
Press FM/DAB button to choose DAB Mode
If the system is switched on for the first time, it will automatically enter into the DA and perform an auto scan function. During the scan the display will show “Scanning together with a slide bar that indicates the progress of the scan and the amount of that have been found so far. Once the scan has finished, the radio will select the f alphanumerically found station. You can now press the □ or □ button to explore the found stations followed by pressing the button to select the station of your choice.
Phono Operation
- Press the volume/power ON/OFF knob to turn the equipment on.
- Use the function selector to select PHONO mode.
NOTE: Should your record stop before the last track finishes, set the auto stop control OFF. Your record will now play to the end, but you will have to stop the turntable manually. (Return the tone arm to its rest manually and if the turntable is still rotating off the unit via the volume control knob. Then set the auto stop control back to ON
Encoding
- Set the function button to PHONO, CD, AUX or Cassette mode.
- Press the record REC button. It will take about 3 - 4 seconds to read the mem device, then the USB or SD icon will flash on the LCD display.
- Press the skip up or skip down button to select the desired mode (USB or SD) for encoding/recording, then press the record REC button again to confirm.
(You can skip this step if only a USB drive or an SD/MMC card is inserted.) - The system will start in encoding/recording mode after a few seconds.
-
Start playback of the music you want to encode/record.
-
To finish encoding/recording, press the ▪op button. The display will show "END" a return to PHONO mode.
NOTE:
The recording speed is 1:1. Recording time is governed by how long it takes for music to play to its end.
☐ The recording format is preset at the MP3 bit rate of 128 Kbps.
CD & Cassette Operation
- Press the VOLUME knob to turn the equipment on.
- Choose the mode you wish to use (CD or Cassette)
- Start playback of the music
The USB Port and SD Card Slot
Playback of music in MP3/WMA format via USB device or memory ca
The system is able to decode and playback all MP3/WMA files stored in the memory media connected to the USB port or SD/MMC card slot.
- Press the VOLUME knob to turn on the equipment.
- Set the function selector to CD/USB/SD mode. (If you have both a USB device a memory card inserted, press the same button to toggle between CD/USB and SD mode.) The system will start reading the storage medium automatically after mode selection and will display the total number of folders and MP3/WMA files.
- The system will then start audio playback from the media storage device (USB or card) automatically.
The auxiliary input
- Press the VOLUME knob to turn the equipment on.
- Use the function selector to select AUX mode, then connect the external audio device (such as a CD player) to the AUX IN socket on the front of the equipment. The signal from the external audio device will now be played through the system.
Please notice - All products are subject to change without any notice. We take reser for errors and omissions in the manual.
ALL RIGHTS RESERVED, COPYRIGHT DENVER ELECTRONICS A/S
DENVER®
www.denver-electronics.com

Electric and electronic equipment contains materials, components and substances that are hazardous to your health and the environment, if the waste material (discarded ele and electronic equipment) is not handled correctly.
Electric and electronic equipment is marked with the crossed out trash can symbol, so above. This symbol signifies that electric and electronic equipment should not be disposed of with other household waste, but should be disposed of separately.
All cities have established collection points, where electric and electronic equipment can either be submitted free of charge at recycling stations and other collection sites, or collected from the households. Additional information is available at the technical department of your city.
Hereby, Inter Sales A/S declares that the radio equipment type MRD-166 is in compli with Directive 2014/53/EU. The full text of the EU declaration of conformity is availabl
the following internet address: www.denver-electronics.com and then click the search ICON on topline of website. Write model number: MRD-166. Now enter product page, and I directive is found under downloads/other downloads.
Operating Frequency Range: FM:87.5-108MHz DAB:168-240MHz
Max Output Power: 2*2W
DENVER ELECTRONICS A/S
Omega 5A, Soeften
DK-8382 Hinnerup
Denmark
www.facebook.com/denverelectronics
24 Knappen CD/USB/SD
25 Knappen Pladespiller
26 Knappen FM/DAB
15 Bouton Lecture/Pause
- CLASSICAL TURNTABLE WITH DAB/FM RADIO, CASSET PLAYER & USB/SD SLOT
- LOCATIONS OF CONTROLS AND INDICATORS
- PHONOGRAPH
- BACK PANEL
- REMOTE CONTROL
- OPERATING INSTRUCTIONS
- DAB radio
- Phono Operation
- Encoding
- NOTE:
- CD & Cassette Operation
- The USB Port and SD Card Slot
- Playback of music in MP3/WMA format via USB device or memory ca
- The auxiliary input
- DENVER®
Brand : DENVER
Model : MRD166
Category : Hi-fi system