
KA 5829 - Coffee maker SEVERIN - Free user manual and instructions
Find the device manual for free KA 5829 SEVERIN in PDF.
| Brand | SEVERIN |
| Model | KA 5829 |
| Product Type | Double coffee maker (duo) |
| Capacity | 2 x 10 cups (approx.) |
| Power supply | 230 V, 50 Hz |
| Power | 1000 W (approx.) |
| Dimensions (L x D x H) | approx. 30 x 25 x 40 cm |
| Weight | approx. 2.5 kg |
| Filter type | Paper filter #4 |
| Carafe | Insulated, double-walled glass, with permeable lid |
| Automatic shut-off | Yes, after brewing cycle |
| Preparation | One or two coffees simultaneously |
| Cord storage | Yes, compartment at the back |
| Descaling | Recommended every 30-40 cycles, with vinegar solution |
| Cleaning | Damp cloth, do not immerse, carafe not dishwasher-safe |
| Safety | Hot surfaces, automatic shut-off, keep out of reach of children |
| Warranty | 2 years, defective parts |
Frequently Asked Questions - KA 5829 SEVERIN
User questions about KA 5829 SEVERIN
0 question about this device. Answer the ones you know or ask your own.
Ask a new question about this device
Download the instructions for your Coffee maker in PDF format for free! Find your manual KA 5829 - SEVERIN and take your electronic device back in hand. On this page are published all the documents necessary for the use of your device. KA 5829 by SEVERIN.
USER MANUAL KA 5829 SEVERIN
natural_image
Black SEVERIN coffee maker with two side dishes and a handle, no visible text or symbols on the device itself.ART.-NO. KA 5829 / KA 5830
GB Instructions for use
FR Mode d'emploi
Before using the appliance, read the following instructions carefully and keep this manual for future reference. The appliance must only be used by persons familiar with these instructions.
Connection to the mains supply
The appliance should only be connected to an earthed socket installed in accordance with the regulations. Make sure that the supply voltage corresponds with the voltage marked on the rating label. This product complies with all binding CE labelling directives.
Familiarisation
- Lids (Main unit)
- Water reservoir with water level indicator
- Swing-out filter
- Heat-retaining carafe with drip-through lid
- On/Off button
- Rating label (on underside of appliance)
- Power cord with plug
Not shown:
Cable storage compartment (at the rear)
Important safety instructions
- In order to avoid hazards, and to comply with safety requirements, repairs to this electrical appliance or its power cord must be carried out by our customer service. If repairs are needed, please contact our customer service department by telephone or email (see appendix).
- Before cleaning the appliance, ensure it is disconnected from the power supply and has cooled down completely. For detailed information on cleaning the appliance, please refer to the section Cleaning and care.
- To avoid the risk of electric shock, do not clean the appliance with liquids or immerse it.
- Caution: Any misuse can cause severe personal injury.
-
Caution: The accessible surfaces heat up during operation and will remain hot for some time afterwards.
-
The appliance must not be operated inside a closed cabinet.
- This appliance is intended for domestic or similar applications, such as the - staff kitchens in shops, offices and other similar working environments, - agricultural working environments, - by customers in hotels, motels etc. and similar accommodation, - in bed-and breakfast type environments.
• This appliance may be used by children (at least
8 years of age) and by persons with reduced physical, sensory or mental capabilities, or lacking experience and knowledge, provided they have been given supervision or instruction concerning the use of the appliance and fully understand all dangers and safety precautions involved.
Children must not be permitted to carry out any cleaning or maintenance work on the appliance unless they are supervised and at least 8 years of age.
- The appliance and its power cord must be kept well away from children under 8 at all times.
- Children must not be permitted to play with the appliance.
- Caution: Keep any packaging materials well away from children – these are a potential source of danger, e.g. of suffocation.
- Always close the carafe with its drip-through lid. Do not leave the heat-retaining carafe unattended near where children may reach it.
- Every time the appliance is used, the main body including the power cord as well as any attachment fitted should be checked thoroughly for any defects. Should the appliance, for instance, have been dropped onto a hard surface, or if excessive force has been used to pull the power cord, it must no longer be used: even invisible damage may have adverse effects on the operational safety of the appliance.
- During operation, the coffee maker must be placed on a level, non-slip surface, impervious to splashes and stains.
- Do not allow the appliance or its power cord to touch hot surfaces or to come into contact with any heat sources.
- Do not allow the power cord to hang free; the cord must be kept well away from hot parts of the appliance.
-
Always remove the plug from the wall socket
-
in case of any malfunction,
- after use, and also
- before cleaning the appliance.
- When removing the plug from the wall socket, never pull on the power cord; always grip the plug itself.
- Do not touch the plug with wet hands.
- To prevent the danger of hot water or steam being emitted, always switch off the coffee maker and allow sufficient time for the appliance to cool down before opening the lid or removing any accessories or attachments.
- Do not leave the appliance unattended while it is switched on.
- No responsibility will be accepted if damage results from improper use, or if these instructions are not complied with.
Cable storage compartment
There is a cable storage compartment at the rear of the appliance. Pull out the cord to the required length before use.
Automatic switch-off
To save energy, models with a heat-retaining carafe will switch off automatically once the brewing cycle has been completed.
Before using for the first time
Before making coffee for the first time, let the appliance go through two or three filtration cycles, using the indicated maximum amount of cold water but without any coffee. Perform this procedure separately for each side. This should also be done if the appliance has not been used for an extended time, and after descaling.
General information
- The double markings on each of the water reservoirs help you to measure the amount of water needed to prepare the required number of cups of coffee.
The scale on the left-hand side corresponds to medium-sized cups with a capacity of approx. 125 ml; the one on the right to smaller-sized cups. Take care not to exceed the indicated maximum number of cups. - If several consecutive brewing cycles are required, switch off the machine after each cycle and let it cool down for approx. 5 minutes.
- Warning: Be careful not to put water into the reservoir immediately after a brewing cycle, as hot steam may escape from the water nozzle. Danger of scalding!
- Caution: Do not attempt to open the lid while brewing is in progress: there is a danger of scalding.
To prepare filter coffee
Coffee can be prepared with one side, or with both sides at the same time.
· Filling the water reservoir:
Open the lid, fill the reservoir with the required amount of fresh cold water and close the lid again.
- Inserting the paper filter:
Open the swing-out filter and insert a size-4 paper filter into the filter holder, first folding down the perforated sides of the filter.
· Adding ground coffee:
We recommend using finely ground filter coffee, approximately 6 g = 1½ - 2 tsp. per medium-sized cup (125 ml).
· Preparing the carafe:
Place the drip-through lid onto the carafe. If correctly fitted, the lid will disable the drip-stop mechanism in the filter holder during the brewing cycle.
Replace the carafe in the appliance.
· Starting the filtering process:
Insert the plug into a suitable wall outlet and use the On/Off button to switch the coffee maker on. The filtering process begins.
- Removing the carafe:
When the filtering process is complete, i.e. all water has run through the filter into the carafe, remove the carafe to serve the coffee.
To pour the coffee, turn the lid counterclockwise about half a turn so that the arrow on the lid is aligned with the pouring spout.
After serving, turn the lid clockwise until the two arrows are facing each other.
- The machine will switch off automatically once the brewing cycle is complete.
- Interrupting the brewing cycle:
To interrupt the brewing cycle, press the On/Off button again to turn the appliance off.
· Switching the coffee maker off:
Remove the plug from the wall socket once brewing is complete.
Heat-retaining carafe
- For technical reasons, the screw cap does not make a complete seal. Therefore, always hold the carafe in an upright position.
- Keeping the coffee hot: a heat-retaining carafe accumulates heat energy, and the carafe is therefore better filled to its maximum capacity. If it is only partly filled, the temperature will not be maintained as efficiently. If you rinse out the carafe with hot water before use, the coffee will be kept warm for a longer.
- The glass flask of the heat-retaining carafe is made of high-quality double-walled glass.
- Any streaks or bubble marks inside the carafe looking like bubbles or scratches do not affect its functional use nor its heat-retaining ability.
- For better insulation, there is a vacuum between the two walls.
- In case the glass is damaged for one or the other reason as mentioned below, there is a risk that the glass carafe implodes because of the vacuum. This might happen quite some time after the glass carafe has actually been damaged, so that a connection to the actual cause of the damage is not obvious.
- Therefore, do not drink out of the carafe and do not put your hand into it.
To prevent damage to the glass flask:
- Avoid shocks and large differences in temperature.
- Do not stir liquid inside the carafe with metal objects or other hard implements, for example with a metal spoon.
- Do not use hard brushes or abrasive cleaning agents.
- Do not wipe the inside with a cloth. Dust particles may damage the glass (in the same way as a glass-cutter).
- Do not put in a dishwasher.
- Do not use in a microwave oven.
Descaling
- Depending on the water quality (lime content) in your area as well as the frequency of use, all thermal household appliances using hot water need descaling (i.e. removal of lime deposits) on a regular basis to warrant proper functioning.
- A lengthening of the brewing time, residual water remaining in the container or increased noise during brewing indicate that descaling of the coffee maker has become necessary.
- An excessive build-up of lime deposits is very difficult to remove, even when strong descaling agents are used. It may also cause the brewing system to leak. To avoid damage caused by the build-up of deposits, descale the appliance after thirty to forty brewing cycles.
- Any warranty claim will be null and void if the appliance malfunctions because of insufficient descaling.
-
We recommend using vinegar for descaling.
-
Mix 80 ml of vinegar essence with the indicated maximum amount of cold water.
- Pour this mixture into each of the water reservoirs. Place a paper filter into the filter holder (without ground coffee) and operate the appliance as described in section To prepare filter coffee. Repeat the descaling process if necessary. Ventilate the room during the descaling process and do not breathe in the vinegar vapours.
- Switch off after 2-3 minutes and let the descaling solution take affect for 10 minutes, then switch on again.
- To clean both sides of the appliance after descaling, operate it a further 2-3 times with cold fresh water only (without using ground coffee).
- Do not pour descaling agents into enamelled sinks.
Cleaning and care
- Remove the plug from the wall socket and allow the appliance to cool before cleaning.
- To avoid the risk of electric shock, never immerse the coffee maker in water. It may be cleaned with a slightly damp cloth, using a mild detergent. Wipe dry afterwards.
- Do not use harsh abrasive cleaners.
- Dispose of the coffee grounds and rinse the filter. As a natural substance, the coffee grounds may be composted.
Heat-retaining carafe:
- Do not dismantle the heat-retaining carafe, do not wash in a dishwasher and do not immerse it in water.
- Rinse the inside with water and wipe the outside with a clean damp cloth after use.
- To remove coffee deposits from the inside of the heat-retaining carafe, fill it with hot water and add a tablespoon of dishwasher detergent. Close the screw cap and leave the carafe for some hours. Rinse out thoroughly with water afterwards.
- Drip-throughlid:
To clean the drip-through lid, it must be fitted before the water (with or without detergent) is poured out, so that the water flows through the lid. If a dishwasher detergent is used, rinse thoroughly with fresh water afterwards.
To clean the valve in the drip-through lid, push the valve in and flush with warm water.
Disposal
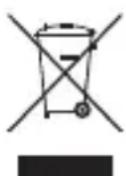
Devices marked with this symbol must be disposed of separately from your household waste, as they contain valuable materials which can be recycled. Proper disposal protects the environment and human health. Your local authority or retailer can provide information on the matter.
Guarantee
This product is guaranteed against defects in materials and workmanship for a period of two years from the date of purchase. Under this guarantee the manufacturer undertakes to repair or replace any parts found to be defective, providing the product is returned to one of our authorised service centres. This guarantee is only valid if the appliance has been used in accordance with the instructions, and provided that it has not been modified, repaired or interfered with by any unauthorised person, or damaged through misuse.
This guarantee naturally does not cover wear and tear, nor breakables such as glass and ceramic items, bulbs etc. This guarantee does not affect your statutory rights, nor any legal rights you may have as a consumer under applicable national legislation governing the purchase of goods. If the product fails to operate and needs to be returned, pack it carefully, enclosing your name and address and the reason for return. If within the guarantee period, please also provide the guarantee card and proof of purchase.
FR
Cafetière Duo
Chère cliente, Cher client,
1 Angel Kanchev, 5th floor
1000 Sofia, Bulgaria
Tel.: +359 2 973 11 31, 973 55 33
Fax: +359 2 944 96 49
E-Mail: vihra.koleva@pirita.bg
China
Ningbo Autin Electric Appliance CO.,LTD
B4-061/062 NO,181 Exhibition Road,
Jiangdong District, Ningbo
Tel.: +86 400 166 0336
Fax.: +86 0574 55331669
Web: www.nbautin.com.cn
Web: www.autin.com.cn
Czech Republic
BVZ Commerce s.r.o.
Parkerova 618
CZ 25067 Klecany
Tel.: +420 233 55 94 74
Fax: +420 233 55 81 59
Danmark
F&H of Scandinavia A/S
Gl. Skivevej 70
DK-8800 Viborg
Tel.: +45 8928 1300
Fax: +45 8928 1301
26 Oaktree Business Park
Trim Co., Meath
Tel.: 046 94 83100
Fax: 046 94 83663
Web: www.bluestone.ie
Italia
ASSISTENZA POST-VENDITA
NUMERO VERDE 800224155
E-Mail: assistenza@severinitalia.it
Indonesia
PT. Setai Modern Elektronik
Email.: info@severin.co.id
Web.: www.severin.co.id
Jakarta
Komp. Glodok Plaza Blok F No. 9, Jl.
Dr.Waleed Maraqa commercial center,
Level 1
Khalda, Amman Zip code: 11953
Tel: +962 6 5346429
Fax: +962 6 5341706
Mob Jordan : +962 797426108
Kuwait
Mohammed Abdulrahman Al Bahar
Al Bahar Building P.O. Box 148
Safat 13002 Kuwait
Tel.: +965 4810855
Latvia
SIA GTCL BALTIC
Piedrujas iela 7
LV - Riga 1073
Tel.: +371 29119989
Fax: +371 67297769
Lebanon
Khoury Home
7th Floor, Cité Dora 3 Building, Dora
P.O.Box 70611
Antelias, Lebanon
Tel.: +961 1 244200
Fax:+966 1 253535
E-Mail: info@khouryhome.com
Internet: www.khouryhome.com
Luxembourg
Ser-Tec
A.A.K & Partners L.L.C.
P.O Box:-1650, Muttrah
Postal Code - 114
Sultanate of Oman
Tel.: +968 24834470
Fax.: +968 24835186
E-Mail: aakpllc@gmail.com
PERU
SEVERIN PERU
Mezzanine 1, South Center Tower
2206 Venture Street, Madrigal Business Park
Alabang, Muntinlupa City
Tel.: 809 34 41
E-Mail: severinconsumercare@
colombophils.com.ph
Polska
Severin Polska Sp.z o.o.
6 Tagore Drive, #03-04
Singapore 787623
Tel.: +65 6455 0005
Fax: +65 6455 4010
Web: www.beste.com.sg
E-Mail: info@beste.com.sg
Slovenia
SEVTIS d.o.o.
Smartinska 130
1000 Ljubljana
Tel.: +386 1 542 1927
Fax: +386 1 542 1926
Slowak Republic
BVZ Commerce s.r.o.
Parkerova 618
CZ 25067 Klecany
Tel.: +420 233 55 94 74
Fax: +420 233 55 81 59
South Africa
AL&CD Ashley (PTY) Ltd.
3rd Floor, Grove Exchange
9 Grove Avenue
Claremont
South Africa
7708
Tel: +27 21 674 0294
Fax: +27 21 674 0295
Web: http://www.alcdashley.co.za
Mail: service@alcdashley.co.za
Svenska
Rakspecialisten HS
Möllevångsgatan 34
214 20 Malmö
Tel.: +46 40 12 07 70
Fax: +46 40 6 11 03 35
E-Mail: info@rakspecialisten.se
Switzerland
SPC Electronics AG
Mövenstrasse 12
CH-9015 St. Gallen
Tel.: +41 71 227 99 99
E-Mail: service@spcag.ch
www.spc.ch
Thailand
Verasu Ltd. part.
83/7 Wireless Rd., Lumpini,
Patumwan, Bangkok 10330
Tel.: +662 254 81 008
E-Mail: askverasu@verasu.com
Tunisie
GEI
54, rue du Mercure
Zone Industrielle 2013-BEN AROUS
TUNISIE
Ukrayina
Service for Modern Electronics LLC
Sim'i Khokhlovykh Str.8
4119 Kiev
Tel.: +38 044 247 67 34
E-Mail: info1@photoservice.com.ua
United Kingdom
Homespares Centres Limited
Firwood Industrial Estate
Thicketford Road
Bolton, BL2 3TR
Tel.: 01204 558160
Fax: 01204 558169
E-Mail: office@homespares.co.uk
Web: www.homespares.co.uk
Vietnam
BRAND PARTNER
CTY TNHH DOI TAC NHAN HIEU
2/7 NGUYEN THANH Y
DA KAO WARD, DISTRICT 1
HO CHI MINH CITY, VIETNAM
Tel.: +84 862 899 648
Fax: +84 862 899 649
E-Mail: info@brandpartner.vn
Stand: 02.2020