
KBB5X - Fridge ELECTROLUX - Free user manual and instructions
Find the device manual for free KBB5X ELECTROLUX in PDF.
User questions about KBB5X ELECTROLUX
0 question about this device. Answer the ones you know or ask your own.
Ask a new question about this device
Download the instructions for your Fridge in PDF format for free! Find your manual KBB5X - ELECTROLUX and take your electronic device back in hand. On this page are published all the documents necessary for the use of your device. KBB5X by ELECTROLUX.
USER MANUAL KBB5X ELECTROLUX
Thank you for purchasing an Electrolux appliance. You have chosen a product based on decades of professional experience and innovation. Ingenious and stylish, it was designed with you in mind. Optimal performance is guaranteed whenever you wish to use it. Welcome to Electrolux.
Visit our website to:

For advice, to download our brochures, resolve any fault or obtain information on support: www.electrolux.com

Register your product for even better service: www.electrolux.com/productregistration

Buy accessories, consumables and genuine spare parts for your appliance: www.electrolux.com/shop
CUSTOMER SERVICE AND MAINTENANCE
We always recommend the use of original spare parts.
When contacting the Service Centre, make sure you have the following details at hand. The information can be found on the data plate: Model, appliance number (PNC) and serial number.

Caution/Warning - Important Safety information.

General information and tips.

Environmental considerations.
Subject to change.
1. SAFETY INFORMATION
Read the instructions with care before installing and operating the appliance. The manufacturer is not responsible for injuries and damage caused by improper installation and use of the appliance. Always keep the instructions at hand for future reference.
1.1 Safety of children and vulnerable people
- This appliance can be used by children aged 8 years and older and adults with limited physical, sensory or mental abilities or lack of experience or knowledge concerning use of the equipment, only if supervised or instructed on the use of the appliance and only if they understand the risks involved.
- Do not allow children to play with the appliance.
- Keep packaging materials out of the reach of children.
- Cleaning and maintenance operations should not be performed by unsupervised children.
1.2 General safety warnings
- The appliance is designed for domestic use and similar purposes, for example:
- in country houses, shop kitchens, offices and other work environments;
- by guests at hotels, motels, bed and breakfasts and in other residential environments.
- Use the appliance only to preserve foods.
- Check that the ventilation openings of the appliance and in the recessed structure are not obstructed.
- Do not use mechanical devices or other artificial means not recommended by the manufacturer for the de-icing.
- Do not damage the refrigeration circuit.
-
Do not use electrical appliances inside the food storage components.
-
Do not use water or steam spray to clean the appliance.
- Clean the appliance with a soft damp cloth. Only use neutral detergents. Do not use abrasive cleaners, scouring pads, solvents or metal objects.
- Do not use this appliance to store explosive substances such as aerosol cans containing a flammable propellant.
- If the power cord is damaged, it must be replaced by the manufacturer, an authorised technician or a qualified person in order to avoid dangerous situations.
2. SAFETY INSTRUCTIONS
2.1 Installation

WARNING!
The appliance must be installed by qualified personnel.
- Remove all packaging materials.
- Do not install or use the appliance if it is damaged.
- Follow the instructions provided with the appliance.
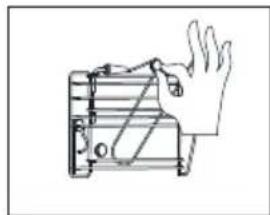
Always handle the appliance with care as it is very heavy. Always wear safety gloves. - Make sure that air can circulate freely around the appliance.
- Wait at least 4 hours before connecting the appliance to the mains. This allows the oil to flow back into the compressor.
- Do not install the appliance near heaters, stoves, ovens and hobs. The back of the appliance must rest against the wall with duct.
-
Do not install the appliance in an area exposed to direct sunlight.
-
Do not install this appliance in places that are too damp or cold, for example in structural additions, garages or cellars.
- To move the appliance, lift it up from its front edge so as not to scratch the floor.
2.2 Electrical connection

WARNING!
Risk of fire and electrical shock.
- All electrical connections must be made by a qualified electrician.
- The appliance must be earthed.
- Make sure that the electrical data on the rating plate corresponds with the values of the power supply system. If not, contact an electrician.
- Always use an electrical outlet with an adequately installed protective contact.
-
Do not use power strips and extension cords.
-
Make sure not to damage the electrical components (e.g. the power plug, power cord or compressor). Contact the Service Centre or an electrician to replace the electrical components.
- The power cord must remain below the level of the power plug.
- Insert the power plug in the socket only after installation. Make sure that the power plug can still be accessed after installation.
- Do not pull the power cord to disconnect the appliance. Always hold the plug when pulling it out.
2.3 Use

WARNING!
Risk of fire and electrical shock.
- Do not change the specifications of this appliance.
- Do not place electrical devices (e.g. ice cream makers) in the appliance unless specifically allowed by the manufacturer.
- Make sure not to damage the refrigeration circuit. It contains an R404a mixture, a non-flammable gas at atmospheric pressure.
- In the case of damage to the refrigeration circuit, make sure that no flames or sparks can develop in the room. Ventilate the room well.
- Do not place hot objects on the plastic parts of the appliance.
- Do not store flammable liquids and gas in the appliance.
- Do not put or keep liquids or flammable materials, or highly flammable objects on, inside or near the appliance.
- Do not touch the compressor or condenser. These are hot.
2.4 Maintenance and cleaning

WARNING!
Risk of injury or damage to the appliance.
- Before performing maintenance, always switch off and unplug the appliance.
- The cooling unit of the appliance contains hydrocarbons. The unit must be refilled and inspected only by qualified personnel.
- Regularly check the drain of the appliance and clean it if necessary. Obstruction of the drain can cause the pooling of water.
2.5 Disposal

WARNING!
Risk of injury or suffocation.
- Unplug the appliance.
- Cut off the power cord and dispose of it.
- Remove the door catch to prevent children and pets from being trapped in the appliance.
- The refrigeration circuit and the insulation materials are ozone-friendly.
- The insulating foam contains flammable gases.
- Contact the local authorities for information on how to properly dispose of the appliance.
- Do not damage the components of the refrigeration unit that are close to the heat exchanger.
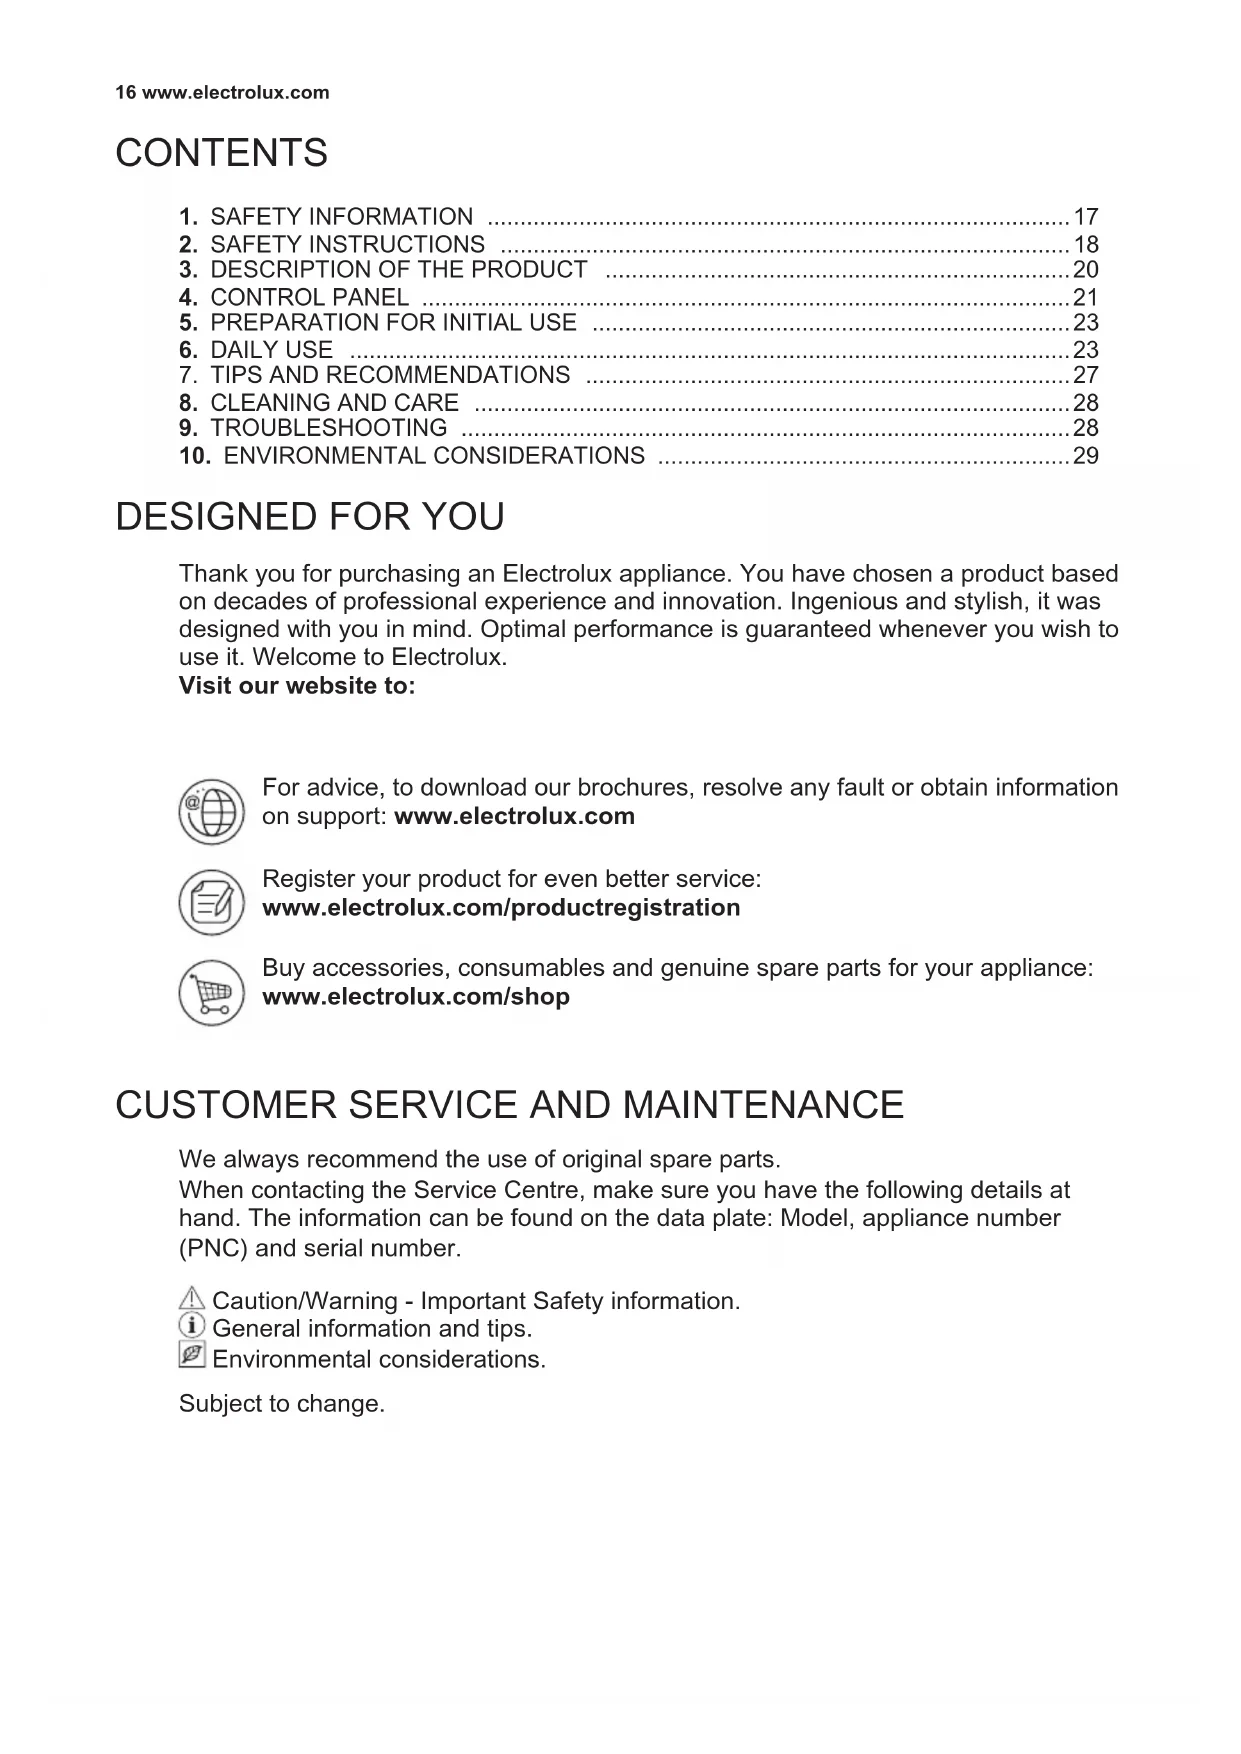
3. DESCRIPTION OF THE PRODUCT
The blast chiller is designed for the professional sector and is intended to be used to chill (+3^) and blast freeze (-18^) food.
Raw and cooked foods preserved in this way maintain their organoleptic qualities
in the interest of flavour and freshness. At the end of each selected cycle, the appliance automatically switches to the holding phase, keeping the product at the preset temperature for a maximum of 24 hours.
1 Control panel
2 Rack holder
3 Food sensor
4 Gasket
5 Wire shelf
6 LED lights*
7 Handle for installation
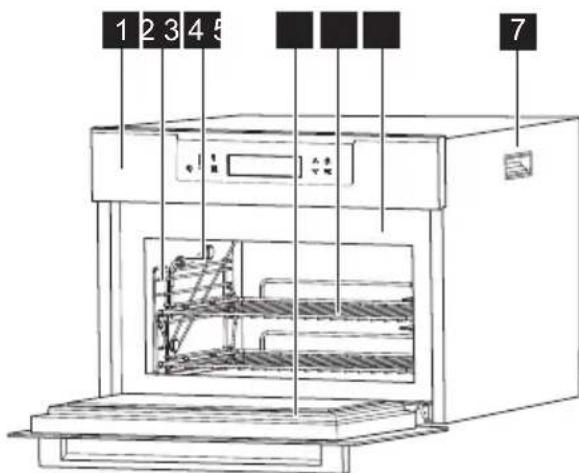
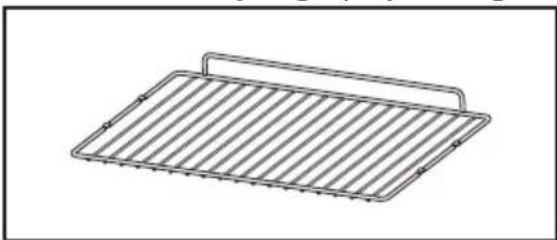
3.1 Accessories
Wire shelf x 2 Sponge (depending on the model)
Food sensor

*The LED lights will be disabled during defrost
4. CONTROL PANEL
4.1 Control panel
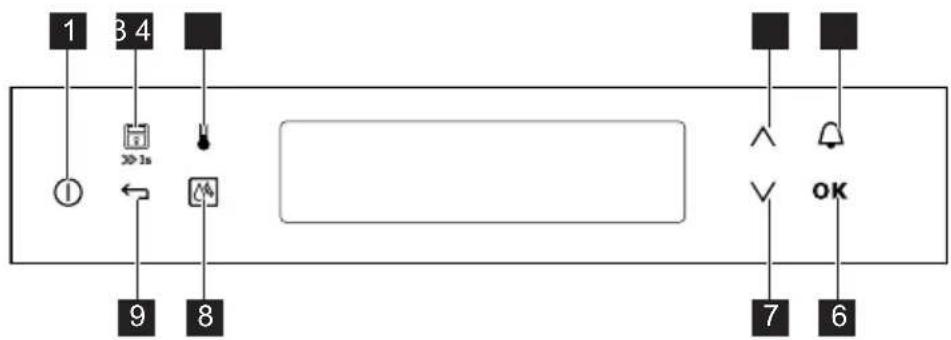
1 ON/OFF key
6 CONFIRM key
2 Display lock (3 s)
DOWN key
3 TEMPERATURE key
8 DE-ICE
4 UP key
9 BACK key
5 TIMER/ALARM
| Sensor key | Function Comment | |
| 1 | 1 | ON/OFF To turn the blast chiller on/off. |
| 2 | 3s | LOCK Display lock. Press this for 3 seconds to activate or deactivate it when a program is in progress. |
| 3 | Temperature Used to test the cell temperature for the current program. | |
| 4 | Up key To go up a vertical list or scroll left/right. | |
| 5 | Minute The user can set a timer/alarm. minder OK OK Confirms an action. | |
| 7 | Down key To go down a vertical list or scroll left/right. | |
| 8 | De-ice Function for removing ice in the cell. | |
| 9 | ← | Back key Used during the selection of programs to return to the previously selected level or program. |
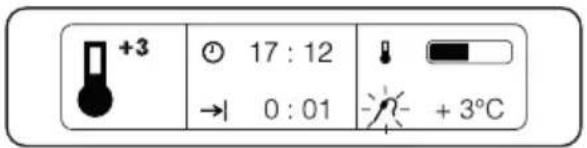
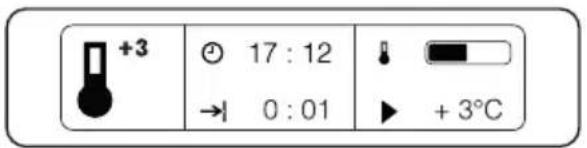
4.2 Display
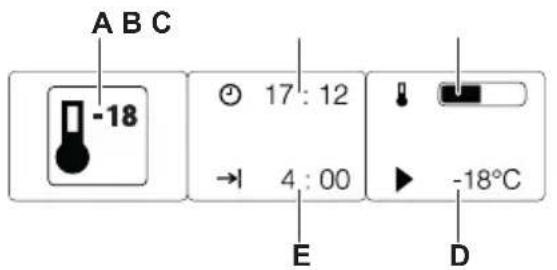
A. Cooling function
B. Time
C. Cooling indicator
D. Temperature
E. Duration of cycle/residual time
Other indicators on the display.
| Symbol Function | |
| Minute | Minute minder The function is active. |
| Time indication The current time appears. | |
| Temperature | Temperature The temperature appears on the display. |
| Set temperature The set temperature value appears on the display. | |
| Food sensor Use of the food sensor appears on the display. | |
| Duration | Duration The required duration of the cycle appears on the display. |
| End of cycle The residual time appears on the display. | |
| Timer | Timer The time elapsed since the start of the cycle appears on the display. |
5. PREPARATION FOR INITIAL USE

WARNING!
Refer to the chapters on safety.
5.1 Initial cleaning
Remove the accessories and removable shelf supports from the appliance.
i
Refer to the chapter "Cleaning and Care".
5.2 Initial connection
After connecting the appliance to the mains, set the language and time.
- Press and set the value.
- Press OK confirm.
6. DAILY USE

WARNING!
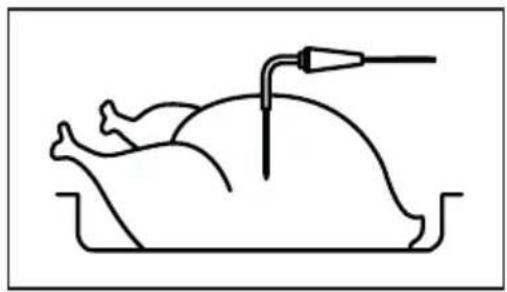
It is advisable to use the food sensor to optimise the operating times and consumption of the blast chiller.
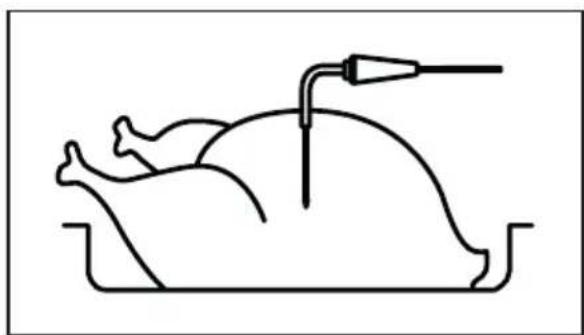
Make sure to insert the food sensor in the middle of the food (see figure).
6.1 Browsing the menus
- Switch on the appliance.
- Press and set the option in the menu.
- Press OK go to the sub-menu or accept the setting.
i
Press any time to return to the main menu.
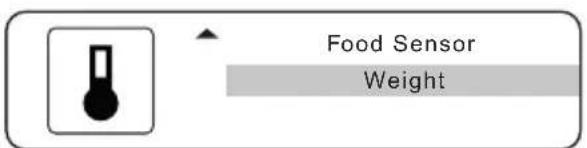
6.2 How to remove the food sensor
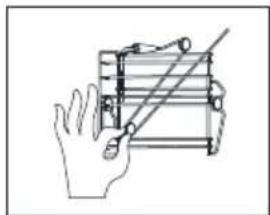

Procedure for blast chilling or freezing with food sensor
-
Press the ON/OFF key.
-
Select the required program and press OK to confirm.
-
Select "Food sensor", insert this in the food and press OK to confirm.
-
Modify the temperature as required and press OK to confirm.
-
The appliance runs the blast chilling cycle until the set temperature is reached.
At the end of the cycle, the appliance will switch to holding mode.
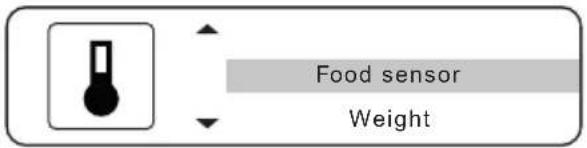
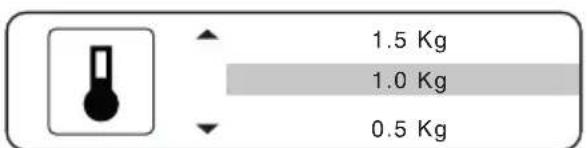
Procedure for blast chilling or freezing with weight
-
Press the ON/OFF key.
-
Select the required program and press OK to confirm.
-
Select "Weight" and press OK to confirm.
-
Select the quantity and press OK to confirm.
-
The appliance starts the blast chilling cycle. The total time and progressive time of the cycle appear on the display.
At the end of the cycle, the appliance will switch to holding mode.
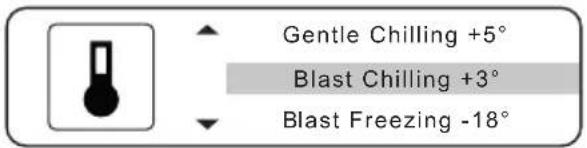
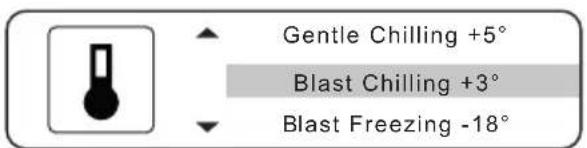
6.3 Blast chiller functions
| Symbol | Function | Application Temperature/ | weight range | Size |
| +5 | Gentle chilling Food sensor +5 / +10°C Whole Weight 1-2-3 Kg Slices/Soup/ | Sauces | ||
| +3 | Blast chilling Food sensor 0 / +10°C Whole Weight 0.5-3 Kg Slices/Soup/ | Sauces | ||
| -18 | Blast freezing Food sensor -5 / -20°C Whole Weight 0.5-3 Kg Slices/Soup/ | Sauces | ||
| * | Assisted cooling | Wine | Red 16°C / White 10°C / Sparkling 5°C | 1-6 |
| Cans | 1-6 | |||
| 1.5 L plastic bottle | 1-10 L | |||
| Assisted freezing | Fruit & vegetables -18°C | 0.5-3 Kg | ||
| Sashimi / Raw fish -20°C | 3 Kg | |||
| Ice cream / Desserts | Blast freezing of ice cream -20°C Ice cream ready to serve -14°C | |||
| Ice cubes | 0.5-3 Kg | |||

WARNING!
Keep the door closed during every blast chilling or freezing program.
If the door is not closed, the program does not start and a message appears on the screen prompting you to close it. If the door is opened during the
blast chilling or freezing cycle, the fan stops and then so does the compressor (after about 1 minute).
If the door remains open for more than two minutes the program is terminated.
6.4 Guidelines for the functions
| Symbol Function Suggested use Holding | ||
| +5 | Gentle chilling Load less than 0.5kg, single portion all vegetables (even if above 0.5kg) desserts, liquid foods and sauces vacuum cooking, mixtures | Refrigerator |
| +3 | Blast chilling Load more than 0.5kg, single portion meat, first courses au gratin puddings, whole fish | Refrigerator |
| -18 | Blast freezing Any food semi-frozen desserts | Freezer |

WARNING!
At the end of the indicated program the blast chiller maintains the set temperature for up to a maximum of 24 hours.

WARNING!
When using the function (blast chilling) with small quantities, single-portion foods, thin slices, vegetables, desserts, a thin layer of ice can form on the surface. This does not affect the quality of the processed food.

WARNING!
The function (sashimi / raw fish -20^) sanitises fish for raw consumption. The cycle lasts 28 hours. (4 hours for freezing and 24 hours for holding at -20^) Timing according to the European HACCP regulation on the sanitation of raw food.
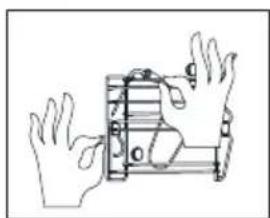
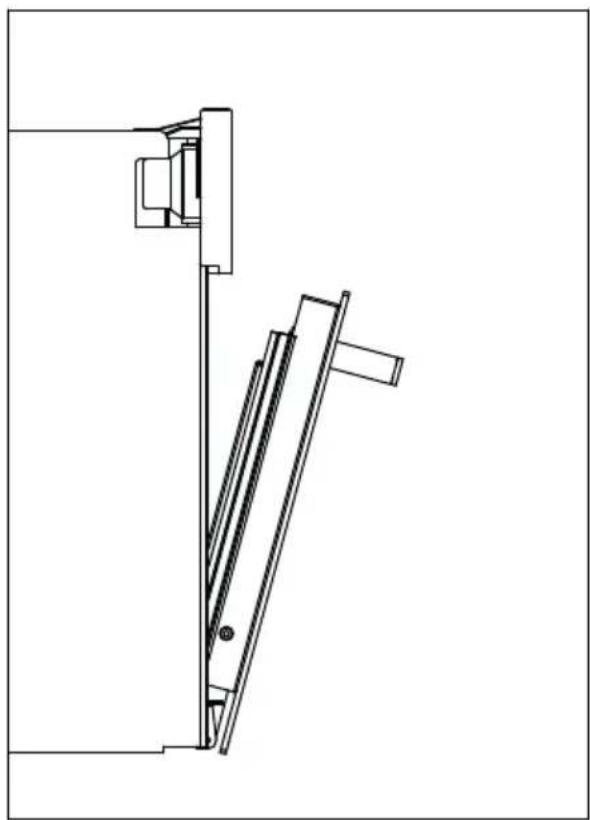
6.5 End of use

WARNING!
At the end of each use it is recommended to carefully dry the cavity to prevent condensation water from stagnating and generating unpleasant odours. Keep the door open as illustrated for at least 60 minutes after the cavity has been dried.
7. TIPS AND RECOMMENDATIONS
7.1 Sensor positioning
Always make sure that the tip of the food sensor is placed in the middle of the food (see picture).
7.2 Pre-cooling
Selecting the chilling cycles +5, +3, -18 automatically activates pre-cooling and "Pre-cooling done, please insert food now" appears on the appliance.
The assisted cooling and freezing cycles do not involve pre-cooling.
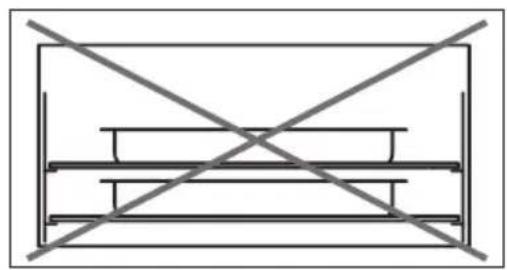
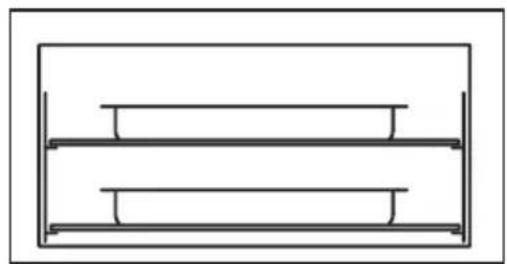
7.3 Loading the machine
To ensure good machine performance and not have any food alterations:
-
arrange the products so as to promote the circulation of cold air throughout the cell;
-
avoid prolonged and frequent door opening.
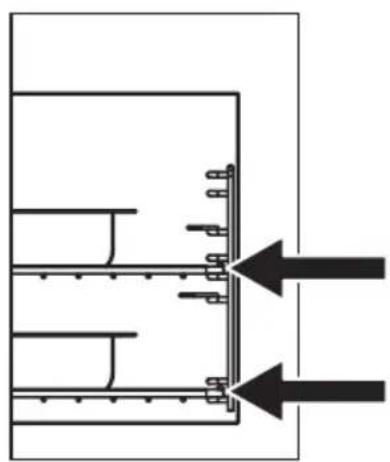
7.4 Cavity temperature
Temperature uniformity is ensured by the fins in the right hand shelf support.

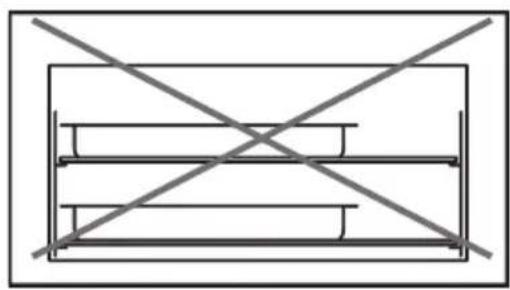
WARNING!
Make sure that the food items to be blast chilled and/or frozen do not overlap and are no greater than 65mm in thickness. Do not exceed the load recommended by the manufacturer (3kg)
8. CLEANING AND CARE
8.1 Routine cleaning
The appliance must be cleaned on a regular basis.
Avoid pulling, moving or damaging pipes and/or cables in the appliance. When cleaning the internal parts, do not use detergents, scouring powders, strongly scented products or wax polishes as they may damage the surface and leave a strong odour.
- Wash the inside surfaces with a solution of warm water and baking soda. Use 2 tablespoons of baking soda per litre of water.
- Wash the shelves with a mild detergent.
- Wring the excess water from the sponge or cloth before cleaning near the controls or any electrical components.
-
Wash the inside and accessories with warm water and mild soap.
-
Regularly inspect the door seals and use a damp cloth to remove dirt and residues.
- Rinse and dry thoroughly.
Make sure not to damage the refrigeration system.
After cleaning, plug the appliance back into the mains.
8.2 Periods of inactivity
If the appliance is not to be used for a long period, adopt the following precautions:
- unplug the appliance;
- remove all the accessories;
- clean the appliance and all the accessories;
- leave the door open to prevent the formation of unpleasant odours.
9. TROUBLESHOOTING

WARNING!
Refer to the chapters on safety.
9.1 What to do when...
| Problem Possible cause Solution | ||
| The appliance does not start up. | No power Check the electrical connection. | |
| Ice in the cavity. Excessive use of the appliance. | De-ice the appliance leaving the door open. | |
| Switch off the machine at the end of the cycle. | ||
| Excessive formation of water at the base of the cavity. | Intensiveuseoftheappliance and subsequent de-icing. | Use the sponge provided to dry the cavity. |
| The message “Please close door to continue program” appears on the display. | The door is not closed properly. | Check that the supporting surface of the gasket is clean. |
| Remove any ice on the frame of the door/gasket. | ||
| The touch screen does not respond to the commands. | The display is dirty. Clean the display and switch the machine off and on again. | |
| The food does not reach the required temperature | Incorrect setting of the chilling cycle. | Check the program and the distribution of food in the cavity. |
| Food is not arranged properly on the trays. | Check for any obstruction in the distribution of air. | |
| Food is excessively thick. Reduce the thickness of the food. | ||
| There is a cover or lid. Remove the cover or lid. | ||
| The temperature indicated by the food sensor is incorrect. | Incorrect insertion of the food sensor. | Check the position of the food sensor in the product. |
| The food sensor is damaged. Use only timed or assisted programs and contact the Service Centre to request a replacement. | ||
| The appliance prompts the user to insert the food sensor when it is in fact already inserted. | Broken food sensor. Contact the technical Service Centre. | |
| The lights do not work. | LED light failure. Contact the technical support service. | |
| The LEDs are switched off with the doors open. | De-ice function active. | Wait for the end of the program. |
| LED light failure. Contact the technical support service. | ||
10. ENVIRONMENTAL CONSIDERATIONS
Recycle materials bearing the symbol Put the packaging in special containers for recycling. Help protect the environment and human health by recycling waste electrical and electronic equipment.
Do not dispose of appliances marked with the symbol with normal household waste.
Take the product to your local recycling facility or contact your municipal office.
Contains fluorinated greenhouse gases.
Hermetically sealed.
Gas name: R404a
Total mass F-gas: 0.28 Kg
GWP: 3922
CO2equivalent:1,1t
