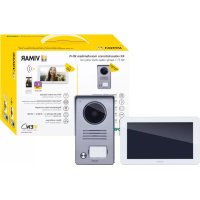
K40955 - Intercom Vimar - Free user manual and instructions
Find the device manual for free K40955 Vimar in PDF.



| Brand | Vimar |
| Model | K40955 |
| Product type | 7" TS Wi-Fi Video Kit (video intercom with touchscreen) |
| Display | 7 inch capacitive touchscreen, resolution 1024 x 600 (RGB) |
| Connectivity | Wi-Fi IEEE 802.11 b/g/n 2.4 GHz; VIEW Door app for iOS (9.0+) and Android (5.0+) |
| Power supply | DC input: 24 V via included power adapter; also compatible with DIN rail power supply (optional) |
| Dimensions (monitor) | 188.8 (W) x 113.6 (H) x 14.9 (D) mm (without wall mount); with mount: 188.8 x 113.6 x 18.4 mm |
| Dimensions (door station) | 90 (W) x 160 (H) x 20 (D) mm (without rain shield); with shield: 94.4 x 162.4 x 34.3 mm |
| Memory | Internal: 100 images, 10 videos; with micro SD card (SDHC, 8-128 GB, class 4-10): 1000 images, 1000 videos |
| Main functions | Video call from door station, intercom between indoor stations, remote gate/door release, automatic and manual recording, "Do Not Disturb" function, 6 melodies, brightness/color/contrast settings, adjustable ringtone and conversation volume |
| Door station | 120° wide-angle camera, 1000TVL, white LEDs for night vision, IP44 rating, IK07, aluminum housing, backlit nameplate, door strike control, surface mount |
| Interface languages | Italian, English, French, German, Spanish, Portuguese, Greek, Dutch |
| Care and cleaning | Wipe with a soft, dry cloth; do not use abrasive products or solvents |
| Security | Personal password (4-16 digits) for remote access; call notifications; OTA firmware update; GDPR-compliant data protection |
| Spare parts and repairability | Contact Vimar after-sales service; spare parts available through authorized network |
| General information | Operating temperature door station: -25°C to +55°C; monitor: -5°C to +35°C; installation by qualified personnel |
Frequently Asked Questions - K40955 Vimar
User questions about K40955 Vimar
0 question about this device. Answer the ones you know or ask your own.
Ask a new question about this device
Download the instructions for your Intercom in PDF format for free! Find your manual K40955 - Vimar and take your electronic device back in hand. On this page are published all the documents necessary for the use of your device. K40955 by Vimar.
USER MANUAL K40955 Vimar
natural_image
Front and back view of a silver electronic device with circular screens and control knobs (no visible text or symbols)K40945 - K40946 - K40955 - K40956
Kit Video 7" TS WiFi
7" TS Wi-Fi video kit
Characteristics & functions
System
The system supports up to two outdoor stations, one CCTV camera for each outdoor station and three indoor stations per family, up to a maximum of two families.
The video entryphones in a system may be all of the same type or of different types:
• Video entryphone in version with touch sensitive keys, available in kits K40910, K40911, K40912, K40930, K40931, K40932
• Video entryphone in touch-screen version, available in kits K40915, K40916, K40917, K40935, K40936, K40937 and
• Video entryphone in Wi-Fi touch screen version, available in kits K40945, K40946, K40947, K40955, K40956, K40957
Correct functioning of the Wi-Fi touch screen video entryphone, in a system, is guaranteed if two conditions are observed:
- The Wi-Fi touch screen video entryphone is configured as master.
- Outdoor stations art. 40921.P1 or 40921.P2 are used in the system; only these outdoor stations guarantee the remote operation functions of the Wi-Fi touch screen video entryphone itself.
Video entryphone
• 7" capacitive touch screen monitor.
• IEEE 802.11 b/g/n 2.4GHz Wi-Fi connectivity
- Possibility of receiving firmware upgrades via OTA (Over The Air)
- Remote operation of calls via one or more smartphones
- Actuator enabling7disabling (lock and gate)
- Internal flash memory and micro SD card support.
• Automatic and manual video/image recording
• Intercom function between indoor units (of the same family).
- Adjustable brightness, colour and contrast
- Adjustable ringtone volume and conversation volume
- 6 selectable ringtones
- "Do not disturb" function
- Multiple languages (Italian, English, French, German, Spanish, Portuguese, Greek, Dutch)
Technical data:
- DC input: 24V (via power supply unit, supplied)
- 7" LCD TFT screen
- LCD resolution 1024 x 600 (RGB)
- Micro SD card slot: SDHC format, - Memory size 8 - 128 GB, Speed class: Class4 - Class10
- Memory capacity: 100 images, 10 videos (video entryphone internal memory). With micro SD card: 1000 images, 1000 videos.
- Dimensions (mm) 188.8 (L) x 113.6 (H) x 14.9 (D) (without wall support) 188.8 (L) x 113.6 (H) x 18.4 (D) (with wall support)
- Wi-Fi IEEE 802.11 b/g/n 2.4GHz - recommended distance from router or Wi-Fi network extender: less than 20 m
- Frequency range: 2412-2472 MHz
- RF transmission power: < 100 mW (20 dBm)
App
• Available for both Android (Android 5.0 and later) and iOS (iOS 9.0 and later) systems
• Receiving calls outdoor station
• List of calls received function
• Image and/or video saving function from calls or consultation.
• Multi-device management function
- Lock or relay remote activation
- Setting communication time from 60s to 420s.
• Auto-rotate image function.
- Possibility of setting the frame rate (high quality: 20f/s; medium quality: 10f/s; low quality: 0.5f/s).
Entrance panel
- Two-wire audio-video unit with wide angle lens camera
• 120° horizontal wide angle, 1000TVL - White LEDs for night-time illumination
• Protection degree: IP44
• Degree of protection against impact: IK07
• Aluminium housing, vandal-resistant
• Speaker volume adjustment - Backlit name plate and call button
- Rainproof cover
• Electric door lock and/or automatic door control
• Surface-wall mount installation - When the outdoor station is in "speaking mode", i.e. when an "outdoor station-monitor" or "outdoor station-App" audio communication is activated, the push button lights and the lights behind the label holder light up intermittently
Technical data:
- Operating temperature: (-25 °C; +55 °C)
- Dimensions (mm) 90 (L) x 160 (H) x 20 (D) (without rainproof cover) 94.4 (L) x 162.4 (H) x 34.3 (D) (with rainproof cover)
Note:
For the correct operation of the Wi-Fi video entryphone and the "VIEW Door" App, the availability of a Wi-Fi network with suitable Internet access is required.
Power supply unit
Depending on the version, to power the system, the Kit includes a multi-plug power supply unit or a power supply unit for DIN rail; see the following pages for the technical characteristics.
- white light = "Do not disturb" function enabled
- flashing white light = New videos/photos in the memory
- Red light = Power ON
- flashing Red light = Wi-Fi connection unavailable or connection to cloud unavailable (this signalling has priority over all others).
3 Micro SD card slot
4 Microphone
5 Speaker
6 Connections:
- for power supply
- for bus (entrance panel/additional video entryphones)
1 Monitor
natural_image
Technical line drawing of a mechanical component with mounting holes and a labeled section (7), no text or symbols present.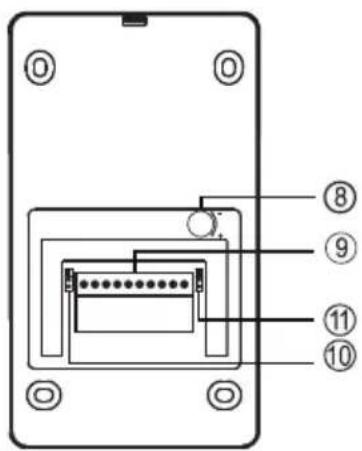
1 Microphone
2 LED lighting for night-time visibility
3 Camera
4 Speaker
5 Name plate with backlit name card holders
6 Call button
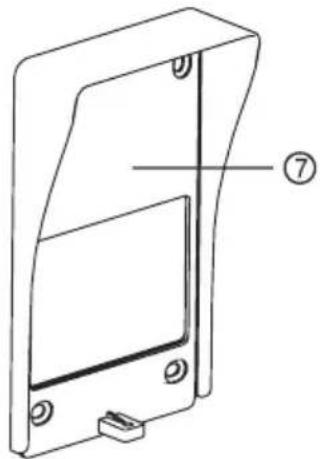
7 Rain-proof frame
8 Speaker volume control
9 Connection terminal block
10 Jumper for configuring entrance panel ID
11 Jumper for configuring NO/NC relay mode:
- NO = Normally open
- NC = Normally closed
Note: When the outdoor station is in "speaking mode", i.e. when an "outdoor station-monitor" or "outdoor station-App" audio communication is activated, the push button lights and the lights behind the label holder light up intermittently.
1 Microfone
Multi-plug power supply (for applicable versions)
AC supply voltage: 100 V - 240 V, 0.6 A, 50 Hz / 60 Hz DC output: 24V, 1A Dimensions (mm): 43.5 (W) x 80.4(H) x 38.5 (D) AU / EU / UK / US plug adapters
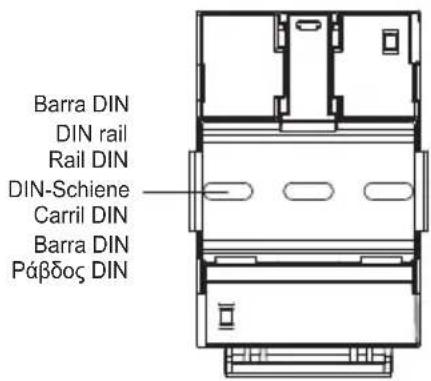
Power supply for DIN rail
Technical characteristics
- Power supply: 100 - 240 Vac 50/60Hz
- Maximum power consumption 0.8 A
- Power dissipation 3.5 W
- Output voltage (+/-) 24 Vdc nominal (SELV - EN60950-1).
- Max. current output: 1 A
- Operating temperature -5 °C +35 °C (indoor)
- 3 x 17.5 mm modules, dimensions: 55x91x54 mm
- □ Symbol for CLASS II
natural_image
Technical line drawing of a server rack with indicator lights and a blank screen (no text or symbols)Ingresso • Input • Entrée • Eingang • Entrada • Entrada • Eísoódoç
natural_image
Technical line drawing of a wall-mounted device with attached components, no text or symbols presentNote:
We recommend you install the video entryphone near the router in order to have a strong enough Wi-Fi signal. The received Wi-Fi signal strength is

shown on the Wi-Fi icon
- We advise against installing the monitor near large metallic objects or near devices which could generate electromagnetic fields.
- We recommend you perform an initial device configuration before connecting to the system bus (remember that monitor 40945.M must be configured as the master).
- The first time the video entryphone is turned on, the device will show the device's display language selection screen.
- For the system to function correctly, each device must have its own unique address (ID).
In the case of speech units, configuring the ID is done by configuring jumper 10.
In the case of video entryphones, configuring the ID is done by:
• indicating the main video entryphone as the Master;
• indicating additional video entryphones as Extension 1/Extension 2.
Please also note that the video entryphones included in the one-family and two-family kits are preconfigured as Master units, whereas the optional video entryphones are preconfigured as Extension 1.
- Once you have completed the previous steps, you can install and connect the devices to the family bus.
- Once the video entryphone is installed, use the
[GENERAL] icon to configure the CAM1, CAM2, CCTV1 and CCTV2 devices, which can be viewed by means of the [SWITCH] icon

and configure the actuators you wish to CK1, LOCK2, GATE1 and GATE2).
Remarques :
Entrance panel installation
- When installing the speech unit, make sure that you set:
o Entrance panel ID by means of jumper 10. The default setting for the entrance panel ID=A0. If also installing the optional speech unit (i.e. the second speech unit), the second device must be assigned a different ID to that of the first speech unit. Therefore, set ID = A1 by setting the jumper to the second position.
o Relay configuration: select NO or NC mode by means of jumper 11. If you do not wish to use the relay through the terminals (com; NO/NC). you can set the relay to NO/NC logic by means of jumper 11.
Note: When installing the entrance panel take care not to seal the bottom part.
Power supply for DIN rail: Possible installations
Installation on switchboard
natural_image
Technical line drawing of an electronic device showing internal components and housing (no text or symbols)Installation on junction box
natural_image
Technical line drawing of a mechanical housing assembly with two views: front view and side view (no text or symbols)Installation of a CCTV camera (optional)
The Vimar 46CAM.136B.8 camera can be connected to the CCTV and GND terminals of the speech unit. Maximum length: 100 m with SYV75-3 / RG59 cable
Single-family system connection diagram
- The minimum cable length between two video entryphones is 5 m.
- Multi-plug power supply: there are two forks, the red one must be connected to the 24V terminal and the black one to the GND terminal of the video entryphone.
- In systems consisting of two speech units, if a call is made from a speech unit while communication is already in progress between the other speech unit and the video entryphone, a busy signal (sequence of beeps) will indicate that the caller needs to wait for the line to become available.
Notas:
Two-family system connection diagram with two panels and up to three monitors per user
MAC: MAC address Wi-Fi
natural_image
Diagram showing a smartphone connected to a device via wireless signal waves (no text or symbols)
Initial monitor-smartphone configuration
Installation notes:
- We recommend you install the monitor near the router in order to have a strong enough Wi-Fi signal
- We advise against installing the monitor near large metallic objects or near devices which could generate electromagnetic fields
Once the system has been connected, the devices can be enabled.
Switching on the EVO Wi-Fi monitor may take approximately 40s.
The monitor has a label at the back featuring the following data:
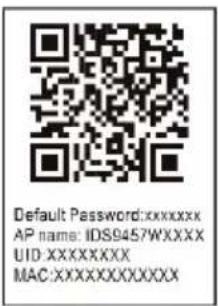
Device QR code
Default Password: initial password (password to be kept private and confidential)
AP name: device name in AP mode
UID: Unique monitor ID
MAC: MAC Wi-Fi address
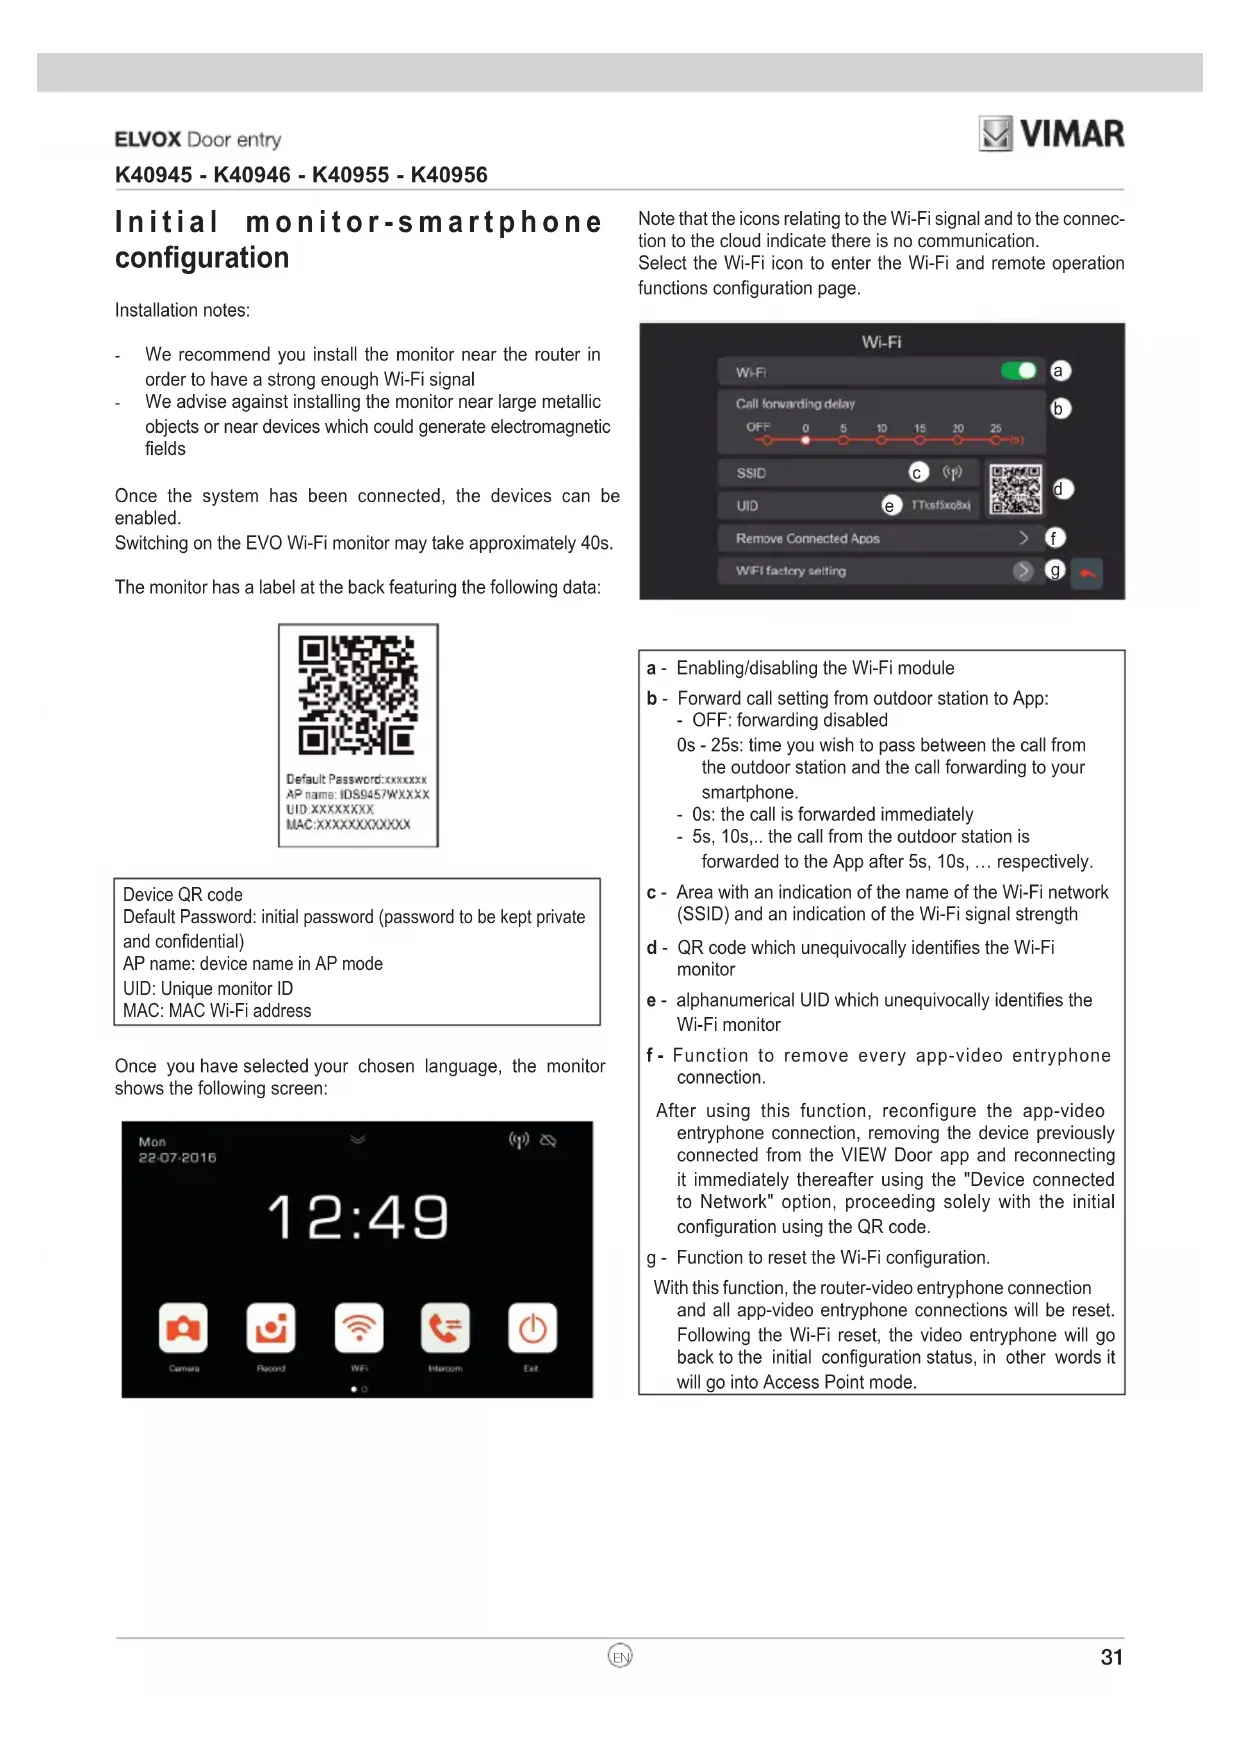
Once you have selected your chosen language, the monitor shows the following screen:
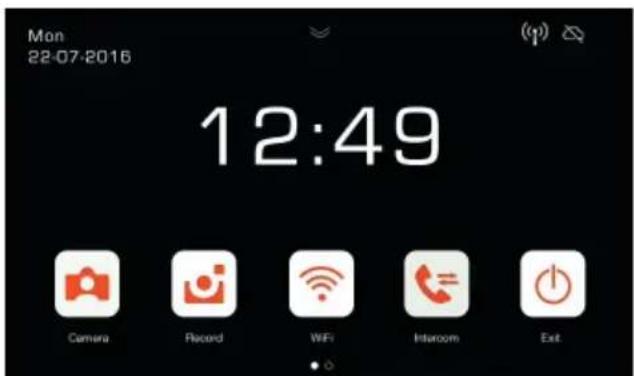
Note that the icons relating to the Wi-Fi signal and to the connection to the cloud indicate there is no communication.
Select the Wi-Fi icon to enter the Wi-Fi and remote operation functions configuration page.
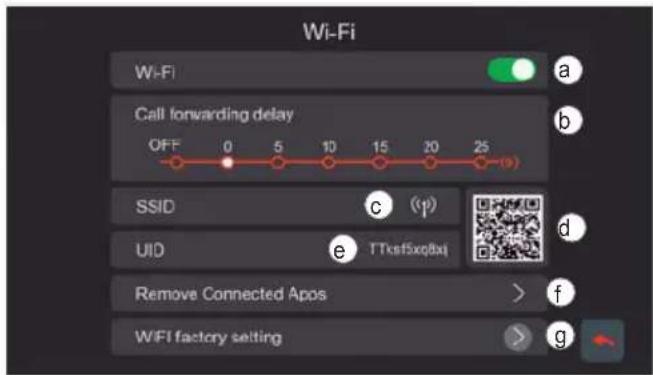
a - Enabling/disabling the Wi-Fi module
b - Forward call setting from outdoor station to App:
- OFF: forwarding disabled
0s - 25s: time you wish to pass between the call from the outdoor station and the call forwarding to your smartphone.
- 0s: the call is forwarded immediately
- 5s, 10s,.. the call from the outdoor station is forwarded to the App after 5s, 10s, ... respectively.
c - Area with an indication of the name of the Wi-Fi network (SSID) and an indication of the Wi-Fi signal strength
d - QR code which unequivocally identifies the Wi-Fi monitor
e - alphanumerical UID which unequivocally identifies the Wi-Fi monitor
f - Function to remove every app-video entryphone connection.
After using this function, reconfigure the app-video entryphone connection, removing the device previously connected from the VIEW Door app and reconnecting it immediately thereafter using the "Device connected to Network" option, proceeding solely with the initial configuration using the QR code.
g - Function to reset the Wi-Fi configuration.
With this function, the router-video entryphone connection and all app-video entryphone connections will be reset. Following the Wi-Fi reset, the video entryphone will go back to the initial configuration status, in other words it will go into Access Point mode.
Remote operation functions configuration:
The connection of the monitor to the Wi-Fi network can only be configured using the "VIEW Door" App available in the store.
Follow the steps set out below:
1) Make sure the Wi-Fi module (a) is enabled
2) During initial configuration, make sure the video entryphone is in AP mode, in other words the icon AP 📁 appears in (c). If the monitor is not in AP mode, reset the configuration of the Wi-Fi module (g).
3) Enable the App, which displays the monitor-app configuration screen:
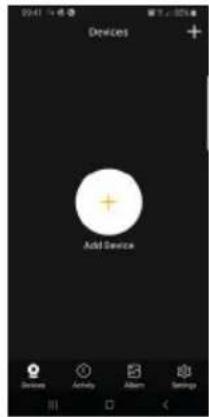
Tap once on "+" to connect the monitor to the App.
4) Select "New Device" if the monitor has not yet been connected to a Wi-Fi network.
If the monitor has already been connected to a Wi-Fi network, then select "Device connected to network" (Device connected to the network)
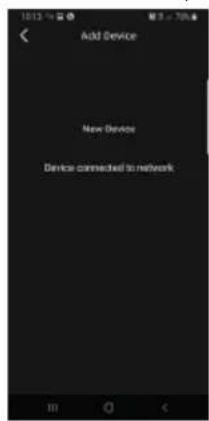
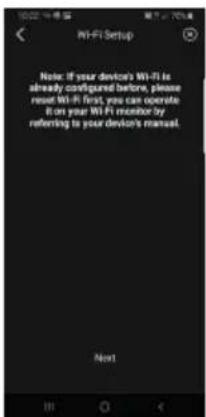
5) Once you have selected "New Device", the App will prompt you to scan the QR code (d) of the monitor you wish to configure. Once the QR code has been scanned, the App will remind you that the monitor needs to be in AP mode, as shown in the figure below:
6) At this stage, the App will start the search for all available Wi-Fi networks.
7) Should the app fail to detect Wi-Fi networks immediately, the following screen will appear:
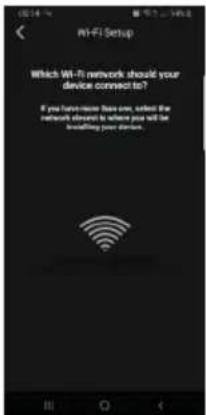
If this is the case, update the scree by swiping down on the smartphone screen.
Continue to update the screen (with a swipe) until the list of available Wi-Fi networks appears, as shown below:
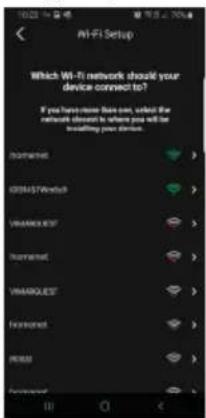
8) The App prompts you to select which network you wish to use.
We recommend you link up to the Wi-Fi network with the strongest signal.
Once you have selected the network, the App will prompt you to enter the password for the chosen Wi-Fi network.
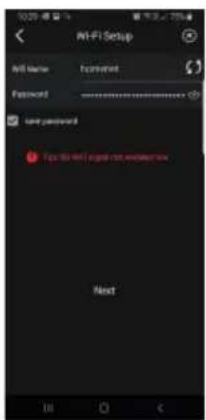
Note that only Wi-Fi networks with a frequency of 2.4GHz should be considered.
Enter the access credentials for the Wi-Fi network and proceed by tapping once on next
9) The App will proceed and connect the smartphone to the monitor, via the cloud
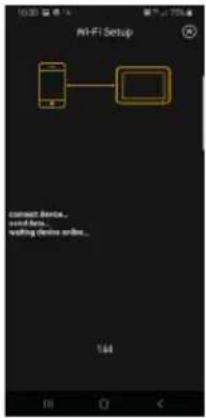
10) Once the connection is complete, the monitor home page will show the following as enabled:
- The Wi-Fi connection (and related signal strength)
- The connection to the Cloud
11) The page relating to the Wi-Fi settings, showing in c) the name of the Wi-Fi network (SSID) and the Wi-Fi signal strength
12) the App will prompt the following screen: you will be able to name the connection you have just configured.
Once you have chosen the name, proceed by tapping once on "Save".
K40945 - K40946 - K40955 - K40956
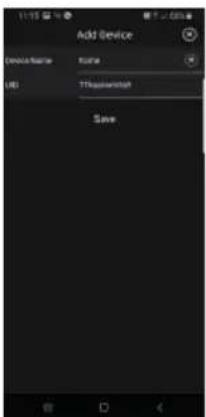
13) After saving, the device shows an initial image
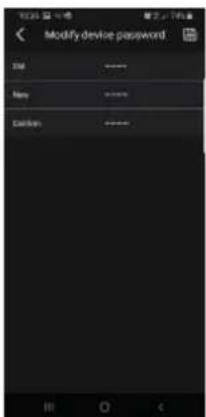
16) Once you have saved the new password, the connection between the App and the monitor proves enabled.
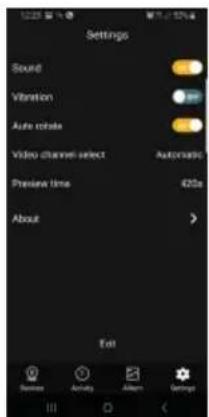
Sound: ringtone enabling
Vibration: vibration enabling
Auto-rotate: image auto-rotate enabling
Video channel select: automatic or manual selection
Preview time: maximum communication duration setting (from 60s to 420s).
Information: information on the App
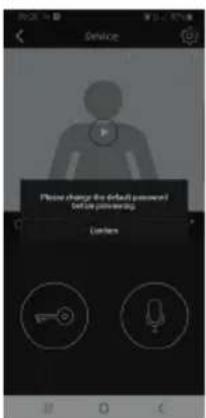
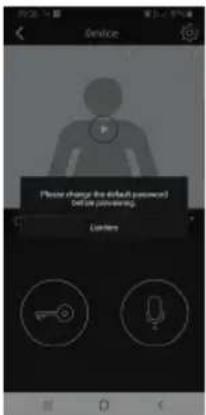
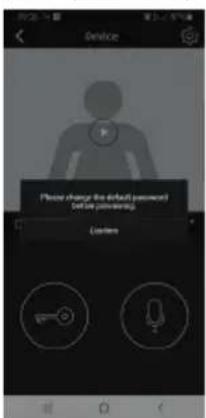
14) Tap once on the image to enable the connection and enter "preview" mode. As soon as the connection has been established, the App prompts you to change the password, switching from the default password to the password customised by the user. For security reasons, the password must comprise a series of numbers of between 4 and 16 digits. Tap once on "Confirm" to proceed
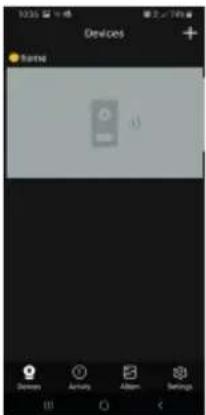
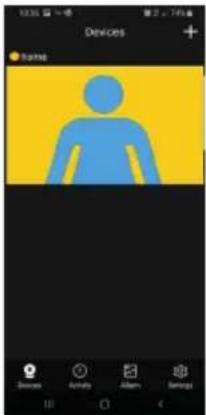
17) In the "Devices" section, you will therefore see the connection to the device referred to as "home" as enabled, as shown below:
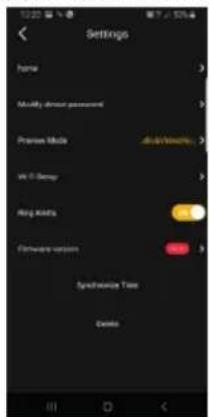
19) In the "Settings" section relating to the connected monitor, the following functions are available relating to the individual device connected:
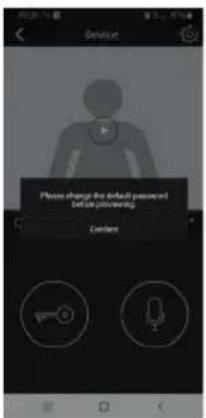
15) Proceed by entering a new password and confirming it. Keep a note of the password you have just set. Should you wish to connect the monitor to another smartphone, you will have to use the same password.
18) Note that when you enter the "Settings" section of the App you can define the following functions for all connected devices
K40945 - K40946 - K40955 - K40956
device: name of the device
Modify device password: menu to change the password
Preview Mode: video mode selection (high quality mode: 20 f/s;
medium quality mode: 10f/2;
low quality mode: 0.5f/s)
Ring Alerts: call notifications from outdoor station enabling
Firmware version: check firmware installed on the monitor and availability of possible upgrades
Synchronize time zone: function for synchronizing the time zone on which the video entryphone clock is based.
The function informs the video entryphone to use the same time zone used by the smartphone.
Once the time zone has been configured, the date and time of the video entryphone will be updated at:
- each video entryphone re-starting
- each update from the cloud (with a weekly frequency).
Delete: delete configured device from the App
Permissions enabled:
To run the app correctly make sure the required permissions are enabled.
For the Android system permission must be given for:
- Camera
- Location
- Storage
- Microphone
- Phone
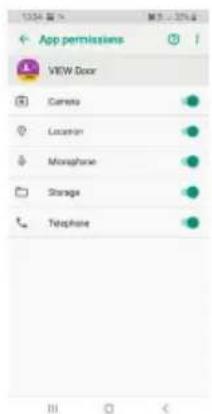
and notifications must be enabled:
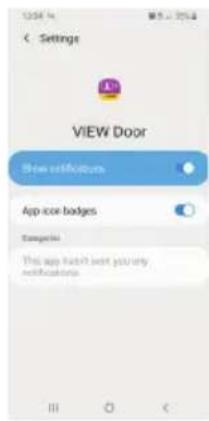
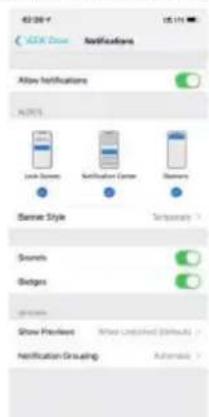
For the iOS system permission must be given for:

And notifications must be enabled:
Video entryphone-smartphone connection for a video entryphone already connected to the Wi-Fi network
If the monitor proves to have already been connected to a smartphone and you wish to connect it to another smartphone, proceed as follows:
1) Tap once on the "+" sign of the App:
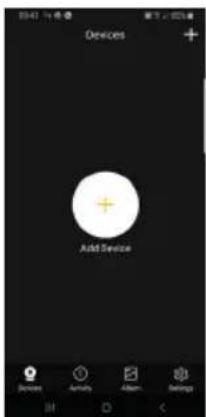
2) Select "Device connected to network". The following screen appears:
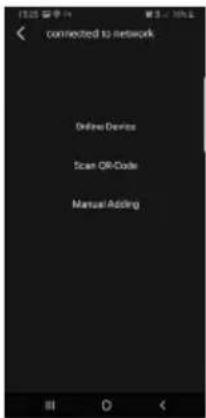
3) If the monitor has already been connected, specify which monitor should be connected to the smartphone.
The monitor can be identified using the three options shown in the image above:
- Online device: the monitor is already connected to the Wi-Fi network. If you connect the smartphone to the same Wi-Fi network, the monitor to be connected should prove available for selection from a list of devices.
- Scan the QR code: to identify unequivocally the monitor to connect to, simply scan the QR code of the monitor
- Manual configuration: manual entry of the monitor UID.
In any case, the connection will only be confirmed once you have entered the password already defined during the initial video entryphone-app configuration, as specified in the previous paragraph entitled "Initial video entryphone-smart-phone configuration"
"VIEW Door" app
The app basically consists of four sections:
Devices: lists the devices connected to the app
Activity: lists the notifications received
Album: shows the videos and photos related to the communications.
Settings: configuration of the main app functions.
In detail:
Devices
Each device connected to the app is marked by a name and an image relating to the last communication.
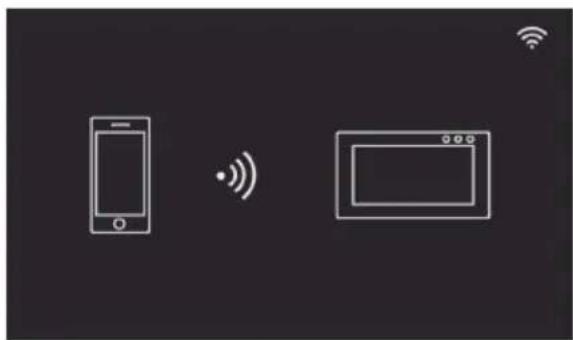
Note that the Outdoor station - App communication can be inter-rupted on the monitor display.
Activate the monitor display (if in stand-by) and swipe from left to right on the screen shown below to interrupt the communication immediately:
natural_image
Diagram showing a smartphone and a device with wireless signal icons, no text or symbols presentTap on the image to activate the video consultation mode; the images relating to the activated device appear on the app.
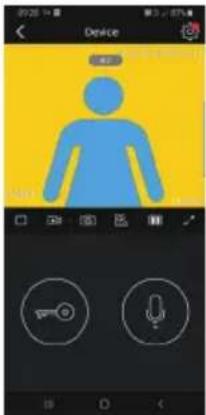
Generally, in preview mode the app will appear as shown in the following image:
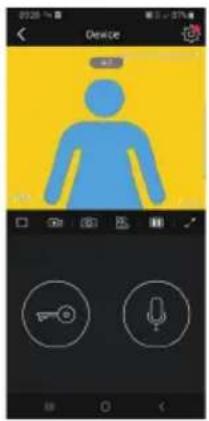

this icon to access the configuration of the spe-
cific device connected.
A red dot indicates that a more recent version of the monitor firmware is available.
- Timeout: Indication of the remaining communication time

Play / Stop button: enables/disables the video consultation
mode

Video camera: Record video

Photography: Capture image

Video device selection (the device must be activated in general" section)

Image quality for preview mode:

high quality (20fps);

medium quality (10fps);
:
ow quality (0.5fps).
The possibility to reduce the image quality may be useful if there is limited data communication bandwidth availability.

Video image rotation
Lock: lock activation (the actuator must be activated in neral" section)
Microphone: audio communication activation (when the communication is active, the call button LED and the name under LED on the indoor station will flash intermittently).
Activity
A time list is given indicating all the call notifications
Album
Contains the videos and photos recorded during communications
Settings
Used to configure some features of the connected device.
natural_image
Diagram showing a smartphone connected to a device via wireless signal waves (no text or symbols)
QR Code des Geräts
K40945 - K40946 - K40955 - K40956
natural_image
Diagram showing a smartphone connected to a device via wireless signal waves (no text or symbols)
natural_image
Diagram showing a smartphone connected to a device via wireless signal waves (no text or symbols)QR Code do dispositivo Default Password: password inicial (password a manter reservada) AP name: nome do dispositivo no AP mode UID: Identificativo unívoco do monitor MAC: MAC address Wi-Fi
8) A app pede a que rede se pretende ligar.
natural_image
Diagram showing a smartphone connected to a device via wireless signal waves (no text or symbols)
natural_image
Diagram showing a smartphone connected to a device via wireless signal waves (no text or symbols)In standby mode, touching any part of the display will bring up the screen showing the device's main functions.
Scrolling down on the arrow shown on the main screen accesses the mute and auto record settings.
Scrolling horizontally access the device settings.
Page d'accueil
Notes regarding mute and auto record settings:
Scrolling down on the arrow shown on the main screen accesses the following settings:
- For enabling/disabling "Mute" function
icon). - For enabling/disabling auto record on panel call and selecting the mode (


| • Cattura imagine automaticamente • Automatic image capture• Capture automatique d'images • Automatisches Standbild• Captación automática de imágenes • Captura de imagem automaticamente• Autóματη λήψη εικόνας | |
 | • Registra video automaticamente • Automatic video recording• Enregistrement vidéo automatique • Automatische Videoaufnahme• Grabación automática de vídeo • Grava vídeos automaticamente• Autóματη εγγραφή βίντεο |
 | • Funzione di registrazione disattivata (Icona di colore Grigio)• Record function deactivated (grey icon)• Fonction d'enregistrement désactivée (icône grise)• Aufnahmefunktion deaktiviert (Symbol in grauer Farbe)• Función de grabación desactivada (icono de color Gris)• Função de gravação desativada (Ícone de cor Cinza)• Απενεργοποιημένη λειτουργία εγγραφής (εικονίδιο γκρι χρώματος) |
By pressing the [Camera] icon, icon on the main screen, the camera will activate and the video entryphone will display the image from the speech unit.
Fonction auto-allumage

Operation: Entrance panel call
When a visitor presses the call button on the entrance panel, an image of the visitor is displayed on the video entry-phone screen and communication with the speech unit can be activated/deactivated by pressing the [Communication]
Press the [Intercom] icon on the main screen, select the indoor unit you want to call, then press the [Communi-

cation] icon to start the call.
The intercom function is used only to communicate between devices in the same family.
Fonction appel intercom- municant

Multimedia - Archiving images and videos
Without an SD card the video entryphone can record up to 100 images and 10 videos in the internal memory.
Inserting a Micro SD card, the video entryphone can record up to 1000 images and 1000 videos.
When the memory is full, the oldest pictures or videos will be overwritten.
Viewing images and videos
Press the [Photo] icon or [Video]
icon L on the main screen to review stored images and videos. In the photo and video list, a red dot indicates that images/videos have not yet been displayed.
Notes:
- The micro SD card must be formatted from the video entryphone before use (icon) - The kit does not include a micro SD card
 | [Melodia] Permette di impostare la suoneria per le chiamate da posti esterni e intercomunicanti.[Melody] For setting the ringtone for speech unit calls and intercom calls.[Mélodie] Permet de choisir la sonnerie pour les appels provenant de postes extérieurs et les appels intercommunicants.[Melodie] Hiermit kann der Rufton für Außenstellen- und Internrufe eingestellt werden.[Tono] Permite configurar el timbre para las llamadas desde aparatos externos e intercomunicantes.[Melodia] Permite definir o toque para as chamadas a partir de postos externos e intercomunicantes.[Μελωδία] Παρέχει τη δυνατότητα ρύθμισης του κουδουνιού για τις κλήσεις από εξωτερικούς σταθμούς και τις κλήσεις ενδοεπικοινωνίας. |
 | [Silenzioso] Permette di abilitare/disabilitare la funzione di "Mute" e impostare l'intervallo di tempo della modalità "Non disturbare".[Mute] For enabling/disable the mute function and setting the time interval for "Do not disturb" mode.[Silencieux] Permet d'activer/de désactiver la fonction « Silence » et de définir l'intervalle de temps de la fonction « Ne pas déranger ».[Lautlos] Hiermit kann die Funktion "Lautlos" aktiviert/deaktiviert und das Zeitintervall des Modus "Nicht stören" eingestellt werden.[Silencio] Permite activar/desactivar la función de "Mute" y configurar el tiempo del modo "No molesten".[Silencioso] Permite habilitar/desabilitar a função de "Mute" e definir o intervalo de tempo do modo "Não incomodar".[Σίγαση] Παρέχει τη δυνατότητα ενεργοποίησης/απενεργοποίησης της λειτουργίας «σίγασης» και ρύθμισης του χρονικού διαστήματος του τρόπου λειτουργίας «Μην ενοχλείτε». |
 | [Indirizzo] Permette di attivare/disattivare la ricezione di chiamate intercomunicanti e impostare l'ID videocitofoni (master, secondario 1 e secondario 2).[Address] For activating/deactivating receipt of intercom calls and setting the ID of video entryphones (master, slave 1 and slave 2).[Adresse] Permet d'activer/de désactiver la réception d'appels intercommunicants et de définir l'ID des portiers-vidéo (maître, secondaire 1 et secondaire 2).[Adresse] Hiermit kann der Empfang von Internrufen aktiviert/deaktiviert sowie die ID der Videohaustelefone (Master, Nebengerät 1 und Nebengerät 2) eingestellt werden.[Dirección] Permite activar/desactivar la recepción de llamadas intercomunicantes y configurar el ID de los videoporteros (master, secundario 1 y secundario 2).[Endereço] Permite ativar/desativar a receção de chamadas intercomunicantes e definir o ID dos videoporteiros (master, secundário 1 e secundário 2).[Διεύθυνση] Παρέχει τη δυνατότητα ενεργοποίησης/απενεργοποίησης της λήψης κλήσεων ενδοεπικοινωνίας και ρύθμισης του ID των θυροτηλεοράσεων (master, δευτερεύουσα 1 και |
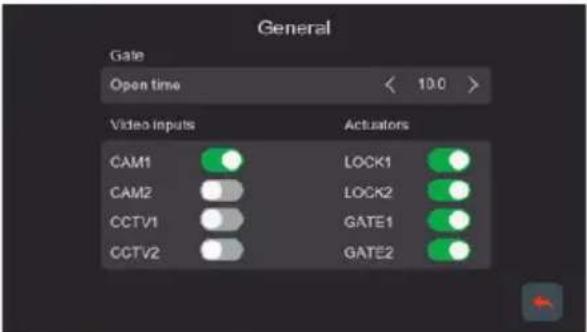 | |
| [Generale] Permette di impostare il tempo di attivazione del relè tra minimo 0,5 s e massimo 10 s. Nella stessa pagina è anche possibile attivare la consultazione dei segnali video CAM1, CCTV1, CAM2, CCTV2 ed abilitare l'utilizzo delle serrature autoalimentate LOCK1, LOCK2 e dei relè GATE1, GATE2.[General] Designed to set the relay activation time between a minimum of 0.5 s and a maximum of 10 s. On the same page, you can also activate consulting of the video signals CAM1, CCTV1, CAM2, CCTV2 and enable the use of the self-powered locks LOCK1, LOCK2 and relays GATE1, GATE2.[Général] Permet de définir le temps d'activation du relais entre 0,5 s (minimum) et 10 s (maximum). La même page permet également de valider la consultation des signaux vidéo CAM1, CCTV1, CAM2, CCTV2 et l'utilisation des gâches auto-alimentées LOCK1, LOCK2 et des relais GATE1, GATE2.[Allgemein] Hiermit kann die Aktivierungszeit des Relais von mindestens 0,5 s bis maximal 10 s eingestellt werden. Auf der gleichen Seite kann darüber hinaus die Abfrage der Videosignale CAM1, CCTV1, CAM2, CCTV2 und die Verwendung der eigenversorgten Türöffner LOCK1, LOCK2 sowie der Relais GATE1, GATE2 aktiviert werden.[General] Permite configurar el tiempo de activación del relé entre ralentí 0,5 s y máximo 10 s. En la misma página también es posible activar la consulta de las señales de vídeo CAM1, CCTV1, CAM2, CCTV2 y habilitar la utilización de las cerraduras alimentadas automáticamente LOCK1, LOCK2 y los relés GATE1, GATE2.[Geral] Permite definir o tempo de ativação do relé entre 0,5 s no mínimo e 10 s no máximo. Na mesma página é também possível ativar a consulta dos sinais de vídeo CAM1, CCTV1, CAM2, CCTV2 e habilitar a utilização dos trincos autoalimentados LOCK1, LOCK2 e dos relés GATE1, GATE2.[Γενικά] Παρέχει τη δυνατότητα ρύθμισης του χρόνου ενεργοποίησης του ρελέ μεταξύ 0,5 δευτ. το ελάχιστο και 10 δευτ. το μέγιστο. Από την ίδια σελίδα είναι ετίσης δυνατή η ενεργοποίηση του ελέχχου των σημάτων εικόνας CAM1, CCTV1, CAM2, CCTV2 και ενεργοποίησης της χρήσης των αυτοτροφοδοτούμενων κλειδαριών LOCK1, LOCK2 και των ρελέ GATE1, GATE2. | |
 | [Lingua] Permette di impostare la lingua del monitor.[Language] For setting the monitor display language.[Langue] Permet de définir la langue du moniteur.[Sprache] Hiermit kann die Monitorsprache eingestellt werden.[Idioma] Permite configurar el idioma del monitor.[Idioma] Permite definir o idioma do monitor.[Γλώσσα] Παρέχει τη δυνατότητα ρύθμισης της γλώσσας της οθόνης. |
 | [Data] Permette di impostare la data, l'ora del monitor e selezionare il formato della data.[Date] For setting the monitor display date and time and selecting the date format.[Date] Permet de régler la date, l'heure du moniteur et de sélectionner le format de la date.[Datum] Hiermit können Datum und Uhrzeit des Monitors eingestellt sowie das Datumsformat gewählt werden.[Fecha] Permite configurar la fecha y la hora del monitor y seleccionar el formato de la fecha.[Data] Permite definir a data, a hora do monitor e seleccionar o formato da data.[Ημερομηνία] Παρέχει τη δυνατότητα ρύθμισης της ημερομηνίας και της ώρας της οθόνης, καθώς και επιλογής της μορφής ημερομηνίας. |
 | [Memoria] Permette di eliminare tutte le immagini o i video nella scheda Micro SD o FLASH, copiare tutte le immagini dalla memoria Flash interna alla scheda micro SD e formattare la scheda Micro SD.[Memory] For deleting all images or videos in the micro SD or flash card, copying all images from the internal flash memory to the micro SD card and formatting the Micro SD card.[Mémoire] Permet d'éliminer toutes les images ou les vidéos de la carte Micro SD ou FLASH, de copier toutes les images de la mémoire Flash interne à la carte micro SD et de formater la carte Micro SD.[Speicher] Hiermit können alle Bilder oder Videos in der microSD-Karte oder im FLASH-Speicher entfernt, alle Bilder vom internen FLASH-Speicher in die microSD-Karte kopiert und die microSD-Karte formatiert werden.[Memoria] Permite eliminar todas las imágenes o los vídeo en la microtarjeta SD o flash, copiar todas las imágenes de la memoria Flash interna a la microtarjeta SD y formatear la misma.[Memória] Permite eliminar todas as imagens ou vídeos do cartão Micro SD ou FLASH, copiar todas as imagens da memória Flash interna para o cartão micro SD e formatar o cartão Micro SD.[Μνήμη] Παρέχει τη δυνατότητα διαγραφής όλων των εικόνων ή των βίντεο που υπάρχουν στην κάρτα Micro SD ή FLASH, αντιγραφής όλων των εικόνων από την εσωτερική μνήμη Flash στην κάρτα micro SD και διαμόρφωσης της κάρτας Micro SD. |
 | [Ripristina] Permette di ripristinare le impostazioni iniziali del sistema (ad eccezione di data, ora, indirizzo ID ed impostazioni Wi-Fi).[Restore] For restoring the initial system settings (except for the date, time, ID address and Wi-Fi settings.[Réinitialiser] Permet de réinitialiser les paramètres d'origine du système (sauf la date, l'heure, l'adresse ID et les réglages Wi-Fi).[Wiederherstellen] Hiermit können die Anfangseinstellungen des Systems (mit Ausnahme von Datum, Uhrzeit, ID-Adresse und WLAN-Einstellungen) wiederhergestellt werden.[Restaurar] Permite restablecer los ajustes iniciales del sistema (excepto fecha, hora, dirección ID y ajustes Wi-Fi).[Repor] Permite repor as definições iniciais do sistema (à exceção da data, hora, endereço ID e definições Wi-Fi.[Επαναφορά] Παρέχει τη δυνατότητα επαναφοράς των αρχικών ρυθμίσεων του συστήματος (με εξαίρεση την ημερομηνία, την ώρα, τη διεύθυνση ID και τις ρυθμίσεις Wi-Fi). |
The instruction manual is down- loadable from the site faidate. vimar.com
In compliance with the provisions of EU Regulation 2016/679 on the subject of personal data protection, Vimar S.p.A. guarantees that the processing using electronic means is carried out while reducing as much as possible the use of personal data and identification data, limiting their use to those cases in which they are strictly necessary to achieve the purposes for which they were collected. Vimar S.p.A. guarantees the implementation and observance of specific safety measures to prevent the loss of data, possible illicit or incorrect uses of the same and unauthorised accesses. The data subject's data will be processed in accordance with the provisions of the product privacy policy which can be consulted from our website www.vimar.com.
It is the responsibility of each data subject to guarantee and verify the ownership and safekeeping of their password and access codes to the web resources. Upon requesting support from the Vimar Service Centre, in order to enable the support activity, each data subject will need to provide the system access password. The provision of the same is considered as consent to the processing. Every
Data subject will be responsible and will have to modify the access password to the system following each intervention provided by the Service Centre
If the products film public venues and not just private property, the 'area under video surveillance' sign envisaged by the privacy regulations and specified on the Italian Data Protection Author - ity website must be displayed visibly.
Confidentialité
Installation should be carried out by qualified personnel in compliance with the current regulations regarding the installation of electrical equipment in the country where the products are installed.
Ensure clearance around the appliance so there is sufficient ventilation.
There must be no dripping or splashes of water on the appliance.
WARNING: To prevent injury, the appliance must be secured to the wall as described in the installation instructions.
Above the power supply there must be a bipolar circuit breaker that is easily accessible with a contact gap of at least 3 mm.
Conformity
RED directive
Standards EN 301 489-17, EN 300 328, EN 62311, EN 60065, EN 62368-1, EN 60950-1, EN 61000-6-1, EN 61000-6-3.
REACH (EU) Regulation no. 1907/2006 – Art.33. The product may contain traces of lead.
Vimar SpA declares that the radio equipment complies with Directive 2014/53/EU. The full text of the EU declaration of conformity is on the product sheet available at the following Internet address: faidate.vimar.com.

WEEE - Information for users
If the crossed-out bin symbol appears on the equipment or packaging, this means the product must not be included with other general waste at the end of its working life. The user must take the worn product to a sorted waste center, or return it to the retailer when purchasing a new one. Products for disposal can be consigned free of charge (without any new purchase obligation) to retailers with a sales area of at least 400m ^2 , if they measure less than 25cm. An efficient sorted waste collection for the environmentally friendly disposal of the used device, or its subsequent recycling, helps avoid the potential negative effects on the environment and people's health, and encourages the re-use and/or recycling of the construction materials.

- Characteristics & functions
- System
- Video entryphone
- Technical data:
- App
- Entrance panel
- Note:
- Power supply unit
- Micro SD card slot
- Microphone
- Speaker
- Connections:
- Monitor
- Multi-plug power supply (for applicable versions)
- Power supply for DIN rail
- Technical characteristics
- Remarques :
- Entrance panel installation
- Installation of a CCTV camera (optional)
- Notas:
- Initial monitor-smartphone configuration
- Remote operation functions configuration:
- K40945 - K40946 - K40955 - K40956
- Permissions enabled:
- Video entryphone-smartphone connection for a video entryphone already connected to the Wi-Fi network
- "VIEW Door" app
- Devices
- Activity
- Album
- Settings
- Page d'accueil
- Notes regarding mute and auto record settings:
- Fonction auto-allumage
- Operation: Entrance panel call
- Fonction appel intercom- municant
- Multimedia - Archiving images and videos
- Viewing images and videos
- Notes:
- Confidentialité
- Conformity
- WEEE - Information for users
Brand : Vimar
Model : K40955
Category : Intercom