Outdoor Security T0724 - Outdoor Lighting Vaxcel - Free user manual and instructions
Find the device manual for free Outdoor Security T0724 Vaxcel in PDF.

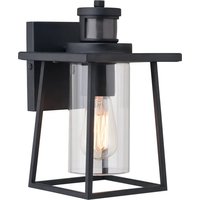
| Product Type | Outdoor solar light with motion sensor |
| Brand | Vaxcel |
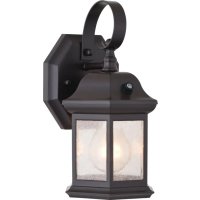
| Model | Outdoor Security T0724 |
| Category | Outdoor lighting |
| Solar panel dimensions | 18.73 cm (7-3/8 in) |
| Power source | Solar panel + rechargeable Li-ion battery 3.7V 2000mAh |
| Battery type | Lithium-ion 18650 3.7V 2000mAh |
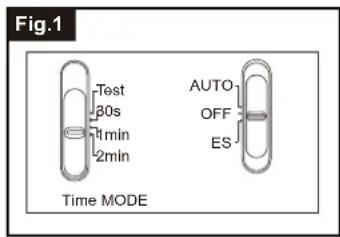
| Operating modes | OFF, Test, Auto, Energy Saving (ES) |
| Adjustable lighting duration | 30 seconds, 1 minute, 2 minutes |
| High color temperature | 5000K (white light) |
| Low color temperature | 2700K (warm light) |
| Detection range | Up to 9.15 m (30 ft) |
| Detection angle | 120 degrees |
| Detector sensitivity | Increases in cold weather |
| Installation | Wall mounting, optimal orientation towards the sun |
| Solar panel maintenance | Clean regularly with a damp cloth, avoid abrasives |
| Detector maintenance | Clean the lens every 1 to 2 months with a soft cloth |
| Battery replacement | Yes, accessible via cover on back of light |
| Warranty | 1 year against manufacturing defects |
| Customer service | info@vaxcel.com / 1-800-482-9235 |
Frequently Asked Questions - Outdoor Security T0724 Vaxcel
User questions about Outdoor Security T0724 Vaxcel
0 question about this device. Answer the ones you know or ask your own.
Ask a new question about this device
Download the instructions for your Outdoor Lighting in PDF format for free! Find your manual Outdoor Security T0724 - Vaxcel and take your electronic device back in hand. On this page are published all the documents necessary for the use of your device. Outdoor Security T0724 by Vaxcel.
USER MANUAL Outdoor Security T0724 Vaxcel
ASSEMBLY AND INSTALLATION INSTRUCTIONS
T0724
Important to Know
For best results, position the solar panel in a location where it will receive maximum sunlight. Ideally, the location should be free from cover or shade.
Installation Steps
-
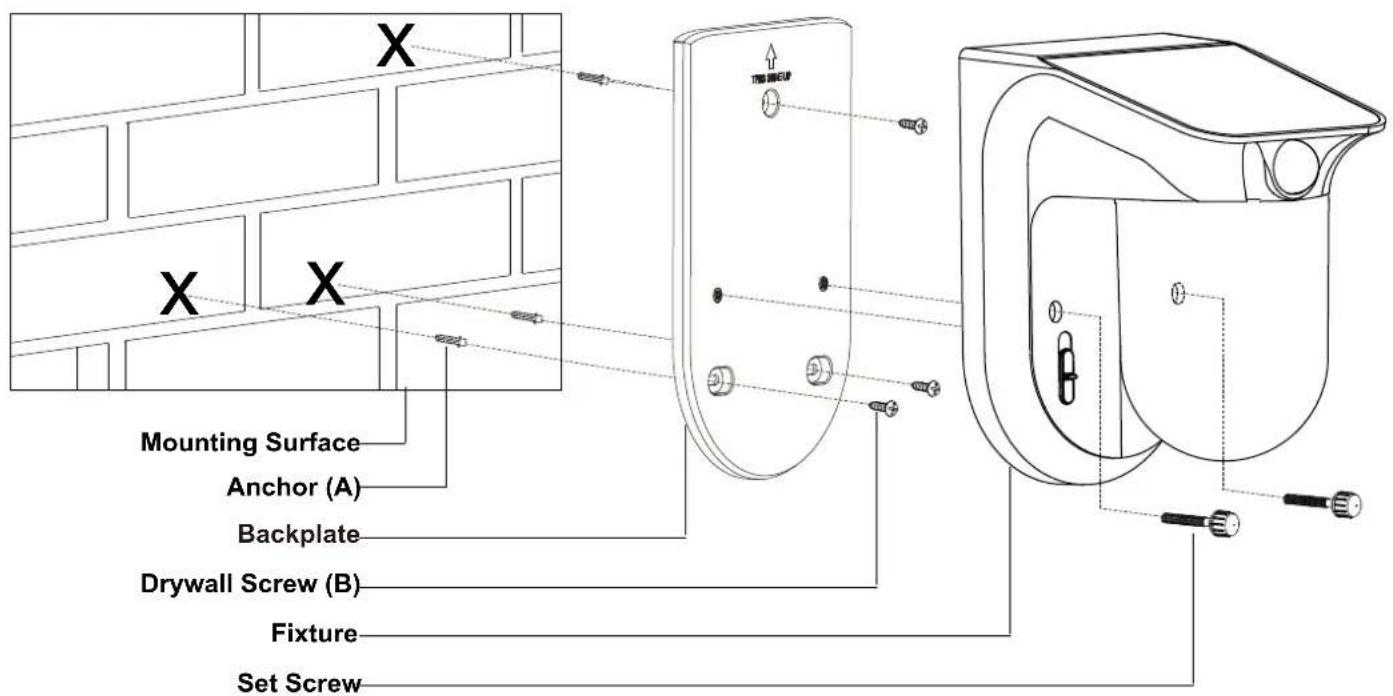
Unscrew the two set screws, remove the fixture from the backplate.
-
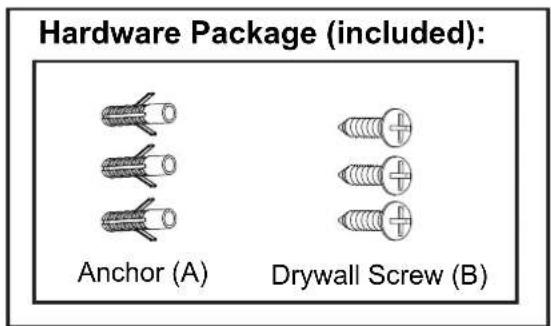
Place the fixture on the chosen surface as shown and mark the position of the 3 holes. Use an electrical drill (not included) to drill three holes into the mounting surface. Insert the anchors (A) in the holes.
-
If mounting to a wooden surface, drill three 3/32 in. holes into the mounting surface. Install the three drywall screws (B), through the backplate and into the mounting surface.
-
If mounting to wall board or brick, drill three 7/32 in. holes into the mounting surface. Insert the wall anchors (A) and attach the mounting plate using the three drywall screws (B).
-
Fasten the backplate onto the wall with three drywall screws (B).
- Attach the backplate of the fixture to the mounting surface by inserting set screws.
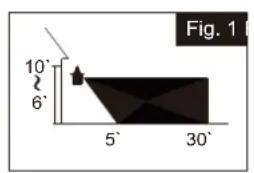
Choose a mode by sliding the switch on the bottom of the sensor of the fixture. (See Fig.1)
1. OFF MODE
- The fixture will have the MODE switch be set at "OFF" as default.
- In "OFF" MODE, the power is turned off to save power and improve battery charging.
-
TEST MODE (daytime and nighttime operation.)
-
Slide the "TIME" switch on the sensor head to the "Test" position
- Slide the "MODE" switch to "Auto" or "ES" position to operate test mode.
-
The light turns to high-level brightness (5000K) when motion is detected, and stays on as long as there's motion being detected. After there's no further motion being detected for 5 seconds, it will revert back to low-level brightness (2700K), and then turns off automatically after another 5 seconds if no further motion is detected.
-
AUTO MODE (nighttime operation only)
-
In "AUTO" mode, slide the "Time" switch to the desired time setting (30s/1min/2min). At dusk, the light turns on to low-level brightness (2700K). When motion is detected, the light turns to high-level brightness (5000K) and stays on as long as there's motion being detected. After there's no further motion being detected, the high-level brightness (5000K) will remain on for the predetermined time you set (30s/1min/2min), and then switches back to low-level brightness (2700K) automatically when no further motion is detected.
The light will turn off automatically at dawn. -
Energy Saving MODE (nighttime operation only)
-
In "ES" mode, slide the "Time" switch to the desired time setting (30s/1min/2min). At dusk, the light stays off. When motion is detected, the light turns to high-level brightness (5000K) and stays on as long as there's motion being detected. After there's no further motion being detected for the first 10 seconds, the high-level brightness (5000K) will reduce to low-level brightness (2700K) for the remaining predetermined time you set (30s/1min/2min), and then turns off automatically when no further motion is detected.
- The light turns off automatically at dawn.
Notes:
- The sensitivity of the motion sensor will increase as the environmental temperature gets cooler. For best performance, gently clean the lens with a soft cloth every 1 or 2 months to ensure maximum sensitivity.
- The fixture will provide a detection distance of up to 30 feet. (See Fig.1)
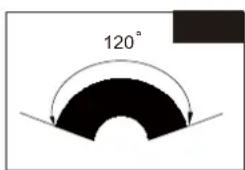
- The sensor detects movement across a detection range of 120 degrees. (See Fig.2)
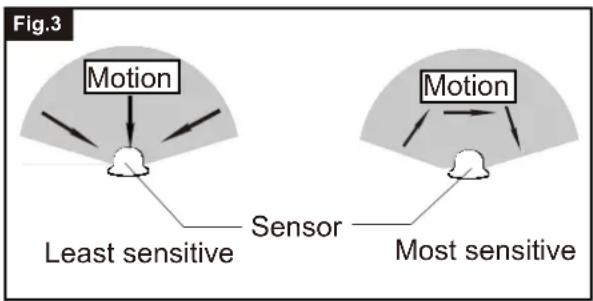
- The sensor will be more sensitive to motion across its detection path than motion directly towards it. (See Fig.3)
- To reduce possible nuisances, do not mount the fixture near a heat source like an air conditioner, vent or furnace exhaust, or in a direction facing any reflecting object or other light source.
Where you install your fixture is important: Be sure the light is mounted straight on the wall otherwise, the detection distance may be limited.
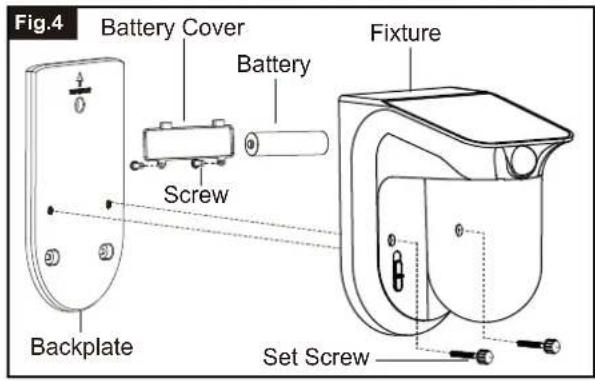
Changing Battery (Fig.4)
- Remove the two screws located on the back of the fixture.
- Open the battery cover on the back of fixture.
- Replace the old battery with a new battery making sure the polarity is correct.
Note: uses 1pc of 18650 3.7V 2000mah Lithium ion Battery.
- Restore the battery cover.
The following parts are available for reorder if damaged or missing.
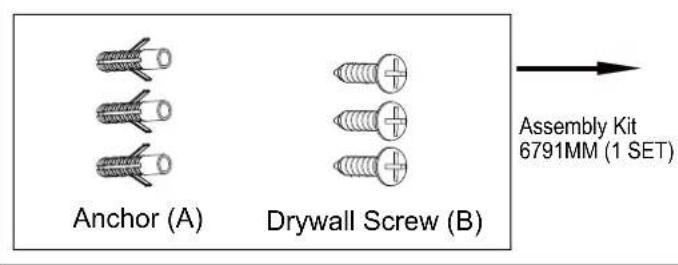
Spare Parts List:
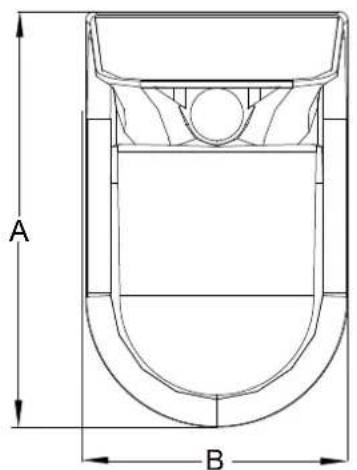
A:7-3/8"
B: 4-1/2"
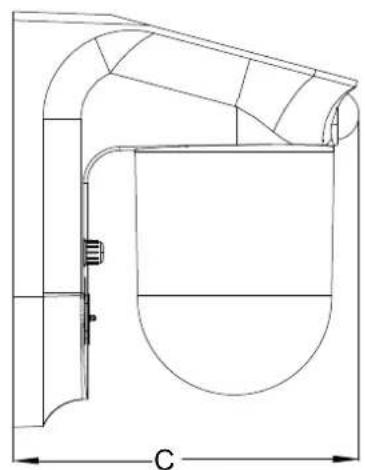
C:6-1/4"
CARE AND MAINTENANCE
- The solar panel should be cleaned with a damp cotton cloth on a regular basis. This will ensure optimal performance and battery charging.
- Never let any abrasive material come into contact with the solar panel.
TROUBLESHOOTING
| SolutionPossible C | ||
| Light does not turn ON | No power to the fixture. | Check that the fixture MODE switch is set at "Auto" or "ES". Check the battery to ensure that it is making secure contact with the terminals.If this does not work, replace with a new battery. |
| Solar cells will not charge | Solar panel may be blocked by trees or other objects does not receive direct sunlight. Rechargeable Battery is bad. | Make sure your solar panel is in a position that will enable the most amount of light to be absorbed. Replace with a new Rechargeable battery. |
| Light flickers | The light fixture has low battery charge. | The rechargeable battery needs at least a few hours of sunlight to recharge sufficiently. |
| The light comes on during the day. | The "TIME" switch is in the "TEST" position. | Set the "TIME" switch to the 30s, 1min, 2min in settings. |
| The lights stay on continuously. | The motion sensor may be picking up a heat source, such as an air vent, dryer vent, or brightly painted, heat-reflective surface. | Move light fixture to a new location. |
ausei
1 Year Warranty
Vaxcel warrants all of our products against defects in workmanship and finishes for one year following the date of shipment.
Additionally, all solar powered lighting is supported by a one year warranty for the functionality of the product.
Exclusions: This warranty does not include the failure of products from extreme acts of nature; environmental conditions not suited for the products intended use; operation in temperatures outside of the range specified in the instruction manual; usage with improper power supply, power surges or dips. For coastal locations, some corrosion is considered normal for the environment.
Vaxcel reserves the right to repair, replace or issue a credit for any properly installed product, provided it is returned per RMA instruction. This warranty is limited to the cost of the product only and does not extend to transportation, installation or replacement costs.
How can warranty service be obtained?
info@vaxcel.com
1-800-482-9235
INSTRUCCIONES DE ENSAMBLAJE INSTALLACION
T0724
B:11,43 cm (4-1/2 po)
C:15,88 cm (6-1/4 po)