FX1+2 - Bee Vevor - Free user manual and instructions
Find the device manual for free FX1+2 Vevor in PDF.
| Product Type | Beehive |
| Brand | Vevor |
| Model | FX1+2 |
| Dimensions | 562 x 462 x 760 mm |
| Cabinet Material | Fir wood |
| Surface Treatment | Wax boiling treatment |
| Number of Boxes | 2 (box 240 and box 170) |
| Frames Included | Frames 240 and 170 (quantities detailed in the manual) |
| Queen Excluder | Included |
| Observation Window | Yes, with acrylic panel |
| Hive Bottom | Bottom board included |
| Cover | Top cover and inner cover included |
| Provided Fasteners | Screws, nails, rubber mallet |
| Recommended Maintenance | Regular beeswax |
| Recommended Use | Beekeeping |
| Country of Origin | China (Shanghai) |
| Assembly Required | Yes, with detailed manual |
Frequently Asked Questions - FX1+2 Vevor
User questions about FX1+2 Vevor
0 question about this device. Answer the ones you know or ask your own.
Ask a new question about this device
Download the instructions for your Bee in PDF format for free! Find your manual FX1+2 - Vevor and take your electronic device back in hand. On this page are published all the documents necessary for the use of your device. FX1+2 by Vevor.
USER MANUAL FX1+2 Vevor
Affordable. Reliable. Home Improvement.
BEE HIVE
MODEL: FX1+2
VEVOR
Affordable. Reliable. Home Improvement.
BEE HIVE
MODEL: FX1+2
natural_image
Wooden frame structure with metal framing and bolt holes (no text or symbols)This is the original instruction, please read all manual instructions care before operating. VEVOR reserves a clear interpretation of our user manual. The appearance of the product shall be subject to the product received. Please forgive us that we won't inform you again if there are technology or software updates on our product.

Warning-To reduce the risk of injury, user must read ins manual carefully.
INSTALLATION NOTES
NOTES:
- Try to choose hard ground for installation.
- Prepare installation tools in advance (Rubber hammer and wood).
- Carefully read this installation manual and confirm the quantity of accessories according to the list.
MODEL AND PARAMETERS
| Model | FX1+2 |
| Product size | 562*462*760mm |
| Cabinet material | Fir wood |
| Surface treatment | Wax boiling process |
COMPONENTS
natural_image
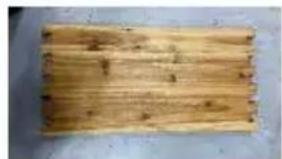
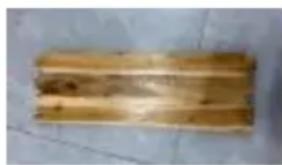
Wooden rectangular slab with visible grain and cracks, placed on a concrete floor (no text or symbols)A1 240 Coaming 1(×4)
natural_image
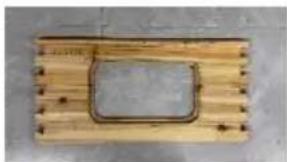
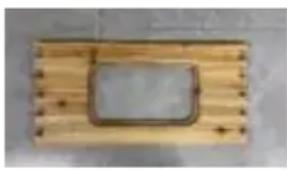
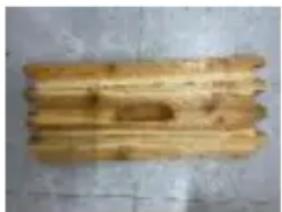
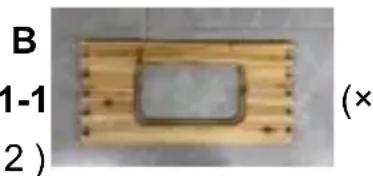
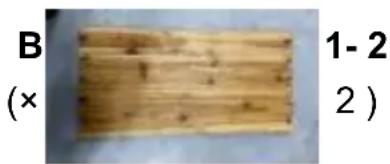
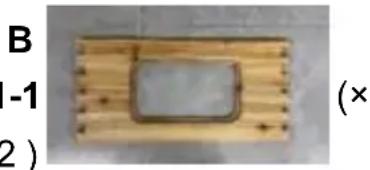
Wooden rectangular block with a rounded square cutout on top, no visible text or symbolsB1-1(×2)
natural_image
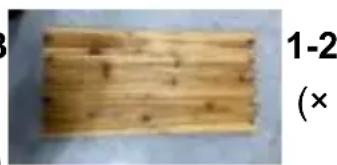
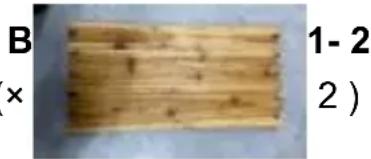
Wooden board with visible grain and knots, no text or symbols presentB1-2 (×2)
natural_image
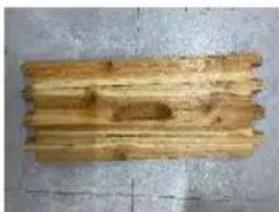
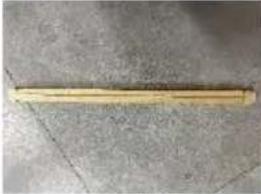
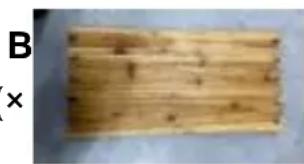
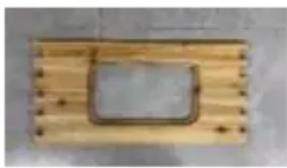
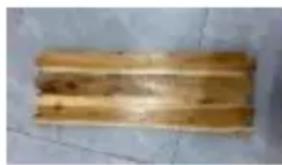
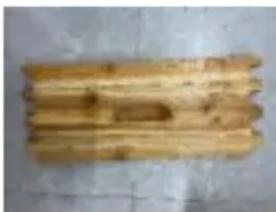
Stack of wooden logs on a concrete surface (no text or symbols visible)A2 170 Coaming 1(×2)
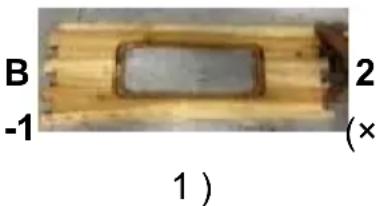
natural_image
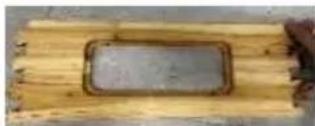
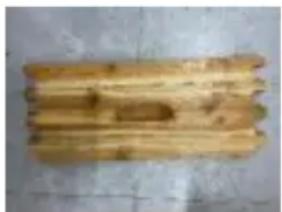
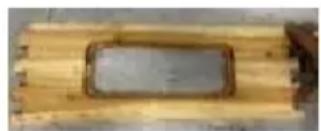
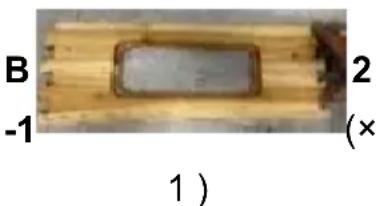
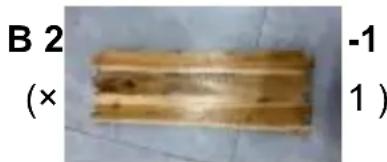
Close-up of a wooden plank with a rectangular cutout on the side (no text or symbols visible)B2-1 (×1)

natural_image
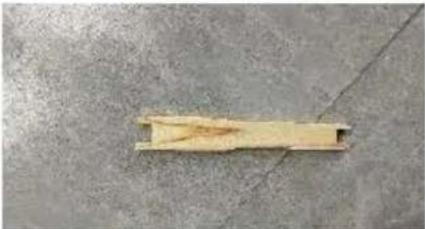
Close-up of a wooden plank with visible grain and wear, placed on a tiled floor (no text or symbols)B2-1 (×1)
 C 170/240 Mainframe bar 1(×30) C 170/240 Mainframe bar 1(×30) | 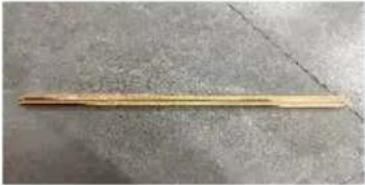 D 170/240 Main frame2(×30) D 170/240 Main frame2(×30) | 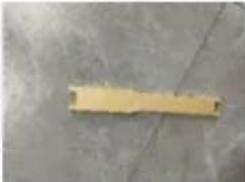 E1 240 Frame bar(×40) E1 240 Frame bar(×40) |
 E2 170 Frame bar (×20) E2 170 Frame bar (×20) | 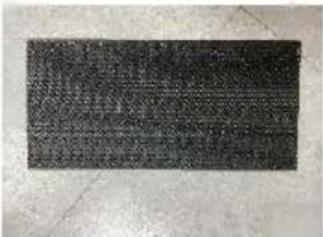 F1 240 Foundation sheet(×20) F1 240 Foundation sheet(×20) | 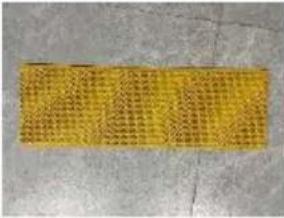 F2 170 Foundationsheet (×10) F2 170 Foundationsheet (×10) |
 G Handle (×3) G Handle (×3) | 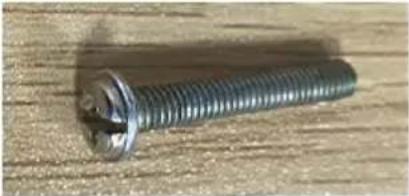 H Screw M4x30 (×3) H Screw M4x30 (×3) | 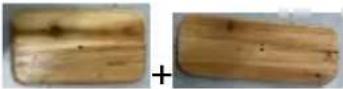 I-1 I-2I Window pane (×3 I-1 I-2I Window pane (×3 |
 J Self-tapping screwM4x20 (×6) J Self-tapping screwM4x20 (×6) | 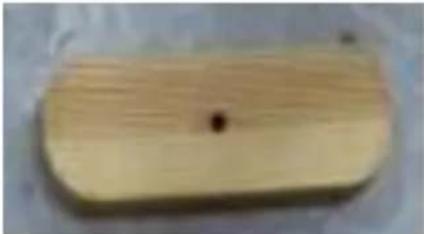 K Small plank (×6) K Small plank (×6) | 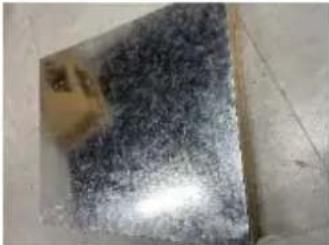 L Top Cover (×1) L Top Cover (×1) |
 M Inner Cover (×1) M Inner Cover (×1) | 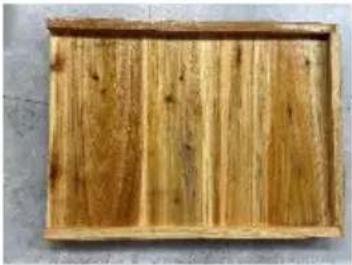 N Bottom Board(x1) N Bottom Board(x1) | 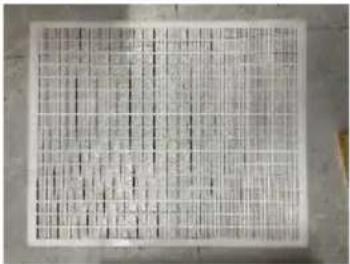 O Queen Excluder(x1) O Queen Excluder(x1) |
natural_image
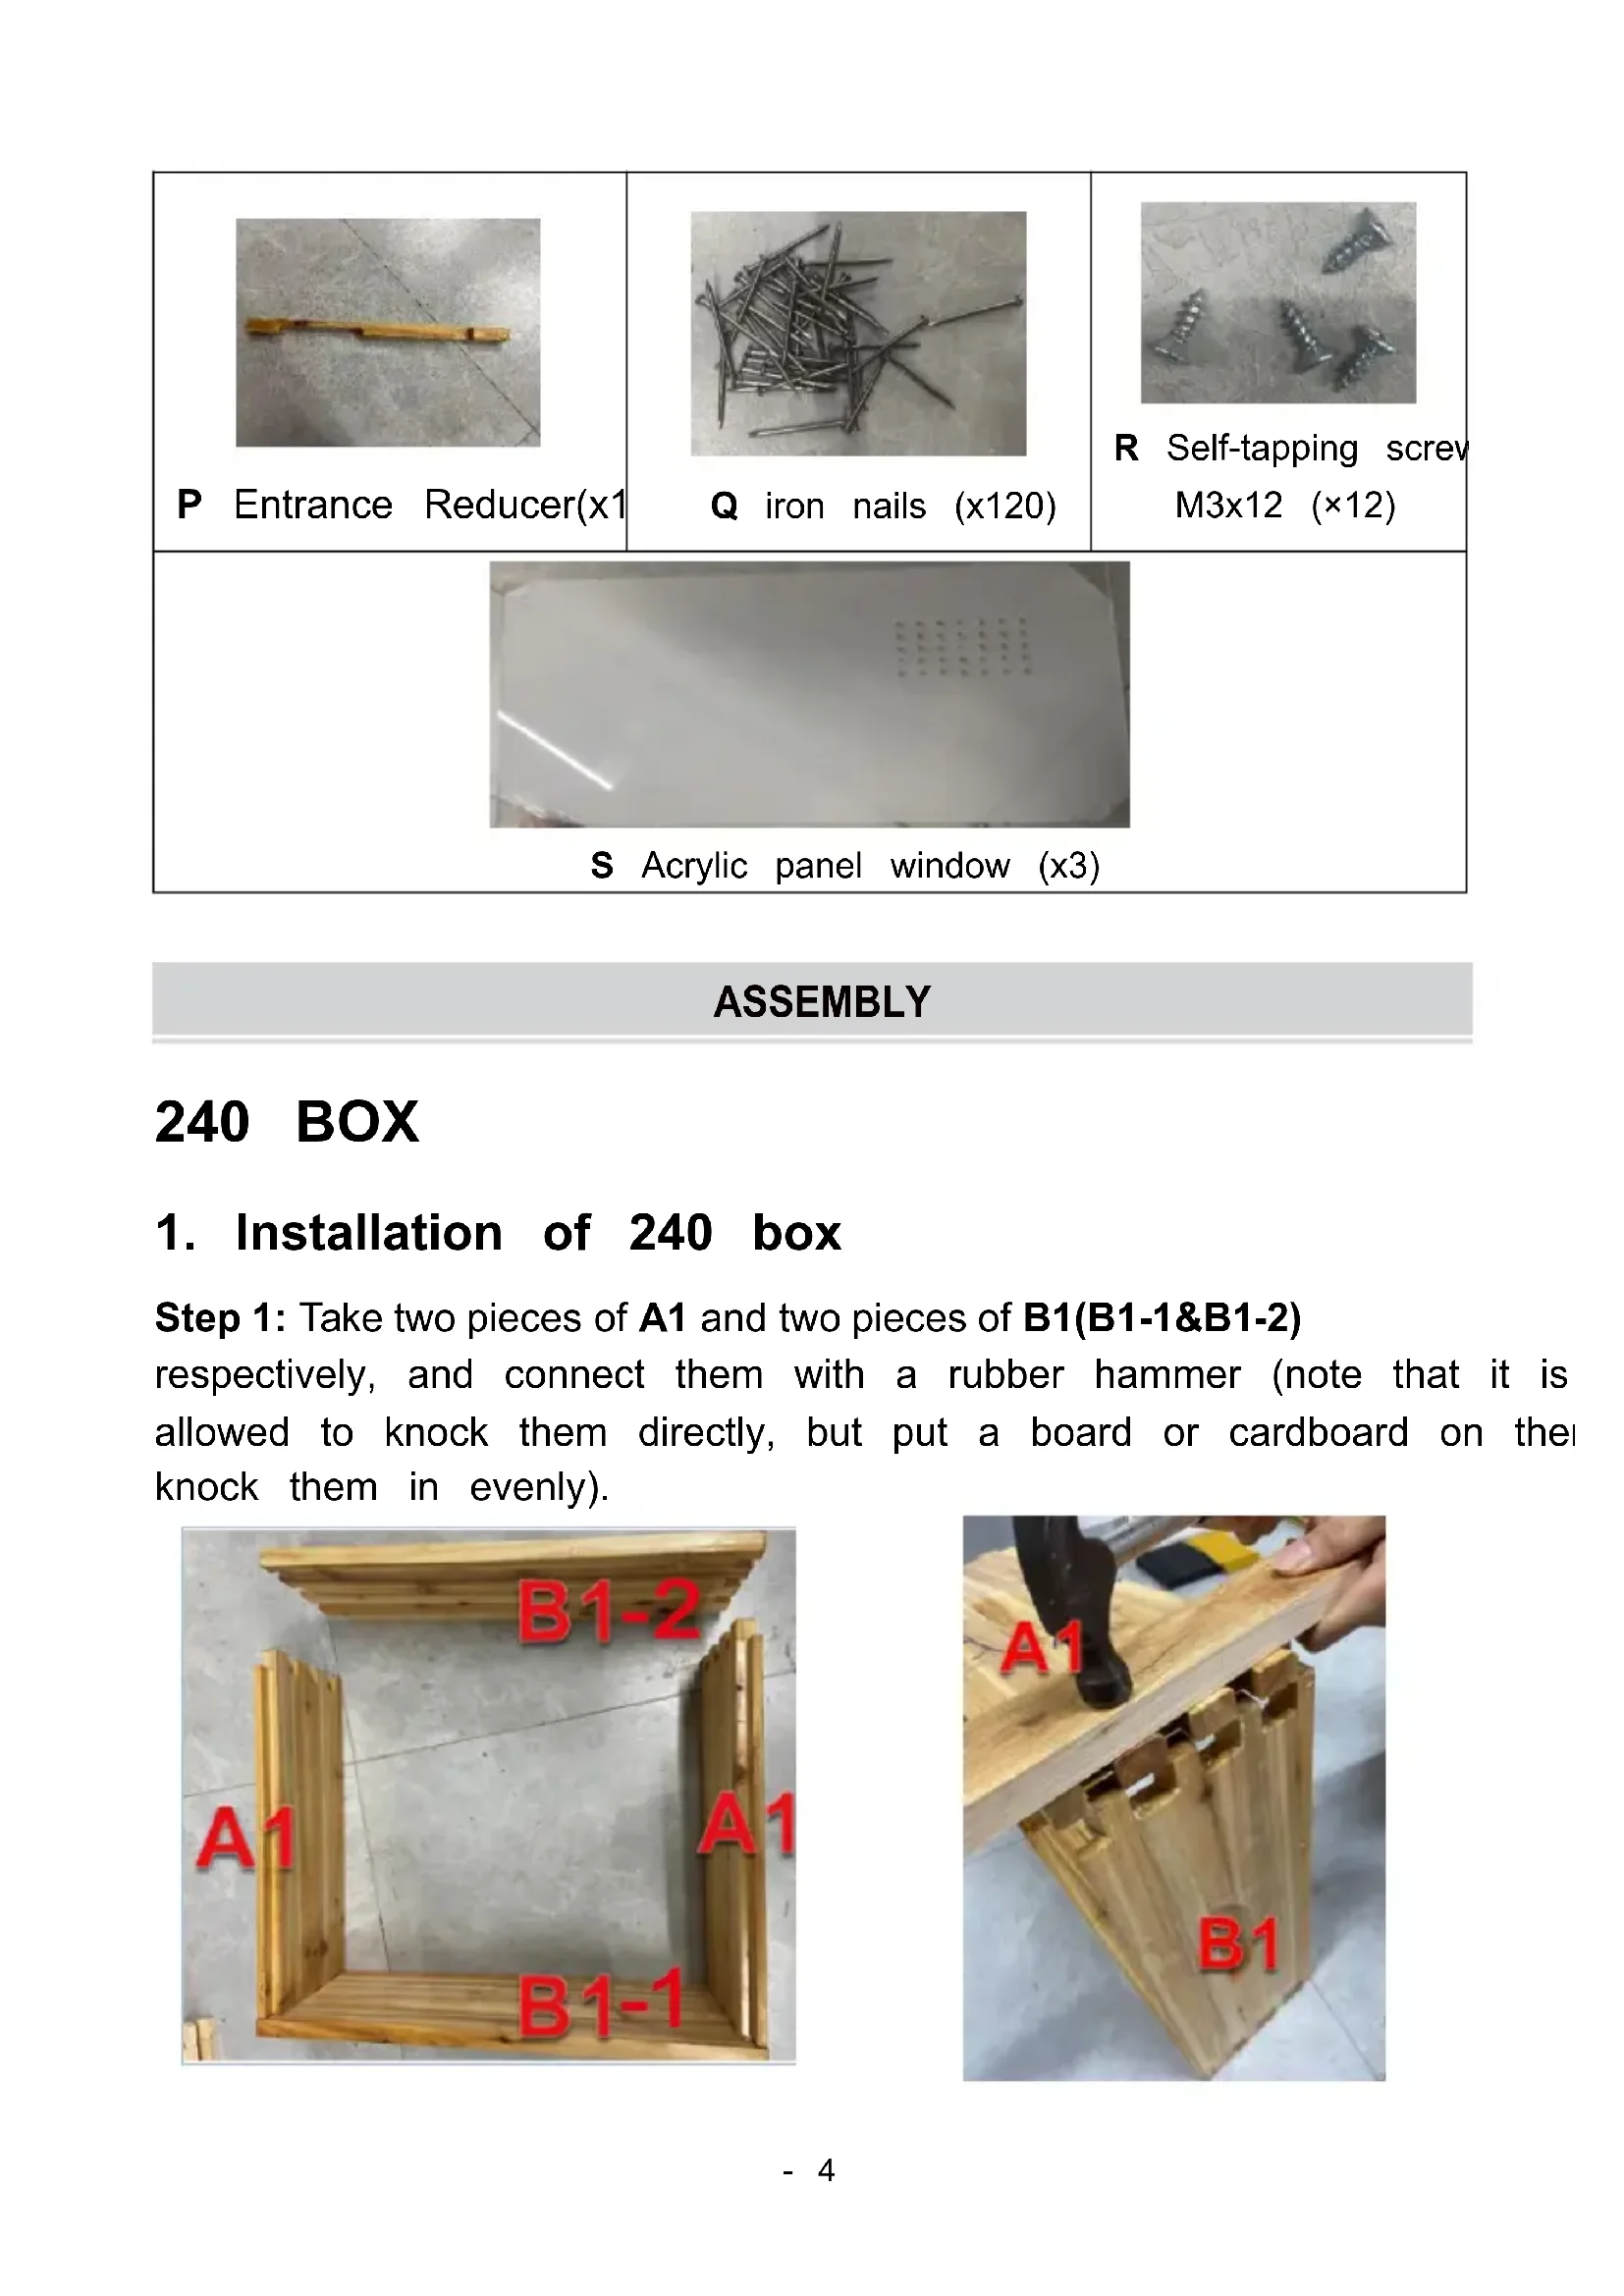
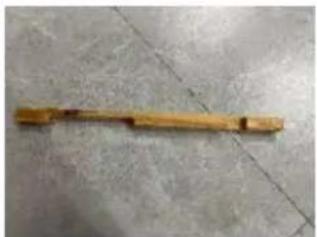
A wooden stick attached to a concrete floor, no visible text or symbols.P Entrance Reducer(x1
natural_image
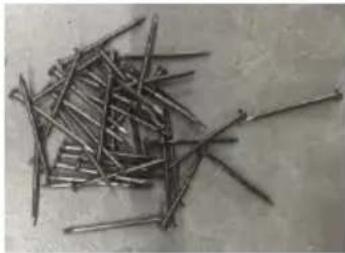
Pile of metal wire rods on a plain surface (no text or symbols visible)Q iron nails (x120)
natural_image
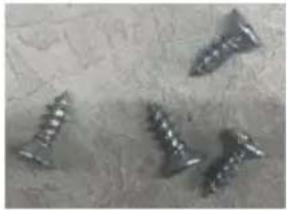
Close-up of four metallic screw fasteners on a textured surface (no visible text or markings)R Self-tapping screw M3x12 (×12)
S Acrylic panel window (x3)
ASSEMBLY
240 BOX
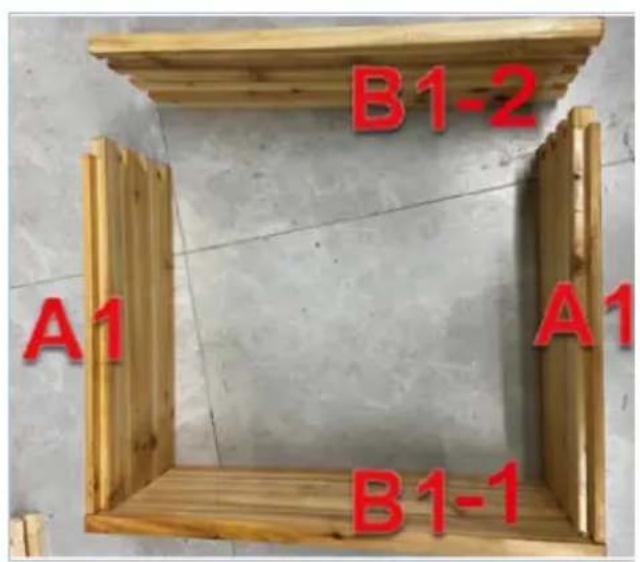
1. Installation of 240 box
Step 1: Take two pieces of A1 and two pieces of B1(B1-1&B1-2)
respectively, and connect them with a rubber hammer (note that it is allowed to knock them directly, but put a board or cardboard on their knock them in evenly).

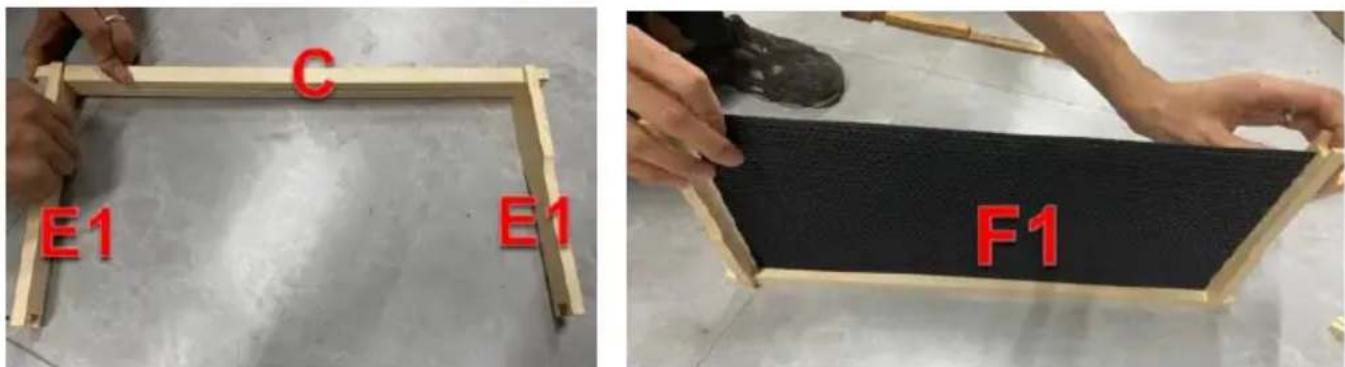
2. Installation of 240 frame
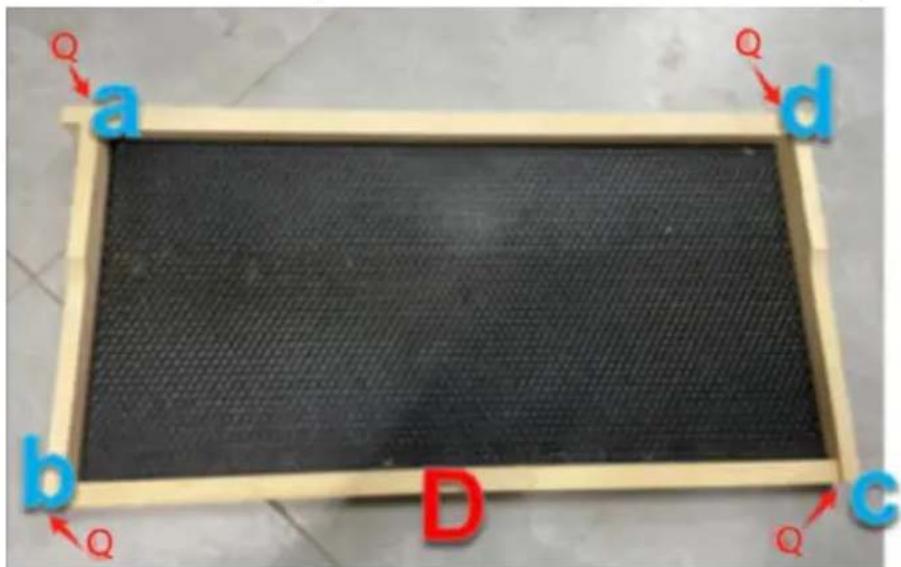
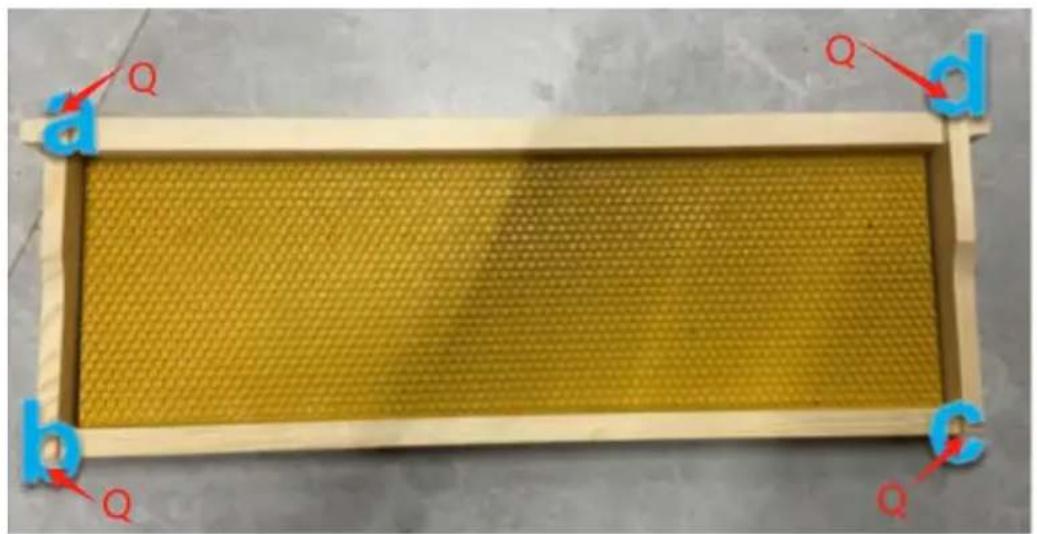
Step 1: Take 2 pieces of E1 and 1 piece of C, insert them into the card slot to connect them, then take 1 piece of F1 and insert it into the slot, finally take 1 piece of D and insert it into the slot to complete a set of frames.
Step 2: Connect with 4 pieces of Q at a/b/c/d 4 positions.
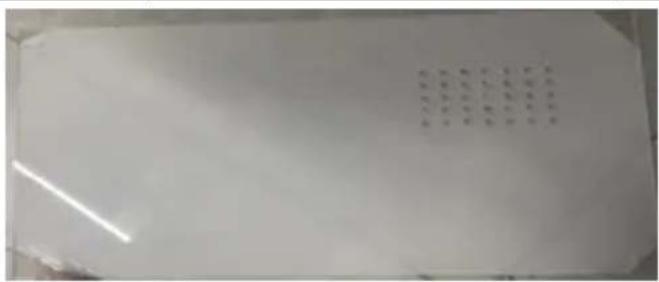
3. Installation of the window
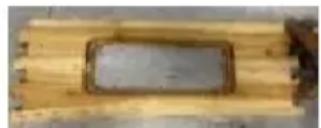
Step 1: Take G, H and I-1 to assemble the cover plate.
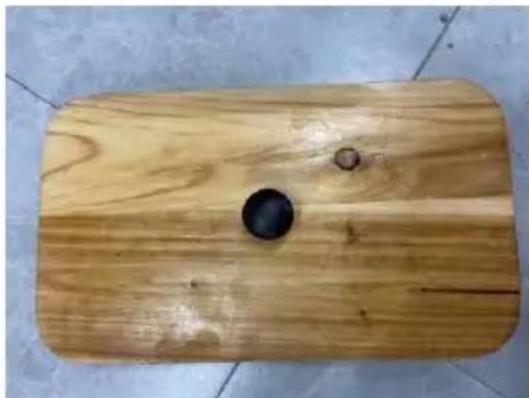
natural_image
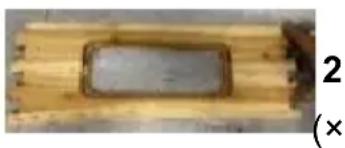
Top-down view of a wooden plank with two circular holes on a tiled floor (no text or symbols visible)Step 2: Take S and Peel off the film from the corners, then Take S and R to assemble the Coaming.
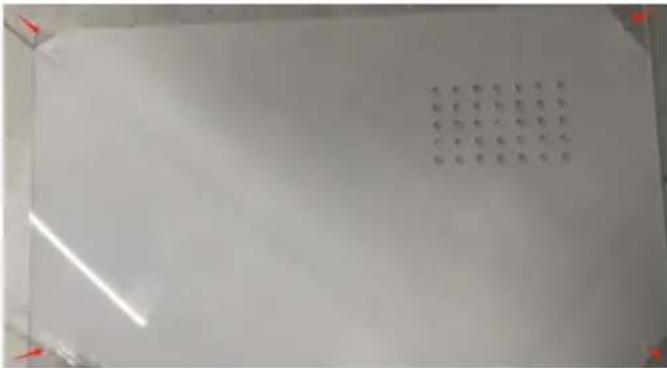
natural_image
Interior view of a wooden room with a dark rectangular object on a wooden floor, marked with red arrows indicating directions (no text or symbols visible)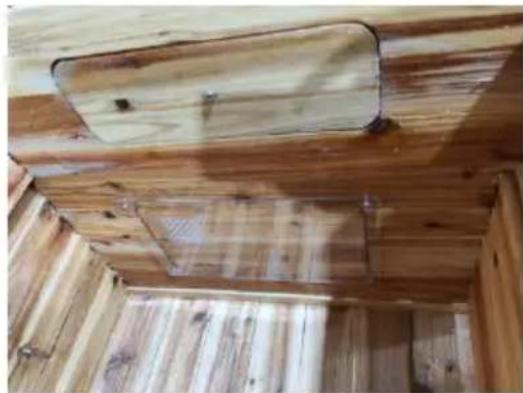
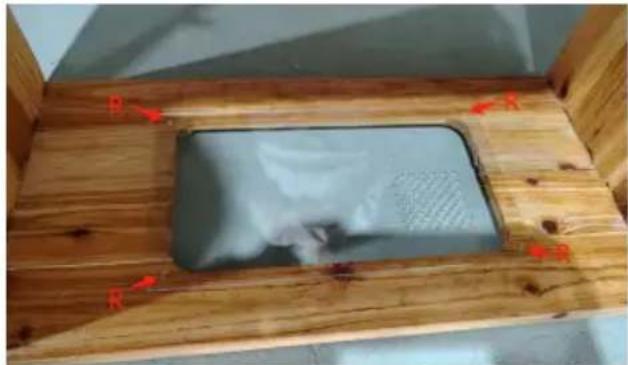
natural_image
Interior view of a wooden cabin with exposed ceiling and floor panels (no text or symbols visible)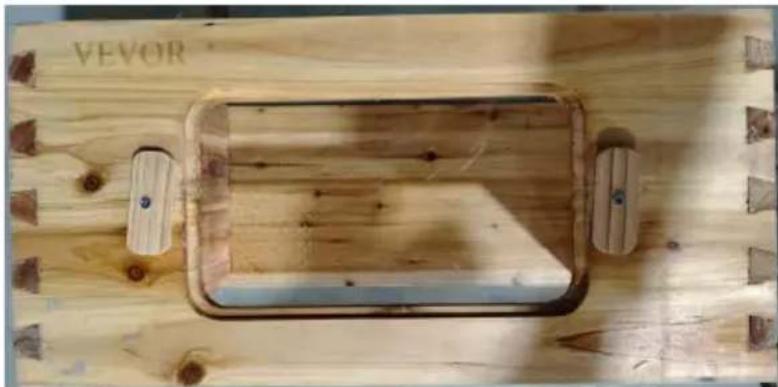
natural_image
Wooden rectangular frame with wooden edges and small connectors, no visible text or symbols on the frame itself.Step 3: Take J and K to assemble the window pressing plates on both sides and put 10 sets of foundations and frames into the box.
natural_image
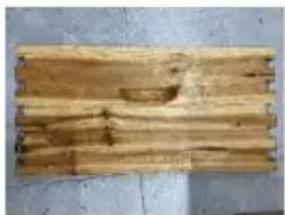
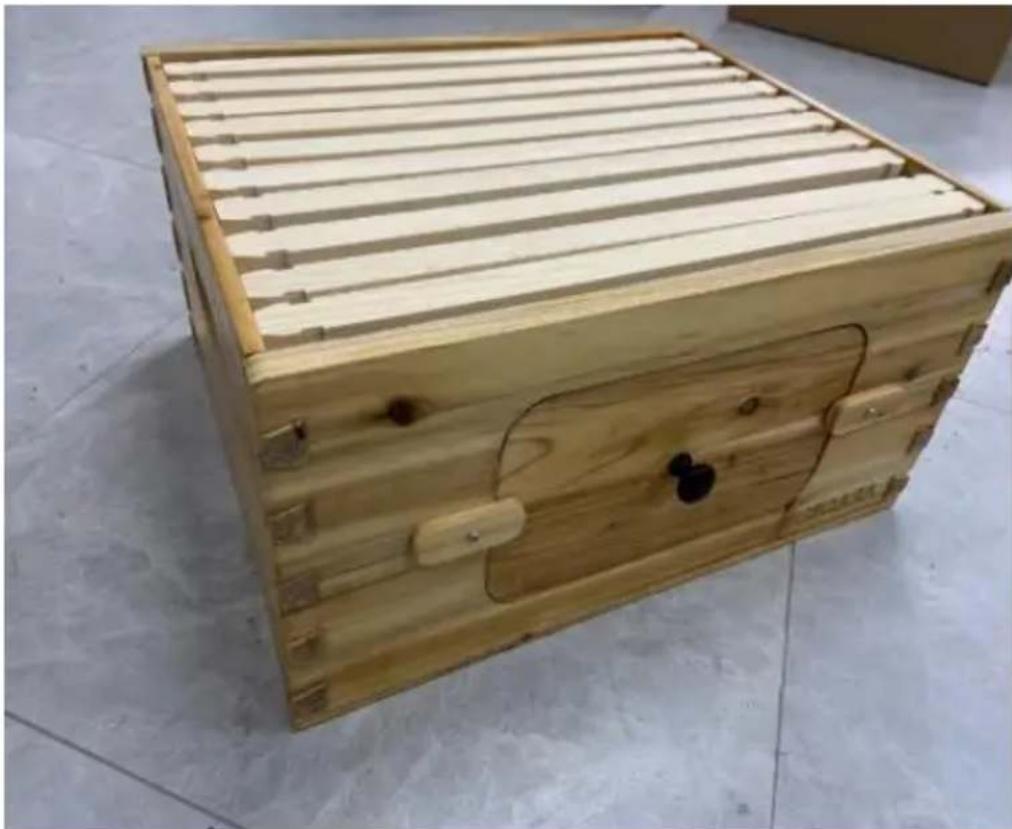
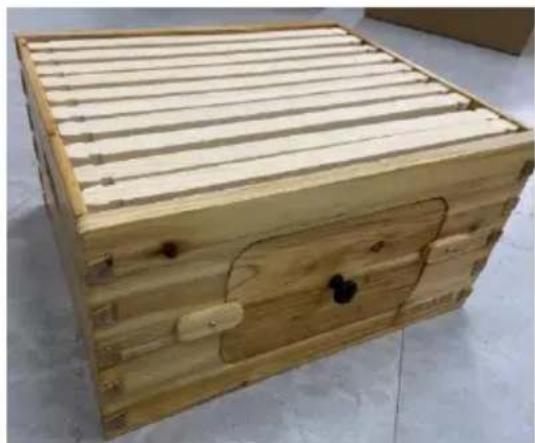
Wooden box with slatted metal frame and closed door, placed on tiled floor (no text or symbols visible)170 BOX
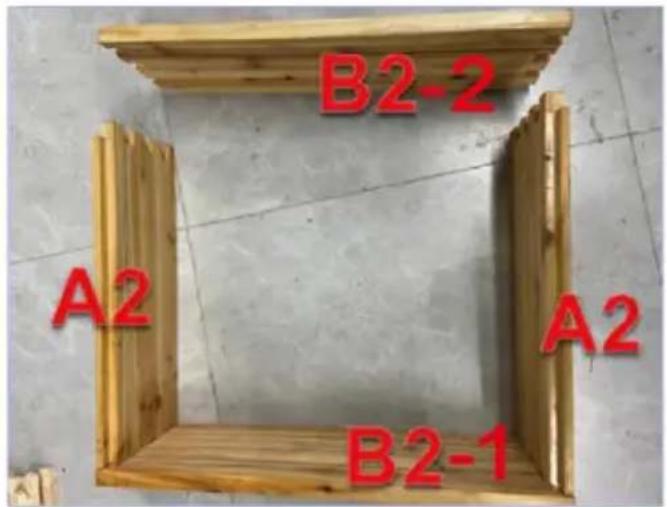
4. Installation of 170 box
Step 1: Take two pieces of A2 and two pieces of B2(B2-1&B2-2)
respectively, and connect them with a rubber hammer (note that it is allowed to knock them directly, but put a board or cardboard on their knock them in evenly).

5. Installation of 170 frame
Step 1: Take 2 pieces of E2 and 1 piece of C, insert them into the card slot to connect them, then take 1 piece of F2 and insert it into the slot, finally take 1 piece of D and insert it into the slot to complete a set frames.
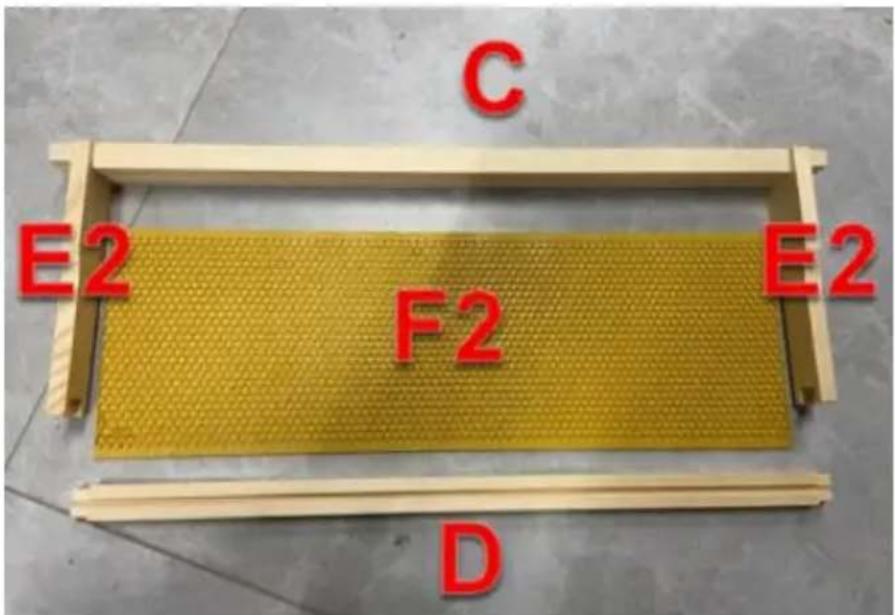
Step 2: Connect with 4 pieces of Q at a/b/c/d 4 positions.
natural_image
Beehive grid with yellow honeycomb pattern inside a wooden frame, labeled with letters a, b, c, d and red arrows indicating orientation (no text or symbols on the mesh itself)6. Installation of the window
Step 1: Take G, H and I-2 to assemble the cover plate.
natural_image
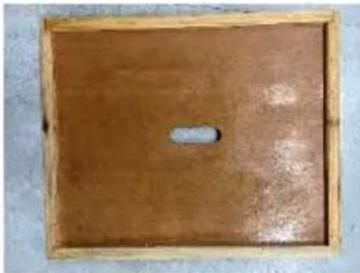
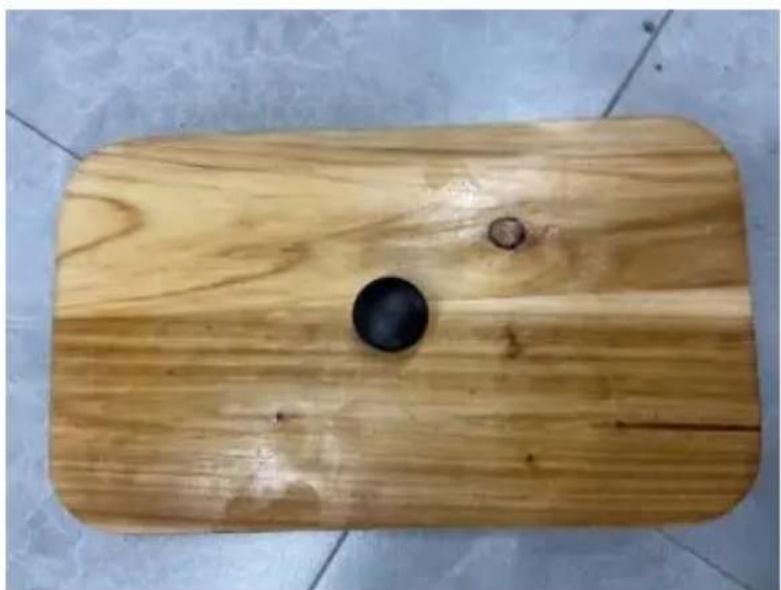
Top-down view of a wooden plank with two circular holes and a central hole, placed on a tiled floor (no text or symbols visible)Step 2: Take N and Peel off the film from the corners, then Take N and M to assemble the Coaming.

natural_image
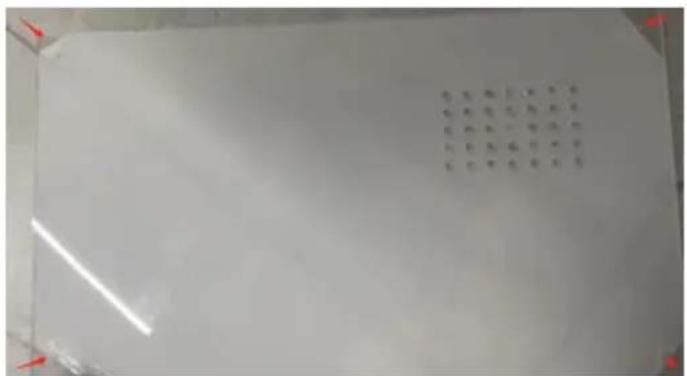
Interior view of a wooden room with a recessed door and red arrows indicating measurement or inspection points (no text or symbols visible)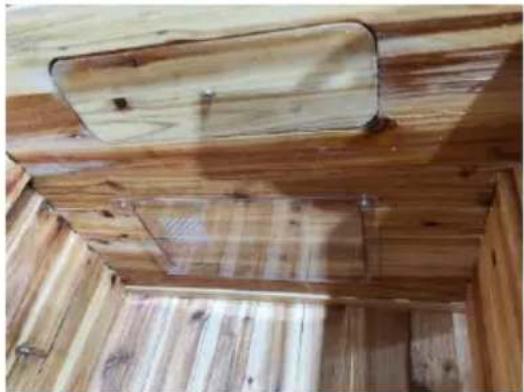
natural_image
Interior view of a wooden structure with exposed beams and insulation (no text or symbols)
natural_image
Wooden tray with a rectangular frame and two side clips, no visible text or symbols on the tray itself.Step 3: Take J and K to assemble the window pressing plates on both sides and put 10 sets of foundations and frames into the box.
natural_image
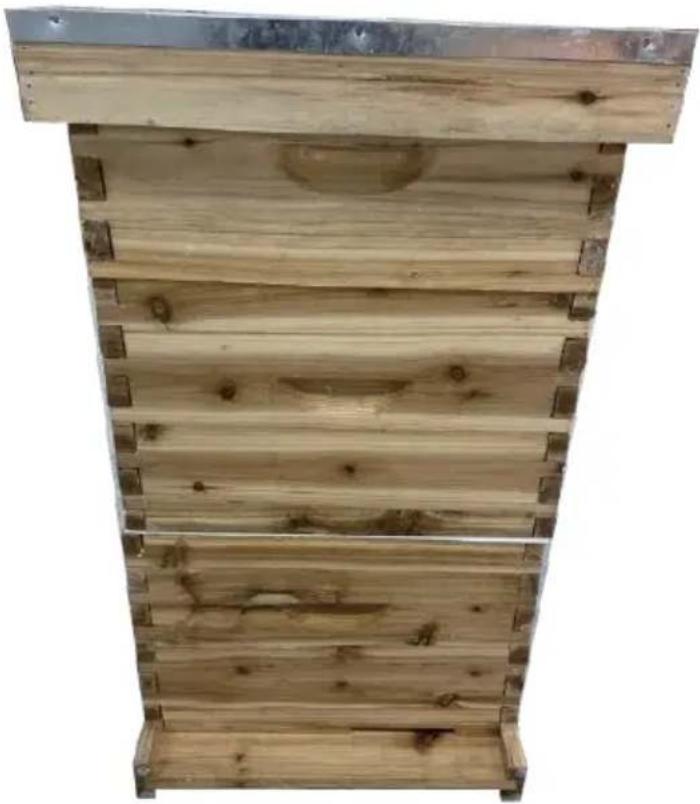
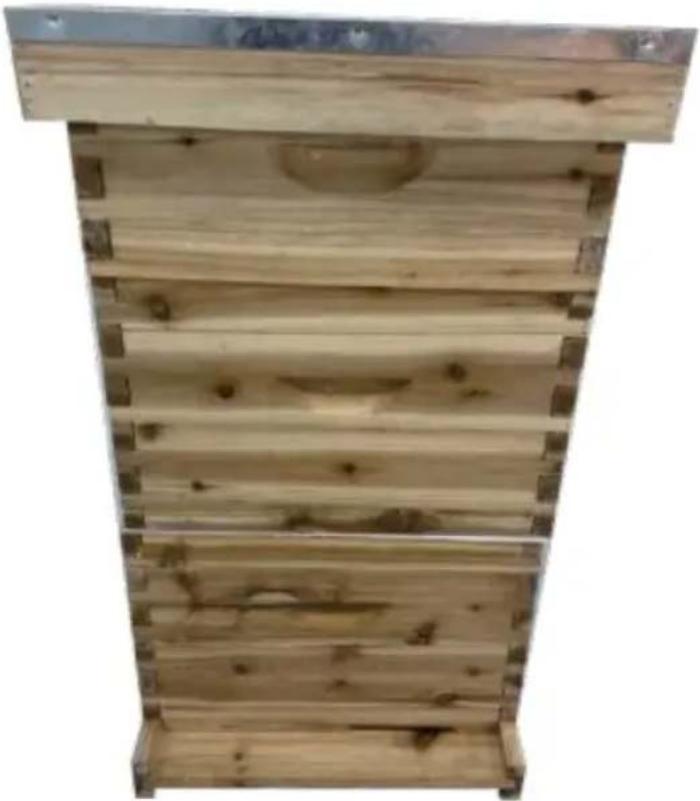
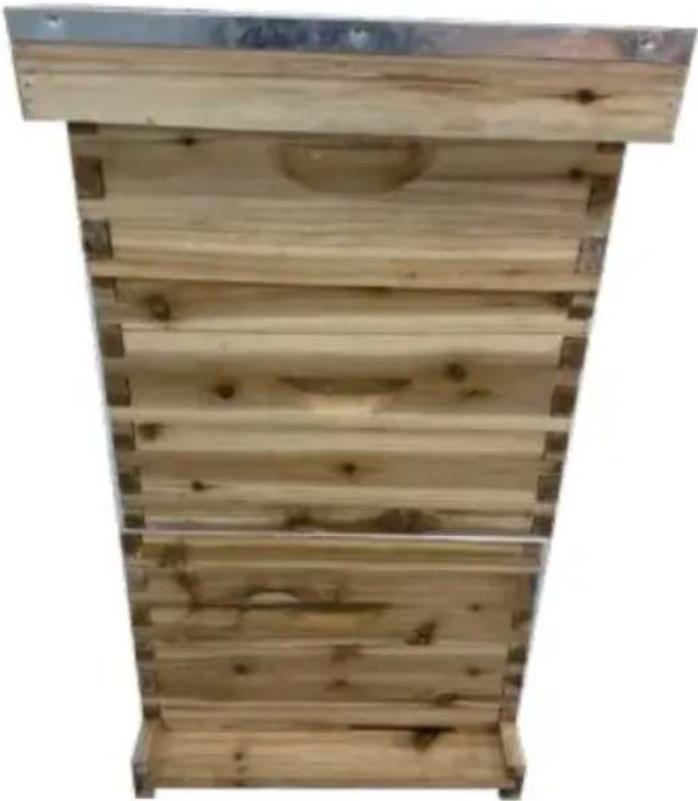
Wooden box with slatted metal frame and two small circular cutouts on the side (no text or symbols visible)Finally, please assemble according to the following figure:
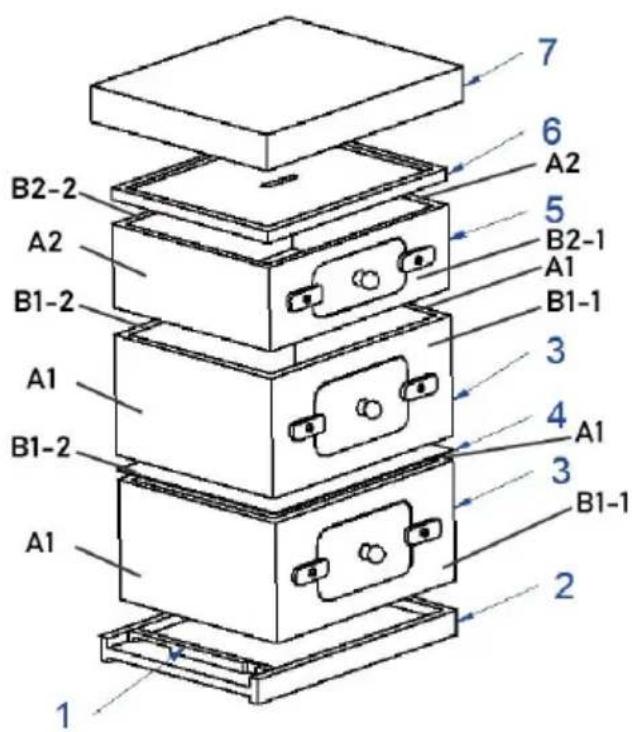
| Indes | Name | Qty |
| 1 | Entrance Reducer | 1 |
| 2 | Bottom Board | 1 |
| 3 | 240 Box | 2 |
| 4 | Queen Excluder | 1 |
| 5 | 170 Box | 1 |
| 6 | Inner Cover | 1 |
| 7 | Top Cover | 1 |
| Details of beehive enclosure boa | ||
| Indes | Name | Qty |
| A1 | Lower side panel | 4 |
| B1-1 | Lower front panel | 2 |
| B1-2 | Lower back panel | 2 |
| A2 | Upper side panel | 2 |
| B2-1 | Upper front panel | 1 |
| B2-2 | Upper back panel | 1 |
MAINTENANCE
- Please use beeswax regularly for maintenance.
- Close the bee window in cold, rainy, and windy weather.
Manufacturer: Shanghaimuxinmuyeyouxiangongsi
Address: Shuangchenglu 803nong11hao1602A-1609shi, baoshanqu, shanghai 200000 CN.
EC REP: E-CrossStu GmbH.
Mainzer Landstr.69, 60329 Frankfurt am Main.
UK REP: YH CONSULTING LIMITED.
C/O YH Consulting Limited Office 147, Centurion House, London Road Staines-upon-Thames, Surrey, TW18 4AX
Imported to AUS: SIHAO PTY LTD.
1 ROKEVA STREETEASTWOOD NSW 2122 Australia
Imported to USA: Sanven Technology Ltd.
Suite 250, 9166 Anaheim Place, Rancho Cucamonga, CA 91730

VEVOR
Affordable. Reliable. Home Improvement.
ALVEARE
MODELLO: FX1+2
MODELLO: FX 1+2

natural_image
Wooden structure with horizontal beams and a metal frame at the top (no text or symbols visible)natural_image
Wooden rectangular slab with horizontal grooves and a small circular mark on the left side (no text or symbols visible)A1 240 C oaming 1(×4
B
1-1
2)

natural_image
Wooden rectangular frame with a central rectangular cutout, no visible text or symbols(×
natural_image
Close-up of a wooden plank with visible grain texture and no text or symbols1-2
2)
natural_image
Stack of wooden logs on a tiled floor (no visible text or symbols)Un 2 17 0 C oaming 1
B
-1
natural_image
Close-up of a wooden plank with a rectangular cutout and a cross mark, no visible text or symbols1)
B 2
(×

natural_image
Close-up of a wooden plank on a tiled floor (no text or symbols visible)-1
1)
natural_image
Wooden rectangular object with a central hole and two small holes, placed on a tiled floor (no text or symbols visible)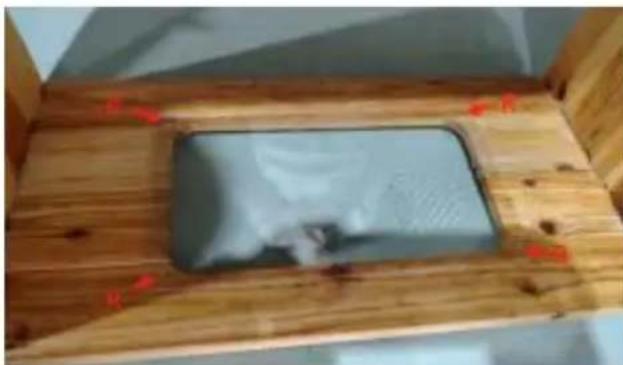
natural_image
Wooden interior with a rectangular object on a wooden surface, marked with red arrows and numbers (no readable text or symbols)
natural_image
Interior view of a wooden cabin with exposed ceiling and floor panels (no text or symbols visible)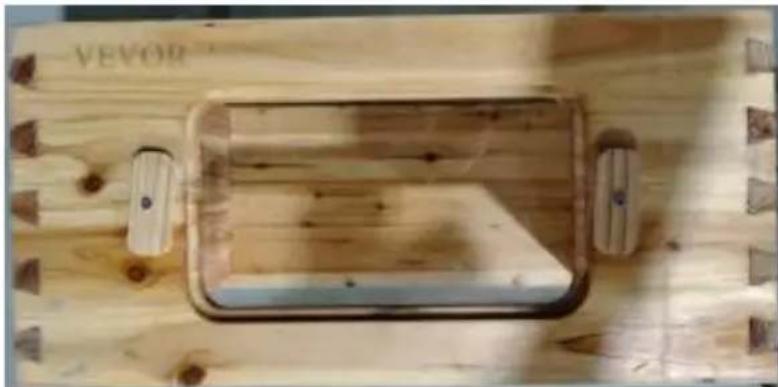
natural_image
Wooden tray with a transparent plastic frame and two side clips, no visible text or symbols on the tray itself.natural_image
Wooden box with slatted metal frame and closed door, placed on tiled floor (no text or symbols visible)17 0 SCATOLA
natural_image
Rectangular yellow honeycomb frame with blue letter labels (a, b, c, d) at corners, no text or symbols on the main structure.natural_image
Top-down view of a wooden plank with two circular holes on a tiled floor (no text or symbols visible)
natural_image
Interior view of a wooden deck with a small rectangular object on top, marked with red arrows and numbers (no readable text or symbols)
natural_image
Interior view of a wooden ceiling with exposed beams and insulation (no text or symbols visible)
natural_image
Wooden wall-mounted device with a transparent rectangular frame and two side clips, no visible text or symbols.natural_image
Wooden box with slatted top and internal compartments, no visible text or symbolsC/O YH Consulting Limited Ufficio 147, Centurion House, London Road Staines-upon-Thames, Surrey, TW18 4AX
Importato in AUS: SIHAO PTY LTD.
1 ROKEVA STREETEASTWOOD NSW 2122 Australia
Suite 250, 9166 Anaheim Place, Rancho Cucamonga, CA 9173 0

VEVOR
Affordable. Reliable. Home Improvement.
COLMENA DE ABEJAS
MODELO: FX1+2
MODELO: FX 1+2

natural_image
Wooden structure with horizontal beams and a metal frame, no visible text or symbolsnatural_image
Wooden rectangular object with a central hole and two small holes, placed on a tiled floor (no text or symbols visible)
natural_image
Wooden interior with a rectangular object on a wooden surface, marked with red arrows and numbers (no readable text or symbols)
natural_image
Interior view of a wooden cabin with exposed ceiling and floor panels (no text or symbols visible)
natural_image
Wooden tray with a transparent rectangular frame and two side clips, no visible text or symbolsnatural_image
Wooden box with slatted metal frame and closed door, placed on tiled floor (no text or symbols visible)17 0 CAJA
natural_image
Rectangular yellow honeycomb frame with blue lettering labels (a, b, c, d) at corners, no text or symbols on the main structure.natural_image
Top-down view of a wooden plank with two circular holes on a tiled floor (no text or symbols visible)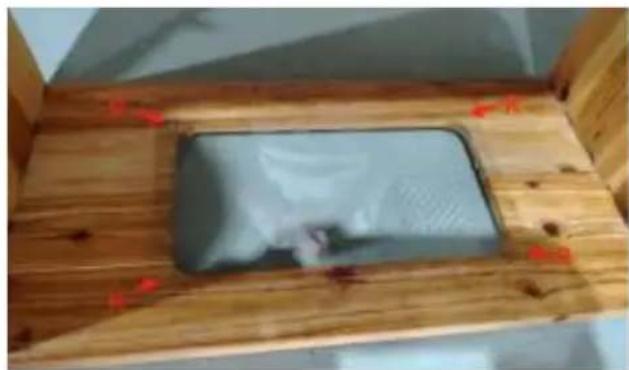
natural_image
Interior view of a wooden deck with a rectangular panel and red arrows indicating direction (no text or symbols)
natural_image
Interior view of a wooden ceiling with exposed beams and insulation (no text or symbols visible)
natural_image
Wooden wall-mounted device with a transparent rectangular frame and two side connectors (no visible text or symbols)natural_image
Wooden box with slatted top and internal compartments (no visible text or symbols)C/O YH Consulting Limited Oficina 147, Centurion House, London Roa Staines-upon-Thames, Surrey, TW18 4AX
Importado a AUS: SIHAO PTY LTD.
1 ROKEVA STREET, EASTWOOD, NSW 2122, Australia
Suite 250, 9166 Anaheim Place, Rancho Cucamonga, CA 9173 0

VEVOR
Affordable. Reliable. Home Improvement.
BIKUPA
MODELL: FX1+2
MODELL: FX 1+2

natural_image
Wooden structure with horizontal beams and a metal frame, no visible text or symbolsnatural_image
Wooden panel with visible grain and a small mark on the surface (no text or symbols)A1 240 C -koppling 1(×
B
1-1
2)
natural_image
Wooden rectangular frame with a central rectangular opening, no visible text or symbols(×
B
2)
natural_image
Wood grain texture with no visible text or symbols, labeled '1-2' and '(×)' on the right side.
natural_image
Close-up of wooden logs on a plain surface (no text or symbols visible)A 2 17 0 C -oaming 1
natural_image
Close-up of a wooden plank with a rectangular cutout (no text or symbols visible)B2-1 ( × 1 )
natural_image
Close-up of a wooden plank with visible grain and texture (no text or symbols)B2-1 ( × 1 )
natural_image
A wooden stick resting on a tiled floor, no visible text or symbols.natural_image
Pile of thin, elongated plant stems or needles on a plain surface (no text or symbols visible)Q -järnspik (x120)

natural_image
Close-up of four metallic screw fasteners on a surface (no text or symbols visible)S Fönster med akrylpanel ( x3)
ASSEMBLY
240 LÅDA

natural_image
Wooden rectangular object with a central hole and two small holes, placed on a tiled floor (no text or symbols visible)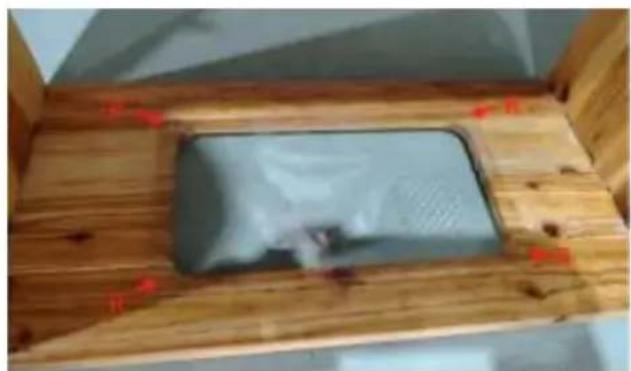
natural_image
Interior view of a wooden structure with a recessed panel and red markings (no visible text or symbols)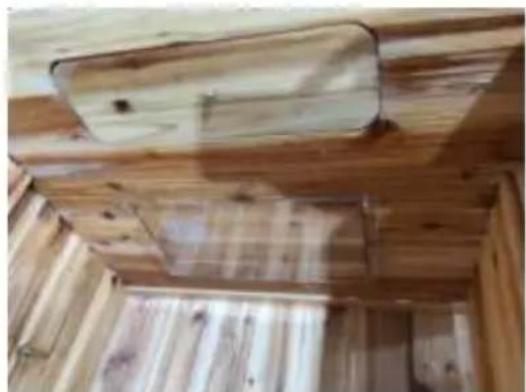
natural_image
Interior view of a wooden structure with exposed beams and supports (no text or symbols visible)
natural_image
Wooden tray with a transparent plastic container and two side clips, no visible text or symbols on the tray itself.natural_image
Wooden box with slatted metal frame and closed door, placed on tiled floor (no text or symbols visible)17 0 LÅDA
natural_image
Rectangular yellow honeycomb structure with blue directional arrows and letter labels (a, b, c, d) on sides, no text or symbols on the main body.natural_image
Top-down view of a wooden plank with two circular holes and a central hole, placed on tiled floor (no text or symbols)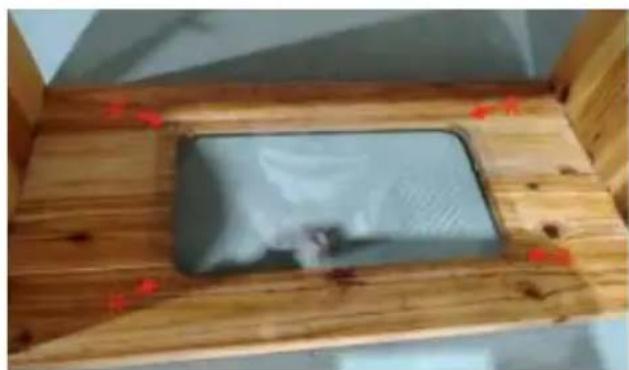
natural_image
Interior view of a wooden deck with a rectangular object on a wooden surface, marked with red arrows indicating direction (no text or symbols visible)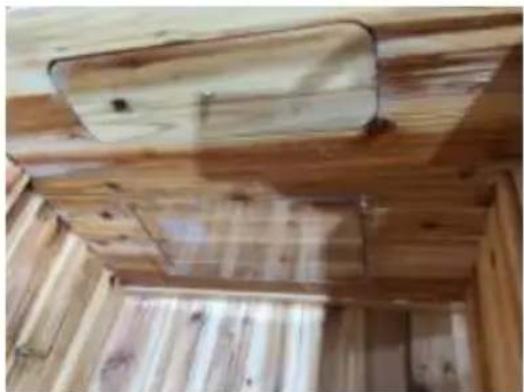
natural_image
Interior view of a wooden structure with exposed ceiling and floor panels (no text or symbols visible)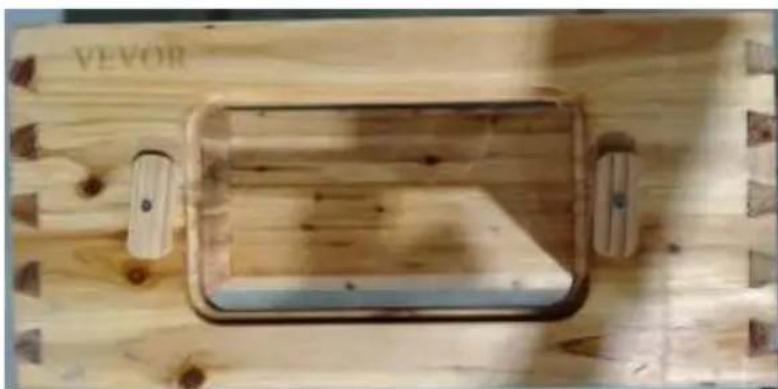
natural_image
Wooden interior with a transparent rectangular frame and metal clips, no visible text or symbolsnatural_image
Wooden box with slatted top and internal door, no visible text or symbolsC/O YH Consulting Limited Kontor 147, Centurion House, London Roa Staines-upon-Thames, Surrey, TW18 4AX
Importerad till Australien: SIHAO PTY LTD.
1 ROKEVA STREETEASTWOOD NSW 2122 Australien
Importerad till USA: Sanven Technology Ltd.
Svit 250, 9166 Anaheim Place, Rancho Cucamonga, CA 9173 0

VEVOR
Affordable. Reliable. Home Improvement.
BIJENKORF
MODEL: FX1+2
MODEL: FX 1+2

natural_image
Wooden structure with horizontal beams and a metal frame (no text or symbols visible)natural_image
Wooden rectangular slab with horizontal grooves and a small circular mark on the left side (no text or symbols visible)A1 240 C oaming 1(×4
B
1-1
2)
natural_image
Wooden rectangular frame with a central rectangular cutout, no visible text or symbols(×
natural_image
Close-up of wooden planks on a concrete surface (no text or symbols visible)Een 2 17 0 C oaming
natural_image
Close-up of a wooden plank with a rectangular cutout on top (no text or symbols visible)B2-1 ( × 1 )
natural_image
Close-up of a wooden plank with visible grain and texture (no text or symbols)B2-1 ( × 1 )
natural_image
Wooden rectangular object with a central hole and two small holes, placed on a tiled floor (no text or symbols visible)
natural_image
Wooden interior with a rectangular object on a wooden floor, marked with red arrows and numbers (no readable text or symbols)
natural_image
Interior view of a wooden structure with exposed ceiling and floor panels (no text or symbols visible)
natural_image
Wooden tray with a transparent rectangular frame and two side clips, no visible text or symbols on the tray itself.natural_image
Wooden box with slatted metal frame and closed door, placed on tiled floor (no text or symbols visible)17 0 DOOS
natural_image
Rectangular yellow honeycomb frame with blue lettering labels (a, b, c, d) at corners, no text or symbols on the main structure.natural_image
Top-down view of a wooden plank with two circular holes on a tiled floor (no text or symbols visible)
natural_image
Interior view of a wooden deck with a rectangular panel and red arrows indicating direction (no text or symbols)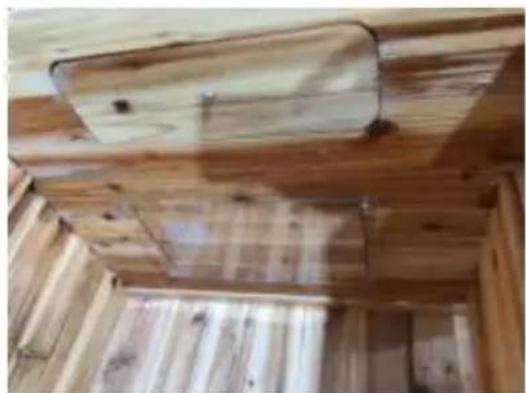
natural_image
Interior view of a wooden structure with exposed ceiling and floor panels (no text or symbols)
natural_image
Wooden wall-mounted device with a transparent rectangular frame and two side clips, no visible text or symbols.natural_image
Wooden box with slatted top and internal compartments (no visible text or symbols)Affordable. Reliable. Home Improvement.
RUCHE D'ABEILLES
MODÈLE : FX1+2
MODÈLE : FX 1+2
natural_image
Wooden structure with horizontal beams and a metal frame at the top (no text or symbols visible)31.Installation de box 24 0
natural_image
Wooden rectangular object with a central hole and two small holes, placed on a tiled floor (no text or symbols visible)
natural_image
Wooden interior with a rectangular object on a wooden surface, marked with red arrows and numbers (no readable text or symbols)
natural_image
Interior view of a wooden cabin with exposed ceiling and floor panels (no text or symbols visible)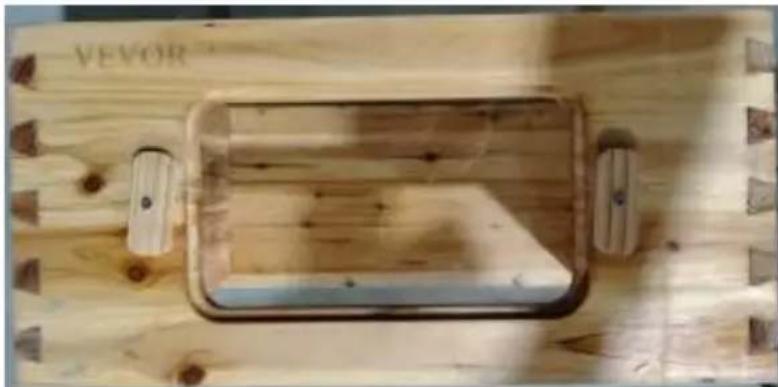
natural_image
Wooden interior with a transparent rectangular frame and two side clips, no visible text or symbolsnatural_image
Wooden box with slatted metal frame and closed lid, placed on tiled floor (no text or symbols visible)17 0 BOÎTE
34. Installation de 170 box
natural_image
Rectangular yellow honeycomb frame with blue letter labels (a, b, c, d) at corners, no text or symbols on the main structure.natural_image
Top-down view of a wooden plank with two circular holes on a tiled floor (no text or symbols visible)
natural_image
Interior view of a wooden structure with a rectangular panel and red arrows pointing to features (no text or symbols visible)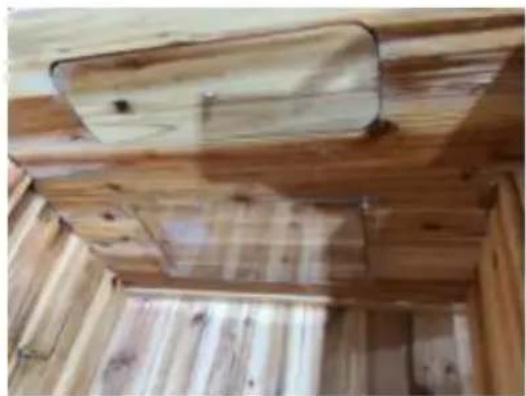
natural_image
Interior view of a wooden structure with exposed ceiling and floor panels (no text or symbols visible)
natural_image
Wooden interior with a rectangular frame and two side clips, no visible text or symbolsnatural_image
Wooden box with slatted top and internal compartments (no visible text or symbols)A/S YH Consulting Limited Bureau 147, Centurion House, London Roa Staines-upon-Thames, Surrey, TW18 4AX
Importé en AUS : SIHAO PTY LTD.
1 ROKEVA STREET, EASTWOOD, NSW 2122, Australie
Suite 250, 9166 Anaheim Place, Rancho Cucamonga, CA 9173 0

VEVOR
Affordable. Reliable. Home Improvement.
BIENENSTOCK
MODELL: FX1+2
MODELL: FX 1+2
natural_image
Wooden structure with horizontal beams and a metal frame (no text or symbols visible)natural_image
Wooden rectangular slab with horizontal grooves, no visible text or markingsA1 240 C oaming 1(×4
natural_image
Close-up of wooden planks on a plain surface (no text or symbols visible)A 2 17 0 C oaming 1

natural_image
Wooden rectangular object with a central hole and two small holes, placed on a tiled floor (no text or symbols visible)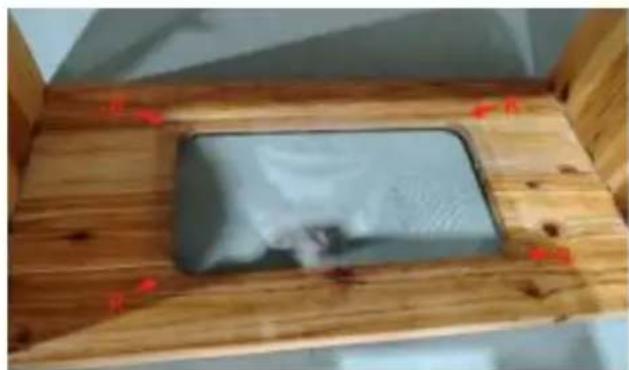
natural_image
Wooden interior with a rectangular object on a wooden surface, marked with red arrows and numbers (no readable text or symbols)
natural_image
Interior view of a wooden cabin with exposed ceiling and floor panels (no text or symbols visible)
natural_image
Wooden interior with a transparent rectangular frame and two side clips, no visible text or symbolsnatural_image
Wooden box with slatted metal frame and closed lid, placed on tiled floor (no text or symbols visible)17 0 BOX
natural_image
Rectangular yellow honeycomb frame with blue lettering and red directional arrows on sides (no text or symbols on the mesh itself)natural_image
Top-down view of a wooden board with two circular holes and a central hole, placed on a tiled floor (no text or symbols visible)
natural_image
Interior view of a wooden deck with a rectangular object on top, marked with red arrows and numbers (no readable text or symbols)
natural_image
Interior view of a wooden ceiling with exposed beams and insulation (no text or symbols visible)
natural_image
Wooden wall-mounted device with a transparent rectangular frame and two side connectors (no visible text or symbols)natural_image
Wooden box with slatted top and internal compartments (no visible text or symbols)C/O YH Consulting Limited Office 147, Centurion House, London Roac
Staines-upon-Thames, Surrey, TW18 4AX
Suite 250, 9166 Anaheim Place, Rancho Cucamonga, CA 9173 0

VEVOR
Affordable. Reliable. Home Improvement.
UL
MODEL: FX1+2
MODEL: FX 1+2

natural_image
Wooden structure with horizontal beams and a metal frame (no text or symbols visible)natural_image
Wooden panel with visible grain and a small mark on the surface (no text or symbols)A1 240 Coaming 1(×4)
natural_image
Wooden rectangular component with a central square cutout, labeled B-1 and (×), no readable text or symbols on the object itself.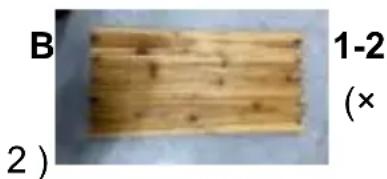
natural_image
Close-up of a wooden strip labeled B and 2, with identifier 1-2 (×) on the right side (no other text or symbols)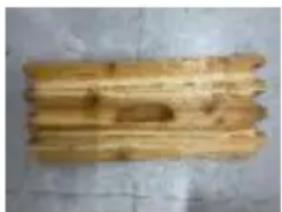
natural_image
Close-up of wooden logs on a plain surface (no text or symbols visible)A 2 17 0 Coaming 1(×
natural_image
Two wooden rectangular strips on a white surface, labeled B 2 and -1, with an '×' indicating a sample (no additional text or symbols)natural_image
Wooden rectangular object with a central hole and two small holes, placed on a tiled floor (no text or symbols visible)
natural_image
Wooden interior with a rectangular object on a wooden surface, marked with red arrows and numbers (no readable text or symbols)
natural_image
Interior view of a wooden structure with exposed ceiling and floor panels (no text or symbols visible)
natural_image
Wooden tray with a transparent rectangular frame and two side clips, no visible text or symbols on the tray itself.natural_image
Wooden box with slatted metal frame and closed door, placed on tiled floor (no text or symbols visible)17 0 PUDEŁKO
natural_image
Rectangular yellow honeycomb frame with blue letter labels (a, b, c, d) at corners, no text or symbols on the main structure.48.Montaż okna
natural_image
Top-down view of a wooden plank with two circular holes on a tiled floor (no text or symbols visible)
natural_image
Interior view of a wooden deck with a rectangular panel and red arrows indicating direction (no text or symbols)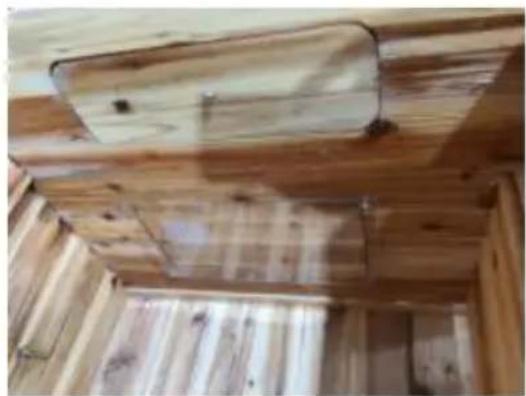
natural_image
Interior view of a wooden ceiling with exposed beams and insulation (no text or symbols visible)
natural_image
Wooden wall-mounted device with a transparent rectangular frame and two side connectors (no visible text or symbols)natural_image
Wooden box with slatted top and internal compartments (no visible text or symbols)C/O YH Consulting Limited Biuro 147, Centurion House, London Road
Staines-upon-Thames, Surrey, TW18 4AX
Importowane do AUS: SIHAO PTY LTD.
1 ROKEVA STREETEASTWOOD NSW 2122 Australia
Importowane do USA: Sanven Technology Ltd.
Apartament 250, 9166 Anaheim Place, Rancho Cucamonga, CA 9173