
CareStyle Compact Pro IS 2565 - Iron BRAUN - Free user manual and instructions
Find the device manual for free CareStyle Compact Pro IS 2565 BRAUN in PDF.
| Brand | Braun |
| Model | CareStyle Compact Pro IS 2565 |
| Product type | Iron with compact steam generator |
| Power | 2400 W |
| Power supply | 220-240 V, 50-60 Hz |
| Water tank capacity | 300 ml |
| Weight | 1.5 kg |
| Dimensions (L x W x H) | 30 x 15 x 20 cm |
| Power cord length | 2 m |
| Soleplate type | Ceramic soleplate |
| Ironing modes | iCare, Turbo, Eco, Vertical steaming |
| Automatic shut-off | Yes, after 10 minutes of inactivity |
| Anti-start system | No |
| Vertical steam function | Yes |
| Locking system | Yes, for transport and storage |
| Removable tank | Yes |
| Double cord | Yes (power cord + steam cord) |
| Cleaning/descaling system | With LED indicator and audible signal |
| Water usage | Tap water recommended, distilled water if hard water |
| Maintenance | Regular soleplate cleaning and periodic descaling |
| Included accessories | Cleaning container |
| Warranty | See warranty notice or Braun website |
Frequently Asked Questions - CareStyle Compact Pro IS 2565 BRAUN
User questions about CareStyle Compact Pro IS 2565 BRAUN
0 question about this device. Answer the ones you know or ask your own.
Ask a new question about this device
Download the instructions for your Iron in PDF format for free! Find your manual CareStyle Compact Pro IS 2565 - BRAUN and take your electronic device back in hand. On this page are published all the documents necessary for the use of your device. CareStyle Compact Pro IS 2565 by BRAUN.
USER MANUAL CareStyle Compact Pro IS 2565 BRAUN
natural_image
Exterior view of a Bruyne Air iron with visible branding and model number (no text-heavy elements)Type 12820010
Register your product
www.braunhousehold.com/register
Ironing system
Deutsch 7
English 9
Français 12
Español 15
Português 18
Italiano 21
Nederlands 23
Dansk 26
Norsk 29
Svenska 31
Suomi 34
Polski 36
Český 39
Slovenský 42
Magyar 44
Hrvatski 47
Slovenski 50
Türkçe 53
Română (RO/MD) 55
Ελληνικά 58
Қазақ 61
Русский 65
Українська 68

73
For demo videos scan the following QR code
© Copyright 2022. All rights reserved
De'Longhi Braun Household GmbH
flowchart
graph TD
    A["Grid Layout"] --> B["Arrow to Grid Layout"]
    B --> C["Arrow to Grid Layout"]
    C --> D["Arrow to Grid Layout"]
DE Bitte lesen Sie die Sicherheitshinweise (separate Broschüre) sorgfältig und vollständig, bevor Sie das Gerät in Betrieb nehmen.
EN Please read safety instructions (separate booklet) carefully and completely before using the appliance.
FR Veuillez lire attentivement l'intégralité des instructions de sécurité (livret séparé) avant d'utiliser l'appareil.
ES Lea completamente las instrucciones de seguridad (manual separado) con atención antes de utilizar el aparato.
PT Leia as instruções de segurança (folheto separado) atentamente e por completo antes de utilizar o aparelho.
IT Si prega di leggere attentamente ed integralmente le istruzioni di sicurezza (libretto separato) prima di utilizzare l'apparecchio.
NL Lees de veiligheidsaanwijzingen (afzonderlijk boekje) aandachtig en volledig voordat u dit product gebruikt.
DK Læs sikkerhedsinstruktionerne (separat hæfte) omhyggeligt og fuldstændigt, før apparatet bruges.
NO Les alle sikkerhetsanvisningene grundig før du tar i bruk apparatet.
SE Läs igenom säkerhetsanvisningarna (separat häfte) noggrant innan du använder apparaten.
FI Lue turvallisuusohjeet (erillinen kirjanen) huolella kokonaan ennen laitteen käyttöä.
PL Przed użyciem urządzenia proszę uważnie przeczytać instrukcje bezpieczeństwa (osobna broszura).
CZ Přečtěte si pečlivě a kompletně bezpečnostní pokyny (samostatná brožura) před použitím přístroje.
SK Kým začnete spotrebič používat', dôkladne si preštudujte bezpečnostné pokyny (samostatná brožúrka).
HU Kérjük, hogy a készülék használata előtt olvassa végig figyelmesen a biztonsági utasításokat (külön füzet).
HR Molimo vas da prije početka korištenja uređaja pažljivo i u cijelosti pročitate sigurnosne upute (posebna knjižica).
SL Pred napravo začnete uporabljati, pozorno in v celoti preberite navodila (ločena knjižica).
TR Cihazı kullanmadan önce lütfen güvenlik talimatlarını dikkatle ve tamamen okuyun (ayrı kitapçık).
RO Vă rugăm să citiți cu atenție și în întregime instrucțiunile de siguranță (broșură separată) înainte de a utiliză aparatul.
GR Μελετήστε με προσοχή όλες τις οδηγίες ασφαλείας (ξεχωριστό φυλλάδιο) προτού χρησιμοποιήσετε τη συσκευή.
KZ Аспапты қолданардың алдында қауіпсіздік бойынша нұсқауларды (бөлек кітапша) зейін қойып түгелдей оқып шығыңыз.
RU Перед использованием прибора внимательно полностью прочтите инструкции по технике безопасности (отдельная брошюра).
UA Перед використанням пристрою уважно та повністю прочитайте інструкцію з техніки безпеки (окрему брошуру).
AR ٢٠ جى قراءة تعليمات الأُمان (كتيب منفصل) بعناية وبشكال كامل قبل استخدام الجهاز.
A
B
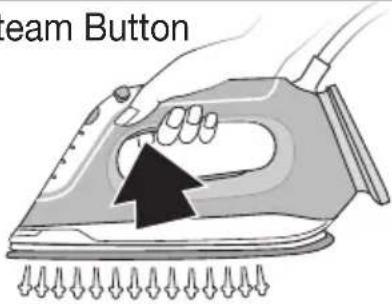
Steam Button
First use
30 sec
natural_image
Illustration of a hand using an iron on a machine, with a black arrow indicating the motion direction (no text or symbols)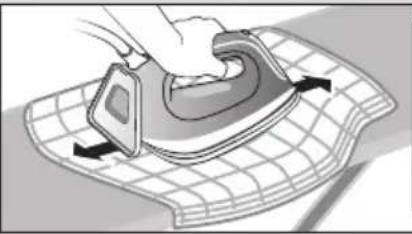
natural_image
Illustration of a hand using a power iron on a grid-patterned surface (no text or symbols)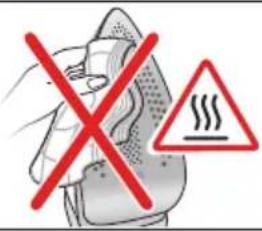
C
Settings
flowchart
graph TD
    A["Settings"] --> B["iCare"]
    B --> C["Lighting Effects"]
    C --> D["Lighting Light"]
    style A fill:#f9f,stroke:#333
    style B fill:#ccf,stroke:#333
    style C fill:#cfc,stroke:#333
    style D fill:#fcc,stroke:#333

Vertical Refresh Steam shot
natural_image
Illustration of a hand using an iron on a garment, showing the iron being placed inside (no text or symbols present)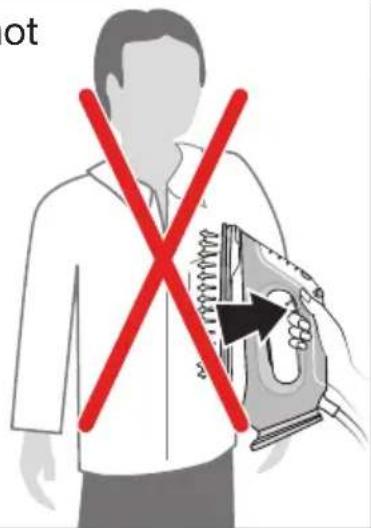
D
Iron Auto-Off


flashing
Restart


natural_image
Simple diagram showing a light bulb with rays and an arrow pointing left (no text or symbols)flashing
iron ready +
E
F
Deutsch
Vor dem Gebrauch
Please read instructions carefully and completely before using the appliance.
Caution: Due to the high power of this appliance please make sure that your mains supply is sufficient. Please contact your local electric power company to make sure that the so called mains impedance is not higher than 0,404 Ohm.
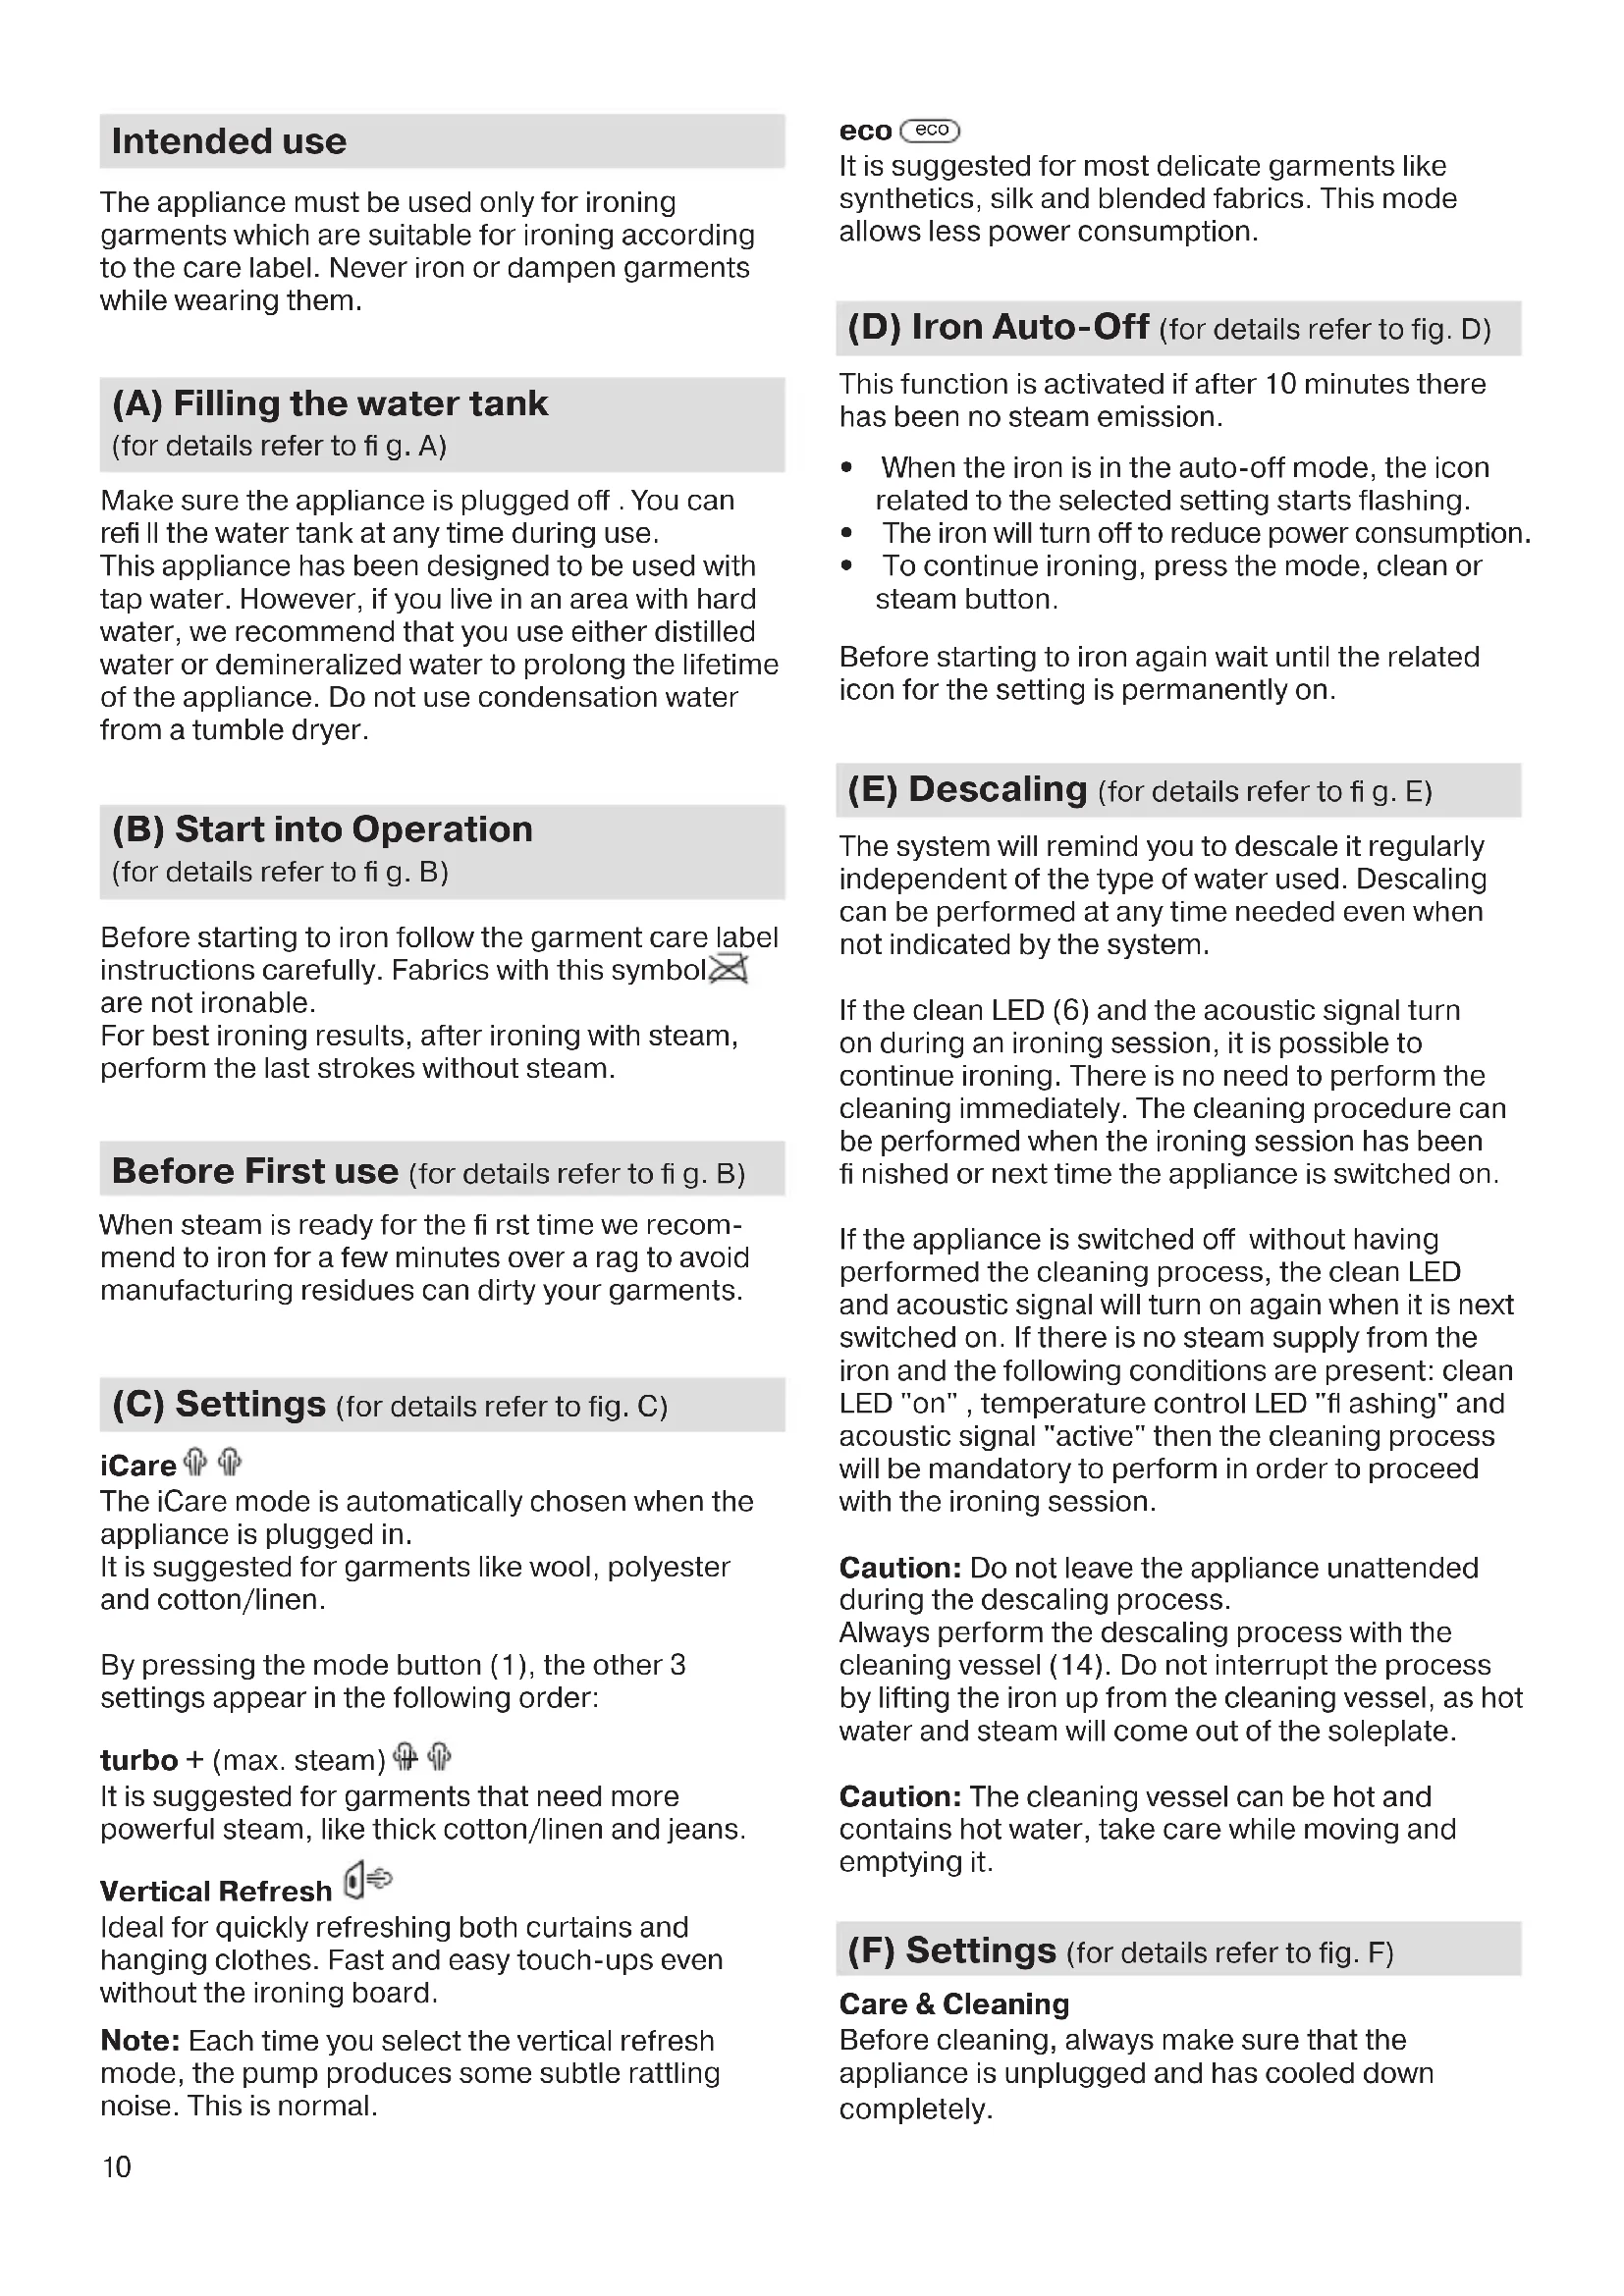
Description
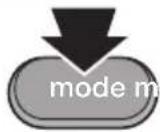
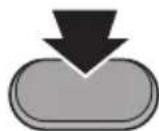
1 Mode button
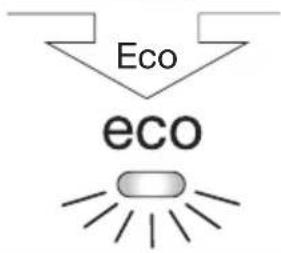
2 Eco mode indicator
3 iCare mode indicator
4 Turbo mode indicator
5 Vertical refresh mode indicator
6 Clean button/Clean system LED
7 Steam button
8 Lock system
9 Double cord/Storage
10 Power cord/Storage
11 Removable water tank
12 Iron rest
13 Heel rest
14 Cleaning vessel
Intended use
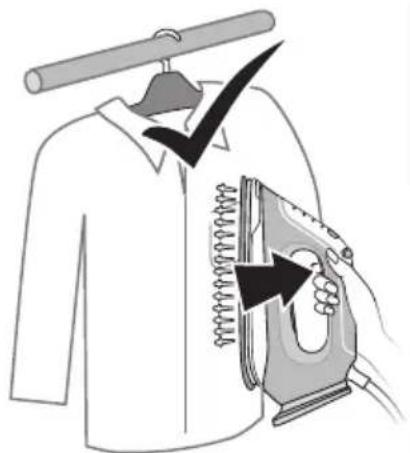
The appliance must be used only for ironing garments which are suitable for ironing according to the care label. Never iron or dampen garments while wearing them.
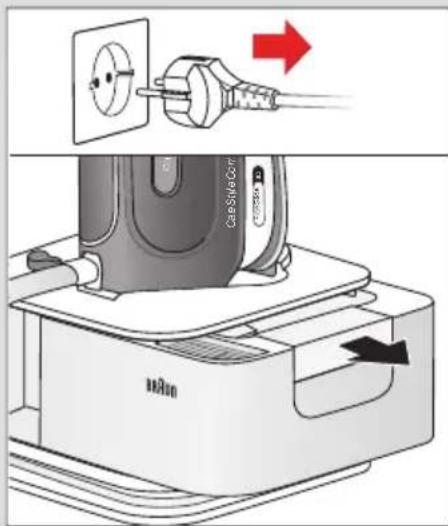
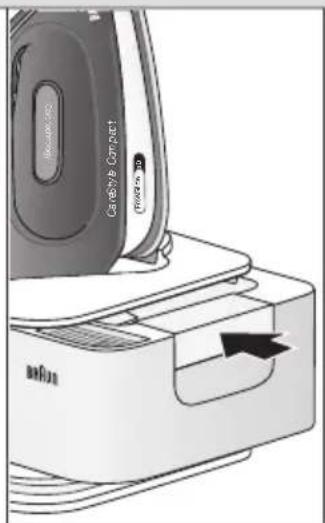
(A) Filling the water tank
(for details refer to fig. A)
Make sure the appliance is plugged off. You can refill the water tank at any time during use. This appliance has been designed to be used with tap water. However, if you live in an area with hard water, we recommend that you use either distilled water or demineralized water to prolong the lifetime of the appliance. Do not use condensation water from a tumble dryer.
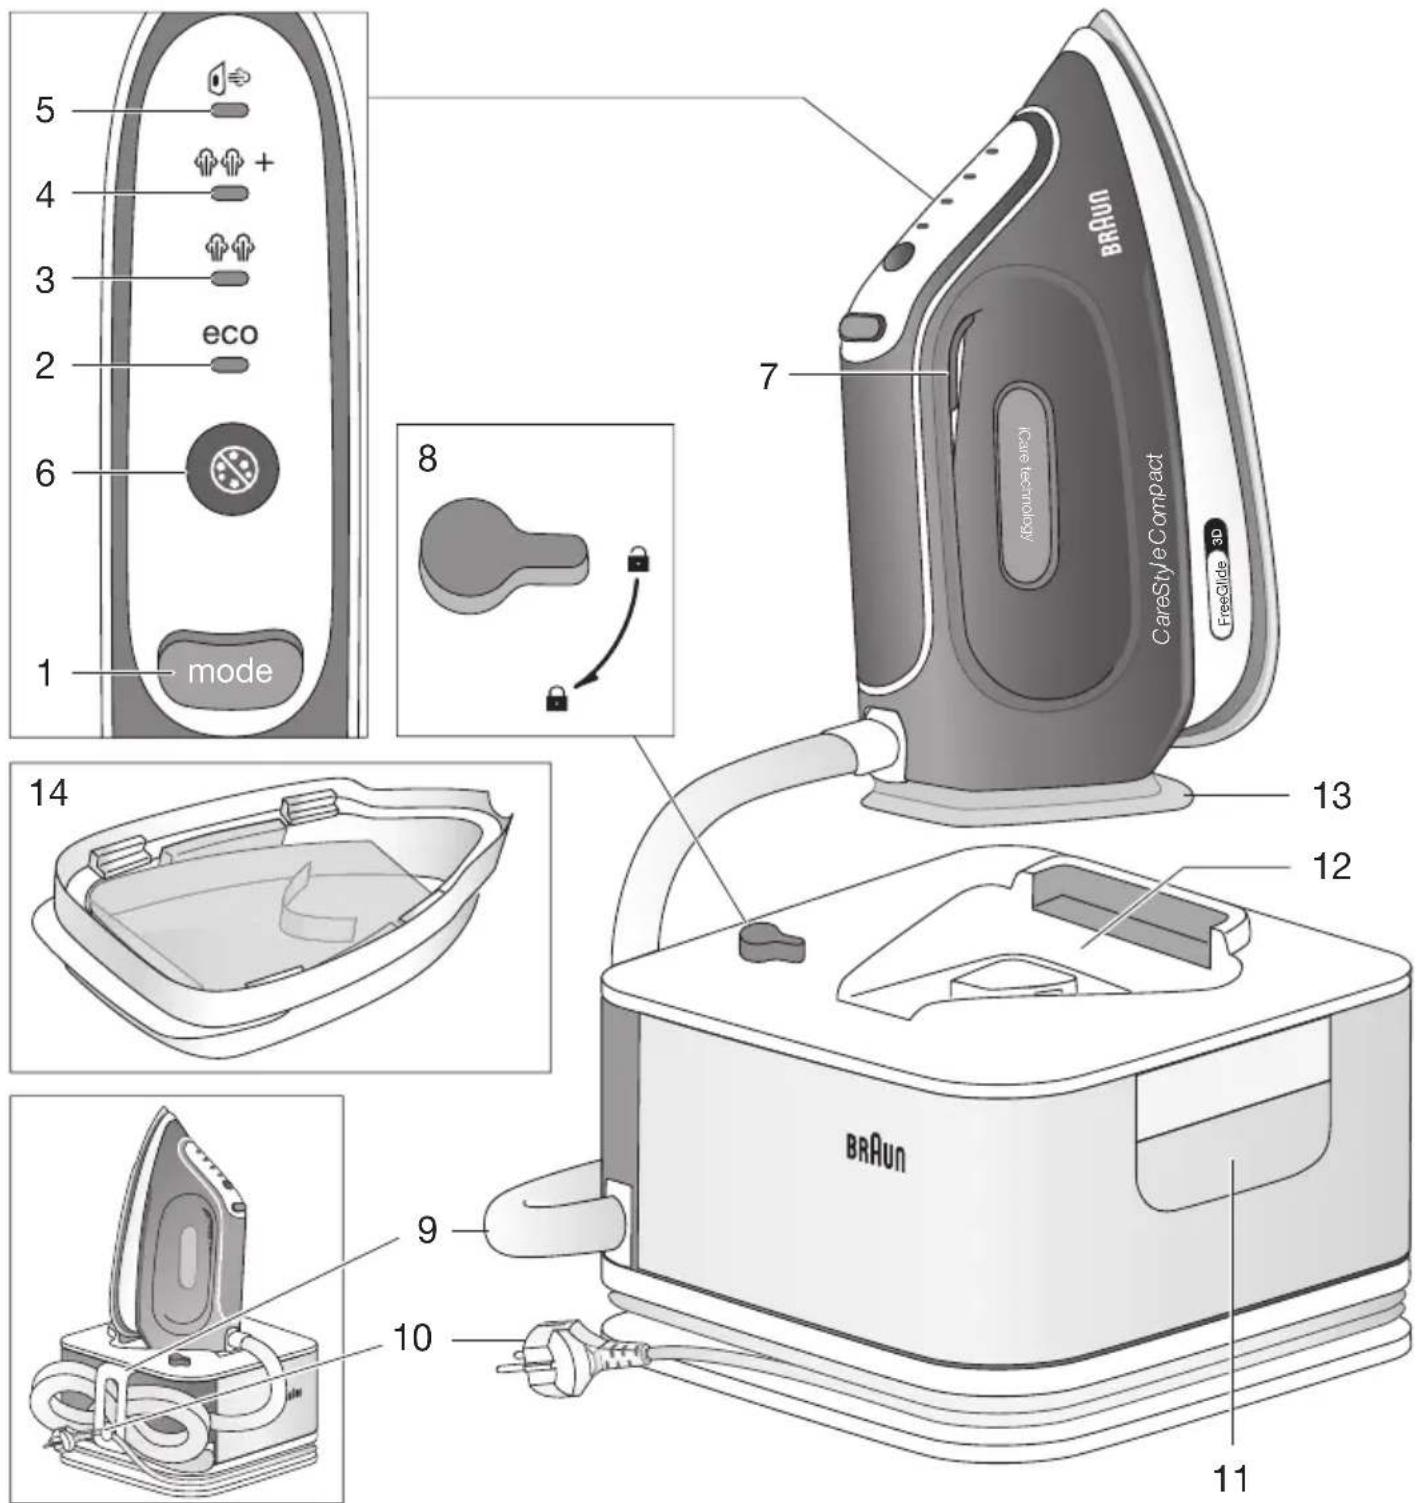
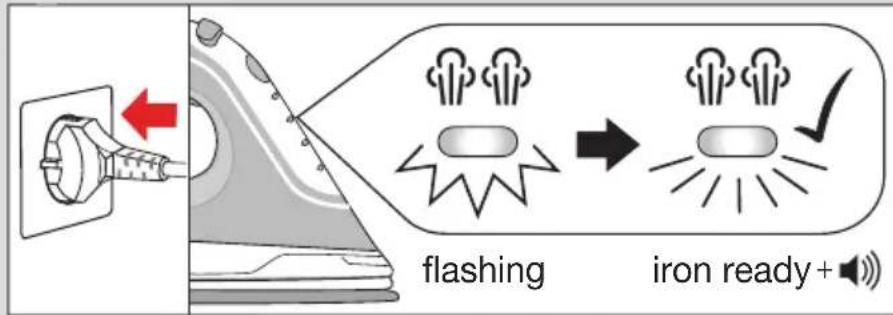
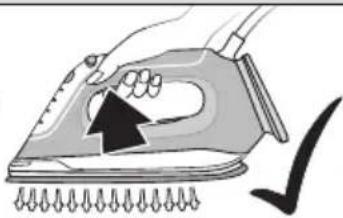
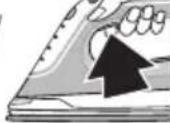
(B) Start into Operation
(for details refer to fig. B)
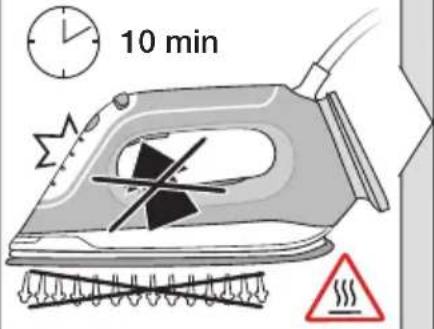
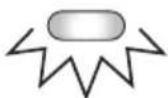
Before starting to iron follow the garment care label instructions carefully. Fabrics with this symbol are not ironable.
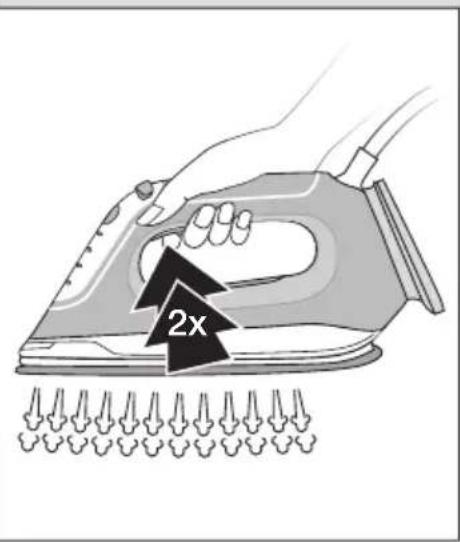
For best ironing results, after ironing with steam, perform the last strokes without steam.
Before First use (for details refer to fig. B)
When steam is ready for the first time we recommend to iron for a few minutes over a rag to avoid manufacturing residues can dirty your garments.
(C) Settings (for details refer to fig. C)
iCare
The iCare mode is automatically chosen when the appliance is plugged in. It is suggested for garments like wool, polyester and cotton/linen.
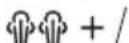
By pressing the mode button (1), the other 3 settings appear in the following order:
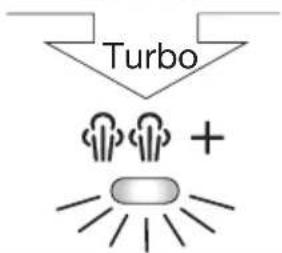
turbo + (max. steam) ♦ ♦
It is suggested for garments that need more powerful steam, like thick cotton/linen and jeans.
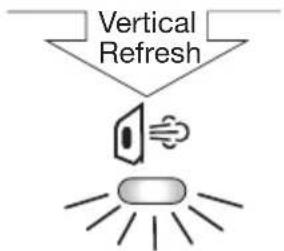
Vertical Refresh
Ideal for quickly refreshing both curtains and hanging clothes. Fast and easy touch-ups even without the ironing board.
Note: Each time you select the vertical refresh mode, the pump produces some subtle rattling noise. This is normal.
eco eco
It is suggested for most delicate garments like synthetics, silk and blended fabrics. This mode allows less power consumption.
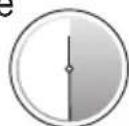
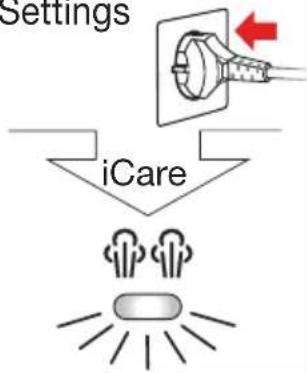
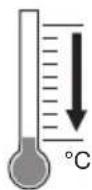
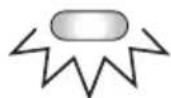
(D) Iron Auto-Off (for details refer to fig. D)
This function is activated if after 10 minutes there has been no steam emission.
- When the iron is in the auto-off mode, the icon related to the selected setting starts flashing.
- The iron will turn off to reduce power consumption.
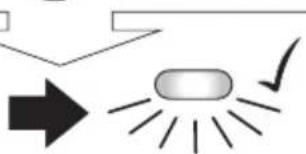
- To continue ironing, press the mode, clean or steam button.
Before starting to iron again wait until the related icon for the setting is permanently on.
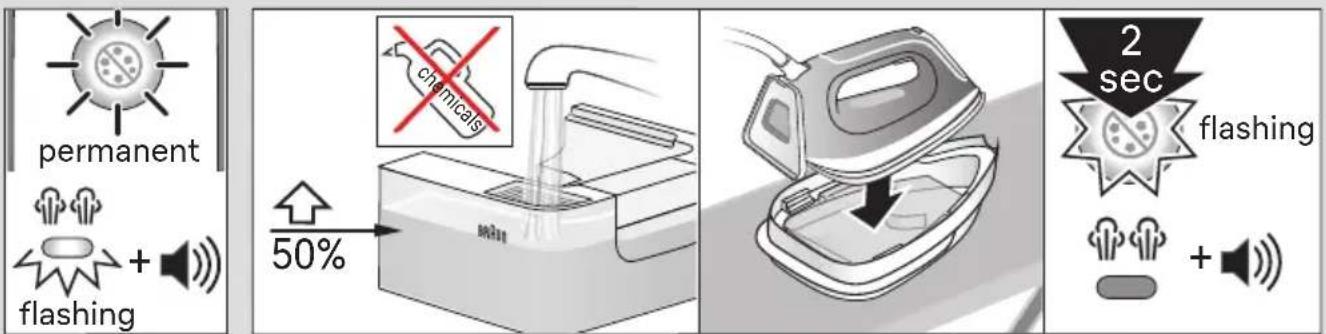
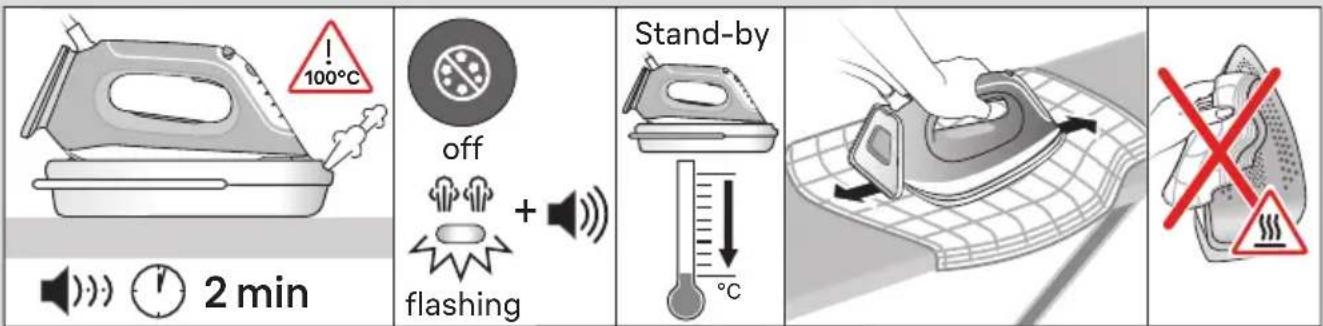
(E) Descaling (for details refer to fig. E)
The system will remind you to descale it regularly independent of the type of water used. Descaling can be performed at any time needed even when not indicated by the system.
If the clean LED (6) and the acoustic signal turn on during an ironing session, it is possible to continue ironing. There is no need to perform the cleaning immediately. The cleaning procedure can be performed when the ironing session has been finished or next time the appliance is switched on.
If the appliance is switched off without having performed the cleaning process, the clean LED and acoustic signal will turn on again when it is next switched on. If there is no steam supply from the iron and the following conditions are present: clean LED "on", temperature control LED "fl ashing" and acoustic signal "active" then the cleaning process will be mandatory to perform in order to proceed with the ironing session.
Caution: Do not leave the appliance unattended during the descaling process.
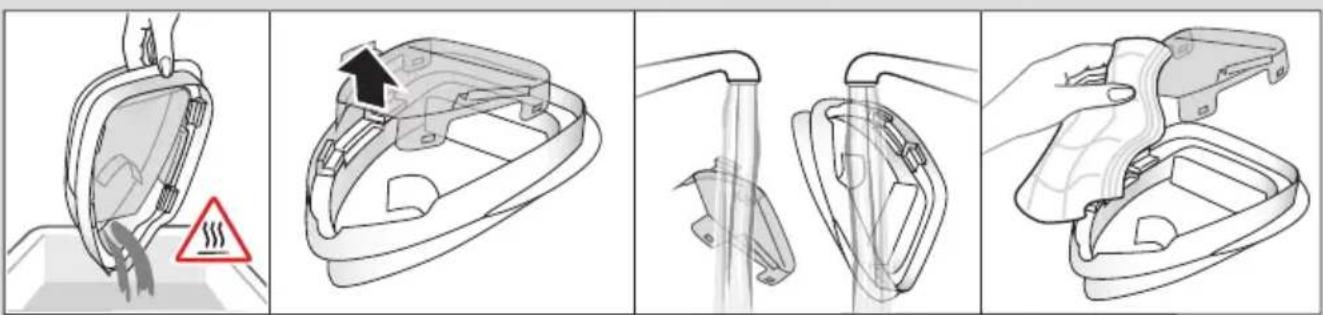
Always perform the descaling process with the cleaning vessel (14). Do not interrupt the process by lifting the iron up from the cleaning vessel, as hot water and steam will come out of the soleplate.
Caution: The cleaning vessel can be hot and contains hot water, take care while moving and emptying it.
(F) Settings (for details refer to fig. F)
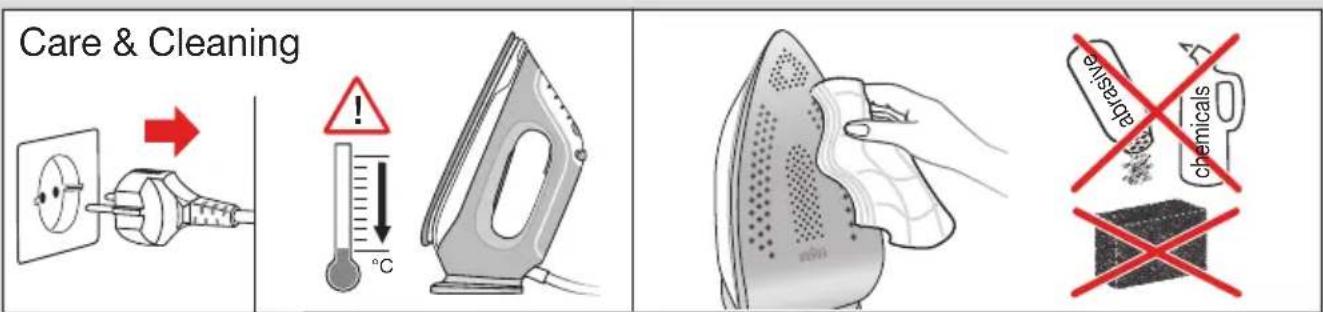
Care & Cleaning
Before cleaning, always make sure that the appliance is unplugged and has cooled down completely.
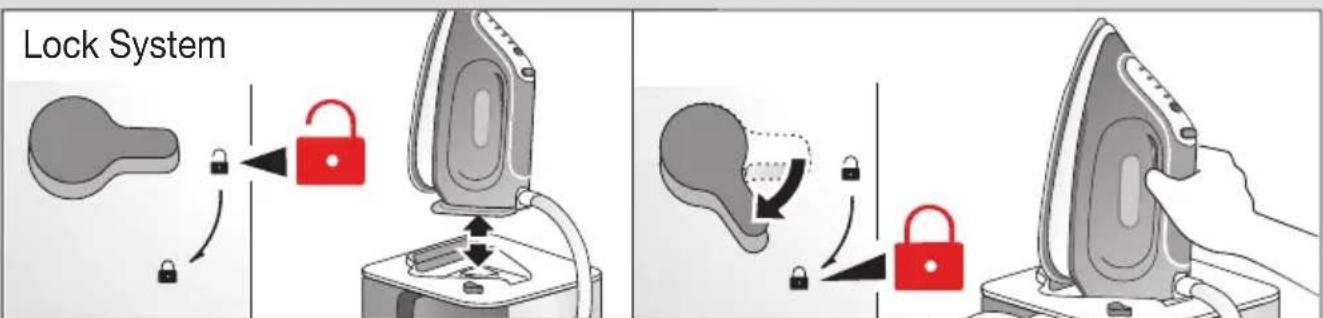
Lock System
The appliance is equipped with a lock system (8) for convenient transportation and easy storage. It is possible to lift and carry the appliance on the handle of the locked iron.
NOTE: Before transportation make sure the iron is properly locked and has cooled down completely.
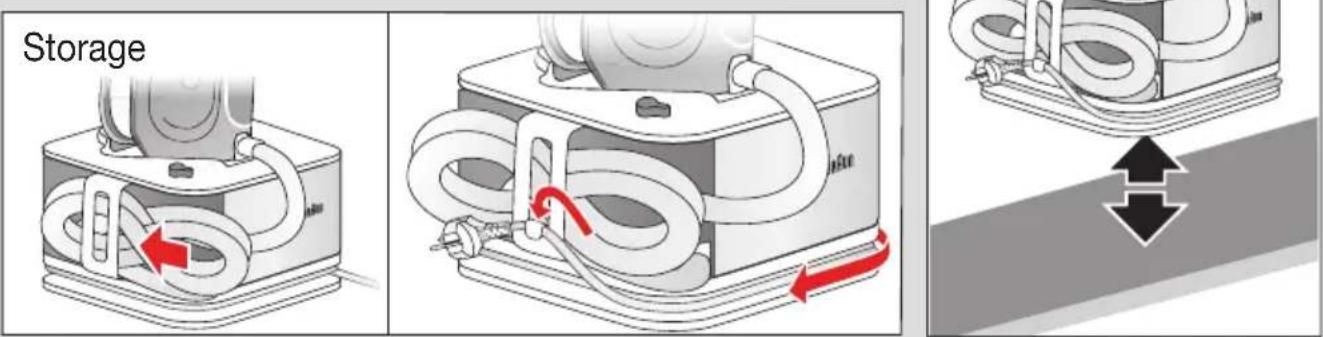
Storage
Unplug and let the appliance cool down (the soleplate is hot) before winding the cords for storage (9,10).
Warranty and Service
For detailed information see separate warranty and service leafl et or visit www.braunhousehold.com.
For UK Only
Guarantee Information
All Braun Household products carry a minimum guarantee period of two years. The rights and benefits under this guarantee are additional to your statutory rights which are not affected.
Please keep your receipt as this will form the basis of your guarantee.
In the unlikely event of a breakdown you have access to professional help from our team simply by calling: 0345 222 0458
For service in the Republic of Ireland please call: 012475471
Braun Household undertakes within the specified period to repair or replace any part of the appliance, free of charge (with the exception of any glass or porcelain-ware incorporated in the product) found to be defective provided that;
• We are promptly informed of the defect.
- The product is used and maintained in accordance with the User Instructions.
- The appliance has not been altered in any way or subjected to misuse or repair by a person other than an authorised service agent for Braun Household.
- No rights are given under this guarantee to a person acquiring the appliance second hand or for commercial or communal use.
- Any repaired or replaced appliance will be guaranteed on these terms for the unexpired portion of the guarantee.
- The need for repair has not been caused by insufficient aftercare or cleaning: or damage caused by the chemical or electrochemical effects of water.
Under no circumstances shall the application of this guarantee give rise to the complete replacement of the appliance or entitle the consumer to damages.
Braun Household, New Lane, Havant, Hampshire PO9 2NH
www.braunhousehold.co.uk
Thank You for choosing Braun. We are confident that you will get excellent service from this product.
TO IMPROVE YOUR EXPERIENCE
Register now at www.braunhousehold.co.uk By registering we may send you from time to time details on exclusive offers, promotions, recipes and inside tips.
Troubleshooting guide
| PROBLEM POSSIBLE | CAUSE SOLUTION | |
| The iron does not produce any steam | When starting your ironing session, the steam button has not been pressed long enough | Press and hold the steam button until steam comes out. It may take up to 30 seconds until steam comes out |
| There is not enough water in the water tank | Fill the water tank | |
| If the clean system LED turns on, the steam function has been disabled until you have performed the cleaning process | Perform the cleaning process (see dedicated chapter) | |
| The iron is heating up | When the selected mode indicator LED is flashing, the iron is heating up; during this phase the steam function is disabled. Wait until the LED turns permanently on. | |
| During steam emission the system produces a pumping noise associated with vibrations | If the water tank is full – this is normal working condition | No action required |
| The water tank is empty | Switch off the system, unplug and fi ll the water tank. Press the steam button until the steam comes out. | |
| Water droplets come out of the soleplate | Steam condenses into water in the hose when you use steam for the fi rst time or have not used it for a long time | This is normal. Hold the iron away from the garment and press the steam button. Wait until steam instead of water comes out of the soleplate |
| The water tank is empty Unplug and fill the water tank. | ||
| During ironing white particles and impurities are coming out of the soleplate | Your tap water is very hard | If your tap water is hard we recommend you use either distilled water or demineralized water |
| Impurities of chemicals present in the water have deposited in the steam vents and/or soleplate | Perform the cleaning process regularly even if not required by the system (see dedicated chapter) | |
| Water fl ushes out of the soleplate | The cleaning process has been activated accidentally. | Switch off the appliance and unplug. Put the iron on the cleaning vessel, switch on and perform the cleaning process completely (see dedicated chapter) |
| The fi rst time the appliance is turned on, you notice smoke/smell | Some parts have been treated with sealer / lubricant which evaporates the fi rst time the iron heats up | This is normal and will stop after the iron has been used a few times. If the smoke/smell is still present after turning off and cooling down, contact an authorized Braun Customer Service |
| All LEDs are flashing System error | Unplug the system, plug in again. If the problem is still present unplug immediately and contact an authorized Braun Customer Service | |
Français
Avant utilisation
turbo + (maks. damp) ♦ ♦