
AX51304 - Air purifier AEG - Free user manual and instructions
Find the device manual for free AX51304 AEG in PDF.
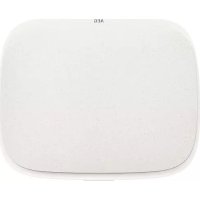



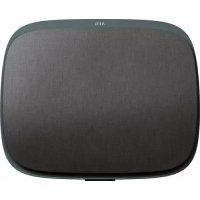
| Product Type | Air Purifier |
| Brand | AEG |
| Model | AX51304 |
| Range | WELL A7 / A5 |
| Power Supply | 220-240 V, 50/60 Hz |
| Network Standby Power Consumption | Less than 2.0 W |
| Radio Frequencies | Wi-Fi 2.4 GHz (15 dBm), RFID 13.56 MHz (30 dBm) |
| Operating Modes | Smart (automatic) and Manual with speed slider |
| Sensors | Laser PM sensor (PM1, PM2.5, PM10) |
| Air Quality Indicator | Color scale: green, yellow, orange, red, purple, brown |
| Filters | Mesh pre-filter, ultrafine particle filter, VOC charcoal filter (all except pre-filter not washable) |
| Ionizer | Yes, can be activated via app (disabled by default) |
| Connectivity | Wi-Fi 2.4 GHz, AEG Wellbeing app |
| Installation | Wall-mounted (with hook) or floor-standing (removable feet) |
| Child Safety | Key lock via app or POWER+MODE combination (5 s) |
| Customization | Front panel with removable fabric cover, top handle, interchangeable feet |
| Maintenance | Clean sensor window with vacuum every 4 weeks; replace filters at end of life (change icon) |
| Repairability | No user-serviceable parts; contact an authorized Electrolux repairer |
| Dimensions (approx.) | Approximately 60 cm high, 40 cm wide, 20 cm deep (without accessories) |
Frequently Asked Questions - AX51304 AEG
User questions about AX51304 AEG
0 question about this device. Answer the ones you know or ask your own.
Ask a new question about this device
Download the instructions for your Air purifier in PDF format for free! Find your manual AX51304 - AEG and take your electronic device back in hand. On this page are published all the documents necessary for the use of your device. AX51304 by AEG.
USER MANUAL AX51304 AEG
Thank you for choosing the Electrolux WELL A7 / A5 series air purifier. Always use original Electrolux consumables, accessories and spare parts to get the best results out of your unit. This appliance is designed with the environment in mind and hence all plastic parts are marked for recycling purposes.
GENERAL SAFETY INFORMATION
This USER MANUAL provides specific operating instructions for your model OR series. Use the unit only as instructed in this manual. These instructions are not meant to cover every possible condition and situation that may occur. Common sense and caution must be practiced when installing, operating, and maintaining any appliance.
WARNING! - CHILDREN & VULNERABLE PEOPLE SAFETY
Risk of suffocation, injury or permanent disability. Keep all packaging away from children.
This appliance can be used by children aged from 8 years and above and persons with reduced physical, sensory or mental capabilities or lack of experience and knowledge if they have been given supervision or instruction concerning use of the unit in a safe way and understand the hazards involved.
Cleaning and user maintenance shall not be made by children without supervision. Children shall not play with the unit. Children under 3 years of age should be kept away from the unit unless continuously supervised.
CAUTION! - AVOID INJURY OR DAMAGE TO THE UNIT OR PROPERTY
Do not direct airflow at fireplaces or other heat related sources as this could cause flare ups.
Do not climb on or place objects on the unit.
Do not hang objects off the unit.
Do not place containers with liquids on the unit.
Turn OFF the unit at the power source when it will not be used for an extended period.
Do not block or cover the air intake area, fan area and air outlet grill.
Ensure that any electrical/electronic equipment is at least 30 cm away from the unit.
CAUTION! - WALL MOUNTING: AVOID INJURY OR DAMAGE TO PROPERTY
Always use appropriate screws and plastic plugs for the wall hang hook, depending on the wall material (e.g., nailable plugs with screws for concrete OR expandable plugs with screws for drywall, etc.). If you are not sure of the type of wall, have a qualified builder or constructor inspect and recommend the correct screw and plug type according to local or national building standards.
Do not, under any circumstances, use the wall hang hook with only one screw.
Always use appropriate safety precautions and protective gear while drilling holes into the wall or handling such equipment (e.g., safety gloves, dust mask, etc.).
Do not pull on or tug on the unit from the power cord while it is wall mounted. Please ensure the power cord is snug to the wall and the floor to avoid any undue tangling of objects with the cord and thus accidental tugs to the unit.
Ensure the wall hang hook is secured to the wall firmly and at the correct angle (e.g., parallel to the floor without any leaning) for best results.
If unsure of whether the wall hang hook has been secured correctly on the wall, before mounting the unit, please test the hook by a) applying some pressure on it from the top with your hands to see if it buckles and b) tugging the hook towards you with some pulling motion to see if screws come loose.
INFORMATION ABOUT RADIO
WiFi working frequency and maximum output power: 2.4 GHz; 15dBm. RFID working frequency and maximum output power: 13.56 MHz; 30dBm ± 10%. Power consumption of the product in network standby is less than 2.0W.
ELECTRICAL SAFETY INFORMATION
WARNING! - AVOID FIRE HAZARD OR ELECTRIC SHOCK
This unit can be used in 50Hz or 60Hz power supply without any change.
Do not use an extension cord or an adaptor plug.
Do not remove any prong from the power cord. Do not pinch, bend, or knot the power cord.
Do not cut or damage the power cord. If the supplied power cord is damaged, it should only be replaced by Electrolux, its service agent or similarly qualified persons. This unit contains no user serviceable parts. Always call an authorized Electrolux servicer for repairs.
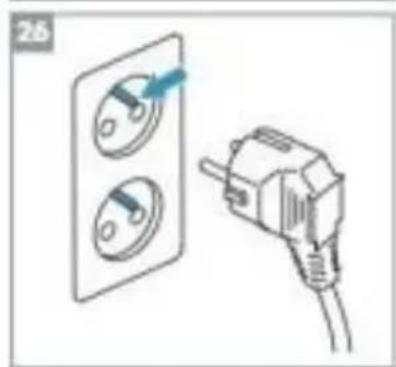
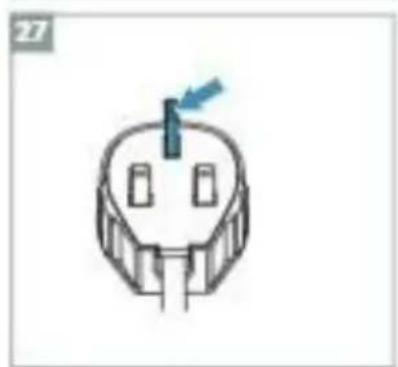
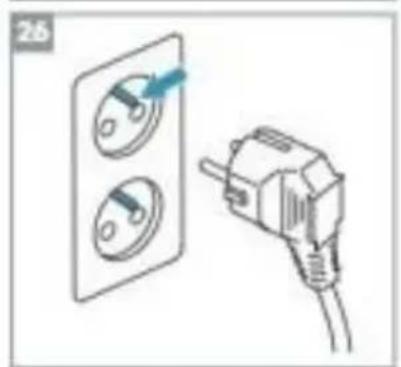
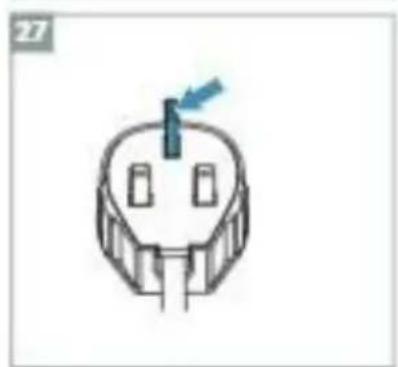
Do not, under any circumstances, cut, remove or bypass the grounding prong (see picture 26 on page 3; for UK see picture 27). If you are not sure the outlet is adequately grounded or protected by a time delay fuse or circuit breaker, have a qualified electrician install the proper outlet according to the National Electrical Code
OR applicable local codes and ordinances.
Do not store or use gasoline or other flammable vapors and liquids in the vicinity of this or any other appliance. Read product labels for flammability and other warnings.
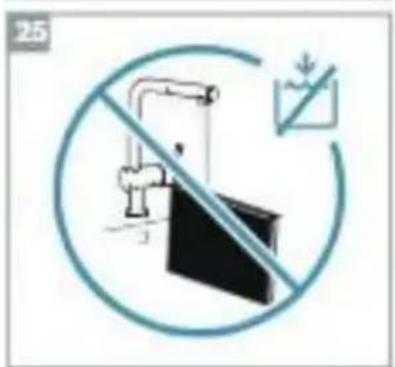
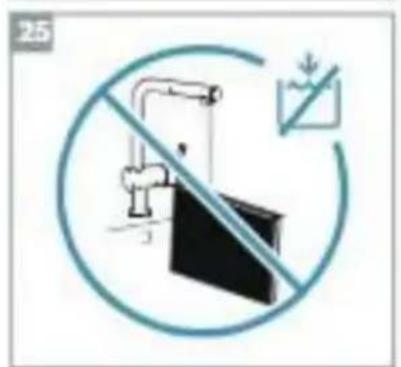
Do not let water or any other liquid or flammable detergent enter the unit to avoid electric shock and/or a fire hazard. Be sure to unplug the unit before cleaning.
Never unplug the unit by pulling on the power cord. Always grip the plug firmly and pull straight out from the receptacle.
CAUTION! - AVOID SERIOUS INJURY OR DEATH
Do not insert or place fingers or objects into the air discharge area or front facing grille of the unit.
Do not start or stop the unit by unplugging the power cord or turning OFF the power at the electrical box.
In the event of a malfunction (sparks, burning smell, etc.), immediately stop the operation, disconnect the power cord, and call an authorized Electrolux servicer.
Do not operate the unit with wet hands.
Do not pull on the power cord.
Do not touch the fan blade when removing the filter(s).
DISPOSAL
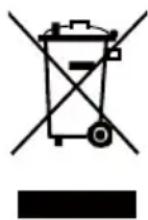
This symbol on the unit or on its packaging indicates that the unit may not be treated as household waste. To recycle your unit, please take it to an official location where they can remove and recycle the battery and electric parts in a safe and professional way. Follow your country's rules for the collection of electrical products and rechargeable batteries.
BEFORE STARTING
Read this manual carefully and pay special attention to safety information.
Pay special attention to the CAUTION sections!
Check that all key components & parts described are included.
KEY COMPONENTS OF WELL A7 / A5 SERIES AIR PURIFIERS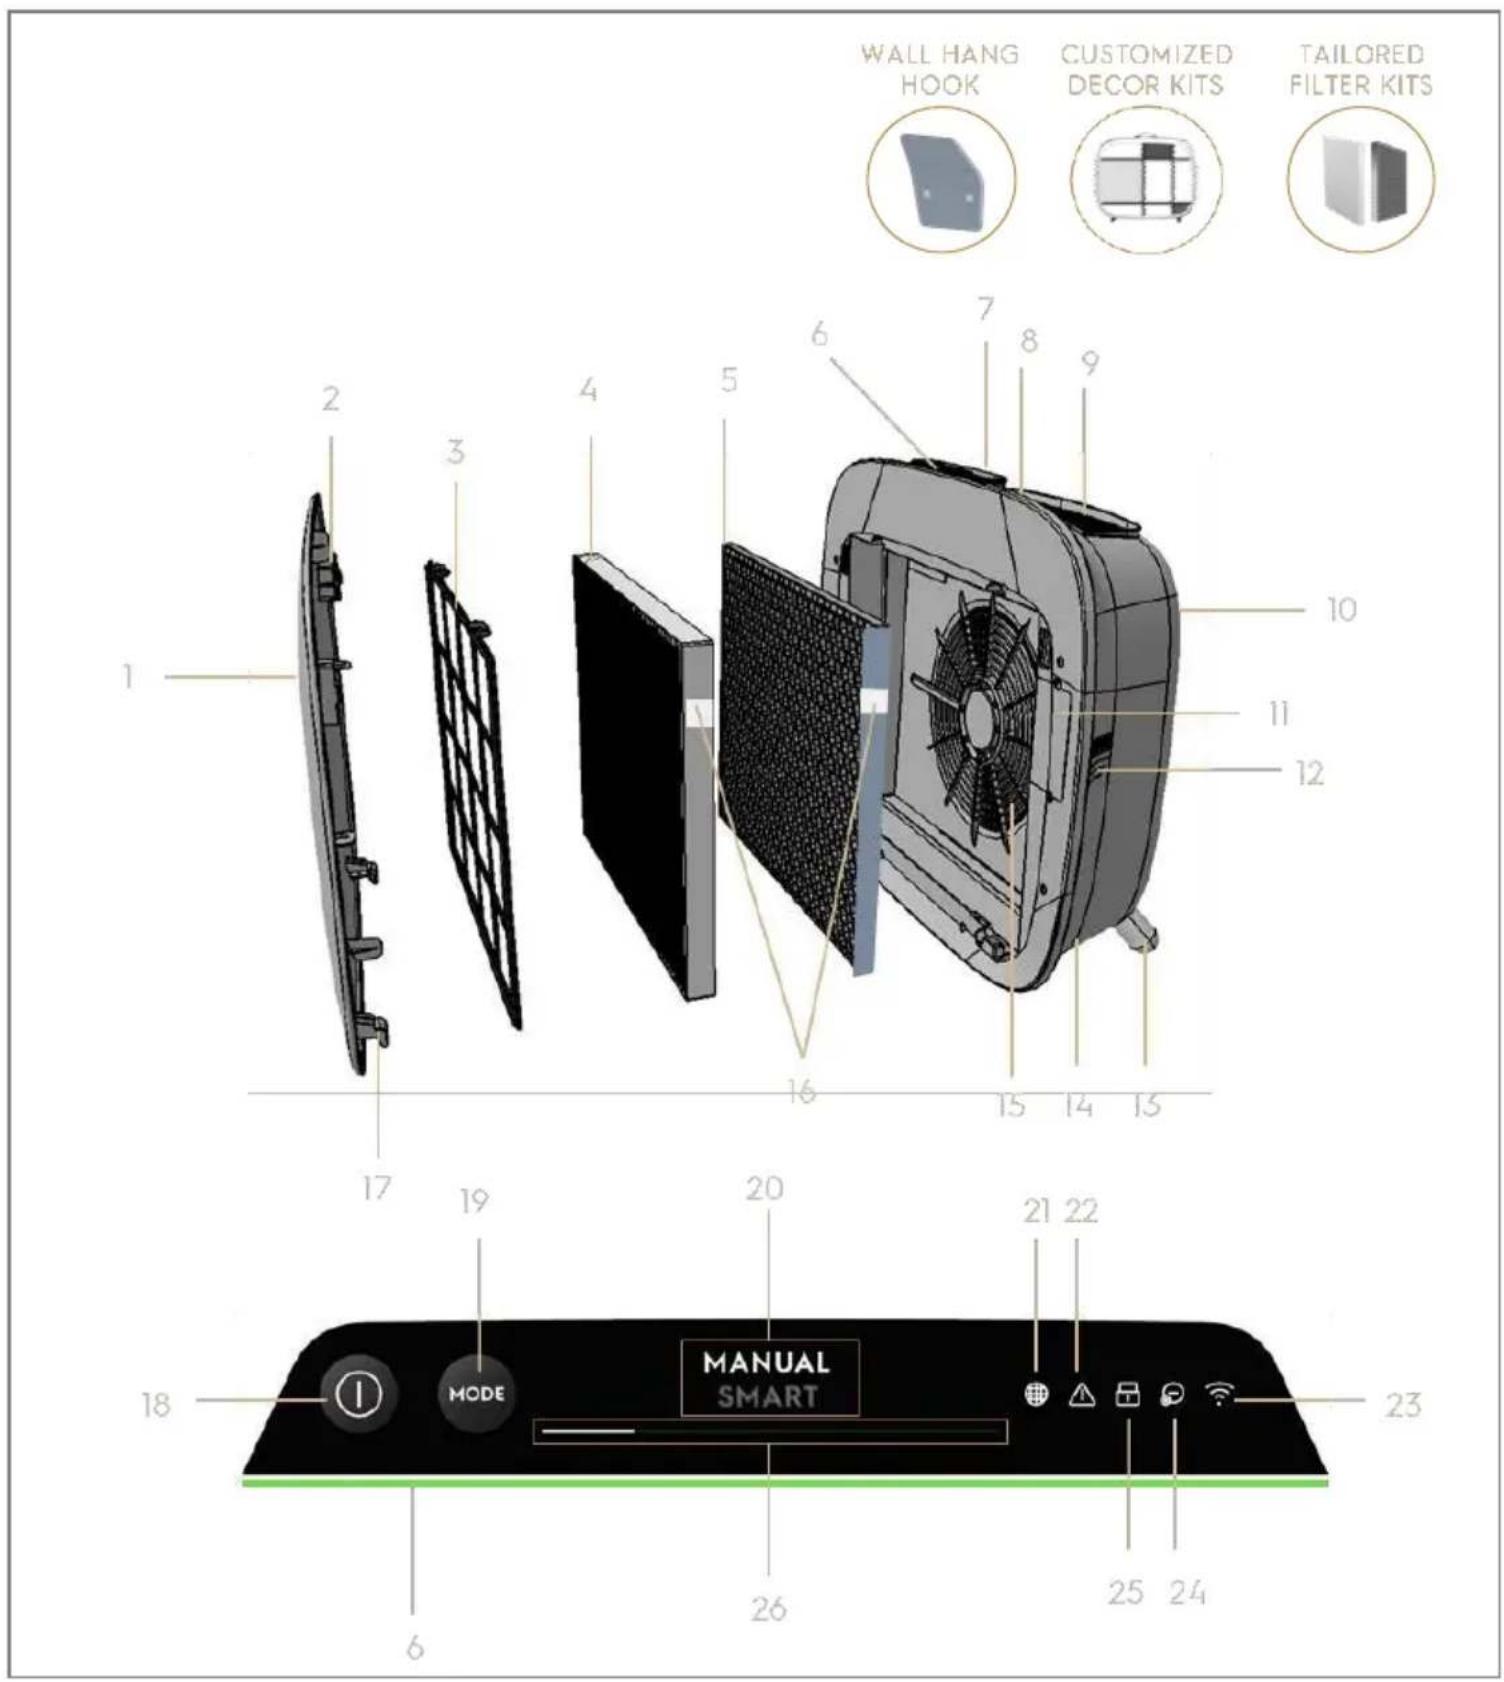
| 1 | Removable & customizable front panel | 14 | Power cord cavity |
| 2 | Front panel magnets | 15 | Fan motor cavity, grill |
| 3 | Mesh pre-filter | 16 | RFID tag(s) |
| 4 | Ultrafine particle filter | 17 | Front panel hooks |
| 5 | VOC carbon filter | 18 | POWER button (ON/OFF) |
| 6 | Air quality indicator | 19 | MODE button |
| 7 | UI Display (UI: User Interface) | 20 | Mode display |
| 8 | Removable top handle for carrying | 21 | Filter change icon |
| 9 | Air outlet grill | 22 | Alert icon |
| 10 | Back grip for lifting & hanging | 23 | WiFi icon |
| 11 | Sensor box | 24 | Ionizer icon |
| 12 | Sensor window | 25 | Child lock icon |
| 13 | Removable feet x2 | 26 | FAN SPEED slider & indicator |
NOTE: Your specific model may not have all the components and features listed within this USER MANUAL. Please check the product packaging OR the product specification page on our website for exact details of your model. Electrolux reserves the right to change information contained herein without notice.
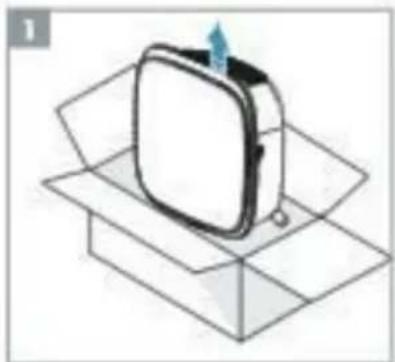
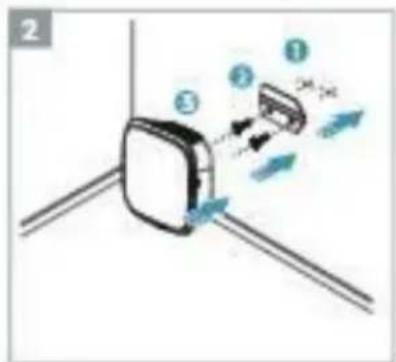
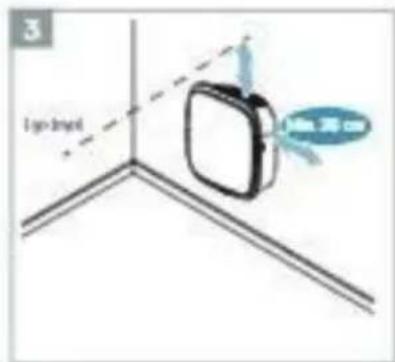
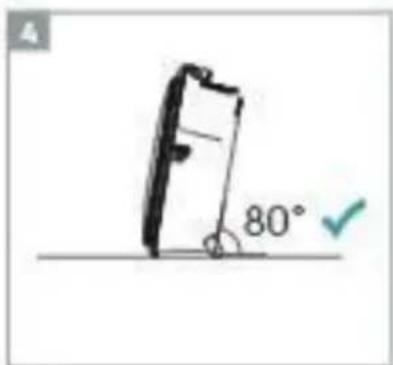
Please be careful while unboxing the air purifier. The unit has several detachable components which may have come loose in transport, so open the box with care and while placed on a large flat surface OR the floor.
- Gently remove the unit (e.g. with top handle when available) and the ancillary components from the main box. Remove the plastic packaging and discard as per safety and local recycling instructions.
- If wall mounting:
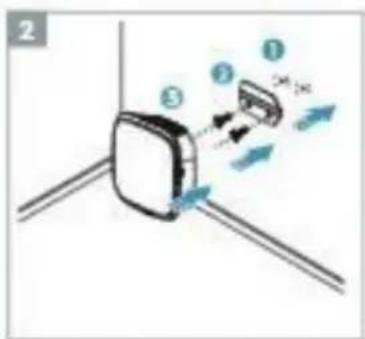
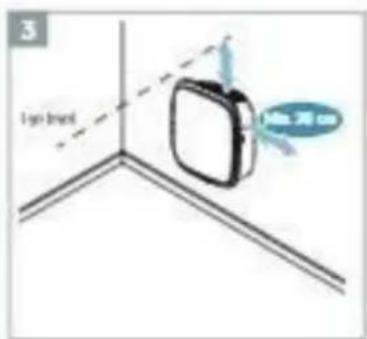
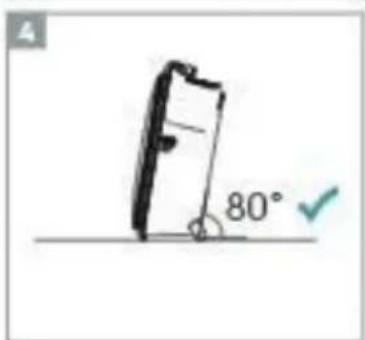
a. Please review safety instructions under the GENERAL SAFETY section before proceeding. b. Identify a spot on the wall where you would like to mount the unit. The spot should be at least 20 cm below eye level when standing fully upright (even lower is ideal & recommended), for optimal viewing as well as cleanliness under the unit. Also ensure that nearest power socket is max 1.5 m away and that there is a clearing of at least 20 cm between right side (sensor window) of the unit and other nearby surface. c. Gently place the provided hook flat against the surface of the wall and with a pencil mark the two spots where screws are to be drilled. The hook should be placed such that the protruding tip (without the holes) is on the top (refer to picture #2). d. Depending on the wall, please use appropriate drill to make two holes into the wall at the identified marks; and insert any plugs as needed. e. Depending on the wall, please use appropriate screws for following step. Place the hook flat against the surface of the wall, so that the holes are concentric and the hook sits parallel to the floor without any inclination, and then tighten the screws till the hook is securely in place and does not move if tugged. f. Lift the unit and place it onto the hook such that the top of the hook securely fits into the inbuilt grip at the back of the unit. g. Gently adjust the unit to remove any inclinations, just like a painting. Ensure that the unit sits flat up against the wall. h. When dismounting the unit, remember to disconnect the power cord from the wall socket first.
- If placing it on the floor:
a. Take the cylindrical feet and screw them into the unit by rotating clockwise till you hear a click (or get some resistance).
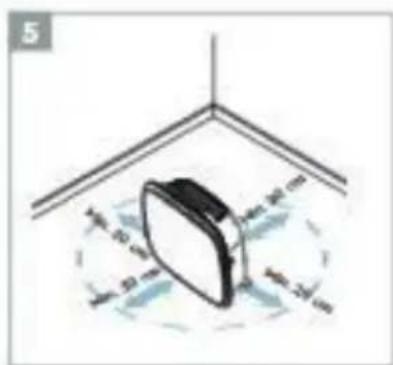
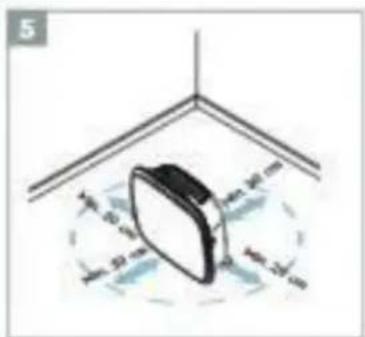
b. Lift the unit and place it next to the power socket to be used. c. Ensure a clearance of at least 30 cm between the front (air inlet) and at least 20 cm between the right side (sensor window) of the unit and other surfaces. Also ensure ample free space above the top (air outlet grill), so the unit can operate at its best in spreading pure air through the room. d. When wall mounting, please remove the cylindrical feet from the base of the unit for more efficient air distribution.
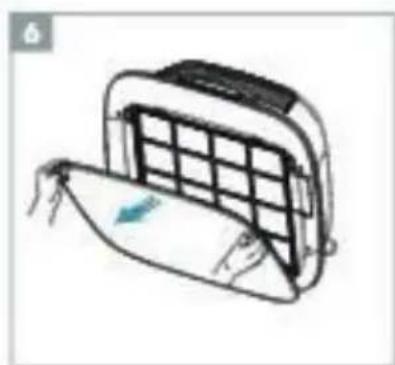
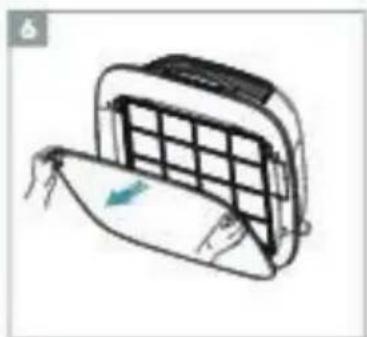
- Remove the front panel by gently pulling it away from the unit with both hands.
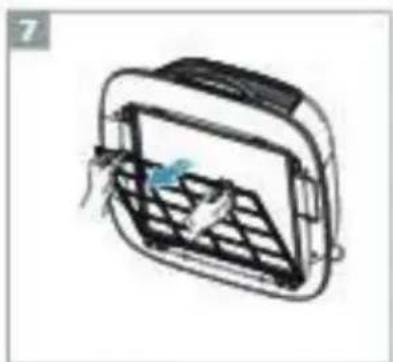
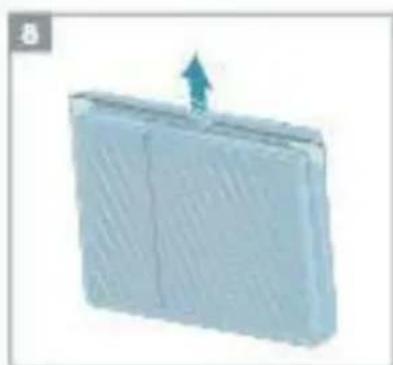
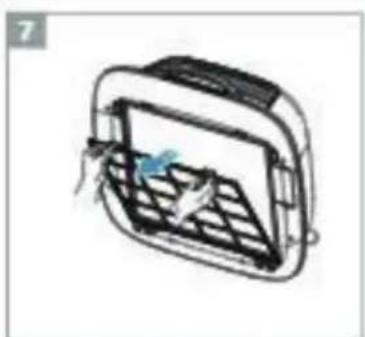
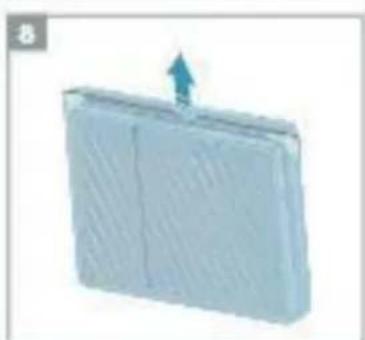
- Take out the mesh pre-filter, ultrafine particle filter, and VOC carbon filter layers and remove all plastic packaging. Discard as per safety and local recycling instructions.
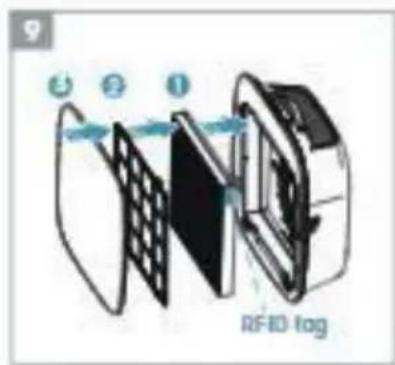
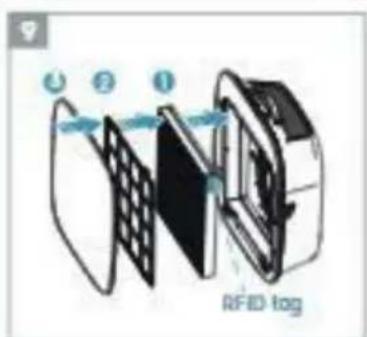
- Place the filter layers back into the unit in the same order as originally found (i.e., VOC carbon filter goes in first). While inserting, take care to hold the filter so that the RFID tag on the filter is located at the top-right - it should be near the sensor box hatch.
- Attach the mesh pre-filter and the front panel back to the unit.
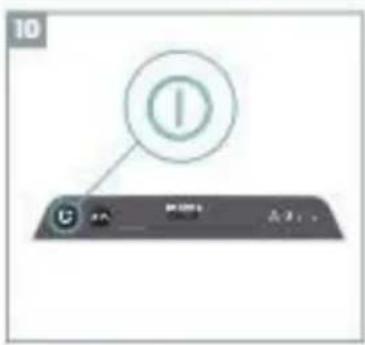
- Plug the unit's power cord into the nearest power socket so that the POWER button on the product UI gets illuminated.
- For best results, operate the unit in an enclosed area with doors and windows closed when feasible.
FIRST & ONGOING USE - picture pages 6-7
TURNING ON
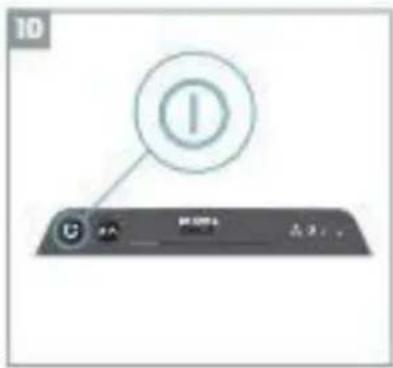
- Tap the POWER button once to turn ON the air purifier.
NOTE: At every new run, it will take about 10 seconds for the sensors to calibrate and analyze the air quality before ramping up to the appropriate fan speed. During this time, the air quality indicator will pulsate slowly in white.
CHANGING MODES & FAN SPEEDS
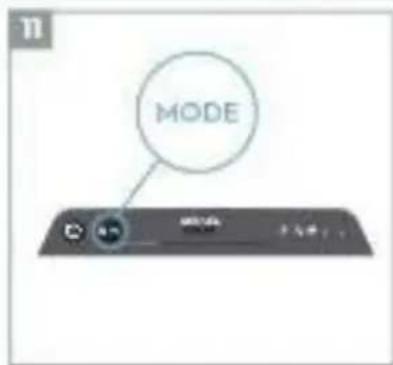
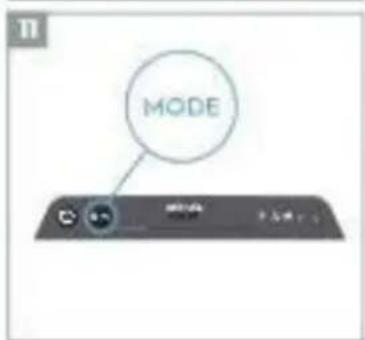
- Tap the MODE button once to toggle between the two modes: SMART and MANUAL.
SMART: This is the default mode the unit will start in. In the SMART mode, the unit will utilize the sensor data as input to decide on the appropriate fan speed
and the UI display's type and intensity level. The fan speed cannot be adjusted manually by the user under this mode. Please see the AIR QUALITY INDICATOR section for more details.
NOTE: The AQI light will turn off completely in a dark room when the unit is in smart mode, so as not to disturb.
MANUAL: In MANUAL mode, the unit will use the sensor data as input only to show the air quality level via the air quality indicator, but will not self-adjust the fan speed. This mode is best utilized for a quick burst of cleaning, especially when the user anticipates an increase in particulate matter in the room due to household chores (e.g., vacuuming).
- While in MANUAL mode, tap and scroll on the fan speed slider to adjust the speed of cleaning - leftmost side being the lowest and rightmost side being the highest speed. NOTE: The unit will ramp up or down to the chosen speed setting gradually. The slider also acts as the indicator for the current fan speed.
- STANDBY & WiFi OFF: The air purifier is designed with ECODESIGN principles in mind and hence will aim to limit power consumption to under 2.0W when the unit is powered OFF (unless user permission to override). When the unit is powered ON, if it has no WiFi connectivity OR is not onboarded, the WiFi radio signal will automatically turn OFF after 30 minutes to conserve power – to bring the WiFi radio signal back ON manually, please initiate ONBOARDING (step 21 only) or unplug and then plug it back in to the socket.
FEATURE ICONS AND INDICATORS
NOTE: Not all indicators or feature icons might be available on your model. Please consult packaging information or the product specifications on the website for details on available features.
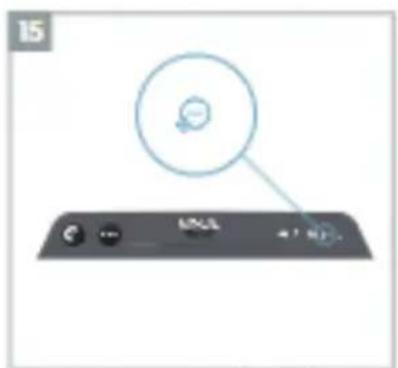
- FILTER CHANGE: The high efficiency filter(s) in the unit cannot be washed, they can only be replaced. The filter change icon lights up to remind you to change your filter(s). Your air purifier may be equipped with more than one filter, so please refer to the Wellbeing App for details on which filter layer is to be replaced. Always ensure the plastic protective bag is removed from the filter before its use in the unit. After the used filter is replaced, the filter change icon will turn off automatically and no reset action is needed.
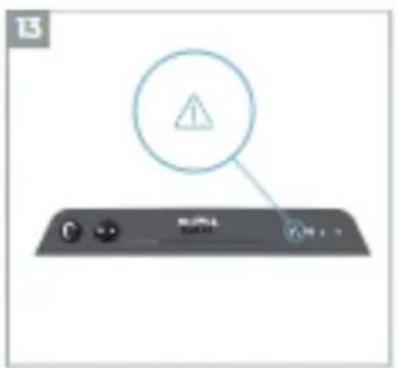
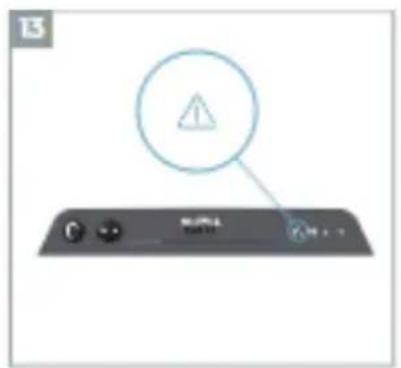
- ALERT: The alert icon will light up to alert you of a possible electrical or electronic error with your unit. Please refer to the Wellbeing App for details on the error type, component details and any mitigating actions. More details can
be found in the ERRORS & TROUBLESHOOTING section below.
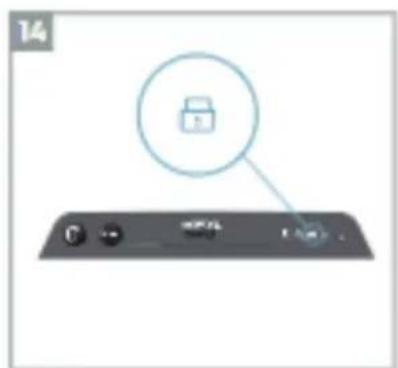
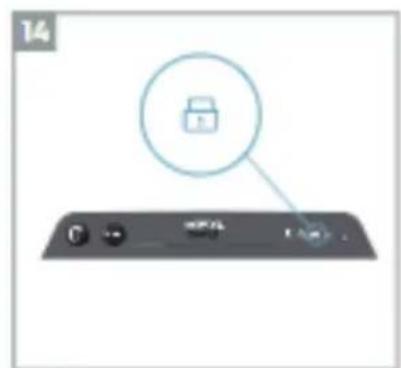
- CHILD LOCK: The unit is equipped with a safety lock feature to disable the product UI to avoid unintended pressing. The child lock feature can be toggled ON/OFF via the Wellbeing App or by long pressing for 5 seconds the POWER and MODE button simultaneously. The child lock icon lights up when the feature is activated.
- IONIZER: The unit is equipped with an ionizer module, which when enabled generates negative ions to further aid with the air purification process. The ionizer is OFF by default and can only be toggled ON/OFF via the Wellbeing App. When the feature is activated the ionizer icon will light up. For more details on how an ionizer helps reduce airborne particles, please refer to the product information page on the website.
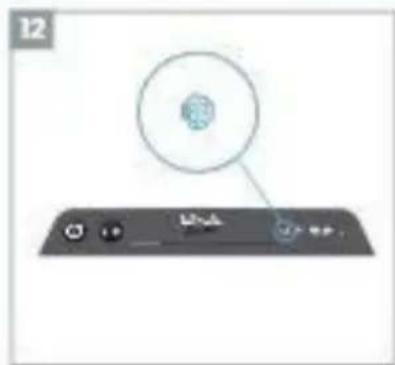
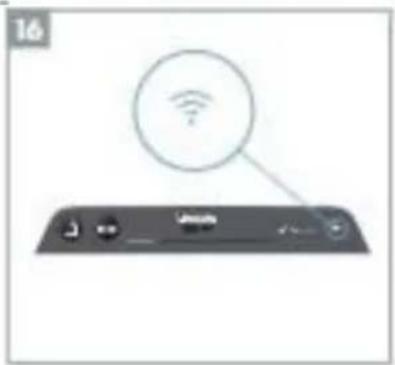
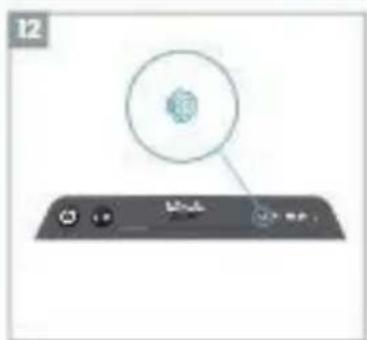
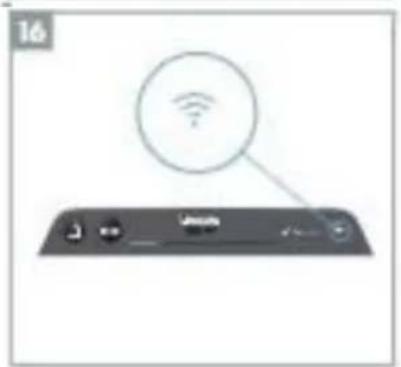
- WiFi: The unit is equipped with a WiFi module, which enables remote control and access to many more features including time-based tracking of your indoor air quality data. When the unit is connected to the home WiFi, this icon will light up. If the icon is blinking, it indicates a temporary loss of WiFi connectivity - please refer to the Wellbeing App for more details.
NOTE: Download our Wellbeing App and follow the step-by-step onboarding instructions to bring the air purifier online.
- AIR QUALITY INDICATOR: The unit is equipped with an air quality sensor(s). The laser-based particulate matter (PM) sensor is a high precision particle sensor that can detect PM1, PM2.5 and PM10 levels. The air quality indicator will visually – with the aid of a color scale - show the real-time air quality as per table below. When in SMART mode, the air quality level will also determine the fan speed as per table below.
NOTE: Please ensure regular cleaning of the sensor window to ensure it does not get clogged with dust and sensors keep performing accurately. Also ensure optimal humidity levels (between 35-80%) for accurate reading from the sensors.
| LIGHT COLOR | PM 2.5 (μg/m3) | AIR QUALITY STATUS | FAN SPEED |
| White | Calibrating | Onboarding | ||
| Green | 0 - 12 | Very Good | 2 |
| Yellow | 13 - 35 | Good | 3 |
| Orange | 36 - 55 | Poor | 4 |
| Red | 56 - 150 | Very Poor | 5 |
| Purple | 151 – 250 | Bad | 5 |
| Maroon | >250 | Very Bad | 5 |
ONBOARDING - picture pages 6-7
NOTE: Some steps in the onboarding flow may have changed, please follow step-by-step instructions in the latest version of the App as reference in case of discrepancy. Please ensure home WiFi is running on 2.4 GHz band and not 5 GHz band, as this will not be recognized by the air purifier.
- Please find the Wellbeing App in the iOS App or Google Play store, download it, sign up and login to the App. Here you will be able to 'Add a device' to the App and follow the step-by-step instructions for onboarding the unit - steps below are indicative.
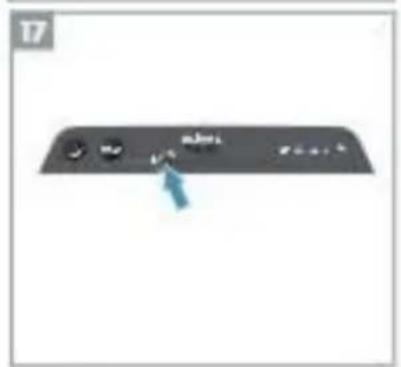
- After plugging the unit into the power socket, please long press the POWER button ① for 5 seconds until the WiFi icon ② starts blinking rapidly - this indicates that the unit's hotspot is activated and is ready for being connected to the WiFi.
- Head over to the Wellbeing App and using the phone's camera to scan the WiFi barcode. The WiFi barcode can be found on the rating label sticker on the unit (typically after the mesh pre-filter, reference image 7). You can also manually enter the digits under the barcode into the App if scanning it does not work.
- Connect the App to the unit's hotspot.
- Choose the 2.4 GHz home WiFi that the unit should connect to from available list and then enter the password for this home WiFi into the App - wait for the unit to establish a connection.
- Complete the steps of naming your newly onboarded air purifier!
- Later, if you would ever like to reset the WiFi credentials stored on your unit, please long press the POWER button for 5 seconds until the WiFi icon starts blinking (i.e., like step 20, hotspot activated). While in this state, again long press the POWER button for 5 seconds until the WiFi icon stops blinking and is not lit. The unit's WiFi settings are now reset and it will not aim to connect to your WiFi network.
CLEANING, CARING & STORAGE - picture pages 6-7
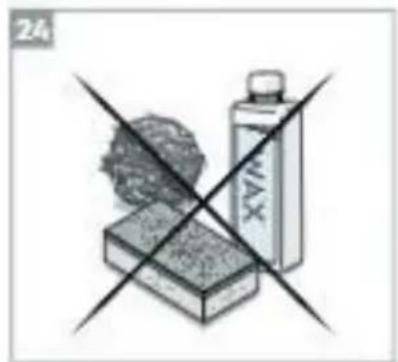
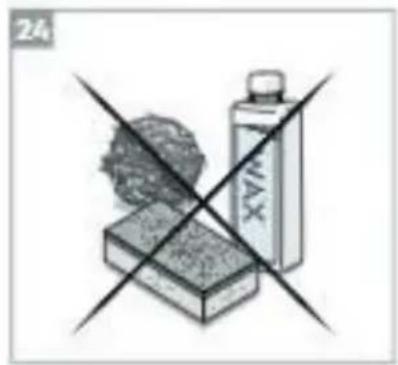
NOTE: Always unplug the air purifier before cleaning to prevent shock or fire hazards. Never use abrasive, harsh detergents or wax for cleaning the unit. The high efficiency filters cannot be washed; they must always be replaced when at the end of life.
CLEANING & CARING
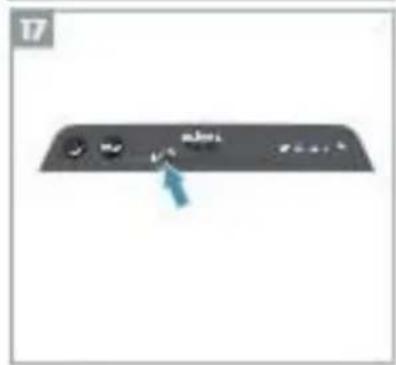
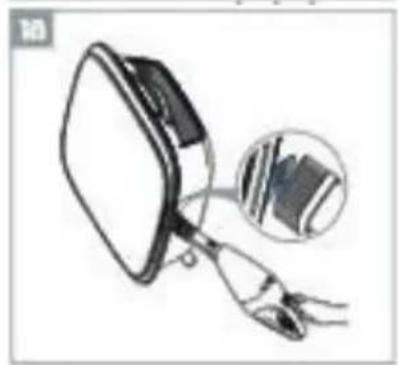
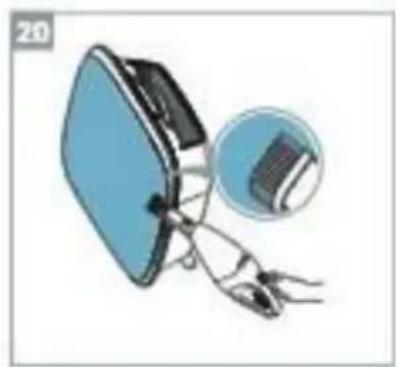
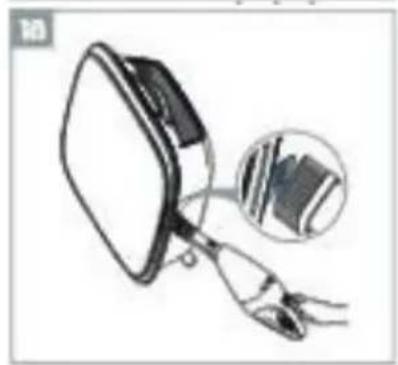
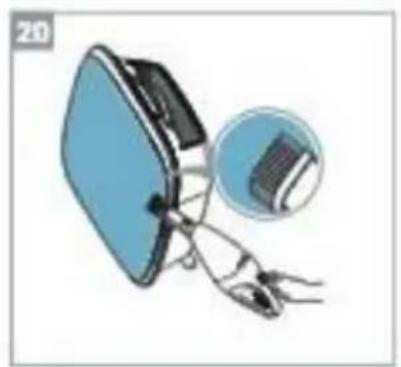
- Ensure the sensor window is kept unclogged for optimal performance of the unit. It is natural for dust to accumulate in this area, hence ensure regular (e.g., once per 4 weeks) vacuuming of the sensor window with a vacuum cleaner that has a narrow nozzle/brush.
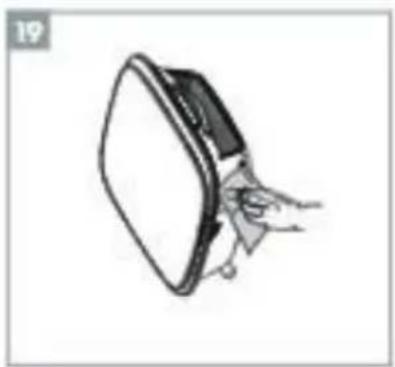
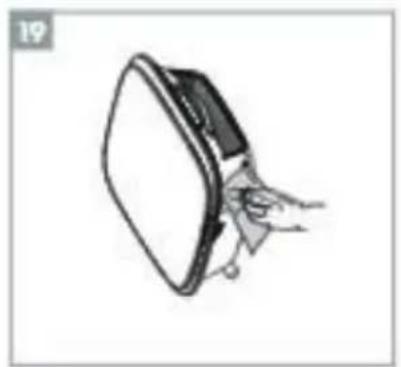
- The plastic parts of the unit should be cleaned with an oil-free dry cloth. For stains on plastic parts, use a slightly damp soft microfiber cloth to gently rub against the stain.
- The fabric attached to the front panel should be wiped with an oil-free dry cloth or by using a vacuum cleaner with a soft brush to avoid breaking of the fibers. The area around the air inlet on the front of the unit may accumulate more dust than some other parts and hence may require more frequent cleaning to ensure optimal performance.
STORAGE
- When storing away, besides unplugging the unit and winding the power cord loosely around the bottom feet, ensure that the unit including the high efficiency filters and the fabric front panel are covered up to avoid accumulation of dust.
REPLACING FILTERS - picture pages 6-7
NOTE: The filters - except for the mesh pre-filter - cannot be washed and must always be replaced when at end of life. The WELL A7 / A5 series air purifiers have a variety of filters to choose from, tailored to your lifestyle needs. Each filter layer is equipped with a smart RFID tag to uniquely identify it as well as to track its usage over time. Head over to the Wellbeing App or the product information page on our website for a guide on choosing the appropriate filter for your needs.
- For the best experience and to secure an uninterrupted use of the air purifier, please monitor the filter's remaining lifetime in the Wellbeing App and order a replacement filter in advance of the lifetime hitting 0%. If you have notifications enabled, the Wellbeing App will inform you when the filter life is close to end of life (e.g., at 5%).
- When one or more of the filters is at end of life, the filter change icon will light up on the product UI to indicate the need for replacement. Please head over to the Wellbeing App to correctly identify which filter is at end of life and needs replacement. When filter is at end of life, the unit's fan speed may be capped in SMART mode.
- The used filter might be heavily coated with dust and particulate matter so before opening the front panel, please ensure a disposable bag or packaging is at hand to place the used filter in.
- Remove the front panel and the mesh pre-filter and put them aside. Next remove the filter layer which is at end of life and place it in the disposable bag at hand.
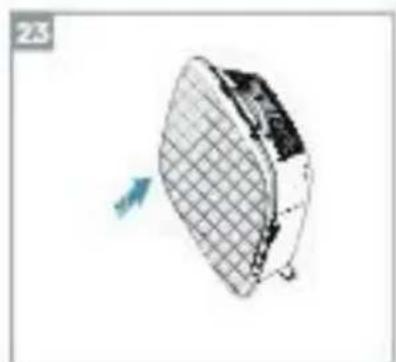
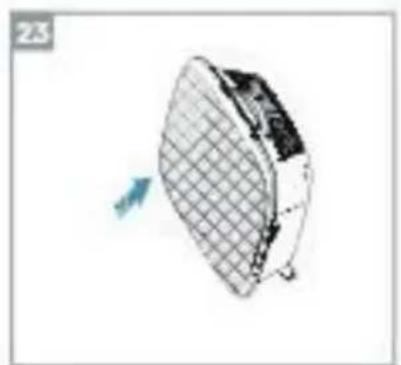
- Next, please remove the plastic packaging from the replacement filter and insert the filter in the appropriate place. Please ensure the VOC carbon filter goes in first inside the unit, followed by the ultrafine particle filter. Reinsert the mesh pre-filter and close the front panel. The filter change icon on the product UI will no longer be lit and the Wellbeing App will indicate the same, with a new filter lifetime reading.
NOTE: In case the change is only reflected on the product UI and not the Wellbeing App, please restart the App and the unit, before further troubleshooting. 36. Discard the used filter as well as any plastic packaging according to local recycling guidelines. The RFID tags contain circuitry and hence are to be disposed separately from the rest of the filter.
CUSTOMIZING - picture pages 6-7
The WELL A7 / A5 series Air Purifier was designed with a unique form and aesthetic sense to ensure it fits in with your home and its furnishings, unlike other appliances. In addition, the series comes with many customization kits for the unit that add to the aesthetics but also functionality of the unit.
TOP HANDLE CUSTOMIZATION
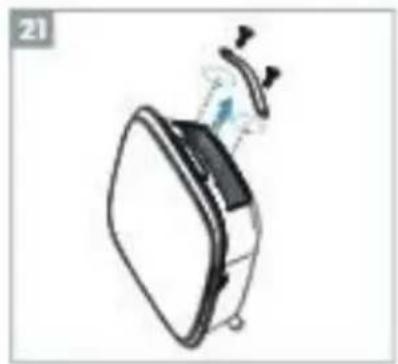
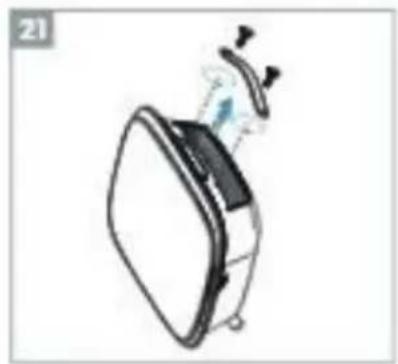
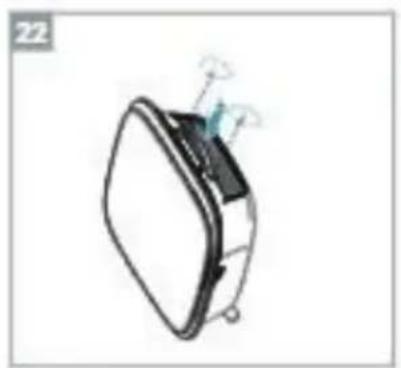
The polyurethane leather (PU) handle at the top of the unit is attached to the unit by way of two screws. Follow the steps below to attach or replace an existing top handle.
- If you are replacing an existing top PU handle:
a. Remove the two screws, twisting counterclockwise and set aside along with existing handle. b. Remove any protective plastic packaging from the new handle and fit it onto the unit by tightening the screws, twisting clockwise, till you meet some resistance. Ensure a snug fit with no gap in between the unit and the screw.
c. Test out the handle by lifting the unit 5-6 cm above the ground with it and giving it a gentle shake.
- If you are adding a top handle for the first time:
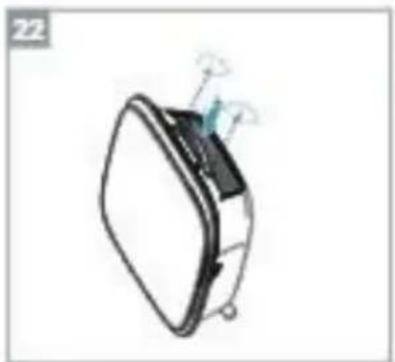
a. At the top of the unit, between the product UI and the air outlet grill, you will find two circular cavities secured with rubber plugs. Uncover the cavities by removing these rubber plugs from the unit, gently pulling on the sides of the plugs. b. Follow steps 37b and 37c (above).
FRONT PANEL CUSTOMIZATION
The look of the front panel can be customized with a fabric cover to help accentuate it and ensure the unit blends well with the room's decor. The fabric cover has an elastic seam that helps secure it to the front panel, so no screws or staples are necessary for installation.
- Detach the front panel from the unit. If it already has a removable fabric cover, gently take it off the panel, ensuring not to bend the panel. NOTE: Some models in the WELL A7 series come with a fabric permanently attached to the front panel; this fabric is not removable, but you can still customize the panel with another fabric cover on top of the existing fabric.
- Remove any plastic packaging from the new fabric cover to be used.
- Starting at the top left corner of the front panel, tuck the elastic band behind the panel. While holding that corner in place, work your way with the other hand to the top right corner, continuously tucking the elastic band of the fabric cover behind the edge of the panel. Then pull the fabric cover towards the bottom edge of the panel and securely tug the rest of the fabric edge behind the bottom part of the panel.
- Smooth out any wrinkles on the fabric cover by pushing against them.
- Attach the front panel with the newly fitted fabric cover back to the unit and check the edges to ensure there is no blockage of the air inlet area.
NOTE: Customizable fabric covers are machine washable, as per the care instructions provided with the kit. It is important that the elastic band along the edges of the fabric cover is unbroken and tight, as it helps ensure an optimum flow of air into the unit with minimal decrease in performance. If you notice that the elastic band is broken or very loose, it is time to replace the fabric cover.
FEET CUSTOMIZATION
The thermoplastic elastomer (TPE) feet are attached to the unit by way of inbuilt screws. The feet – like the top handle – are detachable. Follow the steps below to attach or replace an existing set of feet.
- Place the unit flat on its back, so the front panel faces the ceiling. Unscrew the existing feet, if any, by twisting counterclockwise.
- Remove any protective plastic covering the new set of feet.
- Gently nudge the inbuilt screw of the new feet into the cavity at the bottom of the unit and secure them by twisting clockwise until you meet some resistance.
- Test the stability of the feet by placing the unit back upright and lifting it about 5-6 cm above the ground and giving it a gentle shake.
ERRORS & TROUBLESHOOTING
The table below is only a limited list. For the latest and complete section on troubleshooting, FAQ and error guide please refer to the corresponding section on our website or the Wellbeing App.
| # | ISSUE | TROUBLESHOOTING | NOTES |
| 1 | The air purifier's alert icon is lit | If you have just bought the unit OR inserted new filter(s), please ensure that the filter(s) are positioned in the correct way for the RFID tags to be read by the sensor (refer to point 6 within ONBOARDING & SETUP section above).Generally, the unit comes with a variety of sophisticated sensors, electronics and other electrical components and if one of these is malfunctioning, you will see the alert icon on the product UI light up. For more details on steps to resolve, please head over to the Wellbeing App and check for details whenever you see this icon lit. | Please have at hand the unit's PNC and SERIAL number when calling for support. |
| 2 | The air purifier is running at max fan speed all the time for extended periods | If in MANUAL mode, please check the fan speed slider on the product UI or within Wellbeing App and adjust it to desired level. If in SMART mode, please check air quality indicator on the product UI or within Wellbeing App – if all PM values are constantly showing 999-1000 without any reduction then most likely the sensor is clogged. Please use a vacuum cleaner to clean the sensor via the sensor window – detailed instructions in CLEANING, CARING & STORAGE section above. | The PM sensor in the unit is highly accurate and sensitive and it is normal for the purifier to react to poor air quality by ramping up the fan speed – to get your indoor air quality back to safe levels. |
| 3 | The air purifier is running at lowest fan speed all the time for extended periods | If in MANUAL mode, please check the fan speed slider on the product UI or within Wellbeing App and adjust it to desired level. If in SMART mode, please check air quality indicator on the product UI or within Wellbeing App – if all PM values are constantly reading very good without any increase then this is normal behavior for the unit - your air quality is very good! If the PM2.5 value is high and the unit is still operating at lowest fan speed then please check filter change icon on the product UI or within Wellbeing App and if lit please replace used filter with a new one, this should resolve the specific fan speed issue. If neither of the above steps OR instructions in the Wellbeing App help, please refer to item 9 in the table. | The unit is designed so that when a filter is at end of life, at least within the SMART mode, it will discourage usage till the filter is replaced, by limiting the fan speed so as not to reintroduce the captured particulate matter back into the air. |
| 4 | The air purifier produces a loud or abnormal noise | Please ensure the air inlet (around front panel) and air outlet grill (top of the unit) are unobstructed and that there is a clearance of at least 30 cm between these areas and the nearest surface. If using a custom fabric cover, try to reapply the fabric cover to the panel tighter OR try operating without it to see if noise pattern becomes normal. If neither of the above steps OR instructions in the Wellbeing App help, please refer to item 9 in the table. | An abnormal pattern of noise OR an unusually high pitch is not by design, hence it is best to rectify this. |
| 5 | The air purifier or fan does not operate | Ensure that the house, wall socket being used, and the unit are all receiving power. If needed, try pushing the power plug firmly into the wall socket to check if this resolves the issue. If you have recently (re)placed a filter please remove and reinsert it. Check to make sure that the filter is oriented correctly, so the RFID sensor can detect it. If neither of the above steps OR instructions in the Wellbeing App help, please refer to item 9 in the table. | As a safety mechanism, to avoid risk of injury from the fan blade, the unit will not operate if it does not detect the presence of filter(s). |
| 6 | The air purifier is running but the air quality does not improve | If in SMART mode, closely monitor the difference in air quality levels within the Wellbeing App for next 20 minutes – if you do not see any improvement of the air quality values in the Wellbeing App during this period then follow the step below. Change to MANUAL mode and adjust the fan speed to a higher level to see if this helps resolve the issue. If you still do not see any improvement, please try the step below. Try and close any open doors OR windows to the outside of the room and rerun the unit at the highest fan speed for 20 minutes. If this resolves the issue, we recommend that you operate the unit in this sealed environment as much as possible, till the air quality outside (or in other rooms) is also at a good level. | If the unit is placed in a room larger than a n the recommended size, it will take longer for the air quality to improve – please be patient and maintain the unit at the highest speed feasible. The unit comes with multiple filters – please ensure you have the appropriate filters to tackle the pollutant you seek to remove. |
| 7 | The air purifier produces or emits a strange smell | The first time you run the unit, you may perceive a plastic, glue or paint smell – especially near the air outlet grill – this is unavoidable in some cases (like the ‘new car smell’) but should disappear quickly. If you perceive a burning smell, please disconnect the unit and contact Electrolux authorized service center for further support. | Always ensure that the filters are covered in appropriate packaging while stored away between uses. |
| 8 | I am unable to onboard the air purifier to the App | If you are unable to onboard the unit and connect it to the Wellbeing App after a couple of attempts following the steps in the Wellbeing App and FAQ, then the best course of action is to contact an Electrolux authorized service center for support. | The WiFi chip in the unit operates only at 2.4Ghz so please ensure your home WiFi is operating at this bandwidth. |
| 9 | I have another issue not listed here OR none of the above steps have helped resolve the issue | You can search for more troubleshooting and FAQ guides on our website OR the Wellbeing App under the product information pages, or directly contact Electrolux authorized service center for support. Thank you! | Please have at hand the unit's PNC and SERIAL number. |
OPERATING INSTRUCTIONS
IMPORTANT PARTS OF THE WELL A7/A5 AIR PURIFIER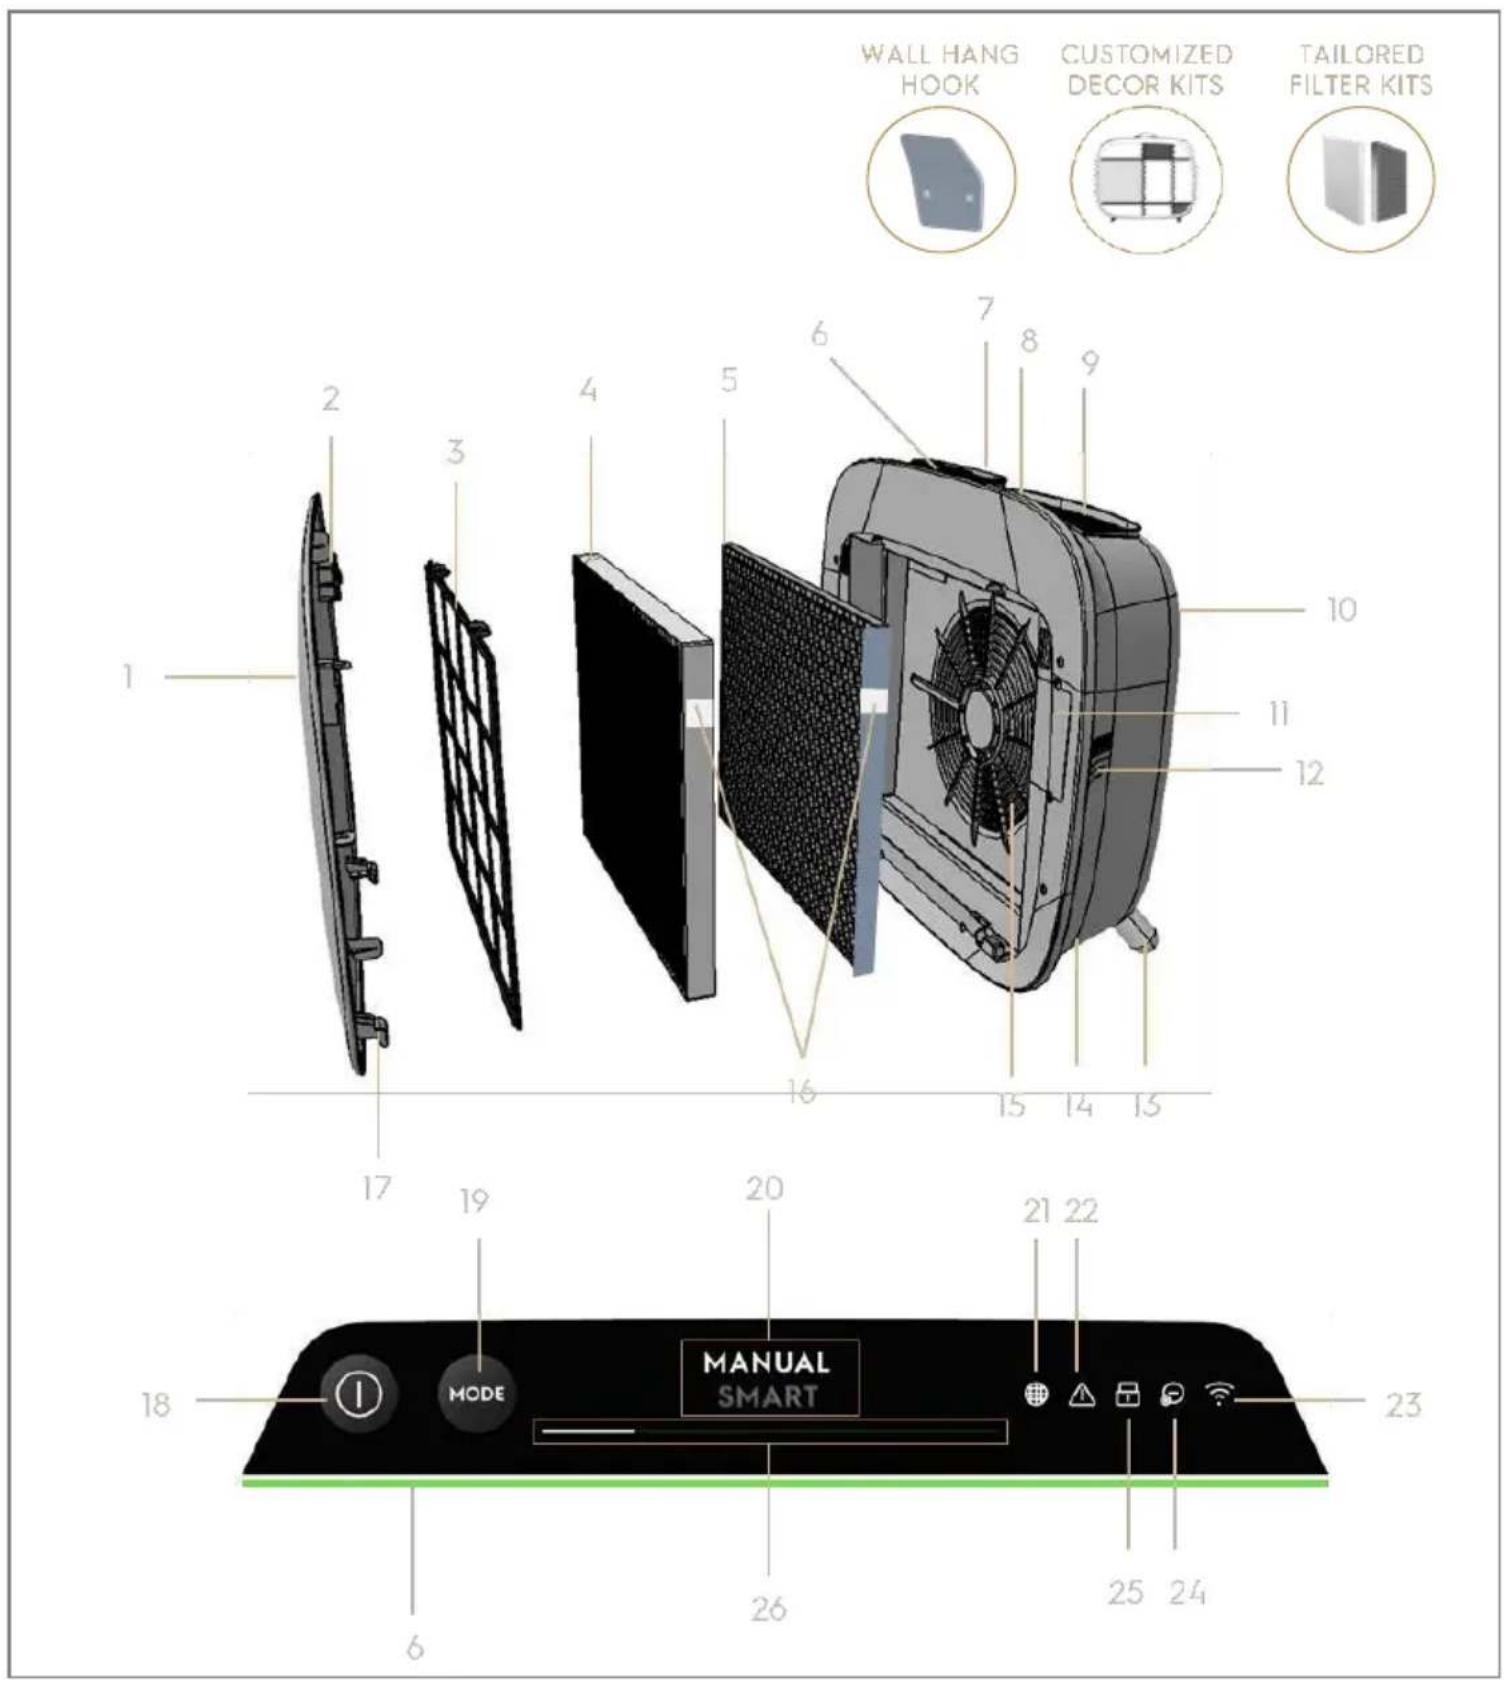
INSTALLATION - see picture on pages 6-7
REPLACING FILTERS - see picture on pages 6-7
RADIO INFORMATION
WiFi operating frequency and maximum output power: 2.4 GHz; 15dBm RFID operating frequency and maximum output power: 13.56 MHz; 30dBm ± 10% The product's power consumption in network standby mode is less than 2.0 W
ELECTRICAL SAFETY INFORMATION
WARNING! - AVOID RISK OF FIRE OR ELECTRIC SHOCK
This unit can be used with a 50Hz or 60Hz power supply without any changes. Do not use an extension cord or plug adapter.
ERRORS AND TROUBLESHOOTING
Models WA51-303 and WA51-304
Models WA71-304 and WA71-305
USER MANUAL
Thank you for choosing the Electrolux WELL A7/A5 air purifier. Please use only original Electrolux consumables, accessories, and spare parts to ensure your appliance achieves the best results. This appliance is designed to be environmentally friendly, and all plastic parts are marked for recycling.
IMPORTANT SAFETY INSTRUCTIONS
This user manual contains specific instructions for using your model of the WELL series. Use the appliance exclusively as described in this manual. This manual cannot cover all possible conditions and situations that may occur. Always use common sense and caution when installing, using, and maintaining any appliance.
WARNING! - RISK OF FIRE OR INJURY TO PERSONS
There is a risk of fire, injury, or permanent disability. Keep flammable materials away from the appliance.
This appliance can be used by children aged 8 years and above and persons with reduced physical, sensory, or mental capabilities, or lack of experience and knowledge, if they have been given supervision or instruction concerning use of the appliance in a safe way and understand the hazards involved.
Children must not perform cleaning or user maintenance without supervision. Children must not play with the appliance. Children under 3 years of age should be kept away from the appliance unless continuously supervised.
CAUTION! - AVOID DAMAGE TO THE APPLIANCE AND OTHER PROPERTY
Do not direct the air flow at fireplaces or other heat sources, as this may cause the flame to flare up.
Do not sit on the appliance or place objects on it.
Do not place objects on the appliance.
Do not place containers with liquids on the appliance.
Unplug the appliance from the power outlet if you will not use it for a long time.
Do not block or cover the air inlet, the fan area, or the air outlet grille.
Make sure that electrical/electronic appliances are at least 30 cm away from the appliance.
ONPE3! - MOHTAXA HA 3nД: n36EHNTE NOBPEDE N OwTeHbE NMOBnHE
3nHy Hocehy Kyky yBek npuBpCTIte 3aBpTbeM n TnIOM nOOrHm 3a MaTePnJaI od Kora je 3nd n3paJen (Hnp. ydapHn TnIe ca 3aBpTbHMa 3a 6eToH, npoHrpBn TnIe ca 3aBpTbHMa 3a rnc i cI.). Ako HnCTe cnryphN oD yera je 3nI, Heka ra norleda KB rpaheBvHcKn paHnk nInn HnKeHep n ppeOpuyo ndroBapajhy Bpcty 3aBpTba n TnIla y cKlady ca loKaJIHOM n HaunOHanHom rpaheBvHcKOM HopMOM.
Hn noi Kojim ycIOBIMa He npuBpshyjTe 3ndHy Hocehy Kyky camo jeHNm 3aBptbem. YBeK Kopncntte odroBapajyhe Mepe npedocptpoxHocTn n 3aHTNY onpeMy dok 6yinte pyne y 3ndy nnpykjeTe TaKBOM onpeMOM (Hnp. cnryphoche rykaBnue, Macky 3a Inue n cI.).
He ByuTe n He cImajTe Ka6I 3a HanajaBe DOK je ypehaj OKaueH na 3nD. NobpnHnte ce da Ka6I 3a HanajaBe 6yde npbby6eH y3 3nD n PoD da 6n ce cnpeuNo HexeJbeHO KaueHe ppeMeTa 3a Ka6I n cImaHbe ypehaja.
YIIO3OPEHbE! -N3BcHNTe ONACHOCT Od IIOXAPA N CTPyJHOr YdAPA
Obaj ypehaj mojke da ce kopncn ca n3bopor HanajaBa od 50 nn 60
Hz 6e3 6nlo KaKBe n3MeHe. He KopncTe npoDyXHn Ka6I nll
aandaTep.
He BaIte KInHOBe n3 cTpyjHOr yTuKaHa. He npo6najTe, He cabNJajTe n He Be3yjTe y ChBop Ka6I 3a HanajaIbe.
He ceuTe n He oWeTeHJTe Ka6I 3a HanajaBe. Ako ce npIoJKeHn Ka6I 3a HanajaBe OWeTeTn, Cme Da ra 3aMeHn cAmo KompanHaElectrolux, Hen cepBncep Hn CInuHo KBaIInKOBaHO IInCe. Obaj ypehaj He caPjN DeIOBe Koje KopncnK MoKe da onpaBn. 3a onpaBky YBeK No3OBtE OblaawHeor cepBncepa KompanHne Electrolux.
Hn noj KoJIM yCIOBIma He ceuTe, He yKlaHajTe H He npecnajTe KInH y3eMbeHa (cI. 26 Ha cTp. 3; 3a BeNkU BpntAHnju cI. 27). Ako HnCTe cnrypn Da IJI je yTuHnca
Klaacnokobao kao
IpaBnHHO y3eMJIbEHa IIN 3aUHTHeHa BpeMeHcKIM Ocnrpyaem IIN npeKnJaem, HeKa KBaJIuΦNkoBAHN eJekTpnuap NoCTaBN OndroBapajyHy UTnHnCy U cKlaNy ca HaunOHaJIHm CTaHdApDOM 3a eJekTpOnHCTaIauNiJe IIN OndroBapajyHm loKaJIHm 3aKOHMa I NOd3aKOHcKIM aKTtMa.
He dpjnte n He kopnctnte 6en3nH n dpyre 3anaJbNBe npape n TeuHocTn y 6nn3HH OBOr n 6nlo KOR dpyror ypehaja. IpouHTajTe HaleHNue npOn3BODa KOje roBOpe o 3anaJBIOCTn n dpyra yno3OpeHa.
Да 6исте спрешил n Stpyн yДap n onacnoct od n36njaHa noЖа, He do3BOIte da BODa nll 6nilo Koja dpyra TeuHocT nll 3anaJbNn DeTepeHT yh y yypehaj. Пр e HHeBa nckbYynte ypehaj n3 cTpyje.
HnkaI He nckbvyjTe ypehaj noblaueHem Ka6la 3a HanajaHe. YBeK YBpCTO yXBaTITe yTNKaU n N3ByCITe ra paBHO n3 yTNuHnIe.
DANGER! - AVOID SERIOUS INJURY AND DEATH
Do not pull or twist the cord and do not place the appliance or any object on the power cord or on the front grille.
Do not bend or kink the power cord or the supply cable, and do not expose them to sharp edges or hot surfaces.
In case of damage (to the plug, power cord, etc.), immediately stop using the appliance, unplug the power cord, and contact the authorized service center of Electrolux.
Do not operate the appliance with wet hands.
Do not pull the power cord.
Do not cover the ventilation openings while the appliance is in operation.
DISPOSAL
This symbol on the appliance or its packaging indicates that the appliance must not be disposed of as household waste. To recycle the appliance, take it to a designated collection point where the battery and electrical components can be safely and professionally removed and recycled.
Follow local regulations regarding the disposal of electrical products and rechargeable batteries.
SAFETY NOTICE
Read the instructions carefully and pay special attention to
safety information. Pay particular attention to the DANGER! label.
Check that all described components and parts are included.
| 1 | Од boйва и прилаговы позьа поча | 14 | Шулbingа за кабл за нара ще |
| 2 | Магнети позье поче | 15 | Шулbingа за мотор вентilatedога, решетka |
| 3 | Решеткаки позфелтер | 16 | RFID ознake |
| 4 | Филтет ултуарони чесниа | 17 | Кушице позье поче |
| 5 | Угеляни foamер за История орrationа юденива | 18 | Дугма нараJAьа (ук./иск.) |
| 6 | Инданатор квалитера ваздауха | 19 | Дугма рекима рада „MODE" |
| 7 | Корисcentи Intertорфеяс | 20 | Прinksа рекима рада |
| 8 | Од boюльва горьа ручка за пошенье | 21 | Слишица замене øлтета |
| 9 | Решетka Издува ваздауха | 22 | Слишица уноzerпьа |
| 10 | Задъа ручка за пошенье и пошенье | 23 | Слишица WiFi-ja |
| 11 | Сенисторическая kутija | 24 | Слишица joонизатopa |
| 12 | Проборчий сенисторía | 25 | Слишица бл Okаде за бeзбедост deе |
| 13 | Од boюльва пошенье, 2 ком | 26 | Клиоза и Иndеликов ор看法 Венисторía |
IMPORTANT: To correctly use the appliance, it is necessary to have the components and functions described in the instructions for use. For the initial use of the model, we recommend the production packaging or the company with the product specification on our website. The Electrolux company reserves the right to change the above information without prior notice.
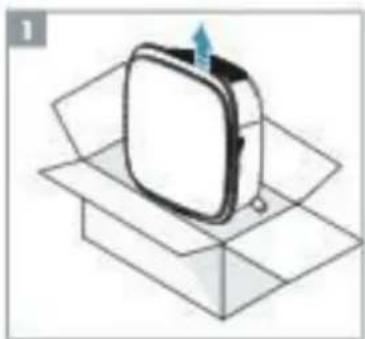
Remove the appliance from the packaging. Arrange the few components that may have shifted during transport, then carefully open the box while it is placed on a large flat surface or the floor.
- Carefully remove the device (e.g., by the top handles, if present) and take the components out of the large box. Remove and dispose of the packaging in accordance with safety and local regulations on recycling.
- In case of wall mounting:
a. Before proceeding, read the safety measures in the section GENERAL SAFETY MEASURES. b. Choose the place on the wall where you intend to mount the device. This place must be at least 20 cm below the ceiling or as you stand upright (lower than that is ideal and recommended) for optimal performance and the possibility of filling the space below the device. Also, the nearest electrical outlet must be located at most 1.5 m away and there must be a gap of at least 20 cm between the right side of the device (sensor area) and the adjacent surface. c. Carefully place the supplied bracket flat on the wall surface and mark with a pencil the two points where you will drill the holes for the screws. The bracket must be placed so that the protruding part (which has no holes) is at the top (see fig. 2). d. Using the drill bit that corresponds to the wall type, drill two holes in the wall at the places you marked, and if necessary, insert the wall plugs. e. In the next step, insert the screws that correspond to the wall type. Place the bracket flat on the wall surface so that the holes on it are concentric with the drilled holes and the bracket is completely parallel to the wall without any tilt, then tighten the screws until the bracket is firmly attached and does not move when pulled. f. Lift the device and place it on the bracket so that the upper part of the bracket fits well into the recess on the back side of the device. g. Carefully hang the device – it will be tilted to one side, just like a picture. Make sure the device fits well against the wall. h. When dismounting the device, do not forget to first unplug the power cable from the wall outlet.
- In case of placement on a table:
a. First attach the adjustable feet to the device, turning them in
the clockwise direction until they lock (or until a defined resistance is felt).
b. Install the unit on a stable surface in the air stream, where no obstacles are present. c. Maintain a distance of at least 30 cm between the front side (air inlet) and at least 20 cm between the rear side (sensor opening) and walls or other surfaces. Also, ensure sufficient space above the top surface (air outlet grille) so that the unit can operate reliably and expel clean air into the room. d. In case of wall mounting, tilt the unit slightly downwards to ensure efficient air distribution.
- Hold the front panel with both hands and tilt it towards you.
- Remove the filter grille, clean the filter with a vacuum cleaner or wash it. The filter for evaporating organic compounds is located in the unit. Dispose of the filter according to local regulations on recycling.
- Insert the filter into the unit so that it is positioned as before (the filter for evaporating organic compounds is first). When inserting the filter, hold it so that its RFID tag is in the upper right corner - near the opening of the sensor box.
- Return the grille and the front panel to the unit.
- Connect the power cable to the nearest wall outlet so that the power cord is not in the way of the user's interface.
- For best results, use the unit in a closed room with closed doors and windows.
OPERATING INSTRUCTIONS - see page 6-7
TURNING ON
- Press the button to turn on the air purifier. NOTE: With each press, it will take about 10 seconds for the sensors to calibrate and analyze the air quality before the fan speeds up to the required speed. During this time, the air quality indicator will slowly flash.
CHANGING OPERATING MODE AND FAN SPEED


- GENERAL SAFETY INFORMATION
- WARNING! - CHILDREN & VULNERABLE PEOPLE SAFETY
- CAUTION! - AVOID INJURY OR DAMAGE TO THE UNIT OR PROPERTY
- CAUTION! - WALL MOUNTING: AVOID INJURY OR DAMAGE TO PROPERTY
- INFORMATION ABOUT RADIO
- ELECTRICAL SAFETY INFORMATION
- WARNING! - AVOID FIRE HAZARD OR ELECTRIC SHOCK
- CAUTION! - AVOID SERIOUS INJURY OR DEATH
- DISPOSAL
- BEFORE STARTING
- FIRST & ONGOING USE - PICTURE PAGES
- TURNING ON
- CHANGING MODES & FAN SPEEDS
- FEATURE ICONS AND INDICATORS
- ONBOARDING - PICTURE PAGES
- CLEANING, CARING & STORAGE - PICTURE PAGES
- CLEANING & CARING
- STORAGE
- REPLACING FILTERS - PICTURE PAGES
- CUSTOMIZING - PICTURE PAGES
- TOP HANDLE CUSTOMIZATION
- FRONT PANEL CUSTOMIZATION
- FEET CUSTOMIZATION
- ERRORS & TROUBLESHOOTING
- OPERATING INSTRUCTIONS
- INSTALLATION - SEE PICTURE ON PAGES
- REPLACING FILTERS - SEE PICTURE ON PAGES
- RADIO INFORMATION
- WARNING! - AVOID RISK OF FIRE OR ELECTRIC SHOCK
- ERRORS AND TROUBLESHOOTING
- USER MANUAL
- IMPORTANT SAFETY INSTRUCTIONS
- WARNING! - RISK OF FIRE OR INJURY TO PERSONS
- CAUTION! - AVOID DAMAGE TO THE APPLIANCE AND OTHER PROPERTY
- ONPE3! - MOHTAXA HA 3NД: N36EHNTE NOBPEDE N OWTEHBE NMOBNHE
- YIIO3OPEHBE! -N3BCHNTE ONACHOCT OD IIOXAPA N CTPYJHOR YDAPA
- DANGER! - AVOID SERIOUS INJURY AND DEATH
- SAFETY NOTICE
- OPERATING INSTRUCTIONS - SEE PAGE
- CHANGING OPERATING MODE AND FAN SPEED
Brand : AEG
Model : AX51304
Category : Air purifier