Ptouch PT1960 - Label printer BROTHER - Free user manual and instructions
Find the device manual for free Ptouch PT1960 BROTHER in PDF.

User questions about Ptouch PT1960 BROTHER
0 question about this device. Answer the ones you know or ask your own.
Ask a new question about this device
Download the instructions for your Label printer in PDF format for free! Find your manual Ptouch PT1960 - BROTHER and take your electronic device back in hand. On this page are published all the documents necessary for the use of your device. Ptouch PT1960 by BROTHER.
USER MANUAL Ptouch PT1960 BROTHER
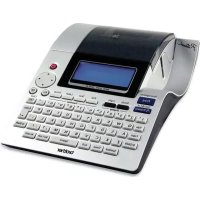
Thank you for purchasing the P-touch 1950!
Your new P-touch will allow you to create labels for any need. Its versatility enables you to design custom labels by choosing from a variety of frame designs and from many character sizes and styles. In addition, the four tape widths (1/4" (6 mm), 3/8" (9 mm), 1/2" (12 mm) and 3/4" (18 mm)) and variety of tape colors allow you to print personalized labels, useful for color-coded filing.
You no longer have to worry about urgent tasks that require professional printing. In the office, the factory, the lab and the home, the quality and performance of the P-touch 1950 makes it an extremely practical machine.
Finally, as you may want to occasionally refer to this User's Guide we suggest that you keep it in a handy place.
Tested to Comply with FCC Standards for Home or Office Use
This Class B digital apparatus complies with Canadian ICES-003.
Switching the language of the messages between English and French
- Erase all of the text in the display either with or by holding down Code and pressing Clear BS
- Hold down Code and press F to display the current language setting ("ENGLISH" or "FRANÇAIS").
- Keep Code held down and press again until the desired setting appears in the display, then release the keys.
The default setting is English.
Turning off the machine does not change the language setting.
The language cannot be changed if some text remains in the display.
Use only the adaptor designed exclusively for this machine. See "GENERAL PRECAUTIONS" on page 3.
IBM is a trademark of International Business Machines, Inc.
Microsoft and Windows are registered trademarks of Microsoft Corporation, USA.
The names of other software or products used in this document are trademarks or registered trademarks of the respective companies that developed them.
CONTENTS
Getting Started
GENERAL DESCRIPTION 1
GENERAL PRECAUTIONS. 3
BATTERIES 3
AC ADAPTOR 4
TAPE CASSETTE 5
ATTACHING LABELS 6
SIZE &WIDTH FUNCTIONS 27
STYLE FUNCTION 29
UNDERLINE FUNCTION 31
FRAME FUNCTION 32
TAPE MARGIN FUNCTION 33
HORIZONTAL ALIGNMENT FUNCTION 34
MIRROR PRINTING FUNCTION 35
LENGTH FUNCTION 36
AUTO CUT FUNCTION 38
PRINT KEY 39
FEED & CUT FUNCTION 40
NUMBERING FUNCTION 40
REPEAT PRINTING FUNCTION 42
MEMORY FUNCTIONS. 43
TROUBLESHOOTING 47
ERRORMESSAGELIST 48
SPECIFICATIONS 51
ACCESSORIES 52
INDEX 55
Getting Started
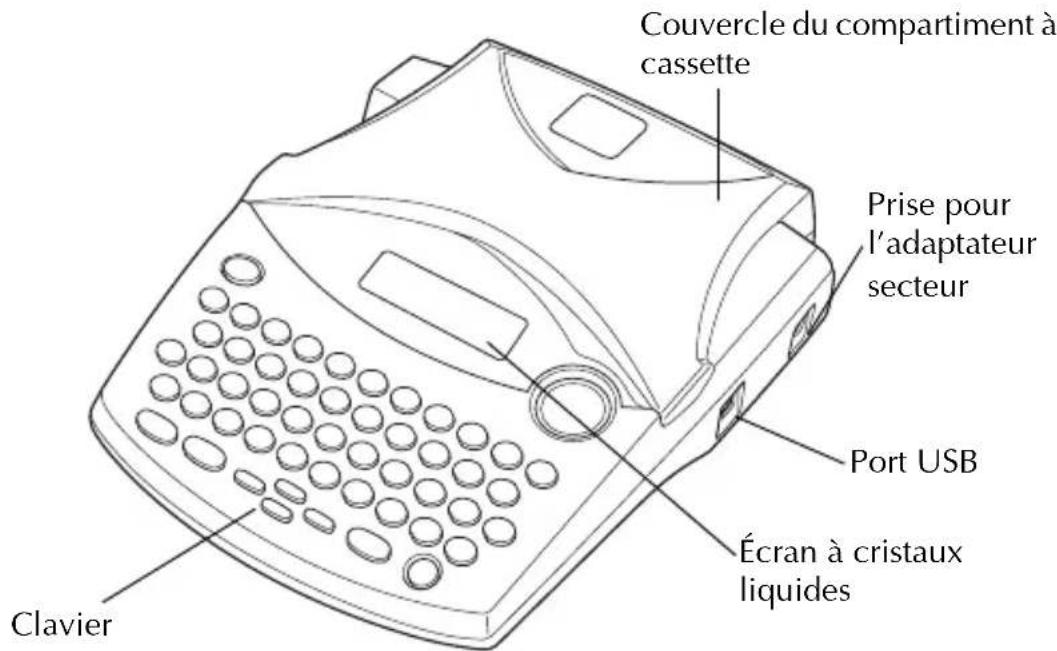
GENERAL DESCRIPTION
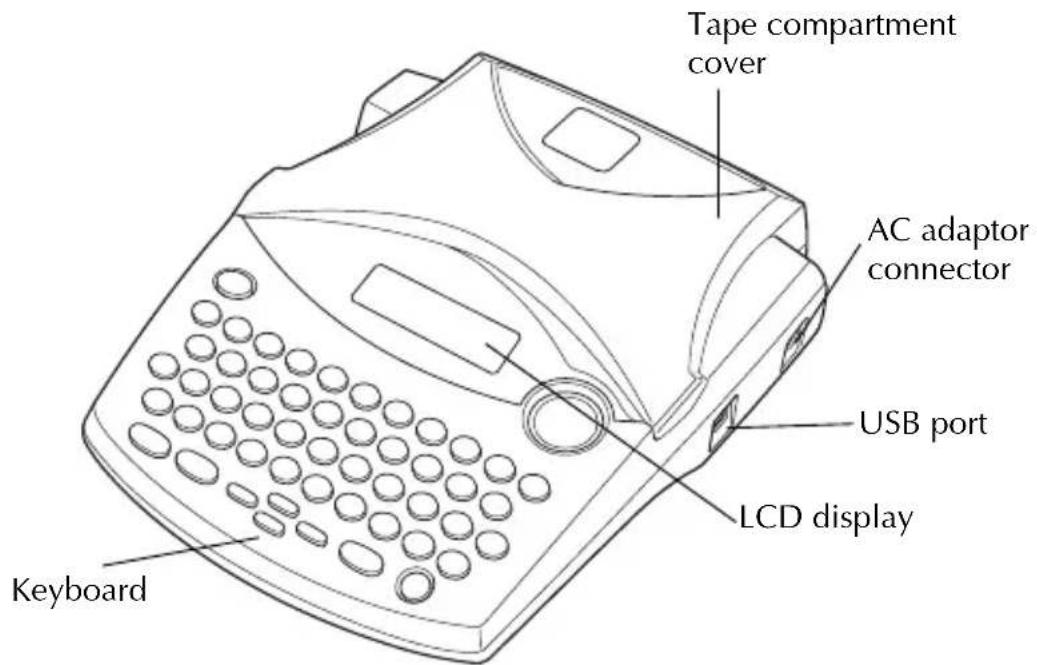
TOP VIEW
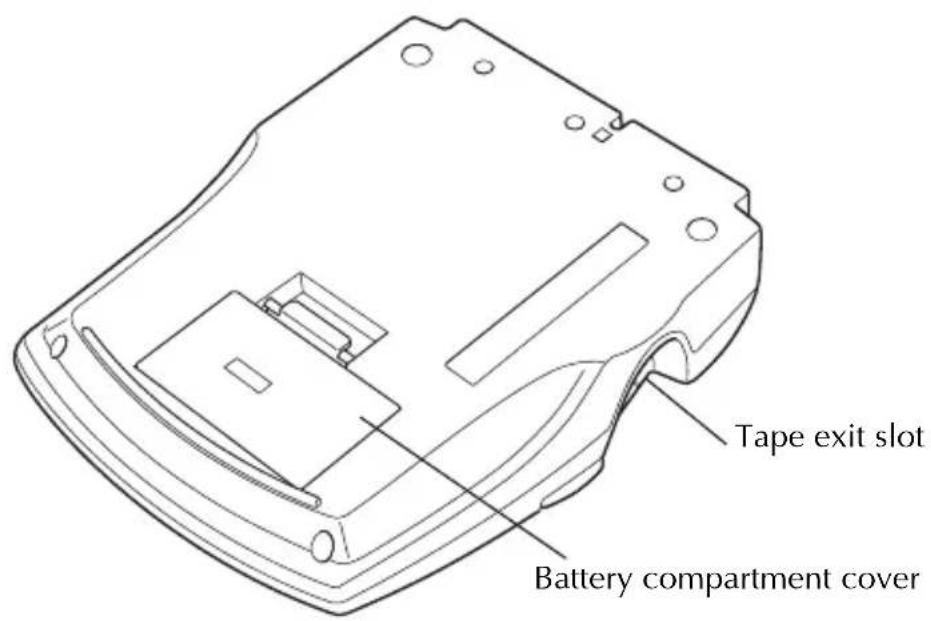
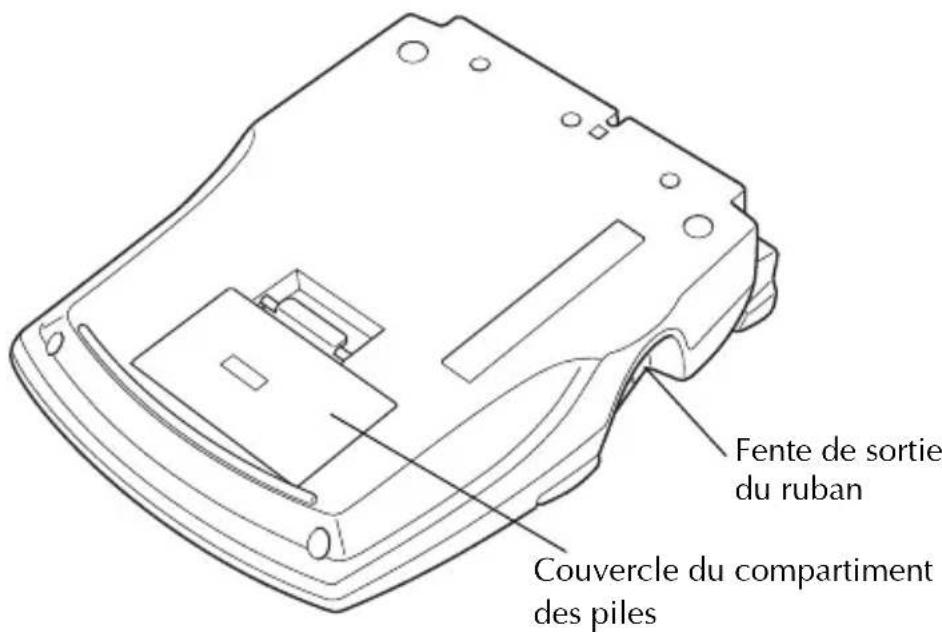
BOTTOM VIEW
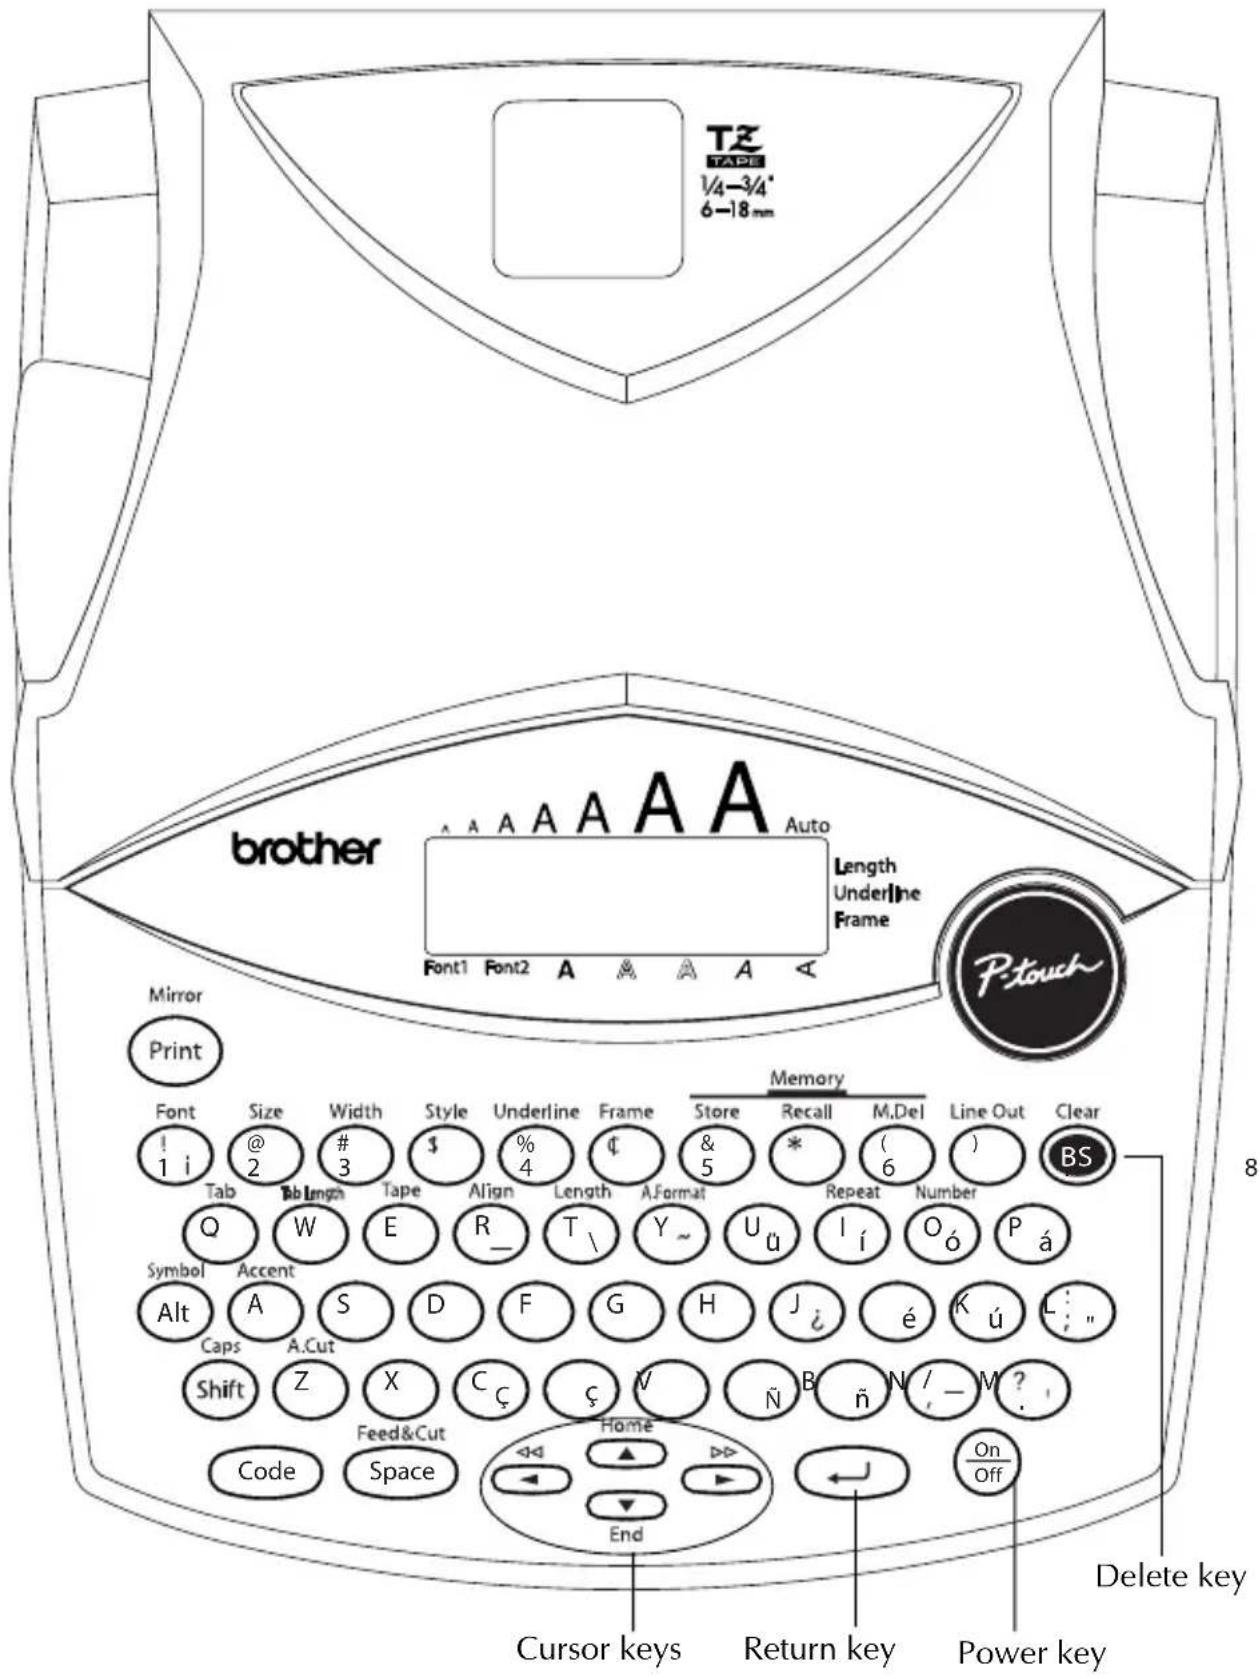
KEYBOARD & LCD DISPLAY
GENERAL PRECAUTIONS
- To avoid injuries, do not touch the cutter's edge.
- Use only Brother TZ tapes with this machine to avoid damage. Do not use tapes that do not have the Mark. Brother cannot be held responsible for trouble or damage by the use of unauthorized supplies.
- Do not pull on the tape being fed from the P-touch. This may damage the tape cassette.
- Do not use the machine in dusty places, and keep it out of both direct sunlight and rain.
- Do not expose the machine to high temperatures or high humidity. Never leave it on the dashboard or in the back of your car.
- Do not leave any rubber or vinyl on the machine for an extended period of time. Doing so may cause staining.
- Do not clean the machine with alcohol or other organic solvents. Use a soft, dry cloth only.
- Do not put any foreign objects into or anything on the machine.
- Use only the AC adaptor (model AD-24) designed exclusively for this machine. Use of any other adaptor may void the warranty.
- Do not try to disassemble the AC adaptor.
- When the machine is not being used for a long period of time and it is not necessary to keep the text files stored in the memory, disconnect the AC adaptor, and remove the batteries to prevent them from leaking and damaging the machine.
- When the AC adaptor is connected, unplugging the adaptor from the electrical outlet before unplugging it from the machine can delete all text files in the memory, even if batteries are installed.
Use six AA alkaline batteries in this machine. - If the batteries are not installed with their positive and negative poles pointing in the correct direction, the batteries may leak, overheat or burst, or the print head may overheat.
BATTERIES
This portable machine can be used anywhere by installing six (6) AA alkaline batteries. When you change the batteries, always replace all six at the same time.
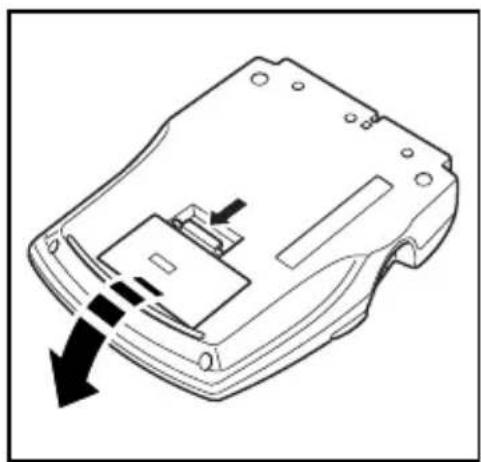
To change the batteries:
1 Remove the battery compartment cover on the back of the machine.
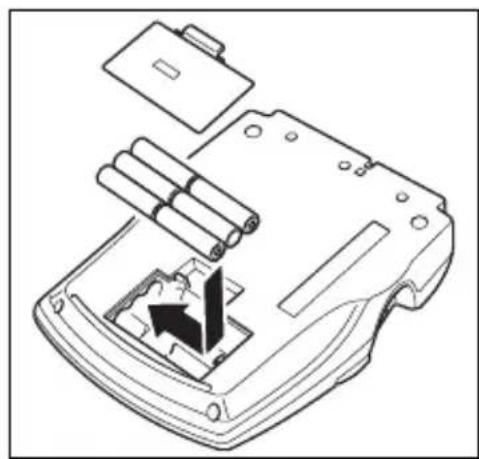
2 If batteries are already installed, remove them.
Insert six new AA alkaline batteries, making sure that their poles point in the correct direction.
4 Attach the battery compartment cover.
Be sure to insert the new batteries within five minutes of removing the old ones, otherwise the text shown in the display and any text files stored in the memory will be lost (unless the machine is plugged into an AC outlet with the AC adaptor).
Remove the batteries and disconnect the AC adaptor if you do not intend to use this machine for an extended period of time. When the power is disconnected, all text shown in the display and stored in the memory will be lost.
If the batteries are not installed with their positive and negative poles pointing in the correct direction, the batteries may leak, overheat or burst, or the print head may overheat.
AC ADAPTOR
The AC adaptor (model AD-24) allows you to use this machine wherever there is an electrical outlet.
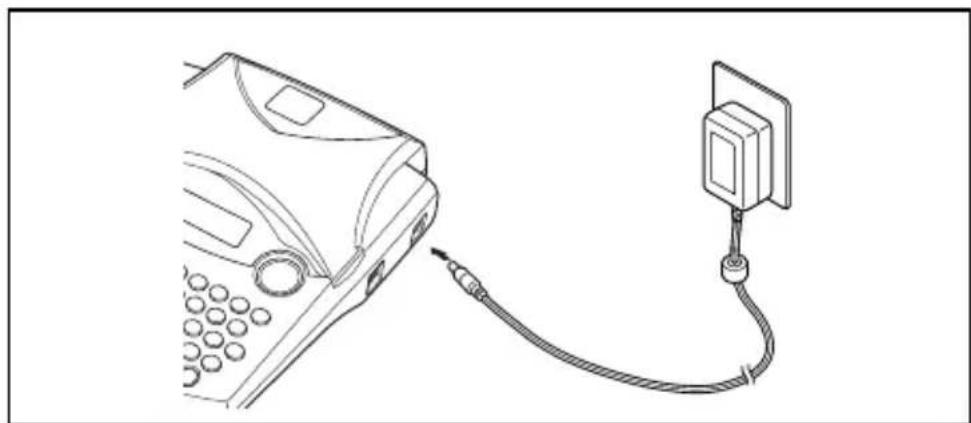
To connect the AC adaptor:
Insert the plug on the adaptor cord into the connector marked DC IN 9-9.5V on the right side of the machine.
Insert the plug on the adaptor into the nearest standard electrical outlet.
Only use the AC adaptor designed exclusively for this machine.
Remove the batteries and disconnect the AC adaptor if you do not intend to use this machine for an extended period of time. When the power is disconnected, all text shown in the display and stored in the memory will be lost.
When the AC adaptor is connected, unplugging the adaptor from the electrical outlet before unplugging it from the machine can delete all text files in the memory, even if batteries are installed.
TAPE CASSETTE
TZ tape cassettes are available for this machine in a wide variety of colors and sizes. It is possible to make distinctive color-coded and stylized labels.
In addition, this machine has been designed to allow you to change the tape cassettes quickly and easily.
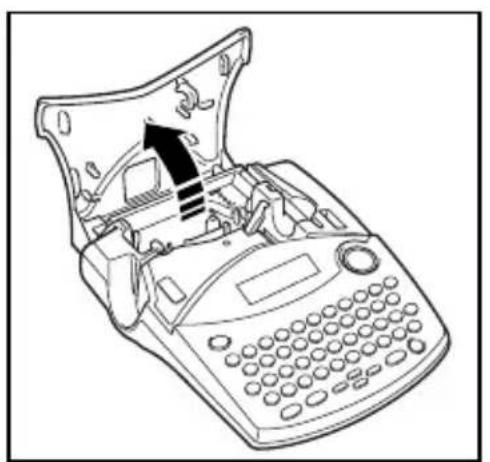
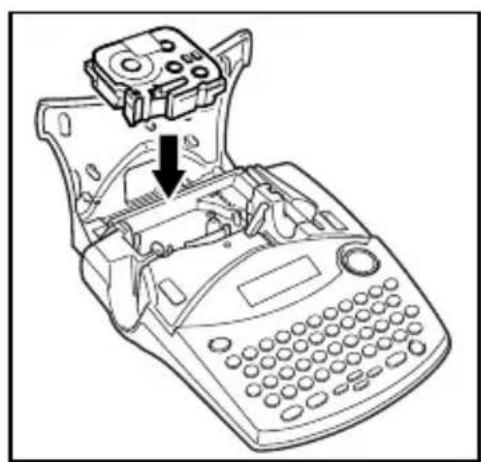
To change the tape cassette:
Lift open the tape compartment cover. The installed cassette is also released.
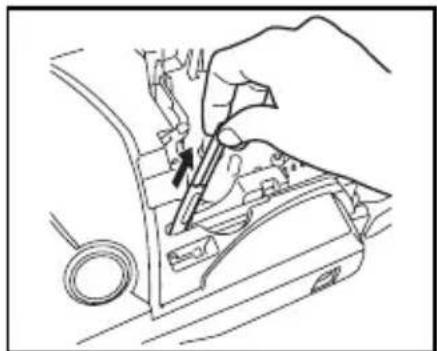
If a tape cassette is already installed, remove it by pulling it straight up.
If the ink ribbon in the tape cassette to be installed is loose, use your finger to wind the toothed wheel in the direction of the arrow on the cassette until there is no slack in the ribbon. Also, make sure that the end of the tape feeds under the tape guides.
If you are using a new tape cassette provided with a stopper, be sure to remove the stopper.
4 Insert the tape cassette firmly into the tape compartment, making sure that the entire back of the cassette touches the bottom of the compartment.
When inserting the tape cassette, make sure that the inner ribbon does not catch on the corner of the metal guide.
Close the compartment cover, and then turn on the machine, if it is off.
Hold down Code and press Feed&Cut once to advance the tape and remove any slack.
This machine does not support stamp tapes (SK-MB/SH-MB).
ATTACHING LABELS
LAMINATED TAPE
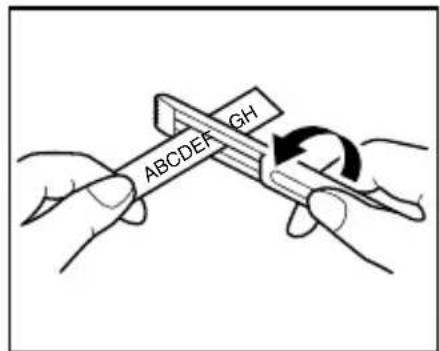
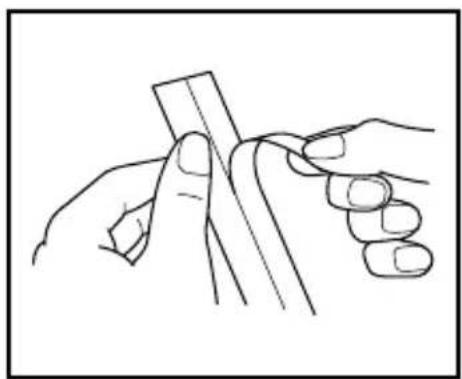
The enclosed stick enables you to easily remove the backing from labels printed on laminated tapes.
Hold the tape in your left hand, with the printed surface facing up, and hold the stick in your right hand.
Pass the tape halfway through the long narrow hole in the stick.
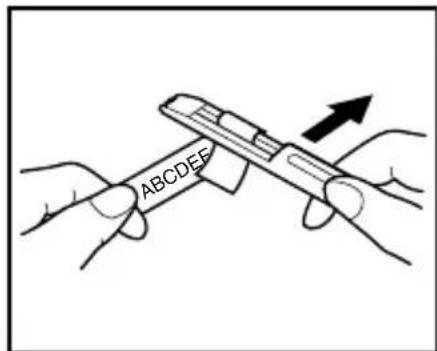
③ Turn the stick three-quarters of a turn towards you and pull the stick away from you as shown below.
Peel off the label backing.
Some tapes can be folded in half so that the inside edges of the two backing pieces come off the label, enabling the backing to be peeled off easily.
FABRIC TAPE
Fabric tape is used to attach a piece of fabric printed with your text onto garments using an iron. After printing the text onto fabric tape and cutting off the label using scissors, place the label on an ironed garment at the location where you wish to attach it in such a way that the printed text can be read correctly. Cover the label with another piece of cloth and use an iron set to a medium-high temperature (320 to 356^ (160 to 180^ ) to press down firmly for 15 to 30 seconds. For more details, refer to the instructions included with the fabric tape cassette.
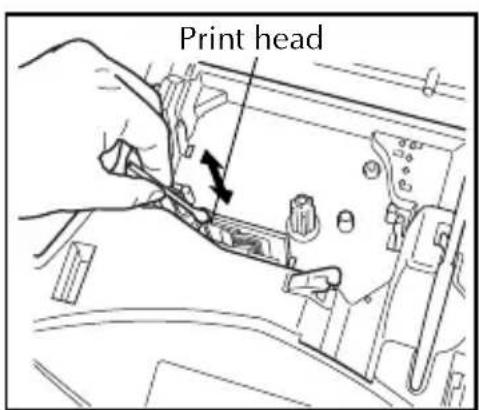
Occasionally, specks of dust or dirt become attached to the machine's print head and rollers. This is particularly likely when you are using the unit outdoors or in a very dusty environment. If a section of the print head is covered with dust, a white horizontal streak may appear through the label text. Therefore, as with a tape recorder, the machine's head may need to be cleaned from time to time.
To clean the print head and rollers:
1Turn off the machine. Remove the batteries and disconnect the AC adaptor.
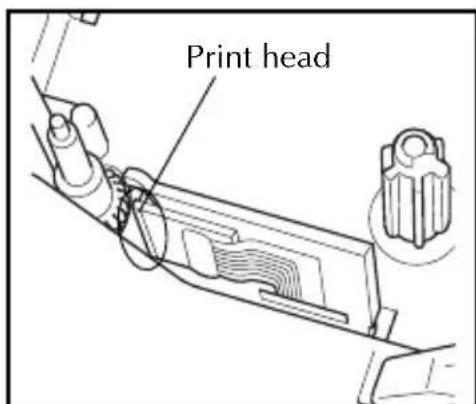
Open the tape compartment cover, and then remove the tape cassette if one is installed. The print head and rollers are located in the tape compartment.
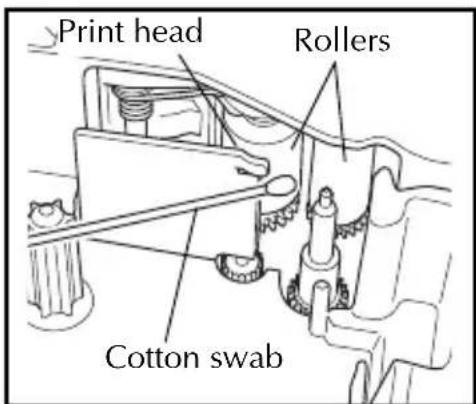
③Print head: Use a dry cotton swab to gently wipe the print head with an up-and-down motion.
Rollers: Use a dry cotton swab to wipe each roller with an up-and-down motion while rotating them with your finger.
Install a tape cassette, close the tape compartment cover, and then try printing again.
If a blank streak still appears in the label, repeat steps 1 to 4.
If none of the above works, contact your service representative.
The print head can be cleaned more easily if the optional print head cleaning cassette (TZ-CL4) is used.
USING WITH A PERSONAL COMPUTER
By installing the P-touch Editor, Quick Editor and Printer driver, you can easily print labels from your personal computer. Various auto format templates are available in the software for easy label making.
What you'll need:
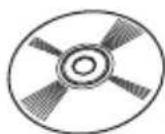
CD-ROM
The CD-ROM contains software, etc., to install on a personal computer.
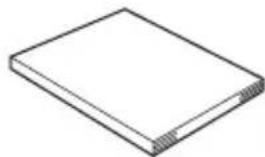
■Software Installation Guide
Keep for future reference.
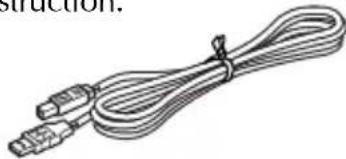
■USB interface cable
(not included)
Make sure that your USB cable is of high quality construction.
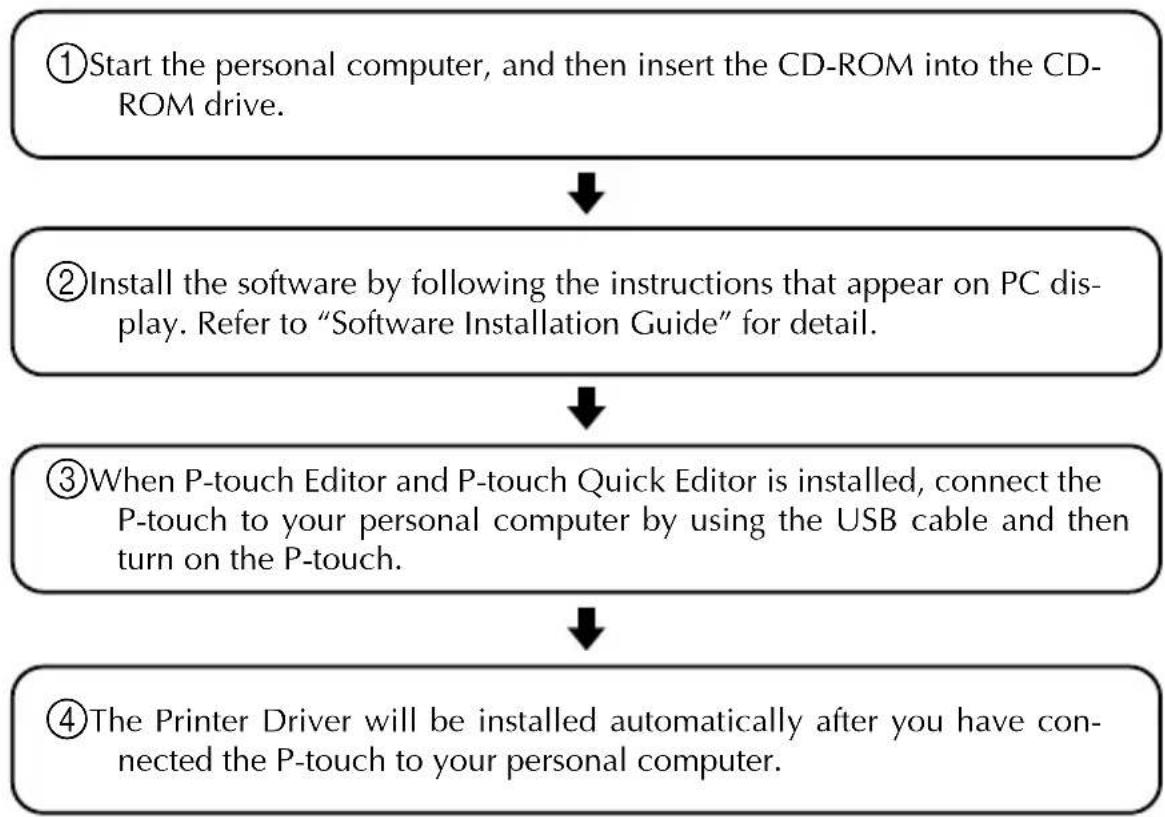
Procedure :
NOTE:
- Do not connect the USB interface cable to a personal computer until the software has been installed.
- Be sure to refer to the "Software Installation Guide" to install the software properly.
Notes on using with a personal computer
- When connected to the personal computer, the machine will automatically turn off if no operation is performed within 60 minutes.
The label length can be set up to 12.2^ (310 mm) long.
About CHAIN print mode :
When printing labels continuously, you can reduce the margin size by selecting the "Chain Printing" option on the computer. The Auto cut function will be off in Chain printing, so you will need to press Code + Space when finally cutting the tape.
Please use scissors to cut off Fabric Tapes or Strong Adhesive Tapes.
System Requirements :
Check that your system configuration meets the following requirements.
-Operating system: Pre-installed with Microsoft Windows 98, 98SE, Me, 2000 Pro, XP Pro or XP Home
Memory:64MB or more
- Hard disk free space: 50MB or more
- Interface : USB 1.1 or later specification
Monitor: 800× 600 dot (SVGA / Higher color or higher graphics card)
-Other: CD-ROM drive for installation
For Your Information
POWER KEY
The Power key ( On ) is located in the lower-right corner of the keyboard. If batteries have been installed or the machine has been plugged in using the AC adaptor, the previous session's information is displayed when the machine is turned on.
The machine will automatically turn off if no operation is performed within the selected time. See below chart for detail.
| Power Supply Non-PC use PC use | |
| Six AA batteries 5 minutes 60 minutes | |
| AC adaptor 5 minutes 60 minutes |
To turn on the machine:
Press On Off. The previous session's information appears in the LCD display.
To turn off the machine:
Press On Off. The current session's information is stored in the internal memory.
CURSOR KEYS
The machine's LCD display shows two rows of 9 characters; however, the text that you create can be up to 99 characters long. You can review and edit different parts of the left by moving the cursor backward and forward.
LEFT CURSOR KEY
To move the cursor one character to the left:
Press once.
If this key is pressed when the cursor is at the beginning of a line following another line, the cursor moves to the end of the previous line.
To move the cursor several characters to the left:
Hold down until the cursor moves to the desired position.
To move the cursor to the beginning of the current line:
Hold down Code and press
RIGHT CURSOR KEY
To move the cursor one character to the right:
Press once.
If this key is pressed when the cursor is at the end of a line followed by another line, the cursor moves to the beginning of the next line.
To move the cursor several characters to the right:
Hold down until the cursor moves to the desired position.
To move the cursor to the end of the current line:
Hold down Code and press
UP CURSOR KEY
To move the cursor up to the previous line:
Press Home once.
If the cursor is in the first line of text, it will move to the beginning of the line.
To move the cursor up several lines:
Hold down until the cursor moves to the desired line.
To move the cursor to the beginning of the entire text:
Hold down Code and press Home
DOWN CURSOR KEY
To move the cursor down to the following line:
Press once.
If the cursor is in the last line of text, it will move to the end of the line.
To move the cursor down several lines:
Hold down until the cursor moves to the desired line.
To move the cursor to the end of the entire text:
Hold down Code and press End
CODE, ALT & SHIFT KEYS
Most characters can be entered simply by pressing their keys. However, to use special functions or to enter capital letters, accented characters and some symbols, the following special keys are necessary.
CODE KEY
To use a function printed above a key:
- Hold down Code and press the key immediately below the desired function.
EXAMPLE
To start the Symbol function:

- Hold down Code and press Alt once.
ALT KEY
To type in characters printed in color on the right-hand side of the keys:
- Hold down Alt and press the key of the desired character written in color. The Alt indicator on the left side of the display comes on while Alt is held down.
EXAMPLE
To type in “-”:
- Hold down Alt and press / , - once. The Alt indicator comes on while Alt is held down.
SHIFT KEY
To type in an uppercase letter or a symbol printed in the top left-hand corner of a key:
- Hold down Caps Shift and press the key of the desired letter or symbol.
EXAMPLE
To type in "%%":
Caps Underline Hold down Shift and press 5

The Caps mode is similar to holding down (Shift). It allows you to type capital letters continuously.
To type in many capital letters:
1 Hold down Code and press Shift. The Caps indicator on the left side of the display comes on.
Press the keys of the desired letters or symbols.
To exit Caps mode, hold down Code and press Shift. The Caps indicator goes off.
SPACE KEY
The Space key (Feed&Cut) lets you add blank spaces between characters in your text. It is different from the right cursor key (D), which just moves the cursor without adding blank spaces.
To add a space:
PressFeed&Cut Space
EXAMPLE
To add a space:
Feed&Cut Press Space
RETURN KEY
As on a typewriter or word processor, this machine's Return key ( ) is used to end a line of text and start another one. When you have finished entering one line, press the return key to make a new line and move the cursor to it.
The text can only contain a maximum of five lines. If you press 一 when five text lines already exist, the error message "5 LINE LIMIT!" will appear.
| Tape widths Maxi | num number of lines that can be printed |
| 1/4" (6 mm) 2 | |
| 3/8" (9 mm) 2 | |
| 1/2" (12 mm) 3 | |
| 3/4" (18 mm) 5 |
The return key can also be used to select an item from a list (e.g., add a symbol or accented character to the text) or to apply a selected setting.
Some questions asking you to confirm a command may appear on the LCD display, especially when the function that you have chosen will delete or affect files. In these cases, pressing is like answering "yes".
To answer "no", press Clear BS. Refer to DELETE KEY on page 17.
To add a new line:
- Press . The return mark ( ) appears to indicate the end of the line.
To select an item from a list:
Press
To answer "yes":
Press
TAB FUNCTION
This function allows you to separate sections of a line of text by adding tabs. This enables you to create perfectly aligned columns without having to type in several spaces. All tabs have the same length and are measured from either the beginning of the line or the previous tab, if there is more than one. The tab length can be set between 0.0'' and 11.8'' (0.0 and 30.0cm ).
The text cannot contain more than 50 tabs. If the maximum number of tabs has already
been added to the text when Code is held down and Q is pressed, the error message "TAB LIMIT!" appears.
| Part No. | Product | Price |
| 8667 | Printer | 300 |
| 122960 | Fax | 100 |
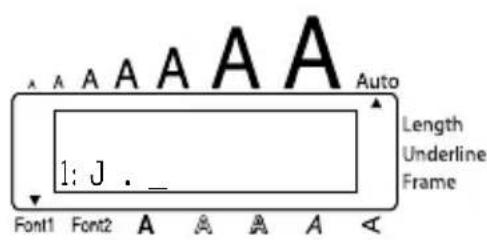
To set the tab length:
Hold down Code and press W once. The current tab length is displayed.
Press Home or End until the desired length is displayed or use the number keys to type in the length.
To change the units (inches or centimeters) used to display the tab lengths, press until the desired units are displayed.
Press
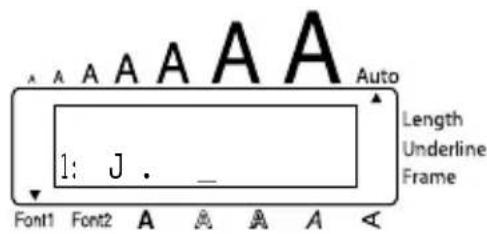
To add a tab:
- Hold down and press once. The tab mark ( ) appears in the text to indicate the position of the tab.
If the text in front of a tab extends past the point where the next section of text should start, the text will instead start at the following tab position.
For example, if the tab length is set to 1.2^ (3.0 cm) and the following text is typed in:
1:ABCDEFtGHIJ 2:JKLMNOPQRSTU
The label shown below will be printed.
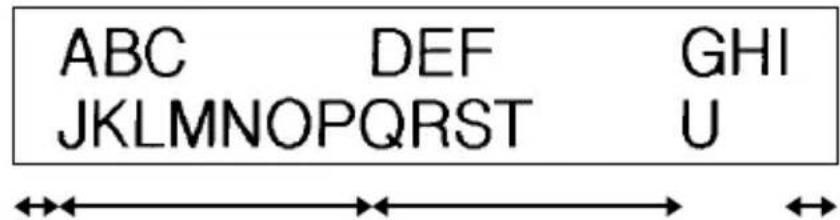
Margin Tab (1.2" (3.0 cm)) Tab (1.2" (3.0 cm)) Margin
EXAMPLE
To set the tab length to 1":
Hold down Code and press W once.
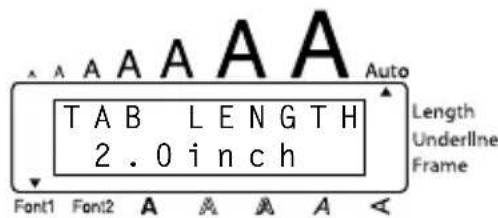
Press until 1.0 is displayed.
Press

To add a tab:
Hold down Code and press once.
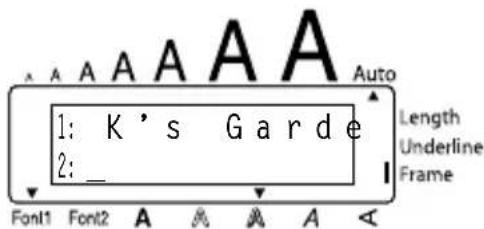
DELETE KEY
The Delete (backspace) key ( Clear ) allows you to remove characters to the left of the cursor's current position. It differs from the left cursor key ( ), which only moves the cursor without deleting any characters.
The delete key can also be used to quit most functions and return to the previous display without changing the text.
Some questions asking you to confirm a command may appear on the LCD display, especially when the function that you have chosen will delete or affect files. In these cases, pressing Clear BS is like answering "no".
To answer "yes", press l . Refer to RETURN KEY on page 14.
To delete one character:
Press , , or to position the cursor below the character immediately to the right of the character that you wish to delete.
2 Press BS once.
To delete a sequence of characters:
Press , , or to position the cursor below the character immediately to the right of the last character that you wish to delete.
Hold down Clear until all of the characters that you wish to delete are deleted.
To quit a function without changing your text:
Press Clear BS to return to your text.
To answer "no":
Press Clear
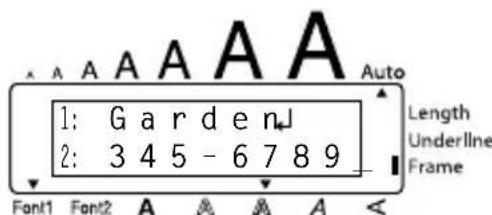
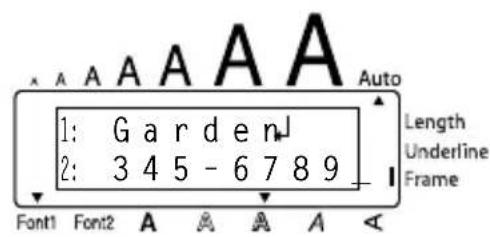
LINE OUT FUNCTION
With the Line Out function, you can easily remove an entire line of text.
To delete a line of text:
Press , , or to position the cursor within the line of text that you wish to delete.
Line Out 2Hold down Code and press 0 once.
Each time \0 is pressed while Code is held down, one line of text is deleted.
EXAMPLE
To delete "012-345-6789":
Line Out Hold down Code and press 0 once.
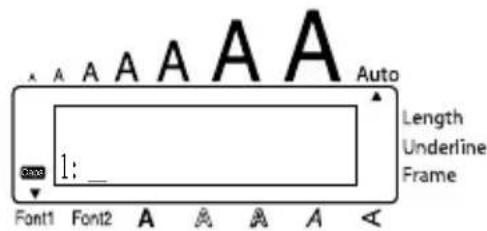
CLEAR FUNCTION
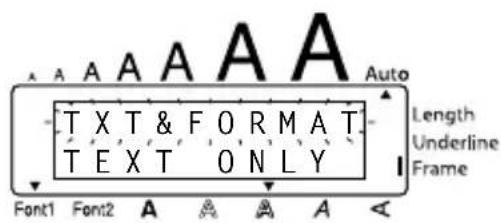
When clearing the display before entering new text, the Clear function can be used to choose whether all of the text is erased and all format functions (Font, Size, Width, Style, Underline, Frame, Tape margin, Alignment, Tab length, Mirror printing, and Length) are returned to their default settings, or whether just the text is erased.
To delete all of the text and return all formats to their default settings:
Hold down Code and press BS
Press Home or until TXT&FORMAT is selected (flashing).
To return to the text without erasing anything, press
Press
EXAMPLE
To clear the text and formats:
1 Hold down Code and press BS
Press until TXT&FORMAT is flashing.
Press
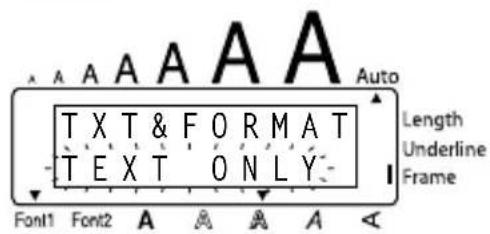
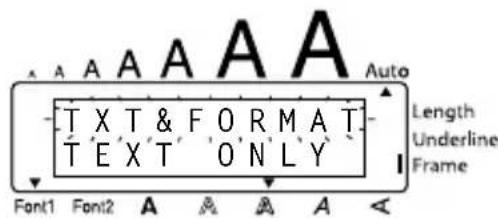
To delete just the text:
Hold down Code and press BS
Press or until TEXT ONLY is selected (flashing).
To return to the text without erasing anything, press B5.
Press
EXAMPLE
To clear just the text:
Hold down Code and press BS
Press until TEXT ONLY is flashing.
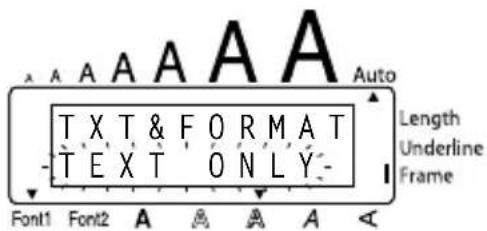
Press

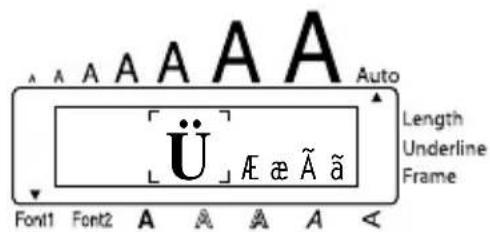
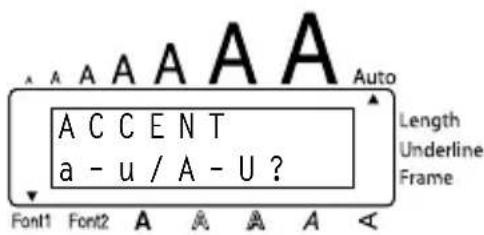
ACCENT FUNCTION
The Accent function can also be used to add accented characters to your text. Many of these characters can also be typed in using the Symbol function.
The accented characters are grouped according to the capital or small letter that they are combined with. The following accented characters are available:
| Letters Accented characters Letters | Accented characters | |
| A | À À À À ãE | i |
| a | àáãàãæ | N |
| C Ç n ñ | ||
| c | ç | O |
| E | è ÉÉÉ | o |
| e | èéëë | U |
| I | ííI | u |
To type in an accented character:
Hold down Code and press A. The message "ACCENT a-u/A-U?" appears on the display.
Press the key of the letter in the desired accented character.
To type a capital letter, hold down Shift (or hold down Code and press Shift to turn on Caps mode) before pressing the letter key.
Press <> or > until the desired accented character appears enlarged within the frame in the middle of the display.
Press . The accented character is added to the text.
To type in a series of accented characters, hold down Code before pressing Then, continue adding accented characters by selecting them as explained in steps 2 and 3, and holding down Code while pressing . Press just after selecting the last character in the series.
EXAMPLE
To add the accented character "E":
Hold down Code and press A
Hold down (Shift) and press E.
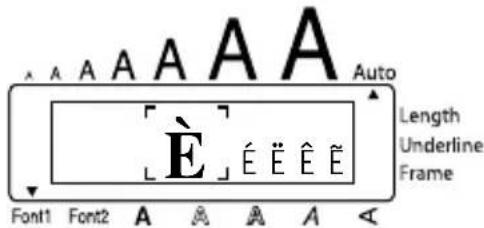
Press until E appears in the frame.
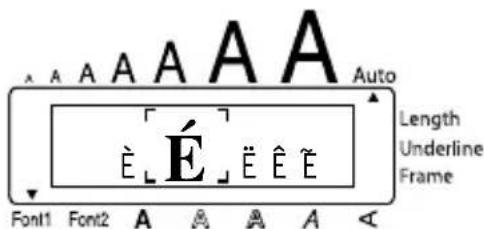
4Press
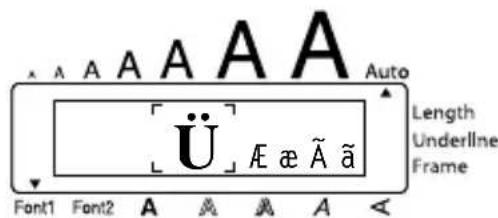
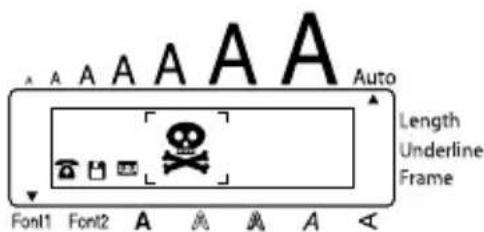
SYMBOL FUNCTION
In addition to the letters, symbols and numerals on the key tops, there are 53 additional marks available with the Symbol function.
The following symbols are available:
To type in a symbol:
Symbol 1 Hold down Code and press Alt. A row of symbols appears in the display.
Press Home or to display different rows of symbols and press or until the desired symbol appears enlarged within the frame in the middle of the display.
Press . The symbol is added to the text.
To type in a series of symbols, hold down Code before pressing . Then, continue adding symbols by selecting them as explained in steps 2 and 3, and holding down Code while pressing. Press just after selecting the last symbol in the series.
EXAMPLE
To add the symbol “ 其
1 Hold down Code and press Alt.
Press Home or until the row containing
"appears, and then press or until
"appears in the frame.
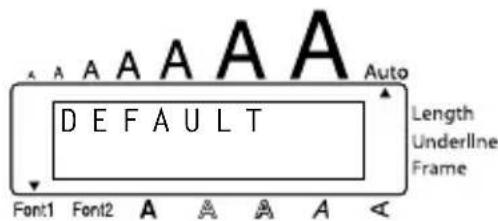
AUTO FORMAT FUNCTION
With the Auto Format function, you can select from a variety of preset formats perfect for your specific need. This function automatically adjusts the label length, tape margins and horizontal alignment without changing the text or any other formats, allowing you to create labels faster and easier.
The following preset formats are available:
| Auto Format Setting | Label Length Setting | Tape Margin Setting | Horizontal Alignment Setting |
| DEFAULT OFF FULL LEFT | |||
| 3.5"FLOPPY 2.8"(7.0 cm) NARROW CENTER | |||
| miniDV 1.7"(4.3 cm) NARROW CENTER | |||
| VHS SPINE 5.5"(14.0 cm) NARROW CENTER | |||
| VHS 3.0"(7.7 cm) NARROW CENTER | |||
| VCR8mm CASE 3.6"(9.2 cm) NARROW CENTER | |||
| VCR8mm 2.9"(7.3 cm) NARROW CENTER | |||
| VHS-C SPINE 1.8"(4.5 cm) NARROW CENTER | |||
| VHS-C 2.3"(5.8 cm) NARROW CENTER | |||
| AUDIO CASSETTE 3.5"(8.9 cm) NARROW CENTER | |||
| DAT CASSETTE | 2.2"(5.6 cm) | NARROW | CENTER |
| MINI DISK | 2.0"(5.2 cm) NARROW CENTER | ||
| ORGANIZER L 3.2"(8.2 cm) NARROW CENTER | |||
| ORGANIZER S | 2.6"(6.5 cm) NARROW CENTER | ||
| FILE LONG | 7.2"(18.3 cm) NARROW CENTER | ||
| FILE SHORT | 3.7"(9.4 cm) NARROW CENTER |
To select a preset format:
1 Hold down Code and press Y once. The currently selected setting appears in the display.
Press or to select the desired setting.
To return to default settings, press &Cut .
Press to apply the selected setting.
The Length indicator comes on if any setting other than DEFAULT is selected.
EXAMPLE
To select the AUDIO CASSETTE setting:
Hold down Code and press _
Press Home or End until the AUDIO CASSETT setting is displayed.
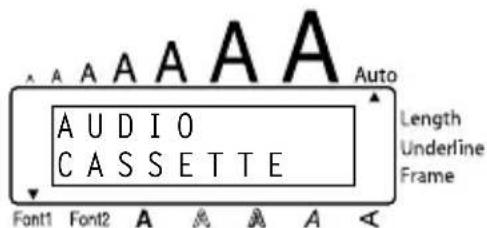
Press
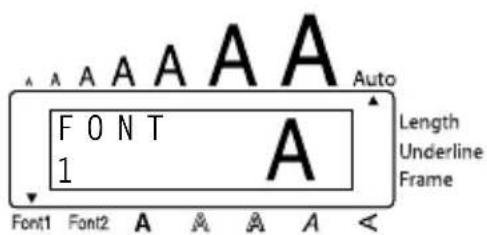
FONT FUNCTION
With the Font function, you can choose one of two fonts for your text.
The following font settings are available:
FONT 1
FONT 2
The default font setting is FONT 1. The font indicator at the bottom left of the display shows the currently selected font setting.
To change the font setting:
1 While holding down Code, press 1 i once, and keep Code held down to display the current font setting.
2 While still holding down Code, continue pressing until the desired font setting is displayed.
The current font setting is shown by the font indicator at the bottom left of the display.
Release Code to apply the selected font setting to the entire text.
EXAMPLE
To select the FONT 2 font setting:
1 While holding down Code, press once, and keep Code held down.
2 While still holding down Code, continue pressing Font until FONT 2 is displayed.

Release Code
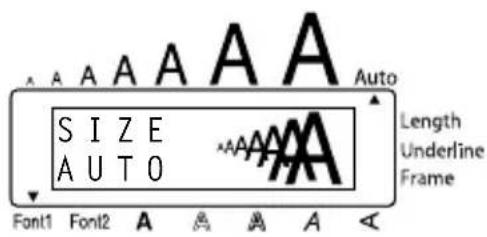
SIZE & WIDTH FUNCTIONS
The character size can be adjusted using both the Size and Width functions. Since the character size that can be used depends on the width of the tape, the following table shows the character sizes that can be used with each tape width.
| Tape Widths Sizes (in points) |
| 1/4" (6 mm) 6, 9, 12 |
| 3/8" (9 mm) 6, 9, 12, 18 |
| 1/2" (12 mm) 6, 9, 12, 18, 24 |
| 3/4" (18 mm) 6, 9, 12, 18, 24, 36, 42 |
The default size setting is AUTO and the default width setting is OFF. The currently selected size setting is always shown by the indicator above the display.
With the AUTO size setting, the machine compares your text with the width of the installed tape and automatically adjusts the characters to the largest possible size. However, seven other point sizes are also available, and each can be printed with either of the two width settings.
With the AUTO setting selected and 1/2'' (12-mm) or 3/4'' (18-mm) wide tape installed, text consisting of just one line of only uppercase letters (and no accented characters) will be printed with a character size slightly larger than a similar sentence also containing lowercase letters (i.e., 29 points for 1/2'' (12-mm) wide tape and 52 points for 3/4'' (18-mm) wide tape).
| Size Setting (in points) | Width Setting Off | Width Setting On |
| 6 | ABC | ABC |
| 9 | ABC | ABC |
| 12 | ABC | ABC |
| 18 | ABC | ABC |
| 24 | ABC | ABC |
| 36 | ABC | ABC |
| 42 | ABC | ABC |
To change the size setting:
While holding down Code, press once, and keep Code held down to display the current size setting.
2 While still holding down Code, continue pressing until the desired size setting is displayed.
The current size setting is shown by the size indicator at the top of the display.
3Release Code to apply the selected size setting to the entire text.
EXAMPLE
To select the 24 point size setting:
1 While holding down Code, press 2 once, and keep Code held down.
2 While still holding down Code, continue pressing 2 until 24 is displayed.
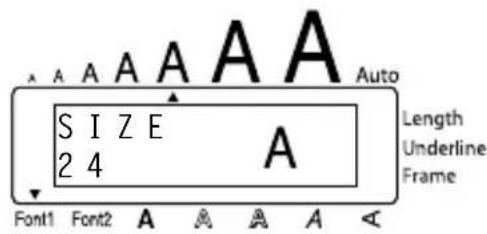
Release Code
To change the width setting:
1 While holding down Code, press 3 once, and keep Code held down to display the current width setting.
2 While still holding down Code, continue pressing until the desired width setting is displayed.
3Release Code to apply the selected width setting to the entire text.
EXAMPLE
To select the ON width setting:
1 While holding down Code, press 3 once, and keep Code held down.
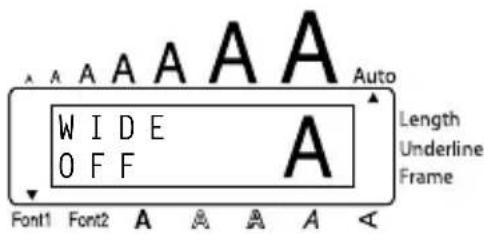
2 While still holding down Code, continue pressing width until ON is displayed.
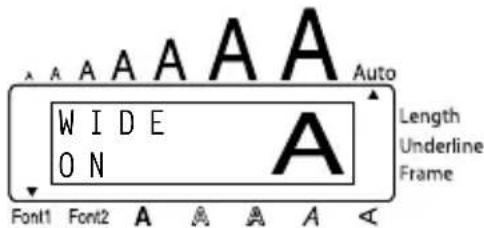
Release Code
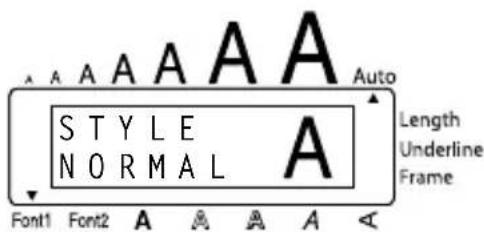
STYLE FUNCTION
You can choose from nine different character styles to apply to your text.
Characters printed using the smaller sizes may be difficult to read if certain style settings (e.g., I+SHAD) are selected.
The following style settings are available:
NORMAL, BOLD, OUTLINE, SHADOW, ITALIC, I+BOLD (italic & bold), I+OUTL (italic & outline), I+SHAD (italic & shadow), VERT (vertical)
The default style setting is NORMAL. The style indicator at the bottom of the display shows the current style setting when any setting other than NORMAL is selected.
Refer to Reference at the end of this section for samples of the available settings.
To change the style setting:
Style 1 While holding down Code, press once, and keep Code held down to display the current style setting.
While still holding down , continue pressing until the desired style setting is displayed.
The current style setting is shown by the style indicator at the bottom of the display.
3Release Code to apply the selected style setting to the entire text.
EXAMPLE
To select the I+SHAD style setting:
style 1 While holding down Code, press once, and keep Code held down.
2 While still holding down Code, continue pressing Style until I+SHAD is displayed.
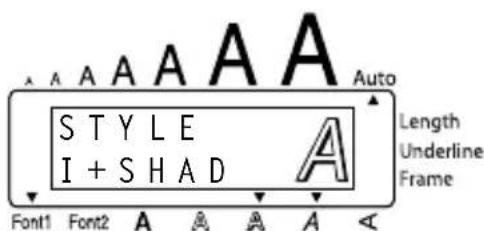
Release Code
REFERENCE
| Font Setting | Style Setting | ||||
| NORMAL BOLD OUTLINE SHADOW ITALIC | |||||
| FONT 1 | abc | abc | abc | abc | abc |
| FONT 2 | abc | abc | abc | abc | abc |
| Font Setting | Style Setting | |||
| I+BOLD I+OUTL I+SHAD | VERT | |||
| FONT 1 | abc | abc | abc | ♂ ♀ ♀ |
| FONT 2 | abc | abc | abc | ♂ ♀ ♀ |
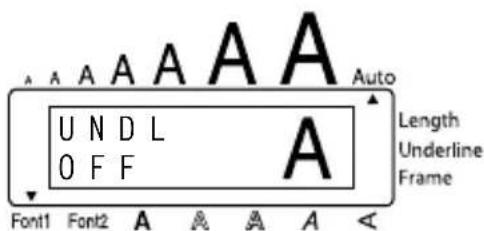
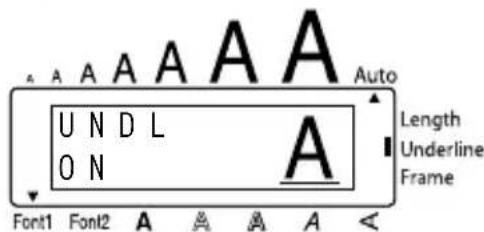
UNDERLINE FUNCTION
You can emphasize your text by underlining it.
The default underline setting is OFF. When the Underline function is set to ON, the Underline indicator on the right side of the display comes on.
UNDL ON
ABC
(Sample)
To turn the Underline function on or off:
1 While holding down Code, press 5 once, and keep Code held down to display the current underline setting.
2 While still holding down Code, continue pressing 55 until the desired underline setting is displayed.
The Underline indicator comes on when the ON setting is selected.
3 Release Code to apply the selected underline setting to the entire text.
EXAMPLE
To select the ON underline setting:
While holding down Code, press 5 once, and keep Code held down.
2 While still holding down Code, continue pressing Underline % until ON is displayed.
Release Code
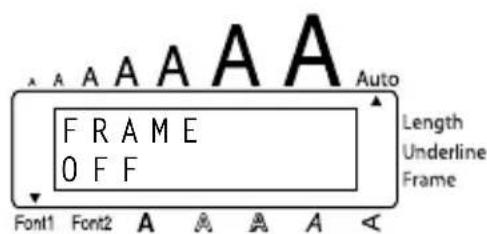
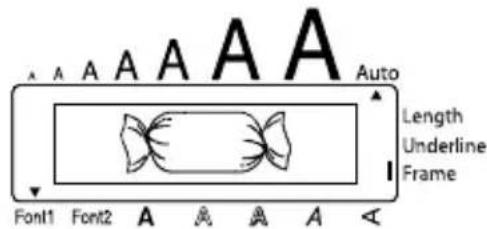
FRAME FUNCTION
With the Frame function, you can choose from various frames and highlights to design a more decorative or emphasized label.
The default setting is OFF; however, the following five settings are also available.
| ABC | ABC | ABC |
| ABC | ABC |
When any setting other than OFF is selected, the Frame indicator on the right side of the display comes on.
To change the frame setting:
1 While holding down Code, press once, and keep Code held down to display the current frame setting.
While still holding down Code, continue pressing until the desired frame setting is displayed.
The Frame indicator comes on when any setting other than OFF is selected.
Release Code to apply the selected frame setting to the entire text.
EXAMPLE
To select the candy frame setting:
1 While holding down Code, press 6 once, and keep Code held down.
EXAMPLE
2 While still holding down Code, continue pressing Frame 6 until the candy frame is displayed.
Release Code
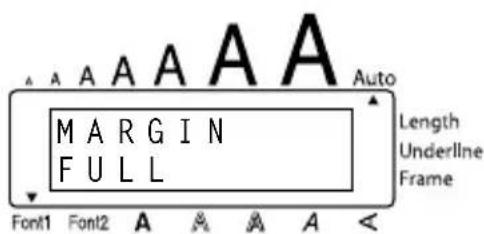
TAPE MARGIN FUNCTION
The Tape margin function allows you to adjust the size of the margins on the left and right sides of your text.
The default tape margin setting is FULL; however, three other settings are also available.
FULL
(1" (24 mm) margins)
NONE
(5/64" (2 mm) margins)
NARROW
(1/6" (4 mm) margins)
HALF
(1/2" (12 mm) margins)
ABC
ABC
ABC
ABC
When a setting other than FULL is selected, extra tape is fed out before printing starts.
After printing using the NARROW and HALF tape margin settings, use scissors to cut along the cutting guide (:) to center the text within the label.
To change the tape margin setting:
1 While holding down Code, press E once, and keep Code held down to display the current tape margin setting.
2 While still holding down Code, continue pressing E until the desired tape margin setting is displayed.
3 Release Code to apply the selected tape margin setting to the entire text.
EXAMPLE
To select the HALF tape margin setting:
Tape 1 While holding down Code, press E once, and keep Code held down.
2 While still holding down Code, continue pressing tape until HALF is displayed.
Release Code

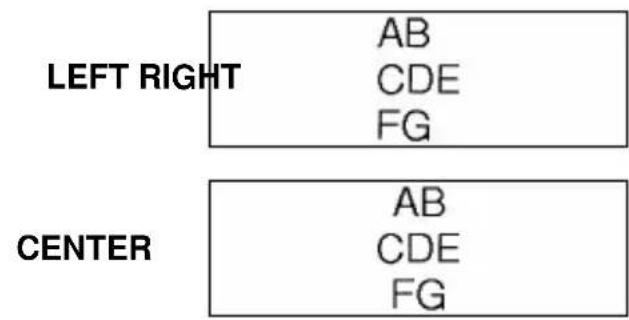
HORIZONTAL ALIGNMENT FUNCTION
You can choose to align the text in one of three ways. In addition, if the Length function was used to set the length of the label, the text will align within the label according to the selected horizontal alignment setting.
The default setting is LEFT; however, two other settings are also available.

To change the horizontal alignment setting:
1 While holding down Code, press R once, and keep Code held down to display the current horizontal alignment setting.
While still holding down Code, continue pressing R until the desired horizontal alignment setting is displayed.
3 Release Code to apply the selected horizontal alignment setting to the entire text.
EXAMPLE
To select the RIGHT horizontal alignment setting:
1 While holding down Code, press R once, and keep Code held down.
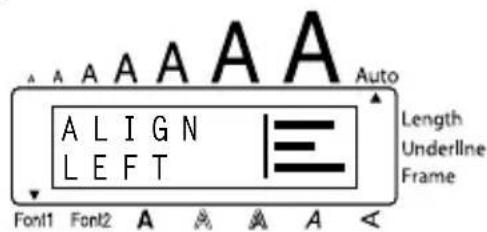
2 While still holding down Code, continue pressing Align R until RIGHT is displayed.
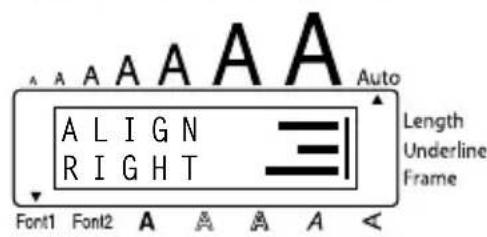
Release Code
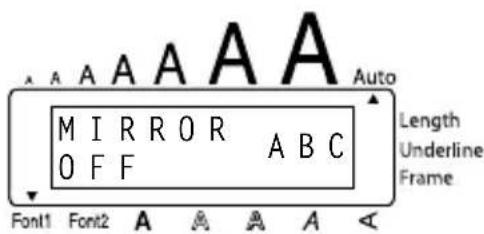
MIRROR PRINTING FUNCTION
This function prints your label so that the text can be read from the adhesive side of the tape. If mirror-printed labels are attached to glass or some other transparent material, they can be read correctly from the opposite side.
When using the Mirror printing function, the text should be printed on clear tape. The default mirror printing setting is OFF.
ON
38A
To turn the mirror printing setting on or off:
1 While holding down Code, press Print once, and keep Code held down to display the current mirror printing setting.
While still holding down Code, continue pressing Print until the desired mirror printing setting is displayed.
3 Release Code to apply the selected mirror printing setting to the entire text.
EXAMPLE
To select the ON mirror printing setting:
1 While holding down Code, press Print once, and keep Code held down.
2 While still holding down Code, continue pressing Mirror 1 until ON is displayed.
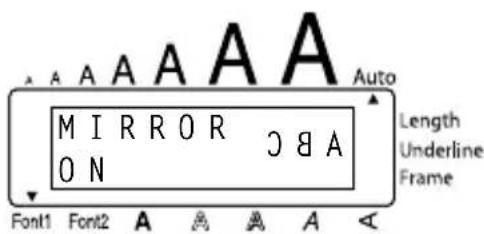
Release Code
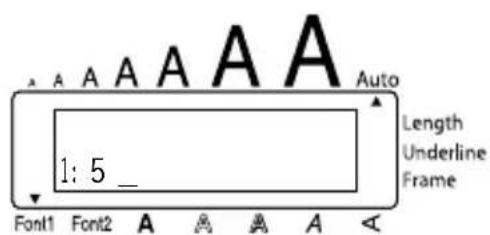
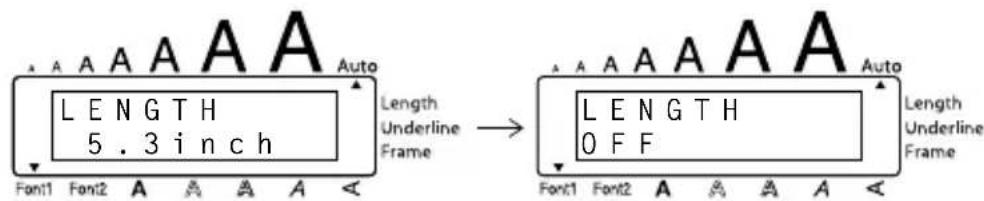
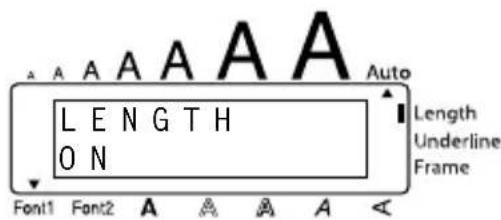
LENGTH FUNCTION
Although the length of the printed label automatically adjusts to fit the length of the entered text, there may be times when you will want to make a label with a specific length. The Length function allows you to set the label length between 1.6'' and 11.8'' (4.0 cm and 30.0 cm).
The default length setting is OFF. When the Length function is set to ON, the Length indicator on the right side of the display comes on.
To turn the Length function on or off:
1 While holding down Code, press T once, and keep Code held down to display the current length of the label (the text and both margins). Then the display will show the current label length setting (ON or OFF).
2 While still holding down Code, continue pressing until the desired label length setting is displayed.
The Length indicator comes on when ON is selected.
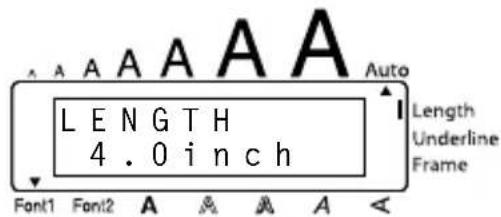
3 Release Code. If ON was selected, the current label length setting is displayed.
Press or to select the desired length or use the number keys to enter a length.
To change the units (inches or centimeters) used to display the label length, press until the desired units are displayed.
To change the length in 1^ (1.0-cm) steps, hold down either or End, and then release the key when the desired setting is displayed.
Press
EXAMPLE
To select a label length of 5^ ..
1 While holding down Code, press T once, and keep Code held down.
2 While still holding down Code, continue press
Length ing T until ON is displayed.
Release Code
Press Home until 5.0 inch is displayed.
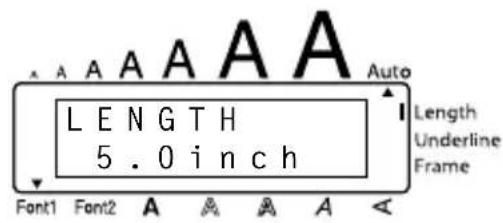
Press
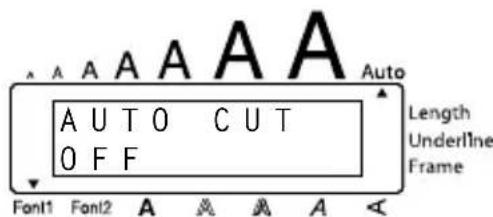
AUTO CUT FUNCTION
The Auto cut function allows you to set whether or not the machine will automatically cut each label after it is printed. Turn on the Auto cut function before starting to print in order to cut the labels automatically after printing them.
After printing a label with the Auto cut function set to OFF, hold down Code and press Feed&Cut once to feed the tape, then cut it.
Please use scissors to cut off Fabric Tapes or Strong Adhesive Tapes.
To turn the Auto cut function on or off:
1 While holding down Code, press Z once, and keep Code held down to display the current auto cut setting.
While still holding down Code, continue pressing until the desired auto cut setting is displayed.
3Release Code to apply the selected auto cut setting.
EXAMPLE
To turn the Auto cut function on:
1 While holding down Code, press Z once, and keep Code held down.
2 While still holding down Code, continue pressing A.Cut Z until ON is displayed.
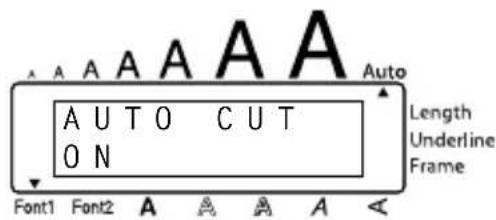
Release Code
PRINT KEY
After you have entered your text and chosen the desired format settings, you are ready to print. If the Auto cut function is set to ON, the label will automatically be cut after it is printed.
To print a label:
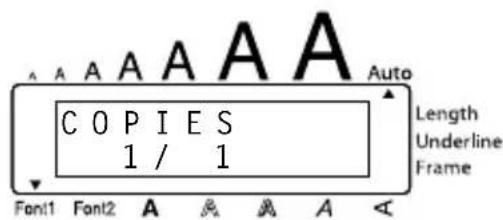
- Press | | once. The message "COPIES" followed by the number of the label being printed is displayed.
If the selected character size is too large for the width of the installed tape cassette, the message "CHR SIZE AUTO?" appears. To allow the text size to automatically be adjusted, press Print or . To stop the text size from being changed, press BS.
EXAMPLE
To print and cut a label:
- Press Mirror Print once.
FEED & CUT FUNCTION
The Feed & Cut function is used to feed out 1^ (24 mm) of tape and automatically cut it off. For example, after printing with the Auto cut function set to OFF or when printing has been interrupted.
To feed and cut off 1'' (24 mm) of tape:
Hold down Code and press FeedCut once. 1^ (24 mm) of tape is fed out and cut off.
Please use scissors to cut off Fabric Tapes or Strong Adhesive Tapes.
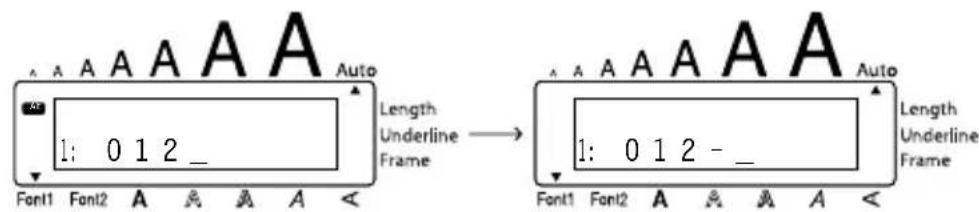
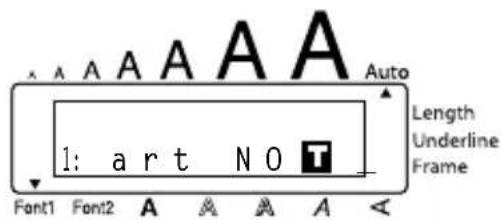
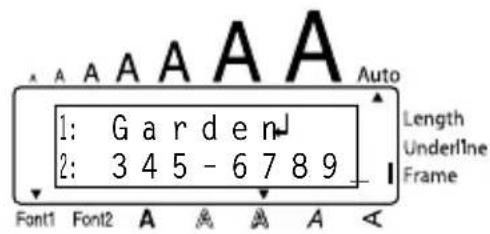
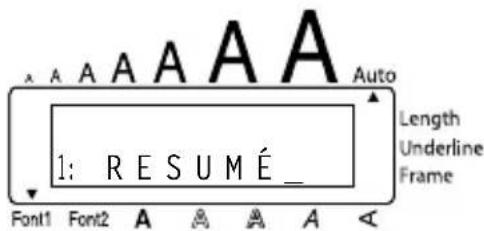
NUMBERING FUNCTION
This function can be used to print many copies of the same text while increasing a certain number in the text by 1 after each label is printed.
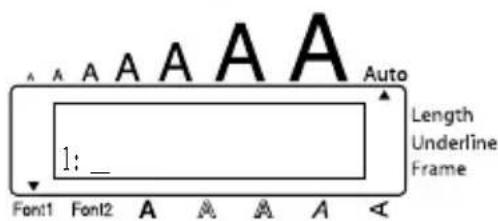
To use the Numbering function:
Press < , or to position the cursor below the number that you wish to increase.
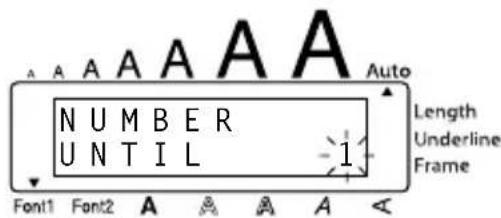
Hold down Code and press 0. The message "NUMBER UNTIL" appears in the display with the current setting.
To cancel the Numbering function at any time, hold down Code and press 0 (or press just BS).
Use the number keys to type in the last number to be printed.
The last number to be printed can also be selected by pressing Home or End
A number lower than the one that was selected cannot be entered.
4 Press (or) to begin printing the labels. The number of each copy is displayed while it is being printed.
If the Tape margin function is set to any setting other than NONE, a cutting guide (:) is printed between each label so the tape can be cut to the correct size.
To print three labels with numbers 1, 2 and 3:
Position the cursor below "1".
Number 2 Hold down Code and press O.
Width Press 3
Minor Press (or ).

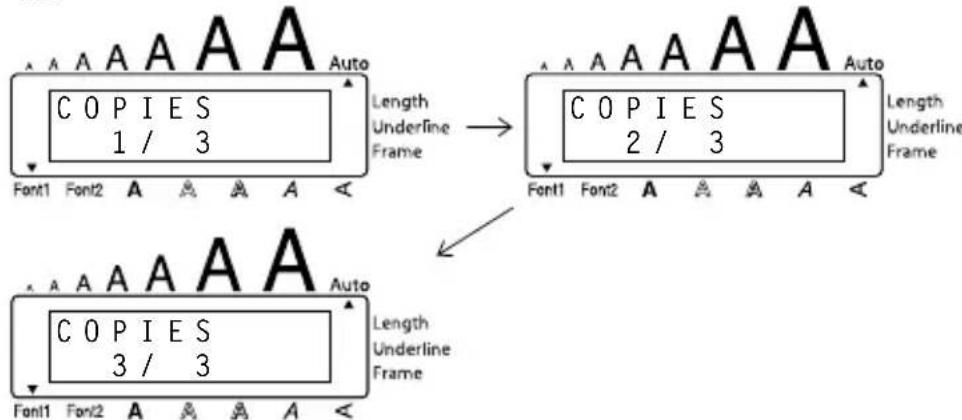
If the Tape margin function is set to any setting other than NONE, a cutting guide (:) is printed between each label so the tape can be cut to the correct size.

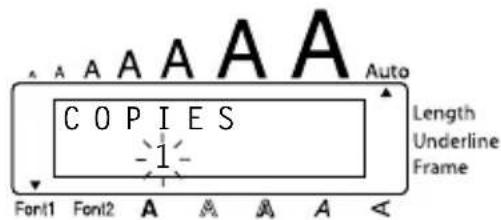
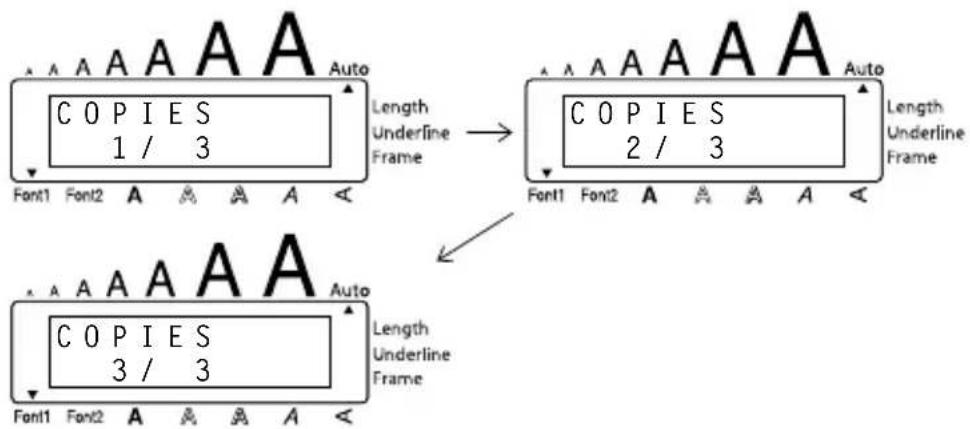
REPEAT PRINTING FUNCTION
This function allows you to print up to 9 copies of the same text.
To use the Repeat printing function:
1 Hold down Code and press. The message "COPIES" appears in the display with the default setting 1, which will need to be changed, as necessary.
To cancel the Repeat printing function at any time, hold down Code and press 1 (or press just BS).
Press or End until the desired number of copies is displayed, or use the number keys to type in the number.
3 Press (or ) to begin printing the labels. The number of each copy is displayed, while it is being printed.
If the Tape margin function is set to any setting other than NONE, a cutting guide (:) is printed between each label so the tape can be cut to the correct size.
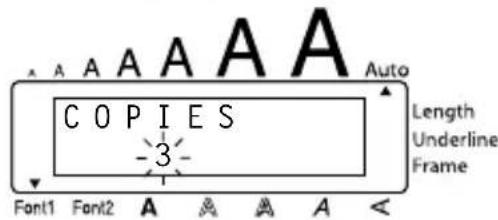
EXAMPLE
To print three copies of a label:
Hold down Code and press i.
Width Press 3
If the Tape margin function is set to any setting other than NONE, a cutting guide (:) is printed between each label so the tape can be cut to the correct size.
| Bill Reynolds ABC Transport 29 South Main St. Los Angeles, CA 98888 | Bill Reynolds ABC Transport 29 South Main St. Los Angeles, CA 98888 | Bill Reynolds ABC Transport 29 South Main St. Los Angeles, CA 98888 |
MEMORY FUNCTIONS
You can use the Memory to store your most frequently used text files. The text remains in the memory, along with its formatting, even after all characters are removed from the display using the Clear function (holding down Code and pressing BS).
When each file is stored, it is given a number to make recalling it easier. Up to 10 text files or approximately 300 characters can be stored in the memory. (A single text file can have a maximum of 91 characters.)
Since a copy of the stored text file is recalled when the Recall function is used, the text can be edited or printed without changing the originally stored file. When a file is no longer needed or more space is necessary, the Memory delete function can be used to delete it.
When inserting new batteries, be sure to insert the new ones within five minutes of removing the old ones, otherwise any text files stored in the memory will be lost (unless the machine is plugged into an electrical outlet with the AC adaptor).
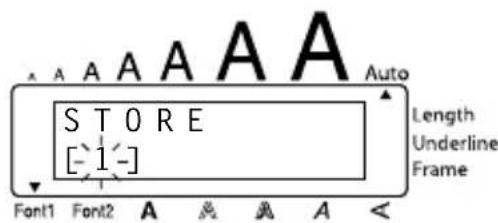
STORING TEXT
To store a text file:
Hold down Code and press 8. The message "STORE" appears on the display with the currently selected file number.
To quit the Store function without storing the text, hold down Code and press \&7 (or press just BS).
Press a number key (or press Home or End) to select the file number where you wish to store the text.
Press . The text is stored under the selected file number and the text previously shown in the display reappears.
If a file is already stored under the selected file number, the message "OVER-WRITE?" appears in the display and you must decide whether or not to overwrite it (delete it from the memory and store the new one).
If the maximum number of characters has already been stored, the error message "MEMORY FULL!" appears in the display. If this occurs, an existing text file must be deleted before the new one can be stored.
To overwrite the stored file with the new one:
- Press to delete the previously stored file and store the new one under the selected number.
To go back and choose another file number without overwriting the text file, press Clear, and then select a different file number.
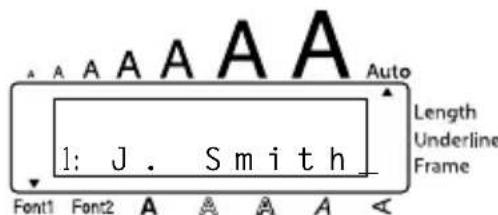
RECALLING TEXT
To recall a text file:
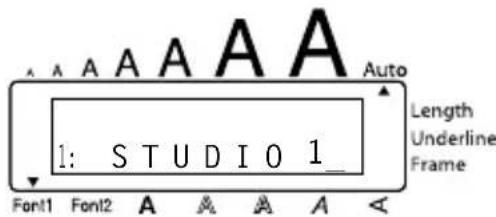
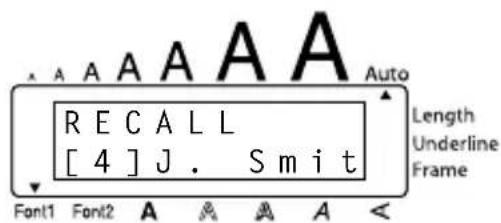
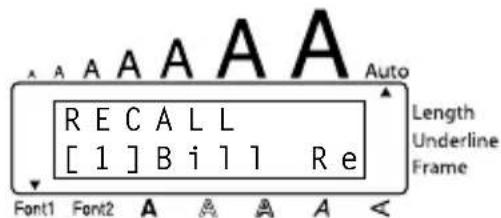
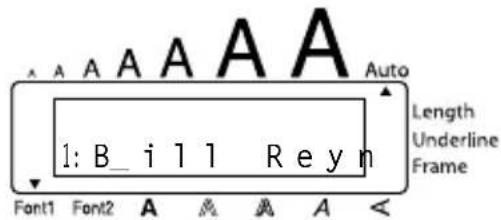
1 Hold down Code and press * 8. The message "RECALL" appears on the display with the file number and beginning of the most recently stored or recalled text.
To quit the Recall function without recalling text, hold down Code and press * (or press just BS).
Press a number key (or press or ) to select the file number containing the text that you wish to recall. The text stored under the selected file number is shown.
To see other parts of the selected text file, press 44 or 45 .
To display the text stored under other file numbers, press Home or End, or the key of a different file number.
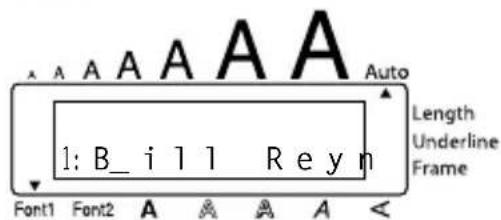
Press . Any text previously entered in the display is erased and the text stored under the selected file number is recalled into the display.
DELETING A FILE
To delete a text file:
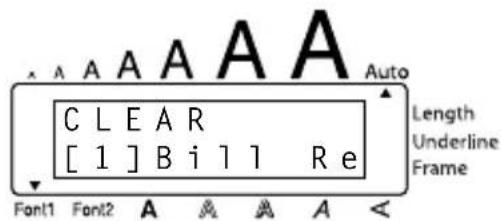
Hold down Code and press 9. The message "CLEAR" appears on the display with the file number and beginning of the most recently stored or recalled text.
To cancel the Memory delete function without deleting the text file, hold down Code and press (or press just BS).
Press a number key (or press A or End) to select the file number containing the text that you wish to delete. The text stored under the selected file number is shown.
To see other parts of the selected text file, press or
To display the text stored under other file numbers, press Home or End, or the key of a different file number.
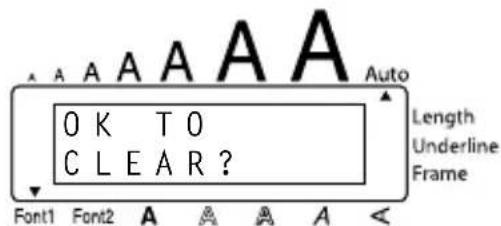
Press . The message "OK TO CLEAR?" appears.
To go back and select a different text file, press BS.
Press to delete the text file that was selected.
EXAMPLE
To store text under file number 4:
Hold down Code and press 8
Style ②Press
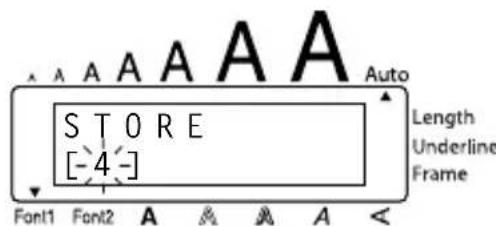
Press
To recall the text from file number 1:
Recall 1 Hold down Code and press &~and~press~
Press
Press
To delete the text stored under file number 4:
Hold down Code and press 9
Style 2 Press 4
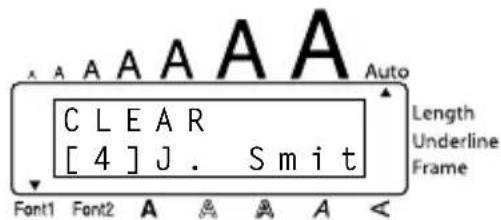
Press
Press
TROUBLESHOOTING
| Problem Remedy | |
| 1. The display stays blank after you have turned on the machine. | Check that the AC adaptor is connected correctly. If you are using alkaline batteries, check that they are correctly inserted. If the batteries are low, replace them with new ones. |
| 2. The machine does not print or the printed characters are blurred. | Check that the tape cassette has been inserted properly. If the tape cassette is empty, replace it with a new one. Make sure that the tape compartment cover has been closed. |
| 3. The text files that you stored in the memory are no longer there. | If the batteries are low, replace them with new ones. |
| 4. The printed characters are not formed properly. | If you are using alkaline batteries, they may be low. Try using the AC adaptor or replace the batteries with new ones. |
| 5. A blank horizontal line appears through the printed label. | Clean the print head as explained on page 7. |
| 6. Striped tape appears. • You have reached the end of the tape. Replace the tape cassette with a new one. | |
| 7. The machine has “locked up” (i.e., nothing happens when a key is pressed). | Turn off the machine, and then while holding down Code and R, turn the machine back on. The text and formats in the display and all text files stored in the memory are erased. |
ERRORMESSAGELIST
| Error Message Cause Remedy | |
| 5 LINE LIMIT! | This message appears if five lines already exist when you press←). |
| BATTERIES WEAK! | This message appears when the installed alkaline batteries become weak. |
| BUFFER EMPTY! | ·This message appears if you hold Length down Code and press T, but no text has been entered in the display. |
| ·This message appears if you try to print, but no text has been entered in the display. | |
| BUFFER FULL! | This message appears if you try to enter a character, symbol, return or space after the maximum number of characters has already been entered. |
| CAN'T HERE! | This message appears if the cursor is at the end of the text when you hold down Code and press 0. |
| CASSETTE CHANGED! | This message appears if the tape cassette is changed while the P-touch is receiving data from the computer. |
| CHANGE ADAPTOR! | This message appears if a high-voltage adaptor is being used. |
| CUTTER ERROR! | This message appears if the tape cutter is closed when you try to print or feed the tape. |
| Error Message Cause Remedy | ||
| EEPROM ERROR! | This message appears if a checksum error occurred when the P-touch was turned on or if the keyword was damaged and it failed to initialize. | Contact your service representative. |
| INTERFACE ERROR! | This message appears if an error occurs while data is being sent from the computer to the P-touch. | Cancel the print job, and then try printing again. |
| INVALID. CHRS! | This message appears if the cursor is not below a number when you hold down Code and press 0. | Move the cursor below a number before holding down Number Code and pressing 0. |
| LENGTH LIMIT! | ·This message appears if the text is longer than 3' 3 1/3" (1 meter) when you try to print. | ·Shorten the text to less than 3' 3 1/3" (1 meter) before trying to print. |
| ·This message appears if the Length function is used to set a label length that is less than 1.6" (4.0 cm) or more than 11.8" (30.0 cm). | ·Set the label length between 1.6" (4.0 cm) and 11.8" (30.0 cm). | |
| ·This message appears if the Tab Length function is used to set a tab length that is more than 11.8" (30.0 cm). | ·Set the tab length so that it is less than 11.8" (30.0 cm). | |
| LINE LIMIT! | This message appears if the number of lines in the text is greater than the maximum number of lines possible for the installed tape. | Reduce the number of lines or install a tape of greater width. |
| MEMORY FULL! | This message appears if you try to store a text file after the maximum number of characters has already been stored in the memory. | Delete an unwanted file to make room for the new one. |
| NO FILES! | This message appears if you try to recall or delete a text file from the memory when none are stored. | Store a text file first. |
| NO TAPE! | This message appears if you try to print a label or feed the tape when no tape cassette is installed. | Install a tape cassette and try again. |
| REPLACE BATTERIES! | This message appears if the installed alkaline batteries are about to run out. | Replace the batteries or use the AC adaptor. |
| ROM PROBLEM! | This message appears if there is a problem with the machine's read only memory. | Turn off the machine, and then while holding down Code and Align R, turn the machine back on. Contact your service representative. |
| TAB LIMIT! | This message appears if the maximum number of tabs has already been added to the text when you hold down Code and press Q. | Limit the number of tabs in the text to 50. |
| TEXT TOO HIGH! | This message appears if the size of the text is larger than the width of the installed tape. | Reduce the size of the characters or install a wider tape. |
| TEXT TOO LONG! | This message appears if the length of the text is longer than the label length that has been set using the Length function. | Delete some of the text, reduce the character width or increase the set label length. |
SHOULD YOU ENCOUNTER ANY PROBLEMS WITH YOUR PRODUCT, PLEASE DO NOT RETURN YOUR PRODUCT TO THE STORE!
After referring to this User's Guide, if you still need assistance, refer to the Brother Contact information in this guide.
SPECIFICATIONS
HARDWARE
Input Device: Keyboard - 51 keys
LCD: 10 characters × 2 lines 20 indicators (including Alt and Caps)
Print Tape: Pressure-sensitive, Adhesive-based 26^3^ (8 m) long Four widths available: 1/4" (6 mm) 3/8" (9 mm) 1/2" (12 mm) 3/4" (18 mm)
Power Supply: Six AA alkaline batteries (AM3, LR6) or AC adaptor (model AD-24)
Print Head: 112 dot / 180 dpi
Dimensions: 7.1^ (W)× 9.2^ (D)× 2.4^ (H) (181.4× 232.5× 61.4mm)
Weight: 1.68 lbs (760g) (without a tape cassette and batteries installed)
SOFTWARE
Buffer Size: Maximum 99 characters Maximum five lines
Memory Size: Approximately 300 characters
Character Size: Seven sizes (6, 9, 12, 18, 24, 36 and 42 points) + 52 point (one line of capital letters only on 3/4'' (18-mm) wide tape) All are available in normal and wide widths Availability depends on tape width.
Print Styles: Normal, Bold, Outline, Shadow (each can be combined with Italic), and Vertical
IMPORTANT WARRANTY INFORMATION
Thank you for purchasing this Brother product.
We hope that you will enjoy using it. We suggest you keep all packing and other materials. Consult your product's warranty for details.
ACCESSIONS
Supplies
Obtain tape cassettes from your nearest authorized dealer.
Use only Brother TZ tapes with this machine. Brother cannot be held responsible for trouble caused by the use of unauthorized supplies. Do not use tapes that do not have the mark.
| Stock No. | Description | QTY/ PACKAGE | PRICE** |
| 3/4" (18 mm)-wide laminated tapes | |||
| TZ-141 Black characters on clear adhesive 1 22.99 | |||
| TZ-M41 Black characters on clear (mat) adhesive 124.99 | |||
| TZ-241 Black characters on white adhesive 1 24.99 | |||
| TZ-242 Red characters on white adhesive 124.99 | |||
| TZ-243 Blue characters on white adhesive 1 24.99 | |||
| TZ-344 Gold characters on black adhesive 128.99 | |||
| TZ-345 White characters on black adhesive 1 28.99 | |||
| TZ-545 White characters on blue adhesive 128.99 | |||
| TZ-641 Black characters on yellow adhesive 1 24.99 | |||
| *TZ-B41 Black characters on fluorescent orange adhesive | 129.99 | ||
| TZ-S141 Industrial (strong adhesive) black characters on clear adhesive | 1 27.99 | ||
| TZ-S241 Industrial (strong adhesive) black characters on white adhesive | 127.99 | ||
| TZ-S641 Industrial (strong adhesive) black characters on yellow adhesive | 1 27.99 | ||
| TZ-SM941 Black characters on matte silver strong adhesive tape | 131.99 | ||
| TZ-FX241 Black characters on white flexible ID tape | 1 27.99 | ||
| 1/2" (12 mm)-wide laminated tapes | |||
| TZ-131 Black characters on clear adhesive 119.99 | |||
| TZ-132 Red characters on clear adhesive | 1 19.99 | ||
| TZ-133 Blue characters on clear adhesive 119.99 | |||
| TZ-135 White characters on clear adhesive 1 23.95 | |||
| TZ-231 Black characters on white adhesive 120.99 | |||
| TZ-232 Red characters on white adhesive 1 20.99 | |||
| TZ-233 Blue characters on white adhesive 120.99 | |||
| TZ-334 Gold characters on black adhesive 1 24.99 | |||
| TZ-335 White characters on black adhesive 124.99 | |||
| TZ-431 Black characters on red adhesive | 1 20.99 | ||
| TZ-435 White characters on red adhesive | 124.99 | ||
| TZ-531 Black characters on blue adhesive | 1 20.99 | ||
| TZ-631 Black characters on yellow adhesive 120.99 | |||
| TZ-731 Black characters on green adhesive 1 $20.99 | |||
- 5 meter long
| Stock No. | Description | QTY/ PACKAGE | PRICE** |
| TZ-M31 Black characters on clear (mat) adhesive 1 20.99 | |||
| TZ-S131 | Industrial (strong adhesive) black characters on clear adhesive | 123.99 | |
| TZ-S231 | Industrial (strong adhesive) black characters on white adhesive | 1 23.99 | |
| TZ-S631 | Industrial (strong adhesive) black characters on yellow adhesive | 123.99 | |
| TZ-FX231 Black characters on white flexible ID tape 1 23.99 | |||
| 3/8" (9 mm)-wide laminated tapes | |||
| TZ-121 Black characters on clear adhesive 116.99 | |||
| TZ-221 Black characters on white adhesive 1 19.99 | |||
| TZ-222 Red characters on white adhesive 119.99 | |||
| TZ-223 Blue characters on white adhesive 1 19.99 | |||
| TZ-325 White characters on black adhesive 122.99 | |||
| TZ-S221 | Industrial (strong adhesive) black characters on white adhesive | 1 21.99 | |
| 1/4" (6 mm)-wide laminated tapes | |||
| TZ-111 Black characters on clear adhesive 114.99 | |||
| TZ-211 Black characters on white adhesive 1 16.99 | |||
| TZ-315 White characters on black adhesive 120.99 | |||
| TZ-S211 | Industrial (strong adhesive) black characters on white adhesive | 1 $19.99 | |
Non-laminated tapes
| Stock No. | Description | QTY/ PACKAGE | PRICE** |
| 3/4" (18 mm) | |||
| TZ-N641 Black characters on yellow adhesive | 1 21.99 | ||
| TZ-N541 Black acharacters on blue adhesive | 1 | 21.99 | |
| TZ-NF41 Black characters on purple adhesive | 1 21.99 | ||
| 1/2" (12 mm) | |||
| TZ-N631 Black characters on yellow adhesive | 117.99 | ||
| TZ-N531 Black characters on blue adhesive | 1 | 17.99 | |
| TZ-NF31 Black characters on purple adhesive | 117.99 | ||
Instant lettering tape
| Stock No. | Description | QTY/ PACKAGE | PRICE** |
| 3/4" (18 mm) | |||
| TZ-L041 | Black characters | 1 $24.99 | |
Iron on transfer tape
| Stock No. | Description | QTY/ PACKAGE | PRICE** |
| 3/4" (18 mm) | |||
| TZ-IY41 Black characters 1 $29.99 | |||
Security tape
| Stock No. | Description | QTY/ PACKAGE | PRICE** |
| 3/4" (18 mm) | |||
| TZ-SE4 Black Ccharacters on white adhesive 1 $49.95 | |||
Fabric tape
| Stock No. | Description | QTY/ PACKAGE | PRICE** |
| 1/2" (12 mm) | |||
| TZ-FA3 Blue characters on white adhesive 1 $34.95 | |||
Options
| Stock No. | Description | QTY/ PACKAGE | PRICE** |
| TZ-CL4 Cleaning Tape 1 20.99 | |||
| TR-9 Lettering Stick 12.99 | |||
| AD-60 | AC adapter 1 34.95 | ||
| AD-24 | AC adapter 129.99 |
** Prices and availability of accessories subject to change without notice.
INDEX
A
AC adaptor. 4
Accented characters. 21
Adding
spaces 14
tabs 16
Aligning 34
Alt key 12
Automatic formatting 24
Automatic tape-cutting. 38
B
Backing label 6
Backspace key 17
Batteries 3
C
Capital letters 13
Caps mode. 13
Cleaning
machine 3
print head. 7
rollers. 7
Clearing
text and formats. 19
text only 20
Code key. 11
Confirming. 15
Cursor keys 10
D
Deleting
characters. 17
text and formats. 19
text lines. 18
text only 20
Deletingstoredd files 44
E
Entering
accented characters. 12, 21
capital letters. 13
spaces 14
symbols 12, 13, 22
tabs 16
Error messages 48
F
Fabric tape 6
Feeding & cutting. 40
Fonts 26
Frames 32
1
Incrementing. 40
K
Keyboard 2
L
Label length 36
Laminated tape 6
M
Margins. 33
Memory 43
Mirror printing 35
Multiple copies 42
N
New lines. 14
Numbering function 40
0
Overwriting stored files 44
P
Power 10
Preset formatting 24
Print head 7
Printing 39
R
Recalling stored files 44
Repeat printing function. 42
Return key. 14
S
Shift key 13
Size. 28
Spaces. 14
Specifications. 51
Storing files 43
Style. 29
Symbols 22
T
Tab length. 16
Tabs 15
Tape cassettes 5
Tape length 36
Text alignment 34
framing 32
margins 33
size 28
style 29
underlining. 31
width. 28
Text lines 14
Troubleshooting 47
U
Underlining. 31
Uppercase letters 13
W
Width 28
ACCESSORY ORDER FORM
This order form is provided for your convenience should your retailer not stock the item(s) needed or if you prefer to order by telephone. To order by phone, please call Brother International at 1-877-BROTHER (1-877-276-8437) and have your Visa or MasterCard available.
| Stock No. Description Price Quantity Total | |||
| TOTAL | |||
Prices subject to change without notice.
Before calling:
- Review the reverse side of this form and select the desired items.
- Complete the order form, indicating the quantity of each item (for your records).
- Enter the total on the "Supply/Accessory Total" line below (for your records).
- Add appropriate sales tax and shipping/handling costs (for your records).
- Have your Visa or MasterCard number and expiration date available.
Supply/Accessory Total All Residents of Canada: Please add applicable sales taxes (G.S.T. & P.S.T.). Shipping/Handling $5.00 TOTAL DUE $
| G.S.T |
| P.S.T. |
G.S.T. # R100663764
P.S.T. # 100100117TQ0001
* Prices subject to change without notice.
MODE D'EMPLOI
INTRODUCTION
Nosyouremercionsd'avoirchoisi leP-touch1950!
CARACTERES ACCENTUÉS. 21
SYMBOLES. 23
FORMATAGE AUTOMATIQUE. 24
POLICES. 26
TAILLE ET LARGEUR. 27
STYLE. 30
SOULIGNEMENT. 31
ENCADREMENT. 32
MARGES 33
ALIGNEMENT HORIZONTAL. 35
IMPRESSION MIROIR 36
LONGUEUR D'ETIQUETTE 37
FONCTION COUPURE AUTOMATIQUE 38
IMPRESSION 39
AVANCE ET COUPURE 40
NUMEROTATION AUTOMATIQUE 40
IMPRESSION MULTIPLE 42
MÉMOIRE 43
DETECTION DE PANNES. 48
LISTES DES MESSAGES D'ERREUR. 49
FICHE TECHNIQUE 52
ACCESSOIRES 53
INDEX. 56
Préliminaires
PRÉSENTATION DE L'APPAREIL
FACE AVANT
FACE ARRIÈRE
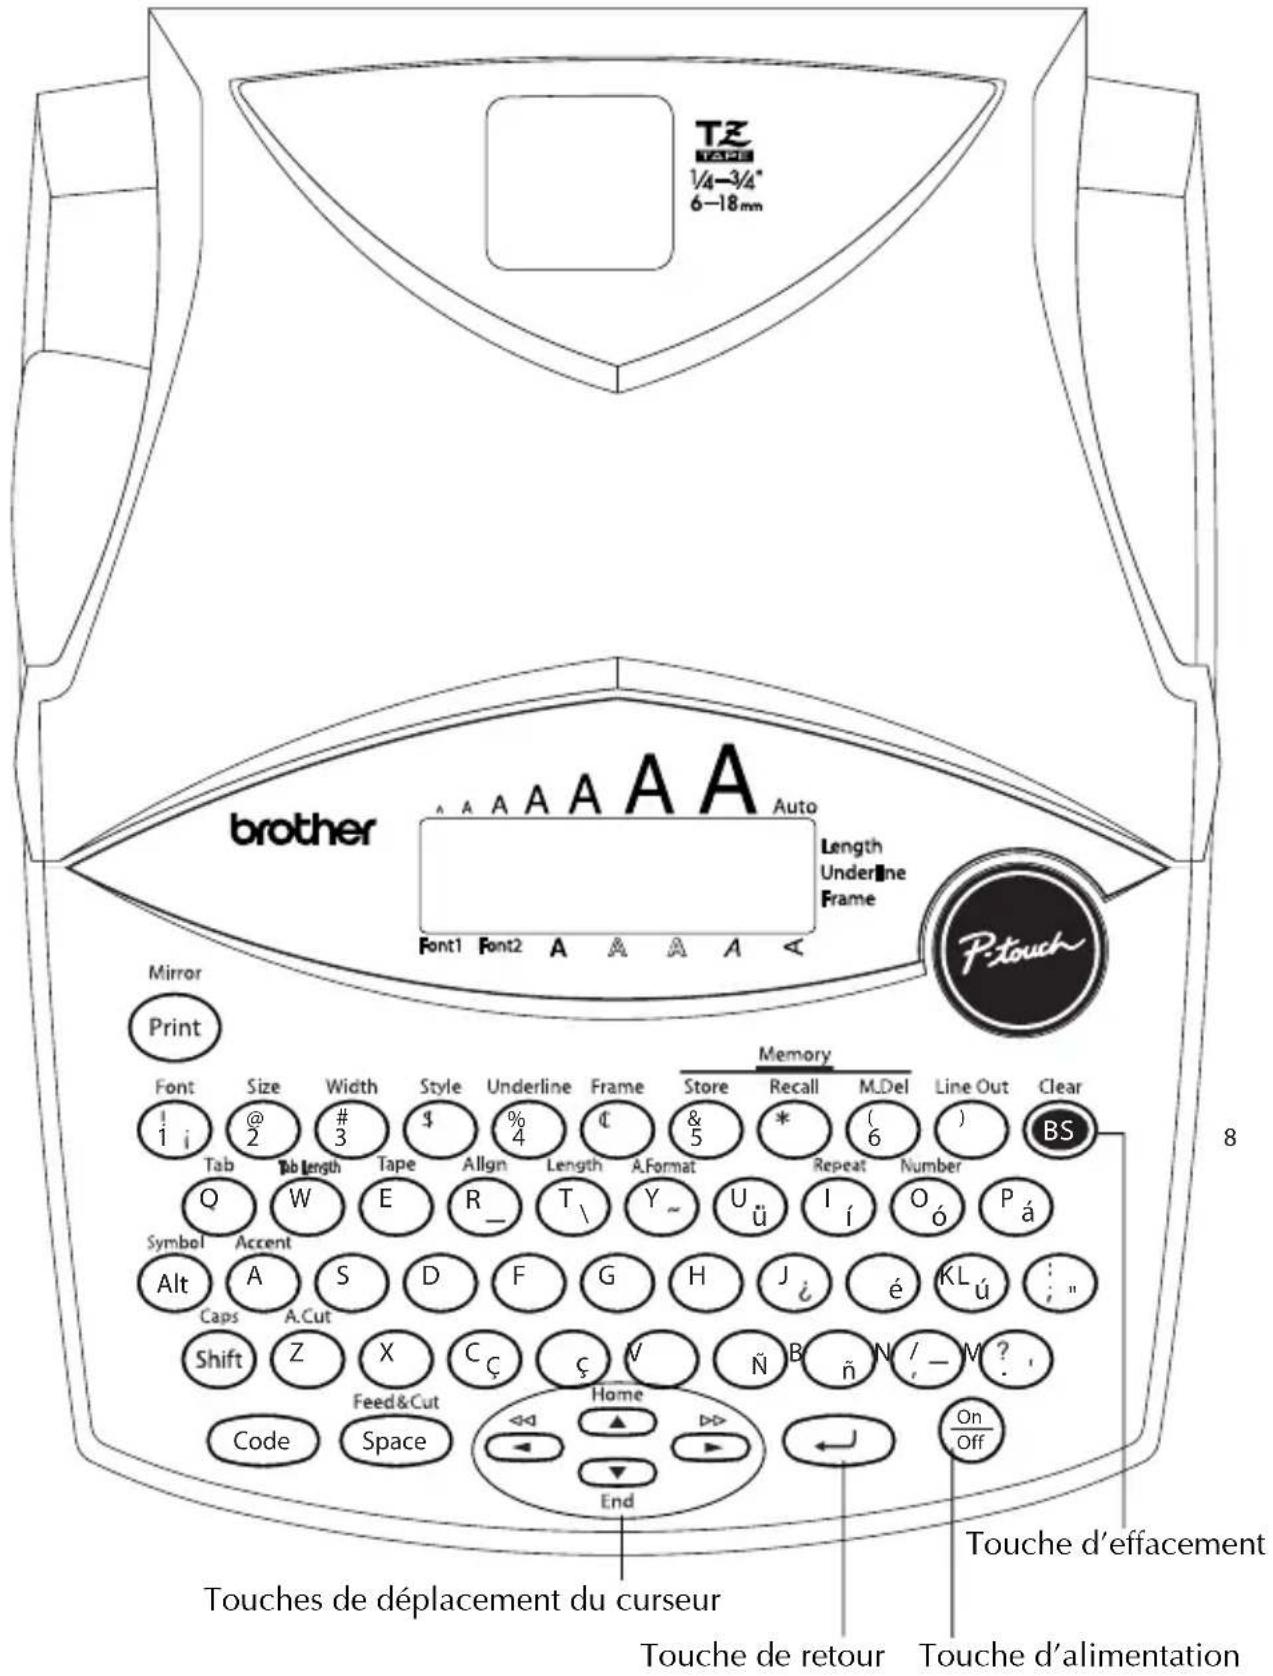
CLAVIER ET ÉCRAN
PRECAUTIONS IMPORTANTES
| Group Symbol | |||||||||
| 1 | Ü | AE | æ | É | Ä | ã | · | TM | e |
| 2 | + | × | ÷ | = | § | 3 | 2 | 3 | 4 |
| 3 | ↑ | ↓ | → | ← | → | ® | © | 云 | □ |
| 4 | ⊗ | ¶ | ◎ | ◎ | ◎ | ◎ | ◎ | ◎ | ◎ |
| 5 | ◎ | ◎ | ◎ | ♥ | ★ | ||||
0
Entrer un symbole :
| Polices | Styles | ||||
| NORMAL | GRAS CONTOUR OMBRE | ITA | |||
| POLICE 1 | ABC | ABC | ABC | ABC | ABC |
| POLICE 2 | ABC | ABC | ABC | ABC | ABC |
| Polices | Styles | |||
| IT+G IT+C | IT+O | VERT | ||
| POLICE 1 | ABC | ABC | ABC | ΔmO |
| POLICE 2 | ABC | ABC | ABC | ΔmU |
SOULIGNEMENT
| Bill Reynolds | Bill Reynolds | Bill Reynolds | ||
| ABC Transport | • | ABC Transport | • | ABC Transport |
| 29 South Main St | • | 29 South Main St | • | 29 South Main St |
| Los Angeles, CA 98088 | Los Angeles, CA 98088 | Los Angeles, CA 98088 | ||


MÉMOIRE
alignment. 35
alimentation. 10
C cadres 32
caracteres accentués 21
Totalfournitures/Accessoires,$
Totalfournitures/Accessoires,$