SUB463S - TV Stand SONY - Free user manual and instructions
Find the device manual for free SUB463S SONY in PDF.
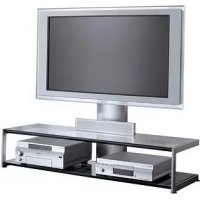
| Product Type | TV stand with built-in speakers |
| Brand | Sony |
| Model | SU-B463S |
| Compatibility | Sony KDL-46HX85x TVs |
| Dimensions (W x D x H) | 1097 x 663 x 255 mm |
| Weight | 6.4 kg |
| Speakers | 2 full-range speakers |
| Material | Steel and plastic |
| Color | Black |
| Main features | Wall mount, built-in speakers, cable management |
| Maintenance | Clean with a soft dry cloth; use mild soap for stubborn stains. Do not use chemicals. |
| Safety | Mandatory attachment of the TV with the provided screws; anti-tip recommendation with optional kit. |
| Spare parts | Neck fixing screws (PSW5 × 16), hinge screws, neck screws |
| Repairability | Disassembly possible for part replacement; assembly with Phillips screwdriver. |
| Warranty | Refer to the manual or dealer |
| Box contents | 1 stand, 1 hinge, 1 neck, 10 screws, 1 instruction manual |
| Required tools | Phillips screwdriver, recommended torque 1.5 N·m |
| Assembly instructions | Attach the neck to the stand, attach the hinge to the TV, install the TV on the stand, tighten the screws. |
| Audio setting | In the TV menu: Settings > Sound > Speaker Position > Speakers in stand |
Frequently Asked Questions - SUB463S SONY
User questions about SUB463S SONY
0 question about this device. Answer the ones you know or ask your own.
Ask a new question about this device
Download the instructions for your TV Stand in PDF format for free! Find your manual SUB463S - SONY and take your electronic device back in hand. On this page are published all the documents necessary for the use of your device. SUB463S by SONY.
USER MANUAL SUB463S SONY
© 2012 Sony Corporation
Owner's Record
The model and serial numbers are located at the rear of the TV Stand. Record these numbers in the spaces provided below.
Refer to them whenever you call upon your Sony dealer regarding this TV Stand.
Model Name
Serial No.
On Safety
Thank you for purchasing this product. Products by Sony are designed with safety in mind.
This instructions manual shows the correct handling of the product and important precautions necessary to prevent accidents. Be sure to read this manual thoroughly and use the product correctly. Keep this manual available for future reference.
CAUTION
Specified products
This TV Stand is designed for use with the specified product only. If you install equipment other than specified, it may fall or break, and cause injury. Illustrations used in this manual show of the KDL-46HX85x, unless otherwise stated.
| LCD TV | |
| SU-B553S KDL-55HX85x | |
| SU-B463S KDL-46HX85x | |
* In the actual model names, the “x” indicates numbers and/or characters specific to each model.
Be sure to secure the TV.
Secure the TV to the TV Stand using the supplied screws. If the TV is not installed securely, it may fall, or the TV Stand may topple over, and cause injury.
Notes on installation
Do not allow the TV Stand to be installed at an angle or incline. To avoid this, observe the following precautions.
- If you install the TV Stand on a soft surface such as a mat or a carpet, lay a board over the designated location beforehand.
Note on use
Cleaning
To keep the TV Stand clean, occasionally wipe it with a dry soft cloth. Stubborn stains may be removed by wiping with a cloth slightly dampened with mild soap. Be sure to dry the area afterwards with a dry soft cloth. Do not use chemicals, such as thinner or benzine, as they damage the finish of the TV Stand.
Do not modify the TV Stand.
It may fall and cause injury.
Be sure to install the TV securely following the instructions.
Tighten the screws securely. If the TV is not installed securely, it may fall and cause injury.
Be careful not to injure your hands or fingers while assembling.
- Be careful not to hurt your fingers or hands when installing the TV.
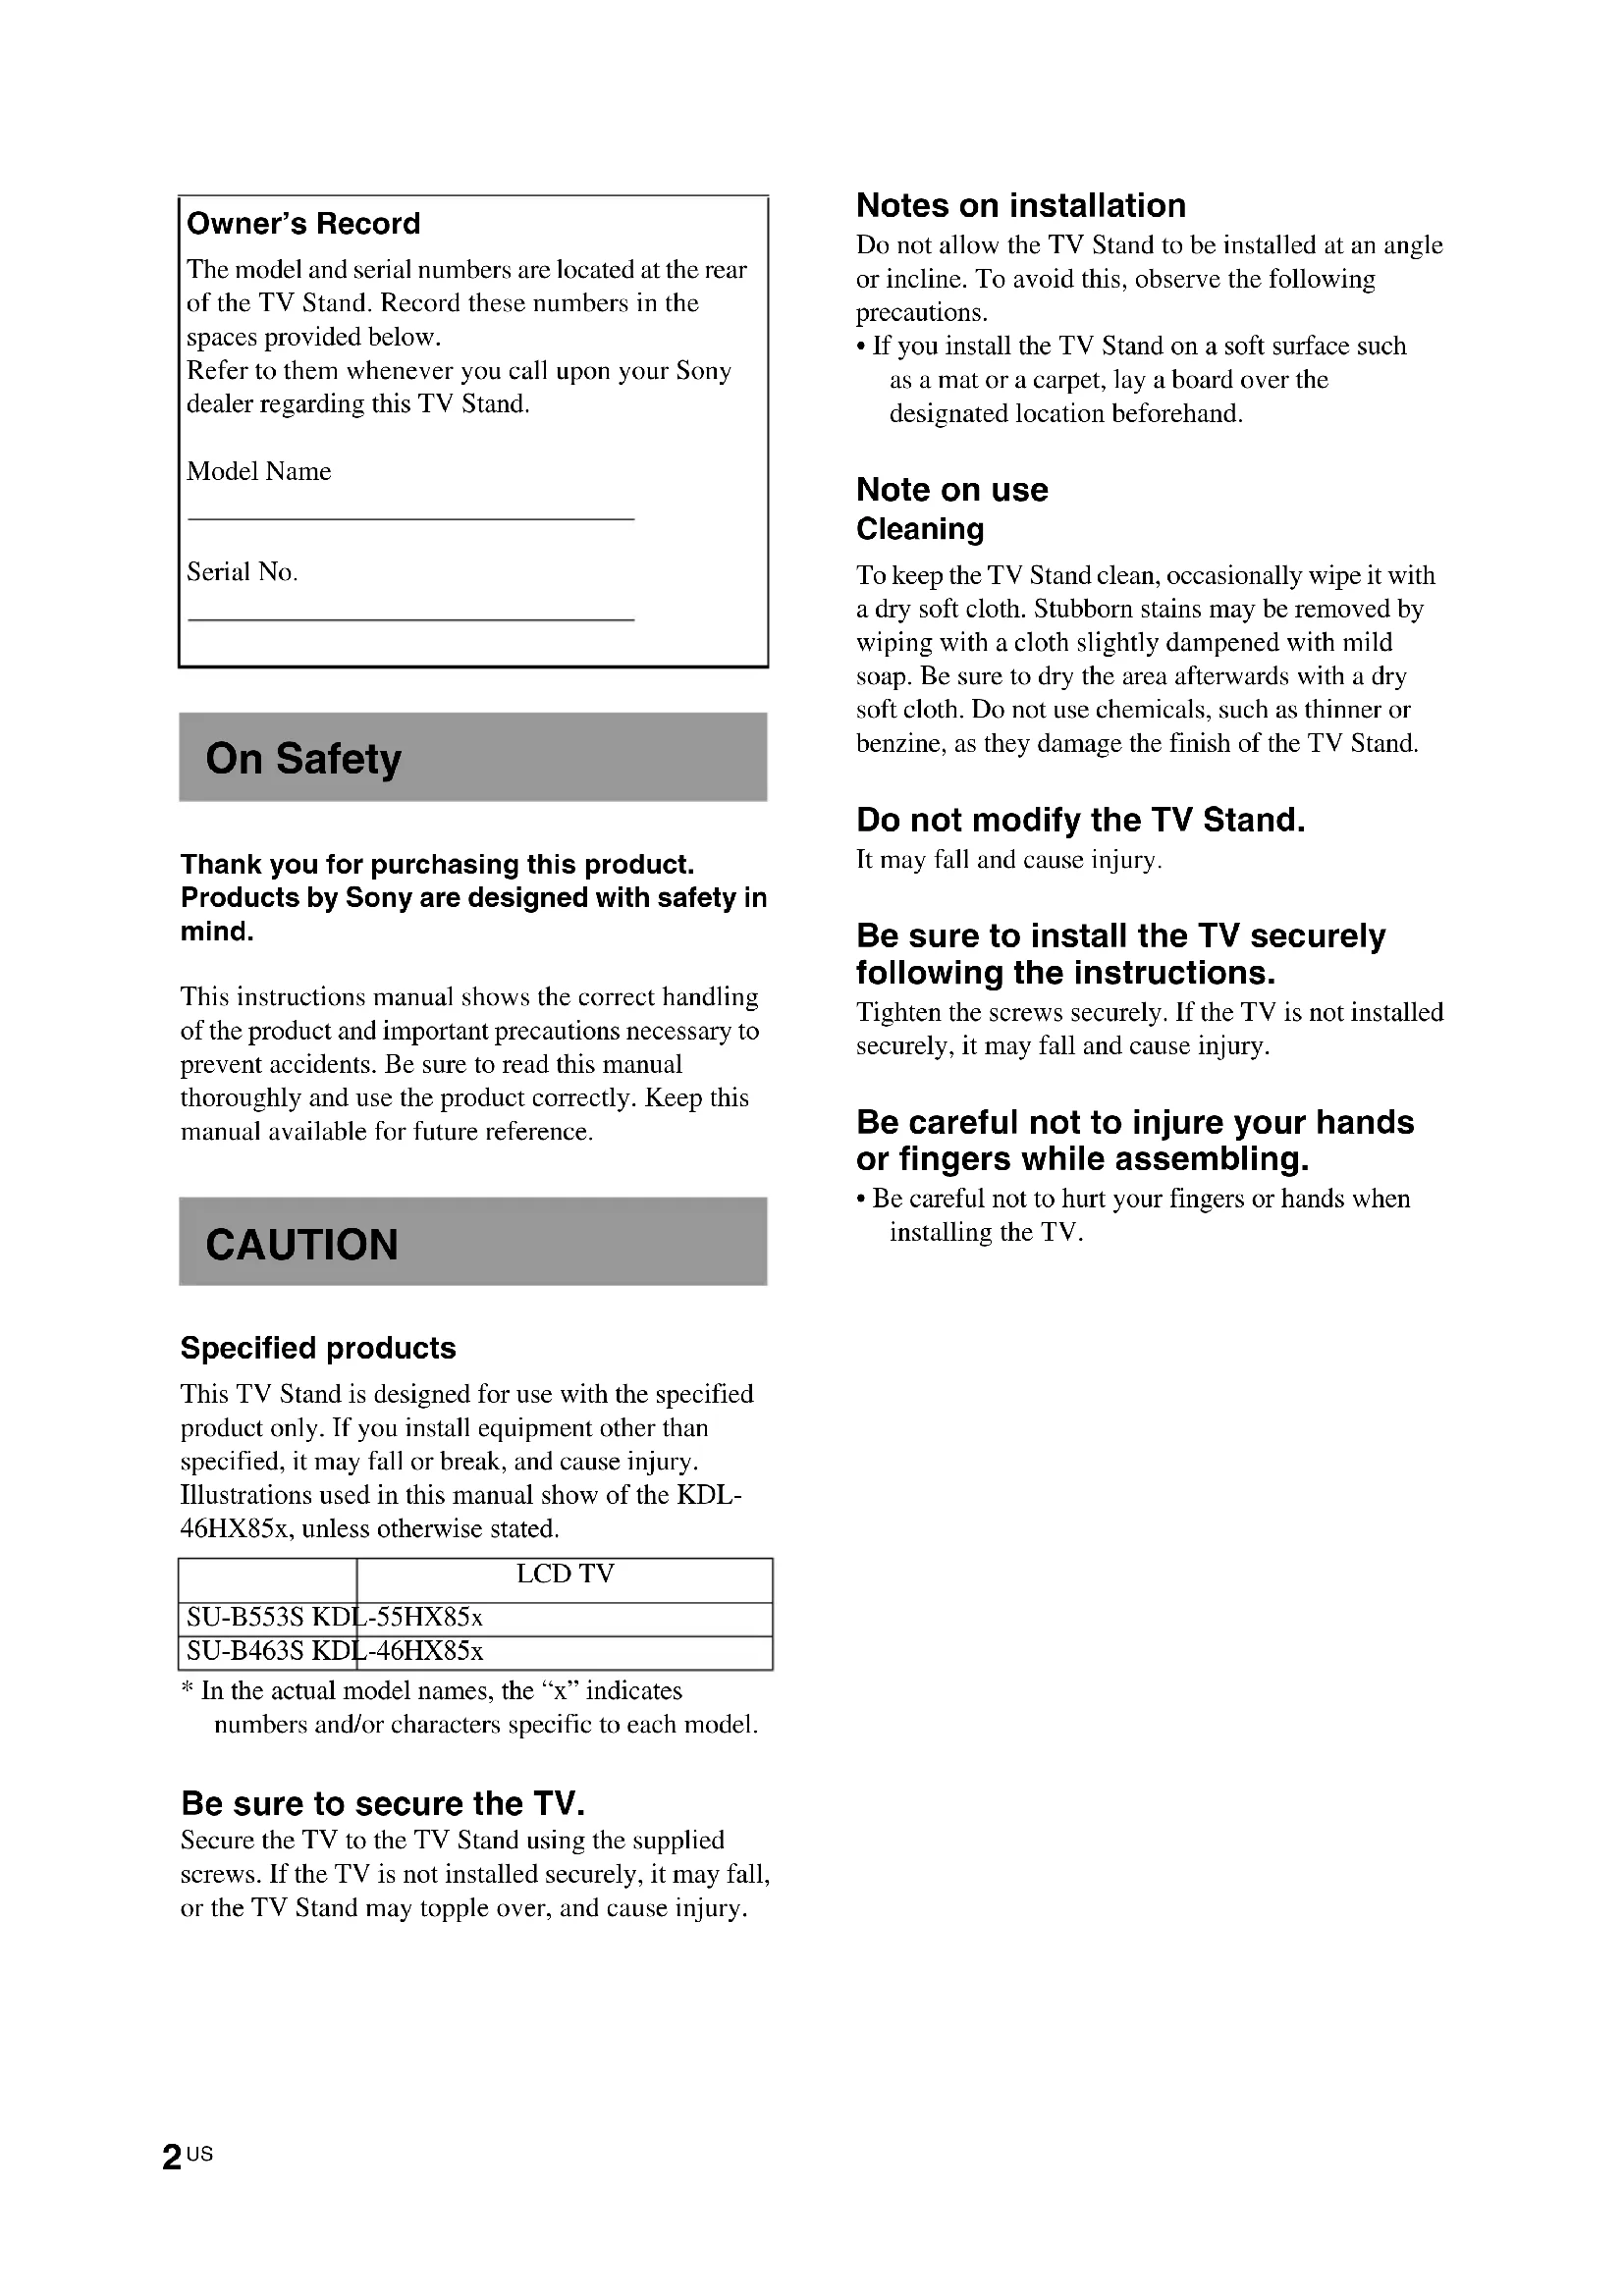
Step 1: Checking the parts
| Name | Quantity |
Stand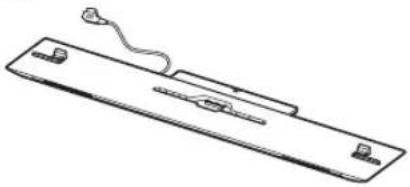 | 1 |
Joint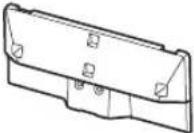 | 1 |
Neck | 1 |
TV Stand Neck AttachmentScrew(PSW5 × 16) (×3)Joint Screw(PSW5 × 16) (×3) 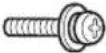 Neck Screw(PSW5 × 16) (×4) Neck Screw(PSW5 × 16) (×4) | 10 |
| Instructions manual 1 |
Refer to the operating instructions supplied with your TV for information on how to remove the Table-Top Stand from the TV.
Step 2: Installing the TV
Before assembling
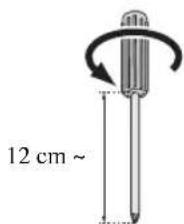
- Be sure to have a Phillips screwdriver that fits the screws prior to the assembly.
- When using an electric screwdriver, set the torque setting to approximately 1.5 N·m {15 kgf·cm}.
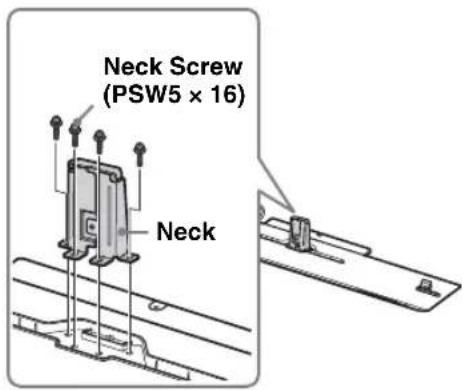
1 Attach the Neck to the TV Stand with the four Neck Screws (PSW5 × 16) (supplied).
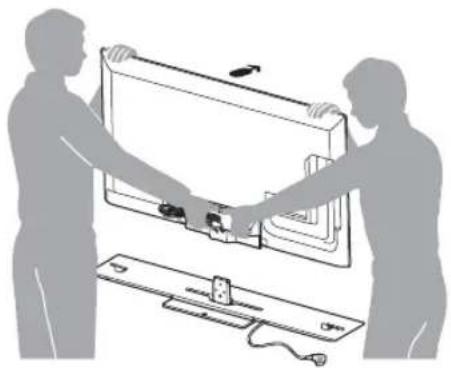
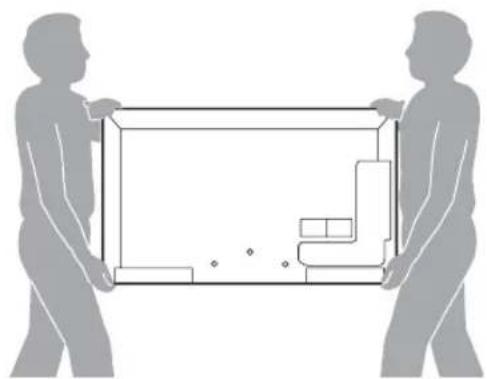
2 Prepare the TV.
natural_image
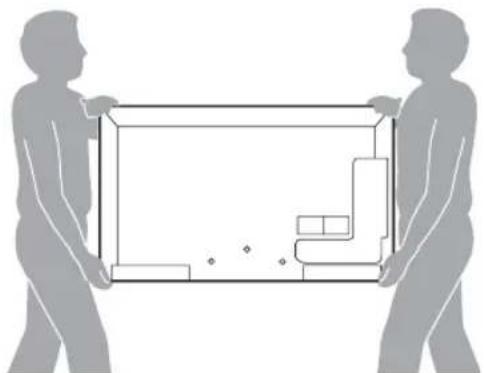
Silhouettes of two people holding a rectangular frame with internal geometric shapes (no text or symbols)When moving the TV, be sure that two or more persons install the TV on the TV Stand as shown in the illustration. If one person does the installation work alone, this may result in an accident or injury.
(Continued)
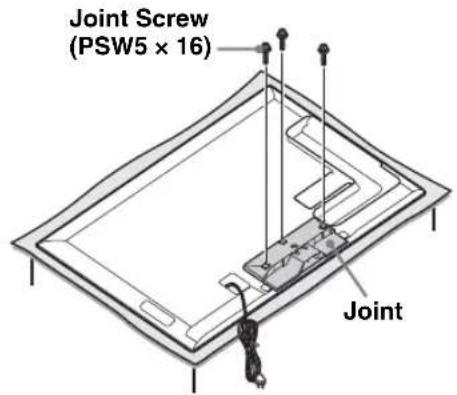
3
Attach the supplied Joint to the rear of the TV with the three screws (PSW5 × 16) (supplied).
Slide the supplied Joint up to attach.
[NO TEXT]
- Make sure to keep the removed screws.
- When removing the Table-Top Stand from the Display, lay the display face down on a stable work surface that is larger than the Display.
• To prevent damaging the surface of the LCD display, make sure to place a soft cloth on the work surface.
CAUTION
- If pressure or shock is applied to the surface of the Display, the LCD display may break or become damaged.
- Lay the display face down on a stable and level surface with the Table-Top Stand hanging over the edge of the surface. Having the display face and the base of the Table-Top Stand on the same level surface will create an unstable working condition and can damage the Display.
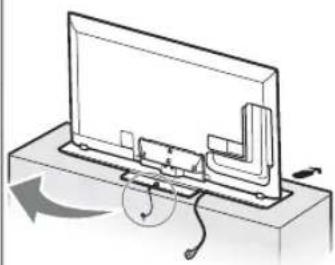
4
Install the TV onto the TV Stand.
When installing the TV on the TV Stand, hold the TV as shown in the illustration and install it on the two brackets of the TV Stand.
natural_image
Illustration of two people assembling a large TV panel with a cable and switch (no text or symbols)
Arrow direction shows front of the TV
Stand.
5
Secure the TV and the TV Stand with the three TV Stand Neck Attachment Screws (PSW5 × 16) (supplied).
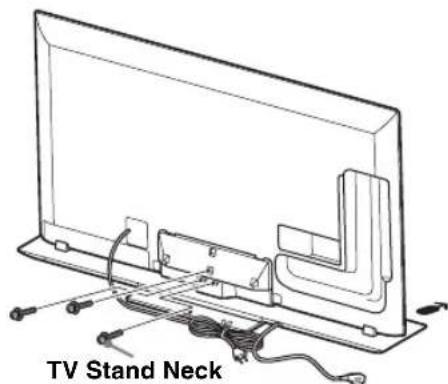
Attachment Screw
(PSW5 × 16)
6
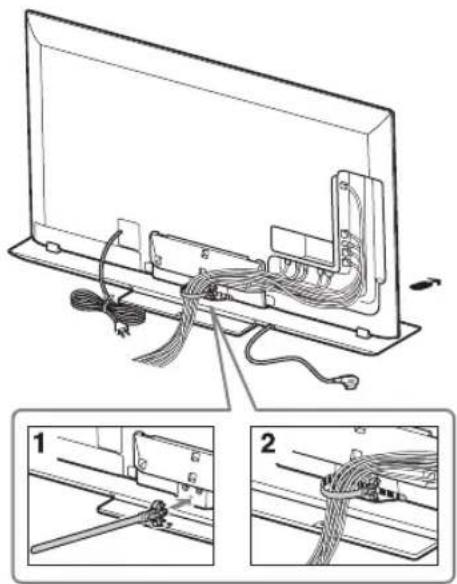
Bundling the cables.
Use the cable clamper supplied with the TV.
[NO TEXT]
- Do not bundle the AC power cord together with other cables.
Step 3: Safety measures to prevent toppling over
WARNING
Be sure to take measures to prevent the TV Stand from toppling over, and causing possible injury and damage.
Securing the TV and the TV Stand
Sony strongly recommends taking measures to prevent the TV from toppling over. Unsecured TVs may topple and result in property damage, serious bodily injury or even death.
Preventing the TV and the TV Stand from toppling
- Secure the TV to a wall and/or board.
- Do not allow children to play or climb on furniture and TV sets.
- Avoid placing or hanging items on the TV.
- Never install the TV on:
– slippery, unstable and/or uneven surfaces.
– furniture that can easily be used as steps, such as a chest of drawers.
• Install the TV where it cannot be pulled, pushed, or knocked over. - Route all AC power cords and connecting cables so that they are not accessible to curious children.
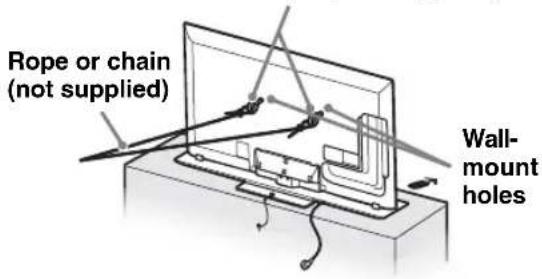
Recommended measures to secure the TV and the TV Stand
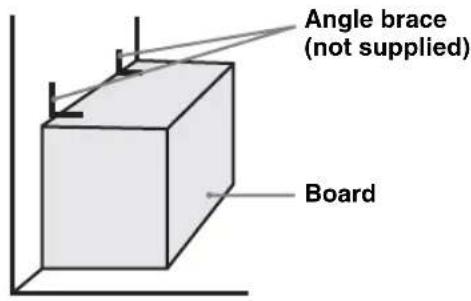
Consider the following measures when securing your TV to a board (not supplied).
①Secure the board for the TV.
Make sure the board can adequately support the weight of the TV. Use two angle braces (not supplied) to secure the board. For each angle brace use the appropriate hardware to:
- Attach one side of the angle brace to the wall stud.
- Attach the other side to the board.
②Secure the TV to the board.
Use the optional hardware listed below (not supplied):
- M4 × 12 machine screw (screwed into the TV Stand)
• A screw or similar (attach it to the board) - Rope or chain (strong enough to support the weight of the TV). Make sure that there is no excess slack in the rope or chain.
An alternative way to secure the TV is with an optional Sony Support Belt Kit.
Screw hole on the TV Stand
M4 × 12 machine screw (not supplied)
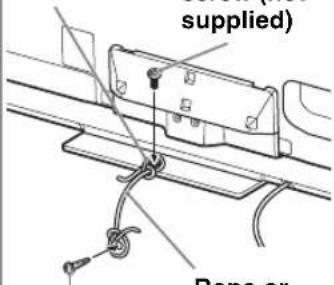
Screw
(not supplied)
Rope or chain (not supplied)
natural_image
Diagram of a device with a rotating arm and cable, showing no text or symbols
Contact Sony Customer Support to obtain the optional Support Belt Kit by providing your TV Stand model name (SU-B553S/B463S).
- For United States call: 1-800-488-7669 or visit: www.sony.com/accessories
• For Canada call: 1-877-899-7669
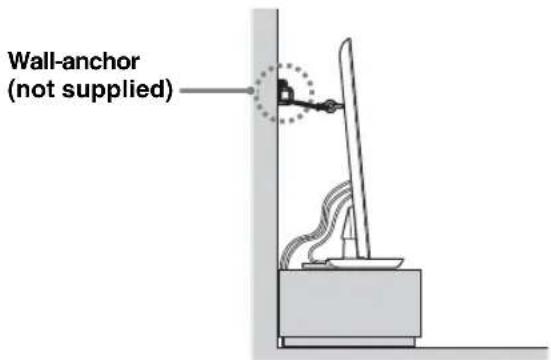
③ Anchor the TV to the Wall.
Anchor the TV to the wall by using bolts, wall anchor and chain (or rope).

- TV SET is shipped with screws attached to the rear of the TV. (They are fastened in the screw holes for wall mounting.) Be sure to remove the upper two screws prior to anchoring the TV on a wall.
- Securing the TV to the board without securing the TV and the board to the wall provides minimum protection against the TV toppling over. For further protection, be sure to follow the three measures recommended.
Anchor bolts (M6, not supplied)
Step 4:
Connecting the TV
Connect the TV with a Speaker Integrated Stand to the TV Stand using the cable of the TV Stand.
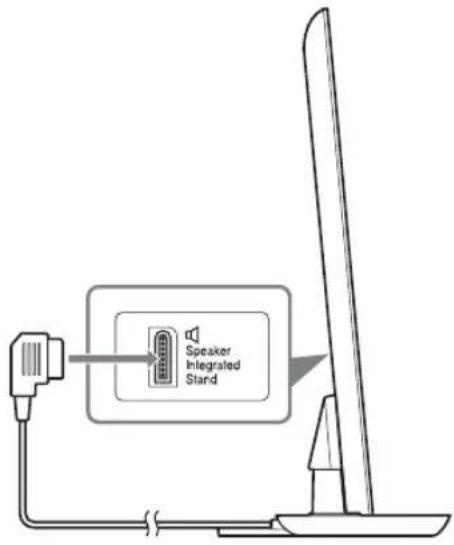
Step 5: Performing the TV settings
Set to "Speaker Integrated Stand" in "TV Position" menu.
Press the HOME button of the remote of the TV and select the menu as follows:

Settings > Sound > TV Position > Speaker
Integrated Stand
Troubleshooting
Sound
No sound from the TV Stand:
- Check the cable connection.
Abnormal sound: - Check the sound setting. Set “TV Position” to “Speaker Integrated Stand” in the “Sound” setting.
Specifications
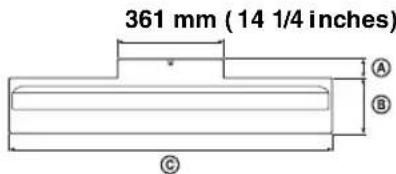
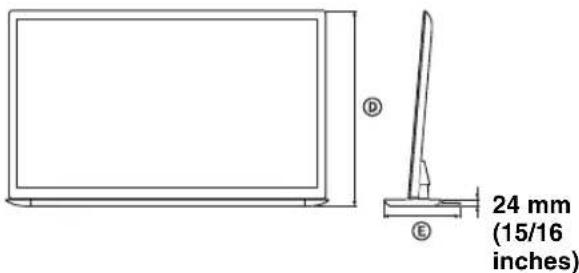
| SU-B553S SU-B463S | |||
| Dimensions: mm (inches) | A | 72 (2 7/8) 65 (2 | 5/8) |
| B | 223 (8 7/8) 190 | (7 1/2) | |
| C | 1,294 (51) 1,097 | (43 1/4) | |
| D | 772 (30 3/8) 663 | (26 1/8) | |
| E | 295 (11 5/8) 255 | (10 1/8) | |
| Stand Weight: | 6.4 kg (14.2 lb) | 5.3 kg (11.7 lb) | |
Speakers
Full Range (2)
Design and specifications are subject to change without notice.
natural_image
Silhouettes of two people carrying a large rectangular object, with no visible text or symbolsnatural_image
Illustration of two people assembling a large TV panel with a cable and switch (no text or symbols)
natural_image
Diagram of a device with a scroll wheel and directional arrow indicating rotation (no text or symbols)
natural_image
Silhouettes of two people carrying a large rectangular object, with no visible text or symbolsnatural_image
Illustration of two people assembling a large electronic device with a power cord and switch (no text or symbols)

natural_image
Diagram of a device with a rotating arm and cable, showing no text or symbols
2 Prepare a TV.
natural_image
Silhouette of two people carrying a large rectangular object with internal compartments (no text or symbols)natural_image
Illustration of two people assembling a wall-mounted device with a power cord (no text or symbols visible)natural_image
Diagram of a device with a scroll wheel and directional arrow indicating rotation (no text or symbols)③Prenda a TV na parede.
Prenda a TV na parede utilizando os parafusos, prendedor de parede e corrente (ou corda).