MXJS9000 - Hi-Fi System SAMSUNG - Free user manual and instructions
Find the device manual for free MXJS9000 SAMSUNG in PDF.

| Product Type | Hi-Fi System |
| Brand | Samsung |
| Model | MXJS9000 |
| Dimensions (main unit) | 525 x 238 x 408 mm |
| Weight (main unit) | 8,3 kg |
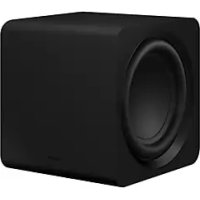
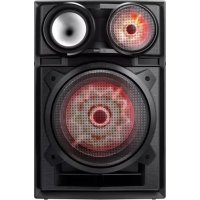
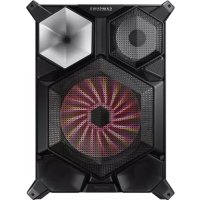
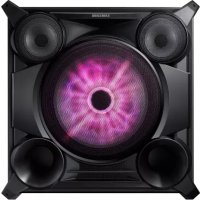
| Dimensions (speaker) | 561 x 752 x 503 mm |
| Weight (speaker) | 30,6 kg each |
| Power Supply | 120-240 V, 50/60 Hz |
| Output Power | 850 W per channel (4 Ω) |
| Frequency Response | 22 Hz - 20 kHz |
| Signal-to-Noise Ratio (amp) | 65 dB |
| FM Tuner - Sensitivity | 10 dB |
| FM Tuner - Signal-to-Noise Ratio | 55 dB |
| CD Player | CD, CD-R, CD-RW, MP3 |
| USB Ports | 2 (USB1 playback, USB2 playback/recording) |
| Bluetooth | Yes (A2DP) |
| TV SoundConnect | Yes |
| Microphone Inputs | 2 (MIC 1/2) |
| Sound Effects | Preset EQ, USER EQ, GIGA PARTY, BEAT WAVING, DJ BEAT, +PANNING, TEMPO, NON-STOP MUSIC RELAY |
| Functions | Timer, standby, USB recording, My Karaoke, AUTO CHANGE, FOOTBALL MODE |
| Supplied Accessories | Remote control, batteries, FM antenna, microphone |
| Safety Instructions | Class 1 laser product, do not open, avoid exposure to moisture |
| Maintenance | Clean discs with a soft cloth from the center to the edge |
| Repairability | Entrust any repairs to qualified personnel. Contact Samsung for assistance |
Frequently Asked Questions - MXJS9000 SAMSUNG
User questions about MXJS9000 SAMSUNG
0 question about this device. Answer the ones you know or ask your own.
Ask a new question about this device
Download the instructions for your Hi-Fi System in PDF format for free! Find your manual MXJS9000 - SAMSUNG and take your electronic device back in hand. On this page are published all the documents necessary for the use of your device. MXJS9000 by SAMSUNG.
USER MANUAL MXJS9000 SAMSUNG
PREMIUM HI- FI Component System user manual
imagine the possibilities
Thank you for purchasing this Samsung product.
To receive more complete service,
please register your product at
www.samsung.com/register
SAMSUNG
Safety Information
Warning
TO REDUCE THE RISK OF ELECTRIC SHOCK, DO NOT REMOVE THE COVER (OR BACK). NO USER-SERVICEABLE PARTS ARE INSIDE. REFER SERVICING TO QUALIFIED SERVICE PERSONNEL.
CAUTION
RISK OF ELECTRIC SHOCK DO NOT OPEN
CAUTION: TO PREVENT ELECTRIC SHOCK, MATCH WIDE BLADE OF PLUG TO WIDE SLOT, FULLY INSERT.

This symbol indicates "dangerous voltage" inside the product that presents a risk of electric shock or personal injury.

This symbol indicates important instructions accompanying the product.
WARNING
- To reduce the risk of fire or electric shock, do not expose this appliance to rain or moisture.
CLASS 1 LASER PRODUCT
This Compact Disc player is classified as a CLASS 1 LASER product. Use of controls, adjustments or performance of procedures other than those specified herein may result in hazardous radiation exposure.
Complies with 21CFR 1040.10 except for deviations pursuant to Laser Notice No. 50, dated June 24, 2007.
DANGER:
- VISIBLE AND INVISIBLE LASER RADIATION WHEN OPEN. AVOID DIRECT EXPOSURE TO BEAM. (FDA 21 CFR)
CAUTION :
CLASS 3B VISIBLE AND INVISIBLE LASER RADIATION WHEN OPEN. AVOID EXPOSURE TO THE BEAM. (IEC 60825-1)
- THIS PRODUCT UTILIZES A LASER. USE OF CONTROLS OR ADJUSTMENTS OR PERFORMANCE OF PROCEDURES OTHER THAN THOSE SPECIFIED HEREIN MAY RESULT IN HAZARDOUS RADIATION EXPOSURE. DO NOT OPEN COVER AND DO NOT REPAIR YOURSELF. REFER SERVICING TO QUALIFIED PERSONNEL.
CLASS 1 LASER PRODUCT
KLASSE 1 LASER PRODUKT
LUOKAN 1 LASER LAITE
KCLASS 1 LASER APPARAT
PRODUCTO LASERCLASE1
2 English
Precautions
- Ensure that the AC power supply in your house complies with the identification sticker located on the back of your product.
Install your product horizontally, on a suitable base (furniture), with enough space around it for ventilation (3 - 4 inches/7.5 - 10 cm). - Do not place the product on amplifiers or other equipment which may become hot. Make sure the ventilation slots are not covered.
- Do not stack anything on top of the product.
Before moving the product, ensure the Disc Insert tray is empty. - To turn off the product completely, disconnect the AC plug from the wall outlet. Disconnect the AC plug from the wall outlet if you will leave the device unused for a long period of time.
- During thunderstorms, disconnect the AC plug from the wall outlet. Voltage spikes due to lightning could damage the product.
- Do not expose the product to direct sunlight or other heat sources. This could cause the product to overheat and malfunction.
- Protect the product from moisture, excess heat, and equipment creating strong magnetic or electric fields (i.e. speakers.).
- Disconnect the power cable from the AC supply if the product malfunctions.
- Your product is not intended for industrial use. It is for personal use only.
- Condensation may occur if your product or disc has been stored in cold temperatures. If transporting the product during the winter, wait approximately 2 hours until the product has reached room temperature before using.
-
The batteries used with this product contain chemicals that are harmful to the environment. Do not dispose of batteries in the general household trash.
-
Place the loudspeakers at a reasonable distance on either side of the system to ensure good stereo sound.
- Direct the loudspeakers towards the listening area.
- Do not expose this apparatus to dripping or splashing. Do not place objects filled with liquids, such as vases, on the apparatus.
- To turn this apparatus off completely, you must disconnect it from the wall outlet. Consequently, the wall outlet and power plug must be readily accessible at all times.
-
Use only a properly grounded plug and receptacle.
-
An improper ground may cause electric shock or equipment damage. (Class 1 Equipment only.)
-
Please check the volume level before playing not to startle the elderly, infirm and pregnant woman at a sudden loud sound.
Disc Storage & Management
-
Holding Discs
-
Fingerprints or scratches on a disc may reduce sound and picture quality or cause skipping.
- Avoid touching the surface of a disc where data has been recorded.
- Hold the disc by the edges so that fingerprints will not get on the surface.
-
Do not stick paper or tape on the disc.
-
Cleaning Discs
-
If you get fingerprints or dirt on a disc, clean it with a mild detergent diluted in water and wipe with a soft cloth.

- When cleaning, wipe gently from the inside to the outside of the disc.
Disc Storage
- Do not keep in direct sunlight.
- Keep in a cool ventilated area.
- Keep in a clean protection jacket and store vertically.
3 English
Contents
SAfETy INformation
2 Warning
3 Precautions
3 Disc Storage & Management
GETTING STARTED
6 Front Panel
7 Rear Panel
8 Remote Control
9 Accessories
9 Connecting the Speakers
9 Cautions on Moving the Speakers
FUNCTIONS
10 Using Samsung Audio Remote App
10 Install Samsung Audio Remote App
10 Accessing the Samsung Audio Remote App
10 The Display function
10 Changing Display mode
10 The DEMO function
11 Playing a CD
11 Loading a Compact Disc
11 CD/MP3/CD-R Playback
11 Selecting a Track
12 Searching for a Specific Music Passage on a CD
12 Repeat One or All Tracks on a CD
12 Playing USB Devices
12 USB Device Playback
12 To Select a File from a USB Device
13 To repeat
13 To Use High Speed Search
13 To Delete a File
13 To Move to the Next/Previous Folder and Next/Previous File
14 To safely remove a USB device
14 Read Before Connecting USB Storage Devices
14 Searching for a Track Quickly
14 Using the MY LIST Function
15 Viewing or Editing MY LIST Tracks
15 Bluetooth
15 What is Bluetooth?
16 To connect the Hi-Fi Component to a Bluetooth device
17 To disconnect the Bluetooth device from the Hi-Fi Component
17 To disconnect the Hi-Fi Component from the Bluetooth device
17 Using Bluetooth Power On
18 TV SoundConnect
18 To connect the Hi-Fi Component to a SoundConnect Compatible Samsung TV
18 To disconnect the TV from the Hi-Fi Component
18 To disconnect the Hi-Fi Component from the TV
18 Using My Karaoke
19 Auto Change Function
19 Listening to the Radio
19 To Store the Stations You Want
20 Selecting a Stored Station
4 English
20 Timer Function
20 Setting the Clock
20 Setting the Timer
22 Cancelling the Timer
22 Setting the Sleep
22 The Recording Function
22 Basic Recording
24 Recording Speed
24 Special Sound Effects
24 Selecting PRESET EQ Mode
24 Selecting USER EQ Mode
25 FOOTBALL MODE function
25 GIGA PARTY Function
25 BEAT WAVING Function
25 DJ BEAT Function
26 +PANNING Function
26 NON-STOP MUSIC RELAY Function
26 TEMPO Function
27 BOOTING SOUND Function
27 PARTY BEAT Function
27 Software Update
28 Disc and Format Compatibility
28 Supported Audio Formats
APPENDIX
29 Troubleshooting
30 Specifications
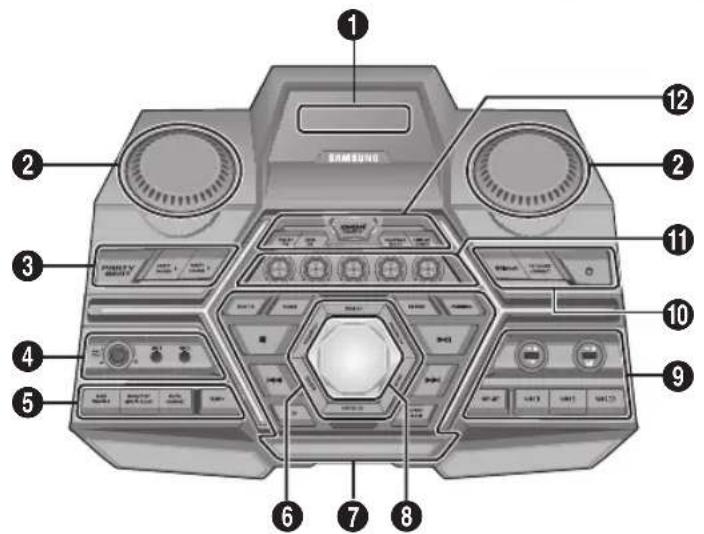
Getting Started
front Panel
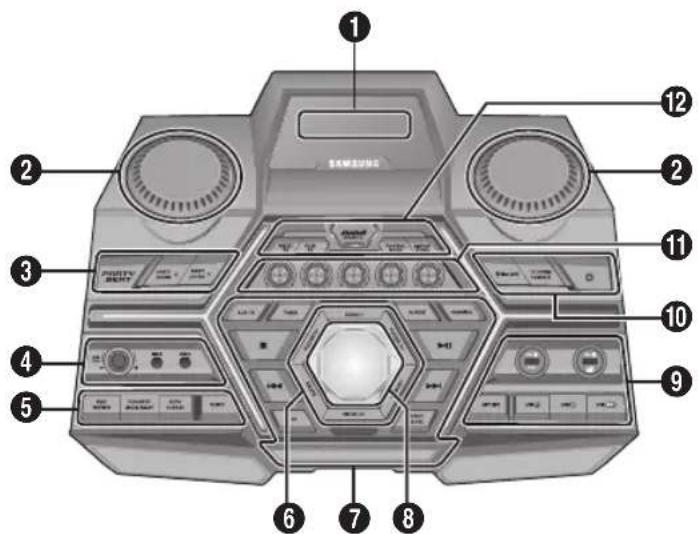
| 1 | Display Panel |
| 2 | PARTY BEAT Pads |
| 3 | PARTY SOUND / button |
| PARTY BEAT button | |
| 4 | MIC 1/2 jacks |
| MIC VOL JOG | |
| 5 | TEMPO button |
| AUTO CHANGE button | |
| NON-STOP MUSIC RELAY button | |
| BEAT WAVING button | |
| 6 | SEARCH button |
| FOLDER -/+ button | |
| MEMORY button | |
| DELETE button | |
| ENTER button | |
| 7 | AUX 1/2 Source buttons |
| TUNER Source button | |
| DJ BEAT button for DJ sound effect | |
| +PANNING button for DJ sound effect | |
| Remote control sensor | |
| DISC tray | |
| BACKWARD SEARCH/SKIP button |
| 7 | STOP button |
| CD Source button | |
| PLAY/PAUSE button | |
| FORWARD SEARCH/SKIP button | |
| OPEN/CLOSE button for Disc | |
| 8 | VOLUME/SEARCH JOG |
| 9 | MY LIST button |
| USB 1/2 Source buttons | |
| USB REC button | |
| USB 1 jack for Playback only. | |
| USB 2 jack for Playing and USB Recording | |
| 10 | Bluetooth Source button |
| TV SOUNDCONNECT Source button | |
| POWER button • Press this button to switch your product on or off. | |
| 11 | Equalizer Jogs for adjusting 5-Band EQ 80Hz / 200Hz / 800Hz / 2kHz / 8kHz |
| 12 | PRESET EQ button |
| USER EQ button | |
| GIGA PARTY button | |
| FOOTBALL MODE button | |
| DISPLAY/DEMO button |
Rear Panel
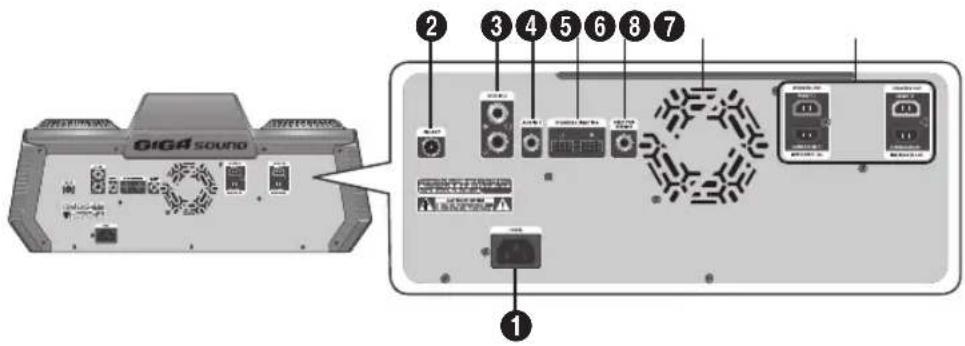
| 1 | POWER • Insert only the provided power cable. |
| 2 | FM Antenna Terminals 1. Connect the FM antenna to the FM antenna connector terminal. 2. Slowly move the antenna wire until you find a location where reception is good, then fasten it to a wall or other rigid surface. |
| 3 | AUX IN 2 Terminals 1. Use an Audio Cable (not supplied) to connect AUX IN 2 on the main unit to Audio Out on an external analog output device. • Be sure to match connector colors. • If the external analog output device has only one Audio Out jack, connect either left or right. • Press the AUX 1/2 button to select AUX 2. • If the product is in AUX mode for more than eight hours and no buttons on the front panel or remote are pushed, the system will turn off. |
| 4 | AUX IN 1 Terminals 1. Use to connect an external device such as an MP3 player. • Connect AUX IN 1 on the rear panel of the main unit to the Audio Out of an external device/MP3 player. • Press the AUX 1/2 button to select AUX1. |
| ⑤ | LED Terminals for Speaker Beat Waving. |
| ⑥ | ONLY FOR SERVICE ·This jack is for testing only. Please do not use. |
| ⑦ | Cooling fan ·The fan operates while the unit is powered on. If you set the unit to the minimum volume, the fan won't operate. Secure a minimum 6 inches (15 cm) of clear space on all sides of the fan when installing the main unit. |
| ⑧ | 2.2 CH Speaker Terminals 1. To achieve the correct sound quality, when you connect the speakers, match the color of the speaker plugs to the color of the speaker jacks. See below. ·LEFT channel (mark#, White/Purple). ·RIGHT channel (mark#, Red/Purple). ·Don't force the Purple SUBWOOFER connector into the White or Red speaker jack. |
Getting Started
Remote Control
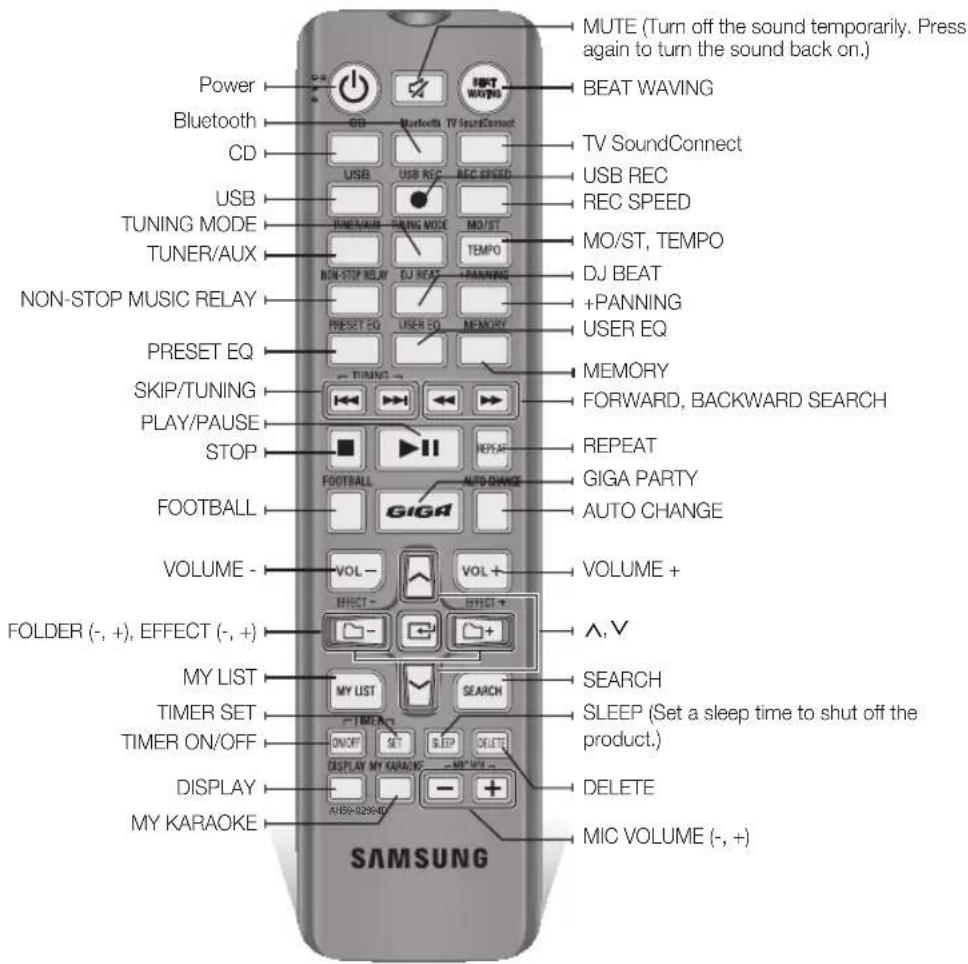
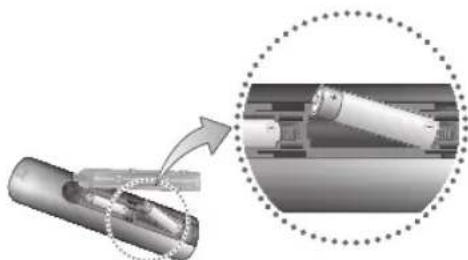
Installing Batteries In The Remote Control
- Place batteries in the remote control so they match the polarity of the illustrations in the battery compartment. : (+) to (+) and (-) to (-).
Do not dispose of batteries in a fire. - Do not short circuit, disassemble, or overheat the batteries.
There is a danger of explosion if the battery is replaced with the wrong battery type. Replace only with the same or equivalent type.
The remote control can be used up to approximately 23 feet (7 meters) in a straight line from the system.
Accessories
Check for the supplied accessories below.

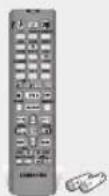
User Manual Remote Control / Batteries
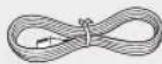
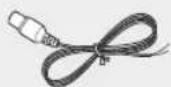
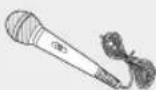
Power Cable FM Antenna Microphone (MIC)
- Figures and illustrations in this user's manual are provided for reference only and may differ from actual product appearance.
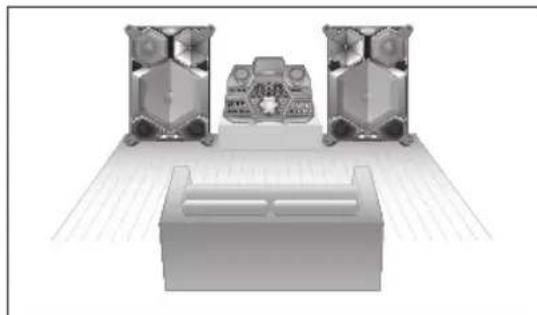
Connecting the Speakers
Recommended speaker setup.
|IMPORTANT |
The product may not operate properly if it is subject to shaking or external shocks or if the speakers are not installed as recommended.
Do not stretch the speaker wires or place a heavy object on them.
Cautions on Moving the Speakers
- When moving the main unit and speakers, make sure to separate all connected speaker cables before.
Functions
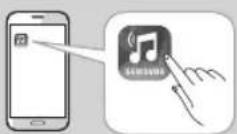
Using Samsung Audio Remote App
Install Samsung Audio Remote App
To control the product with your Smart Device and the Samsung Audio Remote app, download the Samsung Audio Remote App by accessing the app through Google Play store.
I NOTE I
The APP function only supports Android mobile phone devices running Android OS 3.0 or later.
Market search :Samsung Audio Remote

Accessing the Samsung Audio Remote App
After you install the Samsung Audio Remote app, follow the instructions in the app.
The Display function
You can view functions available on the display, adjust the brightness of the display and set the Display/LED either on or off.
Changing Display mode
Press the DISPLAY/DEMO button on the main unit.
Each time you press this button, the mode will change as follows:
- The display automatically darkens if there is no operation of the main unit or the remote control for 5 minutes, and turns on again upon key/remote operation.
Note that percussion input will not revive the display.
- Set the Dimmer function to ON to keep the display dimmed out.
The Dimmer function
The Dimmer function is selected and the display darkens.
LED OFF
The Front display LED and speaker LED is turned off while the dimmer function is working.
Clock ON
The Clock you set is displayed.
Display/LED ON
All displays and the LED are turned on.
The DEMO function
Press the DISPLAY/DEMO button for 5 seconds to start the Demo mode.
When you press the DISPLAY/DEMO button while displaying the demo, the function operates as follows:
DIMMER LED Off (unit/speaker) ---[time display] LED On (unit/speaker)
To cancel the Demo mode
- Press the DISPLAY/DEMO again for 5 seconds. The DEMO mode is canceled and the product turns off.
- Press the CD, Bluetooth, TUNER, AUX1/2, TV SOUNDCONNECT or USB1, USB2 button. The DEMO mode is canceled and the mode is changed to the mode you selected.
NOTES
When the DEMO function is on, only the POWER(),VOL,MUTE buttons and the buttons mentioned above work.
It mutes DEMO music automatically after 3 minutes. The message remains displayed on the front panel after its playback.
There are two tracks of DEMO music. You can switch between them using and buttons while playing.
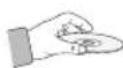
Playing a CD
Loading a Compact Disc
You can play standard compact discs that require no adapter.
- Press the OPEN/CLOSE button, Place a disc gently into the tray with the disc's label facing up.
After putting in the disc, press the OPEN/ CLOSE button to start playing the disc.
- You can load or unload compact discs when the radio, USB, or auxiliary source function is selected. When you press the OPEN/CLOSE button, all the other functions will change to the CD mode.
- If no buttons are pressed on the main unit, or remote control for more than 3 minutes when the product is in Pause mode, it will change to Stop mode.
- If no buttons are pressed on the main unit, or remote control for more than 25 minutes when the product is in Stop mode, the product will turn off.
CD/MP3/CD-R Playback
IMPORTANT
This product is designed to play the following audio disc types: CD-ROM, CD-R, CD-RW.
1. Press the OPEN/CLOSE button and put a disc into the disc tray with its label face upwards.
2. After putting in the disc, press the OPEN/ CLOSE button to start playing the disc.
- For MP3/WMA file, it may take several minutes for the product to finish scanning the disc tracks.
- If you play a file with an English title, the song title will be shown in the display. (Titles in other languages can not be displayed.)
- An English-titled track containing a special character (@, $, *, etc.) will not be displayed.
Track Indicator-Playtime Indicator
-
To adjust the volume:
-
Turn the VOLUME control on the main unit.
- Press the VOL+ or VOL- button on the remote control.
The volume level can be adjusted in 51 steps (Vol min, Vol 1 ~ Vol 49, and Vol max).
- PAUSING PLAYBACK
Main Unit/Remote control
To pause playback temporarily, press the button.
Press the button to continue playing the disc.
- To end playing, press the button.
NOTES
If there is no CD inserted in the disc tray, the unit displays "NO DISC".
The quality of MP3/WMA-CD playback may vary depending on the condition of the disc or the condition of the recorder used to create the disc.
If a disc contains different types of files or unnecessary folders, you will have problems with playback.
Gently insert a CD into the disc tray. Do not apply excessive force.
- Do not apply force to the product or place a heavy object on the product.
- Do not insert an out-of-spec or oddly shaped CD (heart shaped, octangular, etc.). You can damage the product.
- Carefully maintain your CDs.
Selecting a Track
You can select a desired track while the disc is being played.
Functions
To play the current track from the beginning
Press the 14 button, 3 seconds after the current track started playing.
To play the previous track
Press the button twice, 3 seconds or more after the previous track starts playing.
To play the next track
Press the button.
To play the track of your choice
Press the or button to move to a desired track.
Searching for a Specific Music Passage on a CD
When listening to a CD, you can quickly search for a specific music passage on a track.
Forward Search.
Backward Search
You can also press and hold the 14 , 15 buttons on the main unit to automatically scan for a track.
Repeat One or All Tracks on a CD
You can play a CD or tracks on a CD repeatedly.
- Press the REPEAT button on the remote control.
Each time you press this button, the mode changes as follows:
MP3/WMA:OFF TRACK DIR ALL RANDOM
CD:OFF TRACK ALL RANDOM
- When you want to stop the repeat function, press the REPEAT button until "OFF" is displayed.
OFF: Cancels repeat playback.
- TRACK: Repeatedly plays the selected track.
DIR (DIRECTORY) : Repeatedly plays all tracks in the selected folder.
- ALL: Repeatedly plays the entire disc.
- RANDOM: Plays tracks in random order.
Playing USB Devices
Connect an external storage device such as a USB flash memory or external HDD (Hard Disk Drive) to the main unit. You can play files in MP3/ WMA format.
USB Device Playback
- Connect the external USB storage device to your main unit.
- Select the USB mode by pressing the USB1, USB2 button on the main unit or the USB button on the remote control.
- The first file of the first directory plays automatically.
- To stop playing Press the button to stop playing.
IMPORTANT
Do not connect a USB recharger to the USB port of this main unit. You can damage the product.
A maximum of 999 files can be played per USB DEVICE.
To Select a File from a USB Device
You can select an MP3 file while the product is playing.
I NOTE I
If you want to move to the previous/next track, press the l buttons briefly.
- The unit moves to the previous/next track within the directory.
- If you press the buttons more times than the number of the files in the directory, the unit moves to the next directory.
To repeat
- PressstheREPEAT button on the remote control. Each time you press this button, the mode changes as follows:
OFF TRACK DIR ALL RANDOM
- When you want to stop the repeat function, press the REPEAT button until "OFF" is displayed.
OFF: Cancels repeat playback.
- TRACK: Repeatedly plays the selected file.
DIR (DIRECTORY) : Repeatedly plays all files in the selected folder.
- ALL: Repeatedly plays all files.
- RANDOM: Plays files in random order.
NOTE
If the file selected to be played is located in a folder all the files within that folder are played in random order. If the file selected is located in the root folder all files will be played in random order.
To Use High Speed Search
You can search a desired section quickly while the product is playing.
Press the button.
Each time you press th, button, you move through the section forward/backward quickly.
IMPORTANT
The product does not output sound during a high speed search.
You can also press and hold the or button on the main unit to automatically scan for a track.
To Delete a File
You can delete a file from your USB device.
- Select a file you want to delete.
- Press the DELETE button on the main unit or remote control. "DELETE YES/NO" is displayed.
- Use the VOLUME/SEARCH JOG on the main unit or the / buttons on the remote control to select YES/NO.
- Please select "DELETE YES" and press the button. "DELETE END" appears and deletion is completed.
To Move to the Next/Previous Folder and Next/Previous File
Use SEARCH and FOLDER-, + buttons on the remote control or on the main unit to move to the next/previous file and folder.
- Press the SEARCH button to display the current and the next tracks on the panel.
- To browse folders, press the FOLDER-, + button on the main unit or remote control once and the current folder is displayed. Press it again to move to the next folder.
- Press the button when the desired folder is displayed, then it moves to the first track of the selected folder. If no input is detected for 3 seconds after a folder is displayed, then it moves to the first track of the folder.
- File search remains the same as before. At step 1, use VOLUME/SEARCH JOG on the main unit or / button on the remote control to select the desired file.
- Once a folder is selected at step 2, Use the adjusting VOLUME/SEARCH JOG on the main unit or press / button on the remote control, within 3 seconds to find the desired file from the selected folder.
| NOTE |
When sound files are stored in the root directory rather than in a folder, press the FOLDER-, + button to go to the first TRACK.
Functions
To safely remove a USB device
- Press the button twice while the USB is playing or press the button once when play has stopped.
- When the "REMOVE" message appears on the display, remove the USB device.
Read Before Connecting USB Storage Devices
- Some USB devices may not work properly with this product.
- This product only supports external HDD's that are formatted in the FAT file system.
- USB 2.0 HDDs should be connected to a separate power source. Otherwise, the USB 2.0 HDDs will not work.
- If multiple USB external storage are connected together, only the music files in the first HDD will be played.
If a USB external device that has multi partition, only the first partition which support file system is recognized. - Files with Digital Rights Management (DRM) are not supported. DRM restricts unauthorized access to a DRM file so that file is protected from piracy.
- Even if a file has an .mp3 extension, the file cannot be played if it is formatted in MPEG layer 1 or 2.
- Do not use an unrecognized USB hub.
- Only the first 15 characters of an audio file name are shown on the product's display.
Only removable HDDs with less than 160GB are supported. Depending on the device, a 160GB- or more removable HDD may not be supported.
It can take several minutes for the product to recognize the files on some USB devices. -
Some USB devices (USB HDDs, in particular) may cause a delay when moving from track to track.
-
With USB storage devices supporting USB VER1.1 only, the product may access files slowly or may not recognize the file properties.
- The maximum electrical current provided by each USB port to connected USB devices is 0.5A (based on DC 5V).
- If there is no USB connection or STOP mode lasts for more than 25 minutes, the product will automatically turn off.
- Some USB devices, digital cameras, USB card readers, iPods, iPhones, and Smart Phones may not be supported.
Searching for a Track Quickly
You can select a track directly without the button.
CD-DA/MP3-CD/USB
- Press the SEARCH button.
After pressing the SEARCH button, turn the VOLUME/SEARCH JOG control on the main unit to the left or right to select a desired track. - Press the button when the desired track is displayed, then it moves to the selected track.
If no input is detected for 3 seconds, then it moves to the selected track. - You can move to the selected track directly.
- When searching is done, the track will automatically start playing.
Using the MY LIST Function
You can program the playback order of up to 99 tracks of your choice.
1. Press the MY LIST button to display the message below:
$$ \begin{array}{c c c} \text {L I S T} & \text {B 1} \dots \dots \end{array} $$
$$ (0 1 = \text {L I S T n u m b e r}, - - - = \text {t r a c k n u m b e r}) $$
- Use the VOLUME/SEARCH JOG on the main unit or / button on the remote control to move to a desired track.
- Press the button to confirm your selection. The selection is stored and LIST 02--- is displayed.
- To select another track, follow Steps 2 and 3 above.
- Press the or MY LIST buttons to play the my list tracks.
-
Press MY LIST button for 5 seconds to display "MY LIST ON/OFF". Use VOLUME/ SEARCH JOG on the main unit or button on the remote control to select ON or OFF and press button to set.
-
Selection will be cancelled automatically if there is no input for 5 seconds. Even when the MY LIST is set to OFF, saved LIST items are maintained.
If you eject the disc, CD list is deleted. If you turn off the product, CD/USB list is deleted.
If a USB is disconnected while being used, the USB list will be deleted.
NOTES
CD/USB MY LIST play will stop if you try to switch to another mode.
USB REC and DELETE, SEARCH buttons will not work in MY LIST mode. If you press such buttons in MY LIST mode, "MY LIST PLAY" will be displayed instead.
If a file in the MY LIST to be played was not in a supported format, playback skips to the next file automatically.
When the recording or copy is completed, the My List of the USB 2 will be canceled.
Viewing or Editing MY LIST Tracks
You can view and edit a list of programmed tracks.
- Press MY LIST once and FOLDER-, + button to display the message below:
$$ \text {S A V E D} 0 1 0 0 2 $$
$$ (0 1 = \text {L i s t n u m b e r}, 0 0 2 = \text {t r a c k n u m b e r}) $$
- Repeatedly press the button until the desired track is displayed.
- Use the VOLUME/SEARCH JOG on the main unit or / button on the remote control to select a different track.
- Press the button to confirm your selection.
- To play the my list tracks, press the button.
-
If you press DELETE button while a SAVED track is displayed, "REMOVE YES/NO" appears. Use / button on the remote to select an option and then press button to remove the track of the My List track list.
-
Selection will be cancelled automatically if there is no input for about 5 seconds.
To repeat
- Press the REPEAT button. Each time you press this button, the mode changes as follows:
$$ O F F \rightarrow T R A C K \rightarrow A L L $$
Bluetooth
You can use a Bluetooth device to enjoy music with high quality stereo sound, all without wires!
What is Bluetooth?
Bluetooth is a technology that enables Bluetooth compliant devices to interconnect easily with each other using a short, wireless connection.
Functions
-
A Bluetooth device may cause noise or malfunction, depending on usage, when:
-
A part of your body is in contact with the receiving/transmitting system of the Bluetooth device or the Hi-Fi Component.
- It is subject to electrical variation from obstructions caused by a wall, corner, or office partitioning.
-
It is exposed to electrical interference from same frequency-band devices including medical equipment, microwave ovens, and wireless LANs.
-
Pair the Hi-Fi Component with the Bluetooth device while they are close together.
- The greater the distance between the Hi-Fi Component and the Bluetooth device, the worse the quality. If the distance exceeds the Bluetooth operational range, the connection is lost.
- In poor reception areas, the Bluetooth connection may not work properly.
- The Bluetooth connection only works when the Bluetooth device and the Hi-Fi Component are close together. The connection will be automatically cut off if the Bluetooth device is out of range. Even within range, the sound quality may be degraded by obstacles such as walls or doors.
- This wireless device may cause electric interference during its operation.
To connect the Hi-Fi Component to a Bluetooth device
Before you begin, confirm that your Bluetooth device supports the Bluetooth-compliant stereo headset function.
-
Press the Bluetooth button of the Hi-Fi Component to display the BLUETOOTH message.
-
You will see WAIT for a short period of time and then READY on the front display of the Hi-Fi Component.
-
Select the Bluetooth menu on the Bluetooth device you want to connect. (Refer to the Bluetooth device's user manual.)
-
Select "[Samsung] HI-Fl XXXXXX J-Series" from the list.
-
When the product is connected to the Bluetooth device, it will display Device name CONNECTED BLUETOOTH on the front display.
-
If the Bluetooth device has failed to pair with the product, delete the previous "[Samsung] HI-FI XXXXXX J-Series" found by the Bluetooth device and have it search for the product again.
-
You can listen to the music playing on the connected Bluetooth device over the Hi-Fi Component system.
-
In Bluetooth mode, some model's Play/Stop/Next/Back functions are not available.
NOTES
The product only supports Middle Quality SBC data (up to 237kbps@48kHz), and does not support High Quality SBC data (328kbps@44.1kHz).
The AVRCP feature is not supported.
Connect only to a Bluetooth device that supports the A2DP (AV) function.
You cannot connect to a Bluetooth device that supports only the HF (Hands Free) function.
Only one Bluetooth device can be paired at a time.
Once you have turned off the Hi-Fi Component and the pairing is disconnected, the pairing will not be restored automatically. To reconnect, you must pair the device again.
The Hi-Fi Component system may not search or connect properly in the following cases:
- If there is a strong electrical field around the Hi-Fi Component.
- If the Bluetooth device is turned off, not in place, or malfunctions.
- Note that such devices as microwave ovens, wireless LAN adaptors, fluorescent lights, and gas stoves use the same frequency range as the Bluetooth device, which can cause electric interference.
To disconnect the Bluetooth device from the Hi-Fi Component
You can disconnect the Bluetooth device from the Hi-Fi Component. For instructions, see the Bluetooth device's user manual.
The Hi-Fi Component will be disconnected.
- When the Hi-Fi Component is disconnected from the Bluetooth device, the Hi-Fi Component displays DISCONNECTED READY on its display.
To disconnect the Hi-Fi Component from the Bluetooth device
Press another mode button on the front panel of the Hi-Fi Component to switch from Bluetooth mode to another mode or turn off the Hi-Fi Component. The currently connected device is disconnected.
NOTES
The connected Bluetooth device will wait a certain amount of time for a response from the Hi-Fi Component before terminating the connection. (Disconnection time may differ, depending on the Bluetooth device.)
In Bluetooth connection mode, the Bluetooth connection will be lost if the distance between the Hi-Fi Component and the Bluetooth device exceeds 32.80 feet (10 meters).
If the Bluetooth device comes back into the effective range after disconnecting, you can restart the Hi-Fi Component to restore the pairing with the Bluetooth device.
The Hi-Fi Component automatically turns off after 25 minutes in the Ready mode.
When a Bluetooth device is connected to the Hi-Fi Component system, the Hi-Fi Component System automatically switches to the Bluetooth mode if it was in a different mode.
Using Bluetooth Power On
When the product is turned off, you can connect your smart device to the product via a Bluetooth connection to turn it on.
- Press and hold the Bluetooth button on the remote to set the Bluetooth Power On function On. Bluetooth Power On appears on the display.
- When the product is off, connect your smart device to the product via Bluetooth. (For information on Bluetooth connections, refer to your smart device's manual.) The Bluetooth device must have been paired with the Hi-Fi Component before.
-
When the connection is complete, the product turns itself on automatically in Bluetooth mode.
-
Select the desired music to play from your smart device.
I NOTE I
Press and hold the Bluetooth button on the remote control to turn the Bluetooth Power On function on or off. Each time you press and hold this button, the Hi-Fi Component displays Bluetooth Power On Off on its display.
Functions
TV SoundConnect
You can listen to the sound from your SoundConnect Compatible Samsung TV through the Hi-Fi Component by using the TV SoundConnect function.
To connect the Hi-Fi Component to a SoundConnect Compatible Samsung TV
Before activating this function, be sure to set the Samsung TV's SoundConnect or SoundShare function to On.
- Press the TV SoundConnect button of the Hi-Fi Component to display the TV SOUNDCONNECT message.
WAIT SEARCH REQUEST
- Set Add New Device to On in the TV's SoundConnect Settings menu. (Refer to the TV's user manual for details.)
- When the Hi-Fi Component is connected to the TV, it will display [TV] Name CONNECTED TV on the front display.
- The audio from the connected TV plays over the Hi-Fi Component system.
NOTES
The SoundConnect feature is available on some Samsung TVs released since 2012. Check whether your TV supports the SoundShare or SoundConnect function. (For further details, refer to the TV's user's manual.)
If you unplug the Hi-Fi Component, the TV SoundConnect connection is terminated. To re-establish the connection, plug the Hi-Fi Component into an outlet, and then set the TV SoundConnect connection again.
Only one Hi-Fi Component can be connected to a TV via TV SoundConnect at time.
To connect to another TV in TV SoundConnect mode, press the button for more than 5 seconds, and then connect to the other TV by following the directions above.
To disconnect the TV from the Hi-Fi Component
You can disconnect the TV from Hi-Fi Component. For instructions, see the TV's user manual.
- When the Hi-Fi Component is disconnected from the TV, the Hi-Fi Component displays DISCONNECTED REQUEST on its display.
To disconnect the Hi-Fi Component from the TV
Press another mode button on the front panel of the Hi-Fi Component to switch from TV SoundConnect mode to another mode or turn off the Hi-Fi Component. The currently connected device is disconnected.
I NOTES I
The connected TV will wait a certain amount of time for a response from the Hi-Fi Component before terminating the connection. (Disconnection time may differ, depending on the TV)
The connection may be lost or sound may stutter if the distance between the TV and the Hi-Fi Component exceeds 6.5 feet (2 m).
Instability in the network environment may cause the connection to be lost or sound to stutter.
The Hi-Fi Component automatically turns off after 25 minutes if it is not connected to a TV.
Using My Karaoke
You can use the MY Karaoke function to sing along with your favorite CDs and USB tracks.
-
Connect the microphone to the MIC jack on the front of the main unit.
-
If your microphone plug is smaller than the 6.3mm MIC jack, you need a Connector-Adaptor (not supplied) to complete the connection.
-
First, connect the Connector-Adaptor to the MIC jack on the front of the main unit.
-
Second, connect the microphone (with larger jack) to the Connector-Adaptor.
-
Use the MIC VOL JOG on the main unit or the MIC VOL -, + button on the remote control to adjust the volume of the microphone.
- Press the MY KARAOKE button on the remote control to suppress the vocal if you need to. Each time you press the button, the selection changes as follows:
MY KARAOKE ON MY KARAOKE OFF
- If you hear strange noises (squealing or howling) while using the Karaoke feature, move the microphone away from the speakers. Turning down the microphone's volume or the speaker volume is also effective. Do not aim the MICROPHONE towards the SPEAKERS.
The microphone does not operate in the AUX and TUNER mode. - For My Karaoke mode, this mode works only for CD/MP3, USB playback, and this mode cannot be applied during Tuner, Bluetooth, AUX and TV Sound Connect modes.
- MY KARAOKE is available when a microphone is disconnected to the Hi-Fi component.
- When you turn My Karaoke off, all My Karaoke settings are lost.
Auto Change function
You can circularly play between the disc and the USB.
-
Press the AUTO CHANGE button to select a mode and press to apply your selection.
-
If MY LIST Play has not been set in CD/USB
AUTO CHANGE OFF AUTO CHANGE ALL
If MY LIST Play has been set in CD/USB
AUTO CHANGE OFF AUTO CHANGE ALL AUTO CHANGE MY LIST
-
When the AUTO CHANGE mode is "ALL",
-
The music will be played on DISC→ USB1 → USB2 continuously.
-
When the AUTO CHANGE mode is "MY LIST", the Hi-Fi Component will play My List tracks from DISC, USB1, and USB2 continuously.
-
If you press the POWER button, function change button or the OPEN/CLOSE button, the AUTO CHANGE function automatically switches to "OFF" mode.
-
The REPEAT function can't work and automatically changes to OFF.
-
When USB is playing, if you disconnected the USB, the AUTO CHANGE function automatically switches to "OFF" mode.
If there's no USB1, it will jump to USB2. - When the auto change mode is "ALL/MY LIST", the DELETE, MY LIST and REPEAT functions do not work, and the unit displays "AUTO CHANGE ALL/MY LIST".
- When DISC play ends, if there's no USB 1, the unit will play music from USB 2.
- When DISC play ends, if there's no USB 1 and USB 2, the unit will continue to play the disc.
- When USB 2 play ends, if there's no DISC, the unit will play music from USB 1.
Listening to the Radio
To Store the Stations You Want
You can store up to: 15 FM stations.
- Select FM by pressing the TUNER button.
- To search for a station, press the TUNING MODE button on the remote control or the
■ button on the main unit one or more times until MANUAL is displayed.
Functions
-
Press the MO/ST button to switch between stereo and mono.
-
In a poor reception area, select MONO for a clear, interference-free broadcast.
This applies only when listening to an FM station. -
Find a station by:
-
Pressing and holding the TUNIN or button on the remote control to automatically search for broadcasting stations.
-
If you do not want to store the radio station found, go back to Step 3 and search for another station.
Otherwise:
a. Press the button.
b. Or, press the TUNING 串 / 串 or A/V button on the remote control to select a program number in the PRESET mode.
c. Press the button to save the preset.
- To store other radio frequencies, repeat Steps 4 to 5.
I NOTE I
In Tuner mode
- In the MANUAL mode, you can use the × 1 or × 2 button.
- In the PRESET mode, you can use the × or × button on the main unit to search a stored radio station.
Selecting a Stored Station
To listen to a stored station, follow these steps:
- Select FM by pressing the TUNER button on the main unit or remote control.
-
Press the TUNING MODE button on the remote control or the button on the main unit one or more times until "PRESET" is displayed.
-
Press the MEMORY button on the main unit or remote control, when the desired station is displayed, then the station stored.
- Press the < buttons on the main unit or the TUNING < /or / buttons on the remote control to select a preset number. or
You can use the TUNING 四 / 四 or A/V button to select the stored station.
Timer function
Setting the Clock
For each step, you have a few seconds to set the required options. If you exceed this time, you must start again.
- Press the TIMER SET button on the remote control twice. "CLOCK SET" is displayed.
- Press the button on the remote control. The hour flashes.
To increase the hours: A
To decrease the hours: V
- When the correct hour is displayed, press the button, and then the minutes flash.
To increase the minutes
To decrease the minutes: V
- When the correct minute is displayed, press the button. "TIMER PLAY SET" appears in the display.
Setting the Timer
The timer enables you to set the product to switch on or off at specific times automatically.
Before setting the timer, check that the current time is correct.
- For each step, you have a few seconds to set the required options. If you exceed this time, you must start again.
If you no longer want the product to be switched on or off automatically, you must cancel the timer by pressing the TIMER ON/OFF button.
Example: You want to wake up to music every morning.
- Press the TIMER SET button until TIMER PLAY SET is displayed.
- Press the button. Result: ON TIME is displayed for a few seconds. You can set the timer switch-on time.
- Set the timer switch-on time.
a. Press the / button on the remote control to set the hours.
b. Press the button. Result: The minutes flash.
c. Press the / button on the remote control to set the minutes.
d. Press the button. Result: OFF TIME is displayed for a few seconds. You can now set the timer switch-off time.
- Set the timer switch-off time.
a. Press the / button on the remote control to set the hours.
b. Press the button. Result: The minutes flash.
c. Press the / button on the remote control to set the minutes.
d. Press the button. Result: VOLUME XX is displayed, where XX corresponds to the volume already set.
- Press the / button on the remote control to adjust the volume level and press the button. Result: The source to be selected is displayed.
- Press the / button on the remote control to select the source the Hi-Fi Component will play when it switches on.
| If you select You | must also |
| FM (radio) a. Press | press the button. b. Select a preset station by pressing the ∧/V button on the remote control. |
| CD (compact disc) | Load a compact disc. |
| USB1/USB2 Connect a USB device. | |
- Press the button.
Result: TIMER REC SET (Do you want to record?) is displayed.
- Press the button.
Result:REC SET YES/NO is displayed.You can press the A/V button on the remote control to select REC YES or REC NO, and then press button.
1) If you select REC NO, it will cancel tuner timing recording and any currently set timer timing recording. Note that selecting REC NO does not cancel the Timer setting.
2) If you select REC YES, you can set the timer timer recording on and off times.
a. Press the button.
Result: ON TIME is displayed for a few seconds. You can set the tuner timer recording switch-on time.
b. Press the C button.
Result: OFF TIME is displayed for a few seconds. You can set the tune timer recording switch-off time.
NOTES
Tuner timer recording On/Off times can differ from Timer On/Off times.
If the timer switch on and off times are identical, the word ERROR is displayed.
If the switch-on or-off time is the same as the timer recording time, only the switch-on or-off time is effective, and the timer recording is not applied.
Functions
When you use the auto timer, you may need an additional step to use a CD or USB device with it, depending on the disc (or device). Consequently, it is easier to use the tuner instead.
If you select CD or USB mode when there is no disc or no USB in the main unit, it will automatically change to TUNER.
Cancelling the Timer
After you have set the timer, it will start automatically. When it starts, the TIMER ON message appears on the display. If you no longer want to use the timer, you must cancel it.
- As TIMER ON/OFF button, you can select the Timer ON/OFF.
NOTE I
When you select the TIMER OFF mode, the TIMER RECORDING and TIME function are not available.
Setting the Sleep
SLEEP buttons on the remote to set the SLEEP mode.
- Pressing the SLEEP button cycles through the time settings below. 10 20 30 60 90 120 150 OFF
- Number is counted as minutes, and the remaining time appears on the screen.
- If cancelled, SLEEP mode switches to the "OFF" mode.
The Recording function
Basic Recording
You can record from a CD, a USB device, a radio broadcast, or an external source to a USB storage device.
-
Connect an external USB storage device to a USB (REC) jack on your main unit. You can use USB 2.
-
Play a disc or USB, turn on the radio and select a station, or connect an external source to your main unit as described below.
CD
- Press the CD button on the main unit to select the CD function.
- Insert a CD gently into the disc tray.
- Use the CD selection or button to select the desired song.
TUNER
- Select FM by pressing the TUNER button.
- Select the radio frequency you want to record.
USB 1 (Recording device is on USB 2)
- Connect the USB device with the files you want to record to USB 1 jack.
- Press the USB1 button to select USB 1.
- Play a song from the USB 1.
External Source
- Connect an External device/MP3 player to the main unit.
- Press the AUX 1/2 button on the main unit to select AUX IN 1 or AUX IN 2.
-
Play a song from the external device.
-
Press the USB REC button on the remote control to start recording.
CD
- CD recording starts and "TRACK RECORD" and the current track number appear on the display alternately.
- If you want to record all the tracks on the disc, press and hold the USB REC button. "FULL CD RECORD" is displayed.
RADIO
TUNER RECORD" is displayed and recording starts.
CD-ROM/USB
- "FILE COPY" is displayed and COPY starts.
- You can also copy a folder containing MP3/WMA files to a device on USB 2. Press and hold the USB REC button while the system plays an MP3 or WMA file located in a folder. Your system displays "FOLDER COPY", and will record all the files in that folder.
- When the recording is done, "STOP" is displayed.
If there is a file with the same name on the USB 2 device, "FILE ALRADY EXISTS" is displayed, and the function is canceled. - If a microphone is connected to the main unit and you press the USB REC button, the currently playing mp3 file and the sound from the microphone is recorded onto the USB2 device.
- Press the USB REC button for a second to start FILE COPY. Press and hold the USB REC button for a few seconds to start FOLDER COPY.
External Source
"AUX RECORD" is displayed and recording starts.
CD/USB1(MP3) & MIC
-
"MP3 RECORD" is displayed and recording starts.
-
To stop recording, press the button. The recording is automatically saved as an MP3 file.
-
After the recording is finished, a directory named "RECORDING(DISCxxxx)"(FULL CD RECORDING), "RECORDING"(TRACK RECORDING) "CD COPY"(CD-ROM/USB), "TUNER RECORDING", "AUX RECORDING" or "MP3 RECORDING" is created in your device.
I NOTES I
WMA/MP2 files can only be copied not recorded.
Do not disconnect the USB device or the AC Cord during recording. You can cause file damage.
If you disconnected the USB device during recording, the product will turn off and you will not be able to delete the file that has been recorded. If this occurs, connect the USB device to a PC, back up the USB data to the PC, and then reformat the USB device.
If the USB device does not have enough memory, "NOT ENOUGH MEMORY" will appear on the display.
The Recording function supports the FAT file systems only. The NTFS file system is not supported.
When you use the CD high speed search function, the CD recording function is unavailable.
With some USB devices, recording time may be longer.
In the MY LIST mode, you can't use the recording function.
When the Recording function is active, the EQ and GIGA PARTY functions automatically turn off and are unavailable.
During a CD recording, the REPEAT function automatically turns off and is unavailable.
If you use the MIC function during a CD recording, the voice from the microphone will be recorded.
Functions
You can not record audio from the radio when searching for a station or if there are no frequencies available when the product is set to Tuner mode.
Note that setting the input level too loud when recording music from an external device through the AUX or USB channel may introduce noise into the recording. If this occurs, lower the external device's volume level.
The maximum TUNER/AUX recording time is 5 hours.
If USB2 has no USB device connected, and you press the USB REC button, "USB2 NOT READY" is displayed.
Recording Speed
You can select the recording speed before recording.
During the CDDA disc mode, each time you press the REC SPEED button on the remote control, the recording speed will change as follows:
- When you record from the tuner or an external source, you cannot change the recording speed.
If you select HIGH SPEED RECORD, sound is not produced during the recording. - If you connect the microphone, you have one recording speed mode available: NORMAL SPEED RECORD.
During recording, if you disconnect the microphone, the recording will stop. If you reconnect the microphone, the recording will not restart.
I NOTE I
Even when HIGH SPEED RECORD is set, recording may not be made in x4 speed depending on the used USB storage device.
Special Sound Effects
Selecting PRESET EQ Mode
Your Hi-Fi Component system provides predefined equalizer settings that are optimized for particular music genre.
- Press the PRESET EQ button.
Each time you press the PRESET EQ button repeatedly, or press the PRESET EQ button, and then turn the VOLUME/SEARCH JOG control on the product, the mode will change as follows:
HIP HOP ROCK JAZZ CLASSIC ELECTRONIC FLAT ARABIC MUSIC PERSIAN MUSIC GENGE BONGO RHUMBA ESKISTA AFROPOP1 AFROPOP2 INDIAN POP PARTY POP
- After selecting the desired mode, Use the adjusting JOG for each 80Hz, 200Hz, 800Hz, 2kHz and 8kHz levels to fine tune EQ.
- After adjusting your desired band among the PRESET EQs, press the MEMORY button to display the "SAVE TO USER EQ". The adjusted EQ is then saved as USER EQ.
I NOTE I
Preset EQ Default value is HIP HOP.
Selecting USER EQ Mode
USER EQ mode shows up to 5 equalizer bands according to the user's setup.
- To configure the EQ manually, press USER EQ button. You can adjust levels manually.
- Use the adjusting JOG for each 80Hz, 200Hz, 800Hz, 2kHz and 8kHz levels to fine tune EQ.
NOTES
When the Hi-Fi Component is recording, the EQ function is turned off automatically and is unavailable.
If no buttons are pressed within 8 seconds, your settings will automatically be cancelled and the previous settings will be saved.
The PRESET EQ mode may be different depending on your region.
When switched to a PRESET EQ mode by using the PRESET EQ button, the selected EQ mode is activated after 2 seconds.
You can apply the GIGA PARTY effect to the FOOTBALL, EQ functions.
Once switched to a PRESET EQ mode by using the PRESET EQ or button, the EQ screen will disappear.
FOOTBALL MODE function
The football mode brings greater realism to sports broadcasts.
- Press the FOOTBALL MODE button on the main unit or FOOTBALL button on the remote control. Each time you press this button, the mode changes as follows:
OFF ANNOUNCER STADIUM - To cancel this function, press the FOOTBALL MODE button on the main unit or FOOTBALL button on the remote control until "OFF" is displayed.
GIGA PARTY Function
The GIGA PARTY function amplifies the bass sound and provides twice the bass for powerful, realistic sound.
- Press the GIGA PARTY button on the main unit or the GIGA button on the remote control. Each time you press this button, the mode changes as follows:
GIGA PARTY ON GIGA PARTY OFF
- To cancel this function, press the GIGA PARTY button on the main unit or GIGA button on the remote control until "GIGA PARTY OFF" is displayed.
BEAT WAVING Function
The Beat Waving function lets you change the Speaker LED display mode.
1. Press the BEAT WAVING button on the main unit or on the remote control. Each time you press this button, the mode changes as follows:
STARDUST EMERALD MOON SOLAR
BOMB SHOOTING STAR STAR PARTY
1 PARTY 2 FUN 1 FUN 2 PURE FRESH LOVE JOY SUNSET SUNRISE NATURE 1 NATURE 2 WAVE 1 WAVE
2 AURORA OFF
- If you select the GIGA PARTY ON at GIGA PARTY mode
1) If the BEAT WAVING is not set to STARDUST, EMERALD MOON, SOLAR BOMB, SHOOTING STAR or STAR modes, it will automatically switch to one of those, at random.
2) If selected BEAT WAVING is one of the 5 listed modes, it is maintained.
3) You can select another general mode by pressing the BEAT WAVING button.
NOTE
If you select BEAT WAVING OFF, all the speaker LED lighting is turned off.
DJ BEAT Function
The DJ Beat function lets you turn on the DJ Beat sound effect functions. The level of each effect is adjustable.
Press the DJ BEAT button on the remote control or on the main unit.
Each time you press this button, the mode changes as follows:
|IMPORTANT |
You can set each of the DJ Beat functions from -15 to +15. The initial setting for all functions is 0.
Functions
- FLANGER: Creates an effect similar to the sound of a jet engine revving up and down.
- CHORUS: Creates an effect similar to a singing chorus.
WAHWAH:Creates a 'Wah\~ Wah\~'effect.
TREMOLO: Repeatedly and rapidly turns the volume up and down.
FUZZ: Distorts the original sound to make it harder and harsher.
PHASER: Alters the original sound from clear to dull.
SLAPBACK: Creates the effect of a slapback echo following the original sound.
DJ BEAT OFF:Turns off this function.
NOTES
You can control the intensity of the effect with the FOLDER-, + button.
To cancel an effect, press the effect's button again.
You can also control the effect using the EFFECT-, + button on the remote control.
Use the FOLDER-, + button to control the intensity of the effect that was activated last. For example, if you activated the WahWah effect and then the Panning effect, the FOLDER-, + button will control the Panning effect.
To control the intensity of the effect you applied first, press the button of effect that you applied last to turn it off. Then, you can use the FOLDER-, + button to control the intensity of the first effect.
+PANNING Function
Increases the left and right speaker's output in turn and makes it seem as if the sound is moving from side to side.
I NOTE I
To apply the PANNING effect to another effect, press the +PANNING button when the other effect is active or press another effect button when the PANNING effect is active.
NON-STOP MUSIC RELAY Function
The NON-STOP MUSIC RELAY function plays music continuously without an interval between tracks/files. If there were two mp3 files, it skips to the next file's 10 seconds from the start position when the previous track reaches its 10 seconds before the end position.
Press the NON-STOP MUSIC RELAY button on the main unit or NON-STOP RELAY button on the remote control.
Each time you press this button, the mode changes as follows:
NON-STOP RELAY ON NON-STOP RELAY OFF
NOTE
This function is only available during playback of a CD/USB.
TEMPO Function
Use this to change the TEMPO while music is playing.
- During playback (CD-DA/MP3/WMA), press the TEMPO button on the remote control or on the main unit.
- Select the desired TEMPO by using the EFFECT-, + button on the remote control or VOLUME/SEARCH JOG on the main unit.
NOTES
You can set each of the TEMPO functions from -10 to +10. The initial setting for all functions is 0.
TEMPO Function does not operate in the Bluetooth, TV SoundConnect, TUNER and AUX mode.
When you turn TEMPO off, all TEMPO settings are lost.
BOOTING SOUND Function
When the Booting Sound Function is on, your Hi-Fi component demonstrates it's audio prowess as it boots up.
- Press the product's GIGA PARTY button or the remote control's GIGA button for about 3 seconds. The BOOTING SOUND menu appears on the display panel.
- Press the product's GIGA PARTY button or the remote control's GIGA button for about 3 seconds to turn the BOOTING SOUND.
PARTY BEAT Function
The PARTY BEAT function provides percussion sound effect by tapping on the pads with hands. According to the percussion dynamics, it provides lifelike sound effects.
- Press the PARTY BEAT button on the main unit to toggle PARTY BEAT ON or PARTY BEAT OFF. Display panel shows current PARTY BEAT status if this button pushed first.
- Select the percussion sound by keying the PARTY SOUND or PARTY SOUND button during PARTY BEAT ON.
CAUTION
Do not hit the pad with things other than your palm to avoid damage to the product. (e.g.: drumstick, club, etc.)
Check the volume before using the pad.
A sudden loud noise may startle the elderly, infirm, children or those who are pregnant.
Hitting the percussion pad with excessive force may damage the inserted CD's surface or may cause malfunction of the product.
NOTES
Gently tap with your bare palm on the circular pad.
This function only works when both vibration and touch are recognized.
Too frequent tapping may cause an intermittent stuttering.
I MANAGEMENT I
Do not put things on the percussion pad (coffee, water, liquid) and keep its surface clear of dust.
≈ Be careful not to contaminate the pad when using it. When cleaning it, use a soft brush or wet towel.
To prevent deterioration and denaturing of the rubber pad, avoid exposing the product to direct sunlight, high temperature or high humidity to excess.
Software Update
Samsung may offer updates for the product's system firmware in the future.
If an update is offered, you can update the firmware by connecting a USB device with the firmware update stored on it to the USB port on your product.
Note that if there are multiple update files, you must load them onto the USB device singly and use them to update the firmware one file at a time.
Please visit samsung.com or contact the Samsung Call Center to receive more information about downloading updates files.
- Select USB function, insert a USB device containing the firmware update into the USB port on the main unit.
- Updating firmware may not work properly if audio files supported by the product are stored in the USB storage device.
- Do not disconnect the power or remove the USB device while updates are being applied. The main unit will turn off automatically after completing the firmware update.
After the update, all settings are reset to their factory default settings. We recommend you write down your settings so that you can easily reset them after the update.
If the firmware fails to update, we recommend formatting the USB device in FAT16/FAT32 and trying again.
Functions
- Once the software update is completed, turn on the product with no disc inserted. The "NO DISC" message appears on the display. Press and hold the STOP button on the main unit for longer than 5 seconds. "INITIAL" appears on the display and the unit powers off. The upgrade is complete.
- Do not format the USB device in the NTFS format. The product does not support the NTFS file system.
Depending on the manufacturer, some USB devices may not be supported.
If the firmware fails to update, most functions will become inoperable and "PLEASE UPDATE MPEG SW" will appear on the display. Update the firmware again.
Disc and format Compatibility
This product does not support Secure (DRM) Media files.
CD-R Discs
- Some CD-R discs may not be playable depending on the disc recording device (CD-Recorder or PC) and the condition of the disc.
Use 650MB/74 minute CD-R discs. Do not use CD-R discs over 700MB/80 minutes as they may not be played back. - Some CD-RW (Rewritable) media may not be playable.
Only CD-Rs that are properly "closed" can be fully played. If the session is closed, but the disc is left open, you may not be able to fully play the disc.
MP3-CD Discs
Only CD-R discs with MP3 files in ISO 9660 or Joliet format can be played.
- MP3 file names should contain no blank spaces or special characters (. / = +) .
Use discs recorded with a compression/ decompression data rate greater than 128Kbps.
Only a consecutively written multisession disc can be played. If there is a blank segment in the Multisession disc, the disc can be played only up to the blank segment.
- If the disc is not closed, it will take longer to begin playback and not all of the recorded files may play.
- For files encoded in the Variable Bit Rate (VBR) format, (i.e. files encoded in both low bit rate and high bit rate - 32Kbps ~ 320Kbps), the sound may skip during playback.
A maximum of 999 files can be played per CD.
Supported Audio formats
| File Extension | Audio Codec | Sampling Rate | Bit Rate |
| *.mp3 | MPEG 1 Layer3 | 16KHz ~ 48KHz | 80Kbps ~ 320Kbps |
| MPEG 2 Layer3 | 16KHz ~ 48KHz | 80Kbps ~ 320Kbps | |
| MPEG 2.5 Layer3 | 16KHz ~ 48KHz | 80Kbps ~ 320Kbps | |
| *.wma | Wave_Style_ MSAudio1 | 16KHz ~ 48KHz | 56Kbps ~ 128Kbps |
| Wave_Style_ MSAudio2 | 16KHz ~ 48KHz | 56Kbps ~ 128Kbps |
NOTES
Does not support WMA Professional codec.
The above table shows supported sampling rates and bit rates. Files of not supported formats may not be played properly.
Appendix
Troubleshooting
Refer to the chart below when this product does not function properly. If the problem you are experiencing is not listed below or if the instructions below do not help, turn off the product, disconnect the power cord, and contact the nearest authorized dealer or Samsung Electronics Service Center.
| Symptom Check/Remedy | |
| I cannot eject the disc. • Is the power cord plugged securely into the outlet? • Turn off the power and then turn it back on. | |
| Playback does not start immediately when the Play/Pause button is pressed. | • Are you using a deformed disc or a disc with scratches on the surface? • Wipe the disc clean. |
| Sound is not produced. • No sound | is heard during fast playback, slow playback, and step motion playback. • Are the speakers connected properly? Is the speaker setup correctly customized? • Is the disc severely damaged? |
| The remote control does not work. | • Is the remote control being operated within its operational angle and distance range? • Are the batteries drained? |
| The product is not working. (Example: The power goes out or the front panel buttons don't work, or you hear a strange noise.) The product is not working normally. | • Press th● button (on front panel) for more than 5 seconds with no disc inside. The initialization message appears on the screen, and the power will turn off automatically. When you turn your product on again, all the settings will be reset. Don't use this unless absolutely necessary. |
| Can't receive radio broadcast. • Is the antenna connected properly? • If the antenna's input signal is weak, install an external FM antenna in an area with good reception. | |
Appendix
Specifications
| General | Weight | Main unit 8.3 Kg | |
| Speaker 30.6 Kg x 2 | |||
| Dimensions | Main unit 525 (W) x 238 (H) x 408 (D) mm | ||
| Speaker 561 (W) x 752 (H) x 503 (D) mm | |||
| Operating Temperature Range | 5°C~35°C | ||
| Operating Humidity Range 10 % to 75 % | |||
| FM Tuner | Signal/Noise ratio 55 dB | ||
| Usable sensitivity 10 dB | |||
| Total harmonic distortion 1 % | |||
| CD Disc | CD : 12 cm (COMPACT DISC) | Reading Speed : 4.8 ~ 5.6 m/sec. | |
| Maximum Play Time : 74 min. | |||
| Amplifier | Front speaker output 850W/CH (4Ω) | ||
| Subwoofer output 850W/CH (4Ω) | |||
| Frequency range 22Hz~20KHz | |||
| S/N Ratio 65 dB | |||
| Channel separation 60 dB | |||
| Input sensitivity AUX IN1 1.2V, AUX IN2 2.0V | |||
*: Nominal specification
Samsung Electronics Co., Ltd reserves the right to change the specifications without notice.
- Weight and dimensions are approximate.
- Design and specifications are subject to change without prior notice.
- For the power supply and Power Consumption, refer to the label attached to the product.
Open Source Announcement
To send inquiries and requests regarding open sources, contact Samsung via Email (oss.request@samsung.com).
- Hereby, Samsung Electronics, declares that this equipment is in compliance with the essential requirements and other relevant provisions of Directive 1999/5/EC.
The original Declaration of Conformity may be found at http://www.samsung.com, go to Support > Search Product Support and enter the model name.
This equipment may be operated in Jordan.


Contact SAMSUNG WORLD WIDE
If you have any questions or comments relating to Samsung products, please contact the SAMSUNG customer care centre.
| Country Contact Centre | Web Site |
| ■ China | |
| CHINA 400-810-5858 | www.samsung.com/cn/support |
| HONG KONG (852) | www.samsung.com/hk/support (Chinese)www.samsung.com/hk_en/support (English) |
| MACAU 0800 333 www.samsung.com/support | |
| ■ S.E.A | |
| SINGAPORE 1800 SAMSUNG(726-7864) | www.samsung.com/sg/support |
| AUSTRALIA 1300 362 603 | www.samsung.com.au/support |
| NEW ZEALAND 0800 726 786 | www.samsung.com/nz/support |
| VIETNAM 1800 588 889 | www.samsung.com/vn/support |
| THAILAND 0-2689-3232,1800-28-3232 | www.samsung.com/th/support |
| MYANMAR +95-01 -2399-888 www.samsung.com/support | |
| MALAYSIA 1800-88-9999603-77137477 (Overseas contact) | www.samsung.com/my/support |
| INDONESIA 021-5699777708001128888 | www.samsung.com/id/support |
| PHILIPPINES 1-800-10-726/864 [PLDT]02-4222111 [Other landline] | www.samsung.com/ph/support |
| TAIWAN 0800-329999 | www.samsung.com/tw/support |
| JAPAN 0120-363 905 | www.samsung.com/jp/support |
| ■ S.W.A | |
| INDIA 1800 3000 8282 - Toll Free1800 266 8282 - Toll Free | www.samsung.com/in/support |
| BANGLASHEN 096 12300300 | www.samsung.com/in/support |
| SRI LANKA 941175 540540 www.samsung.com/support | |
| ■ MENA | |
| EGYPT 08000-726786416580 | www.samsung.com/eg/support |
| ALGERIA 021 36 11 00 | www.samsung.com/n_africa/support |
| IRAN 021-8255 [CE] | www.samsung.com/iran/support |
| SAUDI ARABIA 8002474357 | www.samsung.com/sa/supportwww.samsung.com/sa_en/support (English) |
| Country Contact Centre | Web Site |
| PAKISTAN | 0800-Samsung (72678) |
| TUNISIA 80-1000-12 | www.samsung.com/n_africa/support |
| U.A.E | 800-SAMSUNG (800-726 7864) |
| OMAN 800-SAMSUNG (800-726 7864) | www.samsung.com/ae/support (English) |
| KUWAIT 183-CALL (183-2255) | www.samsung.com/ae_ar/support (Arabic) |
| BAHRAIN 8000-GAM (8000-4726) | |
| QATAR | 800-CALL (800-2255) |
| TURKEY 444 77 1 | |
| JORDAN | 0800-22273 06 5777444 |
| SYRIA | 18252273 |
| MOROCCO 080 100 22 55 | www.samsung.com/n_africa/support |
| ■ Africa | |
| SOUTH AFRICA 08 | 60 SAMSUNG (726 7864) |
| BOTSWANA 8007 | 260000 |
| NAMILBIA | 08 197 267 864 |
| ZAMBIA 0211 35 | 0370 |
| MAURITIUS | 23052574020 |
| REUNION 262508 | 669 |
| MOZAMBIQUE | 847267864 / 827267864 |
| NIGERIA | 0800-726-7864 |
| Shana | 0800-10077 0302-20077 |
| Cote D'Ivoire 8000 | 0077 |
| SENEGAL | 800-00-0077 |
| CAMEROON | 7095-0077 |
| KENYA | 0800 545 545 |
| UCANDA | 0800 300 300 |
| TANZANIA | 0800 755 755 / 0685 889 900 |
| RWANDA 9999 | |
| BURUNDI 200 | |
| DRC | 499999 |
| SUDAN | 1969 |
MX-JS9000
PREMIUM Hi-Fi Component
S OBC = S BOC + S BOC - S BOC
Samsung
aLoLJIcGaoJcJgao
JLx no zai aill
www.samsung.com/register
SAMSUNG
a_0 < b_0 < 1
#
(aI11g)slblllai8aayssaoaljollaolal aIALL aIoc 2nloall alal gogolgol
Jslal"Jas g5g5 Jl jollln 1

aagallwla jll i

4
11 5
20 111111111111111111111111
4
3B a 10000000000000000000000000000000000000000000000
aaii 111 i j 1 1 1 1 1 1 1 1 1 1 1 1 1 1 1 1 1 1 1 1 1 1 1 1 1 1 1 1
CLASS 1 LASER PRODUCT
KLASSE 1 LASER PRODUKT
LUOKAN 1 LASER LAITE
KCLASS 1 LASER APPARAT
PRODUCTO LASER CLASE 1
x1 = 2,x2 = - 4
aagbgl jlll jll llo w
1 aai joo jz
jLgai 1040.10
2007 g24 50
(FDA 21 CFR).

1 1c aJgao aLwao Lc cLqWg 1
10000000000000000000000000000000000000000000000000000000000000000000000000000000000
1 1
8 Jie 11 Jg wgl s gao 0 2 1 1 1 1 1 1 1 1 1 1 1 1 1 1
LgJrJgJU
yL
gJLwJU LAA JU JSCA 1111111111111111111111
Jsi jill Jaiil chaw aaslo jia
Laae 2 aal
aal 1c abxg jgll aai

151 g 151
aaii i aaii jaii 15
aiaiaiaiaiaiaiaiaiaiaiaiaiaiaiaiaiaiaiaiaiaiaiaiaiaiaiaiaiaiaiaiaiaiaiaiaiaiaiaiaiaiaiaiaiaiaiaiaiaiaiaiaiaiaiaiaiaiaiaiaiaiaiaiaiaiaiaiaiaiaiaiaiaiaiaiaia
JlJlJlJnOgoyyawalGwol. bllic 1LJI
.
aagaiolgaggaojiaio
aag aai bai Lao aie g yabai haoi
#
aII aI 1000
-
1
-
wliio chw glc
-
-
·
-ssjaiJLlJ L
15
g 1
acwll jllc wll pwl 13
13
/lll llll/lll/lll 13
Lol USB,14> 14
USB 14
acmmJnuee 14
MY LIST a.o.1og pl.sui 14
LgJzj"ziaJl"JLwJzC 15
gJ 15
15
Hi-Fi-Component 16
Hi-Fi-Component 17
JG Hi-Fi-Component 17
g
gogglipssr17
18
Hi-Fi Component 18
SoundConnect go goljgolw
Hi-Fi Component 18
Hi-Fi Component 18
My Karaoke 18
19
19
19
a20
LoXuI CLogLeo
2
3
3
p1
aoloLg1 a>gl 6
a. a1s11 a>g11 7
8
19
LcLwJ J9
LcLai Jai iie Lgicjy jcb19
aLgJ1
Samsung Audio Remote 10
App
Samsung Audio Remote App 10
Samsung Audio Remote Jg 10
jaiil aibg 10
10
DEMO a log 10
logiio 11
logoo 11
CD/MP3/CD-R 11
JLWU 11
Jll 12
logonoll
jol 12
logoo
cogaI a.bg 20
aclwbl20
20
gol 22
22
Jwll 22
LwJ LwJ 22
Juswllacw 24
24
PRESET EQ 24
USEREQ 24
FOOTBALL MODE a.bg 25
GIGA PARTY 25
BEAT WAVING 25
DJBEAT a2b9 25
+PANNING 26
NON-STOP MUSIC RELAY 26
TEMPO 26
BOOTING SOUND a.b.27
PARTYBEATa,bg 27
27
28
aogcagllgaglll 28
[3 + \left( {x - }\right) = 0]
Lg3Lwlgcl281 LwL 29
30
| J ! J ! J ! J ! J ! J ! J ! J ! J ! J ! J ! J ! J ! J ! J ! J ! J ! J ! J ! J ! J ! J ! J ! J ! J ! J ! J ! J ! J ! J ! J ! J ! J ! J ! J ! J ! J ! J ! J ! J ! J ! J ! J ! J ! J ! J ! J ! J ! J ! J ! J !J ! J ! J ! J ! J ! J ! J ! J ! J ! J ! J ! J ! J ! J ! J ! J ! J ! J ! J ! J ! J ! J ! J ! J ! J ! J ! J ! J ! J ! J ! J ! J ! J ! J ! J ! J ! J ! J ! J ! J ! J ! J ! J ! J ! J ! J ! J ! J ! J ! J! J ! J ! J ! J ! J ! J ! J ! J ! J ! J ! J ! J ! J ! J ! J ! J ! J ! J ! J ! J ! J ! J ! J ! J ! J ! J ! J ! J ! J ! J ! J ! J ! J ! J ! J ! J ! J ! J ! J ! J ! J ! J ! J ! J ! J ! J ! J ! J ! J ! J!J!J!J!J!J!J!J!J!J!J!J!J!J!J!J!J!J!J!J!J!J!J!J!J!J!J!J!J!J!J!J!J!J!J!J!J!J!J!J!J!J!J!J!J!J!J!J!J!J!J! J!J!J!J!J!J!J!J!J!J!J!J!J!J!J!J!J!J!J!J!J!J!J!J!J!J!J!J!J!J!J!J!J!J!J!J!J!J!J!J!J!J!J!J!J!J!J!J!J!J!J!J!J!J!J!J!J!J!J!J!J!J!J!J!J!J!J!J!J!J!J!J!J!J!J!J!J!J!J!J!J!J!J!J!J!J!J!J!J!J!J!J!J!J!J!J!J!J!J!J!J!J!J!J!J!J!J!J!J!J!J!J!J!J!J!J!J!J!J!J!J!J!J!J!J!J!J!J!J!J!J!J!J!J!J!J!J!J!J!J!J!J!J!J!J!J!J!J!J ...... |
| CD J J J J J J J J J J J J J J J J J J J J J J J J J J J J J J J J J J J J J J J J J J J J J J J J J J C J J J J J J J J J J J J J J J J J J J J J J J J J J J J J J J J J J J J J J J J J J J J J J J J J R J J J J J J J J J J J J J J J J J J J J J J J J J J J J J J J J J J J J J J J J J J J J J J J J J L J J J J J J J J J J J J J J J J J J J J J J J J J J J J J J J J J J J J J J J J J J J J J J J J J JJ JJ JJ JJ JJ JJ JJ JJ JJ JJ JJ JJ JJ JJ JJ JJ JJ JJ JJ JJ JJ JJ JJ JJ JJ JJ JJ JJ JJ JJ JJ JJ JJ JJ JJ JJ JJ JJ JJ JJ JJ JJ JJ JJ JJ JJ JJ JJ JJ JJ J J J J J J J J J J J J J J J J J J J J J J J J J J J J J J J J J J J J J J J J J J J J J J J J J I J J J J J J J J J J J J J J J J J J J J J J J J J J J J J J J J J J J J J J J J J J J J J J J J J JI JI JI JI JI JI JI JI JI JI JI JI JI JI JI JI JI JI JI JI JI JI JI JI JI JI JI JI JI JI JI JI JI JI JI JI JI JI JI JI JI JI JI JI JI JI JI JI JI JI J J J J J J J J J J J J J J J J J J J J J J J J J J J J J J J J J J J J J J J J J J J J J J J J J JD JD JD JD JD JD JD JD JD JD JD JD JD JD JD JD JD JD JD JD JD JD JD JD JD JD JD JD JD JD JD JD JD JD JD JD JD JD JD JD JD JD JD JD JD JD JD JD JD JD JC JC JC JC JC JC JC JC JC JC JC JC JC JC JC JC JC JC JC JC JC JC JC JC JC JC JC JC JC JC JC JC JC JC JC JC JC JC JC JC JC JC JC JC JC JC JC JC JC JC JD JD JD JD JD JD JD JD JD JD JD JD JD JD JD JD JD JD JD JD JD JD JD JD JD JD JD JD JD JD JD JD JD JD JD JD JD JD JD JD JD JD JD JD JD JD JD JD JD J J J J J J J J J J J J J J J J J J J J J J J J J J J J J J J J J J J J J J J J J J J J J J J J J JB JB JB JB JB JB JB JB JB JB JB JB JB JB JB JB JB JB JB JB JB JB JB JB JB JB JB JB JB JB JB JB JB JB JB JB JB JB JB JB JB JB JB JB JB JB JB JB JB JB JC JC JC JC JC JC JC JC JC JC JC JC JC JC JC JC JC JC JC JC JC JC JC JC JC JC JC JC JC JC JC JC JC JC JC JC JC JC JC JC JC JC JC JC JC JC JC JC JC J JC JC JC JC JC JC JC JC JC JC JC JC JC JC JC JC JC JC JC JC JC JC JC JC JC JC JC JC JC JC JC JC JC JC JC JC JC JC JC JC JC JC JC JC JC JC JC JC JC JC JC JC JC JC JC JC JC JC JC JC JC JC JC JC JC JC JC JC JC JC JC JC JC JC JC JC JC JC JC JC JC JC JC JC JC JC JC JC JC JC JC JC JC JC JC JC JC JC JC JB JB JB JB JB JB JB JB JB JB JB JB JB JB JB JB JB JB JB JB JB JB JB JB JB JB JB JB JB JB JB JB JB JB JB JB JB JB JB JB JB JB JB JB JB JB JB JB JB JD JD JD JD JD JD JD JD JD JD JD JD JD JD JD JD JD JD JD JD JD JD JD JD JD JD JD JD JD JD JD JD JD JD JD JD JD JD JD JD JD JD JD JD JD JD JD JD JD JB JB JB JB JB JB JB JB JB JB JB JB JB JB JB JB JB JB JB JB JB JB JB JB JB JB JB JB JB JB JB JB JB JB JB JB JB JB JB JB JB JB JB JB JB JB JB JB JB J JC JC JC JC JC JC JC JC JC JC JC JC JC JC JC JC JC JC JC JC JC JC JC JC JC JC JC JC JC JC JC JC JC JC JC JC JC JC JC JC JC JC JC JC JC JC JC JC JD JC JC JC JC JC JC JC JC JC JC JC JC JC JC JC JC JC JC JC JC JC JC JC JC JC JC JC JC JC JC JC JC JC JC JC JC JC JC JC JC JC JC JC JC JC JC JC JC JD JB JC JC JC JC JC JC JC JC JC JC JC JC JC JC JC JC JC JC JC JC JC JC JC JC JC JC JC JC JC JC JC JC JC JC JC JC JC JC JC JC JC JC JC JC JC JC JC JC JD JEVU JEVU JEVU JEVU JEVU JEVU JEVU JEVU JEVU JEVU JEVU JEVU JEVU JEVU JEVU JEVU JEVU JEVU JEVU JEVU JEVU JEVU JEVU JEVU JEVU JEVU |
aai
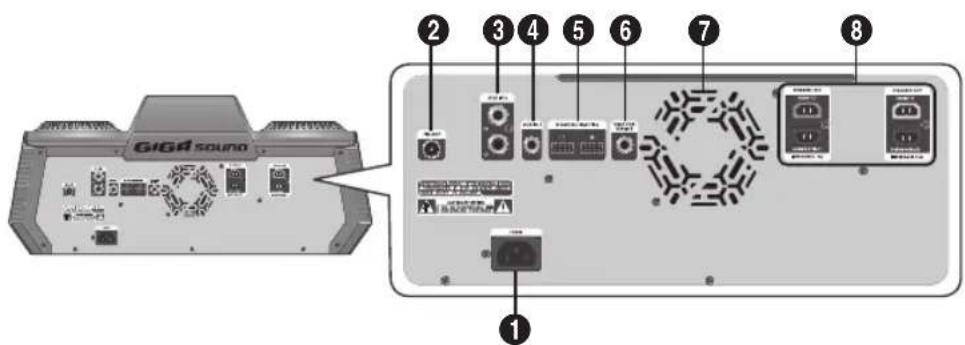
| .العربية الحرفية بعبيعة الحرفية الحرفية الحرفية الحرفية الحرفية الحرفية الحرفية الحرفية الحرفية الحرفية الحرفية الحرفية الحرفية الحرفية الحرفية الحرفية الحرفية الحرفية الحرفية الحرفية الحرفية الحرفية الحرفية الحرفية الحرفية الحرفية الحرفية الحرفية الحرفية الحرفية الحرفية الحرفية الحرفية الحرفية EXCELLENTLY | 5 |
| ONLY FOR SERVICE الصحيى. الإستعمال. الإستعمال الإستعمال الإستعمال الإستعمال الإستعمال الإستعمال الإستعمال الإستعمال الإستعمال الإستعمال الإستعمال الإستعمال الإستعمال الإستعمال الإستعمال الإستعمال الإستعمال الإستعمال الإستعمال الإستعمال الإستعمال الإستعمال الإستعمال الإستUTION الإستUTION الإستUTION الإستUTION الإستUTION الإستUTION الإستUTION الإستUTION الإستUTION الإستUTION الإستUTION الإستUTION الإستUTION الإستUTION الإستUTION الإستUTION الإستUTION الإستUTION الإستUTION الإستUTION الإستUTION الإستUTION الإستUTION الإستUTION الإستUTION الإستPTION الإستPTION الإستPTION الإستPTION الإستPTION الإستPTION الإستPTION الإستPTION الإستPTION الإستPTION الإستPTION الإستPTION الإستPTION الإستPTION الإستPTION الإستPTION الإستPTION الإستPTION الإستPTION الإستPTION الإستPTION الإستPTION الإستPTION الإستPTION الإستPTION الإستUTION الإستUTION الإستUTION الإستUTION الإستUTION الإستUTION الإستUTION الإستUTION الإستUTION الإستUTION الإستUTION ال,en ENGLISH ENGLISH ENGLISH ENGLISH ENGLISH ENGLISH ENGLISH ENGLISH ENGLISH ENGLISH ENGLISH ENGLISH ENGLISH ENGLISH ENGLISH ENGLISH ENGLISH ENGLISH ENGLISH ENGLISH ENGLISH ENGLISH ENGLISH ENGLISH ENGLISH ENGLISH ENGLISH ENGLISH ENGLISH ENGLISH ENGLISH ENGLISH ENGLISH ENGLISH | |
| 2.2 .العربية الحرفية الحرفية الحرفية الحرفية EXCELLENTLY | 8 |
| LINUX. الإستعمال. الإستUTION ال,en ENGLISH ENGLISH ENGLISH ENGLISH ENGLISH ENGLISH ENGLISH ENGLISH ENGLISH ENGLISH ENGLISH ENGLISH ENGLISH ENGLISH ENGLISH ENGLISH ENGLISH ENGLISH ENGLISH ENGLISH ENGLISH ENGLISH ENGLISH ENGLISH ENGLISH ENGLISH ENGLISH ENGLISH ENGLISH ENGLISH ENGLISH | 8 |
| SUBWOOFER JUSION JOULY JOULY JOULY JOULY JOULY JOULY JOULY JOULY JOULY JOULY JOULY JOULY JOULY JOULY JOULY JOULY JOULY JOULY JOULY JOULY JOULY JOULY JOULY JOULY JOULY JOULI JOULI JOULI JOULI JOULI JOULI JOULI JOULI JOULI JOULI JOULI JOULI JOULI JOULI JOULI JOULI JOULI JOULI JOULI JOULI JOULI JOULI JOULI JOULI JOULI JOULII JOULII JOULII JOULII JOULII JOULII JOULII JOULII JOULII JOULII JOULII JOULII JOULII JOULII JOULII JOULII JOULII JOULII JOULII JOULII JOULII JOULII JOULII JOULII JOULII JOULI JOULII JOULII JOULII JOULII JOULII JOULII JOULII JOULII JOULII JOULII JOULII JOULII JOULII JOULII JOULII JOULII JOULII JOULII JOULII JOULII JOULII JOULII JOULII JOULI JOULI JOULI JOULI JOULI JOULI JOULI JOULI JOULI JOULI JOULI JOULI JOULI JOULI JOULI JOULI JOULI JOULI JOULI JOULI JOULI JOULI JOULI JOULI JOULl JOULl JOULl JOULl JOULl JOULl JOULl JOULl JOULl JOULl JOULl JOULl JOULl JOULl JOULl JOULl JOULl JOULl JOULl JOULl JOULl JOULl JOULl JOULl JOULl JOULll JOULll JOULll JOULll JOULll JOULll JOULll JOULll JOULll JOULll JOULll JOULll JOULll JOULll JOULll JOULll JOULll JOULll JOULll JOULll JOULll JOULll JOULll JOULll JOULll JOULl JOULll JOULll JOULll JOULll JOULll JOULll JOULll JOULll JOULll JOULll JOULll JOULll JOULll JOULll JOULll JOULll JOULll JOULll JOULll JOULll JOULll JOULll JOULll JOULl JOULl JOULll JOULll JOULll JOULll JOULll JOULll JOULll JOULll JOULll JOULll JOULll JOULll JOULll JOULll JOULll JOULll JOULll JOULll JOULll JOULll JOULll JOULll JOULl JOULll JOULl JOULll JOULll JOULll JOULll JOULll JOULll JOULll JOULll JOULll JOULll JOULll JOULll JOULll JOULll JOULll JOULll JOULll JOULll JOULll JOULll JOULll JOULll JOULl JOULl JOULl JOULl JOULl JOULl JOULl JOULl JOULl JOULl JOULl JOULl JOULl JOULl JOULl JOULl JOULl JOULl JOULl JOULl JOULl JOULl JOULl JOULl JOUL l JOULl JOULl JOULl JOULl JOULl JOULl JOULl JOULl JOULl JOULl JOULl JOULl JOULl JOULl JOULl JOULl JOULl JOULl JOULl JOULl JOULl JOULl JOULl JOULl JOUL1 JOULl JOULl JOULl JOULl JOULl JOULl JOULl JOULl JOULl JOULl JOULl JOULl JOULl JOULl JOULl JOULl JOULl JOULl JOULl JOULl JOULl JOULl JOULl JOULl JOULI JOULl JOULl JOULl JOULl JOULl JOULl JOULl JOULl JOULl JOULl JOULl JOULl JOULl JOULl JOULl JOULl JOULl JOULl JOULl JOULl JOULl JOULl JOULl JOULll JOULl JOULl JOULl JOULl JOULl JOULl JOULl JOULl JOULl JOULl JOULl JOULl JOULl JOULl JOULl JOULl JOULl JOULl JOULl JOULl JOULl JOULl JOULl JOULll JOUL1 JOULl JOULl JOULl JOULl JOULl JOULl JOULl JOULl JOULl JOULl JOULl JOULl JOULl JOULl JOULl JOULl JOULl JOULl JOULl JOULl JOULl JOULl JOULl JOULll JOUL l JOULl JOULl JOULl JOULl JOULl JOULl JOULl JOULl JOULl JOULl JOULl JOULl JOULl JOULl JOULl JOULl JOULl JOULl JOULl JOULl JOULl JOULl JOULl JOULll JOULI JOULl JOULl JOULl JOULl JOULl JOULl JOULl JOULl JOULl JOULl JOULl JOULl JOULl JOULl JOULl JOULl JOULl JOULl JOULl JOULl JOULl JOULl JOULl JOUL1 JOUL1 JOUL1 JOUL1 JOUL1 JOUL1 JOUL1 JOUL1 JOUL1 JOUL1 JOUL1 JOUL1 JOUL1 JOUL1 JOUL1 JOUL1 JOUL1 JOUL1 JOUL1 JOUL1 JOUL1 JOUL1 JOUL1 JOUL1 JOUL1 JOULl JOULl JOULl JOULl JOULl JOULl JOULl JOULl JOULl JOULl JOULl JOULl JOULl JOULl JOULl JOULl JOULl JOULl JOULl JOULl JOULl JOULl JOULl JOUL1 JOULll JOULl JOULl JOULl JOULl JOULl JOULl JOULl JOULl JOULl JOULl JOULl JOULl JOULl JOULl JOULl JOULl JOULl JOULl JOULl JOULl JOULl JOULl JOULl JOUL1 JOULI JOULl JOULl JOULl JOULl JOULl JOULl JOULl JOULl JOULl JOULl JOULl JOULl JOULl JOULl JOULl JOULl JOULl JOULl JOULl JOULl JOULl JOULl JOULl JOULI JOULll JOULl JOULl JOULl JOULl JOULl JOULl JOULl JOULl JOULl JOULl JOULl JOULl JOULl JOULl JOULl JOULl JOULl JOULl JOULl JOULl JOULl JOULl JOULl JOULI JOUL1 JOUL1 JOUL1 JOUL1 JOUL1 JOUL1 JOUL1 JOUL1 JOUL1 JOUL1 JOUL1 JOUL1 JOUL1 JOUL1 JOUL1 JOUL1 JOUL1 JOUL1 JOUL1 JOUL1 JOUL1 JOUL1 JOUL1 JOUL1 JOULI JOUL1 JOUL1 JOUL1 JOUL1 JOUL1 JOUL1 JOUL1 JOUL1 JOUL1 JOUL1 JOUL1 JOUL1 JOUL1 JOUL1 JOUL1 JOUL1 JOUL1 JOUL1 JOUL1 JOUL1 JOUL1 JOUL1 JOUL1 JOULl JOUL1 JOUL1 JOUL1 JOUL1 JOUL1 JOUL1 JOUL1 JOUL1 JOUL1 JOUL1 JOUL1 JOUL1 JOUL1 JOUL1 JOUL1 JOUL1 JOUL1 JOUL1 JOUL1 JOUL1 JOUL1 JOUL1 JOUL1 JOULl JOULll JOULll JOULll JOULll JOULll JOULll JOULll JOULll JOULll JOULll JOULll JOULll JOULll JOULll JOULll JOULll JOULll JOULll JOULll JOULll JOULll JOULll JOULll JOUL1 JOUL1 JOUL1 JOUL1 JOUL1 JOUL1 JOUL1 JOUL1 JOUL1 JOUL1 JOUL1 JOUL1 JOUL1 JOUL1 JOUL1 JOUL1 JOUL1 JOUL1 JOUL1 JOUL1 JOUL1 JOUL1 JOUL1 JOUL1 JOULll JOULll JOULll JOULll JOULll JOULll JOULll JOULll JOULll JOULll JOULll JOULll JOULll JOULll JOULll JOULll JOULll JOULll JOULll JOULll JOULll JOULll JOULll JOULll JOUL1 JOULl JOUL1 JOUL1 JOUL1 JOUL1 JOUL1 JOUL1 JOUL1 JOUL1 JOUL1 JOUL1 JOUL1 JOUL1 JOUL1 JOUL1 JOUL1 JOUL1 JOUL1 JOUL1 JOUL1 JOUL1 JOUL1 JOUL1 JOULl JOULl JOUL1 JOUL1 JOUL1 JOUL1 JOUL1 JOUL1 JOUL1 JOUL1 JOUL1 JOUL1 JOUL1 JOUL1 JOUL1 JOUL1 JOUL1 JOUL1 JOUL1 JOUL1 JOUL1 JOUL1 JOUL1 JOUL1 JOULl JOUL1 JOULl JOUL1 JOUL1 JOUL1 JOUL1 JOUL1 JOUL1 JOUL1 JOUL1 JOUL1 JOUL1 JOUL1 JOUL1 JOUL1 JOUL1 JOUL1 JOUL1 JOUL1 JOUL1 JOUL1 JOUL1 JOUL1 JOUL1 JOULI JOUL1 JOULl JOUL1 JOUL1 JOUL1 JOUL1 JOUL1 JOUL1 JOUL1 JOUL1 JOUL1 JOUL1 JOUL1 JOUL1 JOUL1 JOUL1 JOUL1 JOUL1 JOUL1 JOUL1 JOUL1 JOUL1 JOUL1 JOUL1 JOULll JOULll JOULl JOULl JOULl JOULl JOULl JOULl JOULl JOULl JOULl JOULl JOULl JOULl JOULl JOULl JOULl JOULl JOULl JOULl JOULl JOULl JOULl JOULl JOULll JOULll JOULl JOULl JOULl JOULl JOULl JOULl JOULl JOULl JOULl JOULl JOULl JOULl JOULl JOULl JOULl JOULl JOULl JOULl JOULl JOULl JOULl JOULl JOUL1 JOUL1 JOULl JOULl JOULl JOULl JOULl JOULl JOULl JOULl JOULl JOULl JOULl JOULl JOULl JOULl JOULl JOULl JOULl JOULl JOULl JOULl JOULl JOULl JOULll JOULl JOULll JOULl JOULl JOULl JOULl JOULl JOULl JOULl JOULl JOULl JOULl JOULl JOULl JOULl JOULl JOULl JOULl JOULl JOULl JOULl JOULl JOULl JOULl JOULll JOULl JOUL1 JOUL1 JOUL1 JOUL1 JOUL1 JOUL1 JOUL1 JOUL1 JOUL1 JOUL1 JOUL1 JOUL1 JOUL1 JOUL1 JOUL1 JOUL1 JOUL1 JOUL1 JOUL1 JOUL1 JOUL1 JOUL1 JOUL1 JOULll JOULl JOULl JOULl JOULl JOULl JOULl JOULl JOULl JOULl JOULl JOULl JOULl JOULl JOULl JOULl JOULl JOULl JOULl JOULl JOULl JOULl JOULl JOULll JOUL1 JOUL1 JOUL1 JOUL1 JOUL1 JOUL1 JOUL1 JOUL1 JOUL1 JOUL1 JOUL1 JOUL1 JOUL1 JOUL1 JOUL1 JOUL1 JOUL1 JOUL1 JOUL1 JOUL1 JOUL1 JOUL1 JOUL1 JOULl JOULI JOULl JOULl JOULl JOULl JOULl JOULl JOULl JOULl JOULl JOULl JOULl JOULl JOULl JOULl JOULl JOULl JOULl JOULl JOULl JOULl JOULl JOULl JOULll JOULll JOUL1 JOUL1 JOUL1 JOUL1 JOUL1 JOUL1 JOUL1 JOUL1 JOUL1 JOUL1 JOUL1 JOUL1 JOUL1 JOUL1 JOUL1 JOUL1 JOUL1 JOUL1 JOUL1 JOUL1 JOUL1 JOUL1 JOULl JOULl JOULll JOULll JOULll JOULll JOULll JOULll JOULll JOULll JOULll JOULll JOULll JOULll JOULll JOULll JOULll JOULll JOULll JOULll JOULll JOULll JOULll JOULll JOUL1 JOUL1 JOULl JOULl JOULl JOULl JOULl JOULl JOULl JOULl JOULl JOULl JOULl JOULl JOULl JOULl JOULl JOULl JOULl JOULl JOULl JOULl JOULl JOULl JOUL1 JOUL1 JOULll JOULll JOULll JOULll JOULll JOULll JOULll JOULll JOULll JOULll JOLL1 JOLL1 JOLL1 JOLL1 JOLL1 JOLL1 JOLL1 JOLL1 JOLL1 JOLL1 JOLL1 JOLL1 JOLL1 JOLL1 JOLL1 JOLL1 JOLL1 JOLL1 JOLL1 JOLL1 JOLLl JOLL1 JOLL1 JOLL1 JOLL1 JOLL1 JOLL1 JOLL1 JOLL1 JOLL1 JOLL1 JOLL1 JOLL1 JOLL1 JOLL1 JOLL1 JOLL1 JOLL1 JOLL1 JOLL1 JOLL2 |
| POWER • | 1 ### |
| FM ### | 2 ### |
| AUX IN 2 ### | 1 ### |
| AUX IN 2 ### | 2 ### |
| AUX IN 2 ### | 3 ### |
| AUX IN 2 ### | 4 ### |
| AUX IN 2 ### | 5 ### |
| AUX IN 2 ### | 6 ### |
| AUX IN 2 ### | 7 ### |
| AUX IN 2 ### | 8 ### |
| AUX IN 2 ### | 9 ### |
| AUX IN 2 ### | 10 ### |
| AUX IN 2 ### | 11 ### |
| AUX IN 2 ### | 12 ### |
| AUX IN 2 ### | 13 ### |
| AUX IN 2 ### | 14 ### |
| AUX IN 2 ### | 15 ### |
| AUX IN 2 ### | 16 ### |
| AUX IN 2 ### | 17 ### |
| AUX IN 2 ### | 18 ### |
| AUX IN 2 ### | 19 ### |
| AUX IN 2 ### | 20 ### |
| AUX IN 2 ### | 21 ### |
| AUX IN 2 ### | 22 ### |
| AUX IN 2 ### | 23 ### |
| AUX IN 2 ### | 24 ### |
| AUX IN 2 ### | 25 ### |
| AUX IN 2 ### | 26 ### |
| AUX IN 2 ### | 27 ### |
| AUX IN 2 ### | 28 ### |
| AUX IN 2 ### | 29 ### |
| AUX IN 2 ### | 30 ### |
| AUX IN 2 ### | 31 ### |
| AUX IN 2 ### | 32 ### |
| AUX IN 2 ### | 33 ### |
| AUX IN 2 ### | 34 ### |
| AUX IN 2 ### | 35 ### |
| AUX IN 2 ### | 36 ### |
| AUX IN 2 ### | 37 ### |
| AUX IN 2 ### | 38 ### |
| AUX IN 2 ### | 39 ### |
| AUX IN 2 ### | 40 ### |
| AUX IN 2 ### | 41 ### |
| AUX IN 2 ### | 42 ### |
| AUX IN 2 ### | 43 ### |
| AUX IN 2 ### | 44 ### |
| AUX IN 2 ### | 45 ### |
| AUX IN 2 ### | 46 ### |
| AUX IN 2 ### | 47 ### |
| AUX IN 2 ### | 48 ### |
| AUX IN 2 ### | 49 ### |
| AUX IN 2 ### | 50 ### |
| AUX IN 2 ### | 51 ### |
| AUX IN 2 ### | 52 ### |
| AUX IN 2 ### | 53 ### |
| AUX IN 2 ### | 54 ### |
| AUX IN 2 ### | 55 ### |
| AUX IN 2 ### | 56 ### |
| AUX IN 2 ### | 57 ### |
| AUX IN 2 ### | 58 ### |
| AUX IN 2 ### | 59 ### |
| AUX IN 2 ### | 60 ### |
| AUX IN 2 ### | 61 ### |
| AUX IN 2 ### | 62 ### |
| AUX IN 2 ### | 63 ### |
| AUX IN 2 ### | 64 ### |
| AUX IN 2 ### | 65 ### |
| AUX IN 2 ### | 66 ### |
| AUX IN 2 ### | 67 ### |
| AUX IN 2 ### | 68 ### |
| AUX IN 2 ### | 69 ### |
| AUX IN 2 ### | 70 ### |
| AUX IN 2 ### | 71 ### |
| AUX IN 2 ### | 72 ### |
| AUX IN 2 ### | 73 ### |
| AUX IN 2 ### | 74 ### |
| AUX IN 2 ### | 75 ### |
| AUX IN 2 ### | 76 ### |
| AUX IN 2 ### | 77 ### |
| AUX IN 2 ### | 78 ### |
| AUX IN 2 ### | 79 ### |
| AUX IN 2 ### | 80 ### |
| AUX IN 2 ### | 81 ### |
| AUX IN 2 ### | 82 ### |
| AUX IN 2 ### | 83 ### |
| AUX IN 2 ### | 84 ### |
| AUX IN 2 ### | 85 ### |
| AUX IN 2 ### | 86 ### |
| AUX IN 2 ### | 87 ### |
| AUX IN 2 ### | 88 ### |
| AUX IN 2 ### | 89 ### |
| AUX IN 2 ### | 90 ### |
| AUX IN 2 ### | 91 ### |
| AUX IN 2 ### | 92 ### |
| AUX IN 2 ### | 93 ### |
| AUX IN 2 ### | 94 ### |
| AUX IN 2 ### | 95 ### |
| AUX IN 2 ### | 96 ### |
| AUX IN 2 ### | 97 ### |
| AUX IN 2 ### | 98 ### |
| AUX IN 2 ### | 99 ### |
| AUX IN 2 ### | 100 ### |
a
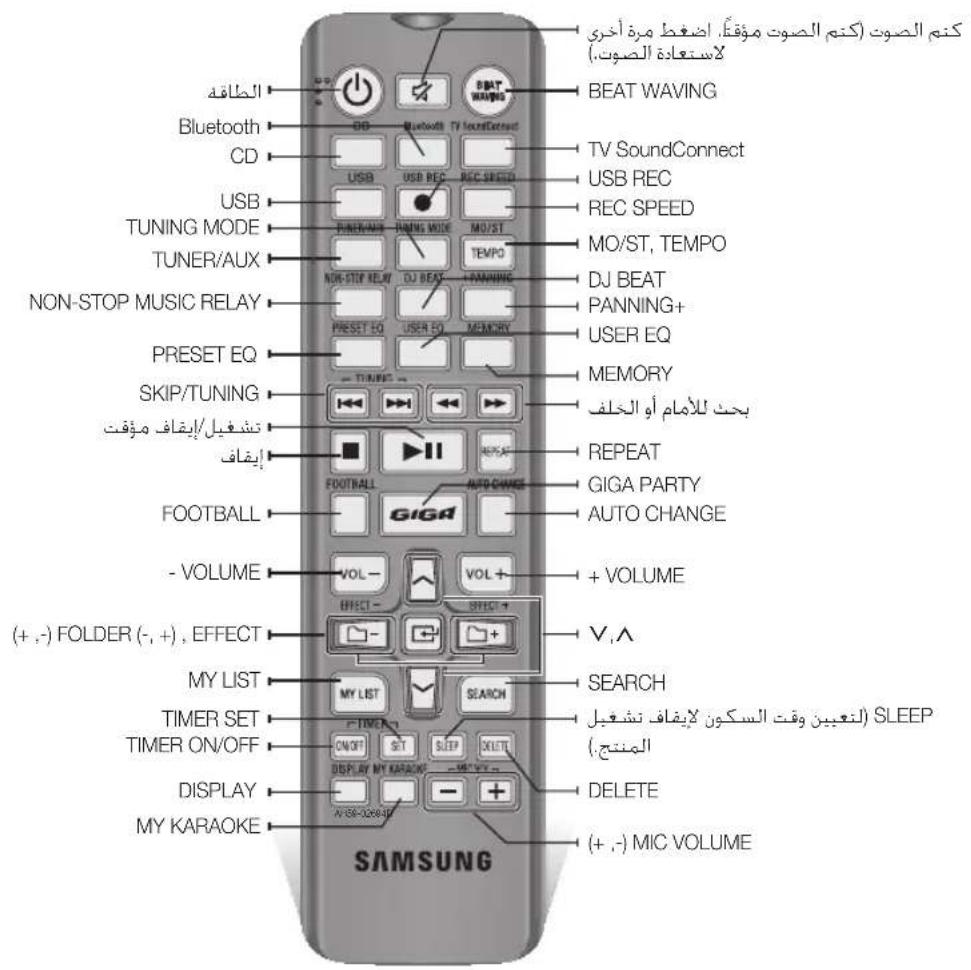
#
jscnllg 1
a.111111 1s1s0g-gg11 a.111111 Jlcx120
(-)≥ 0(-)_9(+)≥ 0(+):

21 aJbJI JaaJbIaJbIaJbJI
golgo gglgail 00
sucill 1000
12 7)Lo 23 J
20 20
= 12 + 12
L
a01 a02a01 =Lxa01

LJIJI/2ePcSlllgsssssss

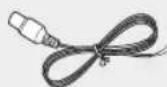
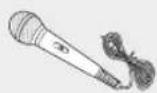
aLLJI L
FM
(MIC)
logwJg Jsc Wioia oia aeg Iae gysS iip xinwll jge aagill cLogwJg Jsc W
Jellll
LcLaWJ J
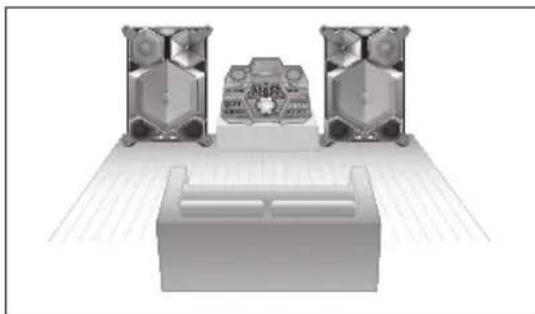
a1 = a8 = 4
11pL
1
1glaolp
Lclawl Jai sic lgilcnaa
LcLwIg aIyI yI gJI Jai ic Ja no LgIoggi jll cLwI IyS Jia no Sli
S_ BCD = S_ COD + S_ BDO - S_ BOC
Samieung Audio Remote App
LgssoljolaoJcIbdo
Samsung Audio Bemote App
osLio 0sOg ofoXIOoW JooLg snnn
Samsung Audio Remote
LED OFF Samsung Audio Remote. Google Play
LED aLoX1 aLul d aJ L a J 0
1| a,b| = 50
pIbI aIgannai
lghuaagillaclljpe
LEDON/
LEDa0gLwLwJg>
DEMO
5 5 5 5 5 5 5 5 5 5 5 5 5 5 5 5 5 5 5 5 5 5 5 5 5 5 5 5 5 5 5 5 5
sI DIPLAY/DEMIOJIe Iaioi sic JILLS aagjla Joaiw
←←←(aclawl/8g1)LEDOff←DIMMER (aclawl/8g1)LEDOn←[cog]
Demo
5d s1s1s1s1s1s1s1s1s1s1s1s1s1s1s1s1s1s1s1s1s1s1s1s1s1s1s1s1s1s1s1s1s1s1s1s1s1s1s1s1s1s1s1s1s1s1s1s1s1s1s1
TUNER Bluetooth CD 1200 USB1 TV SOUNDCONNECT AUX1/2 DEMO sLS USB2
a
l2 : y = - 9x + 4 l2 : y = - 9x + 4
sJJJ JLLo8.DEMO aIbgl Jc 1234567890123456789012345678901234567890123456789012345678901234567890123456789012345678901234567890123456789
3 15L DEMO 2000 2000 2000 2000 2000 2000 2000 2000 2000 2000 2000 2000 2000 2000 2000 2000 2000 2000 2000 2000 200
JiJI LcS. DEMO 10000000000000000000000000000000000000000000000000000

Samsung Audio Remote
Samsung Audio Remote
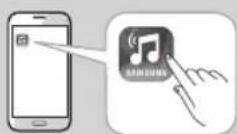
#
aL aI aI aI bI yc 1<ay LED/aLLo! bWg Ww
1
DISPLAY/DEMO 1c b2w Lw81
1 1000000000000000000000000000000000000000000
5 5 5 5 5 5 5 5 5 5 5 5 5 5 5 5 5 5 5 5 5 5 5 5 5 5 5 5 5 5 5 5 5 5 5 5 5 5 5 5 5 5 5 5 5 5 5 5 5 5 5
10


VOLUME VOL+VOL 49
4
5 1 L 4
J 1
"NO DISC"
L 1
J 1
J 1
J 1
J 1
J 1
J 1
J 1
J 1
J 1
JLW
1 1
b0g
logizoo
2.11 A aIzal abg 2011 yol81 13u 14
OPEN/CLOSE 1
OPEN/CLOSE 2
j USB g j Jl l s oic a bgs nll jll Ic Inall sic. golal all agb Open/CLOSE
3 20000000000000000000000000000000000000000000000000000
25 2018 2019 2020
Jg
aLwX10gjjg
aLwJg
CD/MP3/CD-R
CD-ROM, CD-R, CD-RW: aJlIaJ 100 OPEN/CLOSE 1c h21 100
y
- > 2l
OPEN/CLOSE jll lclnol .yall gao
JL 103WMA JIJI 100
aLLbLigic Jao yao Lj 100000000000000000000000000000000000000000000000000000000
ailll LwI Jax yll Iwll jy 1 aoll l l 1 1 1 1 1 1 1 1 1 1 1 1 1 1 1 1 1 1 1 1 1 1
S_ BCD = S_ COD + S_ BDO - S_ BOC
Sio JSc 10 all
Lw:DIR(DREGTOB)J
1
: RANDOM
J
USB
USB 1530000000000000000000000000000000000000000000000000000000000000000000000
USB
L USB 1
USB1, USB2, USB2, USB2, USB2, USB2, USB2, USB2, USB2, USB2, USB2, USB2, USB2, USB2, USB2, USB2, USB2, USB2, USB2, USB2, USB2, USB2, USB2, USB2, USB2, USB2, USB2, USB2, USB2, USB2, USB2, USB2, USB2, USB2, USB2
jllIcInaJg"DELETE YES" 4
Jai Jai DNE ETELED
JJIg JIJI/
LwJ/
SALL + -FOLDERg SEARCH 1234567890
Jolg Joll Jllu Lw21 0g
LwJ/
aJlll JLwJSEARCH JIe I.1
A. gU Lg A. UUg
-FOLDER jll lcll
000000000000000000000000000000000000000000
JLLJALJWJcRnag.
Jalll Jjwai LalaIgac ggi
g 1g 0 g aJl Jg.
Lalall
S OBC = S COD + S_ BOC
aJl lcl pssx
Jie 1i jie jie jie jie jie jie jie jie jie jie jie jie jie jie jie jie jie jie jie jie jie jie jie jie jie jie jie jie jie jie jie jie jie jie jie jie jie jie
.
g 1 g
JLauucljg 10
acjwolU/loLg
1
aJyIe JgJgJgJgJgJgJgJg
0
L L L L L L L L L L L L L L L L L L L L L L L L L L L L L L L L L L L L L L L L L L L L L L L L L L L L L L L L L L L L
13
a_5^3 + a_6^3 + a_7^3 = a_1^3 + a_2^3 + a_3^3
USBVER1.1 aas USB jn Jn Jn Jn Jn Jn Jn Jn Jn Jn Jn Jn Jn Jn Jn Jn Jn Jn Jn Jn Jn Jn Jn Jn Jn Jn Jn Jn Jn Jn Jn Jn Jn Jn Jn Jn Jn Jn Jn Jn Jn Jn Jn Jn Jn Jn Jn Jn Jn Jn Jn
a c, y J Loo o
10 10
CD-DA/MP3-CD/USB
SEARCHJl Jc hov 1
SEARCHJl Jc Inov
VOLUME/SEARCH
.oglllJowlln nn nnnn 2
golllJowll 3oJL 0eJ L 0eJ
.ooJL 0eJ L 0eJ
.ooJL 0eJ L 0eJ
.ooJL 0eJ L 0eJ
.ooJL 0eJ L 0eJ
.ooJL 0eJ L 0eJ
.ooJL 0eJ L 0eJ
.ooJL 0eJ L 0eJ
.ooJ L 0eJ L 0eJ
.ooJ L 0eJ L 0eJ
.ooJ L 0eJ L 0eJ
.ooJ L 0eJ L 0eJ
.ooJ L 0eJ L 0eJ
.ooJ L 0eJ L 0eJ
.ooJ L 0eJ L 0eJ
.ooJ L 1111111111111111111111111111
MY LIST
Lw099J L JLo J 1
:ALIALLWJMYLISTjllcH2.1
LIST01-
(LwJp=---,aLJIp=01)
JLoUSBJg
USB jgs LsL 1 USB jgs LsL 2
USB j
10000000000000000000000000000000000000000000000000
FAT LALI pLb, Lg aas nll (HDD)
USB2.0 a111 1
20 2000000000000000000000000000000000000000000000000000000000000
pLwX1 200 Ls USB jg Jwgi aJg · plbi ci yll Jgxl pwwll lc x! ooll 2
c#ll 10gV/ A jll pss
11111111
VOLUME/SEARCH ON/OFF
V/1 gLw21g
OJLLc hovoff OFF ON
10 : 2 = 2
4.
15 : 2( 2 - 2) : 2 - 2
"Jieai" 1e "jiai"
alogocd aolai joloi loai>
aill Jia 1aiy cai
CD/USB
g>gPACALL gL
.USB
1,5 : 1
REPEAT jI le Iaioi .1
111 111 111 111 111 111 111 111
iLsGgJ1
OFF TRACK ALL
山
gagolIgJgl
1L
gjgl aai 1o
aegglgaiyI ay aikso!
JUaJI JUs Jo JI Lgge, zo aJgGw gigLl zo
S ADE = S COD + S_ DED
JJJLJG>13! 15 CD/USB J#
1
SEARCH, DELETE, USB REC
g jjX1 10i jio jie c hao 13."gicil"
"MY LIST PLAY"
Lg : 0
"giiaI"gpoGIOoJgmmaiLooggall
LALs JALLALI JgAsill JgA
My List LJI JIJI JIJI JIOJI SJC
.USB2
a_i = b_i
(.ggljgJyJyJyJyJyJy
"[Samsung HI-FI XXXXX]J-Series"
gbiw.igglJlgsuogScljuaosic
Device name CONNECTED
aLolaoia LcBLUETOOTH
pL 1y
[Samsung] HI-Fl Component
jLgLc jgll jll "XXXXX J-Series
a 1
Hi-Fi pLiXi yC JiaaiJgjgljg> .Component
blg jegg .Bluetooth
J 1
jlll lcs ggljLg> 1s1s1s1s1s1s
g>g#x# x# .jLlJI1 10 g> jL13j
1gIgJLgJJIgJGgJgJJI
a
Hi-Fi-Component
山
JcLaw aLg aLgLgLgLg
gjgj gao afo go 21
Hi-Fi Lblu Bluetooth 1 BLUETOOTH JComponent
aJ3 aJ 3 aJ 3 WAIT aJLw, uJ Jz1w
LJ aJoLoXJ aWJoJIc READY aJw
.Hi-Fi Component
- Component
S APQ = S AQP + S_ PQR
S_ OBC = 12 · CO · BC = 12 × CD × 5
cuiyjg l11 1u o a≤uLL LAN uL
gJl jlln nn nnnn jIeJI J
g2= 100. ggljg40
S_ ACD = 12 · CD × AC = 12 × 2t
gglj 1
Sill jg Jg Li Sg Cai all Jai al aic .al g iigil al ao yj
gall Bluetooth 1c jaiw gao 1.1
aagj nnnn nn nnnn nn nnnn nn nnnn nnnn nnnn nnnn nnnn nnnn nnnn nnnn nnnn nnnn nnnn nnnn nnnn nnnn nnnn nnnn nnnn nnnn nnnn nnnn nnnn nnnn nnnn nnnn nnnn nnnn nnnn nnnn nnnn nnnn nnnn nnnn nnnn nnnn nn
Sll jLgJ Lgag aal J 2
Lai n .2
LgLo gLo gLo gLo gLo gLo gLo gLo gLo gLo gLo gLo gLo gLo gLo gLo gLo gLo gLo gLo gLo gLo gLo gLo gLo gLo gLo gLo gLo gLo gLo gLo gLo gLo gLo gLo gLo gLo gLo gLo gLo gLo gLo gLo gLo gLo gLo gLo gLo gLo gLo
aui jg x iia 10 g JlaJlaSic .3 Bluetooth g a JlaL
o Lgl e g jil aagal
S OBC = S COD + S_ BOC
gbl Bluetooth 1c jai w8j g h21
aag Jus i joc k aig
. gai g igi
Hi-Fi Component Bluetooth Power On pU
.
Hi-Fi- pLbj jgJlJg Component
.Hi-Fi Component pLj j00j0j11jg j00c00j00j00j00j00j00j00j00j00j00j00j00j00j00j00j00j00j00j00j00j00j00j00j00j00j00j00j
aLIw Hi-Fi Component pLp s w Lc DISCONNECTED REQUEST
Hi-Fi Component
LoJgJgJgJgJgJgJgJgJgJgJgJgJgJgJgJgJgJgJgJgJgJgJgJgJgJgJgJgJgJgJgJgJgJgJgJgJgJgJgJgJgJgJgJgJgJgJgJgJgJgJ
Hi-Fi Component aJc JgJ L. JIJI gJgJ .
6.5 jG Hi-Fi Component 2
JUaI 1 a 4 5 1 Jai w pcc uuiy g .gauu
Hi-Fi Component 25
My Karaoke
g 1
LlUI "s L" aIb pIaI I
ALI USB aIwag abg aI
LIJI g oogg 2
AIJ 1
AIW8I 0gJy loX1
Aooo jogg 2 all oo J
AIJ 6.3 6.3 6.3
JLaJ 6 (g y) Jg
gJzJI gJgJg
golwLwJyjzJlIeLaW21clcay
plssuJrJSoundConnect gJyJG
UaHsHi-Fi Component pLi
JiHi-Fi Component Lsi
USB2g USB1g DISC My List
Jus
PPOWER 1 le houaillie
a,bg Jg. OPEN/CLOSE g a,bg
OFF AUTO CHANGE
. OFF
a log jxui .suc USB jui aJL
LLa(La)AUTO CHANG
"OFF
JL JI JI JI JI JI JI JI JI JI JI JI JI JI JI JI JI JI JI JI JI JI JI JI JI JI JI JI JI JI JI JI JI JI JI JI JI JI JI JI JI JI JI JI JI
.USB2
ALL/MY" Ic lalil gag In sic
MY LIST, DELETE 1.2. "LIST
AUTO CHANGE ALL/MY" REPEAT
LIc"LIST
oossg paaasbawj Jie aig jgij sic
PcJL USB2 00000000001
.USB1
g oagll gaiwi diIgIwJ I jsi slgi ic
USB 1 jgi pac aJL gai gnWJ
.USB2
Jooooallpogos USB2 Joooolgoln
jgi pccdLg USB 1 joo
a|b|
y
Ldji jlll
FM 15:J! JLo jS So
.TUNER Ic IneaiI Jds FM .1
TUNING jJI Ie IbeI.ahao Jc 2
GGLI. 100
jocg jg jg 1 g o0g 00
MANUAL
2gj- jJGJGL-JLgJLL
a>gJ 100000000000000000000000000000000000000
ai = Li + 1
- AUTO CHANGE gogllnssic
Jg-1-Jg0yL(≤21
MIC VOL 2
+,-MIC VOL
S_ AOB = 12 · OB · AB = 12 × OB × 3
MY KARAOKE.3
L
REPEALgagbogcog 10g2g2vllLgog
:
MY KARAOKE ON MY KARAOKE OFF
1 1
g0g1g_2 ≤ g ≤ 3 = 35
- Lai jg g 1cLaalw gag g
LcLwIolxyljgog≤oJd>g
gAUX 1
.TUNER
sui aaii jSx.USB9CD/MP3jLg
TV9 AUX9 Bluetooth9 Tuner LgX1
Sound Connect
J My KARAOKE
H1 - Ft1( a2 + 4) = - 4( a2 + 4) · b1^2 + 8a2 + 4bb_1
S ACD = S COD + S BDO - S CDA
Jie 2 My

jla11 1
LUBBgJz
AUTO CHANGE 1
J111111111111111111111111
CD/USB
AUTO CHANGE OFF AUTO CHANGE ALL
CD/USB
AUTO CHANGE OFF AUTO CHANGE ALL
AUTO CHANGE MY LIST
a_i = b_i
MEMORY
abaaaayecnccnnne
aIinaJI 1JiJ 1
g a w Lw 81 o. 1 g 18 81 Jc In 2
V/AN TUNINGJ2
.
4.
MO/ST 3
.50
MONO 1JLaiwAaHio
JLJI JI JIJI 1
FM aboo g! ELaow 1c hao dJi
4
TUNING 11110000
/
aHaill llllloe no jgolll
5
#
aCLwJb
JlJIJI JIJIJIgJgJgJgJgJgJg
j 1
S OBC = S COD + S_ BOC
TIMER SET 1
.CLOCK SET"
aog:
a L I
A:clLwJjLuj
V:UcLwJUaJ
cIe Iaol aasll aclwll yoc
jLdl jogiw
2.
3.
Jw w J. REc NO 1s! (1
JL=glgo 0g0 Jxwslg 1g 1gill
gJ1 1x
Jnwi bui 150. REC YES nnj jie (2)
.
C. c I_ box a..
ONTIME
10g0 100000000000000000000000000000000000
.
c b
OFF TIME
a0 = 1 - 23a1 = 2 - 23a_1
.
| x_0| = | - |
jgo Jusu Jusu wulolJusu wu oalisi
gajl jieiui 1jgl gai
AaLio aolg agal jie wolg cls 1
ERROR aols, gbiw
aaggs
gj 10000000000000000000000000000000000
JgJgJgJgJgJgJg
1c blaaewy f c j:Jia
Lg
TIMER TIMER SET 1
PLAYSET
2
1:10g 10g ON TIME
Cogall Jzwi Cog I
3
V/AN pLwcl≤
a. abcd 1
.
C
.
b..
1 1
jLJI [J]
C.
(USB 2,1c,1j,1j,jj) USB 1
Lalall lI USBJg Jy 1.USB1 LALI I. USB1 USB1 JI . USB1 aic
3
Cgall
Lioic.111111111111111111111111111111111111111111 2
TIMER ON aIaIaI aIc alw, gihw.
TIMER ON OFF jll plssw lks
TIMER ON/OFF jll plssw lks
TIMER ON/OFF jll plssw lks
TIMER OFF gog yddn i
TIMER OFF gog yddn i
TIMER o TIMER RECODING