
SSMS 600 E2 - Hand blender SILVERCREST - Free user manual and instructions
Find the device manual for free SSMS 600 E2 SILVERCREST in PDF.
| Product type | Immersion blender |
| Brand | SilverCrest |
| Model | SSMS 600 E2 |
| Mains voltage | 220 – 240 V ~, 50 – 60 Hz |
| Rated power | 600 W |
| Protection class | II / double insulation |
| Measuring beaker capacity (max) | 700 ml |
| Processing capacity (max) | 300 ml |
| Included accessories | Immersion blender, whisk, chopper (blade + bowl with lid), measuring beaker with combined lid/foot |
| Food contact materials | Food contact approved |
| Max operating time (blender) | 1 minute, then cool for 2 minutes |
| Max operating time (chopper) | 1 minute, then cool for 2 minutes |
| Max operating time (whisk) | 2 minutes, then cool for 2 minutes |
| Dishwasher | Blade, bowl, whisk, measuring beaker: dishwasher safe |
| Motor unit washable | No, wipe with a damp cloth |
| Safety | Sharp blade, do not immerse motor unit |
| Warranty | 3 years |
| Intended use | Household use only |
Frequently Asked Questions - SSMS 600 E2 SILVERCREST
User questions about SSMS 600 E2 SILVERCREST
0 question about this device. Answer the ones you know or ask your own.
Ask a new question about this device
Download the instructions for your Hand blender in PDF format for free! Find your manual SSMS 600 E2 - SILVERCREST and take your electronic device back in hand. On this page are published all the documents necessary for the use of your device. SSMS 600 E2 by SILVERCREST.
USER MANUAL SSMS 600 E2 SILVERCREST
Operating instructions
NL BE
STAAFMXER
Gebruiksacnwijzing
CZ
TYCOVY MIXER
Návod k obsluze
IAN 332573_2001
DE AT CH
Before reading, unfold the page containing the illustrations and familiarise yourself with all functions of the device.
FR BE
KOMPERNASS HANDELS GMBH
BURGSTRASSE 21
44867 BOCHUM
DEUTSCHLAND
www.kompernass.com
Rezepte
Gemüsecremesuppe
2-4 Personen
Zutaten
Disposal of the packaging 21
Description of appliance/Accessories 22
Technical data 22
Safety instructions 23
Utilisation 25
Assembling 26
To assemble the hand blender 26
Assembling the wire whisk 26
Assembling the liquidiser 26
Operation 27
Cleaning 29
Disposal of the appliance 30
Cream of Vegetable Soup 33
Pumpkin Soup 34
Sweet Fruit Spread 35
Chocolate Cream 36
Mayonnaise 36
Introduction
Congratulations on the purchase of your new appliance.
You have clearly decided in favour of a quality product. These operating instructions are a part of this product. They contain important information in regard to safety, use and disposal. Before using the product, familiarise yourself with all of these operating and safety instructions. Use the product only as described and only for the specified areas of application. In addition, pass these documents on, together with the product, to any future owner.
Intended use
This hand blender is intended exclusively for processing foodstuffs in small quantities. It is intended exclusively for use in domestic households. This hand blender set is not intended for commercial applications.

WARNING!
Danger from unintended use!
Danger can come from the appliance if used for unintended purposes and/or other types of use.
Use the appliance exclusively for intended purposes.
Observe the procedures described in these operating instructions.
NOTICE
- Claims of any kind resulting from damage caused by improper use, incompetent repairs, unauthorized modifications or the use of non-approved spare parts will not be acknowledged. The operator alone bears liability.
Items supplied
The appliance is delivered with the following components as standard:
- Hand Blender Set
- Measuring beaker with combined lid/base
Whisk - Liquidiser (Blade and bowl with combined lid/base)
- Operating instructions
1) Remove all parts of the appliance and these operating instructions from the box.
2) Remove all packing material.
3) Clean all parts of the appliance as described in the chapter "Cleaning".
NOTICE
Check the contents to make sure everything is there and for visible damage.
If the contents are incomplete, or have been damaged due to defective packaging or transportation, contact the Service Hotline (see chapter Service).
Disposal of the packaging
The packaging protects the appliance from damage during carriage.
The packaging materials have been selected for their environmental friendliness and ease of disposal, and are therefore recyclable.

Returning the packaging to the material cycle conserves raw materials and reduces the amount of waste that is generated. Dispos of packaging materials that are no longer needed in accordance with applicable local regulations.

Dispose of the packaging in an environmentally friendly manner.
Note the labelling on the packaging and separate the packaging material components for disposal if necessary. The packaging material is labelled with abbreviations (a) and numbers (b) with the following meanings:
1-7:Plastics,20-22:Paper and cardboard,80-98:Composites.
NOTICE
If possible preserve the appliance's original packaging during the warranty period so that in the case of a warranty claim you can package the appliance properly for return.
Description of appliance/Accessories
Illustration A (hand blender):
Speed regulator
Switch (Standard Speed)
3 Turbo-Switch (High Speed)
4 Motor unit
5 Hand blender
Illustration B (liquidiser):
Bowl lid
7 Blade
Bowl (with combined lid/base)
Illustration C (whisk):
Whisk holder
10 Whisk
Illustration D (accessories):
11 Measuring beaker (with combined lid/base)
Technical data
| Voltage 220 - 240 V ~ (alternating current), 50 - 60 Hz | |
| Nominal Power Rating 600 W | |
| Protection Class | II / double insulation |
| All of the parts of this appliance that come into contact with food are food-safe. | |
| Capacity: Measuring beaker Max. fill volume for liquids | 700 ml 300 ml |
We recommend the following operating times:
Allow the hand blender 5 to cool down for around 2 minutes after 1 minute of operation.
Let the liquidiser cool down for around 2 minutes after 1 minute of operation.
Allow the whisk to cool down for around 2 minutes after 2 minutes of operation.
If you exceed these operating times, the appliance can overheat and be damaged!
Safety instructions

RISK OF ELECTRIC SHOCK
- Connect the appliance only to mains power sockets supplying a mains power voltage of 220 - 240 ~V , 50 - 60 ~Hz .
- Remove the plug from the mains power socket in event of operating malfunctions and before cleaning the appliance.
- Do not expose the appliance to moisture and do not use it outdoors.
If liquid gets into the housing, disconnect the appliance from the mains power socket immediately and have it repaired by a qualified technician.
Always pull on the plug to disconnect the appliance from the mains; never pull on the power cable itself. - Do not kink or crush the power cable, and route the cable so that it cannot be stepped on or tripped over.
- To avoid risks, arrange for defective plugs and/or power cables to be replaced at once by qualified technicians or our Customer Service Department.
- This appliance may be used by people with reduced physical, sensory or mental capabilities or lack of experience and/or knowledge if they are supervised and have been instructed in how to use the appliance safely and have understood the potential risks.
The appliance and its connecting cable must be kept away from children. - Do not attempt to open the hand blender's motor casing. If you do so, the safety of the appliance is no longer assured and the warranty will become void.

Never immerse the blender's motor unit in liquids, or allow liquids to get into the motor unit housing.

WARNING! RISK OF INJURY!
Before changing accessories or additional parts that are in motion during operation, the appliance must be switched off and disconnected from mains power.
Disconnect the appliance from the mains power supply ...
... when the appliance is unsupervised,
... when you are cleaning the appliance,
... when you are assembling or dismantling it.
This appliance may not be used by children.
Children must not play with the appliance.
The appliance and its connecting cable must be kept away from children.
The blade is extremely sharp! Handle it with great care.
- Handle the extremely sharp blade with caution as it can cause injuries.
- Clean the appliance very carefully. The blades are extremely sharp!
Always be careful when emptying the bowl! The blades are extremely sharp!
The appliance should always be disconnected from the mains when unattended and before assembly, disassembly or cleaning.
- Misuse of the appliance can lead to a risk of injury!
Utilisation
NOTICE
- With the measuring beaker ① you can measure volumes of fluids up to 700 ml. For food processing, fill it to a maximun of 300 ml, otherwise fluids could overflow from the measuring beaker ①.
Should you wish to keep liquids/foods in the measuring beaker 1, you can remove the base of the measuring beaker 1 and use it as a lid. Ensure that the spout of the measuring beaker 1 is also closed.
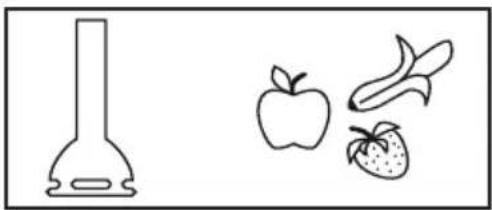
You can use the hand blender 5 to prepare dips, sauces, soups or baby food or to puree fruit. We recommend using the hand blender 5 for a maximum of 1 minute at a time and then letting it cool down.
WARNING! PROPERTY DAMAGE!
Do not use this hand blender ⑤ for the preparation of solid foods. This would lead to irreparable damage to the appliance!
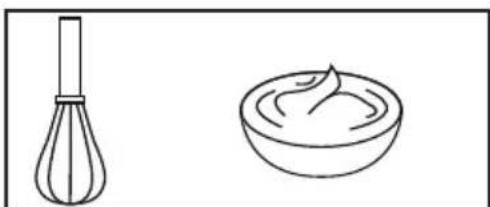
With the whisk you can whip cream, beat egg whites and mix pastry, desserts or mayonnaise. We recommend using the whisk for a maximum of 2 minutes at a time and then letting it cool down.

You can use the liquidiser, which consists of the blade 7, bowl 8 and bowl lid 6 to chop herbs or also harder food. We recommend using the liquidiser for a maximum of 1 minute at a time and then letting it cool down.
WARNING! PROPERTY DAMAGE!
- Do not use the liquidiser to process liquids. This would lead to irreparable damage to the appliance!
Assembling
WARNING! RISK OF INJURY!
- Only insert the plug into the power socket after you have assembled the appliance for use.
NOTICE
Before the first use, clean all parts as described in the chapter "Cleaning".
To assemble the hand blender
WARNING! RISK OF INJURY!
The blade 7 is extremely sharp! Handle it with great care at all times.
Place the hand blender 5 on the motor unit 4 so that the arrow points to the symbol. Turn the hand blender 5 until the arrow on the motor unit 4 points to the symbol 7.
Assembling the wire whisk
Press the whisk into the whisk holder, until it firmly engages.
Place the so assembled whisk onto the motor block 4 so that the arrow points to the symbol Turn the motor block 4 until the arrow points at the symbol
Assembling the liquidiser
WARNING! RISK OF INJURY!
The blade ⑦ is extremely sharp! Handle it with great care.
Carefully place the blade onto its retainer in the bowl. Turn the blade a little until it slides onto the holder.
NOTICE
- The blade ⑦ is not fixed firmly in the holder. This is normal. The blade ⑦ is only sits firmly when the bowl lid ⑥ is put on.
Fill the bowl with the foodstuffs you wish to liquidise 8.
NOTICE
NEVER fill the bowl BEYOND the MAX marking. Otherwise, the appliance does not function optimally.
Place the bowl lid 6 onto the bowl 8 and turn it until tight. Thereby, the lugs on the edge of the bowl 8 must be guided into the rail on the bowl lid 6. Please ensure that the blade 7 is correctly engaged in the bowl lid 6.
Place the motor unit 4 on the bowl lid 6 so that the arrow points to the symbol G. Turn the motor unit 4 until the arrow points to the symbol O.
NOTICE
Should you wish to keep foodstuffs in the bowl 8 you can remove the base of the bowl 8 and use it as a lid. For this, carefully remove the bowl lid 6 and motor unit 4 and, if needs be, the blade 7. Loosen the base of the bowl 8 and then place it onto the bowl 8.
Operation
WARNING! RISK OF INJURY!
▶ Foodstuffs should not be too hot. Squirting contents may cause scalding.
NOTICE
- When you beat cream with the whisk ① hold the container at a slant during the beating. In this way the cream will be thicker quicker. Ensure that cream cannot be sprayed out of the container while it is being beaten. When whipping cream, slide the speed regulator ① to position "Max".
When you have assembled the blender set as you wish to use it:
1) Insert the plug into a mains power socket.
2) Press and hold the switch 2 to process foodstuffs at the standard speed. Slide the speed regulator 1 in the direction of "Max" to increase the speed. Slide the speed regulator 1 in the direction of "Min" to reduce the speed.
3) Press and hold the turbo-switch to process foodstuffs at a higher speed. By pressing the turbo-switch the maximum processing speed is available immediately.
4) Once you are done processing the food, simply release the pressed switch 2/3.
NOTICE
If you hear unusual noises during operation, e.g. squeaking or similar, apply a small amount of neutral cooking oil to the drive shaft of the hand blender 5:

Examples for the chopping and liquiding of various foods with the liquidiser:
| Ingredients max. | amount Processing time Speed | |
| Onions 200 g approx. | 20 Sec. | Min - •• |
| Parsley 30 g approx. | 20 Sec. Turbo | |
| Garlic 20 cloves approx. | 20 Sec. Min - Max | |
| Baby-carrots | 200 g approx. 15 Sec. Min - Max | |
| Hazelnuts/Almonds | 200 g approx. 30 Sec. Turbo | |
| Walnuts | 200 g approx. 25 Sec. | •• - ••• |
| Parmesan | 250 g approx. 30 Sec. Turbo |
Cleaning

WARNING! RISK OF ELECTRIC SHOCK!
Before you start to clean the hand blender, ALWAYS unplug the appliance from the mains power socket.

Under no circumstances may the motor unit 4 be cleaned by immersing it in water or holding it under running water.

WARNING! RISK OF INJURY!
- Handle the extremely sharp blade with caution as it can cause injuries. Reassemble the liquidiser after use and/or cleaning so that you do not injure yourself on the exposed blade.
- Keep the blade out of the reach of children.
NOTICE

The measuring beaker with combined lid/base 1, whisk 10, bowl with combined lid/base 8 and blade 7 are dishwasher-safe.
WARNING! PROPERTY DAMAGE!
- Do not use aggressive, chemical or abrasive cleaning agents! They could irreparably damage the upper surfaces!
1) Disconnect the power cable.
2) Clean the motor block 4 and the whisk holder 9 with a moist cloth. Ensure that water cannot permeate through the openings on the motor block 4. For stubborn stains, put some mild detergent on the cloth. Wipe detergent residues off with a damp cloth.
3) Clean the blender 5, the bowl lid 6, the bowl 8, the whisk 10, the measuring beaker 11 and the blade 7 thoroughly in washing-up water and then remove the detergent residues by rinsing them with clean water.
4) Dry everything well with a dish towel and ensure that the appliance is completely dry before re-use.
Disposal of the appliance

Do not dispose of the appliance in your normal domestic waste. This product is subject to the provisions of European Directive 2012/19/EU.
Dispose of this appliance through an approved disposal centre or at your community waste facility. Observe the currently applicable regulations. In case of doubt, please contact your waste disposal centre.

Your local community or municipal authorities can provide information on how to dispose of the worn-out product.

The product is recyclable, subject to extended producer responsibility and is collected separately.
This appliance has a 3-year warranty valid from the date of purchase. If this product has any faults, you, the buyer, have certain statutory rights. Your statutory rights are not restricted in any way by the warranty described below.
Warranty conditions
The warranty period starts on the date of purchase. Please keep your receipt in a safe place. This will be required as proof of purchase.
If any material or manufacturing fault occurs within three years of the date of purchase of the product, we will either repair or replace the product for you or refund the purchase price (at our discretion). This warranty service requires that you present the defective appliance and the proof of purchase (receipt) within the three-year warranty period, along with a brief written description of the fault and of when it occurred.
If the defect is covered by the warranty, your product will either be repaired or replaced by us. The repair or replacement of a product does not signify the beginning of a new warranty period.
Warranty period and statutory claims for defects
The warranty period is not prolonged by repairs effected under the warranty. This also applies to replaced and repaired components. Any damage and defects present at the time of purchase must be reported immediately after unpacking. Repairs carried out after expiry of the warranty period shall be subject to a fee.
Scope of the warranty
This appliance has been manufactured in accordance with strict quality guidelines and inspected meticulously prior to delivery.
The warranty covers material faults or production faults. The warranty does not extend to product parts subject to normal wear and tear or to fragile parts which could be considered as consumable parts such as switches, batteries or parts made of glass.
The warranty does not apply if the product has been damaged, improperly used or improperly maintained. The directions in the operating instructions for the product regarding proper use of the product are to be strictly followed. Uses and actions that are discouraged in the operating instructions or which are warned against must be avoided.
This product is intended solely for private use and not for commercial purposes. The warranty shall be deemed void in cases of misuse or improper handling, use of force and modifications / repairs which have not been carried out by one of our authorised Service centres.
Warranty claim procedure
To ensure quick processing of your case, please observe the following instructions:
Please have the till receipt and the item number (e.g. IAN 12345) available as proof of purchase.
■ You will find the item number on the type plate on the product, an engraving on the product, on the front page of the operating instructions (below left) or on the sticker on the rear or bottom of the product.
If functional or other defects occur, please contact the service department listed either by telephone or by e-mail.
You can return a defective product to us free of charge to the service address that will be provided to you. Ensure that you enclose the proof of purchase (till receipt) and information about what the defect is and when it occurred.

You can download these instructions along with many other manuals, product videos and installation software at www.lidl-service.com.
This QR code will take you directly to the Lidl service page (www.lidl-service.com) where you can open your operating instructions by entering the item number (IAN) 123456.
Service
GB Service Great Britain
Tel:08004047657
E-Mail: kompernass@lidl.co.uk
IE Service Ireland
Tel.: 1890 930 034
(0,08 EUR/Min., (peak))
(0,06 EUR/Min., (off peak))
E-Mail: kompernass@lidl.ie
IAN 332573_2001
Importer
Please note that the following address is not the service address. Please use the service address provided in the operating instructions.
KOMPERNASS HANDELS GMBH
BURGSTRASSE 21
44867 BOCHUM
GERMANY
www.kompernass.com
Recipes
Cream of Vegetable Soup
2-4 People
Ingredients
2-3 tbsp Cooking oil
200gOnions
200 g Potatoes (specially suitable are floury varieties)
200g Carrots
350 - 400 ml Vegetable stock (fresh or instant)
Salt, Pepper, Nutmeg
5g Parsley
Preparation
1) Peel the onions and chop them with the liquidiser. Wash, peel and cut the carrots into slices. Peel and rinse the potatoes, then cut them into approx. 2 cm cubes.
2) Heat the oil in a pan, sauté the onions until glassy. Add the carrots and potatoes and sauté them also. Pour in sufficient broth so that the vegetables are well covered and then boil everything for 10 - 15 minutes until soft. If necessary, add more broth if the vegetables are no longer completely covered.
3) Wash the parsley, shake it dry and remove the stems. Break the parsley into large pieces and add them to the soup. Puree everything with the hand blender for about 1 minute. Season with salt, pepper and grated nutmeg.
Pumpkin Soup
4 People
Ingredients
1 medium-sized Onion
2 Garlic cloves
10-20g fresh Ginger
3 tbsp Rapeseed oil
400 g Pumpkin (ideally suited is Hokkaido pumpkin, because the shell becomes soft when cooked and it does not need to be peeled)
250 - 300 ml Coconut milk
250 - 500 ml Vegetable stock
■ Juice of 12 of an Orange
some dry white wine
1 tsp. Sugar
Salt, Pepper
Preparation
1) Peel the onion and chop them with the liquidiser, do the same with the garlic. Peel and finely chop the ginger. Firstly, sauté the onion and ginger in hot oil. After 2 minutes add the garlic and sauté this also.
2) Thoroughly clean the pumpkin under warm water with a vegetable brush, then cut it into 2 - 3 cm cubes. (If a pumpkin other than Hokkaido pumpkin is being used, it must be peeled in addition). Add the diced pumpkin to the onions and ginger and sauté them also. Fill with half the amount of coconut milk and sufficient vegetable broth to cover the pumpkin well. Cook for approx. 20 - 25 minutes with the lid on until soft. Mix everything with a hand blender until smooth. Thereby, add additional coconut milk until the soup has the correct soft and creamy consistency.
3) Season the soup with orange juice, white wine, sugar, salt and pepper so that it has both a sweet and a balanced sour-salty note in addition to the sharp flavour.
Sweet Fruit Spread
Ingredients
250 g Strawberries or other fruit (fresh or frozen)
1 packet (about 125g ) Preserving sugar without cooking
1 dash of Lemon juice
1 pinch of the pulp of a Vanilla pod
Preparation
1) Wash and clean the strawberries, at the same time removing the green stems. Drain well in a colander, so that you are rid of excess water and the spread is not too watery. Slice larger strawberries into small pieces.
2) Weigh 250g of strawberries and place in a suitable blender jug.
3) Add a dash of lemon juice.
4) If desired, scrape out and add the pulp of a vanilla pod.
5) Add the contents of the packet of preserving sugar without cooking and mix thoroughly with a hand blender for 45-60 seconds. If there are still large pieces in it, allow it to stand for 2 minutes and then purée it again for 60 seconds.
6) Enjoy the fruit spread straight away or pour it into a glass jar with a screw cap and firmly seal it.
Chocolate Cream
For 4 people
Ingredients
350 g Whipping cream
200 g Dark chocolate (> 60% Cocoa)
1/2 Vanilla pod (Pulp)
Preparation
1) Bring the cream to a boil, crumble the chocolate and melt it slowly over low heat. Scrape out the pulp of half a vanilla pod and blend it into the mixture.
2) Allow it to cool and set completely in the refrigerator.
3) Before serving, stir with the whisk until creamy.
Tip: This tastes good with fresh fruit.
Mayonnaise
Ingredients
200 ml neutral vegetable oil, e.g. Rapeseed oil
1 Egg (yolk and egg white)
10 g mild Vinegar or Lemon juice
Salt and Pepper to taste
Preparation
1) Place the egg and lemon juice in the mixing jug, hold the whisk perpendicular to the jug and press and hold the turbo switch.
2) Slowly add the cooking oil in a thin uniform stream (within 1 minute), so that the oil combines with the other ingredients.
3) Finally, season to taste with salt and pepper.
Sommaire
Introduction 38
Chere cliente, cher client,
Chere cliente, cher client,
KOMPERNASS HANDELS GMBH
BURGSTRASSE 21
44867BOCHUM
ALLEMAGNE
www.kompernass.com
Recettes
Crème de légumes
2 à 4 personnes
Ingrédents
WAARSCHUWING! LETSELGEVAAR!
WAARSCHUWING! LETSELGEVAAR!
WAARSCHUWING! LETSELGEVAAR!
WAARSCHUWING! LETSELGEVAAR!
WAARSCHUWING! LETSELGEVAAR!
WAARSCHUWING! GEVAAR VOOR STROOMSCHOKKEN!
WAARSCHUWING! LETSELGEVAAR!
KOMPERNASS HANDELS GMBH
BURGSTRASSE 21
44867 BOCHUM
DUITSLAND
www.kompernass.com
Recepten
KOMPERNASS HANDELS GMBH
BURGSTRASSE 21
44867 BOCHUM
NIEMCY
www.kompernass.com
Przepisy
Zupa krem z warzyw
2-4osoby
Surowce
KOMPERNASS HANDELS GMBH
BURGSTRASSE 21
44867 BOCHUM
NEMECKO
www.kompernass.com
Recepty
KOMPERNASS HANDELS GMBH
BURGSTRASSE 21
44867 BOCHUM
NEMECKO
www.kompernass.com
Recepty
Kremová zeleninová polievka
2-4osoby
Suroviny
2-3PLoleja
200g cibule
200 g zemiakov (obzvlas'vhodnésu mucnatedruhy)
200 g mrkvy
350 - 400 ml zeleninového vyvaru (čerstvy alebo instantné)
sol', korenie, muskátov'y orech
5g petrzenovej vnae
Priprava
1) Osúpte cibul'u a Rozsekajte ju drvičom. Mrkvu umyjeme, olúpeme a nakrajame na platky. Zemiaky osúpeme, umyjeme aPokrajame na kocky vel'ke asi 2 cm.
2) V hrnci zohrejeme olej a cibul'u v nom do sklovita udusime. Pridame mrkvu a zemiaky a spolu d'alej dusime. Prilejeme tol'ko vyvaru, aby bola zelenina celkom zakrytá a asi 10 - 15 minut varime dozmaknutia. V pripe de potreby dolievame vyvar, aby bola zelenina stale zakrytá.
3) Petržlenovú vna' umyjeme, do sucha otrasieme a odstránime stonky. Petržlen natrámme na váčsie kúsky a dámé do polievky. Mixerom 5 vsetko pomixujeme asi 1 minútu. Dochutíme sol'ou, korením a strúhaným muskátovým orechom.
Tekvicová polievka
Pre 4 osoby
Suroviny
1 stredne vel'ka cibul'a
2 struciky cesnaku
10-20g cerstveho zazvoru
3 PL rastlinného oleja
400 g tekvicovej dužiny (najlepsia je tekvica Hokkaido, pretoze ju nemusime šupaf, lebo jej šupka pri varenízmákne)
■ 250 - 300 ml kokosového mlieka
250-500 ml zeleninového vyvaru
stava z polovice pomaranca
trochuSuchehobieleho vina
1 Clcukru
sol', korenie
Priprava
Ośupe cibul'u a Rozsekajte ju drvičom. To isté urobte aj s cesnakom. Zázvor osúpeme aPokrajame na malé kocky. Najpri podusime cibul'u a zázvor v horúcom oleji. Po 2 minútach pridáme cesnak a d'alej dusime.
4) Tekvicu dobre očistime kefou pod horucou vodou, potom nakrajame na 2 - 3 cm kocky. (lnú tekvicu než Hokkaido treba aj osúpat.) Tekvicové kocky pridáme k cibuli a zázvoru a d'alej dusíme. Prilejeme polovicu množstva kokosového mlieka a tol'ko zeleninového vyvaru, aby bola tekvica celkom zakrytá. ZakryjemePokrievkou a varíme do mäkka asi 20 - 25 minút. Mixerom 5 vsetko dohladka rozmixujeme. Pritom pridáme tol'ko kokosového mlieka, aby polievka ziskala správnu, jejne krémovú konzistenciu.
5) Polievku dochutime pomarančovou šfavou, bielym vinom, kukrom, sol'ou a korením tak, aby mala okrem ostrej aj sladku a vyväženú kysloslanú prichuf.
Sladka ovocna nátierka
Suroviny
KOMPERNASS HANDELS GMBH
BURGSTRASSE 21
44867 BOCHUM
GERMANY
www.kompernass.com

- DE AT CH
- FR BE
- Rezepte
- Gemüsecremesuppe
- Zutaten
- Disposal of the packaging 21
- Description of appliance/Accessories 22
- Technical data 22
- Safety instructions 23
- Utilisation 25
- Assembling 26
- Operation 27
- Cleaning 29
- Disposal of the appliance 30
- Introduction
- Intended use
- WARNING!
- Danger from unintended use!
- NOTICE
- Items supplied
- Disposal of the packaging
- Description of appliance/Accessories
- Technical data
- Safety instructions
- RISK OF ELECTRIC SHOCK
- WARNING! RISK OF INJURY!
- Utilisation
- WARNING! PROPERTY DAMAGE!
- Assembling
- To assemble the hand blender
- Assembling the wire whisk
- Assembling the liquidiser
- Operation
- Cleaning
- WARNING! RISK OF ELECTRIC SHOCK!
- Disposal of the appliance
- Warranty conditions
- Warranty period and statutory claims for defects
- Scope of the warranty
- Warranty claim procedure
- Service
- Importer
- Recipes
- Cream of Vegetable Soup
- Ingredients
- Preparation
- Pumpkin Soup
- Sweet Fruit Spread
- Chocolate Cream
- Mayonnaise
- Sommaire
- Introduction 38
- Recettes
- Crème de légumes
- Ingrédents
- WAARSCHUWING! LETSELGEVAAR!
- WAARSCHUWING! GEVAAR VOOR STROOMSCHOKKEN!
- Recepten
- Przepisy
- Zupa krem z warzyw
- Surowce
- Recepty
- Kremová zeleninová polievka
- Suroviny
- Priprava
- Tekvicová polievka
- Sladka ovocna nátierka
Brand : SILVERCREST
Model : SSMS 600 E2
Category : Hand blender