
SL4TF24PR001 - Mp3 player POLAROID - Free user manual and instructions
Find the device manual for free SL4TF24PR001 POLAROID in PDF.
| Product Type | MP3 Player with video, photo, recorder, camera, camcorder, e-book, tools |
| Display | 320x240 pixel TFT color, 260,000 colors |
| Supported audio formats | MP3, WMA, OGG, APE, FLAC, WAV |
| Supported video formats | AVI, 3GP |
| Supported image formats | JPEG, BMP, GIF, TIF, PNG |
| Voice recording | Built-in microphone, WAV format, adjustable quality |
| Other functions | Digital camera, camcorder, e-book, calculator, stopwatch, calendar, webcam, TV Out, file browser |
| Power | Built-in rechargeable battery, charges via USB DC 5V / 400-500 mA |
| Connectivity | USB 2.0 high speed, 3.5mm headphone jack, TV output, TF card reader |
| Storage | Internal memory (capacity not specified) + external TF card (up to supported capacity not specified) |
| Compatible operating systems | Windows XP/2K/ME/98 (driver required), Linux 9+, Mac OS 10 |
| Maintenance and cleaning | Clean with a soft, dry cloth. Do not use chemicals. Avoid moisture. |
| Safety | Do not expose to water, flames, shocks. Use only a suitable charger. Explosion risk if battery is incorrectly replaced. |
| Spare parts and repairability | Battery replaceable only by a professional. No other spare parts supplied. For any repairs, contact after-sales service. |
| General information | Brand: Polaroid, Model: SL4TF24PR001, Made for PLR IP Holdings, LLC. Distributed by Market Maker Brand Licensing. |
Frequently Asked Questions - SL4TF24PR001 POLAROID
User questions about SL4TF24PR001 POLAROID
0 question about this device. Answer the ones you know or ask your own.
Ask a new question about this device
Download the instructions for your Mp3 player in PDF format for free! Find your manual SL4TF24PR001 - POLAROID and take your electronic device back in hand. On this page are published all the documents necessary for the use of your device. SL4TF24PR001 by POLAROID.
USER MANUAL SL4TF24PR001 POLAROID
QuestionsHere some help:This renewal will help you enjoy your new product

If you still have question, call us for help. 33+04 37 63 29 25

www.polaroid.com
Let's Get Started
User Guide
Precautions
To ensure correct use and to get the best possible performance, the user must understand this guide and strictly follow the instructions provided
Never knock the device violently
Never contact with chemicals such as benzene, thinner etc.
Do not place the unit near magnetic or electrical fields.
Do not place in direct sunlight or near heat sources.
Do not disassemble, repair or modify the device privately.
If the device is damaged, have it repaired by the manufacturer, its after service or a similarly qualified person in order to avoid any hazard.
Using earphone during bicycling, car and motorcycle driving is likely to cause danger.
Do not listen at a high volume as this can damage your hearing.
Children should be supervised to ensure they do not play with the device.
The device should not be exposed to dripping or splashing water.
Objects filled with liquids, such as vases, should not be placed on the device.
Always leave a minimum distance of 10cm around the device for sufficient ventilation.
Sources of naked flame, such as it candles, should not be placed on the device.
Separate household waste, batteries and used electronic products and dispose of them according to regulations.
ATTENTION: There is a danger of explosion if the battery is not replaced correctly. Only replace with the same or equivalent type.
The battery must not be exposed to excessive heat such as from the sun, fire or similar sources.
Do not mix different types of battery or new and used batteries.
The battery must be placed according to the correct polarity.
If the battery is spent it should be removed from the product.
The battery must be discarded safely. Dispose of in provided collection
bins (check with your retailer) in order to protect the environment.
Basic Features
320* 240, 260,000 full color low latency TFT screen,
Supports the following music files MP3, WMA, OGG, APE, FLAC, WAV;
Recorder: Recording MIC; Supported format: WAV;
Image formats supported: JPEG, BMP, GIF, TIF, PNG;
Ability to set photos as wallpaper;
Video formats supported: AVI, 3GP;
Camera and Video recorder function:
Reading EBooks and file navigation function
TV-OUT jack;
Function tools: Features calendar, stopwatch, calculator, webcam;
Supports TF card;
Configuration; Parameters, features and properties;
Special Effect functions for photos and interface;
USB2.0 high speed transmission
Support restore or upgrade player firmware via USB;
Multi-tasking function;
Data transfer function (between player and memory card).
Description
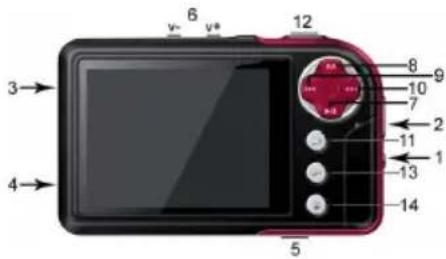
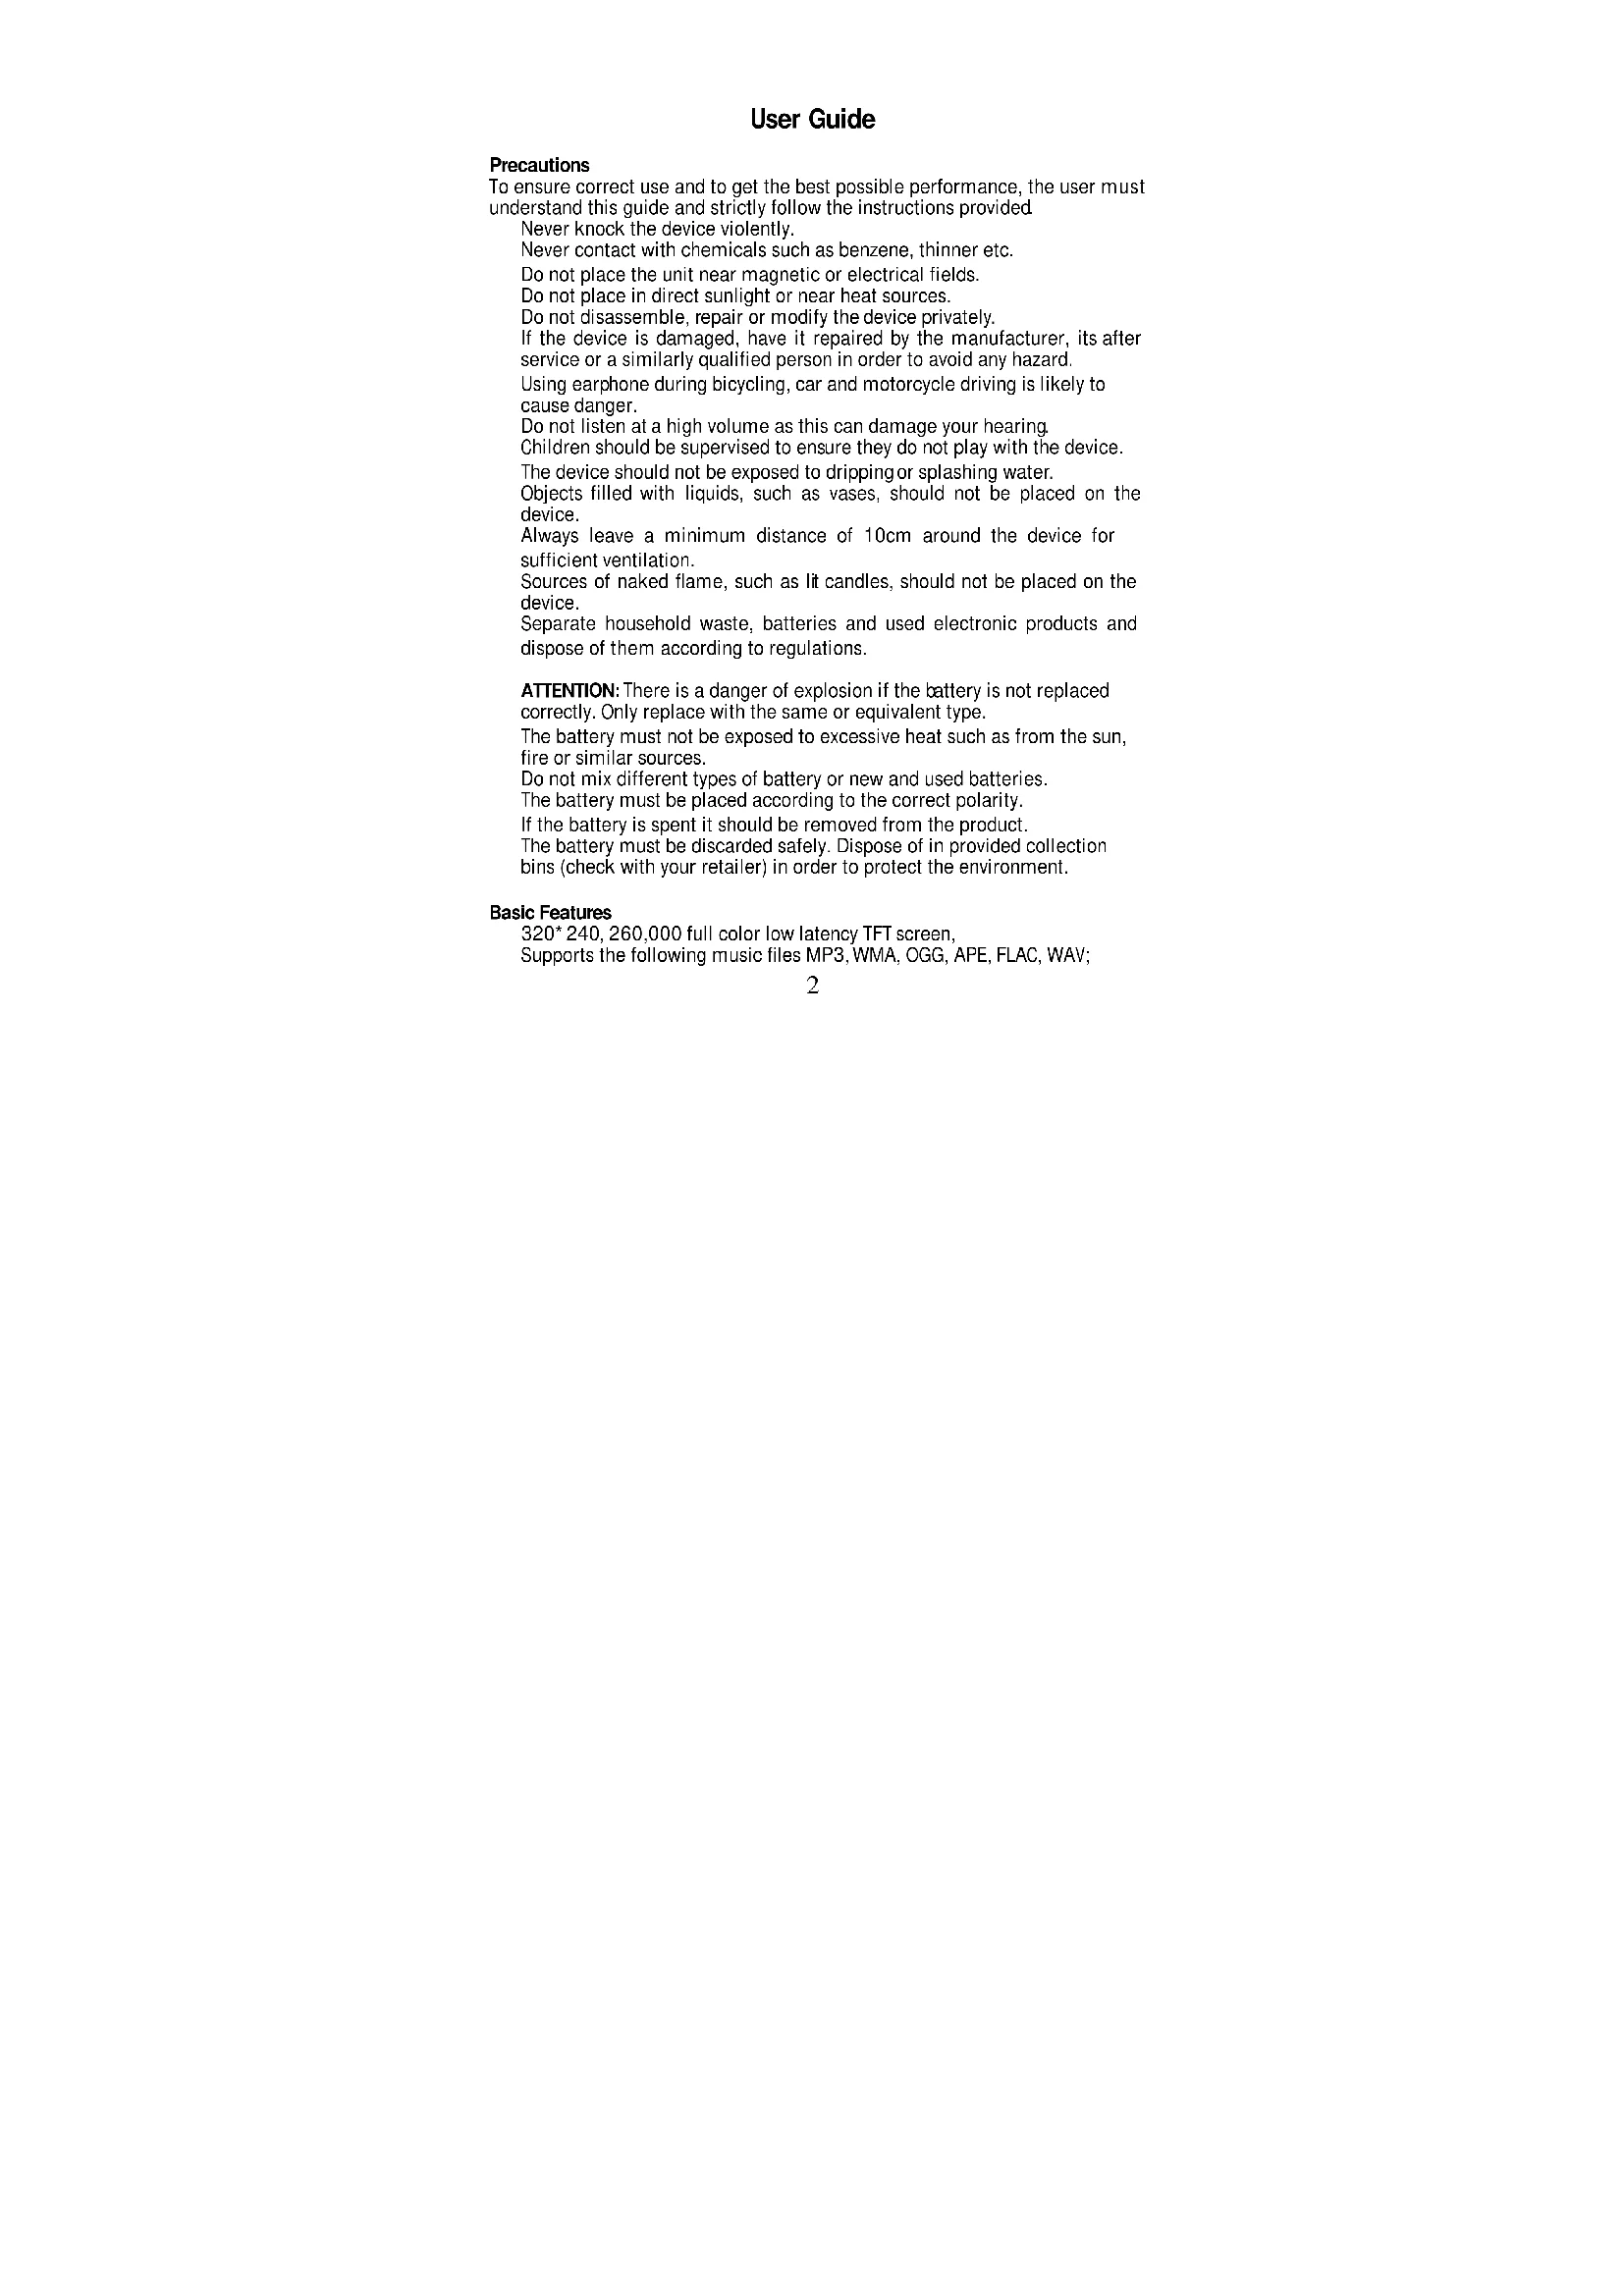
Button Description
- ON/OFF Button
- Strap holder
- USB port
- Earphone Jack
- MicroSD/ TF card slot
- V/V+: Volume control
- :Plavor confirm
-
MENU : Short press to display menu
-
previous item or file. Long press for rewind
- next item or file. Long press for fast forward
- :Ex
- Shortcut key 1: take photo
- Shortcut key 2, immediate launch
- Shortcut Key 3: delete, delete current file and display the next file
Use of Buttons
| Action | Basic use |
| Short press | Press for less than 1,2 seconds |
| Long Press | Press for more than 1,2 seconds |
| Hold | Keep button pressed |
Note: If no specific instructions are given, the default is short press
Turning on and off
Slide the button to ON or OFF to turn the player on or off. Alternatively long press to turn on or off. When the standby time is elapsed the player turns itself off automatically.
Note : This feature is disabled when the player is connected to a PC.
Low Power
When the battery power is low, the player enters standby mode. Do not turn on the player but charge it up instead. We recommend using a DC5V -400-500 mA charger.
System Configuration
Operating System: Windows XP/2K/ME/98 (driver required) / Linux9 and newer/Mac OS 10.
CPU: Pentium-133MHz and higher
Memory: 32 MB and more, 100MB disk space and more.
Video Card: supports 640* 480 and more resolution, 16 bit colors or higher. Rechargeable Battery: Li-ion, 350 mAh - 4.2V.
Connecting to a PC
Connect the player to a PC by using the USB cable. Turn on the player and select a profile. Refer to section
Disconnect the USB cable or remove the player from the PC to activate the player's functions. The device is in charging when it is still connected.
Connecting a charger/adapter
When the charger is connected, the system will display two option :
Music
Select
Main Menu
Now playing: opens the last track played and continues from last stop.
All music: displays all of the music stored in the player's MUSIC directory
Artist: Artist list. Select an artist to display all of their music. Unknown Artist music of artists whose names are not specified. The features Unknown Album and Unknown Genre are similar.
Album: Album list. Select an album to view contents.
Genre: Genre List. Select a genre to select all this type of music
My Music List: Up to five lists, all of which can be customized.
Dir List: Displays the internal memory contents.
Record List: gives access to all recordings
Star Level: Displays a user defined ranking of 1 to 5 stars for favorite music
Tag list: List all the music marked by the user. Maximum of 32 lists.
Music player Interface and use
- Play/pause: Press to play and pause
- Review/ Fast forward: When music is paused, hold to review fast forward.
- Change tracks: Press to go to the previous/ following track.
Sub Menu
On the player press MENU to display the sub menus:
-
AB Repeat: Select < AB repeat , press . "A-" appears, indicating that the system is "waiting confirmation from point A". Press again, "B" appears, indicating that the system is "waiting confirmation from point B", then press the , the icon changes to "A-B", showing that the AB play is starting. Press again, to stop the AB repeat
-
Repeat: Sequence, Repeat One / All, Shuffle, Shuffle + Repeat and Intro.
-
Select EQ: Normal, Rock, Pop, Classic, Soft, Jazz, DBB, User EQ, SRS WOW, SRS WOW HD and SRS User Mode.
4. Set Sound:
1) User EQ: Select
2) SRS User Mode: The same as
3) Fade in / Fade out
-
Replay Times: Press to alter the time relay between 1 to 10 or 8.
-
Replay Interval: Press to change, from 1 sec to 7 secs.
-
Variable Speed: Press to change playback speed between -4 to 4.
8 Lyric Display: Select Activate or Deactivate
- Set Star Level: Set the number of stars to rate favourite music
10 AddBookmark: Select
List>
-
Add to MyList: select a list and press to confirm and return to the previous level. The chosen music is now added. Your music is found in the corresponding list, via
. -
Delete: deletes the current file.
13 Information: displays the audio file details.
Videos
Select
Main Menu and basic use
Now playing : The function is identical to
Dir List: The function is identical to
Tag List : displays up to 32 labelled video files
-
Play / Pause: Press to start playback. During playing, press any button and bars at the top and the bottom of the screen will display the file details and progression. The bars will disappear if no button is pressed within 3 seconds.
-
To go forward or back, use to fast forward or rewind.
-
Switch Files: During playback or at pause, press to change the file
Sub Menu
On the player press MENU to display the sub menus:
Bookmark>,
- Playback Mode: Sequence, Repeat One / All, Random.
- Add Bookmark: similar to
- Delete: deletes the current file.
- Information : displays the video file details.
Pictures
Select
Now playing: Refer to
Dir List: The function is identical to
Play Mode: Press to switch between List Mode and Thumbnail mode.
Sub Menu
In manual navigation, press MENU to display the sub menus:
- Rotate: Select angle of rotation for the image : 90, 180 and 270 degrees.
- Zoom: Press to enlarge or reduce the size. Press to exit the sub menu and press to move the image. press usr and to move to the right/left; press MENU to exit. (while zooming, it is not possible to move between previous/ nex photos).
- Slide Gap: Select the slide show speed: 1-10 Sec.
Note: These functions are disabled for GIF files. Zoom is disabled for images smaller than 320^240 .
- Slide Effect: Choice of transition effects:
, , , , , , , . - Set as desktop background: Can set a personal image as background or in place of start up / shutdown logos. Select "Default background" to reset.
- Set as startup : Short image as startup screen logo
- Set as shutdown. Short image as shut down screen logo
- Delete: Delete the photo displayed
- Information : Display info on displayed photo.
Camera
Select
-
Press br shortcut 1 to take a photo;
-
Press to zoom in/out; Press to switch to video mode
Camera Menu
Press MENU to enter menu. The items are
- Preview: browse taken photos.
- View Parameter: camera settings.
- Switch to DV: switch to video mode.
- White Balance: auto, inside, outside.
- Brightness: value between -3 +3
- Exposure Mode: auto, inside, outside.
-
Special Effect: Off, black and white, sepia and negative
-
Save Path: internal or external memory (not shown if no card detected).
- Resolution: 2048x1536, 1600x1200, 1280x960 and 640x480.
- Self-timer: Off (default), 5 sec, 10 sec, 15 sec, 20 sec.
11.Shutter sound: Off, sound 1 (default sound), sound 2, sound 3 - Date stamp: Off (default), date, time and date;
Video Recorder
Select
Press to start / pause the recording. Press to switch to camera mode
DV Menu
Press MENU to enter menu. The items are
- Preview: Browse taken photos.
- View Parameter: Video recorder settings.
- Switch to DV: switch to basic camera mode
- White Balance: auto, inside, outside.
- Brightness: value between -3 +3
- Exposure Mode: auto, inside, outside.
- Special Effect: Off, black and white, sepia and negative
- Save Path: internal memory or external memory (not shown if no card detected).
- Resolution: 320x240, 224x176 and 176x144.
- Record Quality: High (default), medium, auto.
Recordings
Select
Record\Pause\stop:Pressto start recording or put on pause.Press
and you will be asked "Stop record ?". Select YES or NO and press to confirm and return to the recording screen. The file will be saved in
MENU
On the recording screen, press MENU to display the following :
1. Record Format : To select file format
2. Record Quality : low, medium and high.
3. Record Gain: Adjust the recording volume: levels 1-7.
4. Save Path: Internal or external memory (not shown if no card detected).
EBook
Select
Main Menu
Now showing: Displays the last text shown and highlights the text. The function is identical to
Dir List: The function is identical to
Tag list : displays up to 32 labelled text files.
While reading, press to switch from auto / to manual. In manual mode, the text does not automatically scroll, press to display the previous or following page.
Sub Menu
On the player, press MENU to display its sub menus:
- Skip to : The distance, defined as a percentage, from the start of the text.
- Auto Play Gap: Set the automatic scrolling speed. Press to adjust, from 5sec to 30sec.
- Font Size: Choose between small, medium and large.
4.Add Bookmark:see - Delete File: Delete the current file.
Tools
Select
Stopwatch
- Select Stopwatch then press enter.
- Press to start/ pause/ continue the count. Press to save the value and start another count. After the fifth count, press to restart the first
- When the count is paused, press MENU to continue.
Calculator
- Select calculator then press to enter.
- Press to navigate from right to left. Press to confirm.
Calendar
- Select calendar then press to enter.
- Press to switch Year/ Month/ Day, short pressing or long pressing allows the values to be changed.
PC Camera
- Select
to enter and the system will detect whether a cable has been connected or not. - The USB video icon will appear on the PC, click to use the camera
File Navi
Select
Main menu
- This menu includes :
and ( not shown if no card detected) - Select
to enter the menu list which includes MUSIC, PICTURES, PLAYLIST, RECORD, TXT, VIDEO and other personal files. - Select a file then press to display the contents. Select the file in the list then press to open the file
- Using an external memory is the same.
Sub menu and basic use
Quickly press MENU to enter the sub menu which includes:
- Move and Copy: first select the file/folder to be moved/copied then select the target folder. Press Menu to display a confirmation window of the action.
- Delete:Press to delete the selected file/folder.
Settings
Select
- Effects Setting: Choose between: Normal, Cube, Zoom, Push
2. Time and Date
Adjust the date: Set the system date. Press to change the values and press to confirm and quit. Adjust the time: Set the system time. Press MENU to switch between hours, minutes, AM/PM then press to change the values. Press to confirm and quit.
3. Display
1) Backlight brightness: levels 1-5.
2) Backlight: Off, 5, 10, 20secs, 30secs, 1min, 5mins. If the function is off, then the screen will not turn off automatically. If a duration is selected, then the screen will automatically turn itself off after the defined time period.
4. Power Saving
1) Power saving: Off, 10secs, 30secs, 1min, 5mins and 10mins. If the function is off, then the screen will not turn off automatically. If a duration is selected, then the player will automatically turn itself off after the defined time period.
2) Standby: Off, 10secs, 10min, 30min, 1hr, 2hrs, 3hrs, 4hrs, 5hrs.
- Language: Supports: English, Japanese, Korean, French, German, Italian, Dutch, Portuguese, Spanish, Swedish, Czech, Danish, Polish, Russian, Turkish, Hebrew, Thai, Hungarian, Romanian, Arabic, Indonesian, Malaysian, Greek.
6. TV Out
1) Connect the player to (such as TV or DVD player),
2) Press to select. Off or PAL/NTSC;
3) Go to the corresponding menu to select a file to play.
7. Advanced
1) Player Information: Displays the username, firmware version, memory total space, memory free space, card capacity, card free space
2) Desktop Theme. Frame, Projection, CoverFlow.
3) Key Tone: 4 key tones are available.
4) Formatting memory: Format the player's internal memory. Please back up important data before formatting
5) Formatting external memory: Format the memory card detected. Please back up important data before formatting
6) Set Owner: RegisterUsername
7 Clear DRM HDS. Clear cookies. Select OK or Cancel
8) System Check: Automatic system check. Select OK or Cancel
9) Reset: Reset to factory settings
Connection Type
USB: Connect the player the the PC by using a USB cable, the system will display :
PLR IP Holdings, LLC, its licensees and affiliates, fully support all electronic waste initiatives. As responsible stewards of the environment, and to avoid violating established laws, you should properly dispose of this product in compliance all applicable regulations, directives or otherGovernances in the area where you reside. Please check with local authorities or the retailer where you purchased this product to determine a location where you can appropriately dispose of the product.
In the European Union disposal of electronic waste is the responsibility of the end user.
This symbol on the product or on the container indicts that this product cannot be eliminated with the general waste. The user is responsible for eliminating this kind of waste by throwing them away at a recycling point specifically for electrical and electronic waste. Selective collection and electrical equipment recycling contribute to preserve natural resources and warrant waste recycling to protect environment and health. In order to receive further information about electrical and electronic waste collecting and recycling, contact your Local Council, the service of household waste or the establishment where the product was acquired.


At full volume, prolonged listening to the portable audio device may damage the user's hearing
Polaroid and Polaroid & Pixel are trademarks of PLR IP Holdings, LLC, used under license. All other trademarks are the property of the respective owner, who has not sponsored, endorsed or approved this product. PLR IP Holdings, LLC does not manufacture this product or provide any Manufacturer's Warranty or support.
Copyright © 2012. All rights reserved. This product is manufactured, distributed , and sold by Market Maker Brand Licensing, 79 route national 7,69570 Dardilly, France
For warranty information and technical support, please call 33+ (0)4 37 63 29 25 or visit www.polaroid.com.
Product features, specifications and appearances are subject to change


Questions/
help score help!
This manual will help you
enjoy your new product

If you still have questions, call our help line: 33+04 37 63 29 25

www.polaroid.com

Polaroid
Lecteur MP4
SL4TF24PR001/SEC 22.06.03
MANUEL D'UTILISATION

Dens qqustion
Crgle deoet vazid

2019年全国春季学业水平考试卷1
33+0437632925

ou viis
www.polaroid.com
Let's Get Started
Batterie rechargeable Li-ion, 350 mAh - 4.2V
Connector à un PC
Let's Get Started...