Studio Advance - Soundbar DEFINITIVE TECHNOLOGY - Free user manual and instructions
Find the device manual for free Studio Advance DEFINITIVE TECHNOLOGY in PDF.

| Product type | Soundbar with wireless subwoofer |
| Soundbar dimensions (W x H x D) | Approximately 114 cm x 7.6 cm x 10.2 cm |
| Soundbar weight | 6.2 kg |
| Power supply | Mains 100-240 V, 50/60 Hz |
| Power consumption | Standby < 0.5 W |
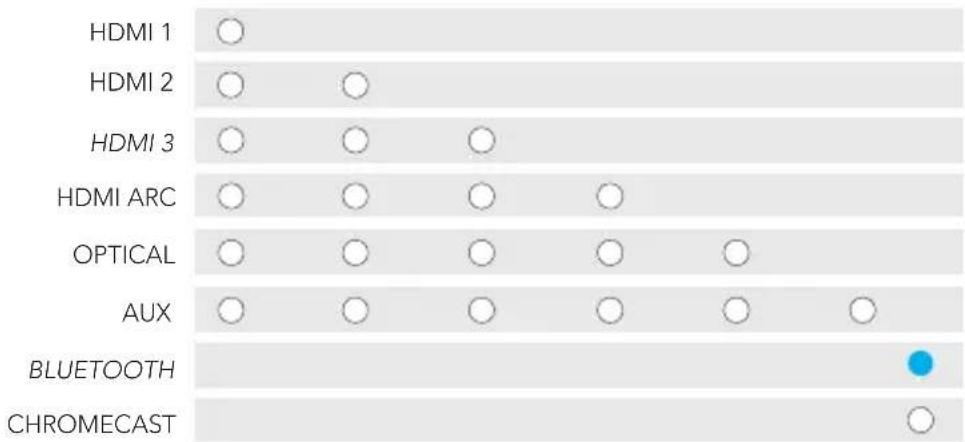
| Audio inputs | 3 HDMI inputs (including one with ARC), 1 optical input, 1 AUX 3.5 mm input |
| Audio output | HDMI ARC, Bluetooth, built-in Chromecast |
| Wireless connectivity | Wi-Fi (Google Home / Chromecast), Bluetooth 5.0 |
| Supported audio formats | Dolby Digital, DTS, PCM |
| Sound modes | Music, Movie, Night |
| Audio settings | Main volume, center level, bass level |
| Soundbar speakers | 2 tweeters, 2 woofers (2.1 configuration) |
| Subwoofer | Wireless, automatically connects to the soundbar |
| Voice assistant | Compatible with Google Assistant via Google Home |
| Wall mounting | Yes, keyhole slots, spacers included |
| Remote control | Infrared remote included |
| CEC compatibility | HDMI-CEC for control via TV remote |
| Maintenance | Clean with a soft, dry cloth. Do not use abrasive products. |
| Operating temperature | 5°C to 35°C |
| Warranty | 2 years (depending on country) |
Frequently Asked Questions - Studio Advance DEFINITIVE TECHNOLOGY
User questions about Studio Advance DEFINITIVE TECHNOLOGY
0 question about this device. Answer the ones you know or ask your own.
Ask a new question about this device
Download the instructions for your Soundbar in PDF format for free! Find your manual Studio Advance - DEFINITIVE TECHNOLOGY and take your electronic device back in hand. On this page are published all the documents necessary for the use of your device. Studio Advance by DEFINITIVE TECHNOLOGY.
USER MANUAL Studio Advance DEFINITIVE TECHNOLOGY
5.1 Home Theater Sound Bar and Wireless Subwoofer System
Setup Guide
What's in the Box

natural_image
Simple rectangular outline with rounded corners and a small square at the bottom right corner (no text or symbols)Sound bar
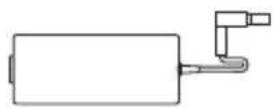
Power supply
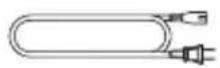
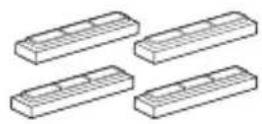
Subwoofer power cord Four risers (magnetic)
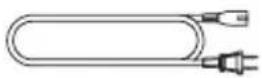
Power cord
IR Adapters (input and output)
Two spaces for wall mounting
Optical cable
natural_image
Simple line drawing of a rectangular frame with a small central block and two side supports (no text or symbols)Subwoofer

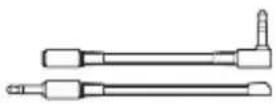
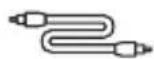
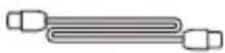
HDMI cable
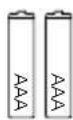
Two AAA
batteries Literature
Remote control

Setup
1.
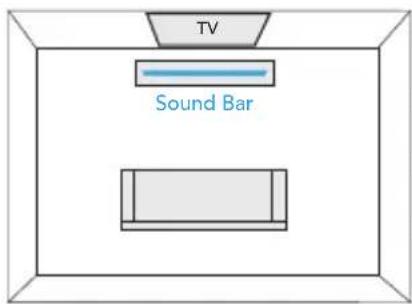
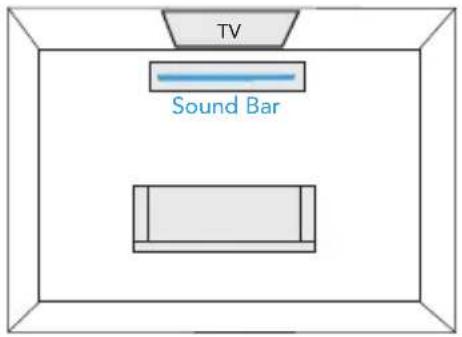
Place the sound bar
For the best listening experience, position the sound bar centered under your TV. You may choose to place it either on a stand, or wall-mount the sound bar below the TV.
2.
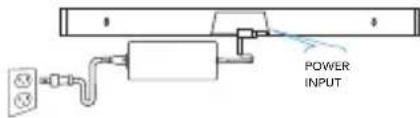
Connect the sound bar to an AC outlet
During startup, you will see multiple light shows. When all 10 LEDs are blinking slowly, the sound bar is ready to be set up with the Google Home app.
3.
Place the subwoofer
For best performance place on the same wall as the TV, no more than 30ft (10m) from the sound bar.
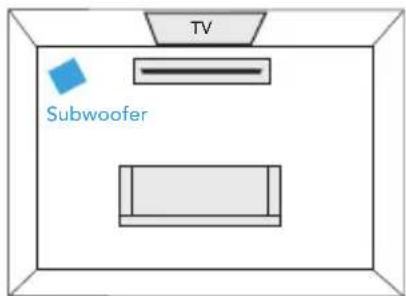
Performance Tip: placing the subwoofer in a corner can make the bass seem even more pronounced.
4.
Connect the subwoofer to an AC outlet
A solid light will be visible on the back of the subwoofer to indicate that it is paired to the sound bar.
5.
Download the Google Home App to setup your sound bar on your Wi-Fi network
Download the free Google Home app and follow the in-app instructions to setup the sound bar on your Wi-Fi network.
For more detailed setup information about Google Home and Chromecast built-in for audio, visit: https://support.google.com/googlehome and https://support.google.com/chromecastbuiltin
Once the sound bar is connected to your Wi-Fi network, it will receive firmware updates for the latest features, performance and tuning. We require updating your sound bar to the latest firmware for the best overall experience. Please refer to the "Receiving Automatic Updates" section under "Functionalities" (p. 8) for details.

Download on the
App Store

GET IT ON
Google Play
6.
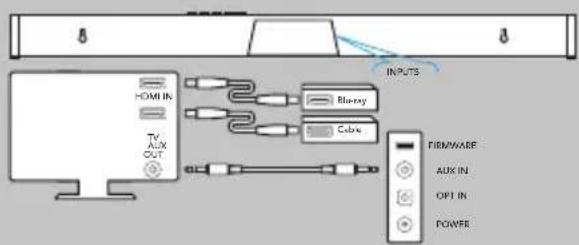
Connect to your TV
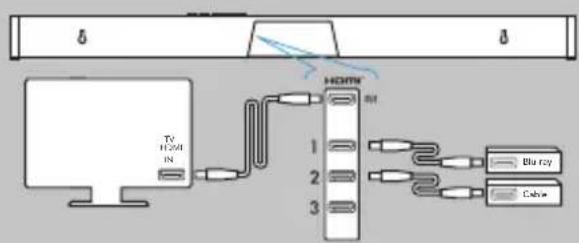
Is an HDMI input jack on your TV labeled "ARC"?
YES — Use HDMI (ARC)

Connect the included HDMI cable to the HDMI jacks labeled with "ARC" on both the TV and the sound bar.
NO — Use all sources into your Studio Advance via HDMI
flowchart
graph TD
    A["TV HDMI"] --> B["HDMN"]
    B --> C["Blu-ray"]
    B --> D["Cable"]
The HDMI cable runs from the HDMI output of the Studio Advance to an HDMI input on the TV set.
Connect to your TV (cont.)
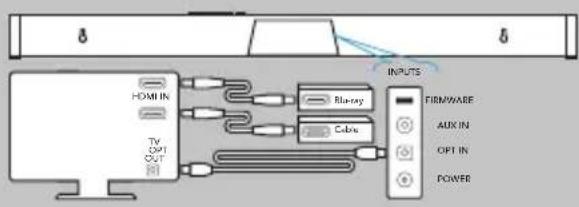
If your TV does not have HDMI, use Optical
flowchart
graph LR
    A[" HDMI IN "] --> B[" TV OUT "]
    B --> C[" Bluesay "]
    B --> D[" Cable "]
    C --> E[" INPUTS "]
    D --> E
    E --> F[" FIRMWARE "]
    E --> G[" AUX IN "]
    E --> H[" OPT IN "]
    E --> I[" POWER "]
Connect the included Optical cable between the TV and sound bar. With certain TV models you may need to turn the internal TV speakers off or set the sound to external speaker.
All sources into your TV with 3.5mm analog mini-jack to the sound bar
flowchart
graph TD
    A["Input"] --> B["Chamber"]
    B --> C["Chamber"]
    C --> D["Cable"]
    D --> E["Firmware"]
    E --> F["AUX IN"]
    E --> G["OPT IN"]
    E --> H["POWER"]
Some older TV's have only an analog output connection. In this scenario, the TV does all the switching between sources and the Studio Advance is always set to INPUT #4. A Dolby Digital or DTS digital audio signal cannot be passed through a TV's analog output connection. The best audio signal quality that can be reproduced using this method is two-channel stereo audio. This method is the least-preferred connection method of the four described here.
7.
Turn on your TV and enjoy the Studio Advance
Turn on your TV and verify that you are hearing sound from the sound bar.
Note: Access your TV's menu and turn off its internal speakers.
If you do not hear sound and do not see any lights on the front of your sound bar, press the power button on the sound bar to turn it on.
natural_image
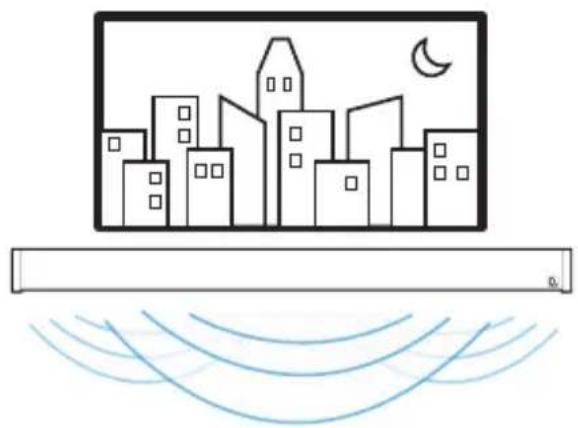
Simple line drawing of a city skyline with a crescent moon and wave lines below (no text or symbols)Functionalities
1. Using your TV remote to control the volume
The Studio Advance comes pre-configured to respond to volume and mute commands from the most popular TV remotes including: Samsung, LG, Sony, Vizio and other major brands.*
*All other trademarks, product names, logos and brands referenced herein are the property of their respective owners
2. Listening to music via Bluetooth®
- Bluetooth will only work after the product has been set up using the Google Home app.
- To pair your device using Bluetooth, press the Bluetooth button on the sound bar. A blue light will slowly pulse on the sound bar as it waits to connect to your Bluetooth device.
- Go to the Bluetooth settings section in your phone, tablet or computer and select the name chosen in the Google Home app. The name of the device changes to the name configured in the Home App setup flow. The light will turn solid blue for 3 seconds and fade to off when your Bluetooth device is connected.
- To re-establish a Bluetooth connection after pairing has already been completed, go to the Bluetooth settings on your device and connect to the sound bar.

Bluetooth®
3.
Chromecast built-in benefits
The Studio Advance features Chromecast built-in for easy streaming and more:
• Stream music from your favorite apps over Wi-Fi.
- Create a whole-home audio experience. Multi-room sync lets you play the same song across Chromecast built-in compatible speakers in your house at the same time.
- Use Google Assistant on a Google Home speaker or other Assistant-enabled device to control music playback on the Studio Advance with voice commands.

Chromecast built-in
Listening to music via Chromecast built-in
- Tap the cast button from your favorite music apps to start streaming to your speakers. For more information please visit: https://www.google.com/chromecast/built-in/audio/
- For information on list of Chromecast compatible apps please visit: https://store.google.com/us/product/chromecast_2015_apps?hl=en-US
Receiving automatic updates (highly recommended)
Definitive Technology securely provides periodic software updates via the Internet which improve product performance.

Google Home App
for iPhone, iPad and Android devices
Remote Control
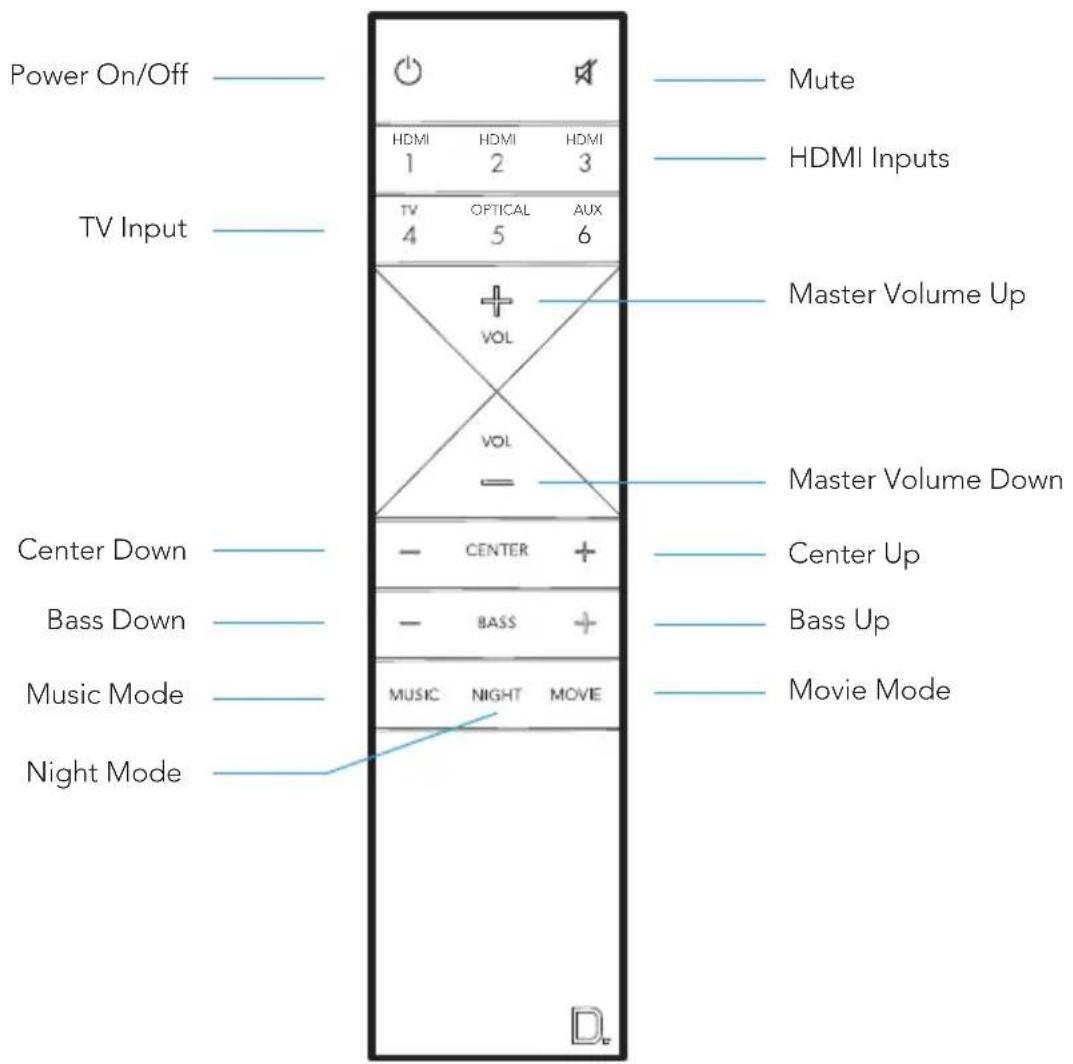
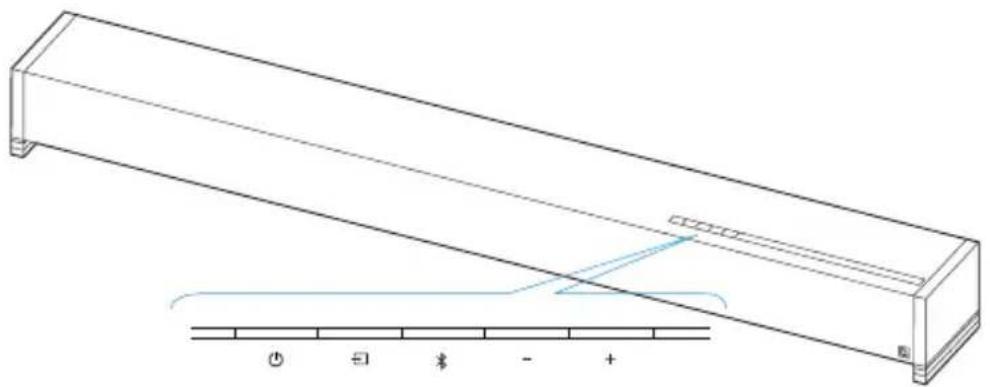
Sound Bar Controls
Front of Studio Advance
natural_image
Technical line drawing of a rectangular mechanical component with a blue internal structure and a scale bar below (no text or symbols)Power - Turns the Studio Advance on/off
Source - Switches sound bar inputs
Bluetooth - Initiates Bluetooth pairing
Volume Down - Decreases the master volume
+ Volume Up - Increases the master volume
Back of Studio Advance

Visual LED Indicators (Sound Bar)

Above is a closeup of the source indicators.
Several source colors indicate the audio bitstream for non-streaming inputs.
PCM CONTENT DOLBY CONTENT DTS CONTENT
NOTE: All source indicators appear for three seconds before fading to off.
MUTE INDICATOR
While MUTE is active, the source indication will blink.
VOLUME LEVEL INDICATORS

natural_image
Row of identical empty circles on a light gray background (no text or symbols)Master Volume will be indicated with 10 LEDs. Each LED will have 10 levels of brightness to indicate 1-100% volume. Volume 1% will be indicated with the left most volume dimly lit, volume 100% will be indicated with all 10 volume LEDs fully illuminated.
Volume indicators will illuminate in purple instead of white to indicate the state of Night Mode. In Standby, all lights are off.
● NIGHT MODE - enabled NIGHTMODE - disabled
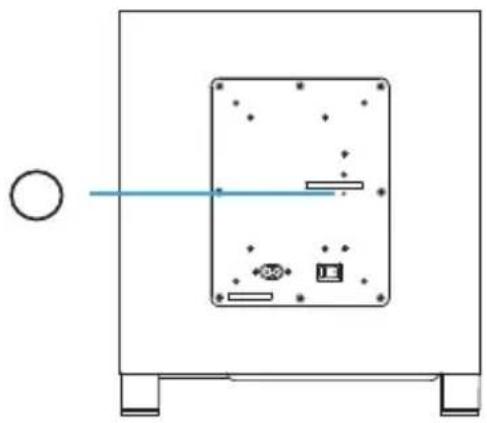
Visual LED Indicators (Subwoofer)
A solid LED light on the subwoofer indicates the subwoofer is connected to the sound bar.
If the subwoofer fails to connect, please call customer service.
natural_image
Simple line drawing of a device with a circular element and horizontal line, no text or symbols presentOptimize Your Listening Experience
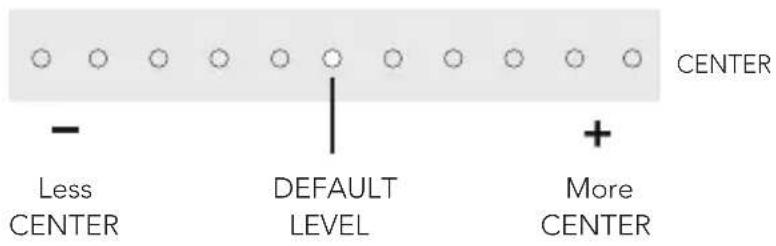
Customize the voice level to reproduce clear, crisp dialogue on your sound bar using the center (+/-) button on your sound bar remote.
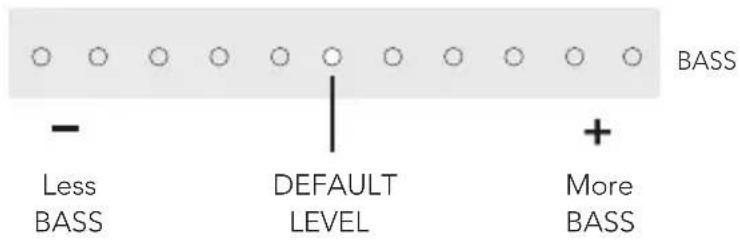
Customize the bass level using the bass (+/-) buttons on your sound bar remote.
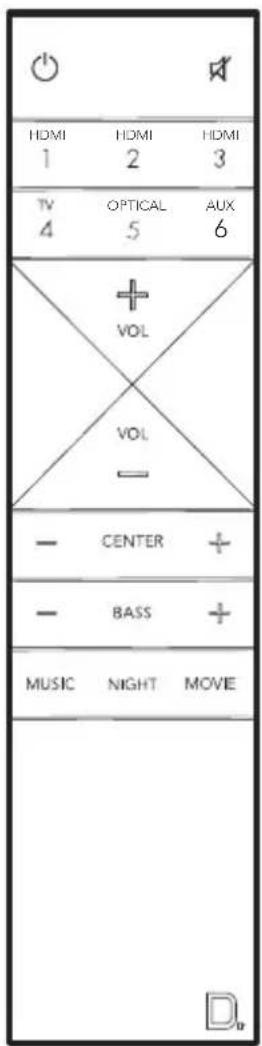
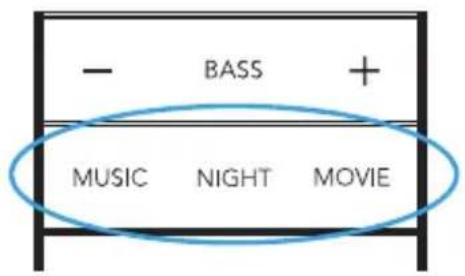
Sound Modes

Music Mode
Music mode provides a natural and balanced sound profile with smoother bass while minimizing home theater spatialization effects.
Movie Mode
Movie mode is optimized for both movies and TV content. It provides home theater spatialization effects, as well as enhanced dialogue and more dynamic bass impact. This is the default sound mode for HDMI and Optical input sources.

Night Mode
Night mode is optimal for low-volume listening. Bass and dynamic range are reduced to improve vocal clarity. Volume indicators will illuminate in purple instead of white to indicate the state of Night Mode. In Standby, all lights are off.
● NIGHT MODE - enabled NIGHTMODE - disabled
Using Your TV or Cable/Satellite TV Remote to Control the Studio Advance
Here's how to use your TV, cable, or satellite remote to control the Studio Advance.
HDMI CEC CONTROL
If your TV is connected via HDMI ARC and your TV supports CEC (and it is enabled in the TV settings menu), you can control the volume and mute functions on the Studio Advance from your TV without any further setup.
PRELOADED IR CODES
The Studio Advance comes pre-loaded with remote commands for many of the televisions manufactured within the last 5 years.
Placement Options
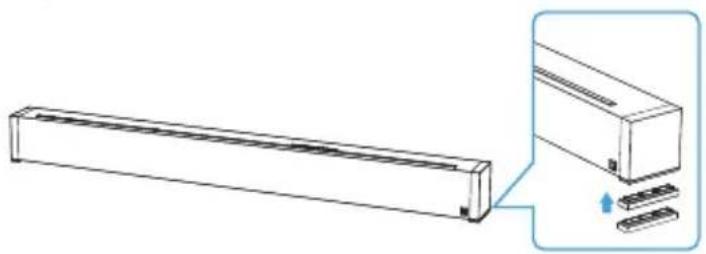
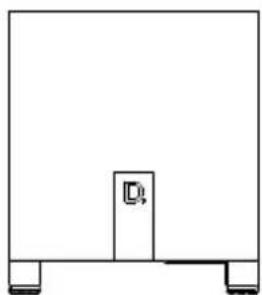
natural_image
Line drawing of a rectangular electronic component with an inset showing a close-up of its internal structure (no text or symbols)TABLETOP MOUNTING
The Studio Advance comes with extra riser feet (two per side) that magnetically attach to the Studio Advance to raise it as much as 15.2 mm (5/8") off the tabletop so the Studio Advance will clear the TV's protruding table stand.
Attach magnetic feet: Peel off the protective cover and expose the magnets. Attach the feet to the bottom edge of the Studio Advance.
NOTE: The Studio Advance could block your TV's remote "eye", making it impossible to control the TV via remote control, so we supply an IR flasher. Plug the flasher into the Studio Advance IR output and position it in front of the TV's eye.
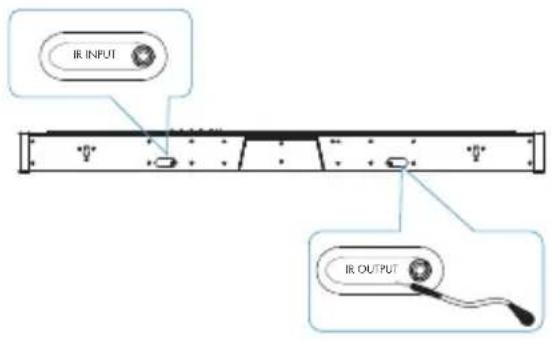
For custom installations: the IR input is more likely to be used with a home automation system, like Crestron or Control 4. This is often just an electrical connection to a piece of equipment.
The Studio Advance has built-in keyhole slots so you can wall-mount it beneath your wall-mounted television. Spacers are included to help secure and install your Studio Advance on the wall.
NOTE: DO NOT mount the Studio Advance directly to the wall. You must use the supplied wall-mount spacers to ensure proper operation and reliability. DO MAKE SURE you are using a wall anchor of suitable load-bearing capacity (13.65 lb).
![8/12.8 mm [30°]](/content/2026/03/501256/images/de5e9f881430b6f64cf25959fe55374febfc09c04f62986d884553fe540fe6b3.jpg)
Leveling the Studio Advance: Use a bubble level to make sure the bar is level. Mark holes with pencil, taking the keyhole slot measurement from the bar.
Drill Screw Holes in Wall: Pre-drill the pilot-hole locations for mounting screws (not included). Use screws rated to hold securely in the wall material and have screw heads at least 0.33" (8.5 mm) in diameter.
NOTE: Measure Twice. Make sure the sound bar clears the ceiling, adjacent walls, corners, beams, lighting fixtures and door/window frames. Leave at least 1-2" (25-50 mm) above the Studio Advance location to allow the Studio Advance to slide onto the screws. Make sure the center of the bar is centered with the TV screen's center point.
Hang the Studio Advance on Posts: Line up the bar so that the screw heads slide into the keyhole slots. Slide the bar down so the screw heads hold the bar firmly in place.
For Further Assistance:
Phone Number
(800) 228-7148 (North America)
+1 (410) 363-7148
definitive@custhelp.com
Definitive Technology
1 Viper Way
Vista, CA 92081
Follow us on


Google, Chromecast, Google Play and other related marks are trademarks of Google LLC
Contenu de la boîte

natural_image
Simple rectangular outline with rounded corners and a small square at the bottom right corner (no text or symbols)Barre de son
natural_image
Simple line drawing of a rectangular frame with a small central block and two side supports (no text or symbols)Subwoofer
Câble HDMI

Deux piles
AAA Document Télérommande

Installation
1 Placez la barre de son
natural_image
Simple line drawing of a city skyline with a crescent moon and wave lines below (no text or symbols)Fonctionnalités
natural_image
Technical line drawing of a rectangular mechanical component with a blue internal structure and a scale bar below (no text or symbols)natural_image
Row of identical empty circles arranged horizontally (no text or symbols)natural_image
Simple line drawing of a device with a circular element and a rectangular panel, no text or symbols present.natural_image
Line drawing of a rectangular air conditioner unit with a close-up inset showing internal components (no text or symbols)MONTAGE SUR TABLE
definitive@custhelp.com
Courrier
Definitive Technology
1 Viper Way
Vista, CA 92081
Suivez-nous sur


natural_image
Simple rectangular outline with rounded corners and a small square at the bottom right corner (no text or symbols)Barra de sonido
natural_image
Simple line drawing of a rectangular frame with a small central block and two side supports (no text or symbols)Subwoofer

Cable HDMI

Dos pilas
natural_image
Simple line drawing of a city skyline with a crescent moon and wave lines below (no text or symbols)Funciones
natural_image
Technical line drawing of a rectangular mechanical component with a blue internal structure and a scale bar below (no text or symbols)natural_image
Simple line drawing of a device with a circular element and horizontal line, no text or symbols presentnatural_image
Line drawing of a rectangular electronic component with an inset showing a close-up of its internal structure (no text or symbols)MONTAJE SOBREMESA
CONSEJOS PARA EL MONTAJE EN PARED DEL STUDIO ADVANCE
definitive@custhelp.com
Correo postal
Definitive Technology
1 Viper Way
Vista, CA 92081
Siga con nosotros


a division of D&M Europe B.V.
Beemdstraat 11
5653 MA Eindhoven
The Netherlands
HBP4236