
CL 2 - Exercise bike Christopeit - Free user manual and instructions
Find the device manual for free CL 2 Christopeit in PDF.

User questions about CL 2 Christopeit
0 question about this device. Answer the ones you know or ask your own.
Ask a new question about this device
Download the instructions for your Exercise bike in PDF format for free! Find your manual CL 2 - Christopeit and take your electronic device back in hand. On this page are published all the documents necessary for the use of your device. CL 2 by Christopeit.
USER MANUAL CL 2 Christopeit
Assembly and exercise instructions for Order No.1107(A)/11072/11071(A)
NL
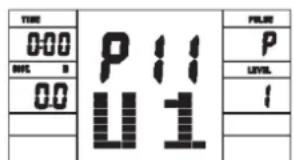
User Setting Program 11 (U1)
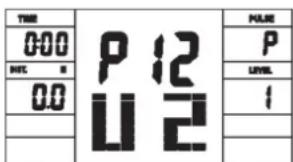
User Setting Program 12 (U2)
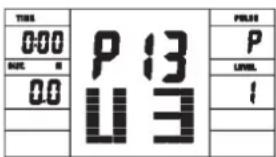
User Setting Program 13 (U3)
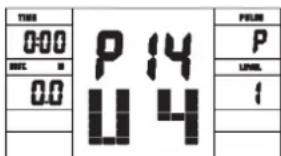
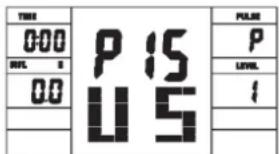
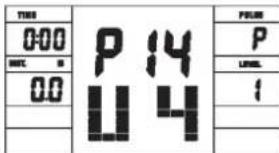
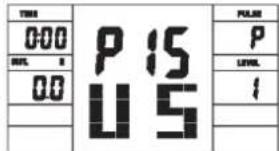
User Setting Program 14 (U4) User Setting Program 15 (U5)
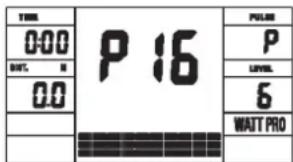
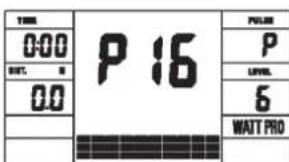
Programm 16 Watt Control Program
Programm 17 HRCP
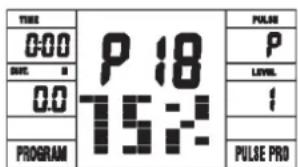
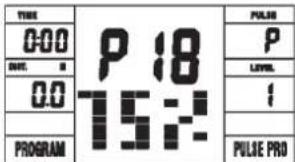
Programm 18 HRCP
Programm 19 HRCP Programm 20 HRCP
Programm Manual:
Programme 1 - 10: Fitness
- Summary of Parts Page 3 - 4
- Important Recommendations and Safety Information Page 18
- Parts List Page 19 - 21
- Assembly Instructions With Exploded Diagrams Page 22 - 24
- Mount, Use & Dismount
Watt table
Page 25
- Computer instructions
Page 26-27 - Cleaning, Storage, Checks, Troubleshooting, Page
- Training Instructions, Warm up exercises (Warm Up) Page 29
Dear customer,
We congratulate you on your purchase of this home training sports unit and hope that we will have a great deal of pleasure with it. Please take heed of the enclosed notes and instructions and follow them closely concerning assembly and use.
Please do not hesitate to contact us at any time if you should have any questions.
Important Recommendations and Safety Instructions
Our products are all tested and therefore represent the highest current safety standards. However, this fact does not make it unnecessary to observe the following principles strictly.
- Assembly the machine exactly as described in the installation instructions and use only the enclosed, specific parts of the machine. Before assembling, verify the completeness of the delivery against the delivery notice and the completeness of the carton against the assembly steps in the installation and operating instructions.
- Check the firm seating off all screws, nuts and other connections before using the machine for the first time and at regular intervals to ensure that the trainer is in a safe condition.
- Set up the machine in a dry, level place and protect it from moisture and water. Uneven parts of the floor must be compensated by suitable measures and by the provided adjustable parts of the machine if such are installed. Ensure that no contact occurs with moisture or water.
- Place a suitable base (e.g. rubber mat, wooden board etc.) beneath the machine if the area of the machine must be specially protected against indentations, dirt etc.
- Before beginning training, remove all objects within a radius of 2 metres from the machine.
- Do not use aggressive cleaning agents to clean the machine and employ only the supplied tools or suitable tools of your own to assemble the machine and for any necessary repairs. Remove drops of sweat from the machine immediately after finishing training.
- WARNING! Systems of the heart frequency supervision can be inexact. Excessive training can lead to serious health damage or to the death. Consult a doctor before beginning a planned training programme. He can define the maximum exertion (pulse, Watts, duration of training etc.) to which you may expose yourself and can give you precise information on the correct posture during training, the targets of your training and your diet. Never train after eating large meals.
- Only train on the machine when it is in correct working order. Use original spare parts only for any necessary repairs. WARNING! Replace the worm parts immediately and keep this equipment out of use until repaired.
- When setting the adjustable parts, observe the correct position and the marked, maximum setting positions and ensure that the newly adjusted position is correctly secured.
- Unless otherwise described in the instructions, the machine must only be used for training by one person at a time. The exercise time should not overtake 60 min./daily.
-
Wear training clothes and shoes which are suitable for fitness training with the machine. Your clothes must be such that they cannot catch during training due to their shape (e.g. length). Your training shoes should be appropriate for the trainer, must support your feet firmly and must have non-slip soles.
-
WARNING! If you notice a feeling of dizziness, sickness, chest pain or other abnormal symptoms, stop training and consult a doctor.
- Never forget that sports machines are not toys. They must therefore only be used according to their purpose and by suitably informed and instructed persons.
- People such as children, invalids and handicapped persons should only use the machine in the presence of another person who can give aid and advice. Take suitable measures to ensure that children never use the machine without supervision.
-
Ensure that the person conducting training and other people never move or hold any parts of their body into the vicinity of moving parts.
-
At the end of its life span this product is not allowed to dispose over the normal household waste, but it must be given to an assembly point for the recycling of electric and electronic components. You may find the symbol on the product, on the instructions or on the packing. The materials are reusable in accordance with their marking. With the re-use, the material utilization or the protection of our environment. Please ask the local administration for the responsible disposal place.
- To protect the environment, do not dispose of the packaging materials, used batteries or parts of the machine as household waste. Put these in the appropriate collection bins or bring them to a suitable collection point.
- For speed dependent operation mode, the braking resistance level can be adjustable manually and the variations of power will depend on the pedaling speed. For speed independent operation mode, the user can set the wanted power consumption level in Watt, constant power level will be kept by various braking resistance levels, that will be determined automatically by system. That is independent on the pedaling speed.
- The machine is equipped with 24-step resistance adjustment. This makes it possible to reduce or increase the braking resistance and thereby the training exertion. Pressing the button " - " for the resistance setting towards stage 1 reduces the braking resistance and thereby the training exertion. Pressing the button " + " for the resistance setting towards stage 24 increases the braking resistance and thereby the training exertion.
- The maximum permissible load (=body weight) is specified as 150 kg. This machine has been tested and certified in compliance with EN ISO 20957-1:2013 und EN ISO 20957-5:2016 H / A^a . This item's computer corresponds to the basic demands of the EMV Directive of 2014/30 EU.
- The assembly and operating instructions is part of the product. If selling or passing to another person the documentation must be provided with the product.
Parts List - Spare Parts List AL 2 Order No.1107(A),11072,11071(A)
Technical data: Issue: 01.02.2018
Ergometer of class H/A with high accuracy
-
Magnetic brake system with approx. 9 KG flywheel
-
Motor- and Computer-controlled resistance, with 24 manually adjustable load steps
10 installed programs
4 heart rate programs
- 5 individual programs
1 manually program
-
1 speed independent program, power control in steps of 10 Watt (30 - 350 Watt)
-
Handlebar and saddle incline adjustable
Saddle horizontally- and vertically-adjustable
-
Wheels for easier transportation
-
Power plug (Adapter)
-
LCD computer, showing at same time: Speed, time, distance, approx. calories, Pedal revolutions per minute, Watt and heart rate.
-
Input of limits for time, distance and approx. calories, watt and heart rate, Announcement of higher limits
Fitness test (Recovery)
Max. body weight 150 KG
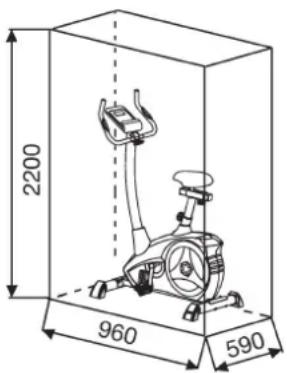
Space requirement approx. L 96, W 59, H 134 cm
Items weight: 28kg
Exercise space approx: min. 2,5m^2
Please contact us if any components are defective or missing, or if you need any spare parts or replacements in future:
Internet service- and spare parts data base: www.christopeit-service.de
This product is created only for private Home sports activity and not allowed to us in a commercial or professional area. Home Sport use class H/A

| Illus. No. | Designation | Dimensions mm | Quantity Attached to illus. No. | ET number 1107(A) | ET number 11072 | ET number 11071(A) |
| 1 Main | Frame 1 33-9212-01-SI 33-1107101-SW 33-1107101-WS | |||||
| 2 | Screw | M4x12 | 4 | 17 | 39-10188 | 39-10188 |
| 3 | Connection cable | 1 | 16+17 | 36-1107207-BT | 36-1107207-BT | |
| 4 | Pulse unit with wire | 2 | 7 | 36-9211-08-BT | 36-9211-08-BT | |
| 5 | Square end cap | 2 | 33 | 36-9211-23-BT | 36-9211-23-BT | |
| 6 | Fixed bracket | 1 | 29+33 | 33-9211-08-SI | 33-9211-08-SI | |
| 7 | Handlebar | 1 | 12 | 33-9211-02-SI | 33-1106102-SW | |
| 8 | Washer | 2 | 25+56 | 39-10520 | 39-10520 | |
| 9 | Bushing | 1 | 25 | 36-9613209-BT | 36-9613209-BT | |
| 10 | Handle cover | 1 | 7 | 36-9211-09-BT | 36-9211-09-BT | |
| 11 | Handlebar support cover | 1 | 12 | 36-1107-04-BT | 36-1107-04-BT | |
| 12 | Handlebar post | 1 | 1 | 33-9212-02-SI | 33-1107102-SW | |
| 13 | Curved washer | 8//19 | 8 | 14+28 | 39-9966-CR | 39-9966-CR |
| 14 | Screw | M8x16 | 4 | 12 | 39-9886-CR | 39-9886-CR |
| 15 | Spring washer | for M8 | 8 | 14+28 | 39-9864-VC | 39-9864-VC |
| 16 | Motor cable | 1 | 3 | 36-1107208-BT | 36-1107208-BT | |
| 17 | Computer | 1 | 12 | 36-1725-03-BT | 36-1725-03-BT | |
| 18 L | End cap left | 1 | 20 | 36-9211-13-BT | 36-9211-13-BT | |
| 18 R | End cap right | 1 | 20 | 36-1107-08-BT | 36-1107-08-BT | |
| 19 | Cap nut | 4 | 28 | 39-9900-CR | 39-9900-CR | |
| 20 | Front stabilizer | 1 | 1 | 33-9211-04-SI | 33-1106104-SW | |
| 21 L | Crank left | 1 | 41 | 33-9211-14-SI | 33-9211-14-SI | |
| 21 R | Crank right | 1 | 41 | 33-9211-15-SI | 33-9211-15-SI | |
| 22 L | Pedal left | 1 | 21L | 36-9110-04-BT | 36-9110-04-BT | |
| 22 R | Pedal right | 1 | 21R | 36-9110-05-BT | 36-9110-05-BT | |
| 23 | Small plastic cover | 2 | 21 | 36-9840-15-BT | 36-9840-15-BT | |
| 24 | Bolt | M8x25 | 2 | 21 | 39-10455 | 39-10455 |
| 25 | Hand grip bolt | 1 | 12 | 36-9211-16-BT | 36-9211-16-BT | |
| 26 | End cap with height adjustment | 2 | 27 | 36-9211-17-BT | 36-9211-17-BT | |
| 27 | Rear stabilizer | 1 | 1 | 33-9211-05-SI | 33-1106105-SW | |
| 28 | Bolt | M8x75 | 4 | 20+27 | 39-10019-CR | 39-10019-CR |
| 29 | Saddle post | 1 | 1+33 | 33-9211-06-SI | 33-1106106-SW | |
| 30 | Knob bolt | 1 | 1+29 | 36-9211-18-BT | 36-9211-18-BT | |
| 31 | Knob | 1 | 6+33 | 36-9211-19-BT | 36-9211-19-BT | |
| 32 | Washer | 10//20 | 1 | 31 | 39-9989-CR | 39-9989-CR |
| Illus. No. | Designation | Dimensions mm | Quantity Attached to Illus. No. | ET number 1107(A) | ET number 11072 | ET number 11071(A) |
| 33 Saddle slide 1 29 33-9211-07-SI 33-1106107-SW 33-1106107-WS | ||||||
| 34 Saddle 1 33 36-9211-20-BT 36-9211-20-BT 36-9211-20-BT | ||||||
| 35 End cap 2 7 36-9211-21-BT 36-9211-21-BT 36-9211-21-BT | ||||||
| 36 Foam grip 2 7 36-9211-22-BT 36-9211-22-BT 36-9211-22-BT | ||||||
| 37 Top cover 1 79 36-1107-06-BT 36-1107205-BT 36-1107-06-BT | ||||||
| 38 C-clip C 17 2 41 36-9211-33-BT 36-9211-33-BT 36-9211-33-BT | ||||||
| 39 Bearing | 6203ZZ | 2 | 1+41 | 39-9947 | 39-9947 | 39-9947 |
| 40 Wave washer | 17//22 | 1 | 41 | 36-9918-22-BT | 36-9918-22-BT | 36-9918-22-BT |
| 41 Axle | 1 | 39+42 | 33-9211-09-SI | 33-9211-09-SI | 33-9211-09-SI | |
| 42 Belt wheel | 1 41 | 36-9211-24-BT 36-9211-24-BT 36-9211-24-BT | ||||
| 43 Belt | 430 PJ6 | 1 | 42+68 | 36-9211-25-BT | 36-9211-25-BT | 36-9211-25-BT |
| 44 Bolt | 2 | 47 | 39-10120-SW | 39-10120-SW | 39-10120-SW | |
| 45 Spring washer | for M6 | 2 | 44 | 39-9865-SW | 39-9865-SW | 39-9865-SW |
| 46 C-clip C12 2 44 36-9111-39-BT 36-9111-39-BT 36-9111-39-BT | ||||||
| 47 Magnetic bracket axle | 1 44 | 36-9211-26-BT 36-9211-26-BT 36-9211-26-BT | ||||
| 48 Magnetic bracket | 1 | 47+49 | 33-9211-12-SI | 33-9211-12-SI | 33-9211-12-SI | |
| 49 Spring | 1 148 | 36-9211-27-BT 36-9211-27-BT 36-9211-27-BT | ||||
| 50 Bolt | M6x35 | 1 | 1+48 | 39-10306 | 39-10306 | 39-10306 |
| 51 Nut | M6 | 1 | 50 | 39-9861-VZ | 39-9861-VZ | 39-9861-VZ |
| 52 Spring washer | for M10 | 1 | 57 | 39-9995 | 39-9995 | 39-9995 |
| 54 Idler wheel | 1 57 | 36-9211-28-BT 36-9211-28-BT 36-9211-28-BT | ||||
| 55 Bushing | 1 56 | 36-9211-14-BT 36-9211-14-BT 36-9211-14-BT | ||||
| 56 Screw | M8x20 | 1 | 57 | 39-10095-CR | 39-10095-CR | 39-10095-CR |
| 57 Idler wheel bracket | 1 | 1 | 33-9211-11-SI | 33-9211-11-SI | 33-9211-11-SI | |
| 58 Spring | 1 147 | 36-9211-37-BT 36-9211-37-BT 36-9211-37-BT | ||||
| 59 Nylon nut | M10 | 1 | 57 | 39-9981 | 39-9981 | 39-9981 |
| 60 Axle nut | 2 | 69 | 39-9820-SW | 39-9820-SW | 39-9820-SW | |
| 61 Screw | M6x40 | 2 | 1+69 | 39-10000 | 39-10000 | 39-10000 |
| 62 U-piece | 2 61 | 36-9713-55-BT 36-9713-55-BT 36-9713-55-BT | ||||
| 63 Nut | M6 | 2 | 61 | 39-9861-VZ | 39-9861-VZ | 39-9861-VZ |
| 64 Nut | 2 69 | 39-9820 | 39-9820 | 39-9820 | ||
| 65 Bushing | 1 69 | 36-9211-15-BT 36-9211-15-BT 36-9211-15-BT | ||||
| 66 Tension cable | 1 | 48+74 | 36-9211-41-BT | 36-9211-41-BT | 36-9211-41-BT | |
| 67 Bearing | 6000Z | 2 | 68+69 | 39-9998 | 39-9998 | 39-9998 |
| 68 Flywheel | 1 67 | 33-1107-01-SI 33-1107-01-SI 33-1107-01-SI | ||||
| 69 Flywheel axle | 1 67 | 33-9211-13-SI 33-9211-13-SI 33-9211-13-SI | ||||
| 70 Screw | 3,5x20 | 17 | 74+79 | 39-9909-SW | 39-9909-SW | 39-9909-SW |
| 71 Screw | 3x10 | 12 | 20+27+72 | 39-10127-SW | 39-10127-SW | 39-10127-SW |
| 72 Round cover | 2 79 | 36-1107-05-BT 36-1107206-BT 36-1106104-BT | ||||
| 73 AC adaptor | 6V=DC/IA | 1 | 83 | 36-9107-22-BT | 36-9107-22-BT | 36-9107-22-BT |
| 74 Serve motor | 1 16 | 36-1721-09-BT 36-1721-09-BT 36-1721-09-BT | ||||
| 75 Rubber ring | 1 11 | 36-9211-31-BT 36-9211-31-BT 36-9211-31-BT | ||||
| 76 Nylon nut | M8 | 4 | 56+78 | 39-9918-CR | 39-9918-CR | 39-9918-CR |
| 78 Bolt | M8x16 | 3 | 41+42 | 39-9823-SW | 39-9823-SW | 39-9823-SW |
| 79 L Chain cover left | 1 | 1+79R | 36-1107-01-BT | 36-1107201-BT | 36-1107101-BT | |
| 79 R Chain cover right | 1 | 1+79L | 36-1107202-BT | 36-1107202-BT | 36-1107102-BT | |
| 80 Screw | 3x10 | 2 | 81 | 39-10127 | 39-10127 | 39-10127 |
| 81 Sensor | 1 1 36-1721-13-BT 36-1721-13-BT 36-1721-13-BT | |||||
| 82 Washer 2 44 39-10013-VC 39-10013-VC 39-10013-VC | ||||||
| 83 DC connection cable | 1 79L | 36-1721-07-BT 36-1721-07-BT 36-1721-07-BT | ||||
| 84 Washer | 4//10 | 4 | 2 | 39-10510 | 39-10510 | 39-10510 |
| 85 Saddle bushing | 1 1 36-9211-40-BT | 36-9211-40-BT 36-9211-40-BT | ||||
| 86 Wave washer | 17//23 | 1 | 41 | 36-9918-22-BT | 36-9918-22-BT | 36-9918-22-BT |
| 87 Small pulley | 1 69 | 36-9211-38-BT 36-9211-38-BT 36-9211-38-BT | ||||
| 88 Tool set | 1 | 36-9211-34-BT 36-9211-34-BT 34-BT 36-9211-34-BT | ||||
| Illus. No. | Designation | Dimensions mm | Quantity Attached to illus. No. | ET number 1107(A) | ET number 11072 | ET number 11071(A) |
| 89 Assembly and exercise instruction 1 36-1107-1 | BT 36-1107-11-BT 36-1107-11-BT 36-1107-11-BT | BT 36-1107-11-BT | ||||
| BT 36-1107-11-BT | ||||||
| BT 36-1107-11-BT | ||||||
| BT 36-1107-11-BT | ||||||
Assembly Instructions
Remove all the separate parts from the packaging, lay them on the floor and check roughly that all are there on the base of the assembly steps. Please note that a number of parts have been connected directly to the main frame and preassembled. In addition, there are several other individual parts that have been attached to separate units. This will make it easier and quicker for you to assemble the equipment. Assembly time: 30 - 40 min.
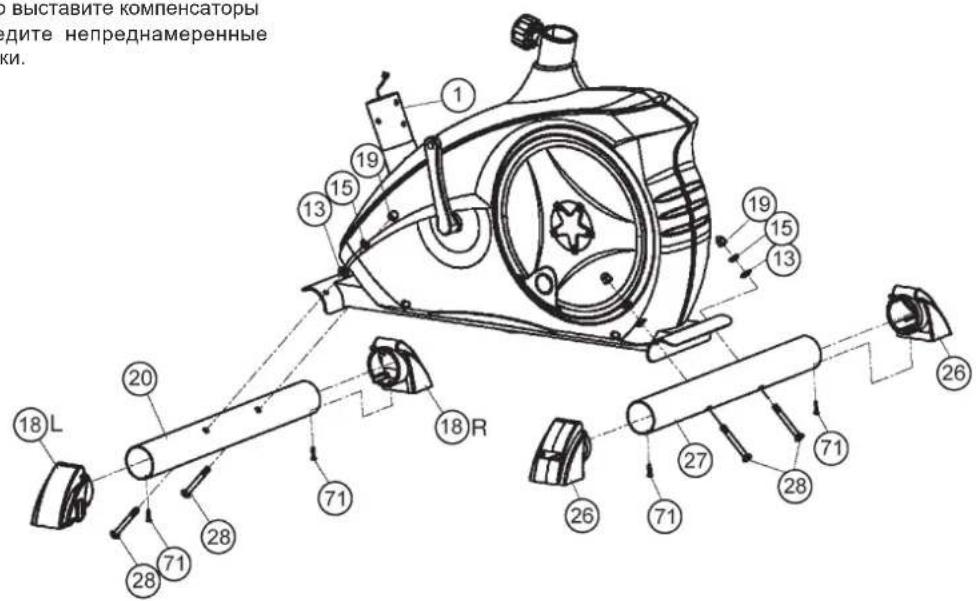
Step 1: Attach the stabilizer (20+27) at main frame (1).
- Put the end caps with transportation roller (18) at the ends of shorter front foot (20) in appropriate position and screw them tightly by using screw (71).
- Attach the front foot (20) with the preassembled end caps with transportation rollers (18) to the main frame (1). Do this with the two screws (28), washers (13), spring washers (15) and cap nuts (19).
- Put the end caps with height adjustment (26) at the ends of longer rear foot (27) and screw them tightly by using screw (71).
- Attach the rear foot (27) to the main frame (1). Do this with the two screws (28), washers (13), spring washers (15) and cap nuts (19). After assembly has been completed, you can compensate for minor irregularities in the floor by turning the wheel at cap (26). The equipment should be set up that the equipment does not move of its own accord during a training session. If you like to change the position of the home bike, put one foot in front of the front foot (20) and pull at handlebar in front direction until the home bike can move easy on the transportation rollers to another place.

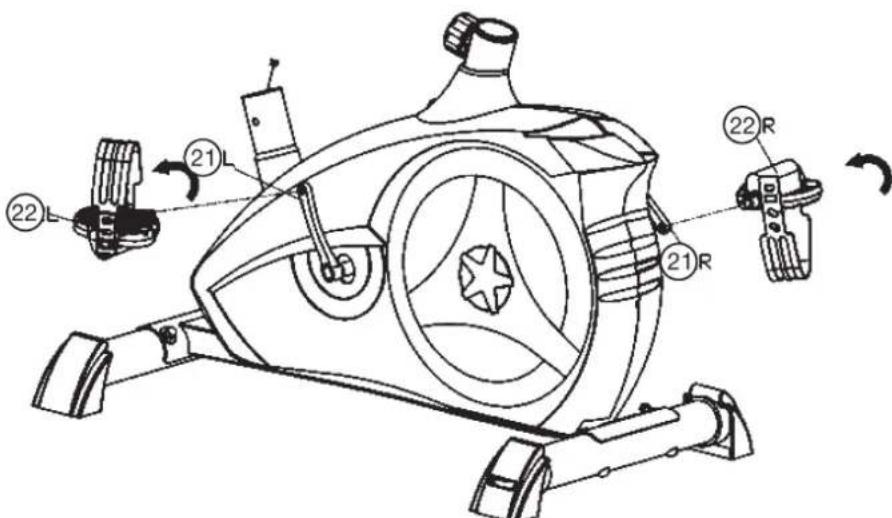
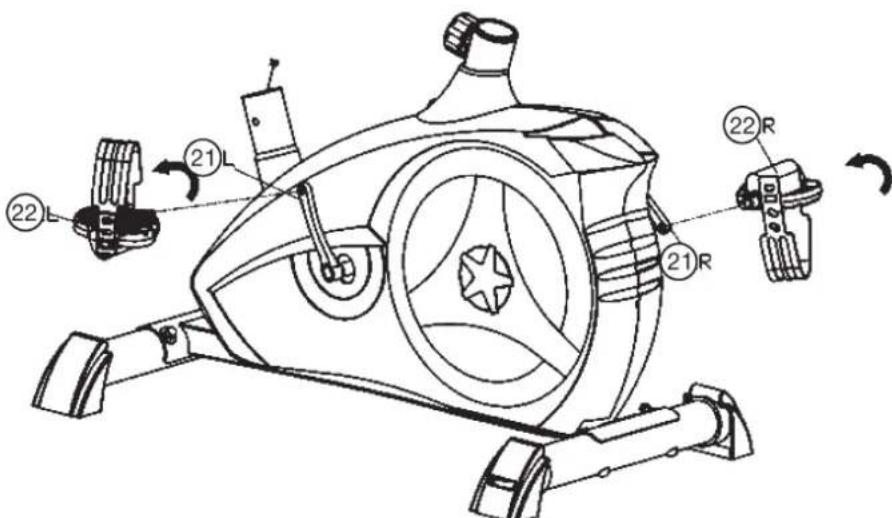
Step 2: Attach the pedals (22L+22R) at pedal crank (21L+21R).
- Screw the right pedal (22R) into the locator in the right-hand side (as seen in operation) for the pedal crank (21R) (warning! the screw direction is clockwise).
- Screw the left pedal (22L) into the locater in the left-hand side (as seen in operation) for the pedal crank (21L) (Warning! the screw direction is anti-clockwise)
- Then mount the pedal straps left and right on the associated pedals (22). (The pedals are signed with _L " for Left and _R " for Right.)
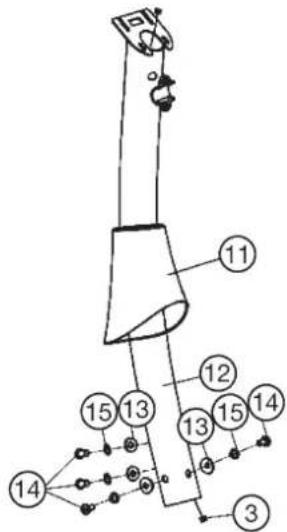
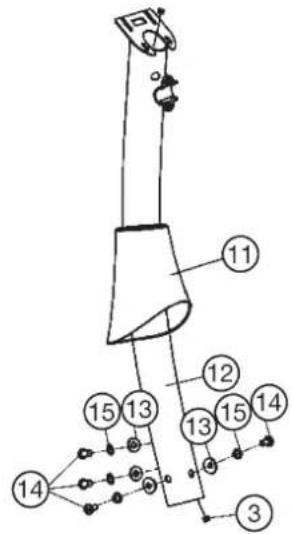
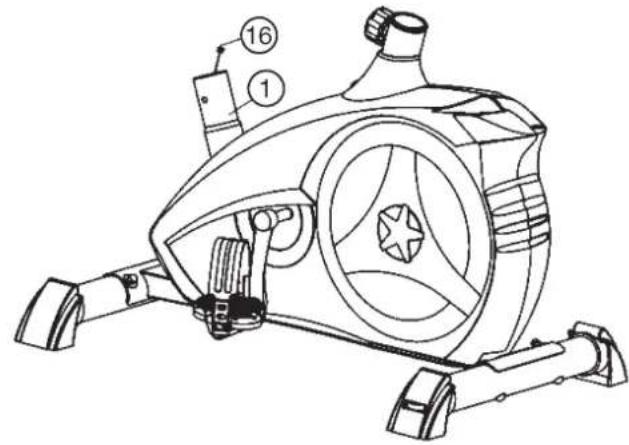
Step 3: Attach the front post (12) at main frame (1).
- Slide the handlebar support cover (11) onto the handlebar support (12).
- Hold the handlebar support (12) with the computer cable (3) against the main frame holder. Connect the plug for the computer cable (3) coming out of the bottom of the handlebar support (12) of the computer with the matching plug for the motor cable (16) coming out of the main frame (1).
(Note: The computer cable harness (3) projecting from the support (3) must not slide into the tube, as it is required for later steps of installation.)
- Place the handlebar support (12) in the locator provided for it in the main frame (1). Ensure that the cable connections made in step 3 are not squashed. When putting the steering tube in place, push the former slowly down into the locator in the main frame. Screw the handlebar support (12) onto the base frame (1) with the screws (14), spring washers (15) and washers (13).
- Push the handlebar support cover (11) into right position to cover up the screw connection point.

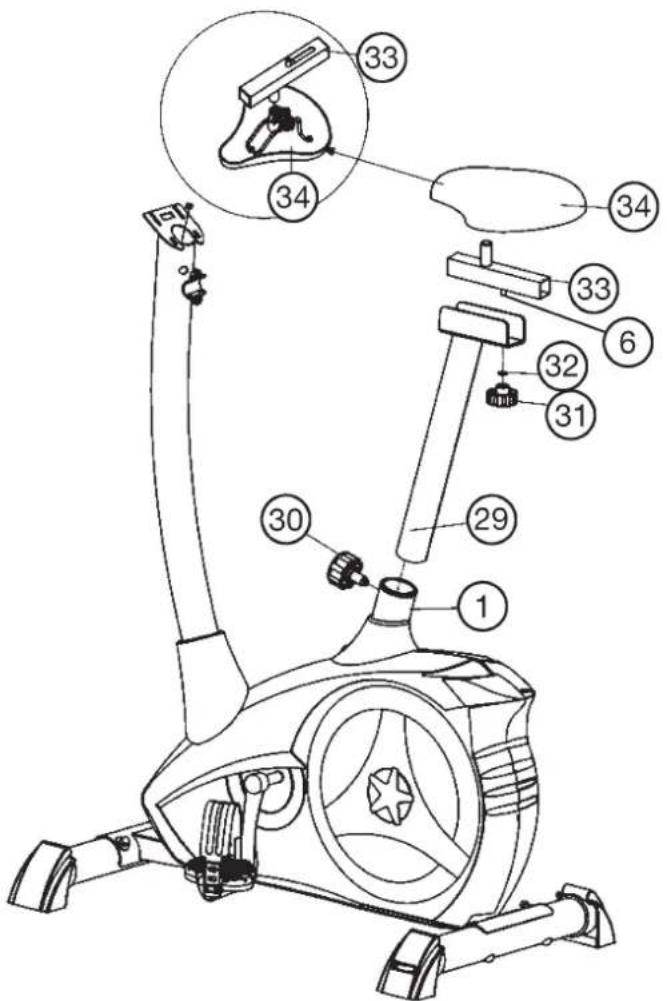
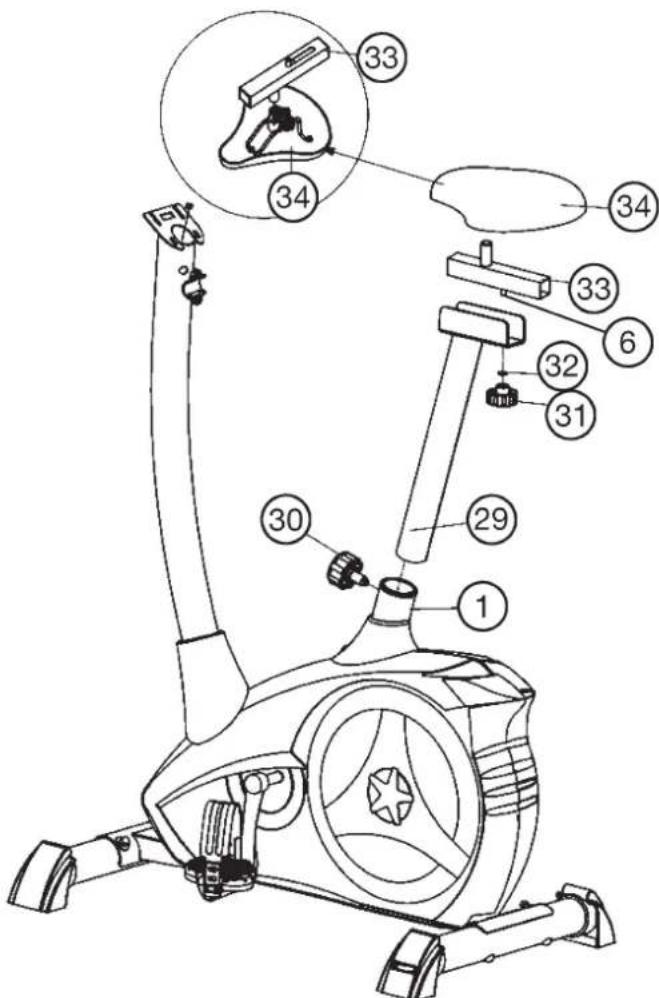
Step 4: Attach the saddle (34) and saddle slide (33) at saddle support (29) and the saddle support (29) at main frame (1).
- Push the saddle (34) with saddle bracket into the saddle slide (33) and tight it up in desired position.
- Place the saddle slide (33) into the holder of saddle support (29), set it at the desired horizontally position and screw it onto the saddle support (29) by fixing piece (6) washer (32) and star grip nut (31).
- Push the saddle support tube (29) into the matching locator in the main frame (1), set it at the desired position and lock it by inserting the bolt with the quick release (30) in place and doing it up tight.
(Note: To screw in the rapid-action lock (30), the threaded hole in the main frame (1) and one of the holes in the saddle support (29) must be aligned. Furthermore, ensure that the saddle support (29) is not pulled out of the main frame beyond the marked maximum Position. The setting of the saddle post can be adjusted as desired later. For this, the rapid action catch (30) must be loosened by only a few revolutions, the cap of the lock must be pulled away and the saddle adjusted. Then secure the new setting by tightening the rapid action catch.) Furthermore, you must ensure when setting this desired position that the seat pillar is not pulled out of the main frame further than the highest setting position, which is marked. Attention: Ensure before every exercising that the saddle is tighten firmly.
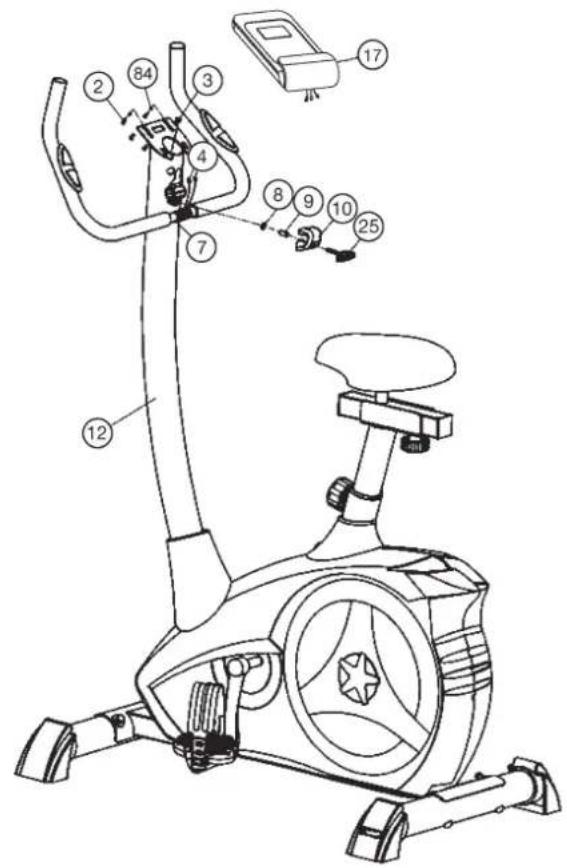
Step 5: Attach the handlebar (7) and computer (17) at handlebar support (12).
- Guide the preassembled handlebar unit (7) through the upper part of the handlebar post (12) and push the pulse cable (4) through the holes at handlebar support into top position and close the bracket of handlebar holder.
- Attach the handlebar cover (10) at the handlebar holder.
- Screw the handlebar (7) in desired position at the handlebar post (12) with spacer (9), washer (8) and handlebar screw (25).
- Push the plugs of the connecting cable (3) and pulse cable (4) projecting from the handlebar support (12) into the associated socket of the computer (17).
- Place the computer (17) on top of the handlebar support (12) and tight firmly by using screw (2) and washers (84). The screws (2) you find at backside of computer.

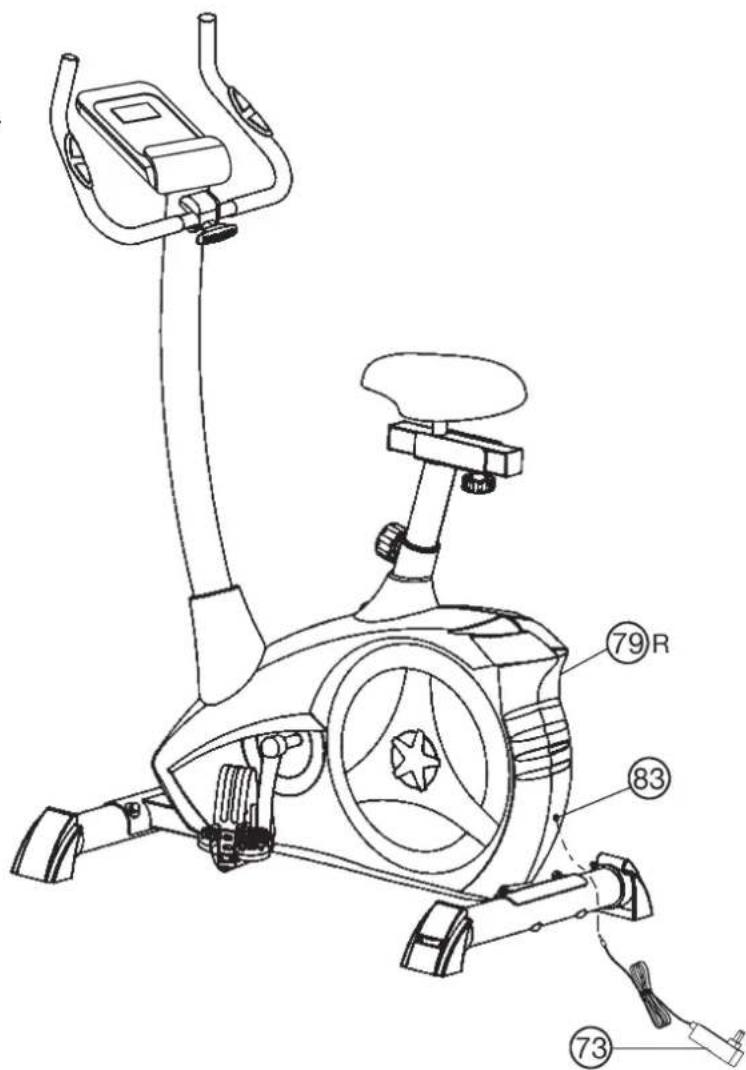
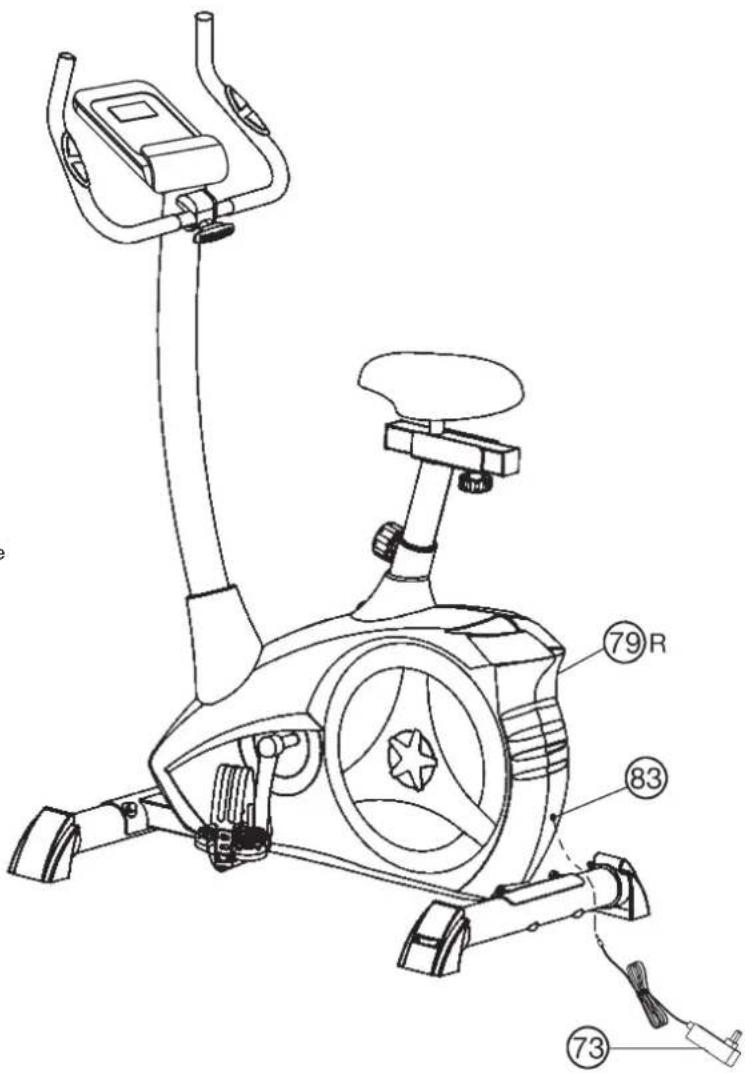
Step 6: Attach the power.
- Please insert the plug of adaptor (73) to the power plug (83) at end of chain guard (79R)
- Please insert the plug of adaptor (73) to the jack of wall power (230V 50Hz)
Step 7: Checks
- Check the correct installation and function of all screwed and plug connections. Installation is thereby complete.
- When everything is in order, familiarise yourself with the machine at a low resistance setting and make your individual adjustments.
Note:
Please keep the tool set and the instructions in a safe place as these may be required for repairs or spare parts orders becoming necessary later.
Mount, Use & Dismount
Transportation of Equipment:
There are two rollers equipped on the front foot. For moving, you can lift up the rear foot and drive it to where you would like to locate or store it.
Adjustment - Seat Position
For an effective workout, the seat must be adjusted properly. While your are pedaling, your Knees should be slightly bent when the pedals are in the farthest position. In order to adjust the seat, unscrew the knob few turns and draw it out slightly. Adjust the seat to the right height, then release the knob and tighten it all the way.
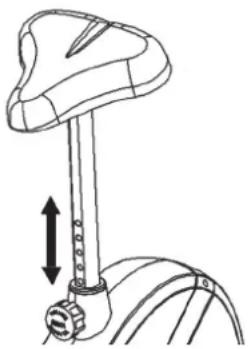
Important:
Make sure to put the knob back into place in the seat post and tighten it completely. Never exceed the maximum height of the seat. Always get off the bicycle before making any adjustment.
Mount, Use & Dismount
Mount:
a. After the seat is adjusted to properly position, insert your foot into retaining strap of pedal step on the pedal and hold the handlebar tightly.
b. Try to put whole body weight on your foot and simultaneously cross over the trainer and land your another foot on the other side.
c. Now you are in the position to start your training.
Use:
a. Keep you hands on the handlebar, and both feet are insert into retaining straps of both pedal properly.
b. Pedal your exercise bike by your both feet alternately.
c. Then you can increase the pedaling speed gradually and adjust braking resistance levels to increase the exercise intention.
Dismount:
a. Slow down the pedaling speed until it comes to rest.
b. Keep the left hand grabbing the left handlebar tightly, put your feet cross over the equipment and land on the floor, then land the other one.
This training equipment is a stationary exercise machine used to simulate without causing excessive pressure to the joints, hence decreasing the risk of impact injuries.
Exercise bike offer a non-impact cardiovascular workout that can vary from light to high intensity based on the resistance preference set by the user.
It will strengthen your muscles of legs and increase cardio capacity and maintain fitness of your body also.
RPM and Power in Watt of Level 1- Level 24 for AL 2 Art.-No. 1107(A), 11072, 11071(A)
| Level/RPM 20.30↓ | 40 | 50 | 60 | 70 | 80 | 90 | 100 | |||||||
| 17 15 24 34 46 61 | 74 | 90 | 111 | |||||||||||
| 28 16 26 37 50 67 | 82 | 100 | 124 | |||||||||||
| 39 18 31 45 60 80 | 98 | 120 | 146 | |||||||||||
| 4 10 22 36 52 70 93 | 114 | 140 | 168 | |||||||||||
| 5 11 24 40 59 80 107 | 131 | 160 | 192 | |||||||||||
| 6 13 27 45 66 90 121 | 148 | 180 | 216 | |||||||||||
| 7 14 30 50 74 100 134 | 166 | 202 | 241 | |||||||||||
| 8 15 33 55 81 110 147 | 183 | 223 | 266 | |||||||||||
| 9 17 36 60 89 120 161 | 201 | 244 | 291 | |||||||||||
| 10 18 39 65 97 130 | 175 | 219 | 266 | 315 | ||||||||||
| 11 20 42 70 104 140 | 189 | 237 | 269 | 340 | ||||||||||
| 12 21 44 75 111 150 | 202 | 254 | 310 | 365 | ||||||||||
| 13 22 47 80 118 160 | 215 | 270 | 330 | 390 | ||||||||||
| 14 23 50 85 125 170 | 230 | 286 | 350 | 414 | ||||||||||
| 15 25 52 90 133 180 | 243 | 302 | 369 | 438 | ||||||||||
| 16 26 55 94 140 190 | 256 | 318 | 389 | 462 | ||||||||||
| 17 27 58 99 146 200 | 269 | 334 | 408 | 486 | ||||||||||
| 18 28 61 104 153 210 | 282 | 350 | 426 | 510 | ||||||||||
| 19 30 64 109 161 220 | 295 | 365 | 446 | 534 | ||||||||||
| 20 31 67 114 169 230 | 308 | 382 | 464 | 558 | ||||||||||
| 21 32 70 118 176 240 | 321 | 398 | 484 | 580 | ||||||||||
| 22 34 72 122 182 250 | 414 | 506 | 602 | |||||||||||
| 23 35 74 127 189 260 | 430 | 430 | 526 | 625 | ||||||||||
| 24 37 76 131 196 270 | 446 | 548 | 649 |
Remarks:
- The power consumptions (Watt) are calibrated by measuring the driving speed (min-1) of axle and the braking torque (Nm).
- Your equipment was calibrated to fulfill the requirements of its accuracy classification before shipment, If you have doubts about the accuracy, please contact with your local retailer or send it to accredited test laboratory to ensure or calibrate it.
Computer Instructions
The monitor is designed for programmable magnetic bikes and introduced with the following categories:
- Key Functions
- About Displays
-Operating Ranges - Things You Should Know Before Exercising
-Operation Instructions
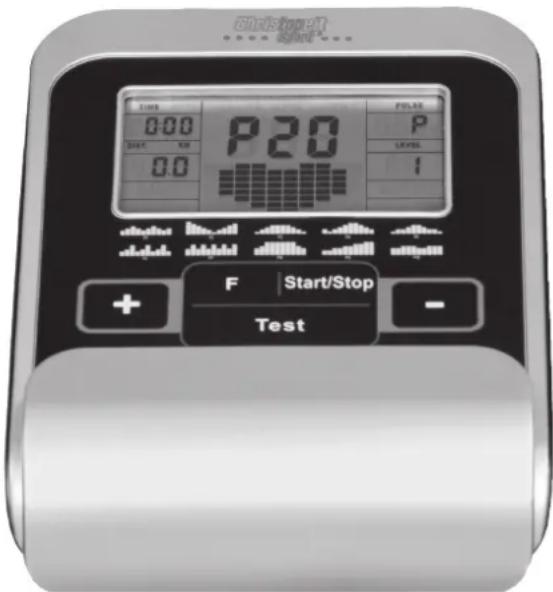
Key Functions
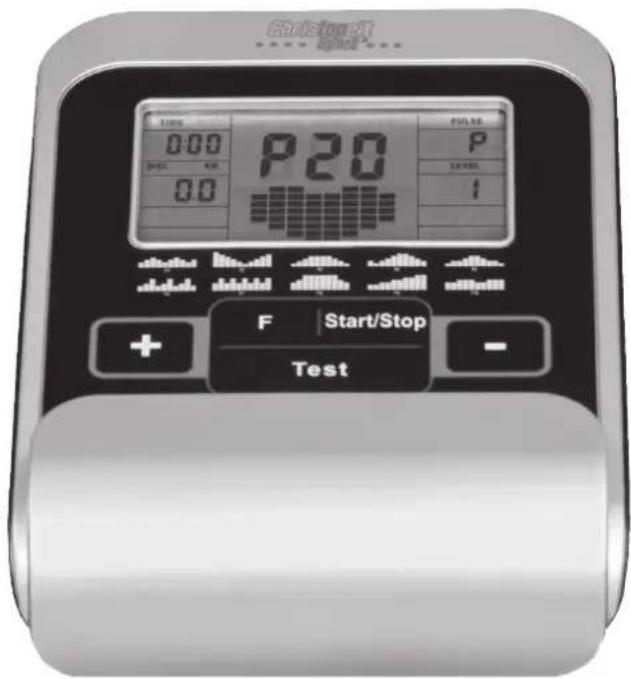
There are total 5 keys including START/STOP, FUNCTION(F), UP(+), DOWN(-), and RECOVERY (TEST).
START/STOP: Starts or stops the program chosen. And, resets the monitor by pressing and holding for 2 seconds.
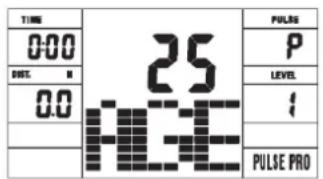
FUNCTION (F): Chooses or enters the functions from PROGRAMS, TIME, DISTANCE, WATT, CAL, TARGET HEART RATE, AGE, and 10 columns. The chosen function shall flash. Please note that not all the functions can be selected in every program according to the types of each program. During exercise, press the F-key to display the functions RPM, watts and calories or speed, time and distance permanently or alternately.
UP(+) : Selects or increases the values of PROGRAMS, TIME, DISTANCE, WATT, CAL., TARGET HEART RATE, AGE, and 10 columns.
DOWN(-): Selects or decreases the values of PROGRAMS, TIME, DISTANCE, WATT, CAL., TARGET HEART RATE, AGE, and 10 columns.
RECOVERY TEST):Starts the function of PULSE RECOVERY.
- About Display
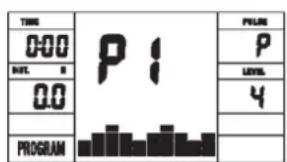
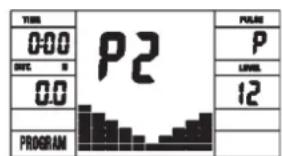
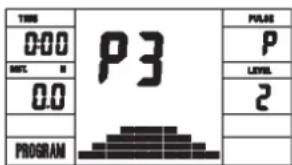
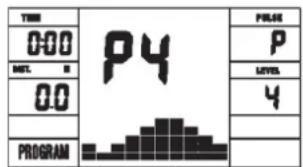
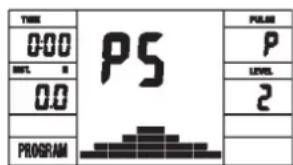
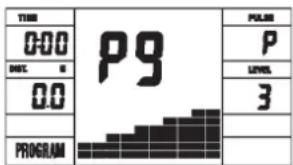
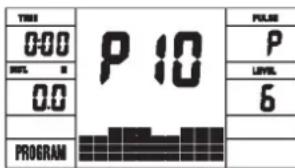
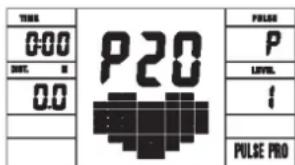
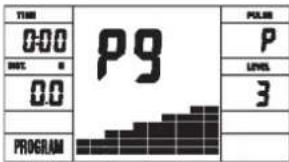
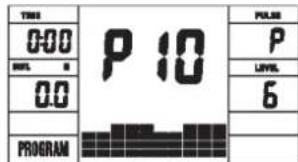
PROGRAM:
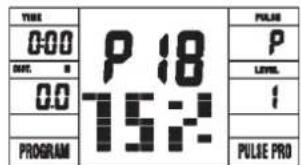
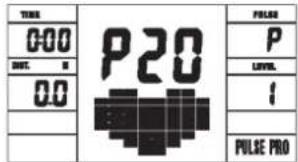
Indicates the programs selected from PROGRAM 1 to PROGRAM 20
LEVEL:
Indicates the level of loading selected from LEVEL 1 to LEVEL 24.
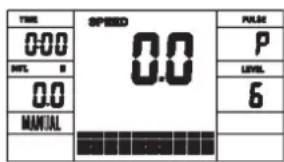
TIME/WATT:
Indicates Time or Watt alternately. The time shows minutes and seconds. If preset, time counts downwards. Minimum preset 5Min. Range 5-99Min. The actually power display show in Watt. Preset range 30-350Watt only in Watt program P16.v Or permanently by pressing the F-key.
RPM/SPEED/KMH:
Indicates RPM or Speed alternately. The RPM display shows the cycle turnings per minute. The speed display show kilometers per hour. Or permanently by pressing the F-key.
DIST/CAL:
Indicates Distance or Calorie alternately.
The distance display show kilometer. Preset range 1-999km. If preset distance counts downwards. The calories display shows kcal. Minimum preset 10kcal. Preset range 10-990. Or permanently by pressing the F-key.
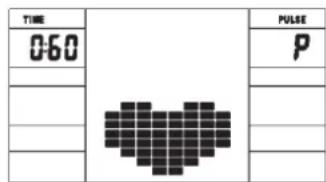
PULSE:
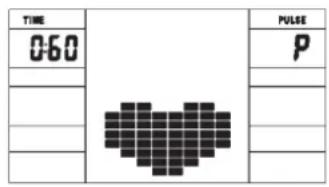
Indicates the actually pulse heart rate. The whole set of heart rate detector include 2 sensors each side. Each sensor has 2 pieces of metal parts. The correct way to get detected is to gently hold both metal parts each hand. With the good signals picked up by the computer, the heart mark in the HEART RATE Display shall flash. Range 60-240bpm. If a pulse upper limit is specified, the display flashes when the preset value is reached.
TARGET H.R.:
Indicates only one value of TARGET HEART RATE.
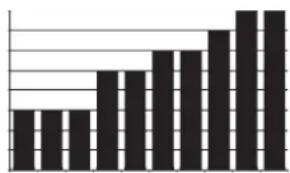
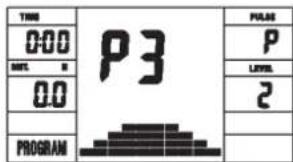
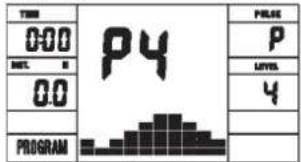
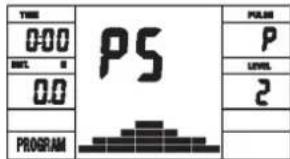
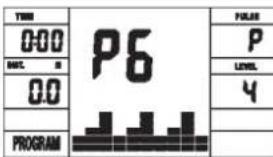
LOADING Profiles:
There are 10 columns of loading bars, and 12 bars in each column. Each column represents 1 minute workout (without the change of TIME value), and each bar represents 2 levels of loading.
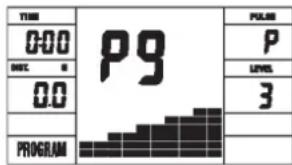
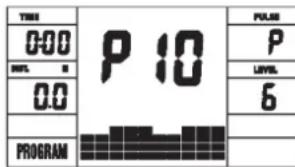
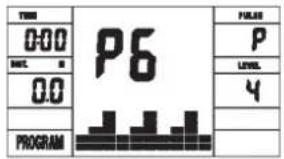
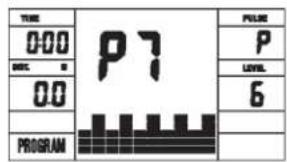
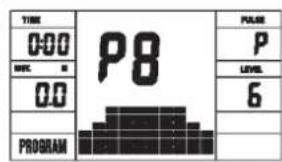
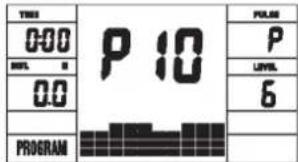
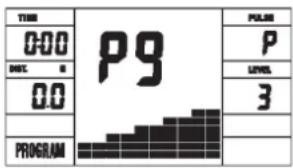
Program Graph:
Each graph shown is the profile of the loading in each interval (column). With the value of TIME counting up, each interval is 1 minute that all the columns make up 10 minutes. With the value of TIME counting down, each interval is the value of setup TIME divided by 10. For example, if the time value is setup to 40 minutes, each interval will be 40 minutes divided by 10 intervals (40 / 10 = 4) . Then, each interval will be 4 minutes. The following graphs are all the profiles in the monitor.
- Things You Should Know Before Exercising
The values calculated or measured by the computer are for exercise purpose only, not for medical purpose.
Programs Selection:
There are 22 programs 1 Manual Program, 10 Preset Programs, 4 Heart Rate Control Programs, 5 User Setting Programs, 1 Speed Independent Watt-Program, and 1 Pulse Recovery Measuring.
Manual Program Programm 1 Rolling Program 2 Valley
Programm 3 Fatburn Programm 4 Ramp Programm 5 Mountain
Programm 6 Interval Programm 7 Cardio Programm 8 Endurance
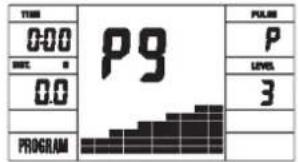
Programm 9 Slope Programm 10 Rally
User Setting Program 11 (U1) User Setting Program 12 (U2) User Setting Program 13 (U3)

User Setting Program 14 (U4) User Setting Program 15 (U5)
Programm 16 Watt Control Program Programm 17 HRCP Programm 18 HRCP

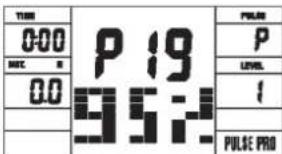
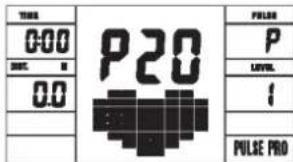
Programm 19 HRCP Programm 20 HRCP
Operation Instructions
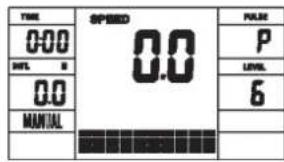
MANUAL Program:
PROGRAM MANUAL is a manual program. Press ^1F^2 key to select TIME, DISTANCE or CAL.. Then,press (+) or (-) key to adjust the values. The default level of loading is 6 .
After pressing "START/STOP" key to exercise, please also apply the heart rate detector appropriately. Users may exercise in any desire level (by pressing (+) or (-) during the workout) with a period of time or a certain distance.
Exercising with a specific Goal:
TIME Control: Sets up a period of time to exercise. (5-99Min.)
DISTANCE Control: Sets up a certain distance to exercise. (1-999km)
CALORIE Control: Sets up certain calories to exercise. (10-990kcal)
Set exercise parameters with F-key for Time/Distance/Calories and Pulse.
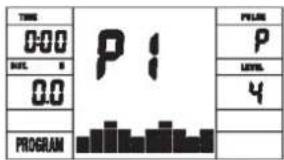
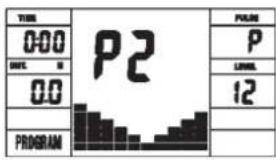
Preset Programs P1-P10:
PROGRAM 1 to PROGRAM 10 are the preset programs. Press "F" key to select TIME, DISTANCE or CAL. Then, press (+) or (-) key to adjust the values. Users may exercise with different level of loading in different intervals as the profiles show. After pressing "START/STOP" key to exercise, please also apply the heart rate detector appropriately. Users may also exercise in any desire level (by pressing (+) or (-) during the workout) with a period of time or a certain distance. Set exercise parameters with F-key for Time/Distance/Calories and Pulse.
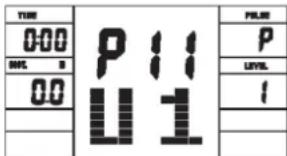
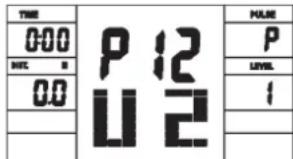
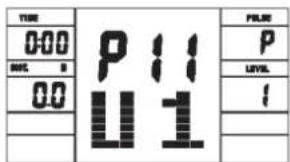
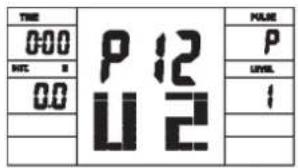
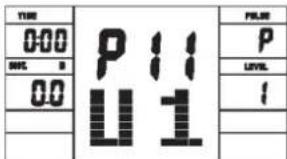
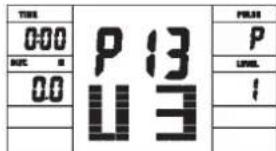
User Setting Programs P11-P15:
Program 11 to Program 15 are the user-setting programs. Users are free to edit the values in the order of TIME, DISTANCE, CAL. and the level of loading in 10 intervals.
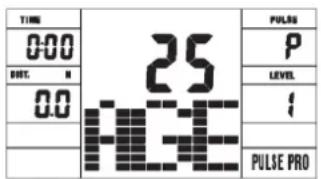
The values and profiles will be stored in the memory after setup. After pressing "START/STOP" key to exercise, please also apply the heart rate detector appropriately. Users may also change the ongoing loading in each interval by pressing (+) or (-) key, and they will not change the level of loading stored in the memory. With the input of age, the computer may suggest a target heart rate to exercise. The suggested heart rate is 80% (220 - age). So, if the heart rate detected equals to or greater than the TARGET H.R., the value of HEART RATE will keep flashing. Please note that it is a warning for users to speed down or to lower the level of loading. Set exercise parameters with F-key for Time/Distance/Calories and Pulse.
Speed Independent Watt-Program P16:
Program 16 is a Speed Independent Program. Press "F" key to select the values of TIME, DISTANCE, CAL, and WATT.
Then, press (+) or (-) key to adjust the values. After pressing "START/STOP" key to exercise, please also apply the heart rate detector appropriately. During the exercise, the level of loading is not adjustable. In this program, computer will adjust the level of loading according to the value of WATT setup.
For example, the level of loading may increase while the speed is too slow. Also, the level of loading may decrease while the speed is too fast. As a result, the calculated value of WATT will close to the value of WATT setup by users. Set exercise parameters with F-key for Time/Distance/Calories and Pulse.
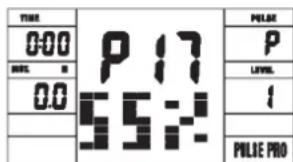
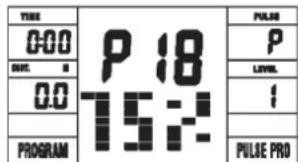
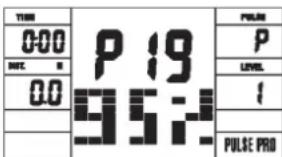
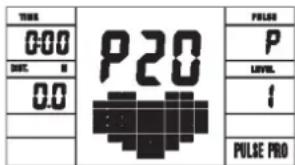
Heart Rate Control Programs P17-P20:
Program 17 to Program 20 are the Heart Rate Control Programs. In Program 17 to Program 19, press F^ key to select TIME, DISTANCE, CAL. and AGE. Then, press (+) or (-) key to adjust the values. Users may exercise in a period of time or a certain distance with 55% Max Heart Rate in Program 17, 75%
Max Heart Rate in Program 18, and 95% Max Heart Rate in Program 19. After pressing "START/STOP" key to exercise, please also apply the heart rate detector appropriately. In these programs, the computer will adjust the level of loading according to the heart rate detected. For example, the level of loading may increase while the heart rate detected is lower than TARGET H.R. Also, the level of loading may decrease while the heart rate detected is higher than TARGET H.R. As a result, the user's heart rate will be adjusted to close the TARGET H.R. in the range of TARGET H.R. -5 and TARGET H.R. +5. With the input of age, the computer may suggest a target heart rate to exercise. The suggested heart rate is 80% (220 - age).
So, if the heart rate detected equals to or greater than the TARGET H.R., the value of HEART RATE will keep flashing. Please note that it is a warning for users to slow down or to lower the level of loading.
In program 20, press F^ key to select TIME, DISTANCE, CAL. and TARGET H.R. Users may setup a target heart rate to exercise in a period of time or a certain distance.

Training area in mm (for home trainer and user)
TEST-Pulse Recovery:
It is a function to check the condition of pulse recovery that is scaled from 1.0 to 6.0 while 1.0 means the best and 6.0 means the worst and the increment is 0.1. In order to get rated correctly, users must test it right after the workout finished by pressing "TEST" key and then stop exercising. After the key is pressed, please also apply the heart rate detector appropriately. The test will last for 1 minute and the result will show in the display.
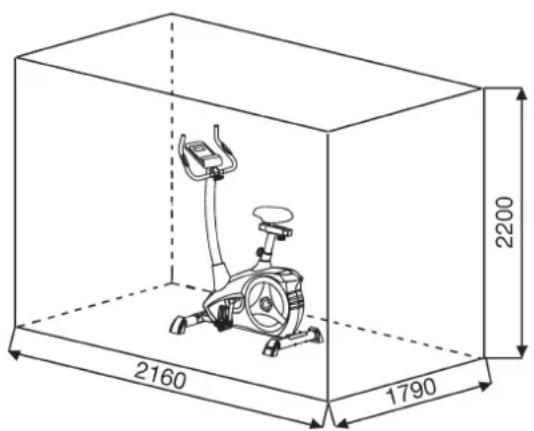
Free area in mm (Training area and security area (rotating 60cm))
Cleaning, Checks and Storage of the Ergometer bike:
1. Cleaning
Use only a less wet cloth for cleaning. Caution: Never use benzene, thinner or other aggressive cleaning agents for surface cleaning as this damage caused.
The device is only for private home use and for use suitable indoors. Keep the unit clean and moisture from the device.
2. Storage
Plug out the power supply unit while intending the unit for more than 4 weeks not to use. Push the saddle slide toward the handlebar and the seat support tube as deeply as possible into the frame. Choose a dry storage in-house and put some spray oil to the pedal bearings left and right, to the thread of the handlebar bolt, and on the thread of the quick release for saddle support.
Cover the bike to protect it from being discolor by any sunlight and dirty through dust.
3. Checks
We recommend every 50 hours to review the screw connections for tightness, which were prepared in the assembly. Every 100 operating hours, you should put some spray oil at the pedal bearings left and right, to the thread of the handlebar bolt and to the thread of quick release for saddle support.
Troubleshooting
If you cannot solve the problem with the following information, please contact the authorized service center.
| Problem Possible | Cause Solution | |
| Computer has no value at Dis-play if you press any key. | No power adapter is well plugged or wall power is without power. | Check that the power adapter is properly plugged in, possibly with another electric device check if the wall power is fine. |
| Computer is not counting data and do not switch on after start cycling. | Sensor impulse missing base on not well plugged connection | Check the plug connections at computer and inside of handle-bar support. |
| Computer is not counting data and do not switch on after start cycling. | Sensor impulse missing base on not correct position of sensor. | Take off the cover and check the distance between magnet and Sensor. The magnet at turning belt wheel should have only less than < 5mm distance against the sensor position. |
| No pulse value Pulse | Lse cable is not plugged in. | Check the separately pulse cable is well connected with computer. |
| No pulse value Pulse | Lse sensors not well connected | Screw out the screw for pulse measurement and check if plugs are well connected and no damage at pulse cable. |
Training instructions
You must consider the following factors in determining the amount of training effort required in order to attain tangible physical and health benefits:
1. Intensity:
The level of physical exertion in training must exceed the level of normal exertion without reaching the point of breathlessness and / or exhaustion.
A suitable guideline for effective training can be taken from the pulse rate. During training this should rise to the region of between 70% to 85% of the maximum pulse rate (see the table and formular for determination and calculation of this).
During the first weeks, the pulse rate should remain at the lower end of this region, at around 70% of the maximum pulse rate. In the course of the following weeks and months, the pulse rate should be slowly raised to the upper limit of 85% of the maximum pulse rate. The better the physical condition of the person doing the exercise, the more the level of training should be increased to remain in the region of between 70% to 85% of the maximum pulse rate. This should be done by lengthening the time for the training and / or increasing the level of difficulty.
If the pulse rate is not shown on the computer display or if for safety reasons you wish to check your pulse rate, which could have been displayed wrongly due to error in use, etc., you can do the following:
a. Pulse rate measurement in the conventional way (feeling the pulse at the wrist, for example, and counting the number of beats in one minute).
b. Pulse rate measurement with a suitable specialised device (available from dealers specialising in health-related equipment).
2. Frequency
Most experts recommend a combination of health-conscious nutrition, which must be determined on the basis of your training goal, and physical training three times a week. A normal adult must train twice a week to maintain his current level of condition. At least three training sessions a week are required to improve one's condition and reduce one's weight. Of course the ideal frequency of training is five sessions a week.
3. Planning the training
Each training session should consist of three phases: the warm-up phase, the training phase, and the cool-down phase. The body temperature and oxygen intake should be raised slowly in the warm-up phase. This can be done with gymnastic exercises lasting five to ten minutes.
Then the actual training (training phase) should begin. The training exertion should be relatively low for the first few minutes and then raised over a period of 15 to 30 minutes such that the pulse rate reaches the region of between 70% to 85% of the maximum pulse rate.
In order to support the circulation after the training phase and to prevent aching or strained muscles later, it is necessary to follow the training phase with a cool-down phase. This should be consist of stretching exercises and / or light gymnastic exercises for a period of five to ten minutes.
You find further information on the subject warm-up exercises, stretch exercises or general gymnastics exercises in our download area under www.christopeit-sport.com
4. Motivation
The key to a successful program is regular training. You should set a fixed time and place for each day of training and prepare yourself mentally for the training. Only train when you are in the mood for it and always have your goal in view. With continuous training you will be able to see how you are progressing day by day and are approaching your personal training goal bit by bit.
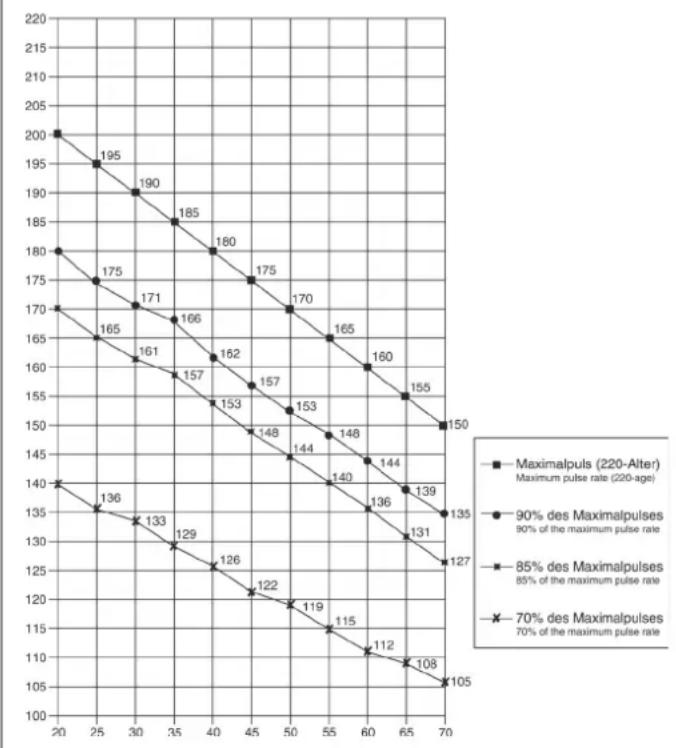
Calculation formula: Maximum pulse rate = 220· age (220 minus your age)
90% of the maximum pulse rate = (220 - age) x 0.9
85% of the maximum pulse rate = (220 - age) x 0.85
70% of the maximum pulse rate = (220 - age) x 0.7
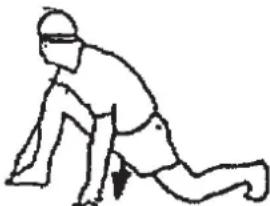
Warm up exercises (Warm Up)
Start your warm up by walking on the spot for at least 3 minutes and then perform the following gymnastic exercises to the body for the training phase to prepare accordingly. The exercises do not overdo it and only as far run until a slight drag felt. This position will hold a while.
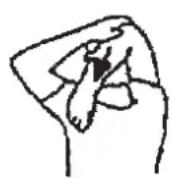
Reach with your left hand behind your head to the right shoulder and pull with the right hand slightly to the left elbow. After 20sec. switch arm.
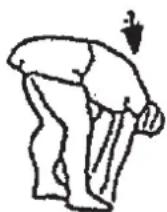
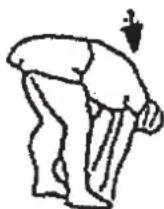
Bend forward as far forward as possible and let your legs almost stretched. Show it with your fingers in the direction of toe. 2 x 20sec.
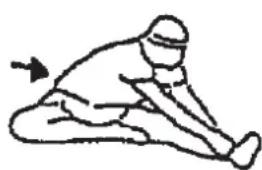
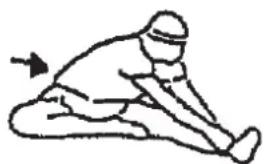
Sit down with one leg stretched out on the floor and bend forward and try to reach the foot with your hands. 2 x 20sec.
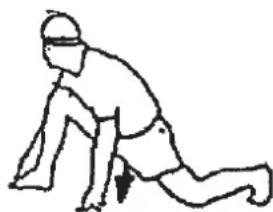
Kneel in a wide lunge forward and support yourself with your hands on the floor. Press the pelvis down. Change after 20 sec leg.
Chere cliente, cher client,
RPM and Power in Watt of Level 1- Level 24 for AL 2 Art.-No. 1107(A), 11072, 11071(A)
| Level/RPM 20-30↓ | 40 | 50 | 60 | 70 | 80 | 90 | 100 | |||||||
| 17 15 24 34 46 61 | 74 | 90 | 111 | |||||||||||
| 28 16 26 37 50 67 | 82 | 100 | 124 | |||||||||||
| 39 18 31 45 60 80 | 98 | 120 | 146 | |||||||||||
| 4 10 22 36 52 70 93 | 114 | 140 | 168 | |||||||||||
| 5 11 24 40 59 80 107 | 131 | 160 | 192 | |||||||||||
| 6 13 27 45 66 90 121 | 148 | 180 | 216 | |||||||||||
| 7 14 30 50 74 100 134 | 166 | 202 | 241 | |||||||||||
| 8 15 33 55 81 110 147 | 183 | 223 | 266 | |||||||||||
| 9 17 36 60 89 120 161 | 201 | 244 | 291 | |||||||||||
| 10 18 39 65 97 130 | 175 | 219 | 266 | 315 | ||||||||||
| 11 20 42 70 104 140 | 189 | 237 | 269 | 340 | ||||||||||
| 12 21 44 75 111 150 | 202 | 254 | 310 | 365 | ||||||||||
| 13 22 47 80 118 160 | 215 | 270 | 330 | 390 | ||||||||||
| 14 23 50 85 125 170 | 230 | 286 | 350 | 414 | ||||||||||
| 15 25 52 90 133 180 | 243 | 302 | 369 | 438 | ||||||||||
| 16 26 55 94 140 190 | 256 | 318 | 389 | 462 | ||||||||||
| 17 27 58 99 146 200 | 269 | 334 | 408 | 486 | ||||||||||
| 18 28 61 104 153 210 | 282 | 350 | 426 | 510 | ||||||||||
| 19 30 64 109 161 220 | 295 | 365 | 446 | 534 | ||||||||||
| 20 31 67 114 169 230 | 308 | 382 | 464 | 558 | ||||||||||
| 21 32 70 118 176 240 | 321 | 398 | 484 | 580 | ||||||||||
| 22 34 72 122 182 250 | 334 | 414 | 506 | 602 | ||||||||||
| 23 35 74 127 189 260 | 347 | 430 | 526 | 625 | ||||||||||
| 24 37 76 131 196 270 | 361 | 446 | 548 | 649 |
DUREE (Time) / WATT:
Tours/min (RPM) /SPEED (Vitesse):
User Setting Program 11 (U1)
User Setting Program 12 (U2)
User Setting Program 13 (U3)

User Setting Program 14 (U4)
User Setting Program 15 (U5)
Programm 17 HRCP
Programm 18 HRCP
Programm 16 Watt Control Program

Programm 19 HRCP Programm 20 HRCP


PROGRAMME 1:Manuel
Warming-up oefingen (Warm Up)
Geachte klant
RPM and Power in Watt of Level 1- Level 24 for AL 4 Art.-No. 1107(A), 11072, 11071(A)
| Level/RPM 20304 | 0506070 | 090100 | |||||||
| 171524344661 | 7490111 | ||||||||
| 281626375067 | 82100124 | ||||||||
| 391831456080 | 98120146 | ||||||||
| 4102236527093 | 114140168 | ||||||||
| 51124405980107 | 131160192 | ||||||||
| 61327456690121 | 148180216 | ||||||||
| 714305074100 | 134166202241 | ||||||||
| 815335581110 | 147183223266 | ||||||||
| 917366089120 | 161201244291 | ||||||||
| 1018396597130 | 175219266315 | ||||||||
| 11204270104140 | 189237269340 | ||||||||
| 12214475111150 | 202254310365 | ||||||||
| 13224780118160 | 215270330390 | ||||||||
| 14235085125170 | 230286350414 | ||||||||
| 15255290133180 | 243302369438 | ||||||||
| 16265594140190 | 256318389462 | ||||||||
| 17275899146200 | 269334408486 | ||||||||
| 1828611041532 | 20282350426510 | ||||||||
| 193064109161220 | 20295365446534 | ||||||||
| 203167114169 | 230308382464558 | ||||||||
| 213270118176240 | 240321398484580 | ||||||||
| 223472122182250 | 250334414506602 | ||||||||
| 233574127189260 | 347430526625 | ||||||||
| 243776131196270 | 361446548649 |
Opmerkingen:
User Setting Program 11 (U1)

User Setting Program 12 (U2)
User Setting Program 13 (U3)


User Setting Program 14 (U4)

User Setting Program 15 (U5)
Programm 16 Watt Control Program
Programm 17 HRCP

Programm 18 HRCP
Programm 19 HRCP Programm 20 HRCP
Programma manual:handmatig
Programma's 1-10: fitness
3. Planning van de training
Warming-up oefingen (Warm Up)
War 1: MoHTax HOxEK (20+27) Ha oCHOBHyO pamy (1)
1.CMOHTpyIe KonnauHn HOKe C TpaHCnOpTnPOBOHyBMn POINKaMn (18) NocpeDCTBOM BnHTOB (71) B KOPOTKne NepeDnH OHOKkA (20), TaK UTO TPAHCnOpTHbE PoJN 6blH HapBaJIeHb Bnepe.
2. CMOHTpyuTe NpeIHO HOKky (20) c TpaHCNOpTIpOBOUHbIMn pONkAMn (18) Ha OCHOBHy pamy (1). IVcNoB3yIe dIa 3TOr o No Da 6oTt a (28), NOknaDhHe Wai6bl (13), npyKNHbIe Wai6bl (15) n KOnNAQOBBe rAIKn (19)
3. CMOHTnpyTe KOnnaQOK HOxKn (26) NOcpeIcTBOM BnHTOB (71) BdoJIbWe 3aJHRA HOxKa (27).
4.CMOHTnpyTe 3aHIOHOKky (27)HaOCHOBHyO pamy (26).NcnoIb3yTe Dnra 3TOro nDba 60nta (28),NDKnadHbIe Wai5bl (13), npyKnHHbIe Wai6bl (15) IN konnaKOBbe raikn (19).Pocne Toro, KaK Bc CMOTnPOBaBn BeCb TpeHaeKe, npaBnBHO BcCTaBnTE KOMNEHCATOpbl HepOBHocTn Pona.3TmBblpePeDte HnpEHNaMepeHhBb DBHXJHcTpeHaeKe BO BPMe TpeHPOBKM.
Uar 2: MoHTax neIaIe (22L+22R) wATyHbI neIaIe (21L+21R)
- PnKpyTne npabyNo neaBb (22R) Ha waTyH neaHn (21R), HaxoJaunncs c npaBoi CTOpOHb B HappaBHeHN DnKKeHn. (BHIMMaHne! HappaBHeHne 3akpyuBaHn 60nta: no yacobn CTpeNke).
- PnkpynTe nebyo neaBn (22L) Ha waTyH neaAin (21L), HaxoJusncr c neBoi CTOpObH b HapnabHeHH DmKHeHH. (BnHMaHne! HApnabHeHc 3akpyuBaHnB 60Tba; npOTNB YacOBOH CTpeKN).
- YctaHOBtpe fncnpyuue neHTbI neJaen Ha COOTBeTCTByUuue neJaln. IynpoueHn MOtXa JEBa NeJaB o6o3HaueHa 6yKBoi L, a npabar neJaB o6o3HaueHa 6yKBoi R.
War 3:
MOHTAX ONOPHON Tpy6bl pyna (12) Ha ochoBHypo pamy (1)
- BctabbTe MaHKeTy O6uNbKa onOpHo Tpy6bl (11) Ha onOpHyo Tpy6y ceDna (12).
2.Bo3bMnte onopHyIO Tpy6y pyra (12) c npedBapnteNbHO CMOHTNPOBaHHbIM coeHNHTeNbHbIM Ka6eIeM (3). CoeHNHte uTekep KOMNbOTepHoro Ka6eIa (3), BbIXOJaunn n3 onOpHoi Tpy6bI pyra (12), co Ka6eIb cepBOBnraTeRa (16), BbIXoJaero n3 OCHOBHO paMbI (1). (BHMannHe! BixOJaunn n3 onOpHoi Tpy6bI (12) KOHeu KOMNbOTepHoro Ka6eIa (3) He noJKeH 3anaDaTb Btp6y, T.K. OH Bam eue noHaDoBnTCr npn oocneDyioUcem MoHTaKe). TaKke ObpaTne BHMaHHe Na To, Yo6bI npn coeHNHeH Npy6 KomNbOTepHbe Ka6eIe He bJIn 3aKaTaBt. - BctaBte onopHyto ty6y pyra (12) B cooTBeTCTByIOuee KpennneHHe Ha oCHOBHO PAme (1). O6paTHTe BHMaHHe HA To, TTObI Ka6eJIbHoe CoednHeHHe He 3aueMmNocB, H MeDNeHHO BCTaBTe ONOpHyTo Tpy6y pyra (12) B COOTBeTCTByIOuee KpennneHHe Ha oCHOBHO PAme. PnIKpyTHTe onOpHyto ty6y pyra (12) K OCHOBHO PAme (1) c NOMOuBo 60NTOB (14), npykHHbIX Wai6 (15) n noKnadHbX wai6 (13).
4.BCTaBbTe MaHKeTy O6WnBkA onOpHoi Tpy6bl (11) Ha onOpHyIO Tpy6y ceDna (12). BnHTbl (77) MoKHO HauTn Ha 3aHeH nHaenn KOMNbIOTepa.
War 4:
MOnTax ceNa (34) n cana30K ceNa (33) Ha onopHyTO ty6y ceNa (29) n onOpHoi Tpy6bI ceNa (29) Ha oChOBHyO pamy (1)
- Bctabte ceTno (34) kpenneHem cTna B cana3Kn ceTna (33) n KpeNko npKpyTnTe BKeNaEMOM HAKNoHe.
- Bctabte cana3kn ce1na (33) B kpeiHneHa onopHou ty6ce 1n (29) n 3akpenite B Jeklaemom rupn30HTanbHom nooKeHHN C nomoUbO np6koBoi wai6bl (31), noKnadno wai6bl (32) n 6oJta (6).
- BCTaBbTe MaHKeTу onOpHyTo Tpy6y CeIJa (29) n COOTBeTcTBYIOUe e KpeNHeHHe Ha oChOBHO pame (1) n 3aФuKcPuyTe ee B JxenaEMOM NIOJKeHH C NOMOsbHo 6bICTpOeCTByIOUero 3aTbopa (30).
(BHIMAHNE! Pn3 3aKpyuHaBHH 6bIcTpoDeNCTByUoero 3aTBopa (30)pe3b6OBoE OTBepCTne B OCHOBHO pame (1) n ODo H3 OTBepCTn BOnOpHOr Tpye CeJNa 29)doJKNbH haxOAnITbcraDpyr HAd Dpyrom.. TaKke 6bpaNTHe BHIMAHNE Ha To, YTo6bl OnOpHAR TpyBa CeJNa (29) He BbIXoDIna N3 OCHOBHO pAmbl DaJIbWe MapKnPOBaHHo MaKcImaJIbHO NtOINu peYrIpOBKn. OnOpHAR TpyBa CeJNa MoKeT No3Ke Ipon3BOJbHO peryIINpOBaTbcR. JnA 3TOrO HeO6XoDMo HEmHORO OCnAbTb 6bIcTpoDeNCTByUOHN 3aTbOP (30) nocpeCDtBOM He6OJIbUoro NobopaUBAHnra, 3aTEM BbITaHyTb erO JnO CBO6OKeDHeNnФKCaUNn BBICOTb, INePecTaBnTB BbICOTy CeJNa B XeJaEMe NOLOKeHMe. Nocne XeJaEMoH NactpoKn 6bIcTpoDeNCTByUOHN 3aTbOP (30) ChOba 3aKpeINb NocpeCDtBOM 3aKpyuHaBHH).
Uar 5: MoHTax pyra (7) n KOMNbHOtepa (17) Ha onOpHyIO Tpy6y pyra (12)
- NopBedeHte pyIb (7) KOTKpbITOMy KpENneHIO pyIHa onOpHO Tpy6y pyIa (12) n 3akpoTe erO Ha pyem (7).
- BCTaBbTe o6oJouKnypOyTkn (10)Ha pyJb (7).
- HaneHbTe noKnaHyu wai6y (9) n noKnaHbIe wai6bl (8), Ha rpi6koBbI 6oT (25) npikpyTte mN pyn (7) K onopHoi Tpy6 pyna (12).
- Bctabte wTekep kOmblbTepeHoro ka6e (3) n Ka6eHa3MepeHna ynbca (4) bblxOaun Cbepy n3 onOpHo Tpy6bI pyra (12), B COOTBeTCTByUoee rHe3do, HaxoJaeeec Ha o6paTHo CTopoHe KOMblbTepe (17).
5.BCTaBbTe KOMnBbTeP (17) CBepxHa onOpHyTo Tpy6y pyna (12)c nOMoUb60ntOB (2) nOdknAHa8 (84).
Uar 6: KOnTpObl
- BCTaBbTe UTeKepe 6noka nntanra (73) B COOTBeTCTByIOuee rHe3do (83) Ha 3aHem KOHcE 06uWbK (79R).
- Bctabte 6nok nntanra (73) B utencelbnyo po3eTky (230V\~/50Hz).
7: KoHTponb
- PpOBepBte BCE coeHHeHn Ha npaBnIbHOCTb c6OpKn n npoBeDnte npoBepKy FyHKuHaHbHOCTn. Ppn ATOM MOHTax CHTaETc3aKOHHeHbIM.
2.EcnBceBnpaKe, npoBeJeTne np6HyTo TpeHnPoBky npu MaHebKo Harpy3Ke, INHDbNduaJIbHo HAcTePOte TpeHaKepe.
3ameyane: IoxaJnyncta, coxpaHnTe Haob npHcTpymeHTOB nnoocneIyoux BO3MOXhIX pEmoHTOB u HcTpyKUIO NO MOHTaxy dIra BO3MOXhIX 3aKa3OB 3anaChbix qactei.
IoiB3OBaHne TpeHaXepom
RPM and Power in Watt of Level 1- Level 24 for AL 2 Art.-No. 1107(A), 11072, 11071(A)
| Level/RPM 20-39↓ | 40 | 50 | 60 | 70 | 80 | 90 | 100 | |||||||
| 17 15 24 34 46 61 | 74 | 90 | 111 | |||||||||||
| 28 16 26 37 50 67 | 82 | 100 | 124 | |||||||||||
| 39 18 31 45 60 80 | 98 | 120 | 146 | |||||||||||
| 4 10 22 36 52 70 93 | 114 | 140 | 168 | |||||||||||
| 5 11 24 40 59 80 107 | 131 | 160 | 192 | |||||||||||
| 6 13 27 45 66 90 121 | 148 | 180 | 216 | |||||||||||
| 7 14 30 50 74 100 134 | 166 | 202 | 241 | |||||||||||
| 8 15 33 55 81 110 147 | 183 | 223 | 266 | |||||||||||
| 9 17 36 60 89 120 161 | 201 | 244 | 291 | |||||||||||
| 10 18 39 65 97 130 | 175 | 219 | 266 | 315 | ||||||||||
| 11 20 42 70 104 140 | 189 | 237 | 269 | 340 | ||||||||||
| 12 21 44 75 111 150 | 202 | 254 | 310 | 365 | ||||||||||
| 13 22 47 80 118 160 | 215 | 270 | 330 | 390 | ||||||||||
| 14 23 50 85 125 170 | 230 | 286 | 350 | 414 | ||||||||||
| 15 25 52 90 133 180 | 243 | 302 | 369 | 438 | ||||||||||
| 16 26 55 94 140 190 | 256 | 318 | 389 | 462 | ||||||||||
| 17 27 58 99 146 200 | 269 | 334 | 408 | 486 | ||||||||||
| 18 28 61 104 153 210 | 282 | 350 | 426 | 510 | ||||||||||
| 19 30 64 109 161 220 | 295 | 365 | 446 | 534 | ||||||||||
| 20 31 67 114 169 230 | 308 | 382 | 464 | 558 | ||||||||||
| 21 32 70 118 176 240 | 321 | 398 | 484 | 580 | ||||||||||
| 22 34 72 122 182 250 | 334 | 414 | 506 | 602 | ||||||||||
| 23 35 74 127 189 260 | 347 | 430 | 526 | 625 | ||||||||||
| 24 37 76 131 196 270 | 361 | 446 | 548 | 649 |
3ameyachnH:
- POKa3aTeIb MoUHcTn B BATTax paCHITbIaETC n3 NOKa3aTeIe Yncla O6OpOTOB neJaIbHOO CmB MHyTy (UPM) n TOpMO3HOrO MOMeHTa (Nm).
- Tpehaxep 6bI BvBepen Ha 3aBode nepeoTprpy3koN 3TIm yDObIeTBopReTpe6oBaHnKlaccnckkaun "C Bbvicok ToHoctbio Hndkaun" Ecnn
Bb noDbepraete comHeHHIO noka3ateJI TpeHaxepa, o6paTntecb K npOdaBcy IIN KOHTpOJI/HAcTPOJN TpeHaKepe.
UctpyKunK KOMnbIOTepy
KOMIbIOpTeBaWero 3PROMeTpa OyeHb YOOb6eB B oCcyKbAHm. TaK KaB BCE cyHKUHOHaBHe DaHHBe ODHOBpeMeHHO BbIOaTc Ha DCnJIeN, NCKIOuAeTc HEO6XoDMOCtB NOCTOaHHORO NEPeKIOUeHnN BeCb TpeHIpOBOuHb INPOeCC MoXHO KOHTpONIpOBAb OBHM B3rJlAOm. 3OT TpeHaxep ABnIEcTa TpeHaxepom, Harpy3Ka KOTOPoR He 3aBNCNT ot Yncna ObopoTOB NeJaEy. Yo6bI DoobTcR XeJaEMo MOuHocTN, KOMIbIOpTe perynnpyET TOPMO3 He 3aBucnMo OT YaCTOTb BpaueHnneJaEe. (nporpaMa BAATT 16)
BknioueHne:
1) BCTaBTe 6TKeep 6noka nHTaHnB B COOTBeTcByIOuee rHe3do Ha annapate. NOBITc3 ByKOBOI CINHaI - BCE NOkA3aTeHN HA KOMNbIOTepe noBATcH a 2 cek n yctaHOBATc H 00 mnn
2) ΜιTekeρ γχε BCTaBηη / KOMnbHOpEρ aBtOMaTHUeCKn OTKIIOHUNc. IocpeDCTbOM HακaTnHa JIo6yO KHOKNy - nπn ObopoTa πελαη - KOMNbIOTep aBtOMaTHUeCKn BKJIQUOaETcN.
BbIKIOueHHe:
KOMBIOTEP OKIIOHaeTcA cMOCTOATEBHO eCNI 60nee 4 MIN. Tpehaxepom He IIOJI3OBAJIncb JIOcNE OKOHuaHn TpeHINPOBKn OTKIIIOHTe TpeHaJKeP OT CETn.
ФУHKUHOHAJIbHbIE KJIABIMI
5Функшоаньых Клави: START (Стар) / STOP (Стон), AUSWAHL (Выбор) (F), AUF(Bверх (+), AB(Bиз (-) n TEST (ФИТпс-оценka).
"Start/Stop"-Khonka:
CTapT NIO octaHOBKa TpeHnPOBKn B BbIbpaHHo NpOprpAMMe. KOMnbIOTeP HauHnHaet OTCHT ONbKO nocHe HaxKaTHN KhONK ,Start/Stop".EcnN depXKaTb KhONKy Start/Stop" 6onee 3 cek. HaxKaToN, BCE daHHble yCTaHABnBAIOTCB H NyIb T.e. Ha HauJaBHyIO CTaDiHO.
F-KHONKA:
Pn NOMOu BBOHOH N NOITBepKdaIOUe KlaBUN (E) BO3MOXeH nepexoN CneIyIOe 3aIABAEMO fYHKU. Bb6paHnaF yHKUIMraTeT. Pn NOMOu KNaBUN,“" u-“ BO3MOXeH BBOH Heo6xOINMbIX NOKa3ATEEN I np NoBTOPHOM Haxatm NkAun F" 3aHaHbIe NOKa3ATenN fIKNCpyIOrC. ONDOBpEmHo HauHnAET MIRAtc bceDyIOuaf yHKU. Bo BPemO obyehn MOXHO HaxtB F KIOUeBle cyHKUIN RPM, Bt n KaIOpn mnn KM/4, BPemN KM noCTOHNO NOKa3bIBaTB INN NOOpeDeNo.
+“H”-KHONKa:
Pn NOMOUI 3TNX KNAIBI W BBI MOKTe I3MeHrTb 3aJaBaEMbIe NOKa3aTeI (TONbKO Pn MIRAOUe INDINKAUN).
"Test" - KHONKA:
Pn nmooun 30n KnaBmM MoKHO npOBecTu pHTec-TEc
HINKALNA
PROGRAMM/ПОПРAMMA:
INHnkaunBCTpoeHHbIX nporpammbIOT1-20 (nporpaMMbl1-10-ΦHTHeCnporpammbI, nporpaMMbl 11-15 -nporpaMMbl3aDabaeMble noJIb3ObaTeNem;nporpaMMa 16 -nporpaMMBaTT; nporpaMMbl 17-20 -nybcOaBcIMble nporpaMMbl).
LEVEL/CTENEHb HAPY3KN:
HnDnkaunBb6paHHO CTeneHHarpy3KnOT 1-24.Em Bblwe CTeneHb Harpy3Kn,TeM 60bnwe cnpotmbneHne. UTPHXOBn HndkaTOp, noka3bIbaOuOn CTeneHb Harpy3Kn,IMeet 12 rop3oHTaBbIX uTPNXOB. Kaxdbn UTPnx NOKa3bIbaeT DBe npaMeTaP (HapnmuE: 3 uTPnx aypoBeH 5nn6).ToHyIO BeINuHNy MOXHO CNTaTB b cyHKnn LEVEL / CTENHeH HAPV3KN.Harpy3KMOxHO INMeHnTB b IIO6oe Bpemn BO BCex nporpaMMc CNOMouBo KnaBnU,“n.”
TIME (BPEM) / WATT (BATT):
YcTaHOBKa/HnDnkaCuaB BpeMeHH B MmHyTax NceKyHdx Do MaKcMaJIbHO3HaueHenn 99:00 MIn. BBoD npOn3BOJNTcB NomHyTHo, CcET no HapactaOuSeN y6bIaIOUeepnOn3BOJNTcB CeKyHdx. B nporpaMMax 1-20 MNImaJIbHOe 3aDaBaEMoe COCTaBnHTet 5 MIn. YcTaHaBnBaETcOT 5do 99Mn. KomNbOTep ToHOr N3MpAeT pON3BeHeHyO B XoTe TpeHnpOBKn pa6ToY. INdkaCuaPnON3BOJNTcB BaTTax. B nporpAMMe 16 npOn3BOJNTcR HnDkaCuaR ueNEBOrO 3HaueHEn. YcTaHaBnBaETcOT 30do 350 BAATT. AByOMaTIueCKoe INMHeHEm OTO6paxeHnI TIME (BpeM) nWATT (BAATT). NnnocToHHo, HxKab KJIaBnHiy F.
RPM (OB/MNH) / SPEED/km/h (CKOPOCTb/KM/haC):
HINIkaUNA 06pOToB nEDAJIe B MNHTy u CKOpOCTu B KM/HaC. ABOTMaTuaCeCKoE N3MeHene OTObpaKeHHa RPM (OB/MnH) n SPEED/km/h (CKOPOCTb/kM/AC). HInu NoCTaRHHo, HaxKaB KJIaBIMU F.
KaKaJn 10 6aJok COOTBETCTByeT 1/10-3aHaHO TpeHPOBOHOr BpMeHH
LEVEL/HARPY3KA:
Pn nomoOn Knabu + / - Bo3MOxHO yCTaHOBHeHne ONTmAbHoHn Harpy3Kn BO BcEx nporpamMax. N3MeHHeNc BnHO no BbICote 6anok n no HnDkaun LEVEL/CTENEHb HAPY3KN -Cem Bblwe KOONK, TEm Bblwe Harpy3Kn n HAObOpOT. K kaxdomy cerMeHTKOJOhKn OTHCATCB Dbe BnUnHb (HanpImep, 3 cerMeHT COOBETCTBYe TcEnHn 5 n 6, nIbn CermENT 7 cooTBcTcBye TcEnHn 13 n 14). Bb6paHHa BnUnHa BnHa B OKoWke LEVEL/CTENEHb HAPY3KN. N3MeHHeNc Bnuret Ha
IeNCTByIOUIO IIOcNeIyIOUIne N03UNIN BpeMeH.NBicota KonoHOK yka3bIABaET BeHHHy HarpzKNI, HO He npOoNB DOpORN. IpoxoxKeHne nporpAMMBIOKA3bIABAOTC HAnCnEE rpaOnueckN. KaJdA npOrpamMa npoTeKaET NO yka3aHHoN CXeME Ha DCnEe, HApnPmep nporpaMMa 3 = ropa+ Hn3HaNtT.D.(PnI 3ToM Bbcota cerMeHTa = Harpz3Ka,BpeM paCnpedJIeTcNO BCen Wkane).
Iocne Hactpoikn nporpamMbI 683aTeIbHo nepeH hauanom TpeHnpBKn HaxKaTb KJIabNHy ,Start/Stop".
Manual Program Programm 1 Rolling Program 2 Valley
Programm 3 Fatburn Programm 4 Ramp Programm 5 Mountain
Programm 6 Interval

Programm 7 Cardio

Programm 8 Endurance
Programm 9 Slope
Programm 10 Rally
User Setting Program 11 (U1)

User Setting Program 12 (U2)
User Setting Program 13 (U3)
User Setting Program 14 (U4)
User Setting Program 15 (U5)
Programm 16 Watt Control Program

Programm 17 HRCP
Programm 18 HRCP
Programm 19 HRCP Programm 20 HRCP
Pporpamma Manuell/PyHnA:
3Ta nporpamma COOTBETCTByET FyHKnI HOpMaIbHOro BeNoTppeHaXepa. Noka3aTeN BPemEH, CKOPoCTn/O6/MnH, DnCTaHcIM, BATT/KnIOJxOyIn N TeKyuIero Noka3aTeN PyNbCa HnpepbIbHO NOKa3bIBaOTcB INnIKaTOpHBIX OKoWkax. C NOMoUbI KnaBNI +" N - " MOKHO BpyHyO 3aDaBaT Harpy3Ky. BCE npaMeTpbl 3aJaOTcB pyHyIO - Het HNKaKoi ABToMaTHeCKO perynIpOBKn. Ecnn Heo6XoDIMO, yCTaHOBka Noka3aTeEn TpeHnpOBKn Zeit/Entfernung/Kalorien/ Puls (BPEMR / DnCTAHLr / KAIOPN / NylbC).
Pporpamma1-10/ΦnTHec:
3Decb 3aHaHb pa3nHbIe TpeHPOBOHbIe nporpaMMbl. PnB bIbOpe OHOH n3 Hx, nporpamma npoTeKaet ABToMaTHueCKN NO BcEM coepKauIMCMB He naPnHHb IMTepBaJam. Pa3JeHneHe npOnCXoNT no CTyNEHM HaPy3Kn IBpemEHbIM INTEpBaJam. ODaKao Bbl MoXeTe B IIO6oe Bpemr N3MeHtB Harpy3Ku NIN BPemr. TaXke npOn3BODITc INdkauniporpaMbI B rpaFneckOM N3ObpaKeHN (DnarpaMMA) Ha DCnEe. EcnH Heo6xoDMo, yctahOBKa nokasateene TpeHnpOBKn Zeit/Enternung/Kaloren/Puls (BPEM / DInCTAHLNA / KALOPN / Nylbc).
Iporpamma 11 - 15: INHINBnUaJIbHbIe TpeHnpOBOuHbIe nporpaMMbl
B 3nX nporpaMMax Bo3MoKeH BBoD pa3nUHbIX nHybIX npocnIe I cTeHeH Harpz3Kn (U1-U5) dIa TpeHnpOBKn. Ecn Heo6xoIMO, yCTaHOBA k noka3aTeNe TpeHnpOBKn Zeit/Entfernung/Kalorien/ Puls (BPEM / INCTAHUN / KAIOPNIN / Nylbc).
Nporpamma 16:Batt-nporpamma
3dec Bbl MOKeTe 3aadaB aWuy INHbNduaIbHyO Harpy3ky B BaTtax. KombiTope C yHcet OnpedeHnBix DOnyCKOB n He3aBnMIO OT YaCTOTbI BpaSeHHne NeIaIe N depKnaBaET 3Ty Harpy3ky B 3aDaHHOM Bamn PpeDeNe. (30-350 BaTT). Ecn I Heo6xOIMO, ycTaHObKa nokaTeNe TpeHIpOBKn Zeit/Entfernung/Kalorien/ Puls (BPEM / DnCTAHU / KAIOPIN / NYJIbC).
Pporpamma 17 - 19: Leneboe 3naueHne nybca THF
Iocne BBOda Baawero Bo3pacta (10-100) KOMnbIoTeP pacHTbBaet BaW MaKcMaJIbHO DoNyCTMlbI NyIbC N B 3aBNCMOCTn OT npOrpaMMbl 3aAdet Bam TpeHIpOBoHyI ueBoN pokaTeIb - 55% / 75% nnn 95% ot MaKcMaJIbHO DoNyCTMmOu YACToTbI NyIbCa. 3TOHOMaTHBbI NOKa3aTeIb BBIOUITcHa Iucnnee. KomNbIoTeP perynpyet Harpy3ky Tak, TTo6bl TpeHIpOBoHyI NyIbC OCTablanC B O6NaCTN Bbl6paHoro peXIMMa.
Pporpamma 20: LeneBoe 3naueHne nylba THF
3Decb Bbl MOKeTe 3aDaTb ONTMaHbHbI NOKa3aTeNb YacToTb 6nEHNA cepua (THF) IN KOMMbOTep C yuetom OnpeDeneHHbx DOnyckOB ydepKnae TBy Harpy3ky B 3aDaHHom Bamn npede. (60-240 nybca)
CINCOK BO3MOXHbIX HENCPABHOCTE:
IocneKaJDOHOHOrOCTapTaKOMNbIOTeP npOBoMNT 6bICTpbTecHaФyHKUHOHaJIbHOCTb.ПрОБHApYKeHnHHeCOOTBeTcBnI MeEOITc TpN CnIHHLa HeNCnpaBHOCTn:
E1 3TOT cnHan, cnpoBokdaouuNc3BykOM, noBnIeTc, ecnecb HeNCnpaBHOCTN B KaBbHbIX COeHNHeHX. IPOBePte BCE Ka6BbHbe CoeHNHeH N Oco6HeH No TKepebl. Pocne yCtpaHeH HEnCnpaBHOCTN HAXMITE KnaBnU "Start/Stop" n DepxNtTe 0one 2 ckyHd nra TORO, YTObbl CNTEmY yCTaHOHTb B HOB.
N3MEPEHNE NJIbCA:
1.PyHoe IMpeHne nylba:
B Ieboi npaboi qacn pyna haxoatac cehcopb B nide metaannuecknx pnaactnh. CoeHInTe Ka6ebI ha KOMnbOtepe. O6paTne BHNMaHne Ha To, 10 N3MepeHHe NyIbca npOncxOHT TOnbKO npN ONDHOpeHHOM HAnIOKeHmpykHa cEHcOpb.CHTbBaHme NyIbca BNHO NO MMrAHOeMy cepJeKy pAOm C INDnKaTOPOM NyIbca. (N3MepeHHe NyIbca PyTeM KOtAKTa pyko CnyXHT TOnbKO dNpOpNEtauu, NOTOMK KAcYe3 DBNKeHne,NOT, TpeHne N.T.D. BO3MOxHO OTKNHOHe NT DeJCTBnTEbHorO nyIbca.Y HeKoTOpbix IOJeD Bo3MOxHO OwINBOOHoe NOKa3AHne NyIbca. EcNBIncNbITbBaete TpydHcTn C N3MepeHHe MNyIbca, Mbl peKomeHdyem Bam nCnONb3OBaTB KapINOaDTNK INI Yacbl- kapdoaTuk).
TEST-FITNESS NOTE (tecT-ΦNTHEC-OLJEHKA)
PacnTBaTak Ha3bIbAeMyo OHTHeC-0ueHky,BaW TpeHaJep npOn3BOaNT OueHcy COCTOHNBAeCNOpTUBHOfOpMbI.PnHUN paChetaOCHOBAn HA TOM, YTO y 3DopOBoro TpeHPOBaHORO YeIOBeka YaCTota NylbCa Ha ONpeDeHOM OTpe3KE BPEMeHNI CHNkAeTcB 6blCTpeE,YEMy3DopOBoro HTepeHPOBaHORO.ДЯ ONpeDeHIN NOKa3ATEnaФtHEC-OUeHKn KOMbIoTEp pacnTBaET pa3HNU MEXdy AcTOTOI NylbCa B KOHeZ TePHOBKN (HaayhBHy Nylbc) NAcTOTOI NylbCa PeE3 Ody MNHyTu Nocne OKOHuaHrN TpeHPOBKn (KoHeuHy Nylbc). POnb3yItecB 3ToI ΦHyKUnE NocLe TORO,KAK BBy HeKOTOpoe BPEMa TpeHPOBaNcB. IpePe HauANOM BOCTAHOBITEnbHOJ Nay3b Bbl DOnJXbI N3MepNTb TEkyuIM Nylbc. DnToro Bbl DoJXbI NOJoxNtB pyKn Ha CeHCOPbl.
06JIacTbO6yEHnB MM (ДЯуCTpoNCTBaHNONb3OBaTeJIH)
BecnnaTbnoBepxHocTbMM (PiouaDbObyeHneN30hbl 63oNaChocTn(BpaauouneC86cm))

YncTka, TexHnueckoe o6cJyXuBaHne n XpaHeHne TpeHaXepa
1. YnCTKa
ДячNTКИСПОЛБ3уTe YIcTуO BJIaXHryO cAnpeTky.ВиMuHnE:нИKOrda He ИспОЛБ3уTe ДЯчNTКИ 6eH3nH,pa36abnteJbIIN IpyrIe arpeCCNBblte YIcTlUne CpeDCTBa,KOTOpBIE MOrYT NOBpeNtB NOBepxHOCTb.TpeHaJKe ppeHa3HaYeH ToIbKO DЯDOMaSHero INCNoJIb3OBaHnB B NOMEuEHn.ПpeOxpaHnTe TpeHaxKeP O t CbIpOCTn I nbIIN.
2. XpaHHeH TepeHaKepe
Ipn He nCnObn3OBaHnn TpeHaxepa 60Jbwe 4 HeJeB, Heo6xOIMOn OTKJIIOHTb erO ot cETn. YCTaHOINTE caNa3Kn ceJa KaK MoXHO 6bnke K pyInu onOpHyIO Tpy6y ceJa ONyCTnTe KaK MoXHO HnKe. IocTAbbTe TpeHaxep B cyxoe NOMEseHne u pacnbIInTe hemHoro Macna Ha NODUnNHKn NeJaEn CnpBaN u CNEBa, a TaKxe Ha pe3b6By BnHTa pynN 6bICTpOeJcTBYoUeR 3aTBopa. HakpoiTe TpeHaxep, YTO6bl 3aunTnB erO OT COJIHeuHbIX JnyeN n PbInN 3TNM PpeDobPaNtB n3MeHeHne OKpackN
3. TexHnueckoe 06cJyXnBaHne
Mbi pekomehnyem nocne kaxdbix 50 yacob noIb3ObaHn npoBepaTb 6oITOBbIe coeINHeHn n nocle kaxdbix 1oo yacob noIb3OBAHn Cma3bIBaTb NOuINHnKn neJaJe CNeBa u cnpaba, pe3b6y BnHTa pyInu 6bICTpoDeiCTByIOUeero 3aTBopa Macnom n3 paCnblntela
IcnpaBHeHne HenoJaok:
Ecn npo6nema He moKet 6bIbpeWeHa c NMOUH HJKeCTOaux Yka3aHnn, noXaNyIncta, o6paTntecb B ueHTp, rDe BBi Kynnn TpeHaxep.
UnpaxHeHHIpa3MHKnpeep TpeHnpOBKo
HaHTe pa3MHky C xOdbbHa MeCTe B TeHeHne 3 MInyT. Nocne 3TOrO BbINONHte CnElyHOuNcye npaxKHeHn, KOtOpBie NOMORY Bam ONTMaJIbHO NOrTOBnTBcR K TpeHnpOBKe. Bo BpemBaBbINONHeHn yPaxKHeHn Bbl He DoJXHbI NCbITbIBaTb 60nl. BbINONHJeYnpaxKHeHne DO NoRBeHn TRHyUero YBCTBa B MbIue.
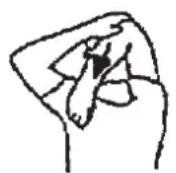
BctaHbTe poBHO n 3aBeDInTe Ody pyky 3a roNoBy. BTopyo pyky noLoXnTe cBepxy,Bo3BMITEcB 3a loKoTb N NotAHnTe Do ouyueHH paTaeKeHH TpuuEanca.OctaHbTEcB B 3tOM noLoXeHHn Ha 20 ceKYnd, NOBTOpTe Dpyroyn pykOi.
HaKnHOHTeCb BnepeI He CnB6a Hor n NOnbTaIeTcB DoCTaTb NaIbCaMn pyK Do nona. BInONHnTe ynpaxKeHHe 2 p3a no 20 CekyHd.
CádbTe Ha non N BbITAHnTe Ondhy Hory. HaknoHHTecb Bnepei nnonpo6yIte doCTaTB CTynHO. BbINOJIHnTE ynpaxKHeHne 2 pa3a no 20 cekyHd.
B noIoxeHnn IwnpOKoro BInapa Oobpntecb pykamn B NOI NOTAHHTe MbluHcH hor. Upe3 20 cekyHn NOMeHnTe Hory.
Pocne pa3MHKNIOTpRCHTeHorAMnpykAMN,HTO6bI paccna6ntbMbIHcB. He npekpaauTe TpeHnpOBky BHe3aHNo.CHa7a yMeHBWte TEMTpeHnpOBKn, 106bl nybc onyctncrdo obchno nokaatae (Cool down).Mb peKomeHdyem B KOHc TepeHnpOBKn CHOBA BInOnHtB KOMJIeKC ynpaxHneHnn da pa3MHKN.
HCTPYKUNI NO TPEHHPOBKE
BbdoJXhbl yntbBaTcneDyOuue paKTopbl,TO6bl onpeDenTb BepHbI npaMeTpbl TpeHPOBOK dNl DOCTNXKeHH OuyTMblx cN3nHeCKNX pe3ynbTaTOB INoJIb3bl dNl 3dOpOBBA.
1.HTHEHCNBHOCTb
YpOBeHb Hn3Nuecknx Harpy30k npn TpeHnpOBkax Donxhen npeBblwabT ypOBeHb HopMaIbHbIX Hn3Nuecknx Harpy30K, HO Bbl He DonXKnbl 3aDbXaTcBn CnIbHO nepeyTomAaTcBc. YD6HOmepo3ΦeKtNBHOCTn TpeHnpOBKn MoKet CnyKntb cactota nybca Bo Bpemr TpeHnpOBKn cactota Nybca MoKet DoCTnRaTb 70-85% OT MAKCImalbHO (CMOTPN TabuNy uΦopMynap dnn ONpeDenenHn paCeta).B nepByIO HeJeIO OACTota Nybca DOJKNHa OCTaBaTb Ha NIKHEn OTMeTke 3ToI o6NaCTn, T.e. OKONO 70% OT MAKCImalbHO. B NoCneDuOnne HeDeNn MeCzU bAcTOy nybca CnEduT NOCTeHNHO HapaunBaTb Do 85% OT MAKCImalbHO. JyUwe BCero dnn Fn3NueCKoro COCTOnHn YelOBeka, BInONHIOeero UnpaxHeHH, eCNu Aactota Nybca BO3paCTaET, OCTaBAHB NpeDenax 70-85% OT MAKCImalbHOh. 3To DOCTnraTeTcYBENHeHEm BpeMeHN TpeHnpOBKn nn IypOBHc CNOXHOCTn.
Ecnn Yactota nynbca He noka3aHa Ha dncnnee KOMNbiTepa Hn Bbl XoNTe PNOBepntb YactOTy Nynbca, KOtopan, BO3MOXHO, NOKa3aHa HeBePHO, BCNECTBne KaKoi-Ni60 Own6Kn. Bbl MoKeTpe npEpnHrtb CneDyOooee: A) NMePHTb YactOTy Nynbca obuHbIM CnOCOBom (NoCCHiTb KOnHcTeBO yapob NBnBa BmHyTu Ha 3anrctBe)
B) n3mepntb yactoty nyIbca c nomoou bO CneuaJIbHorO yctpoiCTBa (KOTOPOE MOXHO KYNITb y npdaBcOB CneuaIIN3npoBaHORO 60pydoBaHHA
2. Yactota
BoIbIINCTBO 3KcNEpTOB peKOMeHdyIOT KOM6HuaIIO 3DopOBoI dIeTbI, KOtOpa OCHOBaHa Ha uei Bauix TpeHnpOBK, nΦn3NueCKne 3aHrTn3 pa3a B HeDeIIO. HopMaIbHbY B3PocNbY cheOBek MoXeT TpeHnpOBaTbCBAJxDb I BHeDEIIO dIy NOIDepXaHNr Ero HOpMaIbHO NΦn3UeCKoI φOpMbI. Tpxpa3OBeIte TpeHNPOBKn Heo6xOdMbl dIy yLyuWeHNBaWeIΦn3UeCKoI φOpMbI yMeHbWeHNBa Beca. NdeaJIbHa JaCTota TpeHnpOBok -5 pa3 B HeDeIIO.
Makc. yactota nylbca = 220 - Bo3pact
(220-BaWBo3pact)
90% OT MaKc. YacToTbI nyJbCa = (220 - Bo3pact) x 0.9
85% OT MaKc. YAcToTbI NylbCa = (220 - Bo3pAcT) x 0.85
70% OT MaKc. YacToTb Nylbca = (220 - Bo3pact) x 0.7
© by Top-Sports Gilles GmbH
D-42551 Velbert (Germany)
Service:
Tel.: +49 (0)2051/6067-0
Fax: +49 (0)2051/6067-44
