Gysflash 15.24 PlE - Uncategorized GYS - Free user manual and instructions
Find the device manual for free Gysflash 15.24 PlE GYS in PDF.
Download the instructions for your Uncategorized in PDF format for free! Find your manual Gysflash 15.24 PlE - GYS and take your electronic device back in hand. On this page are published all the documents necessary for the use of your device. Gysflash 15.24 PlE by GYS.
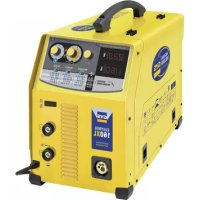
USER MANUAL Gysflash 15.24 PlE GYS
ANOMALIES, CAUSES, REMÈDES
Notice originaleSAFETY INSTRUCTIONS This manual includes guidelines on the operation of your device and the precautions to follow for your own safety. Ensure it is read carefully before rst use and keep it handy for future reference. This device should only be used for charging and within the limits indicated on the device and in the manual. The safety instructions must be followed. In case of improper or unsafe use, the manufacturer cannot be held responsible Device suitable for indoor use only. Do not expose to rain or excessive moisture. This device may be used by children from age 8 and by persons with reduced physical, sensory or mental capabilities or lack of experience and knowledge, provided that they are under supervision or have been told how to use the device safely and are aware of the potential risks. Children must not use the device as a plaything. Cleaning and servicing tasks may not be carried out by children unless they are supervised. Do not use for charging non-rechargeable batteries Do not use any charger other than the one supplied with the machine to charge the batteries. Do not use the device if the charging cable appears to be damaged or assembled incorrectly in order to avoid any risk of short circuiting the battery. Never charge a frozen or damaged battery. Do not cover the device. Do not place the device near a re or subject it to heat or to longterm temperatures exceeding 50°C The electrical installation must include a way to disconnect the appliance from the supply network after installation. Disconnection can be achieved by providing an accessible socket outlet or by incorporating an omnipolar switch in the xed lines according to the installation rules. The electrical installation of the charger must be carried out by a qualied person. The automatic mode of operation and usage restrictions are explained below in these operating instructions. Risk of explosion and re! A battery being charged can emit explosive gas.
- During the charge, the battery must be placed in a well ventilated area.
- Avoid ames and sparks. Do not smoke.
- Protect the electrical contacts of the battery against short- circuiting.
Translation of the original instructionsConnection / disconnection:
- Disconnect the power supply before connecting/disconnecting the device to/from the battery.
- The terminal of the battery that is not connected to the car frame must be connected rst. The other connection must be made on the car frame, far from the battery and the fuel line. The battery charger must be connected to the power supply network.
- After the starting/charging process, disconnect the booster/ battery charger from the power supply network and remove the connector from the car frame and then the connector from the battery, in this order. Connection:
- This device must be connected to an earthed power supply
- Connection to the mains must be made according to the national installation regulations. Maintenance:
- If the power supply cable is damaged, it must be replaced by the manufacturer, its service agent or an equally qualied person.
- Service should be performed by a qualied person
- Warning! Always remove the power plug from the wall socket before carrying out any work on the device.
- Under no circumstances should solvents or other aggressive cleaning agents be used.
- Clean the device’s surfaces with a soft, dry cloth. Regulations:
- The device complies with European Directive.
- The certicate of compliance is available on our website.
- EAC conformity mark (Eurasian Economic Commission)
- Equipment in compliance with British requirements. The British Declaration of Conformity is available on our website (see home page).
- Equipment in conformity with Moroccan standards.
- The declaration Cم (CMIM) of conformity is available on our website (see cover page). Disposal:
- This product should be disposed of at an appropriate recycling facility. Do not dispose of in domestic waste.
Translation of the original instructionsGENERAL DESCRIPTIONGYSFLASH 15.24 PL-E is an on-board charger designed for charging traction batteries used in forklifts or oor scrubbers, utility batteries found in the navy, lorries or buses and batteries for electromobility transport vehicles (bicycles, scooters, golf cars,...). Suitable to charge most of lead (Liquid, AGM) and Lithium batteries (LiFePO5, Lithium-Ion...). This charger is perfectly suited for charging and maintenance of: - 24 V GEL/AGM lead batteries (12 cells in series) from 30 Ah to 240 Ah.- LFP batteries 24V (8 elements in series) from 15 Ah to 240 Ah.- 24 V Li-ion batteries (8 cells in series) from 15 Ah to 240 Ah.CONNECTION AND WIRING
Connections Wiring Type Section
1 2 324 V BATTERY CONNECTION1. SIGNAL mains presence (+24/50mA) 2. NEGATIVE CONNECTION -24 V 3. POSITIVE CONNECTION +24 V Order No. Connector Würth Electronik691344510003H01V-Kor equivalentBattery (2/3)2.5 mm² AWG14Signal (1)maxi 2.5 mm²▪ Crimp the appropriate wiring sleeves 1 for the cross-section of each cable.
- Screw the sleeves onto the connector following the connection diagrams for connectors A and B (above).
- Clip the connectors into their sockets on the board.▪ Pass the cables through the rubber cable glands 2 and plug them into the sheet metal.
- Attach the anges 3 in such a way that the wired parts inside the housing are never under tension (screws M3x20 - TORX 10
Translation of the original instructionsCABLE CALIBRATION Procedure for calibrating the charging cables of the device, so that the charger optimally compensates for the voltage drop due to the cables. It is strongly recommended to perform this procedure each time the cables are modied or changed.
1. Enter one of the lead charging modes.
2. Short-circuit the 2 clamps of the cable (do not short-circuit a battery).
3. Unplug the product from the mains and wait until the charger switches o.
4. Press and hold button
while plugging in the mains socket until indicator or lights up. - lit: Calibration has been performed correctly. - Light on: calibration failed, disconnect the power plug and repeat the procedure.
5. Unplug the mains plug until the charger switches o.
CHARGE MODES Lead/Liquid (28.8 V/15 A) charging mode: Mode designed for the recharge of 24V lead/GEL batteries from 30 Ah to 240 Ah. 6-step automatic char- ging cycle.Lead/Liquid-Traction (28.8 V/15 A) charging mode:Mode designed for charging 24V lead/liquid traction batteries from 30 Ah to 240 Ah. 6-step automatic charging cycle.Lead/AGM (29.6 V/15 A) charging mode: Mode designed for the recharge of 24V lead/AGM batteries from 30 Ah to 240 Ah. 6-step automatic char- ging cycle.Lead/AGM-Traction (29.6 V/15 A) charging mode: Mode designed for charging 24V lead/AGM-traction batteries from 30 Ah to 240 Ah. 6-step automatic charging cycle.Lithium Iron Phosphate charging mode (28.8 V/15 A): Mode for charging 24 V lithium LiFePO4 batteries from 15 Ah to 240 Ah. 6-step automatic charging cycle. Li-ion Charging mode Lithium-ion (25.2V/15A) :Mode for charging 24V lithium-ion batteries from 15Ah to 240Ah. 6-step automatic charging cycle.Some Lithium batteries incorporate a UVP protection (Under Voltage Protection) which dis-connects the battery in case of deep discharge. This protection prevents the charger from detecting the battery. In order for the Gysash 15.24 PL-E to be able to charge the battery, it is necessary to deactivate the UVP protection. To do this, set the charger to Lithium charging mode, unplug the charger until the product turns o. Press and hold button while plug-ging in the product’s power outlet. The charger will then deactivate the UVP protection and automatically start charging.Caution: In case of UVP protection of a lithium battery, remove all consumers on the battery before activating the UVP Wake up.
Translation of the original instructions• Load curve Lead: The GYSFLASH 15.24 PL-E incorporates an advanced 6 (or 7) step charging curve that guarantees the optimal perfor- mance of your battery. This automatic charging curve is adapted to all types of lead-acid batteries (liquid and AGM) in order to guarantee an optimal charge level of your battery. This curve is perfectly compatible with the presence of consumers on the battery.
4 5 6 7Analysis Recovery Desulfation Charge Absorption FloatingTractionif the option is activatedMax 12h<1s Max 8h Max 20hMax 8h 1h - 4h No limitStep : AnalysisAnalysis of the battery condition (charge level, inversion, polarity, wrong battery connected, etc).Step : Absorption (14.6 V)Charge under constant voltage (liquid : 14.4 V, AGM : 14.8 V) to bring the charge level to 100%Step : Recovery (6 A)Recovering damaged elements after deep and prolongeddischarge.Step : Traction (31 V)If the traction option has been selected, the charger will then inject an additional current to create gas to mix the electrolyte and recondition the battery cells. During this phase, the battery may lose a bit of water.Step : Desulfation (15.8 V)Battery desulfation algorithm.Step : Floating (13.6 V) Maintains the battery charge level at its maximum level (liquid : 13.5 V, AGM : 13.5 V).Step : Charge (18 A) Fast charging at maximum current up to 80% of the charge level (liquid : 14.4 V, AGM : 14.8 V).
- Lithium charging curve : The GYSFLASH 15.24 PL-E uses an advanced 6-step lithium charging curve that ensures optimal battery performance. This automatic charging curve is adapted to all types of Lithium batteries to ensure an optimal charge level of your battery. This curve is perfectly compatible with the presence of consumers on the battery.
Analysis Charge ComplementEqualization / BalancingMode FloatingAbsorptionMax 12h<1s Max 8h Max 20hMax 8h No limitStep : AnalysisAnalysis of the battery condition (charge level, inversion, polarity, wrong battery connected, etc).Step : ComplementProgressive increase of the voltage at reduced current to reach U2 (14.4 V) of the charge level.Step : Charge (18 A) Fast charging at maximum current up to U1 (13.8 V)Step : Equalization / Balancing Balancing the battery cells.Step : AbsorptionConstant voltage load U1 (13.8 V) to bring the charge level to 98%. Step : FloatingMaintains the battery charge level at its maximum level with a maintenance charge every 2 months.
- Protections : The GYSFLASH 15.24 PL-E has comprehensive safety features to protect it against short-circuits and polarity rever- sals. It has an anti-sparks feature which prevents sparks whilst connecting the device to the battery. This charger has double insulation and is safe to use with the battery in situ as it will protect the vehicle’s on-board electronics. The GYSFLASH 15.24 PL-E is tted with an integrated temperature probe that ensures that the charging current is adapted to the ambient temperature, for an optimal charging performance.
TROUBLESHOOTING, CAUSES, SOLUTIONS
Troubleshooting Causes Solutions Indicator ashes.• Polarity reversal• Battery voltage is too high• Battery in short-circuit• Check that the charging cables are properly connected.• Check that it is a 24V battery. The indicator is on.• Charge failure, battery non recoverable.• Change the battery and press the mode button to restart a charge The indicator light remains on even after pressing mode button Thermal protectionAmbient temperature is too high (>50°C), cool the room and let the charger cool down. WARRANTY The warranty covers faulty workmanship for 2 years from the date of purchase (parts and labour).The warranty does not cover:• Transit damage.• Normal wear of parts (eg. : cables, clamps, etc..).• Damages due to misuse (power supply error, dropping of equipment, disassembling).• Environment related failures (pollution, rust, dust).In case of failure, return the unit to your distributor together with:- The proof of purchase (receipt etc ...)- A description of the fault reported.
Consult and complete the section on connectors and wiring before proceeding to ep 6.
Type Pb/AGM Pb/AGM type Typ Blei-Säure/AGM Tipo Pb/AGM Тип Pb/AGM Type Lood/AGM Tipo Pb/AGM