Prestige Facet 14F - Speaker ELIPSON - Free user manual and instructions
Find the device manual for free Prestige Facet 14F ELIPSON in PDF.
User questions about Prestige Facet 14F ELIPSON
0 question about this device. Answer the ones you know or ask your own.
Ask a new question about this device
Download the instructions for your Speaker in PDF format for free! Find your manual Prestige Facet 14F - ELIPSON and take your electronic device back in hand. On this page are published all the documents necessary for the use of your device. Prestige Facet 14F by ELIPSON.
USER MANUAL Prestige Facet 14F ELIPSON
PF11C PFSUB10C PFSUB8


PF 6ATM PF 7SR PF 14LCR
Cher Client,
PFSUB8, PFSUB10, PF11C, PF14C, PF14LCR
- 2 enceintes :
PF6B, PF8B, PF6ATM, PF7SR
PF8B, PF14F, PF24F, PF34F, PFSUB8, PFSUB10, PF14C
PF6B, PF8B, PFSUB8, PFSUB10, PF11C, PF14C, PF6ATM, PF7SR, PF14LCR
Certification DOLBY ATMOS®
Thank you for choosing an Elipson audio product.
Please read carefully the following information before using your new loudspeakers.
It contains tips to get the most of it and instructions for safety use.
We strongly recommend that you keep the packaging and this user manual for further use.
I. CONTENT
1 speaker :
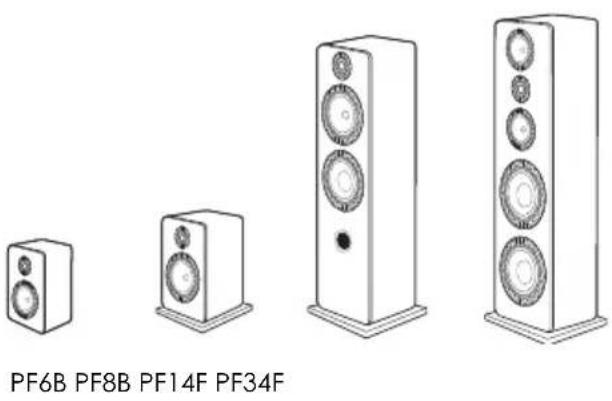
PF14F, PF24F, PF34F
PFSUB8, PFSUB10, PF11C, PF14C, PF14LC R
- 2 speakers :
PF6B, PF8B, PF6ATM, PF7SR
- 1 user manual
- 1 removable magnetic grid (all speakers)
- 1 removable base + 4 screws :
PF8B, PF14F, PF24F, PF34F, PFSUB8, PFSUB10, PF14C
- 4 rubber pads per speaker :
PF6B, PF8B, PFSUB8, PFSUB10, PF11C, PF14C, PF6ATM, PF7SR, PF14LCR
- 4 decoupling (thread M8) spikes per speaker :
PF14F, PF24F, PF34F
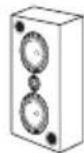
II. PREPARATION
1a
1b
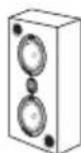
1a. Mounting the removable base on the cabinet (PF8B, PF14F, PF24F, PF34F, PF14C)
Carefully turn the cabinet over and place it on the packaging foams, or on a carpet, to avoid any damage on the top part. Take care not to damage the woodworking, the lacquered front or the loudspeakers during this operation. Adjust the base on the cabinet and screw it using the four provided screws.
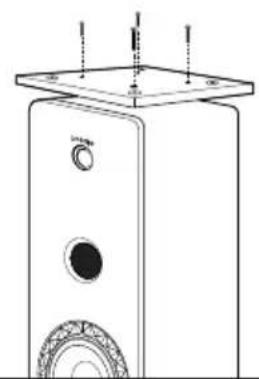
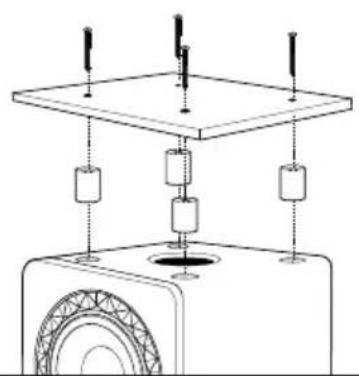
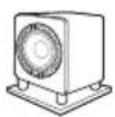
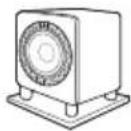
1b. Mounting the removable base on the subwoofer cabinet (PFSUB8, PFSUB10)
Start by positioning the aluminium cylinders in the recesses provided for this purpose. Place the base on the cylinders and secure with the provided screws.
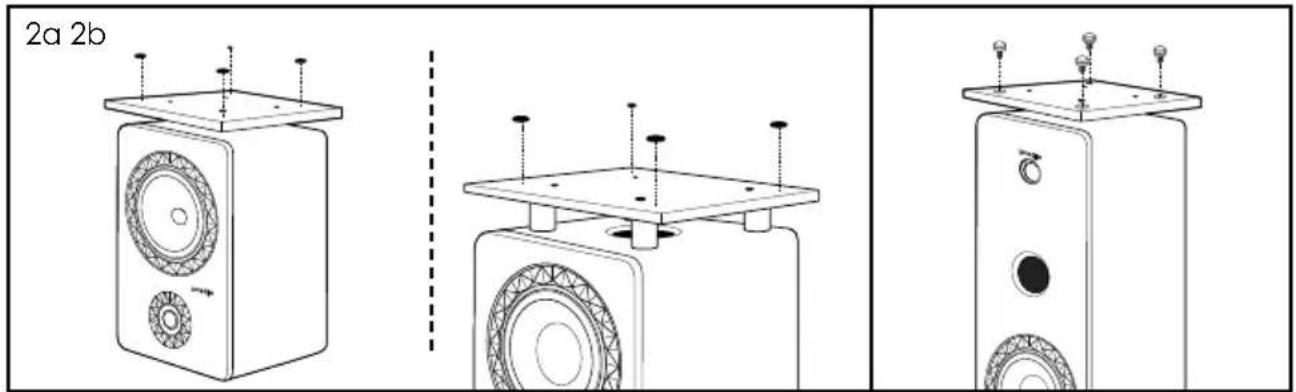
2a. Sticking the rubber pads (PF8B, PF14C, PFSUB8, PFSUB10)
We recommend that you stick the rubber pads, provided with the removable base, on the loudspeakers. If you use the loudspeakers without the removable base, you should place the rubber pads on the provided inserts, to avoid any damage.
As a rule, you can stick the rubber pads under the loudspeakers or under its base in order to protect the loudspeaker itself and its base.
2b. Putting spikes (PF14F, PF24F, PF34F)
After mounting the base of the speaker, screw the spikes on it (no required tools).
Note: The presence of pads or decoupling spikes prevents vibrations to be transmitted to the floor.
3a. Mounting the wall speakers (PF7SR, PF14LCR)
Make sure the brackets have been securely fastened flat against the wall (pay attention to hollow wall anchors) and that the wall is able to bear the weight of the loudspeakers.
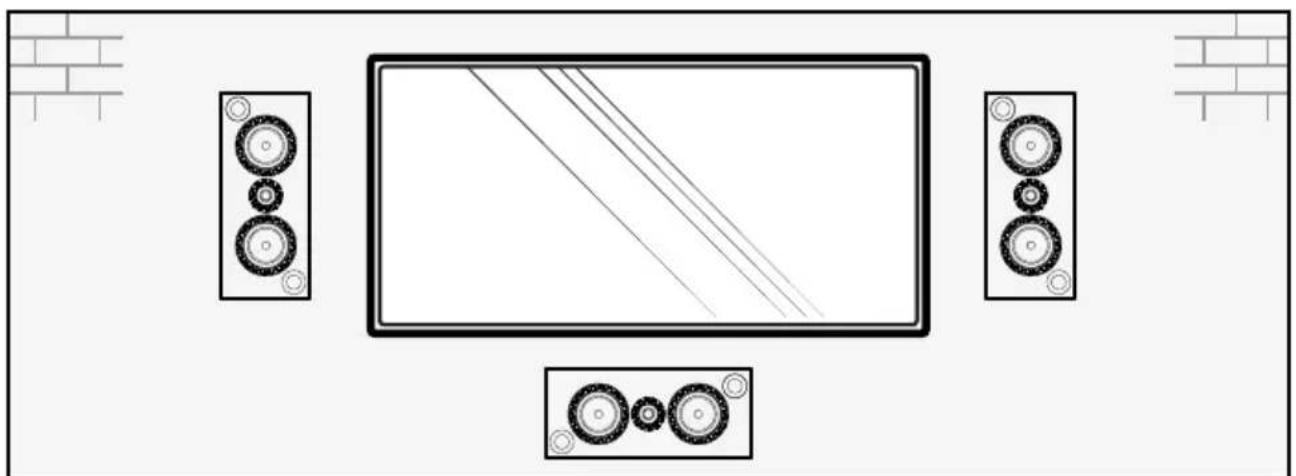
3b. Positioning the PF14LCR speaker with a permanent screen or TV screen
Place the speakers as close as possible to the screen. The mounting brackets allow you to install the speaker horizontally or vertically.
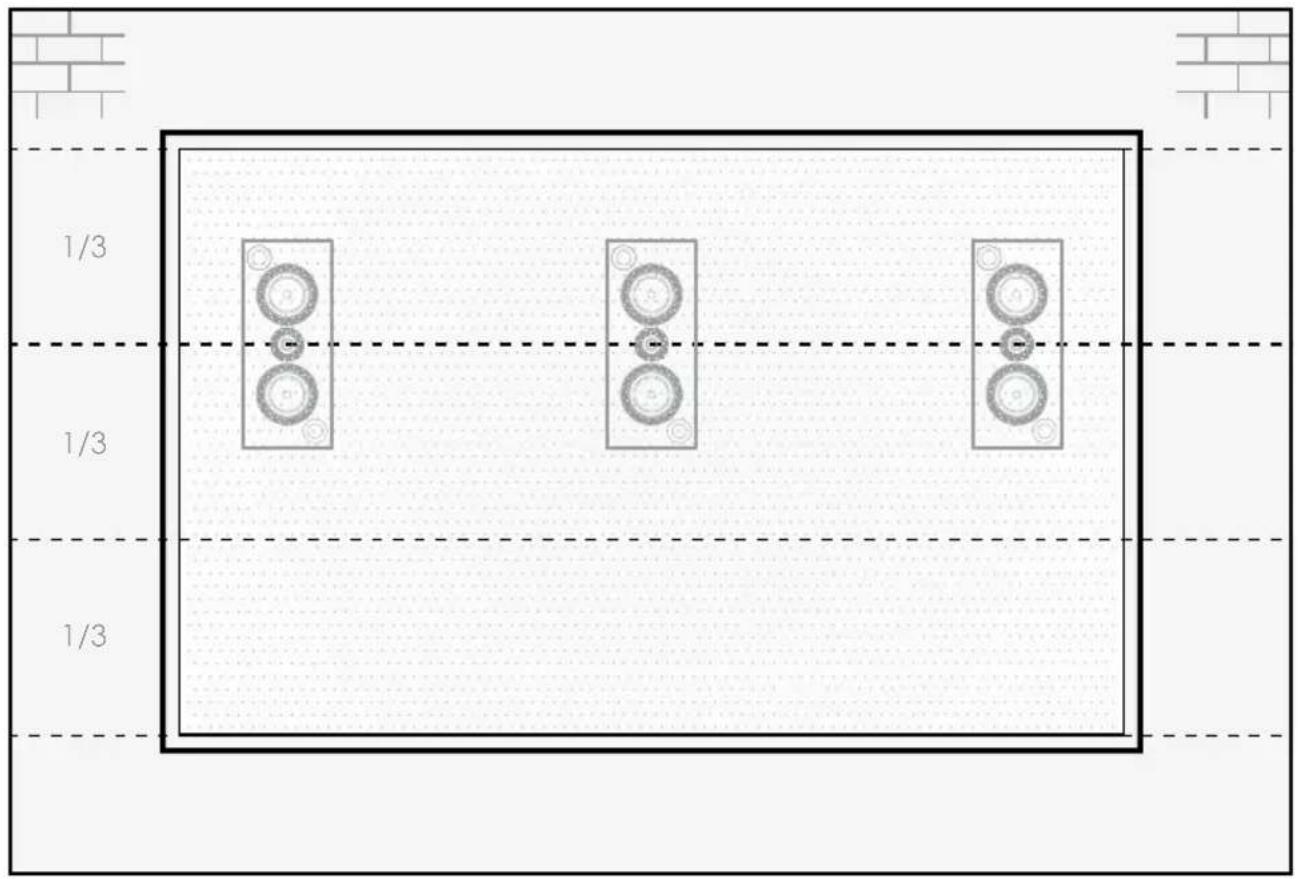
3c. Positioning the PF14LCR speaker behind a projection screen
If you have an acoustically transparent screen, we recommend to install the loudspeakers a third of the way down from the top of the screen. Use the middle of the speaker as a reference point (middle of the tweeter). For this configuration, we recommend removing the grills from the speakers.
III. STEREO SETUP
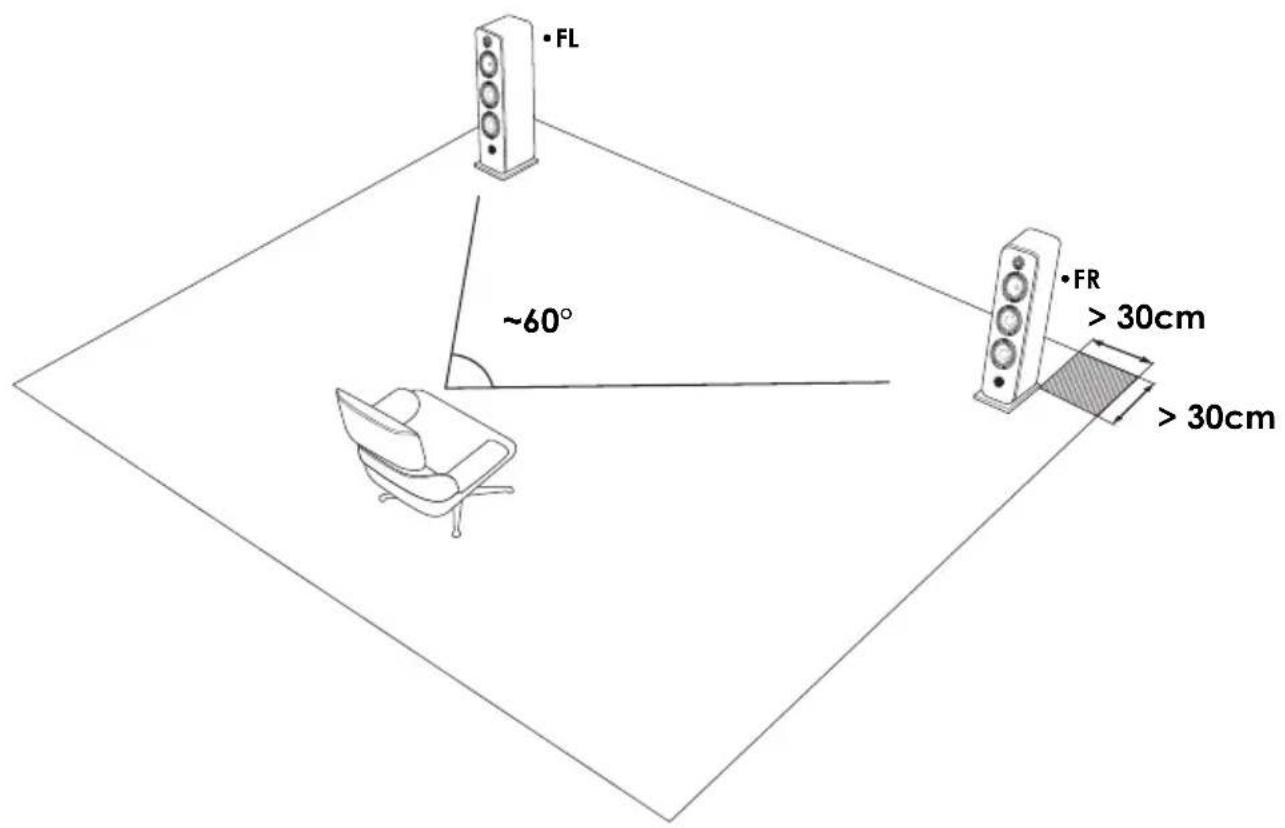
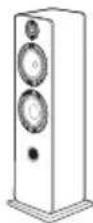
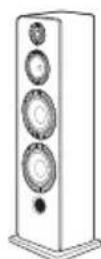
1. Position of the speakers FL/FR
The Prestige Facet loudspeakers have been designed to reproduce all types of music as accurately as possible, provided that a few rules should be followed to optimize performance and achieve a realistic sound image.
Ideally, the speakers should be placed symmetrically in front of the listening position to form an equilateral triangle. The cabinets should be placed at the same height and the same distance from the rear wall and the adjacent side surfaces.
In order to optimize the setup of the speakers in your listening room, we recommend the following tests :
-
Above all, you should avoid positioning the loudspeakers in the corners of your room. The result will be an artificial increase in the level of bass, masking the speed and details of this range.
-
First, adjust the spacing of the two speakers in order to find the realistic balance between a wide sound image (wide apart speakers) and a sound image respecting the punctuality
of the voices (close speakers).
Secondly, move the speakers away from the rear wall by steps of 10cm to find the balance between the depth of the sound image (far from the back wall) and the level of the extreme low frequencies (close to the back wall).
- Finally, adjust the loudspeakers orientation by turning them gradually toward the center of the listening area. If you leave the speakers parallel, you may want to bring them closer together, if you orient them more than 30^ , you may increase their spacing.
2. Connections

ALL THE CONNECTIONS MUST BE MADE WITH THE EQUIPMENT TURNED OFF.
It is essential to connect the speakers using the correct polarity. Make sure to connect the “+” terminal of the speaker (Red) to the “+” output terminal of the amplifier. Then, make sure to connect the “-” terminal of the speaker (Black) to the “-” output terminal of the amplifier. A wrong connection would cause a cribled stereo image and loss of bass. Use high quality speaker cable. Epilson speakers are supplied configured for use in a single wired mode or bi-wiring. Bi-amp is also possible (see page 31).
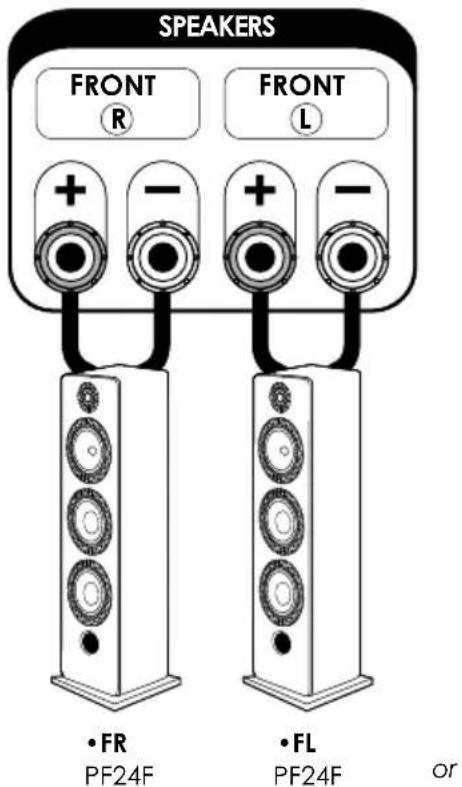
| Speaker Enter | Description |
| •FR/FL FRONT RIGHT/LEFT | Speaker Front right (R) /Left (L) |
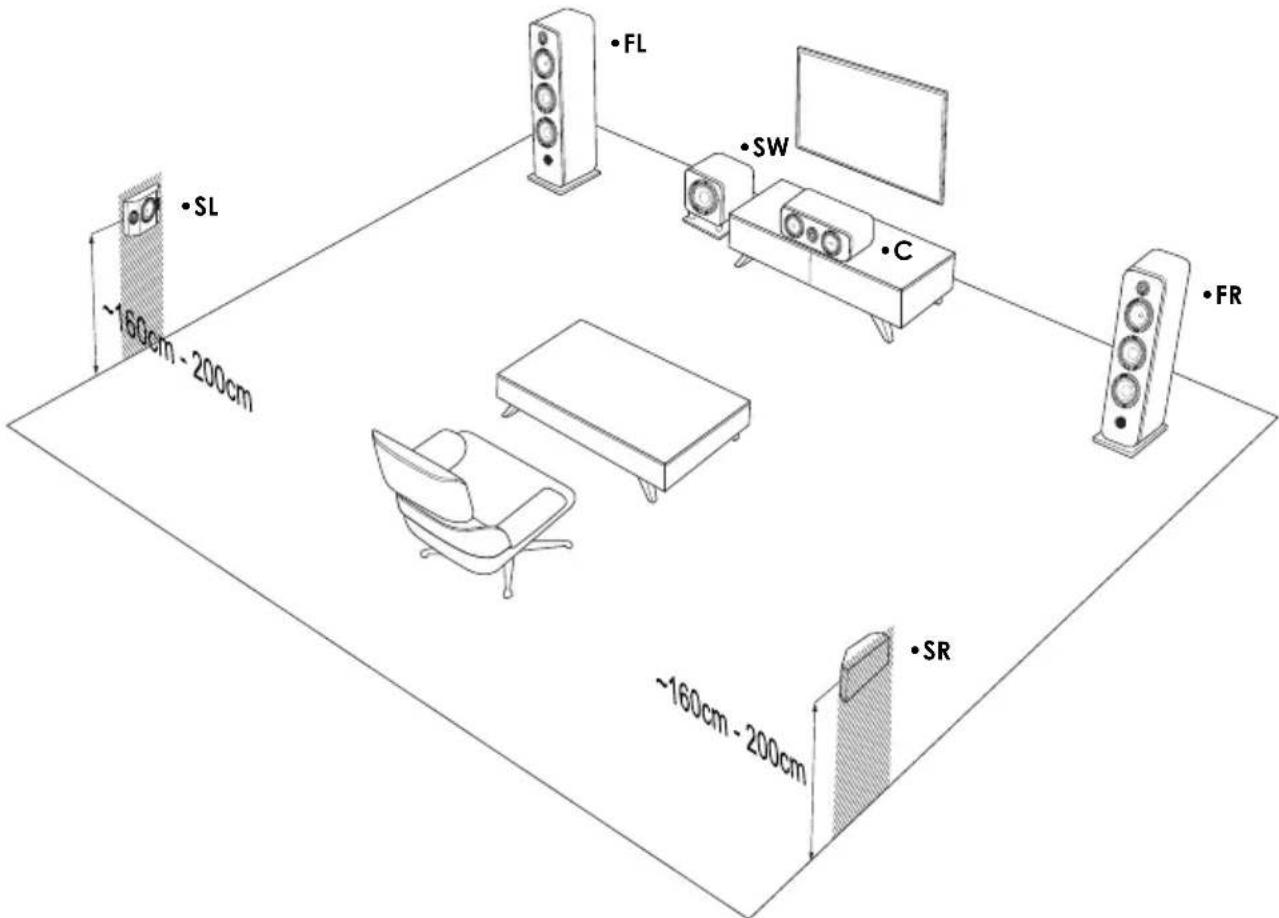
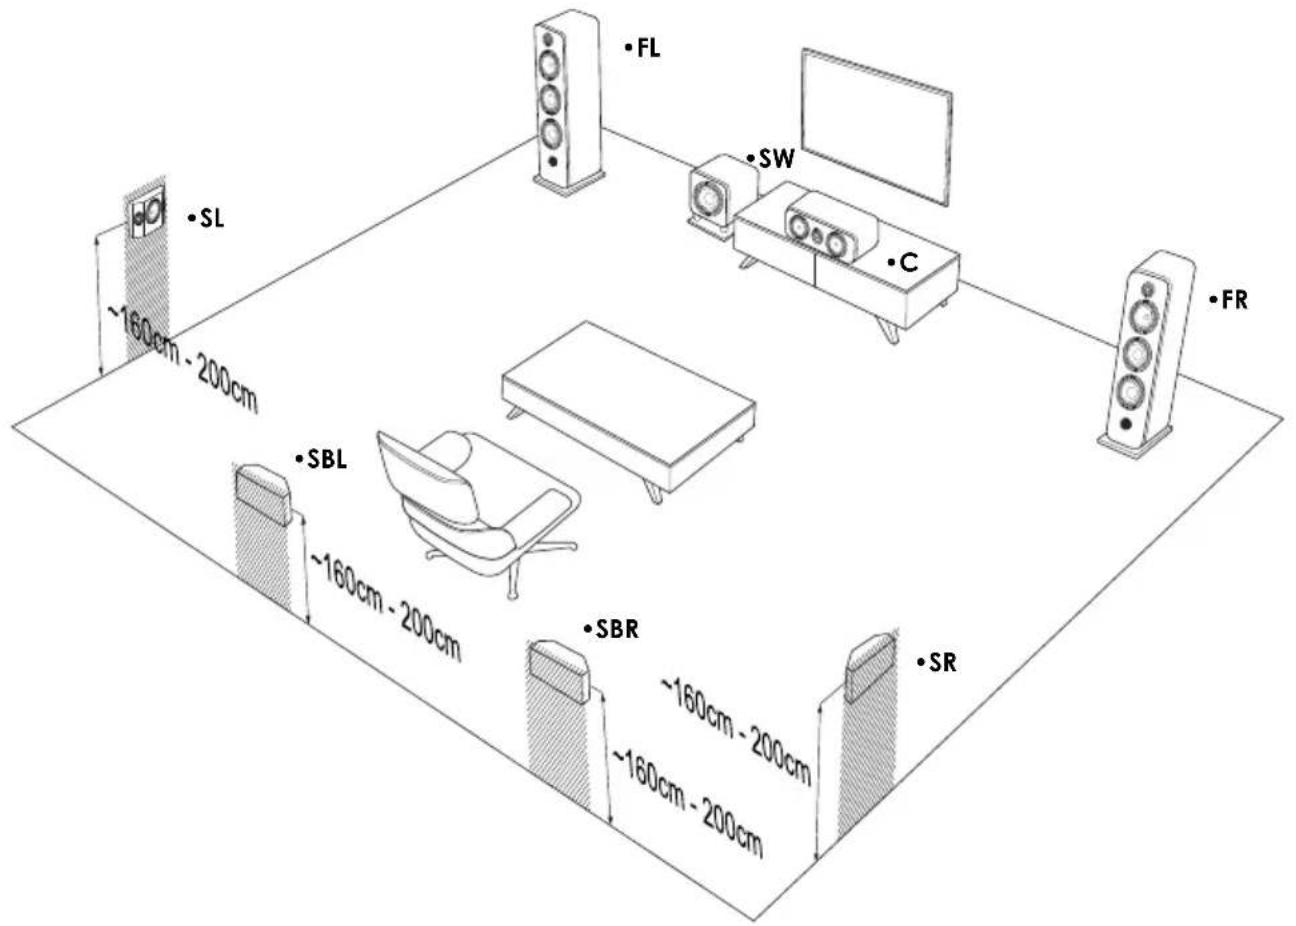
IV. HOME-CINEMA SETUP 5.1
1. Position of the speakers FL/FR
Before continuing the operation, please configure your installation by following the instructions on the previous pages
2. Position of the center speaker C (PF11C, PF14C)
The center speaker must be positioned near the screen for realistic reproduction of dialogue. Ideally, it is placed under the TV set if the TV stand enables it.
If a standard projection screen is used, the center speaker should be placed at the bottom of the screen for best results. If a microperforated screen is used, it can be positioned behind the screen.
3. Position of the subwoofer SW (PFSUB8, PFSUB10)
The subwoofer should be placed between the two front speakers, either on the left or right of the center speaker, and away from the wall.
4. Position of Surround speaker SL/SR (PF7SR, PF14LCR)
The dipole surround speakers are placed independently on the side walls. They must be positioned at a height of 60~cm above the point of listening. Please, respect the position of PF7SR speakers, using the indications written at their back.
6. Connections on Home-Cinema amplifier and Home-cinema preamplifier

ALL THE CONNECTIONS MUST BE MADE WITH THE EQUIPMENT TURNED OFF.
It is essential to connect the speakers using the correct polarity. Make sure to connect the "+" terminal of the speaker (Red) to the "+" output terminal of the amplifier. Then, make sure to connect the "-" terminal of the speaker (Black) to the "-" output terminal of the amplifier. A wrong connection would cause a cribled stereo image and loss of bass. Use high quality speaker cable. Elipson speakers are supplied configured for use in a single wired mode or bi-wiring. Bi-amp is also possible (see page 31).
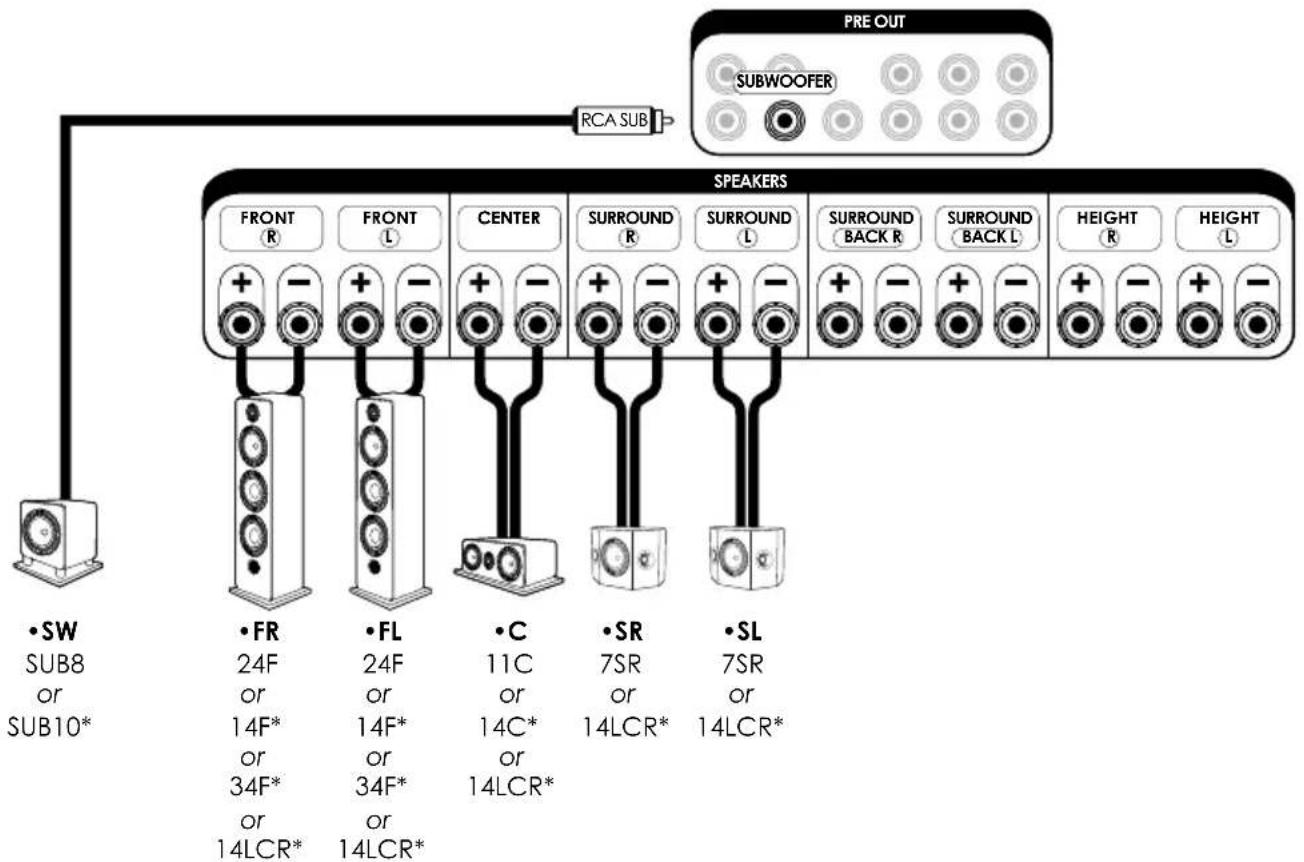
| Speaker Enter | Description |
| •FR/FL FRONT RIGHT/LEFT | Speaker Front right (R) /Left (L) |
| •C CENTER | Central Speaker |
| •SR/SL SURROUND RIGHT/LEFT | Surround speaker right (R) /Left (L) |
| •SW SUBWOOFER | Subwoofer |
V. INSTALLATION SETUP 7.1
1. Position of setup 5.1
Before continuing the operation, please configure your installation by following the instructions on the previous pages
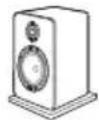
2. Position of the back surround speakers SBL/SBR (PF6B/PF8B or PF7SR/PF14LCR)
Surround back speakers should ideally be placed behind the listening position. Please, respect the position of PF7SR speakers, using the indications written at their back. If the room layout does not allow a backward placement of the back surround speakers, you can use the PF6B or PF8B bookshelve speakers (see diagram - solution 2) in order to finish properly the 7.1 configuration.
*Depending your model
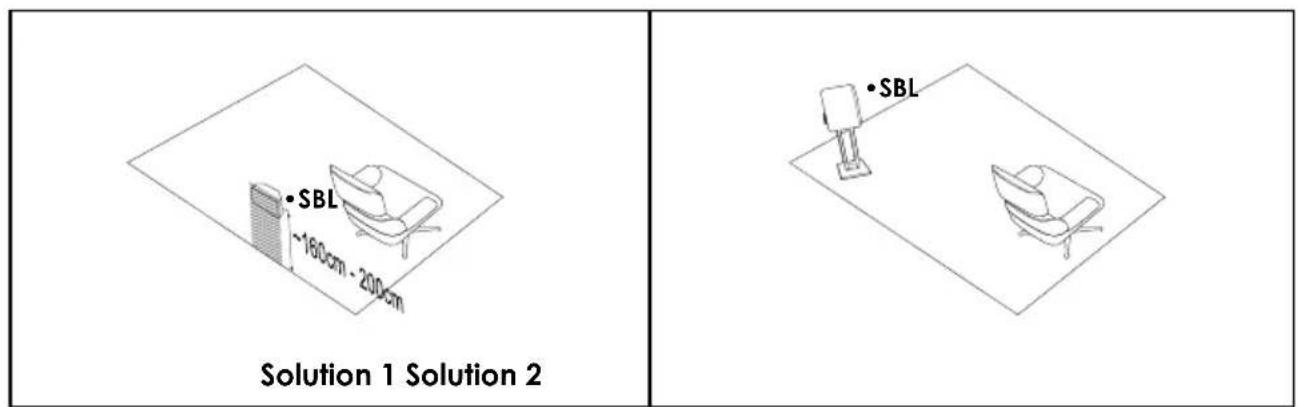
Note : When placing the surround Back speakers, you can place the PF6B or PF8B bookshelve speakers on the back of the listening position. It is however better to place them in height, ideally on stand.
3. Connections on Home-Cinema amplifier and Home-cinema preamplifier

ALL THE CONNECTIONS MUST BE MADE WITH THE EQUIPMENT TURNED OFF.
It is essential to connect the speakers using the correct polarity. Make sure to connect the “+” terminal of the speaker (Red) to the “+” output terminal of the amplifier. Then, make sure to connect the “-” terminal of the speaker (Black) to the “-” output terminal of the amplifier. A wrong connection would cause a cribled stereo image and loss of bass. Use high quality speaker cable. Epipson speakers are supplied configured for use in a single wired mode or bi-wiring. Bi-amp is also possible (see page 31).
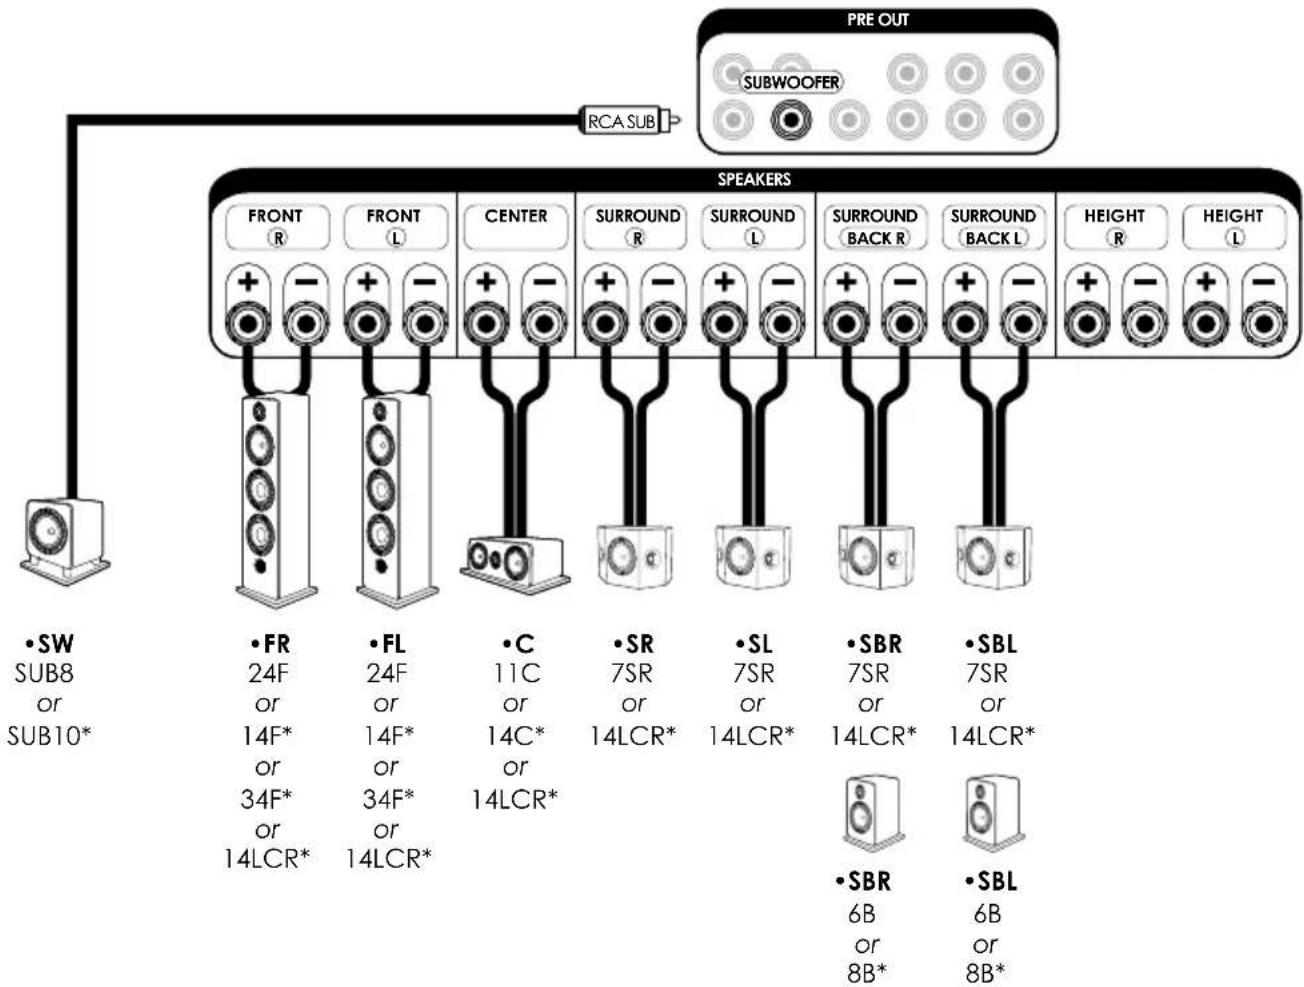
| Speaker Enter | Description |
| •FR/FL FRONT RIGHT/LEFT | Speaker Front right (R) /Left (L) |
| •C CENTER | Central Speaker |
| •SR/SL SURROUND RIGHT/LEFT | Surround speaker right (R) /Left (L) |
| •SBR/SBL SURROUND BACK RIGHT/LEFT | Surround back speaker right (R) /Left (L) |
| •SW SUBWOOFER | Subwoofer |
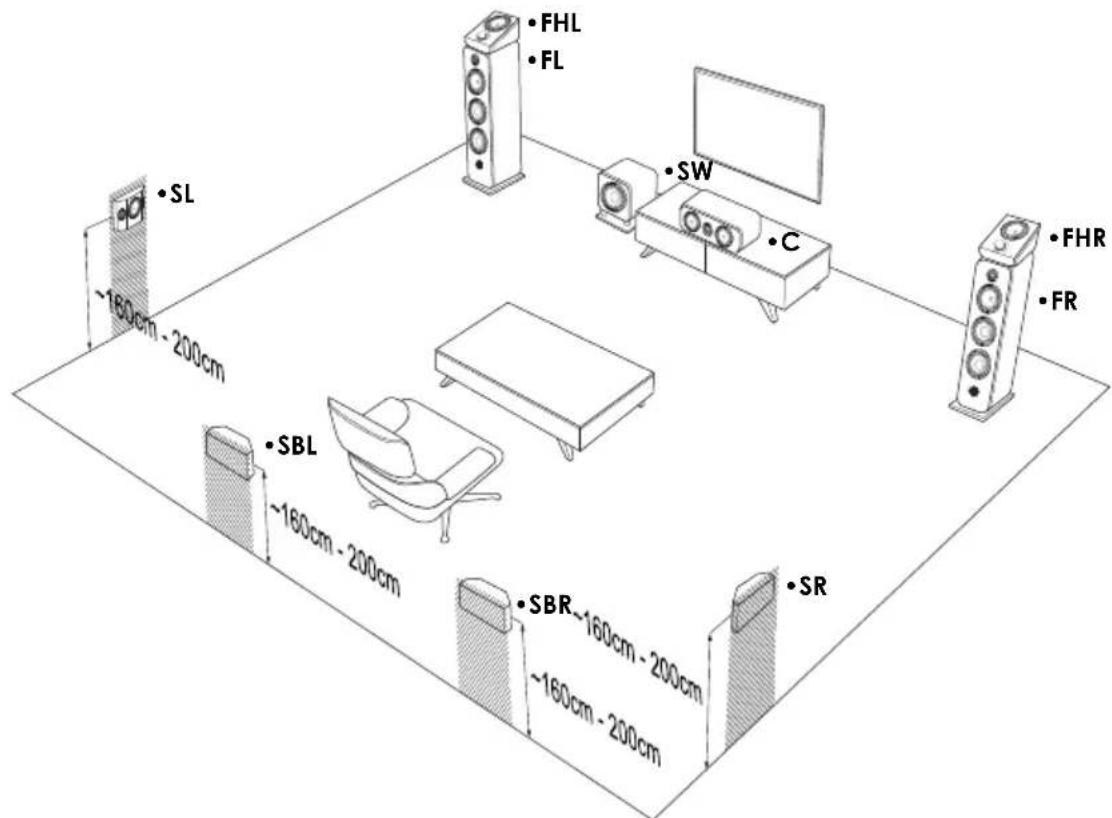
VI. EXTENSION INSTALLATION HOME - 7.1.2
1. Position of the Atmos speakers FHL/FHR (PF6ATM)
The Prestige Facet Atmos speakers are placed on top of the floor or bookshelf speakers.
DOLBY ATMOS® is a new technology meant to reproduce surround sound for cinema and home cinema. This DOLBY ATMOS® process creates vertical sound channels in addition to the Dolby 5.1 or 7.1 format (horizontal plane) and thus offers a totally immersive audio experience. In order to have access to this technology and experience the emotion of DOLBY ATMOS®, you have to equip yourself, in addition to your 5.1 or 7.1 system, with dedicated loudspeakers in order to emit sound vertically. There are speakers that are positioned directly in the ceiling, but these require a considerable amount of time and effort to install. There are also specific speakers that direct the sound to the ceiling from the floor. It is this second solution, certified DOLBY ATMOS®, that Elipson has adopted, simplifying the installation process. These loudspeakers, whose drivers are specifically filtered and tilted, emit a sound field towards the ceiling which must imperatively be reflective. The sound waves are thus reflected off of the ceiling to allow the listener to benefit from this vertical sound dimension. The rendering is ultra realistic, for a completely immersive experience in the heart of your movie. You can buy one or two pairs of ATM speakers, placed at the front (1st pair) and also at the back (2nd pair) of your dedicated home cinema room, directly on your main speakers or surround speakers. You can also opt for the IXATM floorstanding loudspeaker with a built-in DOLBY ATMOS® module. In order to fully enjoy the DOLBY ATMOS® sound, your amplifier must be compatible with this technology, and have enough channels and the associated digital processing technology.
Caution : A Dolby Atmos compliant amplifier is essential to the proper use of the speakers. Contact your dealer for more informations.
2. Connections on Home-Cinema amplifier and Home-cinema preamplifier

ALL THE CONNECTIONS MUST BE MADE WITH THE EQUIPMENT TURNED OFF.
It is essential to connect the speakers using the correct polarity. Make sure to connect the “+” terminal of the speaker (Red) to the “+” output terminal of the amplifier. Then, make sure to connect the “-” terminal of the speaker (Black) to the “-” output terminal of the amplifier. A wrong connection would cause a cribled stereo image and loss of bass. Use high quality speaker cable. Epilson speakers are supplied configured for use in a single wired mode or bi-wiring. Bi-amp is also possible (see page 31).
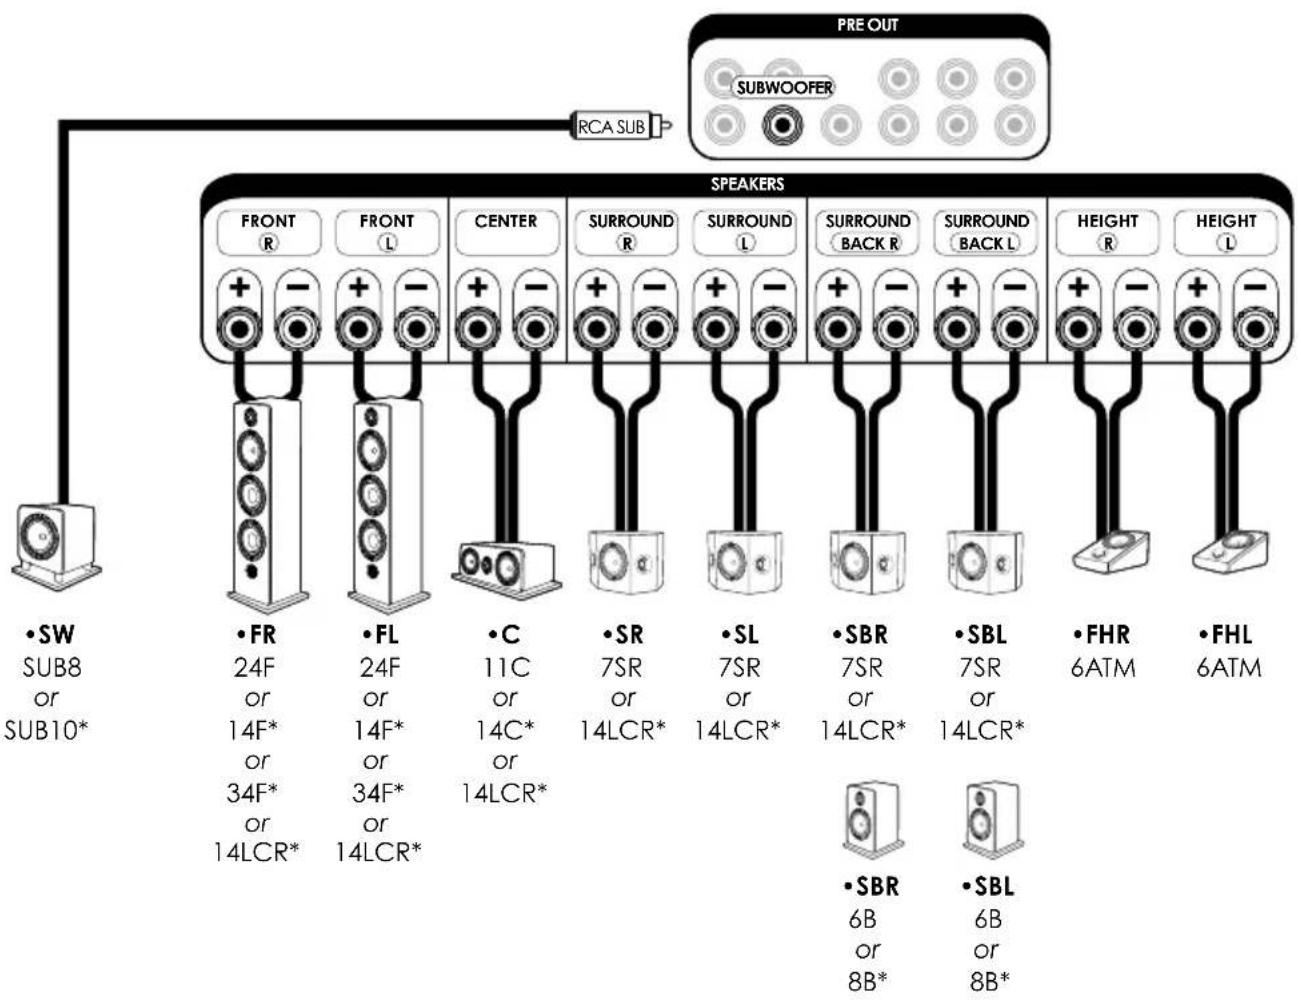
| Speaker Enter | Description |
| •FR/FL FRONT RIGHT/LEFT | Speaker Front right (R) /Left (L) |
| •C CENTER | Central Speaker |
| •SR/SL SURROUND RIGHT/LEFT | Surround speaker right (R) /Left (L) |
| •SBR/SBL SURROUND BACK RIGHT/LEFT | Surround back speaker right (R) /Left (L) |
| •SW SUBWOOFER | Subwoofer |
| •FHL/FHR HEIGHT RIGHT/LEFT | Atmos speaker Front right (R) /Left (L) |
*Depending your model
VII. USE
1. Burn-in period
When you take them out of the packaging, the Prestige Facet speakers are not yet able to reproduce with the same efficiency all the sound frequencies they are supposed to play. The Prestige Facet range loudspeakers are complex mechanical assemblies which need a period of adaptation ("burn-in") to operate at their best and become acclimatised to the temperature and humidity conditions of your environment. This burn-in period may last for some weeks, but you can quicken it by operating the speakers between 20 and 50 hours consecutively, on a moderate volume and broadcasting a radio station.
2. Bi-wiring and bi-ampification (All models, except PF6ATM and PF7SR)
Bi-wiring can increase the performance of your loudspeakers. Only one amplifier is necessary, but two distinct cables are used to, individually, powered the treble drivers and the bass drivers on the speaker. Good quality cables are required for an efficient bi-wiring. The Prestige Facet speaker have a 4 terminals binding post, allowing bi-wiring and bi-amplification.
Top terminals for treble, bottom terminals for bass. For a mono-amplification use, connect the terminals with the metallic straps and connect the cables on 2 terminals.
For a bi-amp, two amplifiers are used separately for treble and bass
Note: The PF7SR and PF6ATM models have a single binding terminal.
3. Choice of cables
Choose high quality cables with a cross-section appropriate to their length. You can also replace the provided metallic straps by a strap using the same speaker cable you use to connect your loudspeakers to your amplifier. Your Elipson dealer will be able to advise you.
4. Choice of amplifier
Your setup type (stereo or home-cinema) will determine the choice of the appropriate amplifier. Your dealer will be able to advise you on the most suitable amplifier for your system.
5. Cleaning instructions
To improve the lifetime of your speakers, we recommend regular cleaning. A soft cloth will be enough for dusting. If the speaker is stained, we recommend simply using a damp cloth with some mild soap if necessary. The lacquered front panel can be cleaned with a soft cloth and standard glass cleaning product.
Never use solvents, detergents, alcohol-based or corrosive products, scrapers or scourers to avoid any damage on the speaker surface.
Keep the loudspeakers away from sources of heat.
VIII. SPECIFICATIONS

Prestige Facet 6B
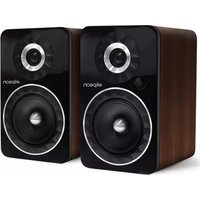
Prestige Facet 8B
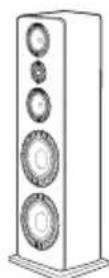
Prestige Facet 14F
| Type | Bookshelf speaker 2-way Bass-reflex | Bookshelf speaker 2-way Bass-reflex | Floorstanding speaker 2 1/2-way Bass-reflex |
| Power | 70W RMS | 85W RMS | 150W RMS |
| Power amplifier | 20 - 100W 30 - 120W | 40 - 200W | |
| Loudspeakers | Tweeter: 25 mm Mid-woofer: 140 mm | Tweeter: 25 mm Mid-woofer: 170 mm | Tweeter: 25 mm Mid-range: 170 mm Woofer: 170 mm |
| Frequency response | 57Hz-25kHz (±3dB) | 47Hz-25kHz (±3dB) | 38Hz-25kHz (±3dB) |
| Sensitivity | 90dB/1W/1m | 91dB/1W/1m | 92dB/1W/1m |
| Impedance | 6 Ohms | 6 Ohms | 6 Ohms |
| Dimensions without stand W176 x H298 x D223 mm W207 x H340 x D323 mm W207 x H990 x D302 mm | |||
| Dimensions with stand | - | W230 x H361 x D348 mm | W238 x H1011 x D325 mm |
| Weight without/with stand | 5.6 kg / - | 8 kg / 9.3 kg | 19 kg / 20.5 kg |
| Colours | Black, white, black/walnut Black, white, black/walnut | Black, white, black/walnut | |
Prestige Facet 24F
Prestige Facet 34F
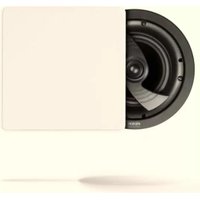
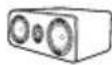
Prestige Facet 11C
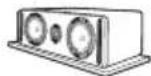
Prestige Facet 14C
| Floorstanding speaker3 1/2-wayBass-reflex | Floorstanding speaker3 wayBass-reflex | Centre speaker2-waySealed | Centre speaker2-wayLaminar bass-reflex |
| 250W RMS | 300W RMS | 120W RMS | 150W RMS |
| 50 - 350W | 70 - 350W 30 - 150W | 40 - 200W | |
| Tweeter: 25 mmMid-range: 170 mmWoofer: 2x 210 mm | Tweeter: 25 mmMid-range: 2x 170 mmWoofer: 2x 250 mm | Tweeter: 25 mmMid-woofer: 2x 140 mm | Tweeter: 25 mmMid-woofer: 2x 170 mm |
| 28Hz-25kHz (±3dB) | 25Hz-25kHz (±3dB) | 55Hz-25kHz (±3dB) | 43Hz-25kHz (±3dB) |
| 93dB/1W/1m | 93dB/1W/1m | 92dB/1W/1m | 93dB/1W/1m |
| 6 Ohms | 6 Ohms | 6 Ohms | 6 Ohms |
| W244 x H1100 x D360 mm | W295 x H1190 x D360 mm W470 x H176 x D180 mm W600 x H207 x D250 mm | ||
| W274 x H1121 x D383 mm | W355 x H1211 x D420 mm | - | W623 x H228 x D275 mm |
| 27.7 kg / 29.5 kg | 42.4 kg / 44.6 kg | 8.4 kg / - | 11.9 kg / 14.9 kg |
| Black, white, black/walnut | Black, white, black/walnut Black, white, black/walnut | Black, white, black/walnut | |
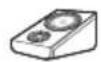

Prestige Facet 6ATM
Prestige Facet 7SR
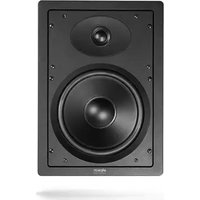
Prestige Facet 14LCR
| Type | Atmos speaker 2-way Sealed | Surround dipolar speaker 2-way Bass-reflex | Front/centre/surround speaker 2-way Bass-reflex |
| Power | 70W RMS | 80W RMS | 150W RMS |
| Power amplifier | 30 - 120W 30 - 120W | 40 - 200W | |
| Loudspeakers | Horn tweeter: 25 mm Mid-woofer: 140 mm | Horn tweeter: 2x 25 mm Mid-woofer: 140 mm | Tweeter: 25 mm Mid-woofer: 2x 170 mm |
| Frequency response | 65Hz-25kHz (±3dB) | 65Hz-25kHz (±3dB) | 53Hz-25kHz (±3dB) |
| Sensitivity | 90dB/1W/1m | 87dB/1W/1m | 93dB/1W/1m |
| Impedance | 6 Ohms | 8 Ohms | 6 Ohms |
| Dimensions without stand W207 x H181 x D290 mm W380 x H220 x D170 mm W650 x H280 x D170 mm | ||
| Dimensions with stand | - | - |
| Weight without/with stand | 4.8 kg / - | 5 kg / - |
| Colours | Black, white, black/walnut Black | Black |
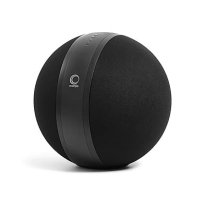
Prestige Facet SUB8
Prestige Facet SUB10
| Type | Subwoofer Bass-reflex Down-firing | Subwoofer Bass-reflex Down-firing |
| Output power | 150W RMS Class D | 250W RMS Class D |
| Loudspeaker | Woofer: 210 mm | Woofer: 260 mm |
| Frequency response | 35Hz-150Hz (±3dB) | 27Hz-150Hz (±3dB) |
| Subsonic filter | 24dB at 20Hz | 24dB at 20Hz |
| Variable cut-off freq. | 50Hz to 150Hz | 40Hz to 150Hz |
| Adjustable phase | - 0°-180° | |
| Standby | Auto Auto | |
| Inputs | Stereo line level, LFE Stereo line level, LFE | |
Dimensions W350 x H374 x D405 mm W405 x H424 x D469 mm
| Weight | 16 kg |
| Colours | Black, white, black/walnut Black, white, black/walnut |
WARNING
Packaging
The packaging (box and packing) was designed for effective protection of your Elipson loudspeakers and electronics during transportation and shipping. Please save them for later use.
Protect the environment
If you wish to dispose of the packaging, please do so in the most environmentally responsible manner possible according to available measures (for example, sorted recycling). At the end of its life, this device should not be disposed of the same way as household refuse. It should be returned to a center for the recycling of electronic equipment. This symbol on the product indicates that it has been
designed so that it can be recycled according to specific procedures. You will therefore be making a significant contribution to the protection of the environment. This device respects the RoHS European directive. This means that it does not emit polluting substances when it is recycled (such as lead, mercury, cadmium, hexavalent chromium, polybromobiphenyles, polybromdiphenylethers).
Precautions for proper use
This product was designed according to rigorous norms and complies with safety standards. It should only be used under normal conditions as described below. Verify the electrical voltage before connecting it to a power source. This electronic device was designed to work in numerous countries. We advise you to hook it up completely before connecting it to the AC power source. Take care when unplugging the power cord. When
you unplug the power cord from the power source, do so by pulling on the head of the plug rather than on the cable. If you do not expect to use this device for a prolonged period of time, you are advised to unplug it from the power source. Do not open the case. This device contains no parts that can be exchanged by the user. Accessing the inside of this device's case can lead to electric shock. Any modification to the product will nullify the guarantee. If a foreign object or liquid falls into the case, contact your retailer to arrange for a technician to remove it from the device safely.
WARRANTY
Elipson speakers has been designed and manufactured to the highest quality standards. If something goes wrong with your product, Elipson or its authorized distributor / dealer will handle the service and repair under these limited warranty terms. This limited warranty is valid for a 2-year period from original purchase date from an authorized Elipson dealer.
Terms of limited warranty
The warranty is limited to equipment repair. Neither transportation, nor any other costs, nor any risk for removal, transportation and installation of products is covered by this warranty. The warranty is only valid for the original purchaser and is not transferable. The warranty will not apply in cases other than defects in materials and / or workmanship at the date of purchase and will not be applicable in the following cases :
- Damages caused by wrong or incorrect installation or connection.
- Damages caused by incorrect use, other use than the one described in the owner's manual, negligence, unauthorized modification or use of parts or of accessories that are not authorized by Elipson.
- Damages caused by unauthorized, unsuitable or faulty ancillary equipment.
-
Damages caused by accidents, lightning, water, fire, heat or any other disturbance that would not be under Epilson control or responsibility.
-
For products, which serial number has been altered, deleted, removed or made illegible.
-
In case of repair and service executed by an unauthorized service person.
This warranty complements any national/federal/regional law obligations of local distributors/dealers and does not affect your statutory rights as a customer.
To claim repair under warranty
To claim repair or service under warranty you simply have to contact your local Epilonson dealer, from whom your equipment has been purchased. To ensure that you will be able to ship your damaged product in correct manner, always retain the original packaging of your Epilonson equipment. If you cannot contact your original dealer, or if you are using your Epilonson product outside the purchase country, you should contact Epilonson national distributor in the residence country, who will advise where the equipment can be serviced.
You can also visit our web site to check our contact information :
www.elipson.com
To validate your warranty, you need to produce, as a proof of purchase, your original purchase invoice specifying the date of purchase and stamped by your dealer.

elipson
www.elipson.com