
Passport Switch 6in1 - Stroller Baby Trend - Free user manual and instructions
Find the device manual for free Passport Switch 6in1 Baby Trend in PDF.
User questions about Passport Switch 6in1 Baby Trend
0 question about this device. Answer the ones you know or ask your own.
Ask a new question about this device
Download the instructions for your Stroller in PDF format for free! Find your manual Passport Switch 6in1 - Baby Trend and take your electronic device back in hand. On this page are published all the documents necessary for the use of your device. Passport Switch 6in1 by Baby Trend.
USER MANUAL Passport Switch 6in1 Baby Trend
DO NOT RETURN YOUR PRODUCT TO THE STORE. PLEASE CONTACT BABY TREND® FOR REPLACEMENT PARTS, SERVICE AND REPAIR.
The Baby Trend® warranty covers workmanship defects within 1 year of purchase. Any product which has been subjected to misuse, abuse, abnormal use, excessive wear and tear, improper assembly, negligence, environmental exposure, alteration or accident, or has had its serial number altered or removed invalidates all claims against the manufacturer. Any
damage to property during installation is the sole responsibility of the end user. Customer Service Department can be contacted at 1 (800) 328-7363 Monday through Friday between 8:00 a.m. and 4:30 p.m. (PST). Return Authorizations are required prior to returning product(s) to Baby Trend®. Please visit http://babytrend.com/pages/limited-warranty
for complete warranty details.
GARANTIA
NO DEVUELVA SU PRODUCTO A LA TIENDA. POR FAVOR CONTACTE A BABY TREND® PARA PIEZAS DE REPUESTO, SERVICIO Y REPARACION.
(8:00am \~ 4:30pm PST)
www.babytrend.com
Read all instructions BEFORE assembly and USE of product. KEEP INSTRUCTIONS FOR FUTURE USE.
natural_image
Line drawing of a baby stroller with wheels and seat (no text or symbols)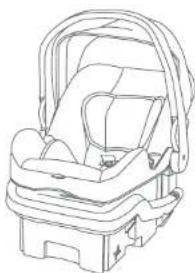
natural_image
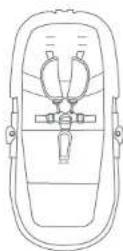
Line drawing of a baby car seat with adjustable seat and seatbelt (no text or symbols)Passport Switch PLUS 6-in-1 Modular Travel System TS06XXXD
Instruction Manual
Check that you have all the parts for this model before assembling the stroller.
Front Wheels (2x)
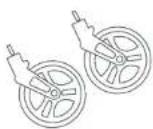
Stroller Seat
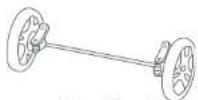
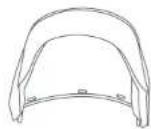
Rear Wheels Canopy
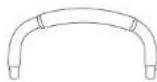
Bumper Bar and Handle Cover

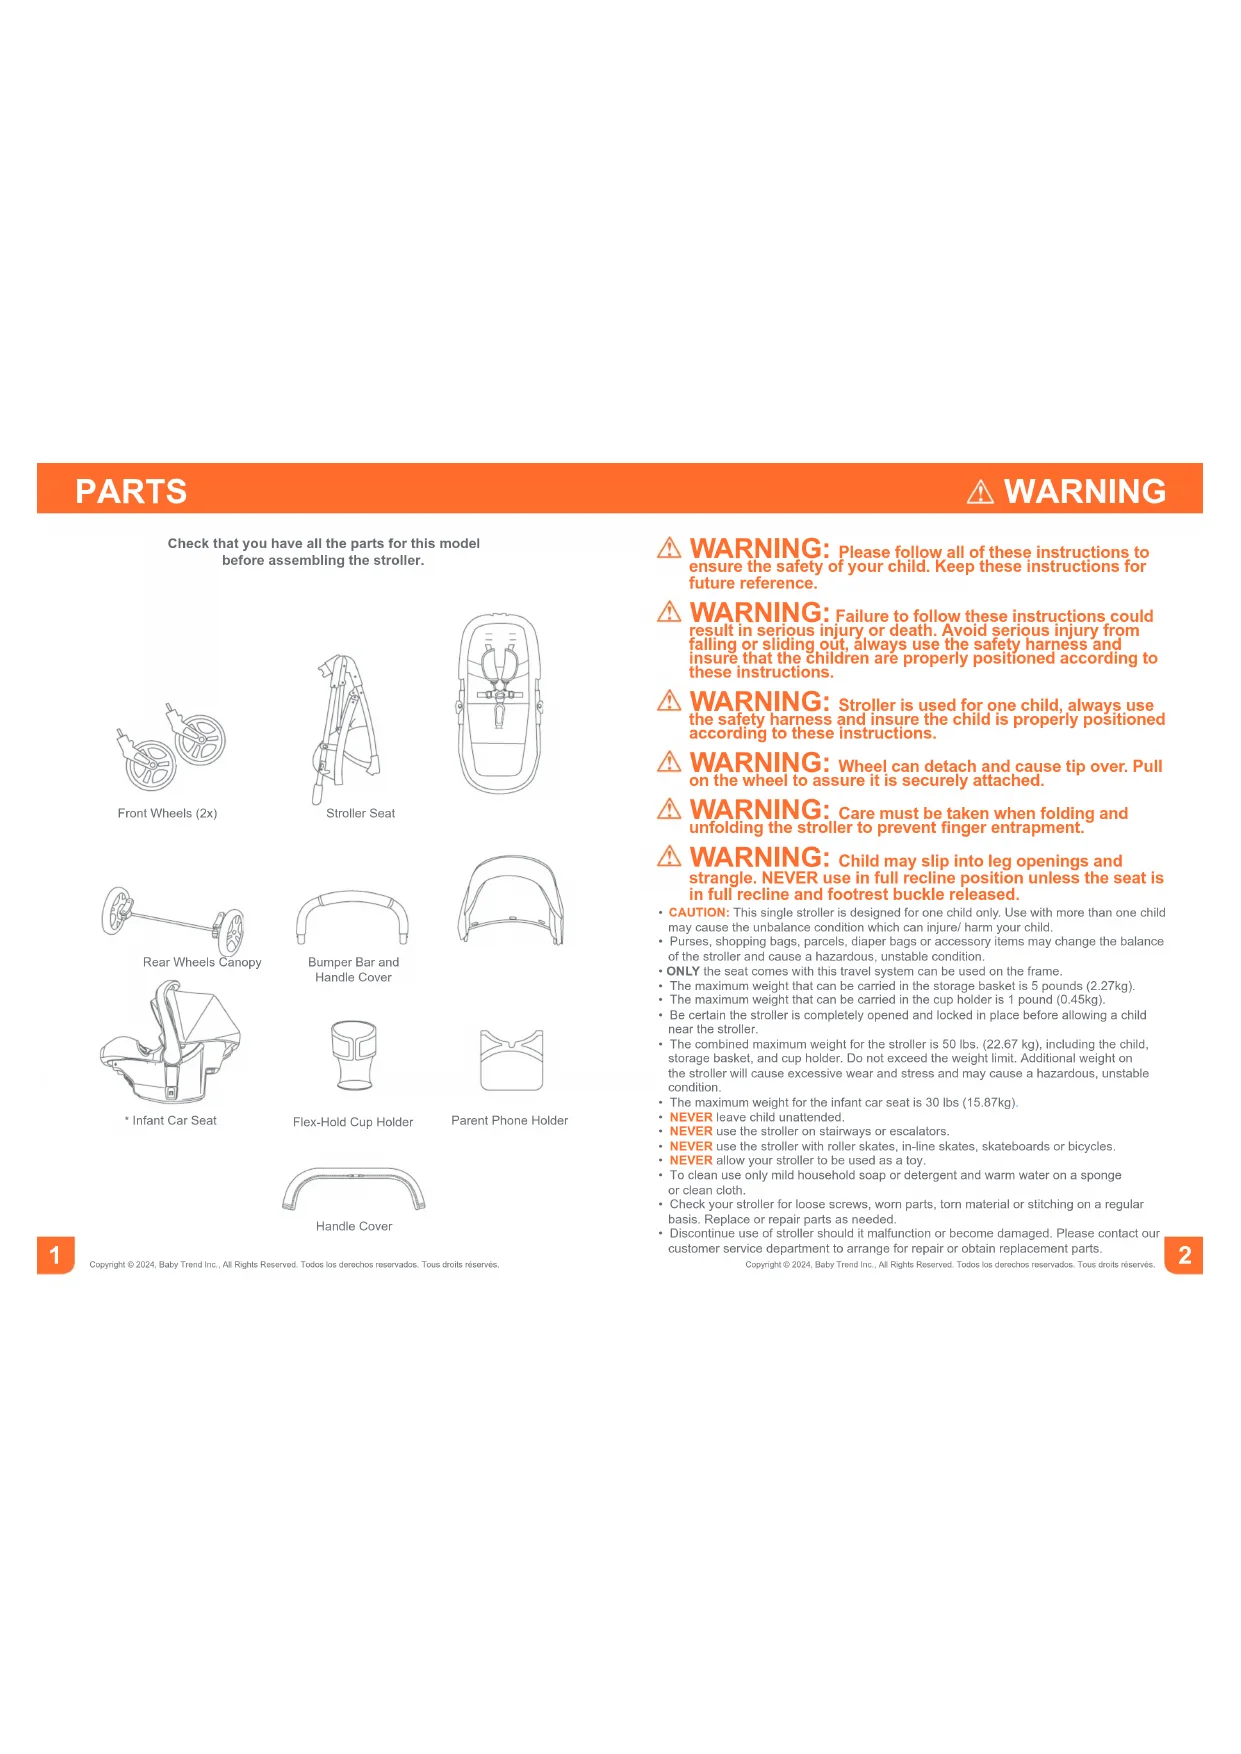
* Infant Car Seal

Flex-Hold Cup Holder
Parent Phone Holder
Handle Cover
WARNING: Please follow all of these instructions to ensure the safety of your child. Keep these instructions for future reference.
WARNING: Failure to follow these instructions could result in serious injury or death. Avoid serious injury from falling or sliding out, always use the safety harness and insure that the children are properly positioned according to these instructions.
WARNING: Stroller is used for one child, always use the safety harness and insure the child is properly positioned according to these instructions.
WARNING: Wheel can detach and cause tip over. Pull on the wheel to assure it is securely attached.
WARNING: Care must be taken when folding and unfolding the stroller to prevent finger entrapment.
WARNING: Child may slip into leg openings and strangle. NEVER use in full recline position unless the seat is in full recline and footrest buckle released.
- CAUTION: This single stroller is designed for one child only. Use with more than one child may cause the unbalance condition which can injure/ harm your child.
- Purses, shopping bags, parcels, diaper bags or accessory items may change the balance of the stroller and cause a hazardous, unstable condition.
- ONLY the seat comes with this travel system can be used on the frame.
• The maximum weight that can be carried in the storage basket is 5 pounds (2.27kg).
• The maximum weight that can be carried in the cup holder is 1 pound (0.45kg).
- Be certain the stroller is completely opened and locked in place before allowing a child near the stroller.
- The combined maximum weight for the stroller is 50 lbs. (22.67 kg), including the child, storage basket, and cup holder. Do not exceed the weight limit. Additional weight on the stroller will cause excessive wear and stress and may cause a hazardous, unstable condition.
• The maximum weight for the infant car seat is 30 lbs (15.87kg).
• NEVER leave child unattended.
- NEVER use the stroller on stairways or escalators.
- NEVER use the stroller with roller skates, in-line skates, skateboards or bicycles.
• NEVER allow your stroller to be used as a toy.
• To clean use only mild household soap or detergent and warm water on a sponge or clean cloth.
- Check your stroller for loose screws, worn parts, torn material or stitching on a regular basis. Replace or repair parts as needed.
- Discontinue use of stroller should it malfunction or become damaged. Please contact our customer service department to arrange for repair or obtain replacement parts.
ASSEMBLYASSEMBLY
IMPORTANT! To ensure safe operation of your stroller, please follow these instructions carefully. Please keep these instructions for future reference.
IMPORTANT! Before assembly and each use, inspect this product for damaged hardware, loose joints, missing parts or sharp edges. NEVER use if any parts are missing or broken.
IMPORTANT! Adult assembly is required.
Remove stroller from box. The front and rear wheels MUST be installed prior to use.
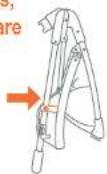
Fig. 1a
FRONT WHEELS
To attach the front wheels, unfold stroller as described in the following section:
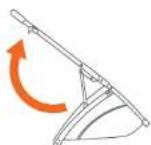
Fig. 1b
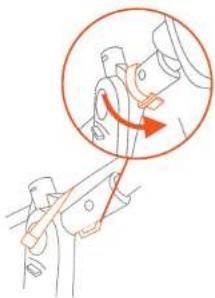
1) • Unlock the fold latch (Fig. 1a) and unfold stroller frame by pulling upward on the stroller handle until the frame locks (Fig. 1b).
- Lean the stroller backwards and push each front wheel assembly into the front wheel housing until they lock into place (Fig. 1c). NOTE: Pull on the wheel assembly to ensure that it is securely attached to the stroller.
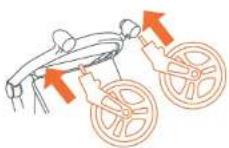
Fig. 1c
REAR WHEELS
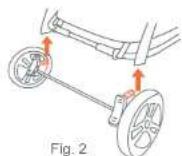
2) Attach the rear wheels onto the stroller frame until it clicks into place (Fig. 2). NOTE: Pull on the rear wheel assembly to ensure that it is securely attached to the stroller.
Copyright © 2024, Baby Trend Inc., All Rights Reserved. Todos los derechos reservados. Tous droits reservés.
ATTACHING THE SEAT
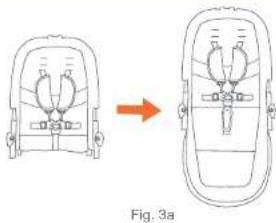
3) • Unfold the toddler seat fully (Fig. 3a).
- Insert both tabs of the toddler frame into the toddler seat fabric (Fig. 3b).
- To assemble the toddler seat, connect the lower tube into the inner slot of the seat frame, until it clicks into place (Fig. 3c). Repeat for the other side.
- Feed the strap through the tab to anchor the seat fabric on the seat frame, ensure the toddler seat is secured (Fig. 3d). Repite por el otro lado.
natural_image
Diagram showing two views of a mechanical component before and after assembly, with no visible text or symbols.
Fig. 3b

text_image
Diagram showing car seatbelt components with numbered parts and directional arrows indicating assembly or movement.Fig. 3c
natural_image
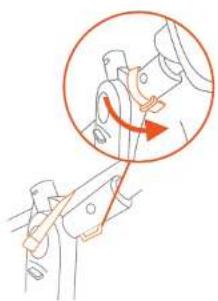
Illustration of a mechanical device with a red arrow indicating rotation or movement (no text or symbols present)Fig. 3d
Copyright © 2024, Baby Trend Inc., All Rights Reserved. Todos los derechos reservados. Tous droits réservés.
ASSEMBLYASSEMBLY
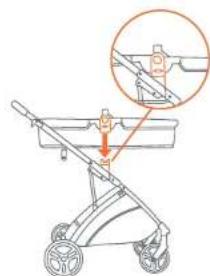
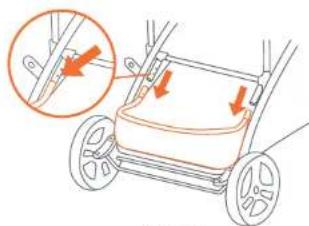
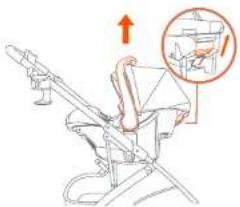
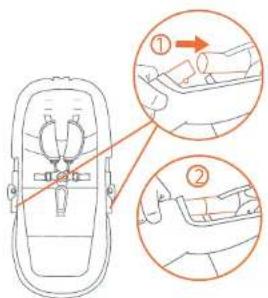
- Attach the seat by lining up the seat anchors on the side of the seat with the anchors on the stroller frame and pushing them together until they click securely (Fig. 3e). The seat can face in either direction, frontward or backward.
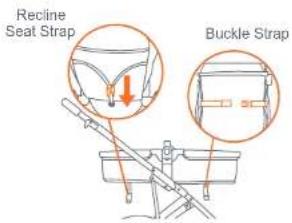
- Carriage Mode: Make sure the buckle strap underneath the seat is loosend. Then loosen the recline seat strap by squeezing the adjuster and pulling downwards (Fig. 3f). The carriage should be fully extended before using.
NOTE: The footrest area should be unbuckled (Fig. 3g).
text_image
Diagram of a baby stroller with an inset showing a hand holding a chair, highlighting the seat area.Fig. 3e
text_image
Recline Seat Strap Buckle StrapFig. 3f

natural_image
Technical line drawing of a mechanical device with a magnified inset showing a component detail (no text or symbols)Fig. 3g
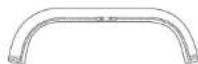
BUMPER BAR HANDLE COVER
4) • Before attaching the bumper bar to the stroller, wrap the handle cover around the bar (Fig. 4a). Unwrap to remove (Fig. 4b).
Fig. 4a
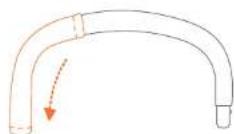
Fig. 4b
BUMPER BAR
WARNING: Do not use bumper bar to lift or carry seat with child inside. The bumper bar is not a carrying handle.
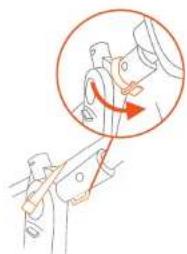
5) Attach the bumper bar by lining up anchors with the slots on the seat. Push until it locks into place (Fig. 5a).
NOTE: The bumper bar must be securely attached before using this product.
• To detach the bumper bar, press the release button on the bottom of the bar on each side, and pull bar out of the anchors (Fig. 5b).
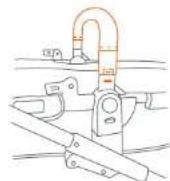
Fig. 5a
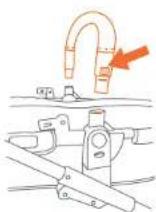
Fig. 5b
ASSEMBLYASSEMBLY
TO ADJUST SEAT

WARNING: The upright position should be used only for a child that is at least 6 months old.
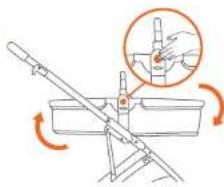
6) • Toddler Seat Mode: The seat can be adjusted into an upright, reclined position. Push the center button on both sides of the stroller adaptor to rotate the seat (Fig. 6a).
- Rotate the seat into the desired position until it clicks into place (Fig. 6b). The seat can face in either direction, frontward or backward.
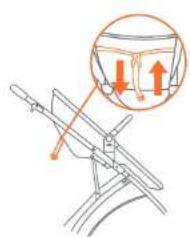
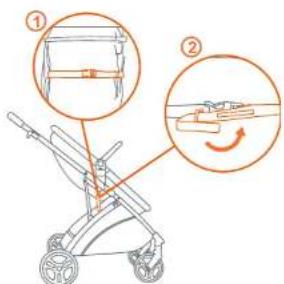
- Buckle the strap located underneath the seat (Fig. 6c). To lighten the strap, use the hook and loop method through the clip. Pull the strap firmly and attach.
NOTE: To adjust the recline seat strap, squeeze the adjuster while pulling downwards or upwards (Fig. 6d).
natural_image
Illustration of a hand using a tool to lift a cup, showing motion arrows (no text or symbols)Fig. 6a
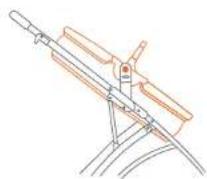
Fig. 6b
text_image
Diagram of a stroller with labeled parts and directional arrows indicating motion or assembly stepsFig. 6c

text_image
Diagram illustrating a mechanical or electrical component with labeled parts and directional arrows indicating movement or force.Fig. 6d
Copyright © 2024, Baby Trend Inc., All Rights Reserved. Todos los derechos reservados. Tous droits reservés.
STROLLER HANDLE COVER FEATURE
7) Zipper: To attach, wrap around the handle and zip closed (Fig. 7a). Unzip to remove (Fig. 7b).
natural_image
Pure diagram of a curved pipe or duct with no text, numbers, or symbolsFig. 7a
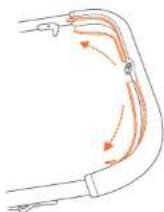
Fig. 7b
PARENT PHONE HOLDER
8) • To attach the parent phone holder: Slide the clip on the phone tab located on the stroller handle until it's tightly secured (Fig. 8). To release, simply pull the parent phone holder upwards.
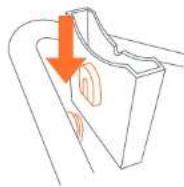
Fig. 8
CUP HOLDER

WARNING: To avoid burns, never put hot liquids in a cup holder. Avoid possible tipping, do not place more than 1lb. (0.45kg) in a cup holder.
9) • To attach the cup holder: Slide the clip on the cupholder over the cup holder tab on the handle bar. Push until firmly in place (Fig. 9).
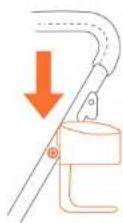
Fig. 9
Copyright © 2024, Baby Trend Inc., All Rights Reserved. Todos los derechos reservados. Tous droits réservés.
ASSEMBLYASSEMBLY
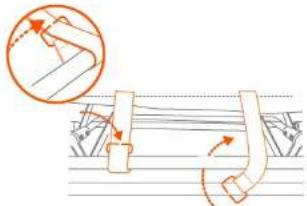
REMOVABLE CANOPY
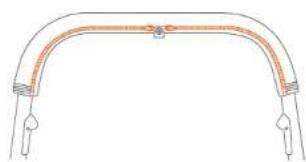
10) To attach the removable canopy: Slide the canopy clips on the inside of the corresponding slots on the stroller frame (Fig. 10a).
- Pull over the back of the canopy fabric to connect the three attachments located on the top of the seat frame (Fig. 10b).
- To open the canopy: Push forward on the front edge of the canopy while holding the rear of canopy in place (Fig. 10c).
• To fold the canopy: Pull backwards on the front edge (Fig. 10d).
• To remove the canopy: Press inward on both canopy tabs and slide the canopy up to remove (Fig. 10e).
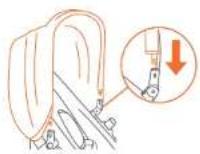
Fig. 10a
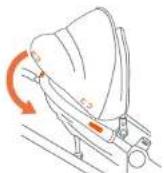
Fig. 10b
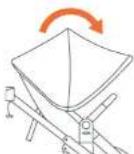
Fig. 10c
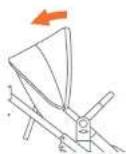
Fig. 10d
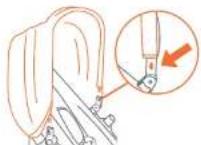
Fig. 10e
Copyright © 2024, Baby Trend Inc., All Rights Reserved. Todos los derechos reservados. Tous droits reservés.
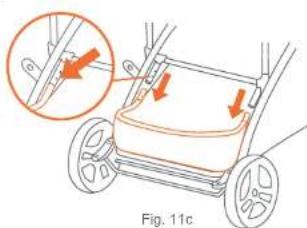
BASKET
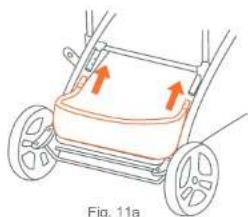
The rear basket needs to be installed prior to use. Pull the basket fabric under the bar before installing.
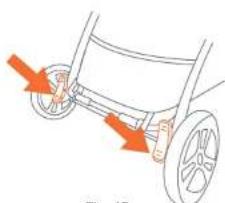
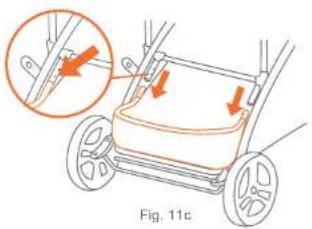
11) • Insert the male ends of the rear basket frame into the female slots on the stroller frame until it locks into place (Fig. 11a).
• Always required: Secure the shorter straps with D-Rings around the bar underneath the rear axle as shown in (Fig. 11b). Thread each strap completely through the D-ring opening to create a loop. Ensure straps are secure to the bar before using the stroller.
- Detach the basket by pushing the button on each sides of the stroller frame and pull the basket out (Fig. 11c).
NOTE: Soft goods can be removed by sliding the fabric from the tube of the rear basket and removing the D-rings.
natural_image
Diagram of a vehicle chassis with two wheels and directional arrows indicating motion (no text or symbols)Fig. 11a

natural_image
Diagram of a mechanical assembly with arrows indicating motion or force direction (no text or symbols)Fig. 11b
text_image
Diagram showing a vehicle chassis with arrows indicating movement or force, and an inset magnified view of the handle.Fig. 11c
Copyright © 2021, Baby Trend Inc., All Rights Reserved. Todos los derechos reservados. Tous droits réservés.
SAFETYSAFETY
BRAKES
WARNING: Always set brakes when the stroller is not being pushed so that the stroller will not roll away. NEVER leave stroller unattended on a hill or incline as the stroller may slide down the hill.
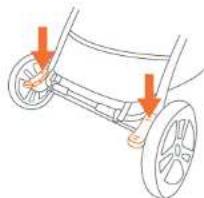
12) • To engage brakes, apply downward pressure to the rear of the brakes (Fig. 12a). NOTE: Check that the stroller will not move once the brakes are properly applied.
• To release, apply downward pressure to the front of the brakes (Fig. 12b).
natural_image
Diagram of a cart with wheels and directional arrows indicating motion (no text or symbols)Fig. 12a
natural_image
Diagram of a bicycle steering wheel with two wheels and an orange arrow indicating direction (no text or symbols)Fig. 12b
TO SECURE THE CHILD
WARNING: Avoid serious injury from falling or sliding out. Always use the safety harness.
⚠ STRANGULATION HAZARD: Child can strangle in loose straps. Never leave child in seat when straps are loose or undone.
Type 1
13) • The shoulder straps of the 5-point harness have 3 attachment positions. Select the position that places the shoulder strap level with, or below the top of the child's shoulder (Fig. 13a). To adjust harness height unhook the shoulder strap from the crotch buckle. Feed the shoulder strap through the harness spread slots. You can access these slots from the rear of the seat underneath the fabric. Feed shoulder strap through the appropriate slot and reattach the shoulder strap to the crotch buckle.
- Carefully place the child in the stroller seat and bring the safety harness around the child's waist and over the child's shoulders. Place the crotch strap between the child's legs. Insert the male end of each shoulder/waist belt into the buckle on the crotch strap. Tighten the harness so it is snug around the child's waist and over the child's shoulders (Fig. 13b).
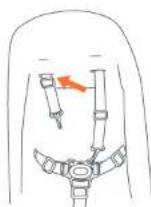
Fig. 13a
Type 1 Buckle
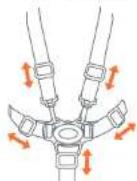
Adjust for a snug fit
Fig. 13b
SAFETY
FOLD / UNFOLD
14) • To release, push the button on center clasp and the two harness buckles will pop free (Fig. 14).
15) • Unhook the shoulder straps only if adjusting the harness positions (Fig. 15).
Type 1

Fig. 14
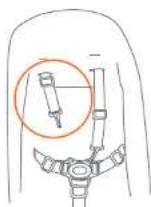
Fig. 15
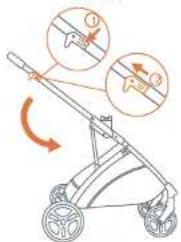
TO FOLD STROLLER
WARNING: Care must be taken when folding and unfolding the stroller to prevent finger entrapment.
CAUTION: Do not allow children near stroller while folding.
NOTE: The stroller can be folded with or without the seat installed.
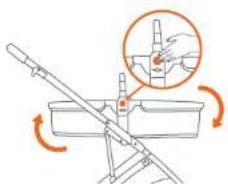
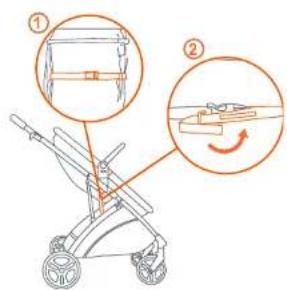
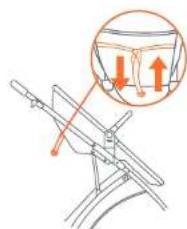
16) Before folding the stroller, push the lower buttons on each side of the seat to disengage from the stroller frame (Fig. 16a). DO NOT remove with child in the stroller seat.
• To fold the stroller, press the button on the left trigger, while pulling both release triggers simultaneously (Fig. 16b) and push the stroller handle toward the floor.
• Make sure the front wheels lie flat, then secure the stroller in the folded position by locking the fold latch, located on the right side of the stroller, over the rivet (Fig. 16c).
TO UNFOLD STROLLER
CAUTION: Do not allow children near stroller while unfolding.
17) • Unlock the fold latch (Fig. 17a) and unfold stroller frame by pulling upward on the stroller handle until the frame locks (Fig. 17b).
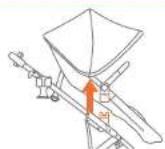
Fig. 15a
text_image
Diagram showing a baby stroller with labeled parts and directional arrows indicating motion or movement.Fig. 16b
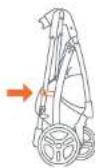
Fig. 16c

Fig. 17a
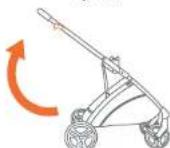
Fig. 17b
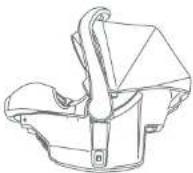
INFANT CAR SEAT
INFORMATION
THE INFANT CAR SEAT
WARNING: To avoid serious injury from falling, ALWAYS use the safety belt to secure the car seat.
ATTENTION: CS01 EZ-Lift, CS02 EZ-Lift PLUS and CS03 EZ-Lift PRO Infant Car Seats must attach to the module of the strollers front seat. These models require child tray and seat back adjustment to the most reclined position.
NOTE: To make seat position adjustments refer to step 6d.
CS01 EZ-Lift, CS02 EZ-Lift PLUS and CS03 EZ-Lift PRO Infant Car Seats
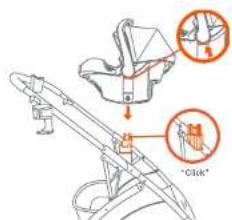
18) • Align the car seat module to the inner frame connectors. Latch the module into the stroller frame. Underneath the car seats handle hub, carefully align it to the modular towers of the stroller frame. Press down firmly for the click. ALWAYS ensure that the car seat is properly connected and locked onto the stroller before each use by lifting up on the car seat handle (Fig. 18).
REMOVING THE CAR SEAT:
19) • NOTE: Set handle to the carry position (Fig. 19a). Squeeze the release handle located at the Top-rear of the car seat and lift away from the stroller (Fig. 19b).
text_image
Technical diagram showing mechanical assembly with labeled parts and zoomed-in detail viewsFig. 18
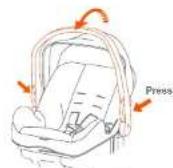
Fig. 19a
text_image
Diagram illustrating a mechanical device with an arrow indicating upward motion, accompanied by a magnified inset showing a close-up of the component.Fig. 19b
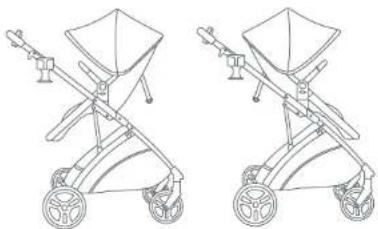
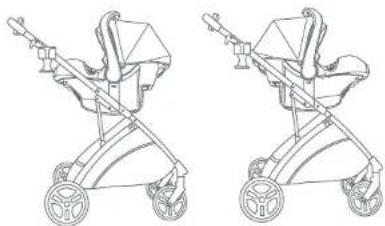
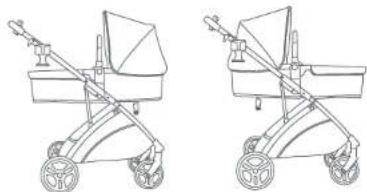
RIDING POSITIONS - 6 MODES
TODDLER SEAT MODE
Face in either direction, front or backwards.
natural_image
Line drawing of a two-wheeled baby stroller with wheels and canopy (no text or symbols)CARSEAT MODE
Face in either direction, front or backwards.
natural_image
Line drawing of a two-step baby stroller with wheels and seat (no text or symbols)CARRIAGE MODE
Face in either direction, front or backwards.
natural_image
Line drawing of two baby strollers with wheels and handles (no text or symbols)MAINTENANCE
PIEZAS
FRONT WHEEL REMOVAL
If adjustment or replacement is necessary:
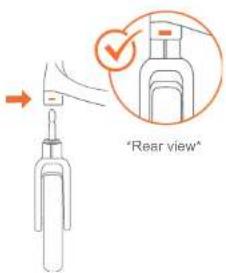
20) Push release button on the rear side of the wheel hub and pull wheel assembly from hub (Fig. 20).
text_image
"Rear view"Fig. 20
CARE AND MAINTENANCE
SEAT PAD
• To clean the seat pad, use only mild household soap or detergent and warm water on a sponge or clean cloth.
OTHER
- Check your stroller for loose screws, worn parts, torn material or stitching on a regular basis. Replace or repair parts as needed.
MAINTENANCE AND CLEANING INSTRUCTIONS:
Use only household mild soap and warm water. DO NOT USE BLEACH.
text_image
Diagram showing car seatbelt mechanism with labeled parts and directional arrows indicating movement or positioning.Fig. 3c
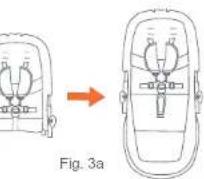
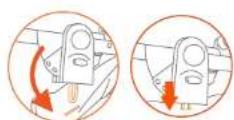
Fig. 3b
natural_image
Illustration of a mechanical device with a circular arrow indicating motion or force direction (no text or symbols)Fig. 3d
MONTAJEMONTAJE
text_image
Diagram of a baby stroller with an inset showing the handle mechanism and a magnified detail view.Fig. 3e
Correa del
asiento reclinable
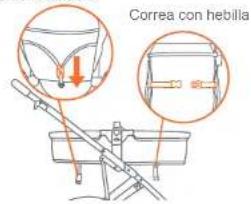
text_image
Correa con hebillaFig. 3f

natural_image
Technical line drawing of a mechanical device with a magnified inset showing a component (no text or symbols)Fig. 3g
CUBIERTA DE MANIJA DE BARRA DE PARACHOQUES
text_image
Diagram of a stroller with two labeled parts showing mechanical components and motion directionsFig. 6c
natural_image
Illustration of a lever mechanism with hand positioning and rotation arrows (no text or symbols)Fig. 6a
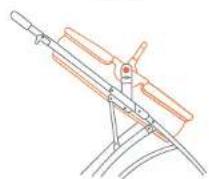
Fig. 6b
text_image
Diagram showing mechanical assembly with highlighted parts and directional arrows indicating motion or force directionsFig. 6d
Copyright © 2024, Baby Trend Inc., All Rights Reserved. Todos los derechos reservados. Tous droits reservés.
natural_image
Pure mechanical component diagram without any text, numbers, or symbols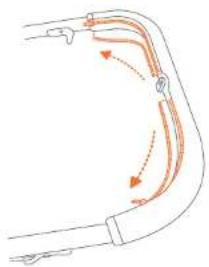
natural_image
Diagram of a curved pipe with directional arrows indicating flow or movement (no text or symbols)Fig. 7b
PORTA TELÉFONO PARA PADRES
natural_image
Illustration of a stroller with two wheels and an orange handle, no text or symbols presentFig. 11a
natural_image
Diagram of a mechanical assembly with arrows indicating motion, no text or symbols presentFig. 11b
natural_image
Illustration of a stroller with arrows indicating motion, labeled Fig. 11c (no text or symbols on the diagram itself)SEGURIDAD SEGURIDAD
FRENOS
ADVERTENCIA:
natural_image
Diagram of a bicycle steering wheel with two wheels and red arrows indicating force or movement (no text or symbols)Fig. 12a
natural_image
Diagram of a bicycle steering wheel with two wheels and orange arrows indicating force or movement (no text or symbols)Fig. 12b
PARA SUJETAR AL NIÑO
text_image
Diagram illustrating the use of a stroller with labeled parts and directional arrows indicating motion or movement.Fig. 16b
Fig. 16c
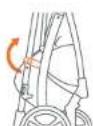
Fig. 17a

Fig. 17b
SILLITA PARA EL AUTOMÓVIL
INFORMACIÓN
natural_image
Line drawing of a stroller with a highlighted section showing internal components (no text or symbols)Fig. 18
PARA QUITAR EL ASIENTO INFANTIL O ASIENTO DEL CARRITO
text_image
Diagram of a stroller with labeled parts and directional arrows indicating movement or forceFig. 19
POSICIONES DIFERENTES PARA PASEAR - 6 MODOS
MODO DE ASIENTO PARA NIÑOS PEQUEÑOS
natural_image
Line drawing of two baby strollers with wheels and canopy (no text or symbols)SILLITA PARA EL AUTOMÓVIL MODO
natural_image
Line drawing of two baby strollers with different designs (no text or symbols)TRANSPORTE CARRUAJE CUNA
natural_image
Line drawings of two baby strollers with wheels and handles, no text or symbols presentMANTENIMIENTO
PIÈCES
DESMONTAJE RUEDA DELANTERA
natural_image
Diagram showing a device with internal components before and after transformation (no text or symbols)Fig. 3a
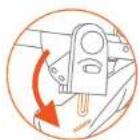
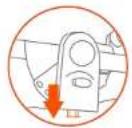
Fig. 3b
text_image
Diagram showing car seatbelt adjustment steps with numbered instructions for lifting and adjusting partsFig. 3c
natural_image
Illustration of a mechanical device with a magnified view showing a rotating component (no text or symbols)Fig. 3d
Copyright © 2021, Baby Trend Inc., All Rights Reserved. Todos los derechos reservados. Tous droits reservés.
natural_image
Illustration of a baby stroller with a magnified inset showing the handle (no text or symbols)Fig. 3e
natural_image
Diagram of a mechanical setup with a lever and bucket, showing a magnified view of a container (no text or symbols present)Fig. 3g
Copyright © 2021, Baby Trend Inc., All Rights Reserved. Todos los derechos reservados. Tous droits réservés.
ASSEMBLAGE
ASSEMBLAGE
COUVERCLE DE POIGNÉE DE BARRE DE PARE-CHOCS
natural_image
Diagram showing a hand operating a tool with rotating arms and a magnified view of the handle (no text or symbols)Fig. 6a

Fig. 6b
text_image
Diagram of a stroller with two views of the handle, labeled with numbered instructions for assembly or repair.Fig. 6c
text_image
Diagram showing mechanical assembly with labeled parts and directional arrows indicating motion or forceFig. 6d
Copyright © 2021, Baby Trend Inc., All Rights Reserved. Todos los derechos reservados. Tous droits réservés.
ASSEMBLAGE
ASSEMBLAGE
FONCTION DU COUVERCLE DE POIGNÉE DE POUSSETTE
natural_image
Diagram of a curved mechanical component with attached fasteners, labeled Fig. 7a (no text or symbols on the diagram itself)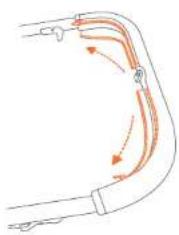
natural_image
Diagram of a curved pipe with directional arrows indicating flow or movement (no text or symbols)Fig. 7b
PORTE-TÉLÉPHONE CELLULAIRE PARENT
natural_image
Diagram showing a curved pipe with an orange arrow pointing downward, indicating a process or movement (no text or symbols present)Fig. B
PORTE-GOBELET
natural_image
Illustration of a stroller with wheels and orange arrows indicating motion (no text or symbols)Fig. 11a

natural_image
Diagram showing a hand holding a tool interacting with a mechanical component, with no visible text or symbols.Fig. 11b
natural_image
Illustration of a baby stroller with arrows indicating movement, labeled Fig. 11c (no text or symbols on the diagram itself)FREINS
natural_image
Diagram of a vehicle chassis with wheels and arrows indicating motion direction (no text or symbols)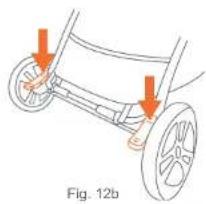
natural_image
Diagram of a vehicle chassis with wheels and two arrows indicating motion direction (no text or symbols)SÉCURITÉSÉCURITÉ
POUR ATTACHER L'ENFANT
text_image
Diagram illustrating a stroller with directional arrows and labeled parts, likely for safety or maintenance instructions.Fig. 16b
Fig. 16c
Fig. 17a
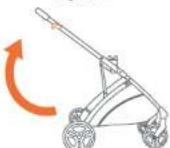
Fig. 17b
Copyright © 2021, Baby Trend Inc., All Rights Reserved. Todos los derechos reservados. Tous droits réservés.
FIXATION DU SIÈGE D'AUTO
natural_image
Line drawing of a stroller with a magnified inset showing the blade and handle (no text or symbols)Fig. 18
POUR RETIRER LA SIÈGE D'AUTO OU LE SIÈGE DE POUSSETTE
text_image
Diagram of a stroller with labeled parts and an inset showing a close-up view of the handle mechanism.Fig. 19
Copyright © 2021, Baby Trend Inc., All Rights Reserved. Todos los derechos reservados. Tous droits réservés.
SÉCURITÉ
ENTRETIEN
POSITIONS DE BALADER - 6 MODES
MODE SIÈGE ENFANT EN BAS ÂGE
natural_image
Line drawing of two baby strollers with wheels and handles (no text or symbols)SIÈGE D'AUTO MODE
natural_image
Line drawing of two baby strollers with wheels and handles (no text or symbols)POSITION LANDAU MODE
natural_image
Line drawing of two baby strollers with wheels and handles (no text or symbols)DEPOSE DE LA ROUE AVANT
The Customer Service Department can be contacted at 1 (800) 328-7363 Monday through Friday between 8:00 a.m. and 4:30 p.m. (PST). Return Authorizations are required prior to returning product(s) to Baby Trend®.