
BDPG700 - Heat gun BLACK & DECKER - Free user manual and instructions
Find the device manual for free BDPG700 BLACK & DECKER in PDF.
| Product Type | Heat Gun |
| Brand | Black & Decker |
| Model | BDPG700 |
| Power Supply | 120 V AC, 60 Hz |
| Maximum Temperature | 538 °C (1000 °F) |
| Fan Speeds | 2 (low and high) |
| Temperature Adjustment | Variable by rotary knob |
| Cord Length | Approximately 2 m (estimate) |
| Weight | Approximately 0.6 kg (estimate) |
| Included Accessories | Fan jet nozzle, coil reflector, cone nozzle, paint scraper |
| Main Functions | Paint stripping, defrosting, pipe soldering, heat shrinking, drying |
| Safety | Do not use as a hairdryer, avoid blocking air intakes, do not touch hot nozzle |
| Maintenance and Cleaning | Clean with mild soap and damp cloth, do not immerse |
| Spare Parts and Repairability | Repair by Black & Decker authorized center, use identical parts |
| Warranty | 2 years for domestic use |
Frequently Asked Questions - BDPG700 BLACK & DECKER
User questions about BDPG700 BLACK & DECKER
0 question about this device. Answer the ones you know or ask your own.
Ask a new question about this device
Download the instructions for your Heat gun in PDF format for free! Find your manual BDPG700 - BLACK & DECKER and take your electronic device back in hand. On this page are published all the documents necessary for the use of your device. BDPG700 by BLACK & DECKER.
USER MANUAL BDPG700 BLACK & DECKER
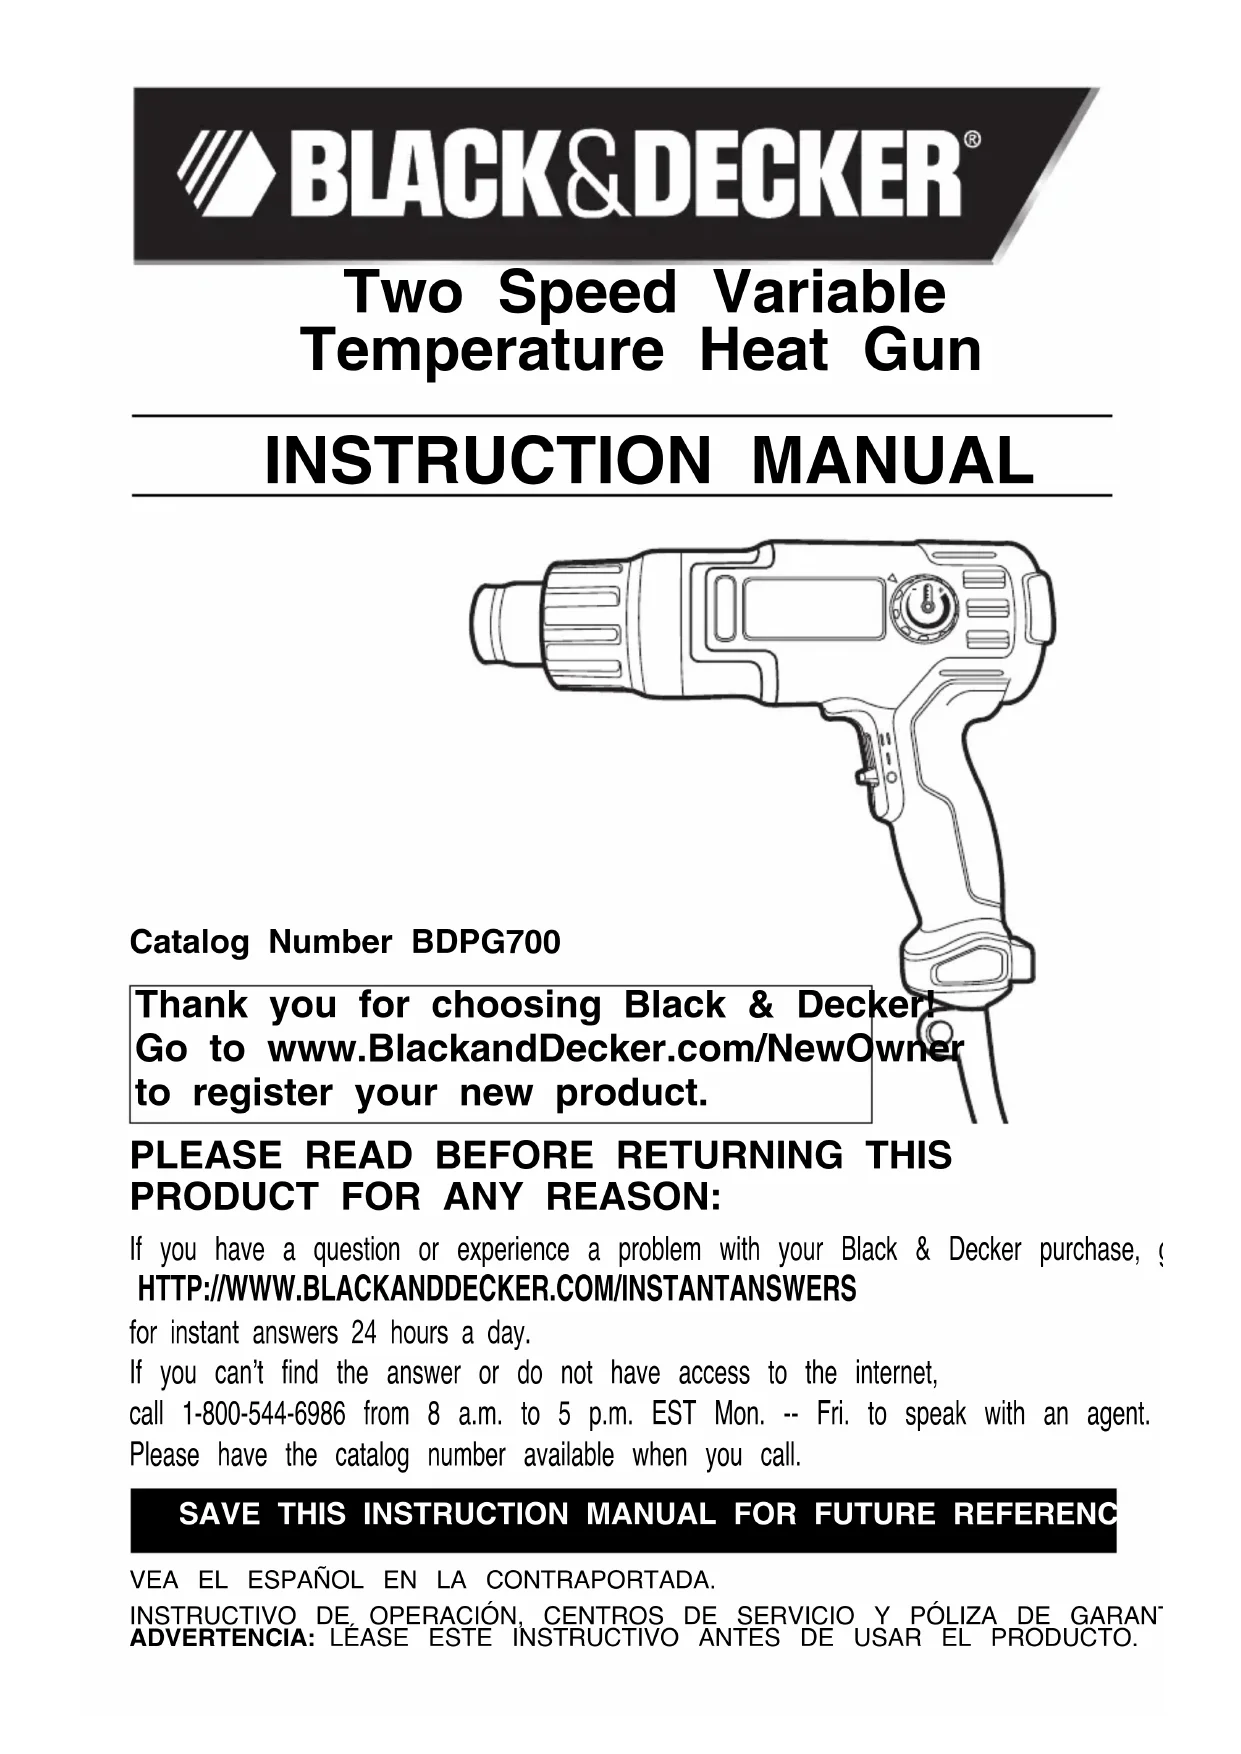
Two Speed Variable Temperature Heat Gun
INSTRUCTION MANUAL

Catalog Number BDPG700
Thank you for choosing Black & Decker! Go to www.BlackandDecker.com/NewOwner to register your new product.
PLEASE READ BEFORE RETURNING THIS PRODUCT FOR ANY REASON:
If you have a question or experience a problem with your Black & Decker purchase, go to HTTP://WWW.BLACKANDDECKER.COM/INSTANTANSWERS
for instant answers 24 hours a day.
If you can't find the answer or do not have access to the internet, call 1-800-544-6986 from 8 a.m. to 5 p.m. EST Mon. -- Fri. to speak with an agent. Please have the catalog number available when you call.
SAVE THIS INSTRUCTION MANUAL FOR FUTURE REFERENCE
GENERAL SAFETY RULES
SAFETYGUIDELINES-DEFINITIONS
It is important for you to read and understand this manual. The information it co protecting YOUR SAFETY and PREVENTING PROBLEMS. The symbols below are you recognize this information.
DANGER:Indicates an imminently hazardous situation which, if not avoided, will result in death or serious injury.
WARNING:Indicates a potentially hazardous situation which, if not avoided, co result in death or serious injury.
CAUTION:Indicates a potentially hazardous situation which, if not avoided, result in minor or moderate injury.
NOTICE:Used without the safety alert symbol indicates potentially hazardous situa which, if not avoided, may result in property damage.
WARNING: Read all safety warnings and all instructions. Failure to follow the way and instructions may result in electric shock, fire and/or serious injury.
SAVE ALLWARNINGS AND INSTRUCTIONS FOR FUTURE REFERENCE
The term "power tool" in the warnings refers to your mains-operated (corded) power battery-operated (cordless) power tool.
SAVE THESE INSTRUCTIONS
1)WORK AREA SAFETY
- Keep work area clean and well lit. Cluttered or dark areas invite accidents.
- Do not operate power tools in explosive atmospheres, such as in the present liquids, gases or dust. Power tools create sparks which may ignite the dust or fumes.
- Keep children and bystanders away while operating a power tool. Distractions can cause you to lose control.
2) ELECTRICAL SAFETY
a) Power tool plugs must match the outlet. Never modify the plug in any way. Any adapter plugs with earthed (grounded) power tools. Unmodified plugs and m outlets will reduce risk of electric shock.
b) Avoid body contact with earthed or grounded surfaces such as pipes, radial and refrigerators. There is an increased risk of electric shock if your body is earthed or grounded.
c) Do not expose power tools to rain or wet conditions. Water entering a power tool will increase the risk of electric shock.
d) Do not abuse the cord. Never use the cord for carrying, pulling or unplugging tool. Keep cord away from heat,oil, sharp edges or moving parts. Damaged or e cords increase the risk of electric shock.
e) When operating a power tool outdoors, use an extension cord suitable for c Use of a cord suitable for outdoor use reduces the risk of electric shock.
f) If operating a power tool in a damp location is unavoidable, use a ground fan interrupter (GFCI) protected supply. Use of a GFCI reduces the risk of electric shock
3) PERSONAL SAFETY
a) Stay alert, watch what you are doing and use common sense when operatir tool. Do not use a power tool while you are tired or under the influence of drug medication. A moment of inattention while operating power tools may result in serious personal injury.
b) Use personal protective equipment. Always wear eye protection. Protective equipment such as dust mask, nonskid safety shoes, hard hat, or hearing protection used for conditions will reduce personal injuries.
c) Prevent unintentional starting. Ensure the switch is in the off position before to power source and/ or battery pack, picking up or carrying the tool. Carrying with your finger on the switch or energizing power tools that have the switch on d) Remove any adjusting key or wrench before turning the power tool on. A wrench or a key left attached to a rotating part of the power tool may result in personal injury.
e) Do not overreach. Keep proper footing and balance at all times. This enables better control of the power tool in unexpected situations.
f) Dress properly. Do not wear loose clothing or jewelry. Keep your hair, clothing away from moving parts. Loose clothes, jewelry or long hair can be caught in many g) If devices are provided for the connection of dust extraction and collection facilities, ensure these are connected and properly used. Use of dust collection can reduce dust-related
4) POWERTOOL USE AND CARE
a) Do not force the power tool. Use the correct power tool for your application. The correct power tool will do the job better and safer at the rate for which it was designed. b) Do not use the power tool if the switch does not turn it on and off. Any power tool that cannot be controlled with the switch is dangerous and must be repaired.
c) Disconnect the plug from the power source and/or the battery pack from the before making any adjustments, changing accessories, or storing power tools. S preventive safety measures reduce the risk of starting the power tool accidentally.
d) Store idle power tools out of the reach of children and do not allow person with the power tool or these instructions to operate the power tool. Power tools dangerous in the hands of untrained users.
e) Maintain power tools. Check for misalignment or binding of moving parts, break and any other condition that may affect the power tool's operation. If damaged, h tool repaired before use. Many accidents are caused by poorly maintained power t f) Keep cutting tools sharp and clean. Properly maintained cutting tools with sharp cutting edges are less likely to bind and are easier to control.
g) Use the power tool, accessories and tool bits, etc. in accordance with these taking into account the working conditions and the work to be performed. Use tool for operations different from those intended could result in a hazardous situati
5) SERVICE
a) Have your power tool serviced bya qualified repair person using only identic parts.This will ensure that the safety of the power tool is maintained.
Additional Safety Instructions
IMPORTANT SAFETY INSTRUCTIONS FOR HEAT GUNS
- Remember that hidden areas such as those behind walls, ceilings, floors, soffit and other panels may contain flammable materials that could be accidentally ignited when stripping paint from the panel. Such a fire would not be readily apparent because considerable damage and danger of injury. This heat gun is capable of temperatures in excess of 1000^ F (538^ C).
- Do not use this tool as a hair dryer.
- Always turn heat gun off, disconnect from power source and let the tool cool down for at least 30 minutes before moving or storing it. Do not lay the heat gun on flammable surfaces when operating the gun or immediately after shutting it off. Alwaysset the gun on a flat level surface nozzle tip is pointed upward when allowing to cool. For easy storage, the tool can have hanghole. The heat gun should be stored indoors.
- Always use good quality scrapers and stripping knives.
- Never obstruct the air intake or nozzle outlet.
- Besure to direct the hotair blast in a safedirection; away from other people or
- Keep fingers away from metal nozzle; it becomes very hot.
- Don't touch the nozzle to any surface while running or shortly after running.
- Avoid poking anything down inside the nozzle.
- Know your work environment. Remember that areas behind soffit board, ceiling floors may contain highly flammable materials. Check these areas before applying
- Clean dry paint from the nozzle after use; it could ignite.
- Clean your scraper blade frequently during use; it could ignite.
- Do not use the heat gun in combination with chemical strippers.
- Do not use accessory nozzles as scrapers.
- Keep nozzle away from cord.
-
Do not use to cook or warm food.
-
Be constantly aware that this tool can ignite flammable materials, and soften others. Regardless of the task you are performing, shield or keep away from materials that are close to the work area.
You may occasionally notice some slight smoking of the tool after it is turned off. The result of heating the residual oil that was deposited on the heating element during manufacturing process.
IMPORTANT NOTICE:
In order for this tool to be an effective paint stripper, it must produce extremely temperatures. As a consequence, the stripper is capable of igniting paper, wood, varnish residue and similar materials.
As you become more familiar with the tool and develop the proper technique, the accidental ignition will be greatly reduced. In establishing the proper technique, the to do is practice! Work on simple stripping projects, preferably outdoors, until you for how to use your stripper safely and effectively.
As you practice, observe the following procedures for safety:
- Always be sure the tool is turned off and disconnected from power supply wl
- Clean the scraper blade often during use. Built up residue on the blade is h flammable.
- Experiment to find the optimum distance from the tool's nozzle to the surface stripped. This distance (usually 1-2 inches) (25-50 mm) will vary depending on the material being removed.
- Keep the heat gun moving ahead of the scraper blade at all times.
- As you work, clean up loose pieces of paint as they accumulate around the
- When working indoors, keep away from curtains, papers, upholstery and similar flammable materials.
- Above all, remember that this is a serious power tool that is capable of producing excellent results when used properly. Practice on simple projects until you feel comfortable with your stripper. Only then will you have mastered the proper technique.
WARNING: Extreme care should be taken when stripping paint. The peelings, r and vapors of paint may contain lead, which is poisonous. Any pre-1977 paint lead and paint applied to homes prior to 1950 is likely to contain lead. Once surfaces, hand to mouth contact can result in the ingestion of lead. Exposures levels of lead can cause irreversible brain and nervous system damage; young children are particularly vulnerable.
Before beginning any paint removal process you should determine whether the paint removing contains lead. This can be done by your local health department or by professional who uses a paint analyzer to check the lead content of the paint to Lead based paint should only be removed by a professional and should not be removed using a heat gun.
Persons removing paint should always follow these guidelines:
- Move the work piece outdoors. If this is not possible, keep the work area open the windows and put an exhaust fan in one of them. Be sure the fan air from inside to outside.
- Remove or cover any carpets, rugs, furniture, cooking utensils, and air ducts.
- Place drop cloths in the work area to catch any paint chips or peelings. Wear clothing such as extra work shirts, overalls and hats.
- Work in one room at a time. Furnishings should be removed or placed in the room and covered. Work areas should be sealed off from the rest of the dwell sealing doorways with drop cloths.
- Children, pregnant women or potentially pregnant women and nursing mothers not be present in the work area until the work is done and all clean up is
- Wear a dust respirator mask or a dual filter (dust and fume) respirator mask been approved by the Occupational Safety and Health Administration (OSHA), the National Institute of Safety and Health (NIOSH), or the United States Bureau of
These masks and replaceable filters are readily available at major hardware stores to ensure the mask fits. Beards and facial hair may keep masks from sealing proper filters often. Disposable paper masks are not adequate.
- Use caution when operating the heat gun. Keep the heat gun moving as excess will generate fumes which can be inhaled by the operator.
- Keep food and drink out of the work area. Wash hands, arms and face and before eating or drinking. Do not smoke or chew gum or tobacco in the work
- Clean up all removed paint and dust by wet mopping the floors. Use a wet all walls, sills and any other surface where paint or dust is clinging. Do not use vacuum. Use a high phosphate detergent or trisodium phosphate (TSP) to wop areas.
- At the end of each work session put the paint chips and debris in a double close it with tape or twist ties, and dispose of properly.
- Remove protective clothing and work shoes in the work area to avoid carrying the rest of the dwelling. Wash work clothes separately. Wipe shoes off with a is then washed with the work clothes. Wash hair and body thoroughly with so
The label on your tool may include the following symbols. The symbols and their defir as follows:
V .volts A. .amperes
Hz hertz W watts
min....minutes ..alternating
current
--- direct current no load speed
Class II Construction earthing terminal
A .safety alert symbol ../min .revolutions or
reciprocations per minute
WARNING: Some dust created by power sanding, sawing, grinding, drilling, and other construction activities contains chemicals known in the state of California to cause cancer, birth defects or other reproductive harm. Some examples of these chemicals are:
- Lead from lead-based paints, crystalline silica from bricks and cement and other masonry products, and arsenic and chromium from chemically-treated lumber (CC
Your risk from these exposures varies, depending on how often you do this type of work. To reduce your exposure to these chemicals: work in a well ventilated area work with approved safety equipment, such as those dust masks that are specially designed to filter out microscopic particles.
- Avoid prolonged contact with dust from power sanding, sawing, grinding, drilling, and other construction activities. Wear protective clothing and wash exposed areas with soap and water. Allowing dust to get into your mouth, eyes, lay on the skin may promote absorption of harmful chemicals.
WARNING: Use of this tool can generate and/or disburse dust, which may cause serious and permanent respiratory or other injury. Always use NIOSH/OSHA approved respiratory protection appropriate for the dust exposure. Direct particles away from face and body. Always operate tool in well-ventilated area and provide proper dust removal. Use dust collection system wherever possible.
WARNING: ALWAYS USE SAFETY GLASSES. Everyday eyeglasses are NOT safe glasses. Also use face or dust mask if cutting operation is dusty. ALWAYS wear certified safety equipment:
ANSI Z87.1 eye protection (CAN/CSA Z94.3).
ANSI S12.6 (S3.19) hearing protection.
- NIOSH/OSHA respiratory protection.
USE OF EXTENSION CORDS
Make sure the extension cord is in good condition before using. Always use the size extension cords with the tool - that is, proper wire size for various lengths. heavy enough to carry the current the tool will draw. Use of an undersized core a drop in line voltage resulting in loss of power and overheating. For proper si chart below.
| Minimum Gauge for Cord Sets Volts Total Length of Cord in Feet 120V 0-25 26-50 51-100 101-150 (0-7,6m) (7,6-15,2m) (15,2-30,4m) (30,4-45,7m) 240V 0-50 51-100 101-200 201-300 (0-15,2m) (15,2-30,4m) (30,4-60,9m) (60,9-91,4m) | |||||
| Ampere Rating | |||||
| More | Not more | American | Wire | Gage | |
| Than | Than | ||||
| 0 | 6 | 18 | 16 | 16 | 14 |
| 6 | 10 | 18 | 16 | 14 | 12 |
| 10 | 12 | 16 | 16 | 14 | 12 |
| 12 | 16 | 14 | 12 | Not Recommended | |
MOTOR
Be sure your power supply agrees with nameplate marking. 120 Volts AC only your tool will operate on standard 60Hz household power. Do not operate AC DC. A rating of 120 volts AC/DC means that you tool will operate on standard DC power. This information is printed on the nameplate. Lower voltage will cause power and can result in over-heating. All Black & Decker tools are factory-tested tool does not operate, check the power supply.
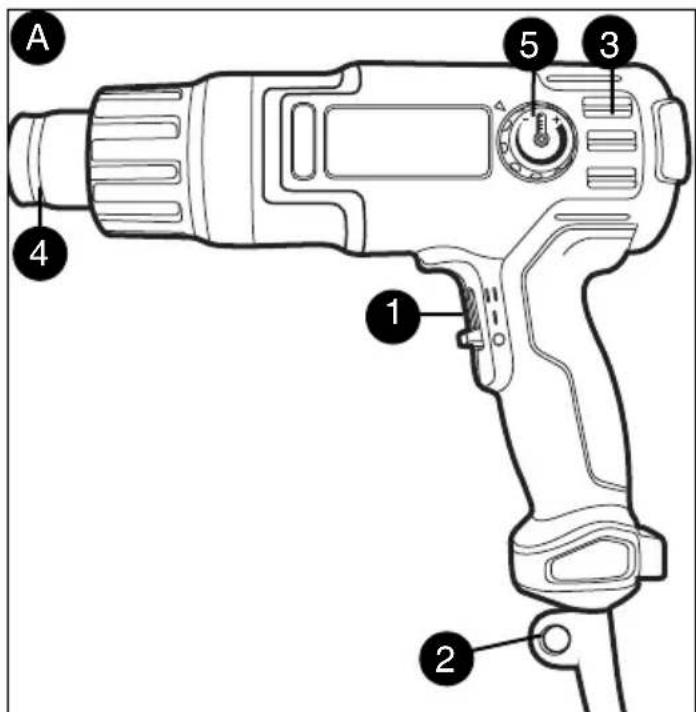
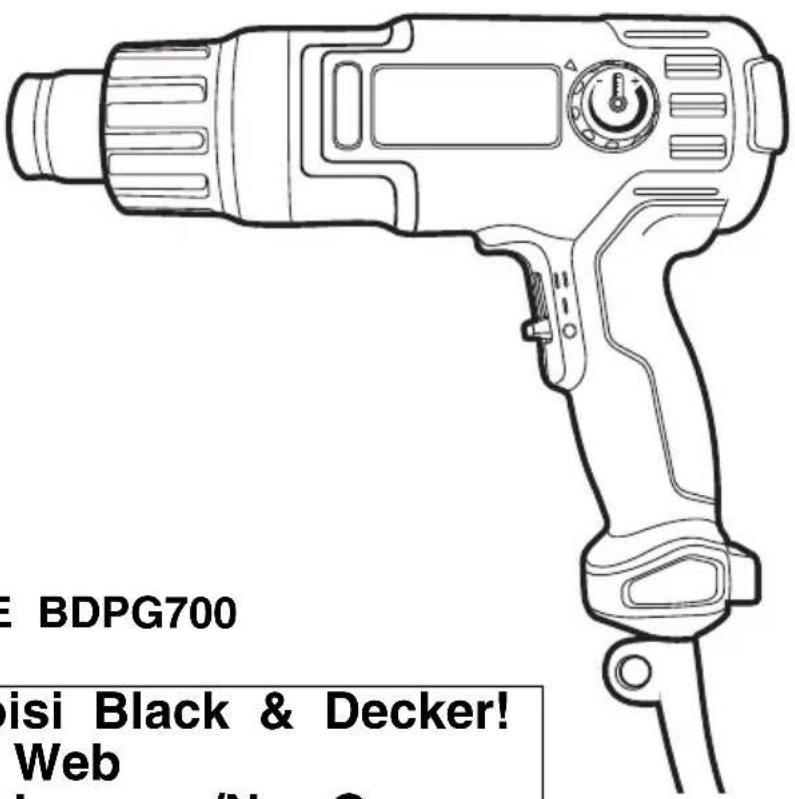
FUNCTIONAL DESCRIPTION
- Two speed switch
- Hang hole
- Air vents
- Hot air nozzle
- Temperature adjustment knob
Tool Operation
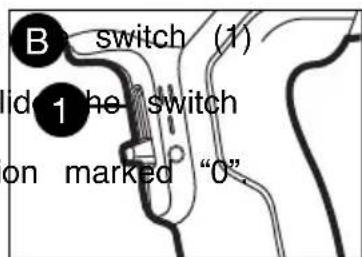
SWITCH - FIGURE B
The position of the switch controls both the fan speed and the heat output of tl. There is considerable overlap in the temperature ranges with the use of the temj adjustment knob.
To turn the tool on in low air speed, low heat, slide to the position marked "l".
To turn the tool on in high air speed, high heat, slide switch (1) to the position marked "II".
To turn the tool off, slide the switch (1) to the position marked "0".
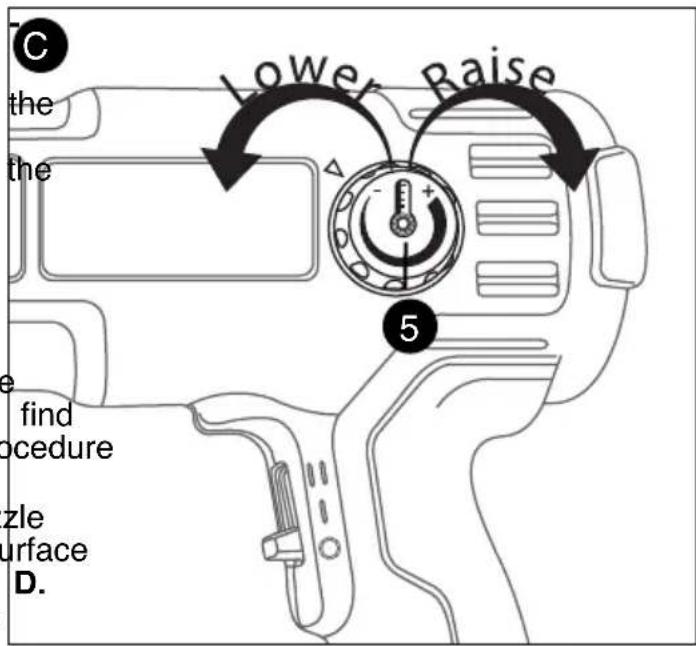
TEMPERATURE ADJUSTMENT KNOB FIGURE C
To raise the air temperature, turn knob (5) clockwise.
- To lower the air temperature turn knob (5) counterclockwise.
REMOVING PAINT - FIGURE D
Efficient paint removal requires the development of technique. Follow the guidelines in this manual and you'll find that you will have mastered the procedure after a few simple projects.
Turn on the tool and hold the nozzle about one inch (25mm) from the surface to be stripped, as shown in figure D.
(Give the unit about 15-20 seconds running time to reach its full heat potential.) The paint being heated will usually begin to blister when it reac the proper temperature for stripping.
When it reaches this point begin scraping with smooth, even strokes. If the paint is sufficiently hot and the scraper is properly suited to the surface being stripped, the paint should come off in a strip equal to the full width of the scraper. Move the u slightly ahead of the scraper to assure that the paint being stripped is softened.
Best results will be achieved if the heat gun is moved slowly, but constantly, from side to side to evenly distribute heat. Do not linger or pause in one spot.
Remember that splinters and small particles of stripped paint can be ignited and blown through holes and cracks in the surface being stripped.
HINTS ABOUT PAINT STRIPPING
A smooth, downward scraping action will give good results and will help to prevent gouging the work surface.
With some paints, prolonged heating will actually make them tougher to strip. Try different heating times until you develop the technique best suited to your particular application.
The heat gun is designed to remove both oil based and latex based paints. It will not remove stains or primer coats that have impregnated the wood grain. Scrape paint as soon as it softens, it will soon cool and harden again. Clean your scraper often to retain a clean, sharp edge. Shield areas adjacent to wher scraping. For example: shield the door with nonflammable materials if you're strip door frame.
Don't concentrate the tools heat on a window pane or other glass surface. Exc may crack the glass. Use some nonflammable material to shield the glass when the window frame.
OTHER USES
For hands free operation, place the heat gun on a flat surface as shown in fig. Aside from stripping paint, your heat gun has a wide array of other uses. Use softening linoleum and floor tile and for loosening heat sensitive adhesives. It's use with heat shrinkable tubing and anywhere you need a portable heat source. even use it to thaw frozen metal water pipes.
Automotive uses include reducing set time on body fillers or drying time of paints (the product manufacturer's recommendations must be followed.) Caution must be exercised around gasoline, automotive fluids, tires, gaskets, upholstery and hoses, etc. to prevent damage or fires. Be constantly aware that this tool can ignite flammable materials and soften or melt others. Avoid overheating adjacent flammable materials such as wood, insulation, electrical wiring jackets or plastic. Thaw only those metal pipe sections that are fully exposed. Do not attempt to thaw pipes that are inside walls, floors, ceilings, or otherwise enclosed. Do not attempt to thaw pipes that are wrapped in insulation.
ACCESSIONS
WARNING: The use of any accessory not recommended for use with this tool could be hazardous. Always unplug the tool attaching or removing accessories. Do not remove accessory tips until the tool has c to room temperature.
The following attachments are included with the BDPG700 Heat Gun.
FAN NOZZLE
Wider distribution of the hot air, for working on large surfaces—floors, doors, etc.
SPOOL REFLECTOR
Evenly dispenses air around whole object. Ideal for soldering pipework, shrink sealing electrical cable.
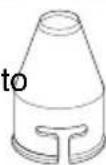
CONE NOZZLE
For precise operations- concentrates the air onto a smaller surface area.
PAINT SCRAPER
For easier paint removal from hard surfaces.
CAUTION:These nozzles remain hot after use. Use care in handling them.
TROUBLESHOOTING
PROBLEM POSSIBLE CAUSE POSSIBLE SOLUTION
- Unit will not start.
- Cord not plugged in.
-
Plug tool into a working outlet.
-
Circuit fuse is blown. Replace circuit fuse. (If the product repeatedly causes the circuit fuse to blow, discontinue use immediately and have it serviced at a BLACK &DECKER service center or authorized servicer.)
- Circuit breaker is tripped. - Reset circuit breaker. (If the product repeatedly causes the circuit breaker to trip, discontinue use immediately and have it serviced at a BLACK & DECKER service center or authorized servicer.)
- Cord or switch is damaged. - Have cord or switch replace at a BLACK & DECKER Service Center or Authorized Servicer
For assistance with your product, visit our website www.blackanddecker.com for the location of the service center nearest you or call the BLACK & DECKER help line at 1-800-544-6986.
ACCESSIONS
Recommended accessories for use with your tool are available from your local dealer authorized service center. If you need assistance regarding accessories, please call: 1-800-544-6986.
WARNING: The use of any accessory not recommended for use with this tool could be hazardous.
MAINTENANCE
Use only mild soap and damp cloth to clean the tool. Never let any liquid get inside tool; never immerse any part of the tool into a liquid.
IMPORTANT: To assure product SAFETY and RELIABILITY, repairs, maintenance and adjustment (other than those listed in this manual) should be performed by authorized service centers or other qualified service personnel, always using identical replacement
SERVICEINFORMATION
All Black & Decker Service Centers are staffed with trained personnel to provide customers with efficient and reliable power tool service. Whether you need techn advice, repair, or genuine factory replacement parts, contact the Black & Decker nearest you. To find your local service location, refer to the yellow page directo
"Tools—Electric" or call: 1-800-544-6986 or visit www.blackanddecker.com.
FULLTWO-YEARHOMEUSEWARRANTY
Black & Decker (U.S.) Inc. warrants this product for two years against any defecematerial or workmanship. The defective product will be replaced or repaired at n in either of two ways.
The first, which will result in exchanges only, is to return the product to the re whom it was purchased (provided that the store is a participating retailer). Return be made within the time period of the retailer's policy for exchanges (usually 30 after the sale). Proof of purchase may be required. Please check with the retail specific return policy regarding returns that are beyond the time set for exchange. The second option is to take or send the product (prepaid) to a Black & Decker authorized Service Center for repair or replacement at our option. Proof of purchase be required.Black & Decker owned and authorized Service Centers are listed und "Tools-Electric" in the yellow pages of the phone directory.
This warranty does not apply to accessories. This warranty gives you specific le and you may have other rights which vary from state to state or province to p Should you have any questions, contact the manager of your nearest Black & I Service Center. This product is not intended for commercial use.
FREEWARNINGLABELREPLACEMENT: If your warning labels become illegible or missing, call 1-800-544-6986 for a free replacement.
LATIN AMERICA: This warranty does not apply to products sold in Latin America. Products sold in Latin America, check country specific warranty information contain the packaging, call the local company or see the website for warranty information

Imported by Black & Decker (U.S.) Inc., 701 E. Joppa Rd. Towson, MD 21286 U.S.A.
See 'Tools-Electric' -Yellow Pages for Service & Sales
MANUEL D'INSTRUCTIONS
N° DE CATALOGUE BDPG700
Col. Industrial Bravo
GUADALAJARA, JAL
Av. La Paz #1779
(33) 3825 6978
Col. Americana Sector Jnr
MEXICO, D.F.
Eje Central Lázaro Cardena
No. 18
(55) 5588 9377
Local D, Col. Obrera
MERIDA, YUC
Calle 63 #459-A
(999) 928 5038
Col. Centro
MONTERREY, N.L.
Suav. Francisco I.
No.831
(81) 8375 2313
Col. Centro
PUEBLA, PUE
17 Norte #205
(222) 246 3714
Col. Centro
SQUERETARO, QRO
Av. Madero 139 Pte.
(442) 214 1660
Col. Centro
SAN LUIS POTOSI, SLP


- Two Speed Variable Temperature Heat Gun
- INSTRUCTION MANUAL
- PLEASE READ BEFORE RETURNING THIS PRODUCT FOR ANY REASON:
- SAVE THIS INSTRUCTION MANUAL FOR FUTURE REFERENCE
- GENERAL SAFETY RULES
- SAFETYGUIDELINES-DEFINITIONS
- SAVE ALLWARNINGS AND INSTRUCTIONS FOR FUTURE REFERENCE
- SAVE THESE INSTRUCTIONS
- 1)WORK AREA SAFETY
- 2) ELECTRICAL SAFETY
- 3) PERSONAL SAFETY
- 4) POWERTOOL USE AND CARE
- 5) SERVICE
- Additional Safety Instructions
- IMPORTANT SAFETY INSTRUCTIONS FOR HEAT GUNS
- IMPORTANT NOTICE:
- USE OF EXTENSION CORDS
- MOTOR
- FUNCTIONAL DESCRIPTION
- Tool Operation
- SWITCH - FIGURE B
- TEMPERATURE ADJUSTMENT KNOB FIGURE C
- REMOVING PAINT - FIGURE D
- HINTS ABOUT PAINT STRIPPING
- OTHER USES
- ACCESSIONS
- FAN NOZZLE
- SPOOL REFLECTOR
- CONE NOZZLE
- PAINT SCRAPER
- TROUBLESHOOTING
- PROBLEM POSSIBLE CAUSE POSSIBLE SOLUTION
- MAINTENANCE
- SERVICEINFORMATION
- FULLTWO-YEARHOMEUSEWARRANTY
- MANUEL D'INSTRUCTIONS
- GUADALAJARA, JAL
- MEXICO, D.F.
- MERIDA, YUC
- MONTERREY, N.L.
- PUEBLA, PUE
- SQUERETARO, QRO
- SAN LUIS POTOSI, SLP
Brand : BLACK & DECKER
Model : BDPG700
Category : Heat gun