
THVEL460KS - Air Conditioning THOMSON - Free user manual and instructions
Find the device manual for free THVEL460KS THOMSON in PDF.
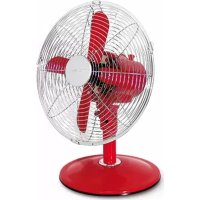
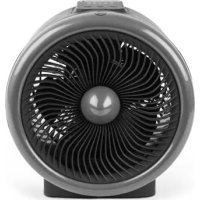
| Product type | Pedestal fan |
| Brand | Thomson |
| Model | THVEL460KS |
| Power supply | 220-240 V ~ 50 Hz |
| Power consumption | 55.5 W |
| Rated power | 60 W |
| Electrical class | II |
| Maximum air flow | 50.4 m³/min |
| Sound power level | 63 dB(A) |
| Maximum air speed | 2.7 m/s |
| Standby consumption | 0.2 W |
| Service value | 0.91 (m³/min)/W |
| Number of speeds | 3 (low, medium, high) |
| Operating modes | Normal, Natural, Silent |
| Timer | 30 min to 7.5 h (in 30 min increments) |
| Oscillation | Yes |
| Remote control | Yes (CR2025 battery included) |
| Adjustable height | Yes (telescopic tube with ring) |
| Maintenance | External cleaning with damp cloth, vacuum grilles |
| Safety | Unplug before cleaning, do not cover, do not immerse |
| Repairability | Contact a qualified professional (no user-serviceable parts) |
| Standards | Compliant with directives 2014/35/EU and 2014/30/EU |
Frequently Asked Questions - THVEL460KS THOMSON
User questions about THVEL460KS THOMSON
0 question about this device. Answer the ones you know or ask your own.
Ask a new question about this device
Download the instructions for your Air Conditioning in PDF format for free! Find your manual THVEL460KS - THOMSON and take your electronic device back in hand. On this page are published all the documents necessary for the use of your device. THVEL460KS by THOMSON.
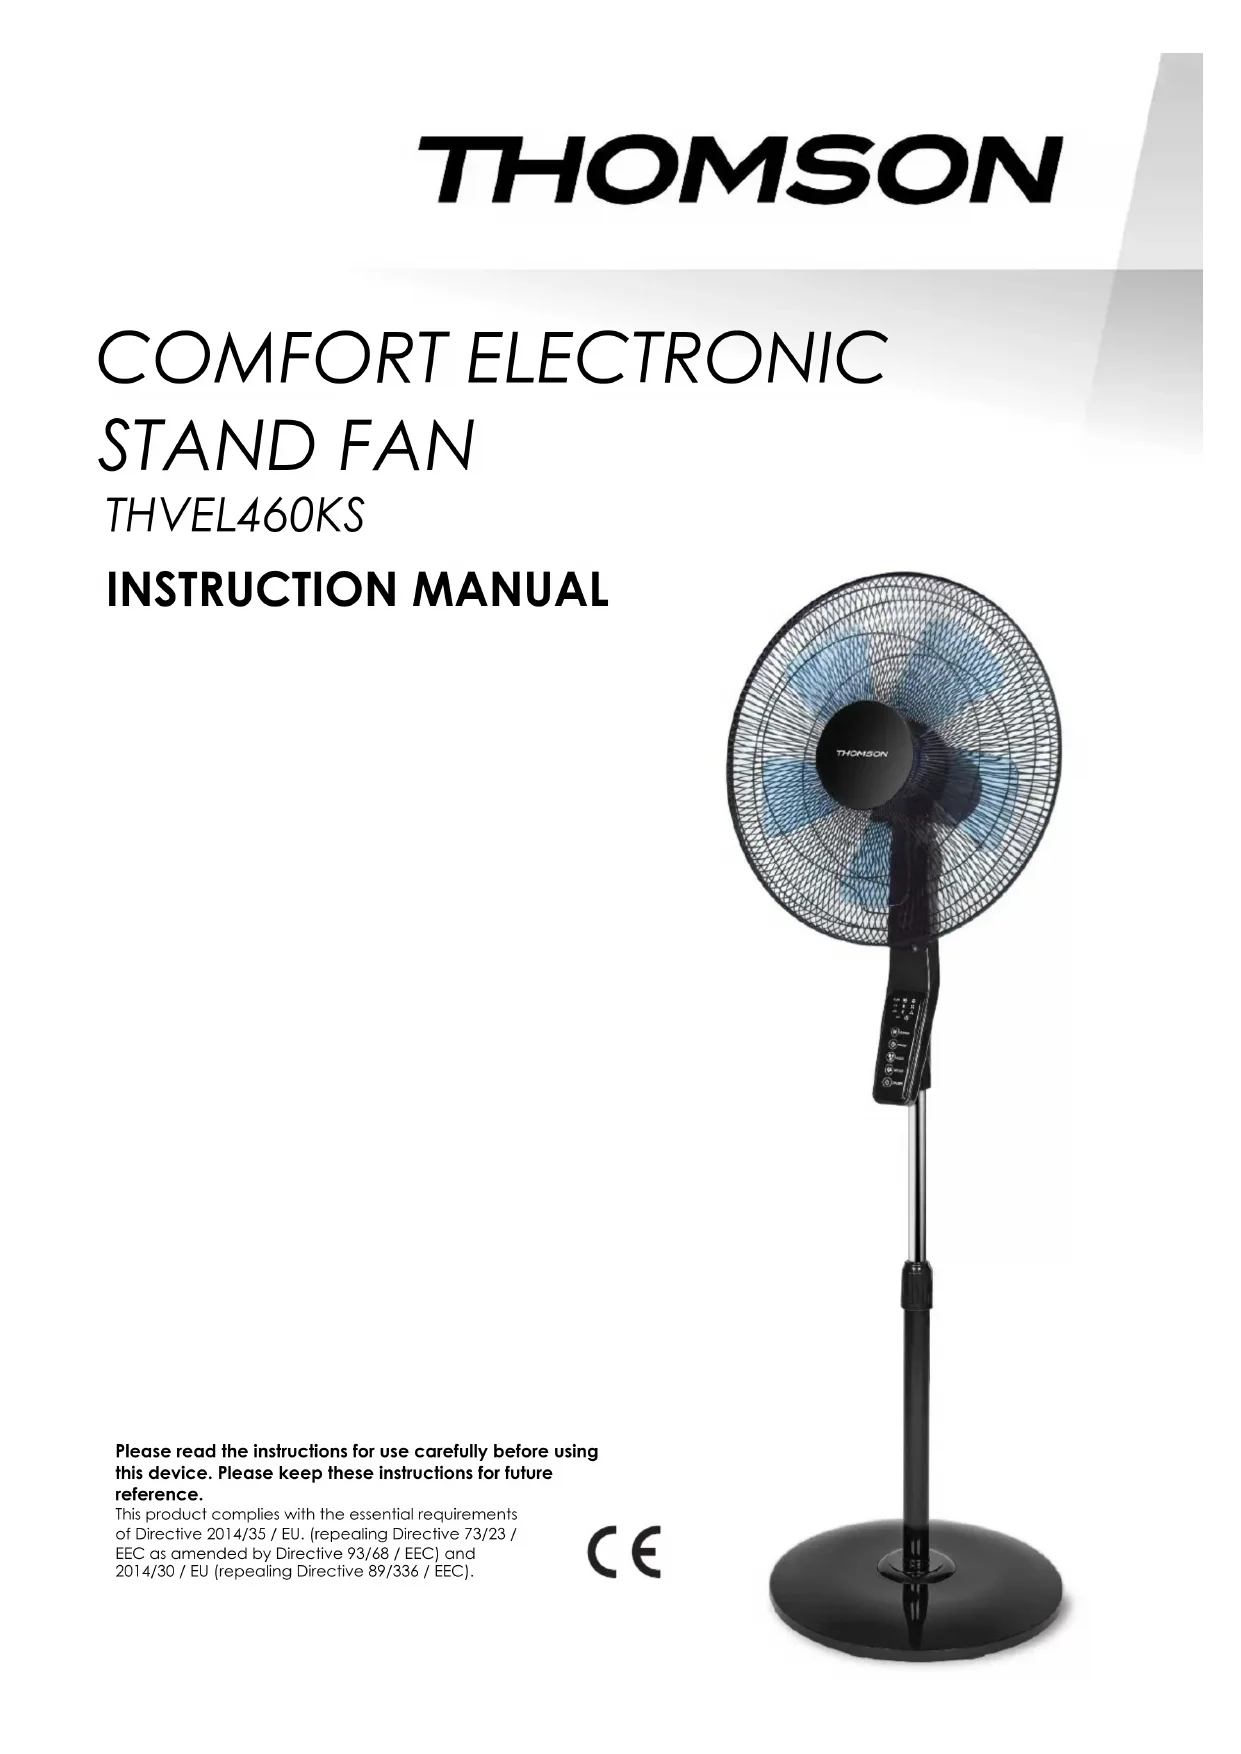
USER MANUAL THVEL460KS THOMSON
Please read the instructions for use carefully before using this device. Please keep these instructions for future reference.
This product complies with the essential requirements of Directive 2014/35 / EU. (repealing Directive 73/23 / EEC as amended by Directive 93/68 / EEC) and 2014/30 / EU (repealing Directive 89/336 / EEC).

WARNING!!!
If the power cord is damaged, it must be replaced by the manufacturer, its service or similarly qualified persons in order to avoid a hazard.
The plug socket power cable must be removed before cleaning the unit or undertake maintenance operations.
WARNING
The product must be installed in accordance with the national wiring rules.
This unit is intended for household and domestic use only.
- Well assemble the product before use.
-
Before connecting the appliance, check that:
-
The supply voltage is the same as the nameplate,
- The power supply socket is suitable to the device,
-
The cable plug is adapted to the socket. The product is intended only for a socket with a main voltage of 230 volts (50 Hz).
-
Never insert fingers, pencils or other objects through the grid when the appliance is running.
- Make sure the appliance is placed on a stable surface when in use.
- Do not use your appliance near a window. The rain could cause an electrical shock.
- Never leave the appliance running unattended.
- For security reasons, you MUST always remove the plug from the outlet when not in use, before cleaning or before maintenance.
- Do not use chemicals or detergents for cleaning, it could easily damage or deform your appliance.
- Do not pull the cord to unplug from the socket.
- Do not use the unit with a damaged cord or plug.
- Never attempt to disassemble or repair the device yourself. In the case of repairs by someone not competent, the warranty is void.
- Unplug the product when you move it.
- Never run the product in the presence or within reach of unsupervised children.
-
The unit and the grid should not be removed for maintenance or cleaning.
-
The devices are not intended to be operated by means of an external timer or a separate remote control system.
- This appliance can be used by children aged from 8 years and above and persons with reduced physical, sensory or mental capabilities or lack of experience and knowledge if they have been given supervision or instruction concerning use of the appliance in a safe way and understand the hazards involved. Children shall not play with the appliance. Cleaning and user maintenance shall not be made by children without supervision.
- This product complies with the requirements of Directives 2014/35/EU (repealing Directive 73/23/EEC amended by Directive 93/68/EEC) and 2014/30/EU (repealing Directive 89/336/EEC).
- WARNING !!! If the power cable is damaged, it must be replaced by the manufacturer, its after sales service or similar qualified persons in order to avoid a hazard.
- The plug must be removed from the base before cleaning the appliance or undertaking maintenance operations.
- Once the device is assembled, it is forbidden to remove the grilles.
-
This appliance is intended to be used in indoor use only & household.
-
Regarding the correct assembly of the device, refer to page 7 of the corresponding instructions.
- For cleaning and maintenance instruction, refer to page 9 of the corresponding section
- User instructions should be provided with the device so that it can be used safely.

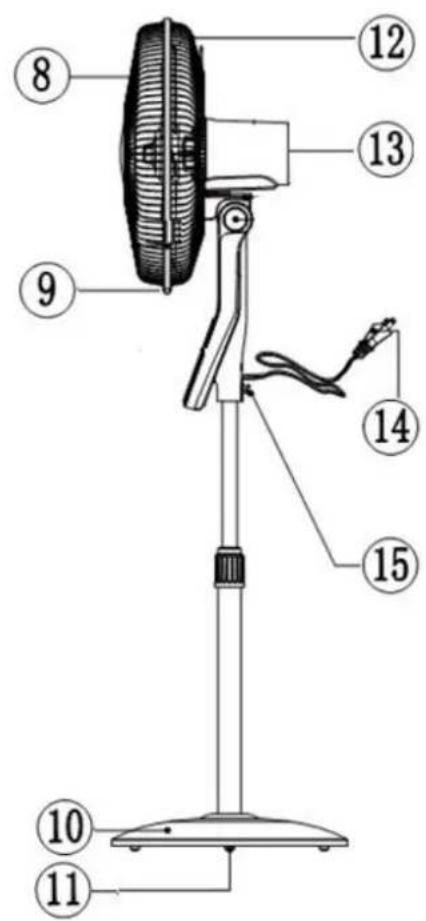
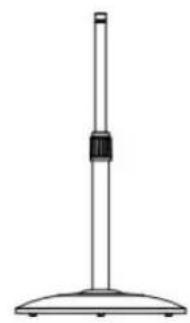
1.Blade
2. Front grill
3. Control panel
4. Adjustable pole
5. Rod fixing ring nut
6. Lower tube
7. Base decorative cap
- Front grill
- Ring screw
- Base
- Balance weight
- Rear grill
- Motor housing
- Power cord
- Fixing screw
ASSEMBLY

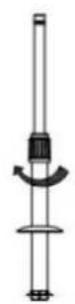
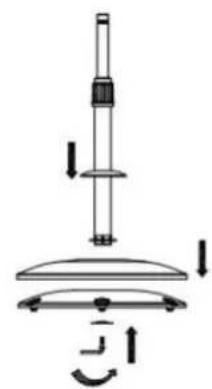
- Loosen and remove the rod fixing ring nut from the top of the lower tube. Slide the decorative cap from the base onto the tube. Replace and tighten the rod fixing ring.
- Then connect the tube assembly to the round base and positioned on the counterweight. From underneath, insert the washer and tighten the assembly using the supplied angle screw. Squeeze until it is properly locked.
- Slide the base decorative cap down over the assembly.
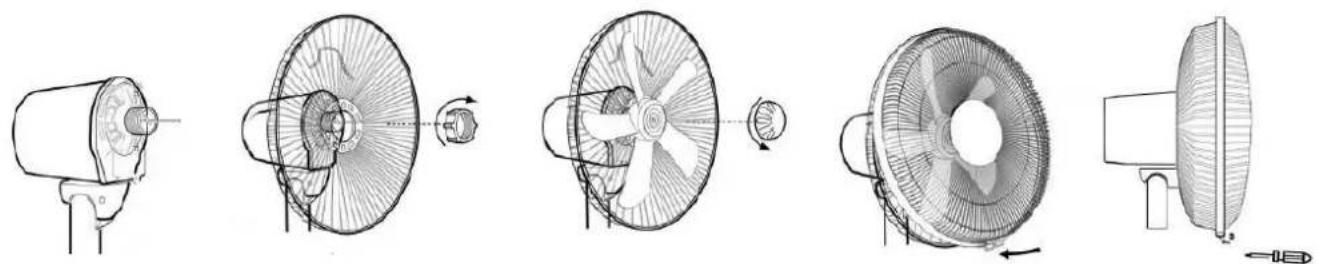
- Remove the lock nut from motor shaft. (anticlockwise)
- Place the rear grill on the motor housing, making sure to position the housing lugs in the guide holes of the grille.
- Firmly tighten (clockwise) the locknut to secure the rear grille.
- Place the fan blade on the motor shaft by placing the notches in the blade in the shaft passing through the motor shaft.
- Tighten with the reverse nut (counterclockwise and lock the blade securely).
- Place the front grille and install the plastic strapping ring around the grilles to hold them. Be sure to position the edges of the 2 grids in the 2 notches inside the strapping.
-
Tighten the grid screw to secure the ring.
-
Insert the inner tube in the main body (control panel) of the fan and fix it with the screw at the back.
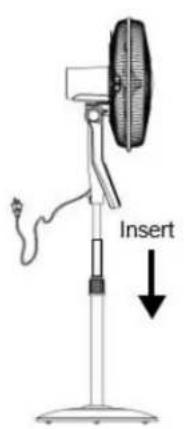
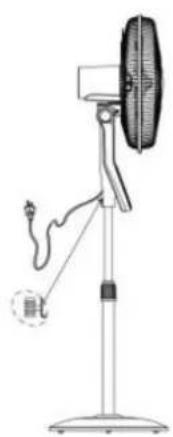
Screw in clockwise direction.
WARNING: Keep all objects at least 1 meter from the front, sides and rear of the appliance.
IMPORTANT! DO NOT COVER THIS APPLIANCE!
Place the fan on a dry, level and solid surface.
Operation
- Plug the powercord into the suitable wall socket.
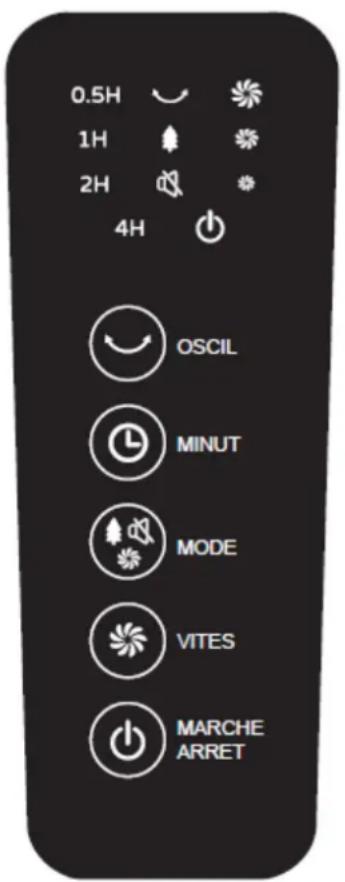
- Press MARCHE ARRET (ON/OFF) button to start the fan.
- Press VITES (SPEED) button to set Low, Middle or High speed.
- Press MODE button to set normal, natural or quite mode.
- In quite mode: the fan will operate at a predetermined speed and lower noise level, the indicator will be illuminated.
In Natural mode: The fan changes pace randomly to give you the sensation of a natural breeze. The indicator will be illuminated. - Press OSCIL (SWING) button to active oscillation function.
- Press MINUT (TIMER) button to start timer from 30 minutes to 7.5 hours. Each time you press button timer will increase in 30 minutes. Renew the operation until the desired time is reached up to 7.5 hours.
- Tilt adjustment: air flow can be adjusted by moving the fans head up or down.
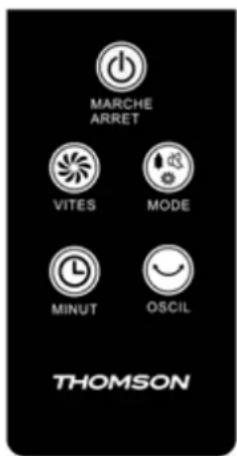
Remote control
All functions on the fan can be activated from the remote control.
-Remote control requires 1pc CR2025 3V battery supplied in the remote control. Used batteries must be safely disposed. Place them in collection bins provided to protect the environment.
-Respect the polarity when inserting
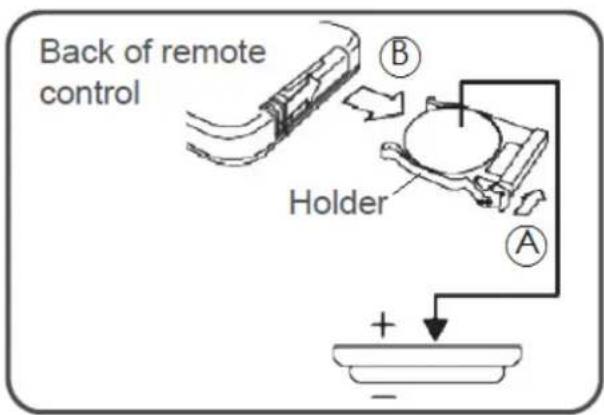
BATTERY REPLACEMENT
- Remove the battery holder by pressing the locking tab A with your thumb and pulling it out as per arrow B.
- Replace the battery with the same type and the (+) side facing up.
- Gently push in the holder until securely locked into place.
CAUTION: Danger of short circuit and electric shock if battery is incorrectly replaced. Replace batteries only with batteries of the same type or compatible
CLEANING AND MAINTENANCE
- The fan requires regular cleaning to ensure trouble free operation.
- Ensure that the fan is switched off from the supply mains before removing the grill.
- Unplug the fan from the mains supply before cleaning.
- Use a damp cloth (not wet) to wipe the exterior of the fan to remove dust and dirt.
- Use a vacuum cleaner to remove dust and fluff from around the grills.
- Ensure the fan is dry before plugging back into the mains supply.
- Do not attempt to dismantle the fan. There are no user serviceable parts. For service or repair, contact an authorized electrical service technician.
TECHNICAL SPECIFICATIONS:
| Model n° | THVEL460KS |
| Power supply | 220-240V~50Hz |
| Power | 60 W |
| Class | II |
| Remote control battery | CR2025, 3V |
| Description | Symbol | Value | Unit |
| Maximum fan flow rate | F | 50,4 | m3/min |
| Fan power input | P | 55,5 | W |
| Service value | SV | 0,91 | (m3/min)/W |
| Off power consumption | POFF | 0,2 | W |
| Fan sound power level | LWA | 63 | dB(A) |
| Maximum air velocity | c | 2,7 | metres/sec |
| Measurement standard for service value | IEC 60879:1986 (corr.1992) | ||
| Contact details for obtaining more information | SCHNEIDER CONSUMER GROUP, 12 rue Jules Ferry, 93110 Rosny sous Bois, France | ||
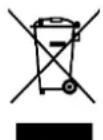
The European directive 2012/19/EC on Waste Electrical and Electronic Equipment (WEEE), requires that old household electrical appliances must not be disposed in the normal unsorted municipal waste stream. Old appliances must be collected separately in order to optimize the recovery and recycling of the
materials they contain and reduce the impact on human health and the environment. The crossed out "wheeled bin" symbol on the product reminds you of your obligation, that when you dispose of the appliance it must be separately collected.
Consumers should contact their local authority or retailer for information concerning the correct disposal of their old appliance.
The warranty does not cover the wear parts of the product, nor the problems or damage resulting from:
(1) surface deterioration due to normal wear and tear of the product;
(2) defects or deterioration due to contact with liquids and corrosion caused by rust or the presence of insects;
(3) any incident, abuse, misuse, alteration, disassembly or Unauthorized repair;
(4) improper maintenance, improper use concerning the product or connection to an incorrect voltage;
(5) any use of accessories not supplied or not approved by the manufacturer.
The guarantee will be cancelled if the nameplate and / or serial number of the product are removed.
Imported by SCHNEIDER CONSUMER GROUP 12 Rue Jules Ferry, 93110 Rosny-sous-Bois, France THOMSON is a trademark of Technicolor SA used under license by SCHNEIDER CONSUMER GROUP.
Brand : THOMSON
Model : THVEL460KS
Category : Air Conditioning