
KM 6036 CB - Food Processor BOMANN - Free user manual and instructions
Find the device manual for free KM 6036 CB BOMANN in PDF.
| Product type | Food processor (dough kneader, beater, mixer) |
| Brand | Bomann |
| Model | KM 6036 CB |
| Power supply | 220-240 V~, 50/60 Hz |
| Power consumption | 1500 W |
| Protection class | II |
| Net weight | Approx. 6.35 kg |
| Bowl capacity (thick dough) | Max. 4.5 kg |
| Bowl capacity (moderately thick dough) | Max. 5.5 kg |
| Bowl capacity (light dough / cream) | Max. 6.5 L / 4 L |
| Number of speeds | 6 speeds + pulse (position P) |
| Included accessories | Whisk, mixing hook, dough hook, splash guard |
| Bowl material | Not specified (likely stainless steel or food-grade plastic) |
| Safety | Safety switch on the pivoting arm, motor overload protection, automatic stop if arm is raised |
| Cleaning motor housing | Damp cloth with a drop of detergent |
| Cleaning bowl and accessories | Hand wash with warm soapy water, not dishwasher safe |
| Reparability | Contact authorized after-sales service; power cord replaceable by a professional |
| Intended use | Household use only, do not use outdoors |
| Warranty | Keep the warranty card and receipt |
| Included documents | User manual (66 pages) available in multiple languages |
Frequently Asked Questions - KM 6036 CB BOMANN
User questions about KM 6036 CB BOMANN
0 question about this device. Answer the ones you know or ask your own.
Ask a new question about this device
Download the instructions for your Food Processor in PDF format for free! Find your manual KM 6036 CB - BOMANN and take your electronic device back in hand. On this page are published all the documents necessary for the use of your device. KM 6036 CB by BOMANN.
USER MANUAL KM 6036 CB BOMANN
WAARSCHUWING: Risico op lets!
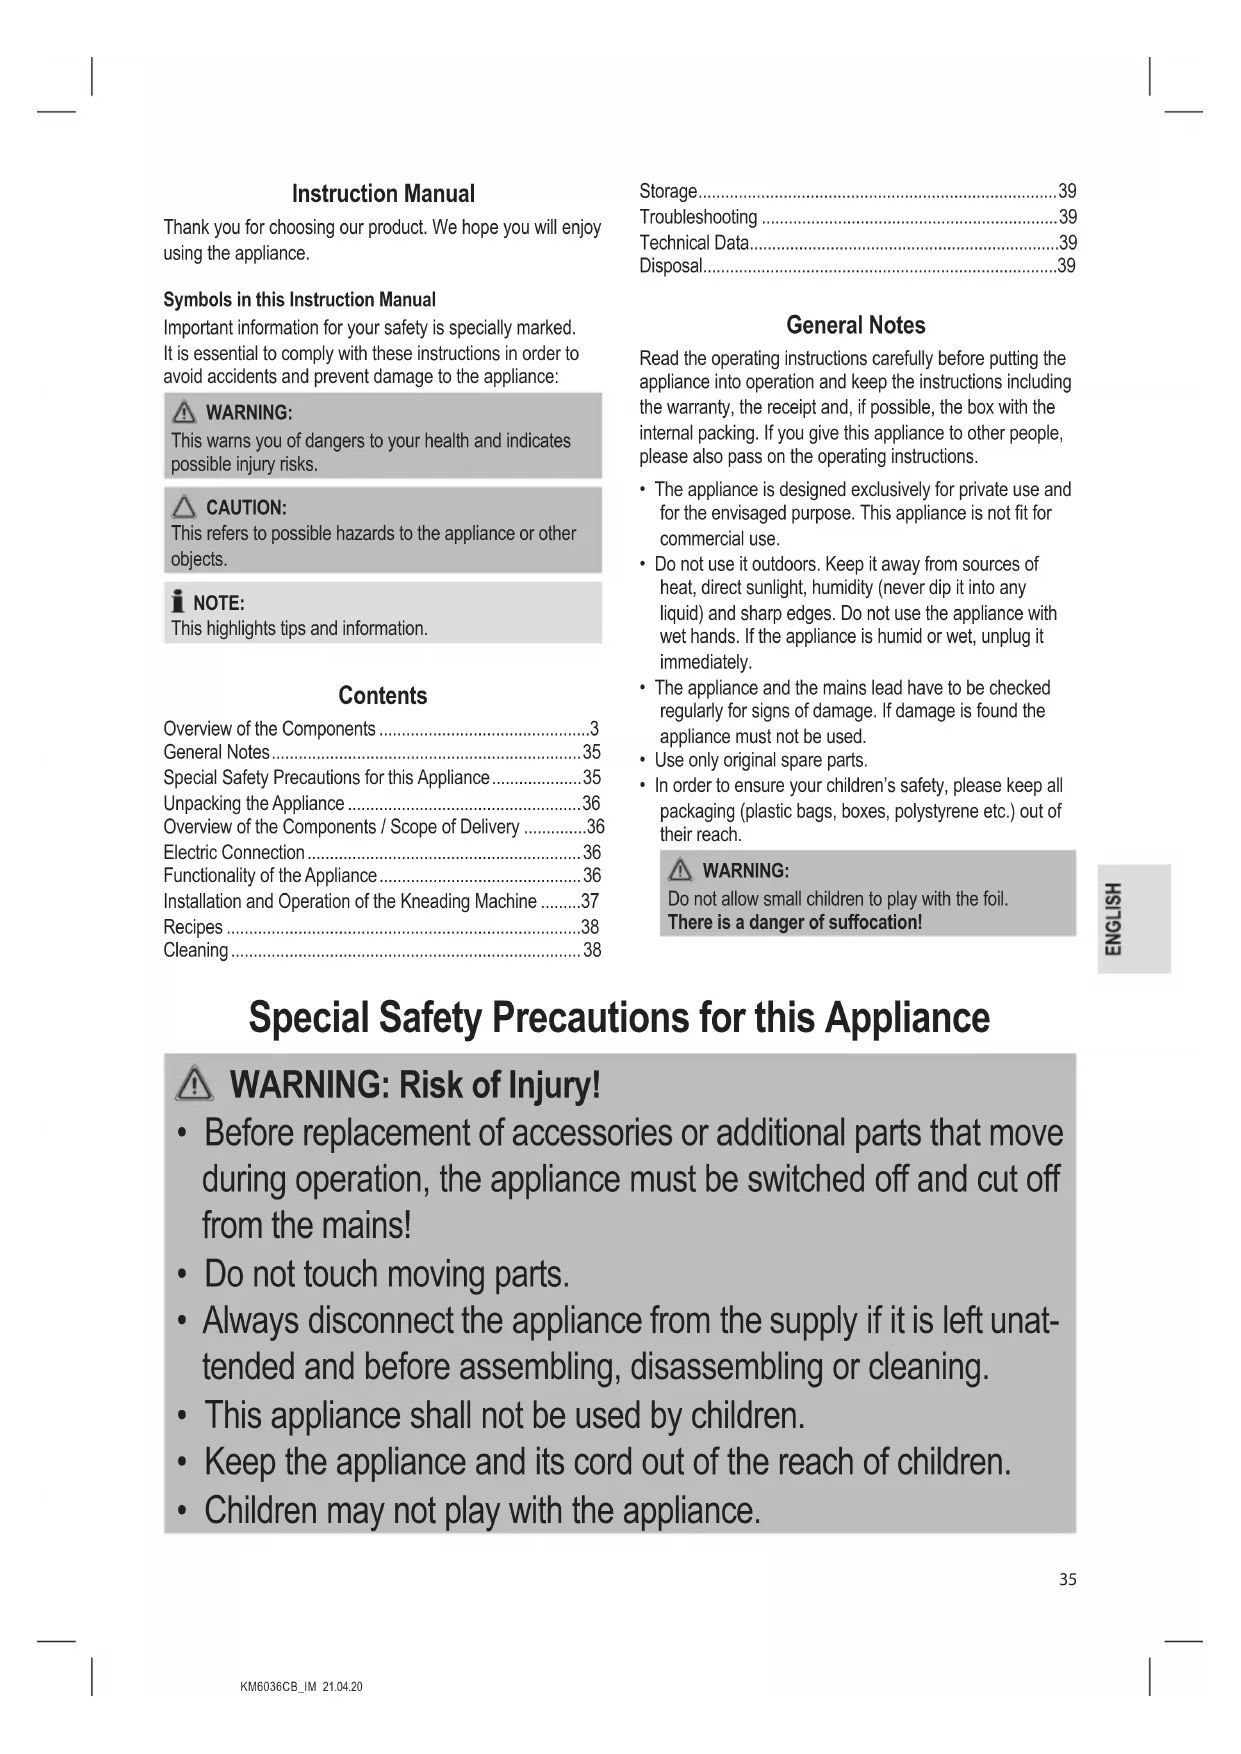
Thank you for choosing our product. We hope you will enjoy using the appliance.
Symbols in this Instruction Manual
Important information for your safety is specially marked. It is essential to comply with these instructions in order to avoid accidents and prevent damage to the appliance:

WARNING:
This warns you of dangers to your health and indicates possible injury risks.

CAUTION:
This refers to possible hazards to the appliance or other objects.

NOTE:
This highlights tips and information.
Contents
Overview of the Components 3
General Notes 35
Special Safety Precautions for this Appliance 35
Unpacking the Appliance 36
Overview of the Components / Scope of Delivery 36
Electric Connection 36
Functionality of the Appliance 36
Installation and Operation of the Kneading Machine 37
Recipes 38
Cleaning 38
Storage 39
Troubleshooting 39
Technical Data. 39
Disposal 39
General Notes
Read the operating instructions carefully before putting the appliance into operation and keep the instructions including the warranty, the receipt and, if possible, the box with the internal packing. If you give this appliance to other people, please also pass on the operating instructions.
- The appliance is designed exclusively for private use and for the envisaged purpose. This appliance is not fit for commercial use.
- Do not use it outdoors. Keep it away from sources of heat, direct sunlight, humidity (never dip it into any liquid) and sharp edges. Do not use the appliance with wet hands. If the appliance is humid or wet, unplug it immediately.
- The appliance and the mains lead have to be checked regularly for signs of damage. If damage is found the appliance must not be used.
- Use only original spare parts.
- In order to ensure your children's safety, please keep all packaging (plastic bags, boxes, polystyrene etc.) out of their reach.

WARNING:
Do not allow small children to play with the foil. There is a danger of suffocation!
Special Safety Precautions for this Appliance

WARNING: Risk of Injury!
- Before replacement of accessories or additional parts that move during operation, the appliance must be switched off and cut off from the mains!
- Do not touch moving parts.
- Always disconnect the appliance from the supply if it is left unattended and before assembling, disassembling or cleaning.
- This appliance shall not be used by children.
- Keep the appliance and its cord out of the reach of children.
Children may not play with the appliance.

WARNING: Risk of Injury!
- Appliances can be used by persons with reduced physical, sensory, or mental capabilities or lack of experience and / or knowledge, if they are supervised or have been instructed concerning safe use of the appliance and understand the hazards involved.
- Do not repair the appliance by yourself. Always contact an authorized technician. If the supply cord is damaged, it must be replaced by the manufacturer, its service agent or similarly qualified persons in order to avoid a hazard.

CAUTION:
Do not immerse the appliance into water for cleaning. Follow the instructions that we provide in the chapter "Cleaning".
- Do not manipulate any of the safety switches.
- Only process foodstuffs with this appliance. Misuse of the appliance for other purposes may cause injury.
Unpacking the Appliance
- Remove the packaging of the appliance.
- Remove all packaging material such as plastic film, filler material, cable ties and box packaging.
- Check that all parts are in the box.
- If the packaging content should be incomplete or if damages should be noticeable, do not operate the appliance. Return it to the distributor immediately.

TE:
Dust or production residues may still be found on the appliance. We recommend that you clean the appliance as described under "Cleaning".
Overview of the Components / Scope of Delivery
1 Swivel arm
2 Motor housing
3 Swivel arm release button
4 Control knob
5 Mixing bowl
6 Splash guard
7 Whisk
8 Mixing hook
9 Kneading hook
Electric Connection
Check that the mains voltage to be used matches the voltage of the appliance. Refer to the rating label for detailed specifications.
Functionality of the Appliance
Protective Features
- The appliance is equipped with a circuit breaker. The appliance can only be operated if the following is observed:
- The swivel arm is locked in place in the lowest position.
- The electronic speed regulation prohibits a motor drive overload automatically. The revolutions per minute are automatically regulated in the case of an overload.
Turning the Appliance On
- Once you have connected the appliance to the power supply and the circuit breaker on the swivel arm has been closed, the appliance is ready for use.
- Turn the control knob clockwise to select the desired speed level. The appliance starts to operate. The illumination on the control knob lights up.
- Pulse operation: Turn the control knob counter-clockwise to the P position. Hold the control knob in this position only for a short time. The illumination on the control knob lights up.
Turning the Appliance Off
- Set the control knob into 0 position to turn the appliance off.
- Disconnect the mains plug from the socket.
Installation and Operation of the Kneading Machine
NOTE:
Turn on the appliance with the mixing bowl in place only!
1. Opening the swivel arm:
Press and hold the release button. Manually move the swivel arm to the top position and release the release button.
- If you need the splash guard, attach it now to the swivel arm from below. Hold the splash guard (6) in such a way that the fill opening is positioned in front of you.
3. Use of an attachment:
On the top of the attachment, you can see a recess for the drive shaft and a recess for the splint. Push the attachment onto the drive shaft. Push down and at the same time turn the accessory anticlockwise in order for the splint of the drive shaft to lock into the accessory.
4. Mixing bowl:
Set the mixing bowl to its holder. Turn the mixing bowl all the way in the direction LOCK shown on the housing.
- Fill your ingredients into the mixing bowl.
NOTE:
If you knead heavy doughs, do not put all the ingredients at once into the mixing bowl. Start the kneading with flour, sugar and eggs. Add fluids slowly during the kneading.
- Check that the control knob is set to 0.
- Press and hold the release button. At the same time, lower the arm slowly by hand. Release the release button.
- Insert the power plug into a suitable socket.
- Select a speed using the table below.
Table of Dough and Tools
| Doughs Tool Levels Quantity Max. Operating Time | ||||
| Heavy doughs (e. g. bread or short pastry) Dough hook 1-3 max. 4.5 kg 3-5 minutes | ||||
| Moderate doughs (e.g. cake mix) | Stirring hook | 3-4 | min. 0.5 kg max. 5.5 kg | 2-5 minutes |
| Light doughs (e.g. waffle or crêpe batter, pudding) | Whisk | 4-5 | min. 500 ml max. 6.5 litres | 2-5 minutes |
| Cream | Whisk | 6 | min. 200 ml max. 4 litres | 4-7 minutes |
| Beaten egg whites | Whisk | 6 | 4-30 egg white | 3-5 minutes |
NOTE:
Short time operation: With heavy dough, do not operate the appliance longer than 5 minutes and then let it cool down for 10 minutes.
Pause Operation

WARNING: Danger of injury!
- Always set the control knob to 0 if you want to interrupt the operation.
- Pull the power plug to change attachments.
- Wait for the attachment to come to a complete stop!

WARNING: Danger of injury!
- If you press the release button during operation to swing the arm up, a safety switch will shut off the motor.
- The motor is turned on again only when the swivel arm is lowered again and the control knob is set to 0 before returning it to its original position!
End Operation and Remove the Bowl
- At the end of work, set the control knob to 0. Pull the power plug.
-
Press and hold the release button. Manually move the swivel arm to the top position and release the release button.
-
Remove the attachment.
- Remove the splash guard.
- Turn the mixing bowl briefly anticlockwise to remove it.
- You can loosen the finished dough with a scraper and remove it from the mixing bowl.
- Clean all used components as described in the chapter "Cleaning".
Recipes
Sponge Mixture (Basic Recipe) Speed 3 - 4
Preparation:
250 g soft butter or margarine, 250 g sugar, 1 package of vanilla sugar or 1 package Citro-Back, 1 pinch of salt, 4 eggs, 500 g wheat flour, 1 package of baking powder, approx. 1% litre milk.
Preparation:
Fill the wheat flour with the remaining ingredients into the mixing bowl and mix it with the mixing hook first for 30 seconds at speed 3 and then approx. 3 minutes at speed 4.
Grease the form or line it with baking paper, fill in the dough, and bake. Before the cake is removed from the oven, test to see if it is done: With a sharp wooden stick, pierce the centre of the cake. If no dough sticks to it, it's done. Place the cake on a baking grid to let it cool.
Conventional Oven:
Tray slot: 2
Heating: Electric oven upper and lower heat
175 - 200°C, gas oven: Speed 2 - 3
Baking time: 50 - 60 minutes
You can modify this recipe according to your taste, e. g. with 100 g raisins or 100 g nuts or 100 g grated chocolate. Let your imagination run wild.
Linseed Rolls Speed 1-3
Ingredients:
500 - 550 g wheat flour, 50 g linseed, 38 litre water, 1 cube yeast (40 g), 100 g low-fat curd, well drained, 1 teaspoon salt. For brushing: 2 tablespoons water.
Preparation:
Soak linseed in 1% litre of lukewarm water. Place the remaining lukewarm water (1/4 litre) into the mixing bowl, crumble the yeast into it, add curd, and mix well with the kneading hook on speed setting 1. The yeast must be completely dissolved. Add the flour with the soaked linseeds and salt into the mixing bowl. Knead on speed 2, then change to speed 3 and knead another 3 - 5 minutes. Cover the dough and let it rise in a warm place for 45 - 60 minutes. Knead again, take it out of mixing bowl, and form 16 rolls from it. Cover a baking tray with wet baking paper. Place the rolls on it, let them rise for 15 minutes, brush with lukewarm water, and bake.
Conventional Oven:
Tray slot: 2
Heating: Electric oven: Upper and lower heat
200 - 220 °C (preheat for 5 minutes), gas oven: Speed 2 - 3
Baking time: 30 - 40 minutes
Chocolate Cream Speed 4-5
Ingredients:
200 ml sweet cream, 150 g dark chocolate, 3 eggs, 50 - 60 g sugar, 1 pinch of salt, 1 package of vanilla sugar, 1 tablespoon cognac or rum, leaf chocolate.
Preparation:
Whip the cream stiff in the mixing bowl with the whisk, remove it from the bowl, and keep it cool. Melt the chocolate according to the instructions on the package or heat it for 3 minutes in the microwave at 600W . In the meantime, whisk the eggs, the sugar, the vanilla sugar, cognac or rum, and salt in the mixing bowl with the whisk at speed 4 to a foam. Add the melted chocolate and mix it in uniformly at speed 4 - 5. Keep some of the whipped cream for garnishing. Add the remaining cream to the creamy matter and fold in for a short time with the pulse function (speed P). Garnish the chocolate cream and serve it well cooled.
Cleaning

WARNING:
- Always pull the power plug before cleaning.
- Never immerse the appliance in water for cleaning. This might result in an electric shock or fire.

CAUTION:
- Do not use a wire brush or abrasives for cleaning.
- Do not use acid or abrasive cleaning agents.
Motor Housing
Clean the housing only with a damp cloth and a squirt of detergent.
Mixing Bowl, Splash Guard, Kneading and Mixing Attachments

CAUTION:
The attachments are not suitable for cleaning in a dishwasher. Heat and aggressive cleaning agents may warp or discolour the attachments.
- Components that have come into contact with food, can be cleaned using hot rinsing water with a small amount of hand detergent.
- Dry all components well before re-attaching them to the appliance.
Storage
- Clean the appliance as described. Let the accessories dry completely.
- We recommend that you keep the appliance in the original packaging, if you do not want to use it for a longer period.
- Always store the appliance out of reach of children in a well ventilated, dry place.
Troubleshooting
| Problem Possible Cause Solution | ||
| The appliance cannot be switched on or stops operation. | Appliance without power supply. Check the swivel arm is not locked in the lowest position.A safety switch prevents operation. | socket with another appliance. |
| The swivel arm is not locked in the lowest position. | - Check the proper position of the swivelling arm.- Set the control knob in the 0 position.Then select the desired speed setting. | |
| The overheating protection has been activated. The motor is too hot. | Let the appliance cool down for at least 15 minutes before switching it on again. | |
| The appliance is defective. Contact our service centre or a specialist. | ||
Technical Data
Model: KM 6036 CB
Power supply: 220 - 240 V~, 50 / 60 Hz
Power consumption: 1500 W
Protection class: II
Net weight: approx. 6.35kg
The right to make technical and design modifications in the course of continuous product development remains reserved.
This appliance has been tested according to all relevant current CE guidelines, such as electromagnetic compatibility and low voltage directives, and has been constructed in accordance with the latest safety regulations.
Disposal
Meaning of the "Dustbin" Symbol

Protect our environment: do not dispose of electrical equipment in the domestic waste.
Please return any electrical equipment that you will no longer use to the collection points provided for their disposal.
This helps avoid the potential effects of incorrect disposal on the environment and human health.
This will contribute to the recycling and other forms of re-utilisation of electrical and electronic equipment.
Information concerning where the equipment can be disposed of can be obtained from your local authority.
Instrukcja obslugi
UcTpaHHe HeNCnPaBHOCTeI 58
TexHHueckne daHHbIe. 58
YTNIN3aun 58
067aHhOpMaun
Ipeed hauanom 3KcNpyataunn npbopa BHNMaTeJbHO npouTaNte npunaeraemyu INCTpykunno NO 3KcNpyataunn COxpaHNTe ee B HadeXHom MeCTe, BMeCTe C rapaHTnHBIM TaIOHOM, KaccOBbIM YekOM N, PO BO3MOXHOCTN, KAPTOHHO Ko06KO C yNAKOBOUHBM MaTePnaIOM. Ecn daeTe KOmy-Ni6o IonoIb3OBAtbc npbOpom, Obra3aTeJIbHO daIte B pniDaay DaHHy INCTpykunno NO 3KcNpyataunn.
Повьтугсь пиборм только чатугим обраим и по ha3нayehи. Пибор He прдha3нayeh Дя КOMМерчecko ИСпОлььзOBAHИ.
He nonb3yntecb np6bopom noT OKpbItbIM He6bOM. Ipe doxpanaHne np6bOp OT kapbl, npMbx COIHeuHbIX LyueB, BnaxhoCTN (Hn B Koem cnyae He norgykaTe ero B BoDy) n yapob 06 octpble yrbl. He npKacaiTe b K np6bOp Bynaxhblm pykam. Ecn np6bOp ybnaxhInncn HnHAMOK, TyT Xe Bblte BuNKy n3 po3eKn.
-Прибори Кабелсетево ппань Heobxodmo peуларно obcneobatb Ha haJIuHne cIeDOB nobpekdeHЯ.При об hapжehи NOBpeKdHЯ NOJb3ObaTbcr npri6bopor 3anpeaetcra.
- Vicnoj3yuteToIbKOOpnHaHbHbe3aHactn.
- V3 coo6paqhen 6e3onacnoctn dIy deTeH He octabJIaIte Iexatb ynaKOBky (IINaCTNKOBbie MeUKN, KapTOH, neHONlaCT n T.D.) 6e3 npncMOtpa.

IPEDYIPPEXDEHNE:
He no3B0JIaIe TeIeTAM INrpaTb C noJIIN3TIneHOBOJ
PnEHKo. Onachoctb ydybja!
Oco6bIe yka3aHnI NO TexHnke 6e30nacHOCTN dJa DaHHoro yCTpO'CTBa

3NeKtpnueckoe coeHHeHne
Pn3aMeuBaHnBraKOroTeCTaHe3aKaIaNbIBaNteB 1aWyDnA CMeuBaHnCpa3y Bce INHpeJeHtbl.HauHnTE3aMeuBaHnE CMyKn,caxapa nRnU.MeIeHNO do6abTne KINKOcTB PPOeCE CMeuBaHn.
- Y6eIntecb, yTO kpyrna pyuKa ynpabJeHnHaXoDITcB B NOJKeHHN 0.
- Haxmte u ydepxmbaTe KhoNky Ocbo6oxdHn. OndoBpeMeHHo MeIeHHO OyCTnte pbuar BpyHyIO. OTnyCTnte KhoNky Ocbo6oxdHn.
8.BctabBeBnky nntaHnB noxDxOrauoyo po3eTky. - BbIepeTe ckOpocTb no Ta6nue Hnke.
Ta6Iuca TINOB TecTa HcNoIb3yEmbIX HacaIOK
Ecni TcTo TaKeJeoe, He nCnOJIb3yIte npI6Op 6oJee 5 MInyT; DeJaTe nepepbIBbHa 10 MInHyT, YTO6bl DaTb EMy OCTbITb.
Mmnybchbn pexnM
IPEyIPEKJHHE:Onachoctb TpaBm!
Bcerda yctaHaBnBaIte KpyrIyO pyKy ynpabEnH BIOJoxHe 0,ecIN HxKHO npepBaTb pa6Oty yCTpoiCTBa.
ИЗБЛЕКITe BUILKY ПИТАнЯ ДДЯЗм�ы HabaДК.
- Doxntecb, noka hacaika nonHOCTbIO octaHOBITcI
EcnB0BpempaobtihhkahtKhoNkyOCBO6OKeHnry,HTo6bIIOHnTbroNOBky,3aUHTbIpeKKnOHaTeNbOTKJIOHT dBVaTeNb.
MToTOp BKJIIOUHTcA CHOBA TOJbKO NocIe NOBTOpHOrO onyckaHnI NOBOPOTHO rNeu I yCTaHOBKn KpyIIOI pyKn ynpaBHeHnB NIOLOXeHne O do BO3BpaTa B ee nCXoJHoe NIOLOXeHne!
3aBepuepepa0bI IN CHrTne KyBUNHa DnA CMeunBaHn
- Послес Испόльбозовая усточа установке Круглиу ручу уразавлены в поожени 0. Изblinkеши Виший рптуни.
- HaxMMTe u ydePKuBaIte KhoNkU OcBO6OKeHnI. IpeBeDenTe NOBOpOTbI pyKaB BpyHyU B cepXHee noIOxKeHne.
- CHIMMTe HacadKy.
4.YdAnIte npncnocObeHne dna 3aunTbI O6pb3r. - Pe3ko NOBepHnTe MNCky IJIa CMeUINBaHHa NpOTNB YacOBoI CTpeKN, YTO6bI ee CHrTb.
- IcnoIb3yJ nonaTky, n3BneKeITe nprirotOBnHoe TecTo n3 KyBUnHa dJa CMeunBaHHa.
- OuHCTInTe BCE NcIOJIb3OBAUWeCRA KOMnHOHeTbI, KaK yKa3aHo B pa3dJeE «UcTka».
PeuenTbi
CmecbIg6nckBntOB
(OCHOBHOn peueeNT)
CkopocTb 3-4
UHapeueHmbI:
250 r MaRko macna nImaprapnHa, 250 r caxapa, 1 naKeTnBaanbHoro caxapa nI 1 naKeTn JIMMOHOro apomataTopa, 1 zenotka coN, 4 yuca, 500 r nnEHHNoMkyi, 1 naKeTn pa3pbixnTeTn, npImepHo 18 nITpa MOnoka.
Tomoska:
HacbInbTe NIIeHnHyO MyKy BmEcTe C OCTaIbHbIMN INHrpe- dIeHTAMN B KYBUnH CMeuBaHnR N IprImeHnTe KpOK dIra nepemeunBaHn CHaHa Na 30 cekyHd Ha ckopocTn 3, 3aTeM pIIM. Ha 3 MInHytbl Ha ckopocTn 4. CmaXbTe fOpmy INI BByIOXnTE ee KyINHapHO BymarO, 3anoJHnTe TeCTOM N BbIeKaIte. PIOBepbTe roTOBHOCTb nepe TEm, KaBbHyTb 6IkoDo n3 dYxOBKn: npOTKHnTe 3aoCTpeHHoN DepeBraHHo N aNochok B ceHTpe. EcIn Ha naNoUke HeT Tecta, 3HaHT BByeKha Rotoba. YIOXnTE BbIeKcy Ha KxOHHyPeWETky DnA OCTbIBAHn.
06bHna yxo8ka:
MecTo nIpyntuBn: 2
HarpeB: IekTpuecka DyXOBKa C harpeBOB Bn3y N BBepx y 175-200°C,ra3OBa DyXOBKa: ckopocTb 2-3
Bpemr Bbineukn: 50-60 MmhyT
Moxho MeHbT b3OT peeIeNt no CBOemy Bkycu, Hapnimep do6abWb 100 r n3oMa, nn 100 r opexob nn 100 r tepTorO wokona. Het npedena BOO6paXeHHIO.
BnyOuKn CJIbHrHbIMN
CEMeUkAMN
Ckopoctb 1-3
UHapedueHmbI:
500-550rπeHnHou MyK,50rCEmH NbHa, 3 % nItpa BObl,1 Ky6NK dpoXKei (40 r),100rHexmHOn cHyxHO 3aKBacKn, xopoIo npocUeHHo, 1aHna loKkCoII. DnmauBaHn:2 CToIOBbIe IooKKn BObl.
Tomoska:
3amOHTe CeMeHa NbHa B 1/8 NITpa TepnoB OdbI. IOMecTne OCTabuHocr Tepnyo Body (14 NITpa) B KByuHn CMeuBaHHa, HacbInbTe TuJa DPOXKU, DoabBe TcuyxHHyo 3aKbAcKy u XopoWehko NepemEuaHte KpOKom dIa 3ameuBaHHa Ha CKOpOCTn 1. DPOXKU DOJIKNHbI NOHOCbO pactBopntbcra. IOMecTne MykC 3amOueHHbIMn CemeHAMn NbHa n CoJbIO B KByuHH CMeuBaHHa. 3ameuBaAte Ha ckOpOCTn 2, 3aTeM NImHe Tce CKOpOCTb Ha 3 u 3ameuBaAte eue 3-5 MInyT. HApOte Te cTo n NomeCTne erO B TepNoe MeTO Ha 45 -60 MInyT. ChoBa 3ameuBaAte, N3BNeKte N3 KByuHa CmeuBaHHa n pa3dEnITE Ha 16 6yIoueK. YIoKeTbe NpoTINBeH KyINHapHyIO bymary. IomecTne Ha Hee 6yIoNKn, DaIte NM 15 MInyT, UTObbl POnHrtbcra, CMAKbTe TepNO BDOI N BIneKaIte.
06bHnaydyxo8ka:
MecTo nIpynOIBHr: 2
HarpeB: 3neKtpuecky dYxOBka: HarpeB
Bn3y n BBepxy 200-220°C
(nporpTeB 5 MNHyT),
ra3OBa dYxOBka: Ckopoocb 2-3
BpemBaIeKn:30-40MnHyT
単okoJaHbI Kpem CkopoocTb 4-5
HnapedueHmbI:
200 M n C mTaHbI, 150 r T eM Horo Wokonada, 3 Rua, 50 - 60 r caxapa, 1 uenotka coN, 1 naKeTn B aHnBHoro caxapa, 1 cToIOBaJ IOKka KOhJaKa nn POMa, WokOnadna CTpyjXkA.
Tomoeba:
B36nBaIte INHrpEneHbIB KyBUnHe CMeuINBaHnBEHyKOM, INBLeKInTe INx IN3 KyBUnHa n XpaHIne Ha XoNoDe. PAcToIIne 50KoNpAcd corlaacHO HCTpykUHN HA yNaKOBKe INn HarpeBaIte erO 3 MInHyTb IB MmKpOBOJHOBoI neH npi 600 Bt. OndHOBpeMeHHo B36BeIte Ra, caxap IN BaHInbHbIMcaxap, KOhJaIK INn pOM IN CoMb IB KyBUnHe CMeuINBaHnBEHvNKOM Ha CKOpocTn 4 Do obpa3oBaHnIeHbl. DObaBbTe paCtOnJIeHHbI WOKoNAd IN nepeMeMaTe DO OndOpOHOH MaCCbI Ha CKOpocTn 4-5. OctabTe HeKOTOpoe KOnlueCTBO B36ntoro Kpema dIra YukpaWeHnI. DObaBbTe OCTaBImcR Kpem K nepeMeuINBaEMoM MacCe IN KpATKOBpeMeHHO CMeuIte BCE B IMnyIbChOM pexHmE (CKOpocTb P). YKpaCbTe WOKoNAdHbIM Kpemom INoDaBaHTe OXnaJdEHbIM.
UncTka
I P E D U N P E X K D E H N E:
- Pered ounstkoBceRa n3BneKaTe BnKy nntaHna.
He norpykaite yctpoiCTBO B BODy dIa OUHCTKN. 3To moKet npNBecTN K nopaxeHHIO 3JIeKTpueeCKIM TOKOM IIN IOXapy.
BHIMAHNE:
He nOpB3yIe MeTaNJIuYeCKyU 0eTky NIN INHbIe abpa3nHBIe YNCTaIe CpeCDtBA JnOChTKn.
He nCnoB3yIte arpeccnBhble nn a6pa3nBhble qHCTaUne cpeDCTBa.
Koxy MoTopa
Koxy CneyeT NCTnTb TOJbKO C NOMOJIbBO BnaXHO TkaHNI, DoabNBE HEMHORO KINKOCtN DnA MbITb Nocybl.
KyBunH DnA CMeuBaHn, 3aunTHa KpbIuKa O p3-6pbI3rBuHnHa, HacaKn DnA B3bNBAHn N CMeuBaHn
BHIMAHNE:
Hacadkn HeIb3a MbltB NocydomoeyHm MaHInHe. HarpeB n arpeccnBhIe YnCTaue cpeDCTBa mOyt DeopmpnoBat nIi ObecuBETb Hacadkn.
- DeTani npi6opa, coPnKacabWneec C nuiueBbIMn PNOyKTAMN, MOxHO BbIMbITb rOpRye NpOToCHo BOIOI CdoabHeHem He6oJbWoTO KOnUeCTBa MoUeero cpeDCTBa.
XopoIo npocuyuHTe BCE KOMnHOHeHTbI nepei NOBTOpHbIM NIOKJIIOUeHHeM K pni6Opy.
XpaHeHne
OuHCTHTe yCTPOIcTBO B COOTBeTCTBUN C INHCTpyKlunrMn. TaIte npHaNAdEKNHOCTm NOINHOCTbIO BBICOXHyTb.
- Ecni Bbl XOTnTe npOJIntb cPOK cnYk6bI yCTPOIcTBA, peKOMeHdyETcXpaHNTb erO B opINHaJIbHOy naKOBKe.
Bcerda xpaHnte yctpoCTBO B HeoctynHom Ira Tei, xopoIO npOBetpnaeMOM n cyxom MecTe.
YcTpaHHe HEnCnpaBHOCTeI
4ab = 3a

1b3a 40go 3 b16 c1g y jgljgl
:JgJgJgJgJgJgJgJgJgJgJgJgJgJgJgJgJgJgJgJgJgJgJgJgJgJgJgJgJgJgJgJgJgJgJgJgJgJgJgJgJgJgJgJgJgJgJgJgJgJgJ
g 15 g 15 g 15 g 15 g 15 g 15 g 15 g 15 g 15 g 15 g 15 g 15 g 15 g 15 g 15 g 15 g 15 g 15 g 15 g 15 g 15 g 15 g 15 g 15 g 15 g 15
gjy
1..jglj
- a : 13 10或14 15
.
3...gdually 1j
- g,g, j,jj
S OBC = S AOB + S_ BOC
:ab
aulll gbi/ bugbl gl aole ojbs
130 131
2
1gJgJgJgJgJgJgJgJg
Soill 4
1511 5
jll 6
a017
8
joll 9
jL
jglgdo dolaiol jgl gll jglg jglg jglg jglg jglg jglg jglg jglg jglg jglg jglg jglg jglg jglg jglg jglg jglg jglg jglg jglg jglg jglg jglg jglg jglg jglg jglg jglg jglg jglg jglg jglg jglg jglg
3
61
60
60
59
59
59
4olc Udo 30
10 10000000000000000000000000000000000000000000000000000000000
clay y.bab ao gaaab jolul plaiu w u pao jglll lio .jplall plaiw w jglll lio
aJlal Jlae JI aai. aJlal JSL 5j glal pauu y (aIw oIg l g IaBo aoo y) aybgl oI uall aagol g I bJgall jI 1. aluuy jgal pao w y.oal all
a 12g g aLs y plbly aasy j 100gbl 100g jagll gaae
y
L
jglpluulwuy wus j Jolli. liuoi juiol de
pluswsljlloa jgo
L 100000000000000000000000000000000000000000000000000000
J 1
a
clogabglal glaill gagll jyll yj:
Ugol
- 由 b > 0 且 b^2 - 4ac > 0 求 a < 1
63 - 62
- 62
62
62
jlll 1yololx
!4y1j:
J
1s
.45joo61ol
( 0,14,0,14) ± 1
AD = BD = 3
.
. JləbJgl
. jIaJIy JlaB
·s + 勾结
aalil gaiy yllg jg lo llae rblg aegbglg jn nn nnnn n
GARANTIEKARTE
warranty card · garantiekaart · carte de garantie · scheda di garanzia · tarjeta de garantia · cartao de garantia · garantikort · karta gwarancyjna · zaru.cnli list · kartica jamstva · carte de garantie · fapaunnoHa Kapta · zaru.cnly list · garancijski list · garanciajegy · rapaHTiHmNfOpMynap · fapaHTnHbTanoH
KM 6036 CB
24 Monate Garantie gemäß Garantieerklarung - 24 months warranty according to warranty declaration - 24 maanden garantie volgens garantieverklaring - 24 mois de garantie selon la déclaration de garantie - 24 messi de garanzia seconde la dichiarazione di garanzia - 24 meses de garantia de acuero con la déclaracion de garantia - 24 menedes garantiet henhold til garantibeteingensle - 24 misieace gwarancjna podastawie oswiadczcnia gwarancjnego - zaruka 24 meseicu podle prohlasenf o zarue - 24 mesecno jamstvo u skladu s jamstvenom deklaraciujm - 24 luni garantie conform declaratie de garanjie - 24 mecaa rapaunn a cbotertcbrne c rapaunnohara deknapaern - 24-measa nza zaruka podla vyhlasenia o zaruke - 24-mesecnagarcija, skladno z garancjsko izjavo - 24 honap garancia a garanciafeletetelekben leirtak szerint - rapahtra na 24 micui bIDnoiDho napi no rapaHTIO - rapaHTN - 24 mecaa cornaccho zarneneHHBM rapaHTHBM npAraBnAM -
Kaufdatum, Handlsterpmel, Unterschied - date of purchase, dealer stamp, signature - aankoopdatum, dealerpmel, handtdeckung - date d'achat, tampon du concessionaire, signature - data di acquisto, timbre di riendatore, fornca - fecha de compra, sellio del distribuiator, fornca - data de compra, carlimbo do distribuiator, assinatura - kipsozato, forhandlstemper, signature - data zakupu, pieczec spradewy, podisp - datum zakupeni, ralitico predege, podisp - datum koupivne, rig trogova, podisp - data o achitei, stamplia furnizatoriul, semmatura - Data na nojukiva, neuva na pnojeavna, nojce - datum nikukpa, pecliatka obchodnica/ predaje/, podisp - datum nikukpa, rig trogova, podisp - visilaris datumata, kereskedé belyegroje, aliaraks - datra npodbanha, nevata npodanpa, npjnc - Data npodopeptenei, ilamran npodana, nojce:
BOMANN®
www.bomann-germany.de
BOMANN
C. Bomann GmbH
Internet: www.bomann-germany.de
Made in P.R.C.


- WAARSCHUWING: Risico op lets!
- Symbols in this Instruction Manual
- WARNING:
- CAUTION:
- NOTE:
- Contents
- General Notes
- Special Safety Precautions for this Appliance
- WARNING: Risk of Injury!
- Unpacking the Appliance
- TE:
- Overview of the Components / Scope of Delivery
- Electric Connection
- Functionality of the Appliance
- Protective Features
- Turning the Appliance On
- Turning the Appliance Off
- Installation and Operation of the Kneading Machine
- Opening the swivel arm:
- Use of an attachment:
- Mixing bowl:
- Pause Operation
- WARNING: Danger of injury!
- End Operation and Remove the Bowl
- Recipes
- Sponge Mixture (Basic Recipe) Speed 3 - 4
- Preparation:
- Conventional Oven:
- Linseed Rolls Speed 1-3
- Ingredients:
- Chocolate Cream Speed 4-5
- Cleaning
- Motor Housing
- Mixing Bowl, Splash Guard, Kneading and Mixing Attachments
- Storage
- Technical Data
- Disposal
- Meaning of the "Dustbin" Symbol
- Instrukcja obslugi
- 067aHhOpMaun
- IPEDYIPPEXDEHNE:
- Oco6bIe yka3aHnI NO TexHnke 6e30nacHOCTN dJa DaHHoro yCTpO'CTBa
- 3NeKtpnueckoe coeHHeHne
- Mmnybchbn pexnM
- IPEyIPEKJHHE:Onachoctb TpaBm!
- 3aBepuepepa0bI IN CHrTne KyBUNHa DnA CMeunBaHn
- PeuenTbi
- CmecbIg6nckBntOB
- (OCHOBHOn peueeNT)
- UHapeueHmbI:
- Tomoska:
- 06bHna yxo8ka:
- BnyOuKn CJIbHrHbIMN
- CEMeUkAMN
- UHapedueHmbI:
- 06bHnaydyxo8ka:
- 単okoJaHbI Kpem CkopoocTb 4-5
- HnapedueHmbI:
- Tomoeba:
- UncTka
- I P E D U N P E X K D E H N E:
- BHIMAHNE:
- Koxy MoTopa
- KyBunH DnA CMeuBaHn, 3aunTHa KpbIuKa O p3-6pbI3rBuHnHa, HacaKn DnA B3bNBAHn N CMeuBaHn
- XpaHeHne
- gjy
- aulll gbi/ bugbl gl aole ojbs
- jL
- 4olc Udo 30
- L
- Ugol
- jlll 1yololx
- GARANTIEKARTE
- KM 6036 CB
- BOMANN®
Brand : BOMANN
Model : KM 6036 CB
Category : Food Processor