
ZeroGlu Pro BM1 1500 - Bread maker IMETEC - Free user manual and instructions
Find the device manual for free ZeroGlu Pro BM1 1500 IMETEC in PDF.
| Product type | Bread machine |
| Brand | Imetec |
| Model | ZeroGlu Pro BM1 1500 |
| Number of programs | 20 automatic programs |
| Maximum flour capacity (bread) | 500 g |
| Maximum ciabattas capacity | 350 g flour |
| Maximum rolls capacity | 250 g flour |
| Main functions | Kneading, rising, baking, delayed start (up to 15 h), keep warm, adjustment of baking time |
| Browning levels | Light, medium, dark |
| Included accessories | Bread pan, 2 kneading blades, 2 ciabatta containers, 4 roll containers, blade hook, measuring jug, yeast container, container rack |
| Container material | Non-stick coating (probable) |
| Power supply | 220-240 V ~ 50/60 Hz (common estimate) |
| Safety | Power failure protection (active memory up to 15 min), automatic stop at end of program, thermal lock |
| Cleaning and maintenance | Bread pan and blades washable with water (max. 60°C), do not put in dishwasher; measuring jug and yeast container dishwasher safe |
| Warranty | 2 years |
| Dimensions (L x l x H) | Approximately 30 x 25 x 35 cm (estimate) |
| Weight | Approximately 5 kg (estimate) |
Frequently Asked Questions - ZeroGlu Pro BM1 1500 IMETEC
User questions about ZeroGlu Pro BM1 1500 IMETEC
0 question about this device. Answer the ones you know or ask your own.
Ask a new question about this device
Download the instructions for your Bread maker in PDF format for free! Find your manual ZeroGlu Pro BM1 1500 - IMETEC and take your electronic device back in hand. On this page are published all the documents necessary for the use of your device. ZeroGlu Pro BM1 1500 by IMETEC.
USER MANUAL ZeroGlu Pro BM1 1500 IMETEC
Instructions for use
Dear customer, thank you for choosing our product. We feel certain you will appreciate its quality and reliability as it was designed and manufactured with customer satisfaction in mind. These instructions for use are compliant with the European Standard EN 82079.

WARNING! Instructions and warnings for safe use.
Before using this appliance, carefully read the instructions and in particular the safety notes and warnings, which must be complied with. Keep this manual together with its illustrative or future consultation. Should you transfer the appliance to a user, make sure you hand over this documentation as well.
① NOTE: should any part of this manual be difficult to understand or any doubt arise, contact the company at the address indicated on the last page before using the appliance.
值 NOTE: persons with impaired vision may consult these instructions for use in digital format at the website www.tenactagroup.com
INDEX
Introduction page 14
Safety notes page 14
Key to symbols used page 17
Description of appliance
and accessories page 17
Contact with foodstuffs page 18
Cleaning before using for the
first time page 18
Usage page 19
Quantities page 19
Programs page 19
Use page 22
Cleaning and maintenance page 24
Protection in the case
of a power failure page 24
Useful tips page 24
Troubleshooting page 25
Disposal at the end of life page 26
Support and warranty page 26
Illustrative guide page I-IV
Technical data page IV
SAFETY NOTES
- After unpacking, make sure the appliance is intact, complete with all its parts as shown in the illustrative guide and with no sign of damage. In doubt, do not use the appliance and contact an authorised service centre.

WARNING! Remove any communication material such as labels, tags etc. from the appliance before use.

WARNING! Risk of suffocation. Children shall not play with the packaging. Keep the plastic bag out of the reach of children.
EN
- This appliance must be used only for the purpose for which it was designed, namely as a bread maker for home use. Any other use is considered not compliant to the intended use and therefore dangerous.

WARNING! Any misuse of the appliance may lead to injuries.
- Before connecting the appliance to the mains supply, make sure that the voltage and frequency indicated on the technical data of the appliance correspond to those of the mains supply. The rating is on the appliance or on the power supply unit, if any (see illustrative guide).
- This appliance can be used by children aged from 8 years and above and persons with reduced physical, sensory or mental capabilities or lack of experience and knowledge if they have been given supervision or instruction concerning use of the appliance in a safe way and understand the hazards involved. Children shall not play with the appliance. Cleaning and user maintenance shall not be made by children without supervision.

WARNING! Keep the appliance and its cord out of reach of children less than 8 years.
- DO NOT use the appliance with wet hands, damp feet or barefoot.
- DO NOT pull the supply cord or the appliance itself to remove the plug from the socket.
DO NOT pull or lift the appliance by the supply cord. - DO NOT allow the supply cord to hang over the edge of the support surface. If pulled by the cord, the appliance may fall and cause injuries or burns.
DO NOT expose the appliance to humidity, to the effects of weather (rain, sun, etc.) or to extreme temperatures.
The appliance is not to be used outdoors. - DO NOT leave the appliance unattended while in operation.
DO NOT leave the appliance unattended when plugged in. - Always disconnect the appliance from the mains supply before
EN
cleaning or performing maintenance and when the appliance is not in use.
- If the appliance is faulty or malfunctions, switch it off and do not tamper with it. Contact an authorised technical service centre for any repairs.
- If the supply cord is damaged it must be replaced by an authorised technical service centre, so as to prevent all risks.
- The electrical safety of this appliance is only guaranteed when it is connected correctly to an effective earthing system as required by applicable electrical safety standards. This important safety requirement must be verified before connecting the appliance to the mains supply. If in doubt request a thorough check of the system by a qualified technician.
- This appliance shall not come into contact with water, other liquids, spray, steam. For any cleaning and maintenance operation refer to the instructions in the relevant chapter.
- DO NOT use this appliance near a washbasin or a sink filled with water. During use the appliance must be placed in such a way that it cannot fall in the washbasin or the sink.
- DO NOT leave this appliance in contact with or near materials and surfaces that are easily flammable or can be damaged by heat.
- This appliance must be placed on a flat, stable surface.
- See the external packaging for the characteristics of the appliance.
- Use the appliance only with the supplied accessories that are an essential part of the appliance.
- This appliance is not intended to be operated by means of an external timer or separate remote-control system or any other similar system.
- DO NOT use near a hob. The supply cord shall not come into contact with hot, incandescent surfaces, open flames, pots and other utensils.
DO NOT touch, block or cover the hot air outlet grids. - DO NOT leave food in contact with the appliance for any longer than is necessary for preparation.
DO NOT use extension cords or adaptors.
KEY TO SYMBOLS USED
| Warning/Caution/Danger ON position | |
| Prohibition OFF position | ○ |
| Light browning Bread roll shape | ☆☆ |
| Medium browning Ciabatta shape | ☆ |
| Dark browning Bread shape | ○ |
| Timer ① | Timer Mixing |
| Leavening Baking | sss |
| End | End |
DESCRIPTION OF APPLIANCE AND ACCESSORIES
Refer to the illustrated guide on pages I and II to check that your appliance is complete with all accessories.
- Lid
- Baking chamber
- Heating element
- Gears
- Machine body
- On/off switch
- Technical data
- Power cable
- ON light
- MENU button
- START/STOP button
-
- button
-
- button
- BROWNING button
- SHAPE button
Accessories
- Containers for bread rolls
- Containers for ciabattas
-
Hook to remove the blades
-
Mixing blades
- Bread container
- Pins
- Rack for ciabatta and bread roll containers
- Measuring cup for the yeast (if included)
- Graduated cup (if included)
During operation, the phases are indicated on the display
- Baking with bread roll containers
- Baking with ciabatta containers
- Baking with bread container
- Mixing
- Leavening
- Baking
- Program end
- Dark baking
- Medium baking
- Light baking
- Timer
CONTACT WITH FOODSTUFFS
EN
Please follow the guidelines given in this table concerning the following to ensure that the appliance is used safely:
- parts of the appliance intended for contact with food; the parts of the appliance not indicated in the table are not meant to come into contact with food.
- the types of food which may be used in this appliance.
- the maximum period of time for which foodstuffs may remain in contact with the parts of the appliance intended for contact with food.
- the maximum permissible temperature of food used in the appliance.
| List of parts Food | Maximum time | Maximum temperature | |
| Bread container, pins, mixer blades | All 210 minutes | 170°C | |
| Containers for ciabattas | |||
| Containers for bread rolls | |||
| Hook to remove the blades | |||
| Graduated cup (if included) | All 5 minutes | 40°C | |
| Measuring cup for the yeast (if included) |
CLEANING BEFORE USING FOR THE FIRST TIME

WARNING! Before use, wash all parts which will come into contact with food.
- Open the lid.
- Remove the bread container by lifting the handle, moving it to free it from the gears [Fig. B]. Clean the accessories according to the following table:
| Accessory | Under running water, up to 60°C | In the dishwasher | Wipe with a dampened and thoroughly squeezed-out sponge |
| Bread container, pins, mixer blades | ✓ | NO | ✓ |
| Containers for ciabattas | ✓ | NO | |
| Containers for bread rolls | ✓ | NO | |
| Hook to remove the blades | ✓ | NO | |
| Graduated cup (if included) | ✓ | ✓ | |
| Measuring cup for the yeast (if included) | ✓ | ✓ |
- Dry with a dry cloth.
When used for the first time, the machine may emit a little smoke and odour caused by possible manufacturing residues. Perform a baking cycle, making a type of bread to be thrown out.
USAGE
The appliance has the following functions:
| Control Function | |
| ON light Indicates that the appliance is on. | |
| MENU button | Selects the programs from 1 to 20. The number of the program and the relative duration are shown on the display. |
| START/STOP button To start or stop the appliance. | |
| + button | To extend baking for another 10 minutes in programs that permit it and adjust the delayed start. |
| - button | To shorten baking by 10 minutes in programs that permit it and adjust the delayed start. |
| BROWNING button | To select the desired amount of browning, among light, medium or dark. |
| SHAPE button | To vary those programs that permit baking options between containers for ciabattas or bread rolls. The programs that use the bread container are fixed. |
| On/off switch To switch the appliance on and off. |
QUANTITIES
- Do not exceed the quantities indicated by the recipes in the recipe book based on the various accessories.
- To make bread with smaller quantities than what is indicated in the recipe in the recipe book, it is recommended to select the "light" browning level to have a shorter baking time.
- Do not reduce the quantity of ingredients by more than 20% in order not to jeopardise the good outcome of the dough and the final result.
| Accessory Ingredients and maximum quantities | |
| Bread container | 500 g of flour/25 g fresh brewer's yeast or 8 g of lyophilised brewer's yeast or 12 g of baking powder for sweets |
| Containers for ciabattas do not exceed a total of 350 g of flour | |
| Containers for bread rolls do not exceed a total of 250 g of flour | |
PROGRAMS
The bread maker has 20 different programs for kneading times, number of leavening phases and temperature conditions (during both leavening and baking). For the details of the various programs, refer to the recipe book enclosed.
MIXING:
During this phase, all programs emit 4 BEEPs two minutes before the end of mixing in order to add any additional ingredients.
During this phase, the lid can be left open to control the process.
LEAVENING:
There are different leavening times, depending on the program.
Keep the lid closed during leavening.
TRANSFERRING THE DOUGH INTO THE CIABATTA AND BREAD ROLL CONTAINERS:
The dough should only be transferred from the bread container to the ciabatta and bread roll containers for certain programs (no. 2, 4, 5, 7, 9, 11, 15, 16).
The appliance indicates the moment that the operation can be performed by emitting 10 BEEPs, then waiting for the next command: the ON light starts to flash. The appliance will beep again after 5 minutes.
- Remove the bread container.
- Take out the dough and transfer it to the ciabatta or bread roll containers.
- Insert the containers into the guides of the rack, until the seats in the containers coincide with the raised sections in the guides [Fig L].
- Insert the rack in the baking chamber [Fig. M].
- Press the MENU button to restart the machine: the ON light becomes steady. The program starts additional leavening and continues automatically.
① NOTE: if the machine is not restarted within one hour after the 10 BEEPs, the program will stop and the initial program screen will appear on the display. To resume baking, set program no. 20.
BLADE EXTRACTION:
When making the bread, the mixing blades can be removed during the last leavening period: the exact moment for doing this is indicated in the Programs table in the recipe book, under the "blade extraction" column.
- Use the spatula to move the dough and remove the two blades.
PROGRAM END
Indicates the total recipe execution time at the various browning levels.
DELAYED START

WARNING! The delayed start should only be used for recipes that have already been tried out.
The delayed start can be used with certain programs in order to have the bread ready up to 15 hours later.
DO NOT use this function with perishable ingredients or gluten-free flours.
The delayed start function is only active with programs no. 1, 3, 8, 10, 14.
- Place the ingredients in the bread container in this order: liquid ingredients, flour, yeast, salt and sugar. The last three elements must not come into contact either with each other or with the water.
- Select the program, shape and baking level required.
- Press the + and - buttons consecutively to define the max. hours/minutes after which the bread must be ready. Example: if it's 12:30 and you want the bread to be ready for 6pm, set 5:30. You can scroll through the numbers more quickly by pressing and holding the buttons.
- Press the START button. The MENU button indicator light will come on, and you will see an arrow in line with the word TIMER on the screen; the machine will remain in standby for the programmed time.
ALtering THE BAKING TIME
The standard recipe time can be altered for certain programs, increasing or reducing the baking by 10 minutes.
LONG LEAVENING WITH PRE-FERMENT - PROGRAM no.13:
- Place the ingredients of the pre-ferment (called biga or polish) in the bread container, after dissolving the yeast thoroughly in water at room temperature.
- Select program no. 13 and the required browning level, then press START.
- The machine will knead the dough for 8 minutes: the result will be a fairly wet pre-ferment that must be left to rise for the necessary time - approximately 8 hours.
- When the pre-ferment has risen, add the other ingredients and then press the MENU button to begin
the second kneading phase.
- The machine will knead the dough for 15 minutes.
- About halfway through this phase, check the consistency to make sure it's firm and springy; add flour if too wet, or water if too dry.
PIZZA DOUGH - PROGRAM no.18:
The program activates the kneading phase followed by three leavening phases with brief kneading in between. There is no baking phase.
To bake small pizzas, switch to program no.19.
To bake one big pizza, carefully take the dough out of the container and place it on a baking tray. Add the toppings, and place in a hot oven.
SMALLPIZZAS-PROGRAMno.19
This program uses the baking phase only.
Transfer the dough (already prepared with program 18) from the bread container to the ciabatta containers, then add the required toppings.
- Select program no.19.
- Set the required baking time (from 10 to 60 minutes) using the + and - buttons.
- Press the START/STOP button: the baking phase will begin straight away.
DOUBLE QUANTITY OF DOUGH FOR BREAD ROLL'S AND CIABATTAS:
If you want to make a double quantity of bread rolls or ciabattas, double the amount of the ingredients (but remember that the maximum quantity of flour is 500g ).
DO NOT make a double quantity of cakes and desserts, as the baking powder starts reacting upon contact with the liquids so the mixture needs to be baked straight away.
- Put the ingredients in the bread container and start the first phase of the program.
- When transferring the dough, put half of it in the ciabatta or bread roll containers and the other half in a container covered with a damp cloth and left in a cool place.
- Continue the set program to bake the dough.
- When the program has ended, use the ciabatta or bread roll containers again for the remaining dough. Select program no.19 and set the baking minutes indicated in the recipe, then start the baking phase.
DOUBLE QUANTITY OF DOUGH FOR BREAD ROLL'S AND CIABATTAS TO BE MADE LATER:
If you want to bake the remaining dough later on, keep it in the fridge to stop the leavening process.
- Use program no.20, which includes a leavening phase to reactivate the dough before baking it.
- Use the SHAPE button to select the type of container (ciabatta or bread rolls), altering the baking time if necessary for the recipe and the required result.
① NOTE: this program only works when the machine is completely cold.
USE
EN

WARNING! This appliance is not to be used if it has been dropped or if there are visible signs of damage.

WARNING! Risk of burn. DO NOT touch the external surfaces during operation and until the appliance has completely cooled down.

WARNING! The bread may burn and produce flames and / or smoke. DO NOT use water to extinguish. Disconnect the appliance and use a damp cloth to put out any flames.

WARNING! DO NOT touch the kneading blades with your hands or utensils while they are operating.

WARNING! The kneading blades must be removed exactly when indicated in the table of programs. If they are removed before then, the dough may rise too much and come out from the pan while baking.

WARNING! Risk of scalding. Heat and steam come out from the cooking chamber when opening the lid of the appliance.

WARNING! Risk of scalding. Always wear oven gloves to open the lid and to remove containers.

WARNING! Risk of scalding. DO NOT move the appliance while it is in operation.

WARNING! Never start the appliance empty or only with water in the containers to prevent causing irreversible damage to your break maker.
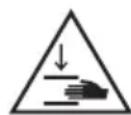
WARNING! Risk of crushing. The lid may close accidentally.

WARNING FOR CELIACS
When using the bread maker, celiacs must respect the hygiene rules normally recommended for handling gluten-free foods. Never use the machine for recipes that include glutens because the flour, which rises up when kneading, can contaminate the baking chamber and the lid.
EN
NEVER place the machine on paper/cardboard or plastic surfaces.
NEVER place paper, cardboard or plastic inside the machine or on the lid.
Let the machine cool down completely if you want to run two baking cycles.
- Open the lid.
- Insert the bread container into the baking chamber. If this operation is difficult, a gear is probably not engaged at the bottom of the container: in this case, rotate the mixer blade slightly and try again.
- Insert the 2 mixing blades in the respective pins, pushing them down fully [Fig. C].
- Insert the power cable plug into the power socket.
- Move the on/off switch to the ON position [Fig. D]; after a BEEP, program 1 appears on the display.
- Press the MENU button several times to select the program; the program number and duration will appear on the display [Fig. E].
- Press the SHAPE button to select the BREAD ROLL or CIABATTA shape; the selected icon appears on the display. For programs with a loaf shape, the selection is automatic [Fig. F].
- Press the BROWNING button to select the required browning level - LIGHT, MEDIUM or DARK; the selected icon appears on the display [Fig. G].
- With programs 2, 4, 5, 6, 7, 9, 11, 12, 13, 15, 16 and 20, the baking time can be varied by pressing the + or - button to add or take off 10 minutes [Fig. H].
- Press the START/STOP button to start the machine: the operating light comes on and the baking process starts. The remaining time is updated on the display [Fig. 1].
- Insert the ingredients in the bread container, following the order indicated in the recipe.
- During the process, an arrow appears on the display that indicates the current phase: mixing, leavening, baking and end of program.
To stop any active program, press the START/STOP button for a few seconds: the indicator light on the MENU button will switch off.
BAKING:
Note: it is important not to open the lid during the baking phase.
When the bread is done, the machine will beep four times: the ON light turns off and the initial screen appears on the display. The indicator on the display shows the END phase.
- Turn off the appliance by moving the on/off switch to the OFF position [Fig. D].
- Disconnect the power cable plug from the power socket.
Taking out the bread container:
- Hold the lid still with one hand, to make sure it doesn't close on your hands.
- Using gloves, grip the handle and then move it backwards and forwards to take out the container.
- Use a silicone or wooden spatula to detach the bread from the walls of the container, to avoid scratching them.
- Bring the slots under the container into line with the blades (this will make it easier to remove the bread).
EN
- Tip the container over and strike it on the base to remove the bread.
- If the mixing blades are still in the bread, remove them by inserting the relative hook in the hole in the blade and levering slightly on the wall inside the hole [Fig. N].
Taking out ciabattas or bread rolls:
- Using gloves, grip the handles of the support to take it out.
- Remove the ciabatta or bread roll forms from the support.
- Turn the forms upside down to take out the ciabattas or bread rolls.
- Clean any parts that come into contact with foodstuffs immediately as described in the chapter 'Cleaning and care'.
CLEANING AND MAINTENANCE

WARNING! Always disconnect the appliance from the socket before cleaning or performing maintenance.

WARNING! Risk of crushing. Remove the lid before any cleaning operation.

WARNING! Risk of fire. Wait for the appliance to cool completely before storing it.
- Tilt the lid slightly and remove it from the slots [Fig. O].
- Clean the lid, the baking chamber and the heating element using a moist and well-wrung cloth. Do not use detergents, abrasives and do not pour in liquids.
- Clean the accessories according to the table indicated in the chapter Cleaning before using for the first time.
- Wipe the motor unit with a dampened and thoroughly squeezed out sponge.
- Dry with a dry cloth.
PROTECTION IN THE CASE OF A POWER FAILURE
The machine is provided with a protection that, in the case of a power failure (max. 15 minutes) keeps the memory active and guarantees that the recipe will be continued.
USEFUL TIPS
The cover can be kept open during kneading, to check the result.
During the various leavening phases, the machine maintains the right temperature: the cover must therefore be kept closed.
At the end of the program, the bread can be kept warm for one hour if it's left inside the machine with the lid closed.
To learn how to use all the functions of the bread maker, to begin with you are advised to follow the recipes without altering the ingredients or quantities. In this way, you will get to know the various programs and accessories so it will then be easier to try out variations with ingredients to your own taste or more suitable for your own type of diet. It's a good idea to replace just one ingredient at a time (e.g. a different flour, oil instead of butter, etc.), so you can more easily note the difference compared with the original recipe you have already tried.
If you want to change the brand of flour, or try out new flours, we suggest you use the recipe that's most similar in terms of ingredients (i.e. the one based on the flour you want to use) and required shape, then make your own personal changes.
Dough using flours with gluten and brewer's yeast must be quite firm and elastic: after a few minutes of kneading, the gluten mesh begins to form and the dough becomes springy, detaching from the edges of the container (if you insert and then take out your finger, the dough will slip back into place). Dough made with gluten-free flours, on the other hand, isn't elastic and requires more water: the consistency of the end result will be similar to that of ice-cream. Check the consistency and add more water or flour if necessary.
TROUBLESHOOTING
Should one of the problems indicated occur, adopt the proposed solution:
| Problem Solution | |
| A selected program does not start. A delayed start | was set. |
| A selected program does not start and error E01 appears on the display. | The machine is still hot because bread was just made. Wait for the machine to cool completely (approx. 1 hour). |
| A selected program does not start and error E00 appears on the display. | The room is too cold. Increase the room temperature. |
| A program for bread rolls or ciabattas does not restart after the transfer. | More than one hour passed after the 10 signalling BEEPS for the transfer. |
| The program for polish does not restart after adding the ingredients. | More than 12 hours passed since the 10 signalling BEEPS for the program. |
| Smoke is escaping the baking chamber. | The dough came out of the container and touched the heating element. Turn off the machine, disconnect the socket from the power outlet and clean the baking chamber after the machine has cooled down completely. NEVER use water. |
| The motor runs but mixing does not start and noise is heard during rotation. | The mixing blades are not inserted. The bread container is not inserted properly. Stop the machine and push the container down firmly, fixing it tightly or insert the mixing blades. |
| The bread container exits from its seat during mixing. | Stop the machine and push the container down firmly, fixing it tightly. |
| An error code appears on the display: EEE or HHH. | Take the machine to an authorised Imetec service centre. |
| Bread made with gluten-free flours doesn't rise very much. | It's normal for bread, bread rolls or ciabattas made with naturally gluten-free flours to rise less than those made with a mixture of flours; this is due to the absence of thickening agents that support the structure of the bread, but does not jeopardise the correct leavening and baking in any way. |
DISPOSAL AT THE END OF LIFE

The appliance packaging is made of recyclable materials. Dispose of the packaging in accordance with the environmental protection regulations.
Pursuant to Directive 2012/19/EU on waste electrical and electronic equipment (WEEE), the crossed bin symbol on the appliance or its packaging indicates that the appliance must be disposed of separately from other waste at the end of its useful life.
The user must therefore take the appliance to an appropriate recycling centre for electrical and electronic equipment. Alternatively, instead of handling the disposal, the user can hand over the appliance to the retailer when a new, equivalent one is purchased. The user can hand over electronic products measuring less than 25cm to retailers of electronic products having a sales area of at least 400m^2 free of charge and with no obligation to buy. Appropriate separate collection for the subsequent procedure for the decommissioned appliance for recycling, which includes treatment and environmentally friendly disposal helps prevent adverse effects on the environment and health and promotes reusing and/or recycling materials that the appliance consists of.
SUPPORT AND WARRANTY
The appliance is guaranteed for a period of two years from the date of delivery. This date is taken as the date on the receipt/invoice (as long as it is clearly legible), unless the purchaser can prove that delivery was made at a later date.
In the event of a defect in the product which existed prior to the date of delivery, appliance repair or replacement is guaranteed free of charge, unless one of the two solutions is disproportionate to the other. The buyer has the obligation to notify an authorised Service Centre of the non-conformity within two months from discovering the defect.
The warranty does not cover parts that may be faulty due to:
a. damage from transport or accidental drops,
b. incorrect installation or inadequate electrical system,
c. repairs or alterations performed by unauthorised personnel,
d. insufficient or improper maintenance and cleaning,
e. products and/or parts of products subject to wear and/or consumables, and reduced operating time of rechargeable batteries, if applicable, due to usage or age.
f. failure to observe the operating instructions of the appliance, negligent or careless use.
The above list is merely an example; it is not complete, as this warranty in any case does not cover circumstances that cannot be traced back to manufacturing flaws.
Any improper or professional use of the device will immediately void the guarantee.
The manufacturer cannot be held responsible for any direct or indirect damage or injury to persons, property or pets attributable to the non-observation of any of the directions given in the "Instruction manual and safety information handbook" for the installation, use and maintenance of the appliance.
This is without prejudice to any contractual warranty claims against the seller.
Assistance
The appliance may only be repaired by an authorised service centre. If the faulty appliance is under warranty, it must be sent to the Assistance Centre along with a fiscal document proving the date of purchase or delivery.
INTRODUCTION

- INDEX
- SAFETY NOTES
- EN
- KEY TO SYMBOLS USED
- DESCRIPTION OF APPLIANCE AND ACCESSORIES
- Accessories
- During operation, the phases are indicated on the display
- CONTACT WITH FOODSTUFFS
- CLEANING BEFORE USING FOR THE FIRST TIME
- USAGE
- QUANTITIES
- PROGRAMS
- MIXING:
- LEAVENING:
- TRANSFERRING THE DOUGH INTO THE CIABATTA AND BREAD ROLL CONTAINERS:
- BLADE EXTRACTION:
- PROGRAM END
- DELAYED START
- WARNING! The delayed start should only be used for recipes that have already been tried out.
- ALtering THE BAKING TIME
- LONG LEAVENING WITH PRE-FERMENT - PROGRAM no.13:
- PIZZA DOUGH - PROGRAM no.18:
- SMALLPIZZAS-PROGRAMno.19
- DOUBLE QUANTITY OF DOUGH FOR BREAD ROLL'S AND CIABATTAS:
- DOUBLE QUANTITY OF DOUGH FOR BREAD ROLL'S AND CIABATTAS TO BE MADE LATER:
- USE
- WARNING FOR CELIACS
- BAKING:
- Taking out the bread container:
- Taking out ciabattas or bread rolls:
- CLEANING AND MAINTENANCE
- PROTECTION IN THE CASE OF A POWER FAILURE
- USEFUL TIPS
- TROUBLESHOOTING
- DISPOSAL AT THE END OF LIFE
- SUPPORT AND WARRANTY
- Assistance
- INTRODUCTION
Brand : IMETEC
Model : ZeroGlu Pro BM1 1500
Category : Bread maker