Pivalla - Coffee machine GRAEF - Free user manual and instructions
Find the device manual for free Pivalla GRAEF in PDF.
User questions about Pivalla GRAEF
0 question about this device. Answer the ones you know or ask your own.
Ask a new question about this device
Download the instructions for your Coffee machine in PDF format for free! Find your manual Pivalla - GRAEF and take your electronic device back in hand. On this page are published all the documents necessary for the use of your device. Pivalla by GRAEF.
USER MANUAL Pivalla GRAEF
Operating Instructions
FR
Mode d'emploi
ESPRESSOMASCHINE
pivalla
Inhaltsverzeichnis
Vorwort....3
natural_image
Silhouette of a coffee cup with 'Espresso' text on the side (no other symbols or text)Doppio
text_image
Nilch EspressoCaffé Latte
natural_image
Line drawing of a measuring cup with handle and cup (no text or symbols)Löffel
SIEBEINSÄTZE
DOPPELWANDIGE SIEBEINSÄTZE
1 Tasse
2 Tassen / 2 Pads
natural_image
Simple line drawing of a bowl (no text or symbols)
natural_image
Simple line drawing of a bowl or container (no text or symbols)natural_image
Line drawing of a hand using a tool to press a rectangular box (no text or symbols present)natural_image
Simple line drawing of a mechanical component or tool interacting with a rectangular block (no text or symbols)text_image
W/5 G W/5 G W/5natural_image
Pure technical line drawing of a mechanical assembly without any text, numbers, or symbolsnatural_image
Line drawing of a printer with a paper airplane, showing the front panel and base (no text or symbols)natural_image
Line drawing of a mechanical device with a lever and handle, no text or symbols presentnatural_image
Diagram of a hand pouring liquid into a container with a lid, showing mechanical components (no text or symbols)natural_image
Diagram of a mechanical device with a rotating knob and piping (no text or symbols)natural_image
Line drawing of a kitchen appliance with a bowl and a hand operating it (no text or symbols)natural_image
Simple line drawing of a bucket with a handle and a circular object above it, placed on a base (no text or symbols)text_image
STANDARD 0 +5 +1natural_image
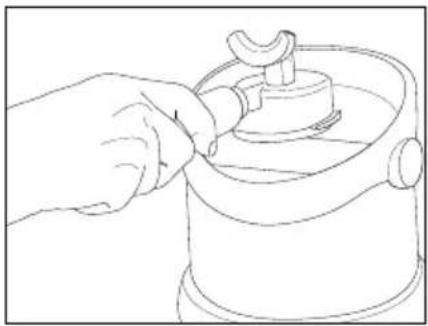
Line drawing of a hand using a tool to clean or repair a pipe fitting (no text or symbols)natural_image
Line drawing of a hand pouring liquid into a glass jar (no text or symbols)natural_image
Line drawing of hands using a tool to lift a cup (no text or symbols)natural_image
Diagram of a kitchen sink with a pipe fitting and valve mechanism (no text or labels)natural_image
Line drawing of a coffee machine with two cups and a coffee cup, no text or symbols presentnatural_image
Line drawing of a hand using a tool to press or press over a textured surface (no text or symbols)natural_image
Line drawing of a hand holding a container with a lid and handle (no text or symbols)natural_image
Line drawing of a hand using a microscope to clean or store equipment (no text or symbols)natural_image
Line drawing of a hand cleaning a pipe with a cloth (no text or symbols)natural_image
Line drawing of a mechanical component with a downward arrow indicating force or direction (no text or symbols)natural_image
Diagram of a mechanical device with a rotating component and directional arrow (no text or symbols)natural_image
Line drawing of a coffee machine with two cups and a coffee cup, no text or symbols presentnatural_image
Line drawing of a hand using a tool to press or lift a cup on a surface (no text or symbols)natural_image
Line drawing of a hand pouring liquid into a cooking pot (no text or symbols)natural_image
Line drawing of hands using a precision machine to press or install a tray (no text or symbols visible)natural_image
Line drawing of a mechanical component with a handle and circular housing (no text or symbols)natural_image
Line drawing of a mechanical device with a handle and internal components (no text or symbols)natural_image
Line drawing of a mechanical component with a rotating arrow indicating rotation (no text or symbols)natural_image
Line drawing of a mechanical device with a handle and central component (no text or symbols)natural_image
Line drawing of a mechanical component with a cylindrical shaft and flanged housing (no text or symbols)natural_image
Line drawing of a mechanical device with a handle and mesh chamber (no text or symbols)natural_image
Line drawing of a mechanical device with a handle and central component (no text or symbols)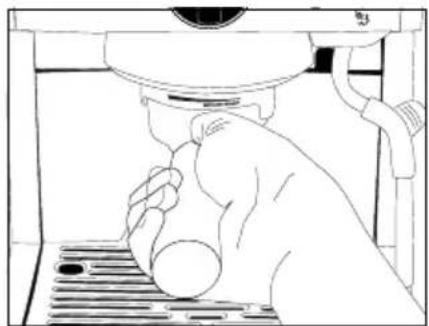
natural_image
Line drawing of a hand using a vacuum cleaner to clean or store items (no text or symbols)natural_image
Line drawing of a coffee machine with two cups and a coffee cup, no text or symbols presenttext_image
STANDING 0natural_image
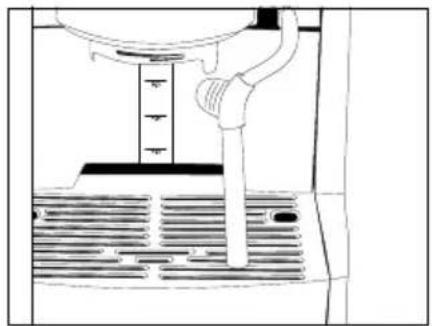
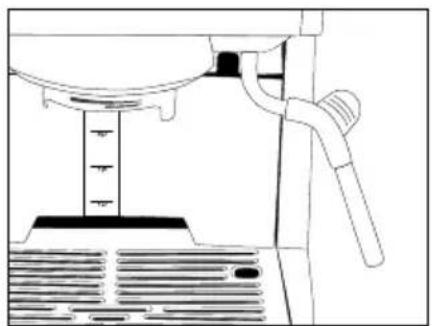
Technical line drawing of a machine tool with measurement markings (no text or symbols)natural_image
Line drawing of a kitchen appliance with handle and ventilation grille (no text or symbols)text_image
Technical diagram showing a washing machine with water level indicators and a glass of liquid, likely for a kitchen or appliance inspection.natural_image
Line drawing of a hand pouring liquid into a cup using a washing machine (no text or symbols)natural_image
Line drawing of a coffee maker with a hand pouring milk from a cup (no text or symbols)text_image
Diagram of a washing machine control panel with labeled buttons and dial indicatornatural_image
Line drawing of a washing machine with control knobs and a side-mounted stand (no text or symbols)natural_image
Line drawing of a kitchen mixer with control panel and cloth (no text or symbols)natural_image
Line drawing of a coffee maker with a lever and cup (no text or symbols)text_image
STANLEY 0natural_image
Exploded view diagram of a mechanical component showing layered structure (no text or symbols)natural_image
Line drawing of a hand using a tool to press or install a rectangular box (no text or symbols visible)natural_image
Line drawing of a laboratory setup with a beaker and a control panel (no text or symbols)text_image
STAGGY 8/13 0 6 5/13natural_image
Line drawing of a laboratory setup with a beaker and a stand (no text or symbols)natural_image
Line drawing of a laboratory setup with a container and a pressure vessel (no text or symbols)natural_image
Simple circular arrow symbol pointing right, no text or labels presentnatural_image
Line drawing of a hand holding a box with a tool, no text or symbols presentnatural_image
Line drawing of a mechanical assembly with a tool inserted into a rectangular block (no text or symbols)natural_image
Line drawing of a hand using a tool to adjust or install a rectangular box (no text or symbols present)natural_image
Technical line drawing of a mechanical device with a cylindrical component mounted on a base, no visible text or symbols.natural_image
Simple line drawing of a laboratory setup with a beaker and a pipette pouring liquid from a bottle (no text or symbols)text_image
STANDARD B1/3 0 G B1/3natural_image
Line drawing of a hand using a tool to adjust or install a rectangular box (no text or symbols present)natural_image
Line drawing of a mechanical assembly or tool interacting with a rectangular block (no text or symbols)natural_image
Line drawing of a hand inserting a component into a box, with no visible text or symbolsnatural_image
Illustration of a hand holding a mechanical component with a cylindrical component inserted (no text or symbols)text_image
Diagram showing a hand holding a circular object next to a labeled box labeled 'GRAEE' with Chinese text.natural_image
Diagram of a hand operating a sewing machine with an upward arrow indicating motion (no text or symbols present)natural_image
Line drawing of a mechanical device with a bucket and support structure (no text or symbols)natural_image
Simple line drawing of a mortar and pestle in a beaker with liquid, no text or symbols presentnatural_image
Line drawing of a hand using a tool to adjust or install a rectangular box (no text or symbols present)natural_image
Line drawing of a mechanical assembly or mounting bracket with a tool inserted (no text or symbols)natural_image
Hand holding a button on a ventilation grille inside a device (no text or symbols visible)natural_image
Line drawing of a hand holding a small object near a window (no text or symbols)natural_image
Line drawing of a hand using a tool to press or inspect a circular object with horizontal lines (no text or symbols)natural_image
Technical line drawing of a mechanical device with a textured base and measurement scale (no text or symbols)natural_image
Line drawing of a hand using a tool to press or install a machine component (no text or symbols visible)Enjoying is more than just having a cup of coffee! 29
Espresso specialities....30
Safety instructions....31
Unpacking....33
Requirements on the installation location....33
Product description 34
Scope of delivery 34
Filter inserts 35
Double-walled filter inserts 35
Pad filter insert 35
Prior to first use....35
Water level indicator 35
Initial operation 35
Venting 35
Preparation....36
Espresso preparation....37
Preparation of coffee using pads....39
Automatic switching off 40
Milk frother with Pannarello....40
Hot water withdrawal 41
Cup warm 42
Descaling....42
Cleaning....46
Cleaning the brewing unit 46
External cleaning 48
Cleaning tools 48
Technical data....49
After-sales service....49
Accessories 49
Disposal....51
2 year warranty ....51
PREFACE
Dear Customer,
You have made a good choice by buying this espresso machine. You have purchased a recognised quality product.
We would like to thank you for buying this machine and wish you a lot of fun with your new Graef espresso machine.
ENJOYING IS MORE THAN JUST HAVING A CUP OF COFFEE!
The development of espresso technology, which is used in the Graef group handle espresso machines, dates back to the year 1901. Finely ground coffee grounds are extracted in the machine under high pressure (about 9 bar) in approx. 23 seconds. In case of group handle espresso machines, the removable group handle is manually filled with coffee grounds and then pressed into the filter insert of the group handle - a process which is called "Tamping".
To prepare a good espresso, the 4-M formula is a good starting point.
-
The Mixture (Miscela) - Selection of coffee beans.
-
The Mill (Macinacaffè) - A good mill by means of which coffee is always freshly ground, such as the Graef coffee grinders CM 702, CM 800, CM 802 or CM 900.
-
The Machine (Macchina) - A good device which generates optimal water pressure.
-
Made by human hand (Mano) - Due to manual operation, espresso is prepared and coordinated with the 3 other factors.
ESPRESSO SPECIALITIES
Espresso is the basis for a lot of different espresso variants. We would like to introduce you to the best known ones.

text_image
EspressoRistretto
- The same amount of coffee as with an espresso, but half the quantity of water.

text_image
EspressoLungo
- The same amount of coffee as with an espresso, but double quantity of water.
text_image
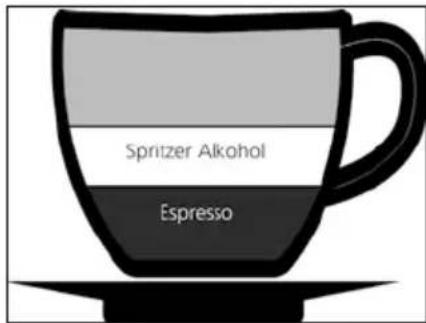
Spritzer Alkohol EspressoCorretto
- Espresso lengthened with a dash of alcohol, e.g. Grappa, Amaretto, Brandy etc.

natural_image
Silhouette of a coffee cup with 'Espresso' text on the side (no other symbols or text)Doppio
- Double espresso with double quantity of coffee and water.
text_image
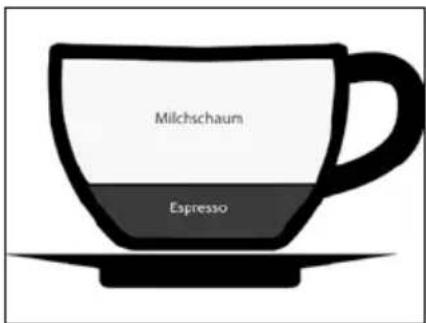
Milchschaum EspressoMacchiato
• An espresso with a milk froth dome.
text_image
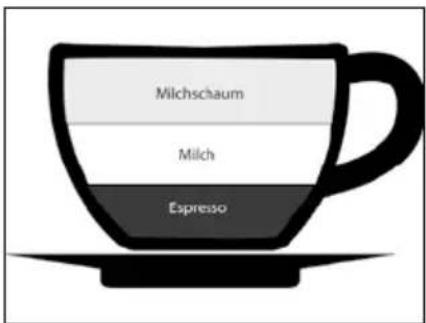
Milchschaum Milch EspressoCappuccino
• An espresso with frothy milk.
text_image
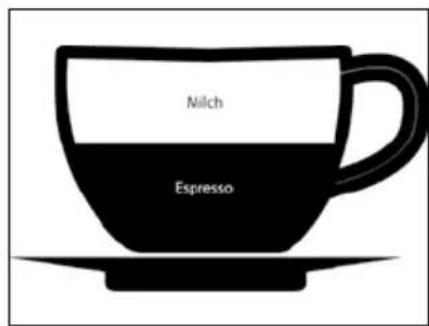
Milch EspressoCaffé Latte
• A double espresso with hot milk.
text_image
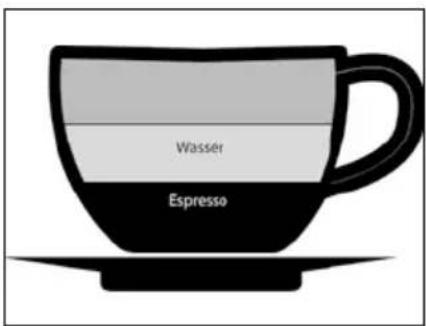
Wasser EspressoCaffé Americano
- An espresso filled up with the same or double quantity of water.
text_image
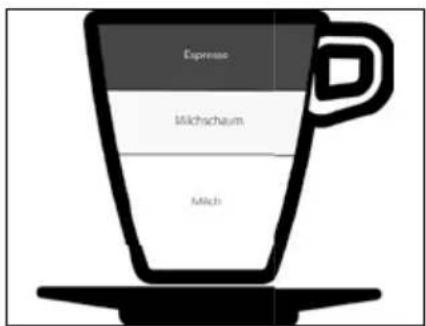
Express Milchschaum MilkLatte Macchiato
• 2/3 hot milk, 1/3 milk froth and finally one espresso.
SAFETY INSTRUCTIONS
This device conforms to the relevant safety regulations. However, incorrect handling may lead to injury and damage.
For safe handling of the device, please observe the following safety instructions:
- Before using the unit check for any external visible damage of the housing, the connection cable and plug. Do not operate a damaged unit.
- Repairs of the device, e.g. replacing a damaged supply cable, must be carried out exclusively by a skilled person or by the Graef customer service. Incorrect repairs may cause considerable hazards for the user. In addition, any claim under guarantee is forfeited.
- Defective parts must be replaced by original spare parts only. It is only with these parts that the safety requirements are met.
- This appliance can also be used by children from 8 years age as well as by persons with limited physical, sensory or mental ability or with a lack of experience and/or knowledge if they are supervised or have been trained in using the appliance and have understood the dangers which may result from it. Cleaning and user maintenance must not be carried out by children, unless they are 8 years or older and are supervised.
- This appliance and its supply cable have to be kept away from children under the age of 8 years, and it has to be ensured that children do not play with the appliance.
- The unit is not intended to be used with an external timer or a separate remove control.
- This unit is suitable for use in the household and for similar applications, for example in workers kitchens, in shops and offices, in agricultural farms, in hotels, motels and other bed and breakfast guest houses and institutions.
- Always disconnect the connection cable by using plug; do not pull the connecting cable.
- Prior to connecting the unit, compare the details regarding
voltage and frequency on the name plate with those of your electrical network. These details must correspond so that no damages occur to the unit.
- Do not use the appliance if the mains cable or plug are damaged.
- Prior to using the appliance any further, have a new connection cable installed by the Graef customer service or by an authorised skilled person.
- Do not open the housing under any circumstances. If live connections are touched or the electrical and mechanical construction are modified, there is the danger of electric shock.
- Never touch live parts. This might cause an electric shock or, in the worst case, lead to death.
- Never carry the unit by its power cable.
- Never transport the appliance while it is in operation.
- Never touch the plug with moist hands.
- Packaging materials must not be used for playing. There is a danger of suffocation.
- Observe the notes on the requirements regarding the installation location and the electrical connection of the unit in order to avoid personal and material damages.
- While water is running through the machine, never remove the group handle filled with coffee grounds, because it is under pressure.
- Use the appliance only if the drip tray and collection tray are properly positioned.
- Do not misuse the espresso coffee maker other than it's intended use in order to avoid potential injury.
• Heating element surface is subject to residual heat after use.
- Before preparing espresso, check to see that the group handle is tightened firmly.
- Pull the mains plug before each cleaning process.
- Before carrying out external cleaning, allow the appliance to cool.
- For external cleaning, do not use any aggressive or abrasive
detergents and solving agents.
- Do not scratch off stubborn soiling with hard objects.
- Do not put the unit in the dishwasher and do not use it under running water.
- Do not immerse the unit in water.
- To froth milk, only use a milk jug or an other larger vessel. Do not use a cup. Excessive foaming milk may lead to burns.
- Never direct the steam distributor to yourself or other persons. DANGER OF BURNS!
- Always use the handle to move the steam distributor. After use, do not touch the pipe of the steam distributor. It becomes very hot.

urfaces are liable to get hot during use.
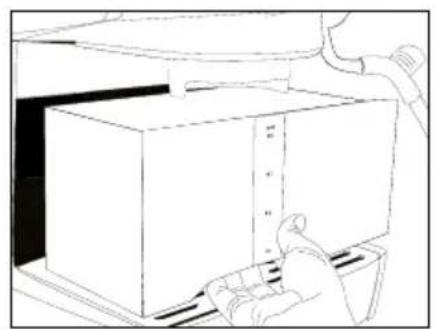
UNPACKING
When unpacking the unit, proceed as follows:
- Pull the unit out of the cardboard box.
- Remove all packaging and possible stickers on the unit (do not remove the name plate).
REQUIREMENTS ON THE INSTALLATION LOCATION
For safe and fault-free operation of the unit, the following has to observed during installation:
- Use a firm, even, horizontal, non-slip and heat resistant surface with a sufficient load capacity.
- Select an installation location in such a way that children cannot reach any hot surfaces of the unit.
- The unit is not designed for installation in a wall or a built-in cupboard.
- Do not set up the unit in a hot, wet or moist environment.
- The power outlet must be easily accessible so that the power cable can be quickly removed in case of emergency.
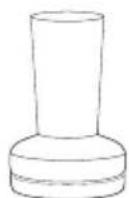
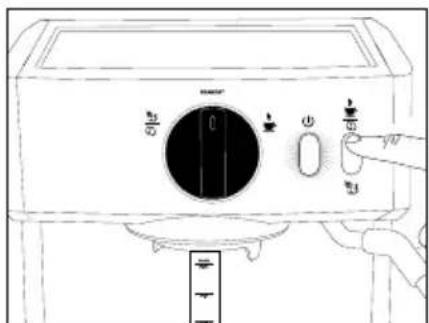
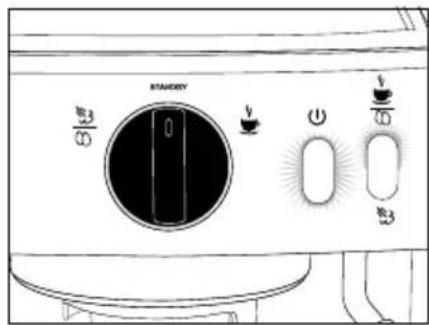
PRODUCT DESCRIPTION
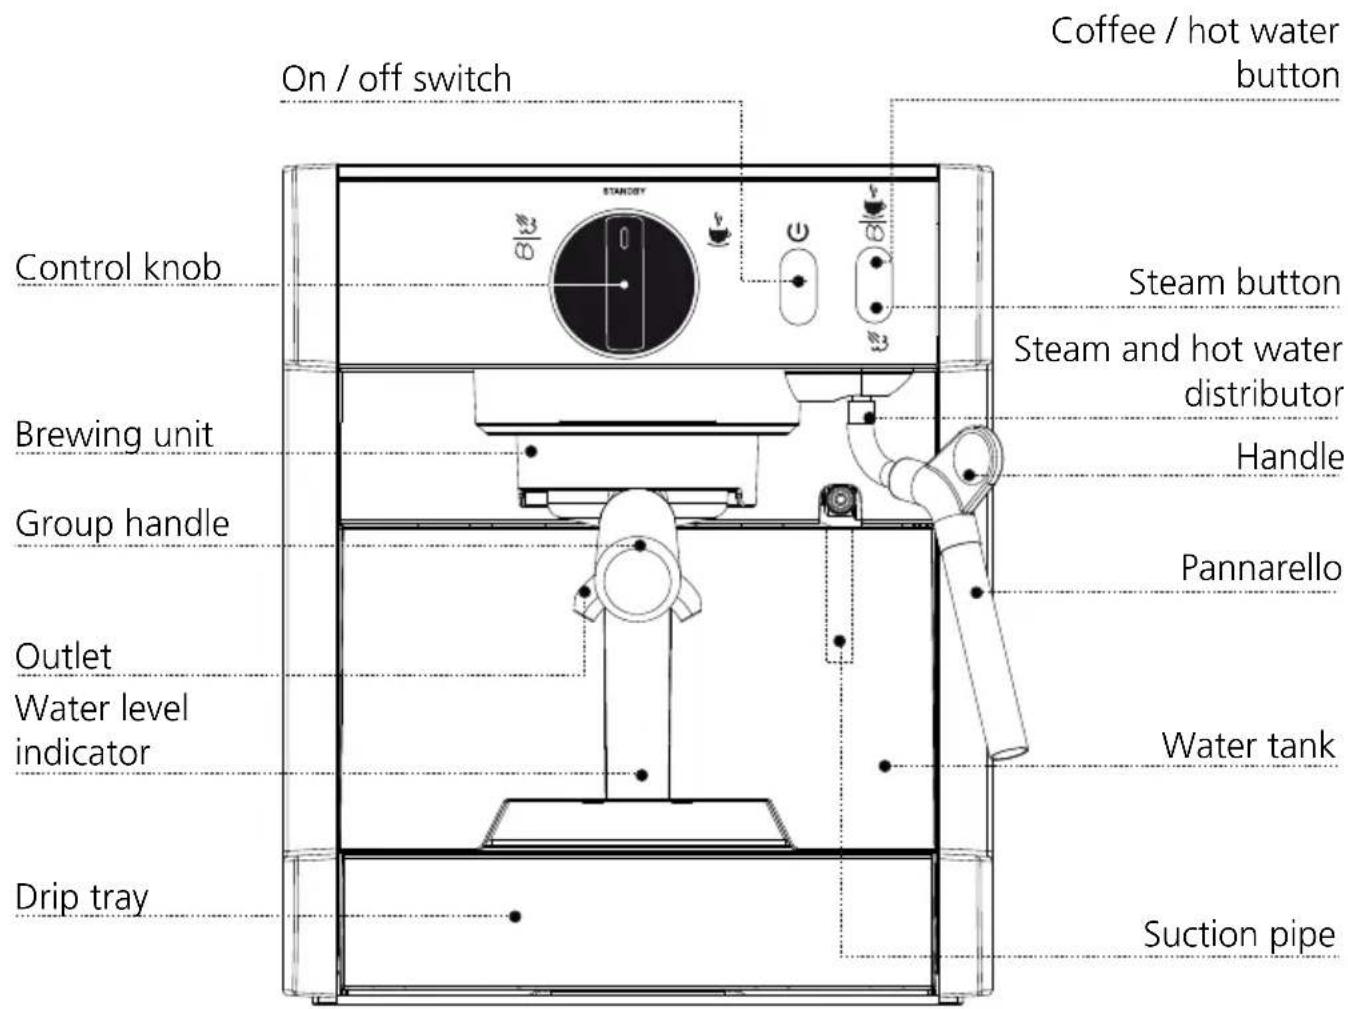
text_image
On / off switch Coffee / hot water button Control knob Steam button Brewing unit Steam and hot water distributor Handle Group handle Pannarello Outlet Water level indicator Water tank Drip tray Suction pipeSCOPE OF DELIVERY
Double-walled filter insert for 1 cups
Double-walled filter insert for 2 cups
Pad filter insert
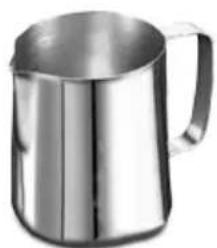
Milk jug
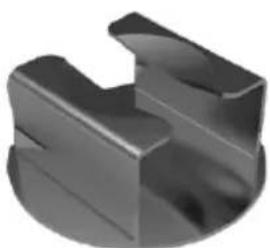
Group handle
Tamper
Cleaning tool

natural_image
Line drawing of a single cup with a long handle (no text or symbols)Spoon
FILTER INSERTS
DOUBLE-WALLED FILTER INSERTS
1 cup
natural_image
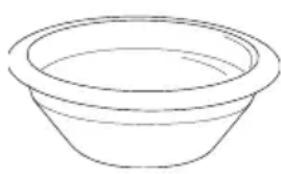
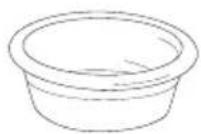
Simple line drawing of a bowl (no text or symbols)2 cups
natural_image
Simple line drawing of a bowl or basin (no text or symbols)These filter inserts facilitate the preparation of espresso, ensuring an espresso with perfect cream. We recommend to basically use freshly ground coffee. The double walled filter insert for 2 cups can be used also for Cappuccino / hot chocolate pads or for 2 commercial pads for 2
cups of coffee.
PAD FILTER INSERT
With the pad filter insert, you can also use commercial pads for the preparation of one cup of coffee.
PRIOR TO FIRST USE
Prior to first use, clean the group handle (not the unit) and the water tank under running water so that potential production residues are removed.
WATER LEVEL INDICATOR
A signal tone sounds if there is not enough water in the tank any more. You can still proceed with the started withdrawal, but you must fill in new water after that.
INITIAL OPERATION
Note: Vent the unit prior to initial commissioning or after you have not used the unit for a long period of time. Do not insert the group handle for venting.
VENTING
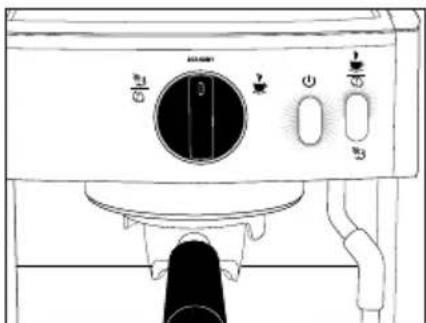
- Insert the plug into the socket.
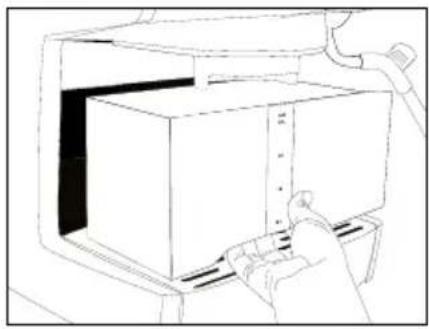
natural_image
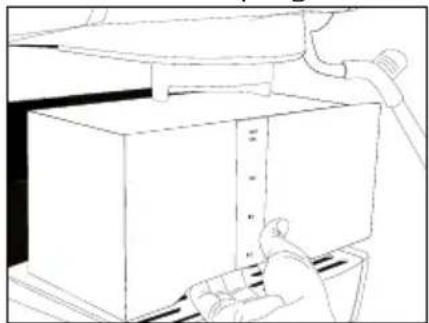
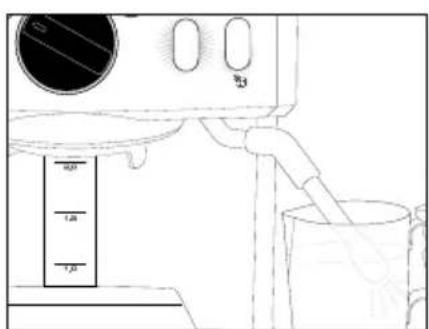
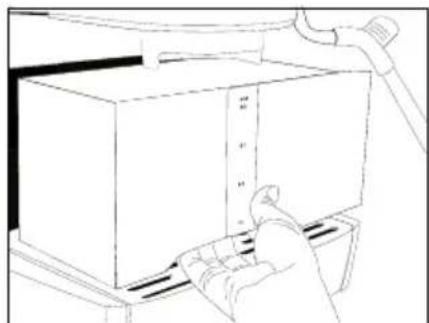
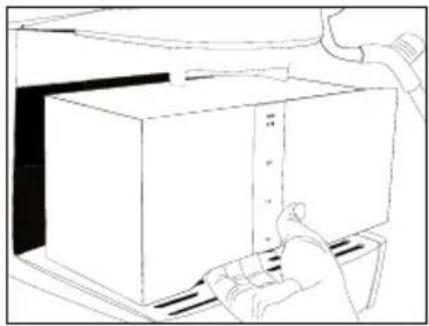
Line drawing of a hand using a tool to press a rectangular box (no text or symbols)- Remove the water tank.
natural_image
Simple line drawing of a mechanical device with a lever and base (no text or symbols)- Fill the water tank with fresh water and re-insert it.
text_image
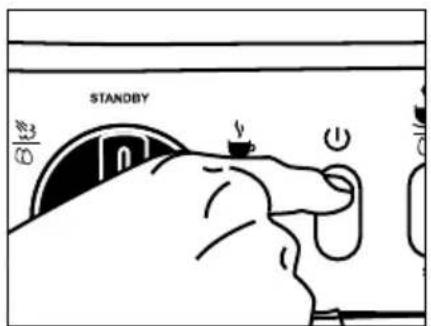
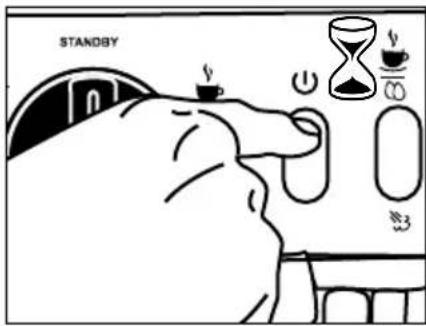
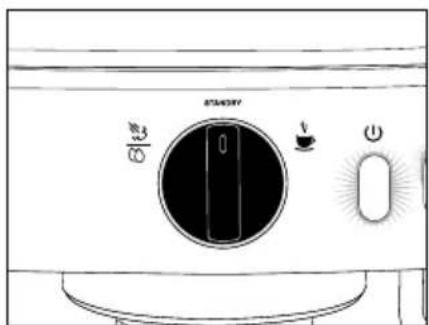
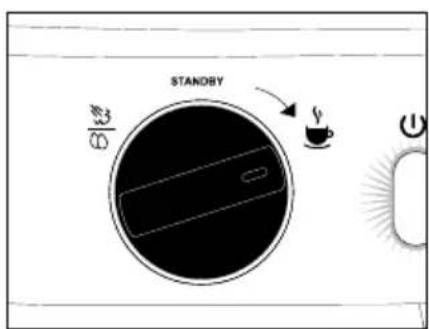
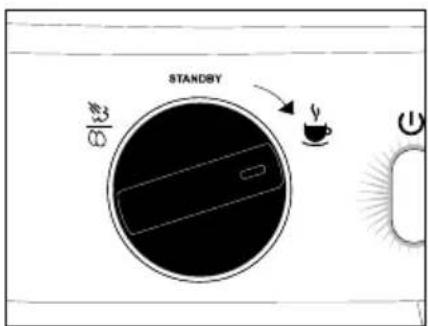
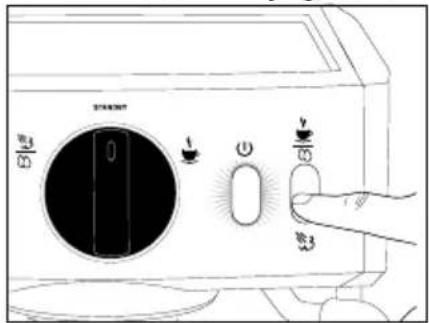
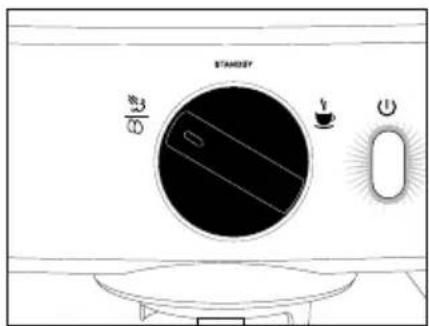
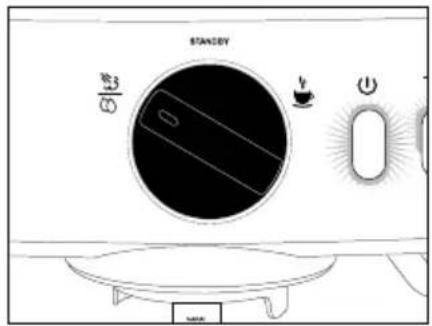
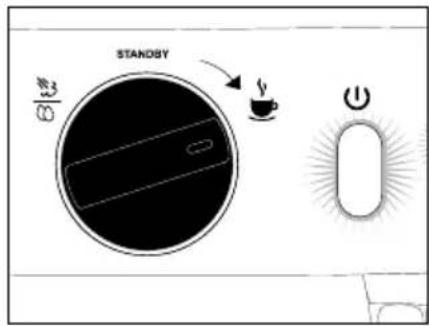
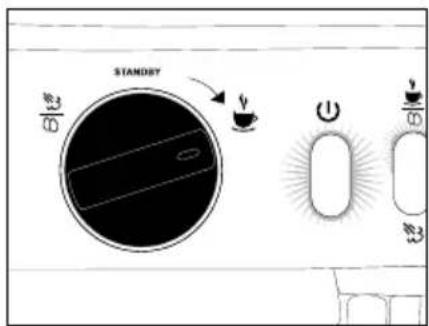
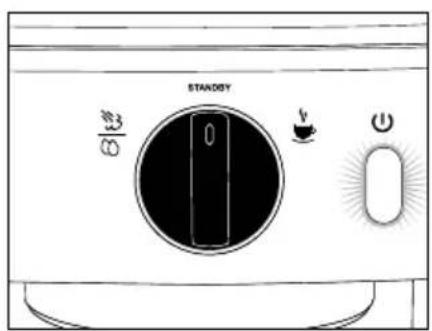
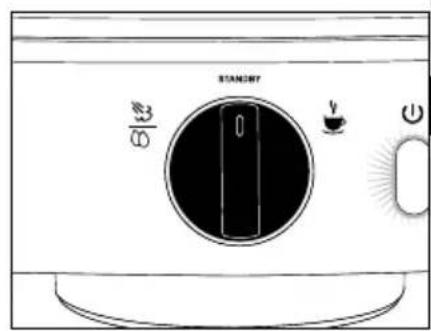
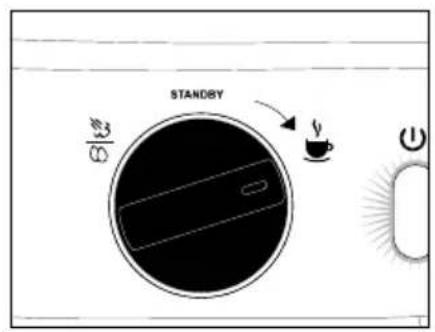
STANDBY- Press the ON/OFF-button ⏻, the buttons will flash.
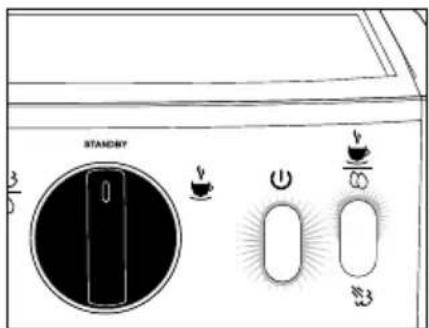
text_image
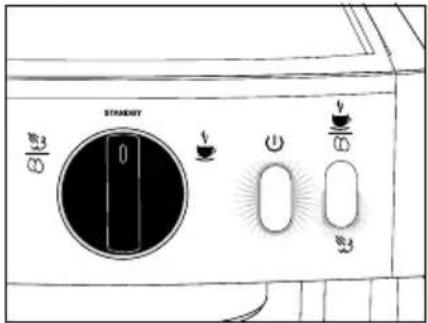
STANDBY 0 3/5 ← ← ← 0 3/5• If the button illuminates
text_image
1.0mm 2.5m 4.0m 7.0m 9.0m- Put one cup or glass under the steam distributor.
text_image
ON/OFF 1/3 2 3 4- Turn the control knob to 310 , the process will start.
⑪ and red and do not flash any more, the unit is heated up and ready.
natural_image
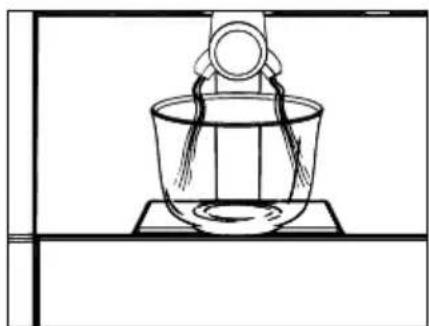
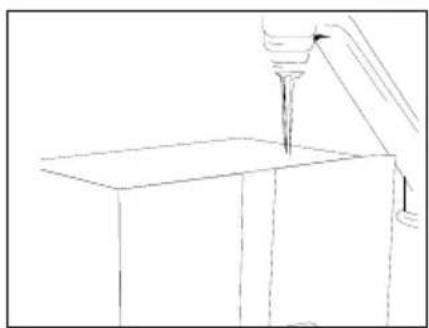
Pure technical line drawing of a mechanical assembly without any text, numbers, or symbols- Let the air escape until a constant water jet runs through.
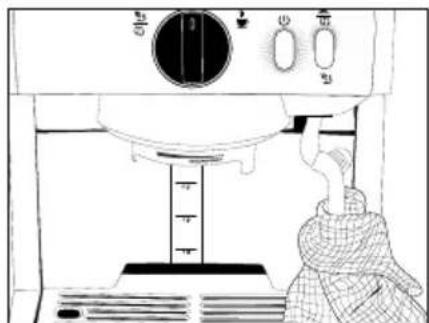
PREPARATION
Note: After switching the unit back on again, carry out an empty withdrawal as described below in order to bring the system to temperature.
natural_image
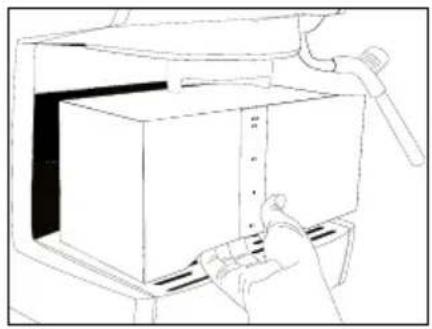
Line drawing of a hand using a tool to press or install a rectangular box (no text or symbols visible)- Remove the water tank.
natural_image
Line drawing of a mechanical device with a lever and handle, no text or symbols present- Fill the water tank with water and re-insert it.
natural_image
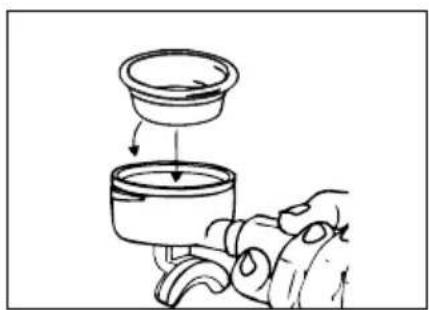
Illustration of a hand pouring liquid into a container with a lid, showing mechanical components (no text or symbols)- Insert the desired filter insert.
natural_image
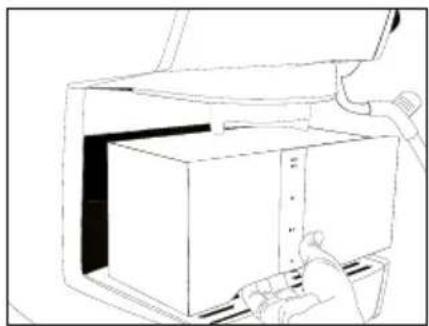
Diagram of a kitchen sink with a valve and piping (no text or symbols)- Put in the group handle without coffee grounds (from left to right).
text_image
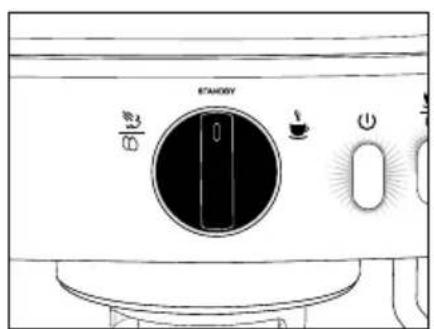
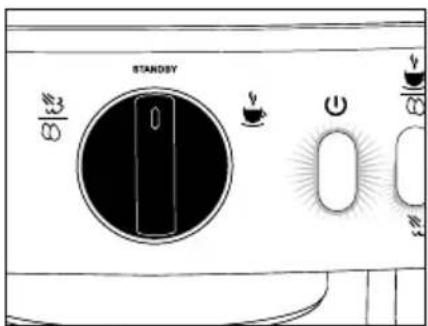
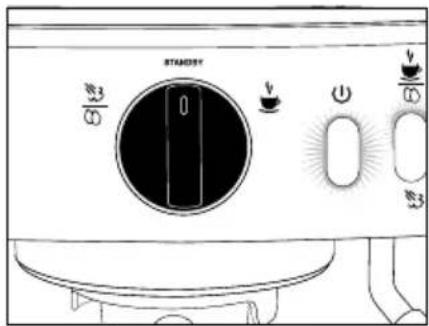
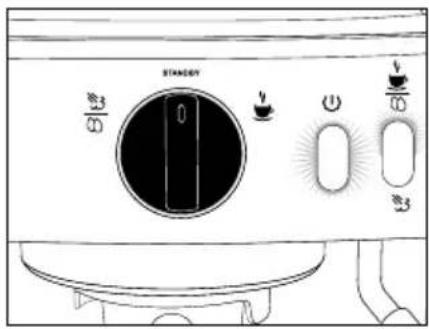
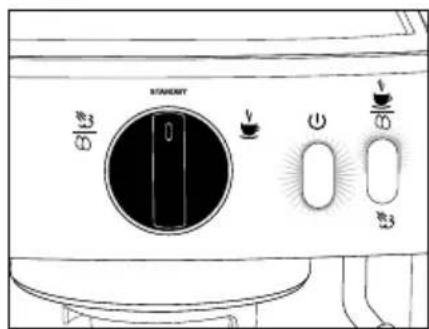
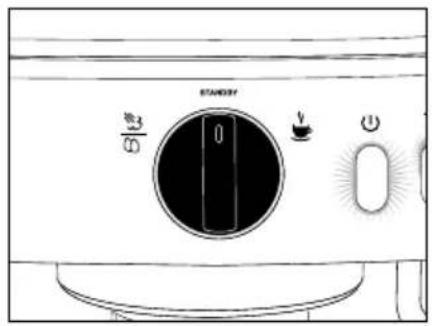
STANDBY- Switch the unit on. The lamps are flashing with the unit heating up.
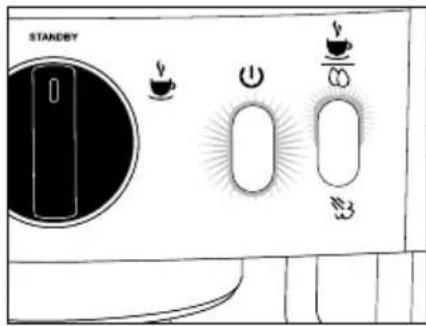
text_image
STANDBY 0 + - 3- When the buttons illuminate after that, the unit is ready for operation.
natural_image
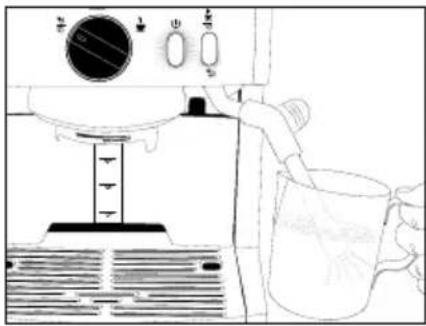
Line drawing of a kitchen appliance with a bucket and a hand operating the counter (no text or symbols)- Put a cup below the outlet.
text_image
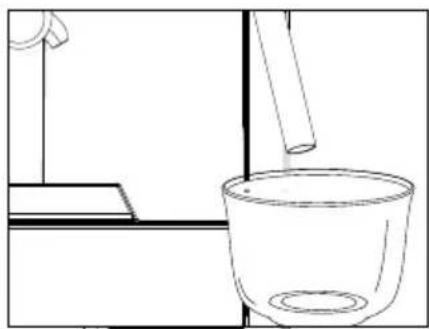
STANDBY B/4- Turn on the control knob 🤨 and start an empty withdrawal (without coffee grounds).
natural_image
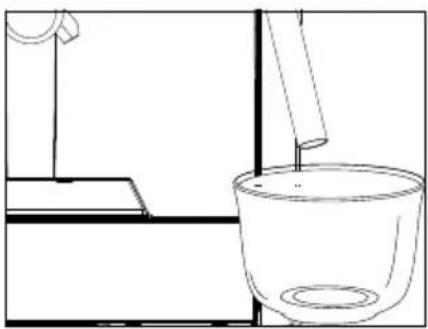
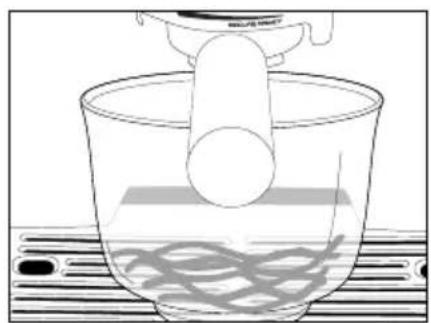
Simple line drawing of a laboratory apparatus with a beaker and stand (no text or symbols)- Allow the cup to be filled half in order to bring the system to temperature.
text_image
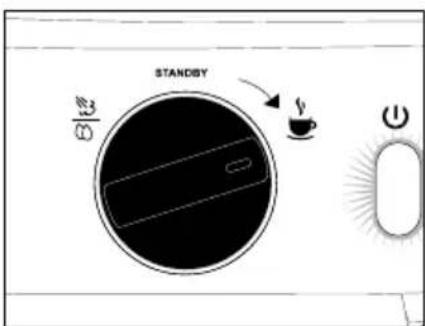
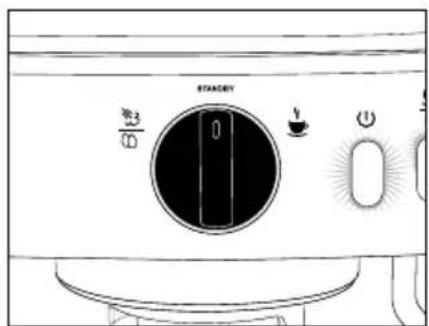
0 0 0 0 0 0 0 0 0 0 0 0 0 0 0 0 0 0 0 0 0 0 0 0 0 0 0 0 0 0 0 0 0 0 0 0 0 0 0 0 0 0 0 0 0 0 0 0 0 0 0- Then turn the control knob back to "STAND-BY" again.
ESPRESSO PREPARATION
Note: See under preparation in order to warm up the group handle, system and cups. After that, start preparing espresso.

natural_image
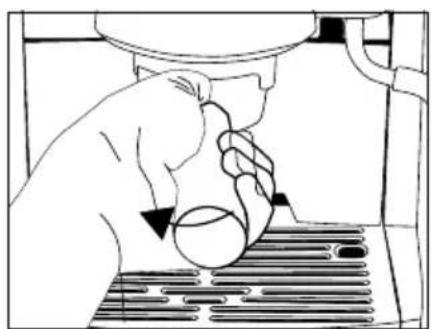
Line drawing of a hand cleaning a pipe with a hook (no text or symbols)- Dry the group handle after preparation.

natural_image
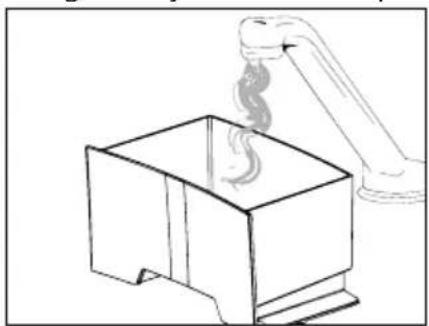
Line drawing of a hand pouring liquid into a microscope (no text or symbols)- Grind the coffee grounds in the group handle (until the filter is full).

natural_image
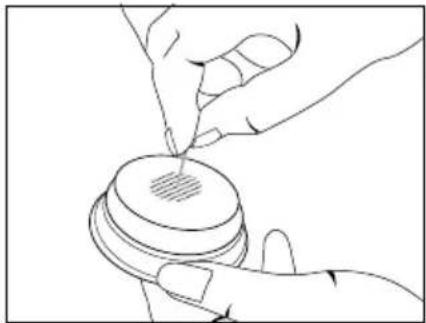
Line drawing of hands performing a manual task with a cup and tool (no text or symbols)- Firmly press on the coffee grounds using the enclosed tamper.
text_image
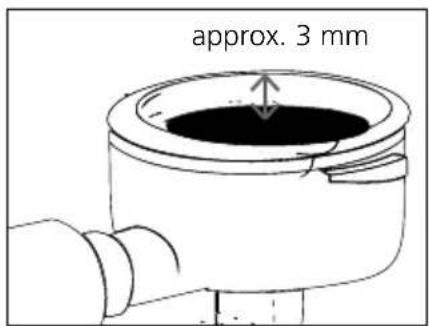
approx. 3 mm- The distance between the upper edge and the coffee grounds should be approx. 3 mm.
natural_image
Diagram of a kitchen sink with pipe fittings and a valve, showing mechanical components without any text or symbols.- Wipe off excessive coffee grounds from the edge and clamp in the group handle.
natural_image
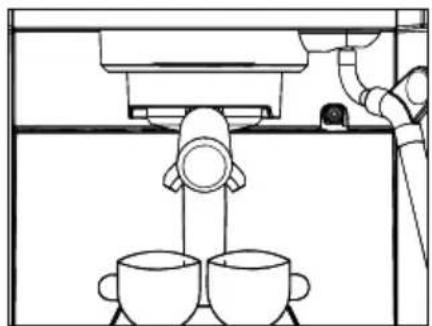
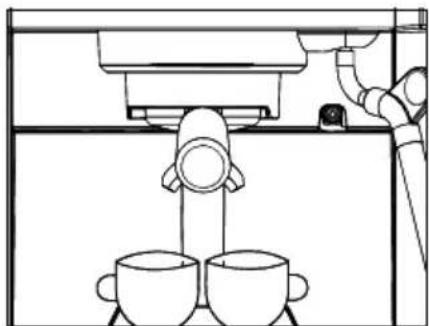
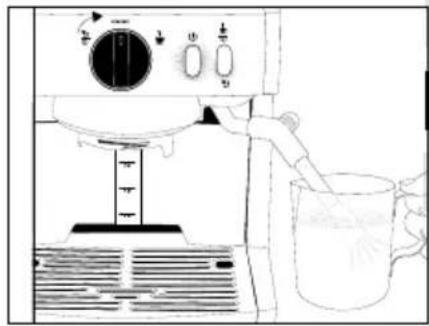
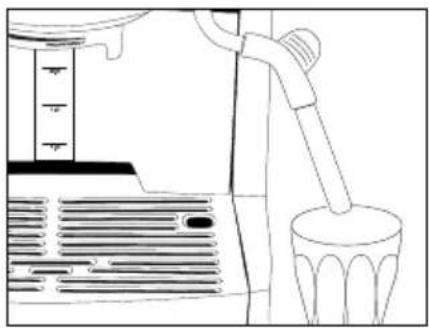
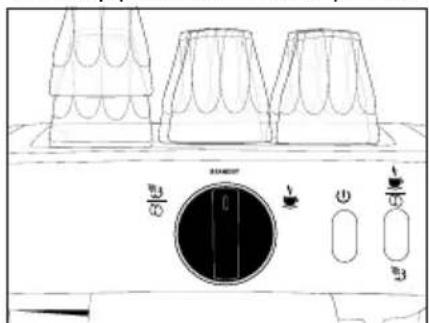
Line drawing of a coffee machine with two cups and a coffee cup, no text or symbols present- Put the cups or one cup underneath the outlet.
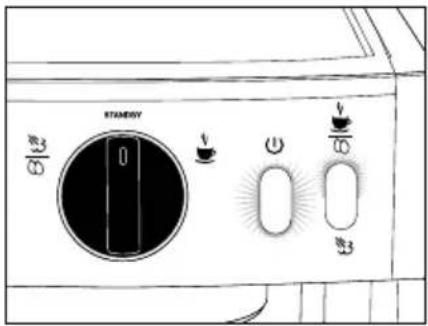
text_image
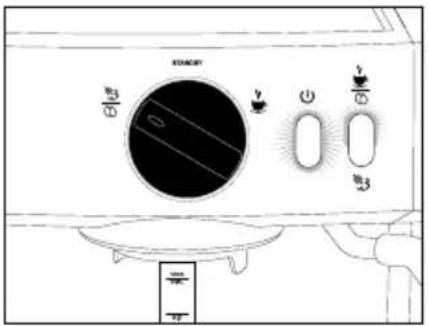
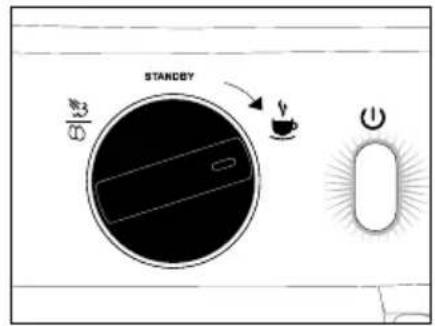
STANDBY 3/8- Turn the control knob to 🍼.
text_image
B1/2 STANDOY 0• After reaching the desired quantity of coffee, turn the control knob back to "STANDBY" again.
natural_image
Line drawing of a hand using a tool to press or install a component on a surface (no text or symbols)- Remove the group handle.

natural_image
Line drawing of a hand pouring liquid from a pot into a container (no text or symbols)- Remove the coffee grounds into a used coffee tray (not included in the scope of delivery).
natural_image
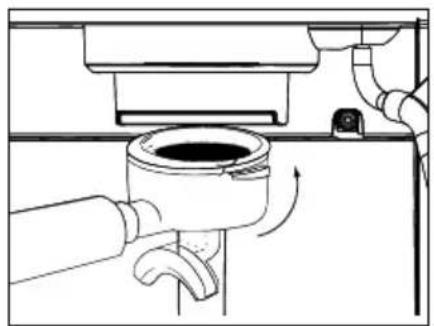
Line drawing of hands using a lathe machine to press or install a tray (no text or symbols visible)• To clean, hold the group handle underneath the brewing unit and briefly let water run through.
PREPARATION OF COFFEE USING PADS
Put the filter insert for pads into the group handle.
Note: See under preparation in order to warm up the group handle, system and cups. After that, start with the pad.
natural_image
Line drawing of a hand using a tool to adjust or install a mechanical component (no text or symbols present)- Dry the group handle after preparation.
natural_image
Diagram of a mechanical component with a downward arrow indicating force or direction (no text or symbols)- Insert the pad into the Clamp in the group filter insert. handle.
natural_image
Diagram of a mechanical device with a rotating component and directional arrows indicating motion (no text or symbols)- Clamp in the group handle.
natural_image
Line drawing of a coffee machine with two cups and a coffee cup, no text or symbols present- Put the cups or one cup underneath the outlet.
text_image
STANDBY 3/8- Turn the control knob to 🍒.
text_image
STANDARD 0• After reaching the desired quantity of coffee, turn the control knob back to "STANDBY" again.
natural_image
Line drawing of a hand using a tool to press or install a component, with no visible text or symbols.- Remove the group handle.
natural_image
Line drawing of a hand pouring liquid into a cooking pot (no text or symbols)- Remove the used pad into a used coffee tray (not included in the scope of delivery).
natural_image
Line drawing of hands using a lathe machine to press or install a component, with no visible text or symbols.- Hold the group handle underneath the brewing unit and briefly let water run through.
AUTOMATIC SWITCHING OFF
If the unit is not used for about 20 minutes, it will automatically switch off in order to save energy. (Regulation of the EU commission).
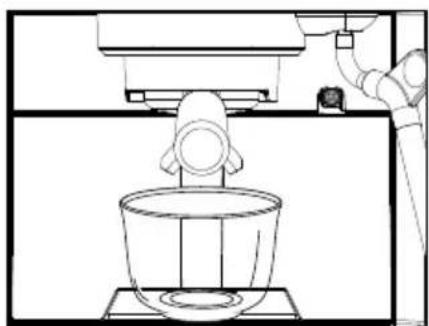
MILK FROTHER WITH PANNARELLO
If the unit is switched off, switch it back on again ⏻
• Fill the milk jug to 1/3 of cold milk.
text_image
B 0 G G W- Press the
3 button. It is flashing, with the system heating up.
text_image
STANDARD B/3 0 G B S- If the
3 button illuminates, the system is ready for operation.
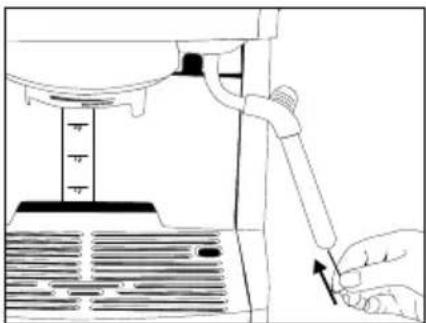
natural_image
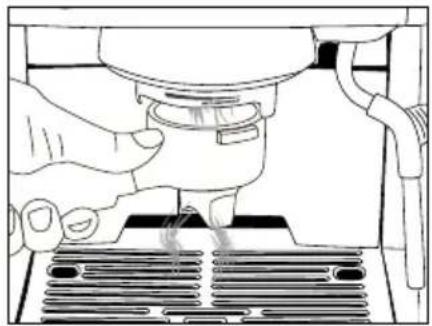
Technical line drawing of a mechanical device with a lever and base plate (no text or symbols)- Hold the steam distributor toward the drain cover.
text_image
STANDEY 6.5 10• Turn the control knob to
310 , and let the con- densation water escape.
text_image
STANDSY 8/13 0 E 8/13- After the condensation water has escaped, turn the control knob back to "STANDBY" again.
natural_image
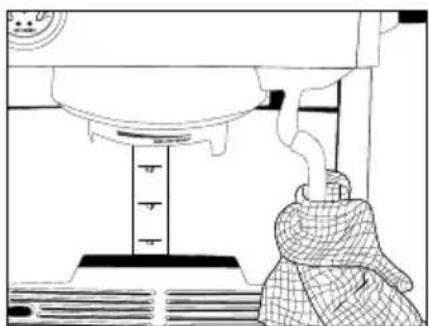
Technical line drawing of a mechanical device with no visible text or symbols- Swivel the steam distributor outward.
text_image
Technical diagram of a washing machine with labeled parts and volume indicators- Now immerse the steam distributor into the milk and turn the control knob to 310 . The milk is frothed up.
natural_image
Line drawing of a hand pouring liquid into a cup using a microwave oven (no text or symbols)- Hold the milk jug at a slight angle.
natural_image
Line drawing of a microwave oven with a glass pitcher pouring liquid from a side arm (no text or symbols)- Lower the milk jug, once the milk level is increasing, and turn the control knob to "STANDBY".
text_image
Diagram of a washing machine control panel with labeled buttons and dial indicator- After finishing the process, press the button again. Attention, steam evaporates.
natural_image
Line drawing of a washing machine with control panel and side buttons (no text or symbols)- If the button illuminates red, the unit is ready for preparing coffee again. Attention, steam will evaporate again after a short time.
natural_image
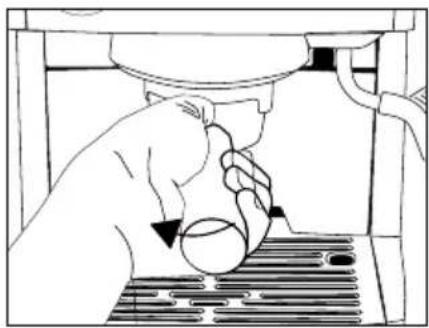
Line drawing of a kitchen mixer with control panel and cloth (no text or symbols)- Hold the steam distributor toward the drain cover and turn the control knob to 310 . Let water run through for a short time and clean the steam distributor using a cloth.
Please note: If the milk is heated up to more than 70^ C, the foam will simply collapse and the drink will later taste too sweet or even of burned milk.
HOT WATER WITHDRAWAL
If the unit is switched off, switch it back on again ⏻
natural_image
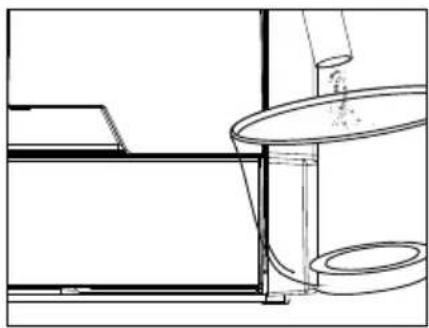
Line drawing of a kitchen utensil with a tool, no text or symbols present- Swivel the steam distributor outward and put a vessel underneath.
text_image
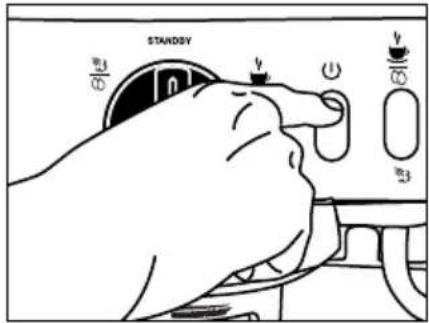
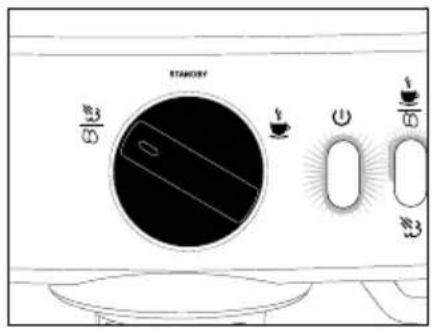
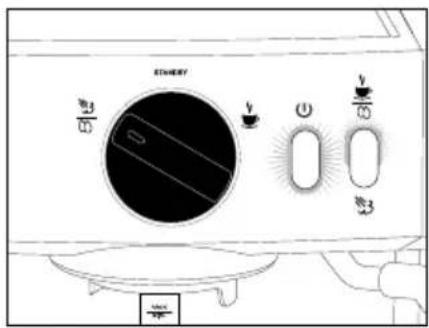
STANEOY 0 1/2 3 3- Check to see that the button illuminates
text_image
STANLEY 3 0 + - Power- Turn the control knob to 310 , the process will start.
text_image
STANDARD 3/8 0 0 0 0 0- After the process is completed, turn the control knob back to "STANDBY" again.
Note: Should you have used the steam function shortly before, first carry out an empty withdrawal of 1 espresso before preparing hot water.
CUP WARM
This appliance has a passiv cup warm function.
text_image
Technical diagram of a toaster front panel with labeled buttons and control knob- Place the cups on the top of the appliance. They get heated up.
DESCALING
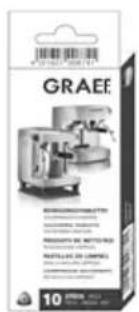
If you regularly decalcify the unit, this will increase the service life. Use only Graef descaling tablets which are especially matched to our appliances. You can obtain them from our online shop on haushalt.graef.de/shop under article number 145618.
We do not assume any liability for lack of or insufficient descaling. In this case, the warranty will become null and void.
- Remove the pannarello and unscrew the steam jet.
- Remove the group handle, the water reservoir and the drip tray.
- Turn the machine upside down.
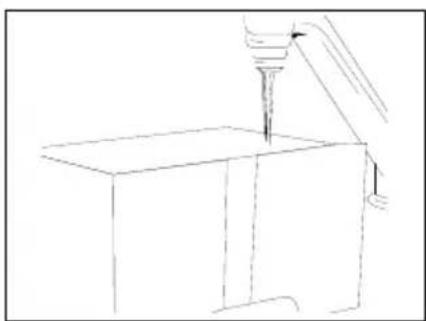
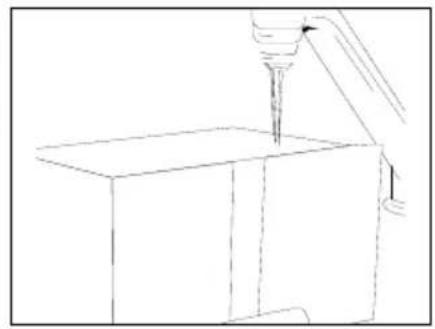
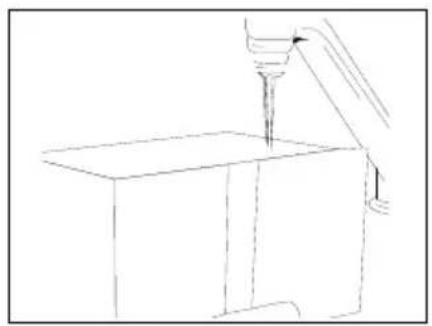
• Using a 2.5 hex-wrench, unscrew the shower screen from the brewing head.
- Remove the rubber seal.
- Wash the shower screen in hot soapy water, rinse and dry well.
- Set aside in a safe place with the screw and the rubber seal.
- Using a small brush, scrub in and around the area of the brewing head, removing all coffe granules.
• Turn the machine upright.
- Replace the drip tray
text_image
STANDSY- Switch the unit on.
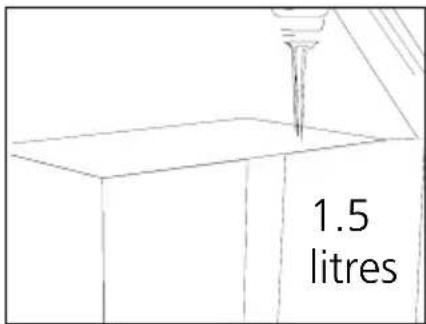
text_image
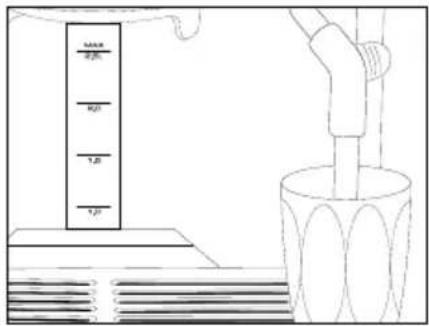
1.5 litres• Fill the Tank with approx. 1.5 litres of water.
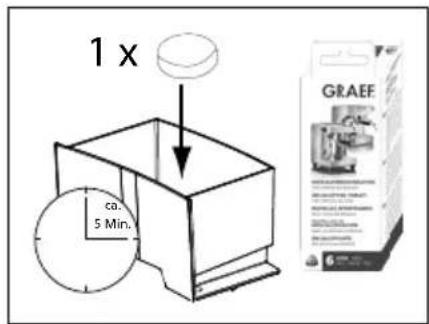
text_image
1 x ca. 5 Min.- Put one Graef descaling tablet into the tank and let it take effect until it has dissolved.
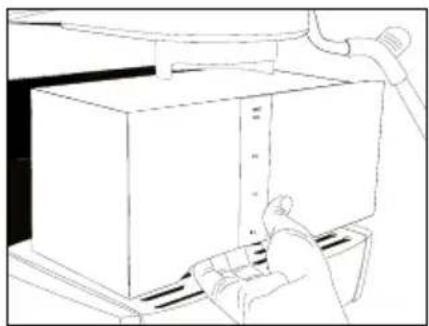
natural_image
Line drawing of a hand using a tool to adjust or install a rectangular box (no text or symbols visible)• Re-insert the water tank.
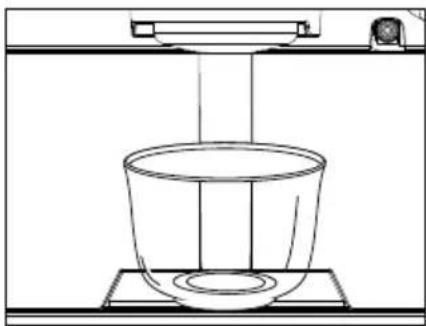
natural_image
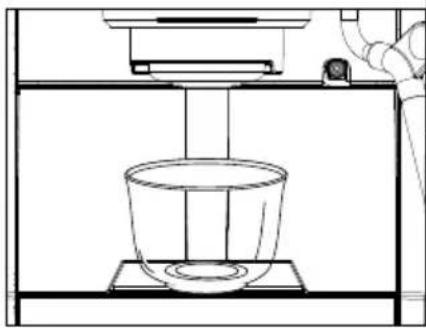
Line drawing of a laboratory setup with a beaker and a stand (no text or symbols)- Put a vessel underneath the brewing unit. Do not clamp in the group handle.
text_image
STANOGY E CO2- Turn the control knob to 🍼.
text_image
STANDARD 8/3 0 6 8/3- When the vessel is full, turn the control knob back to "STANDBY" again.
natural_image
Line drawing of a laboratory setup with a beaker and a stand (no text or symbols)• Empty the vessel and put it underneath the steam distributor.
text_image
STANOSY S G G- Turn the control knob to 310 .

text_image
STANDARD 3 5 0 1 2 3- After a couple of seconds, turn the control knob back to "STAND-BY".
natural_image
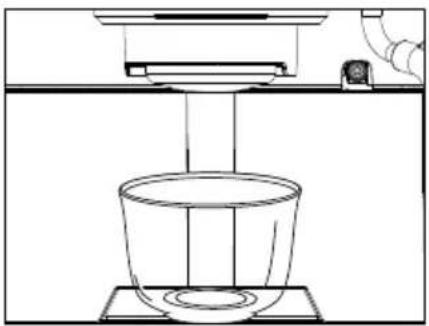
Line drawing of a mechanical device with a cup and base, no text or symbols present- Put a vessel underneath the brewing unit again.
text_image
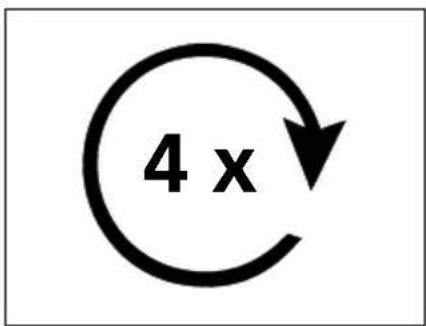
4 x• Alternately repeat the descaling process 4 times.
text_image
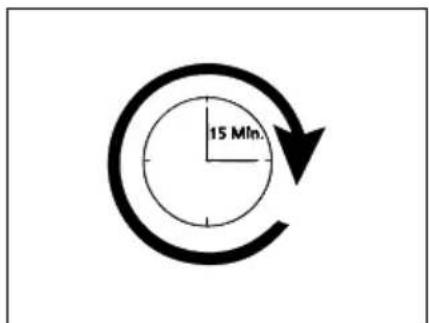
15 Mln.- Allow the mixture to take effect for 15 minutes.
natural_image
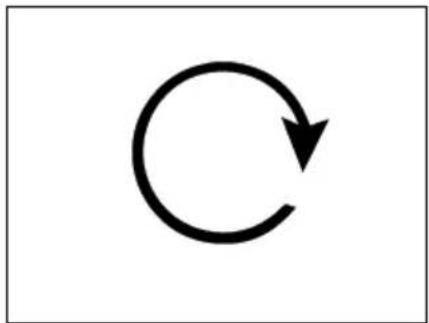
Simple circular arrow symbol pointing right, enclosed in a rectangular border (no text or labels)- Then repeat the descaling processes until the tank is empty.
natural_image
Line drawing of a hand holding a box with a ruler, no text or symbols present- Remove the water tank and pour away the remaining water.
natural_image
Simple line drawing of a mechanical component or tool interacting with a rectangular block (no text or symbols)- Fill the tank with fresh water.
natural_image
Line drawing of a hand using a tool to adjust or install a rectangular box (no text or symbols visible)• Re-insert the water tank.
natural_image
Line drawing of a laboratory setup with a beaker and control panel (no text or symbols)- Put a vessel underneath the brewing unit.
text_image
STANDRY 1/8 0 0 1/8 3/8- Turn the control knob to 🍒.
text_image
STANDARD B3 B3- When the vessel is full, turn the control knob back to "STANDBY" again.
natural_image
Simple line drawing of a laboratory setup with a beaker and a funnel pouring liquid from a bottle (no text or symbols)• Empty the vessel and put it underneath the steam distributor.
text_image
EIGHT 1/2 0 0 1/10 3- Turn the control knob to 380 .
text_image
STANDARD 8/3 0 6/3- After a couple of seconds, turn the control knob back to "STAND-BY".

text_image
OKLet the machine cool down, than replace the rubber seal, filter, and screw. Tighten well.
• After every descaling, also carry out a cleaning.
CLEANING
CLEANING THE BREWING UNIT
Only use Graef cleaning tablets which are especially matched to our appliances. You can obtain them from our online shop on haushalt.graef.de/shop under article number 145614.
natural_image
Line drawing of a hand inserting a component into a box (no text or symbols)- Remove the water tank.
natural_image
Line drawing of a mechanical device with a pointed tip and lever, no text or symbols present- Fill the water tank with approx. 1 litre of water.
natural_image
Line drawing of a hand using a tool to adjust or install a rectangular box (no text or symbols present)- Re-insert the water tank.
natural_image
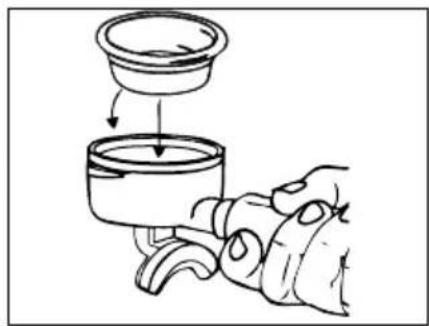
Illustration of a hand holding a cup with a lid above it, showing mechanical components (no text or symbols)- Insert the filter insert for 2 cups.
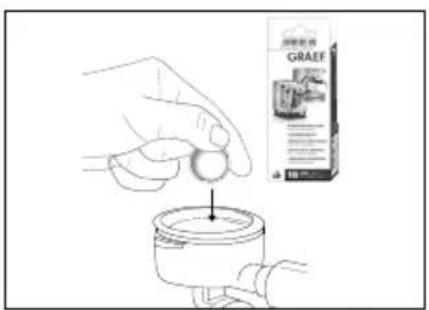
text_image
Illustration showing a hand holding a small object above a cylindrical container, with a product box labeled 'GRAEF' in the background.- Put a Graef cleaning tablet into the group handle.
natural_image
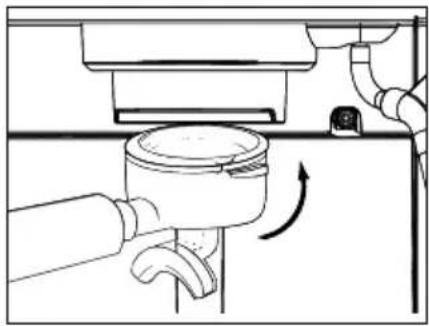
Line drawing of a hand using a sewing machine to press or install a button, with an upward arrow indicating motion (no text or symbols present)- Clamp in the group handle.
natural_image
Line drawing of a mechanical device with a bucket and housing (no text or symbols)- Put a cup below the outlet.

text_image
STANDBY 3/8 ↑ ↑- Turn the control knob to 🍼.
text_image
STANDBY 0 3 1/2- After 10 seconds, turn the control knob back to "STANDBY" again.
text_image
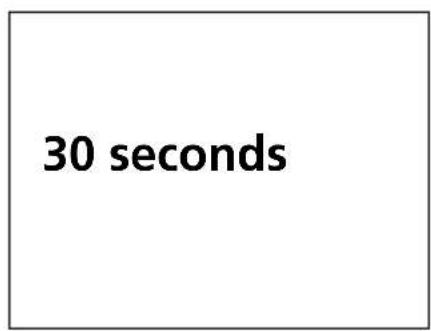
30 seconds- Wait for 30 seconds.
text_image
STANDBY S E I O- Turn the control knob to 🍼.
text_image
STANDARD 0 1/8• After 10 seconds, turn the control knob back to "STANDBY" again.
text_image
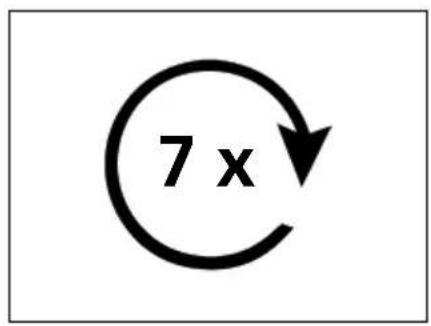
7 x- Repeat these processes 7 times.
text_image
STANDBY 3/8- Turn the control knob to 🍒.
text_image
Blu® STANDRY 0- After 30 seconds, turn the control knob back to "STANDBY". Ready! Now you can proceed as usual.
natural_image
Simple line drawing of a mortar and pestle in a glass bowl with liquid, no text or symbols present- Remove the cup and pour away the water.
natural_image
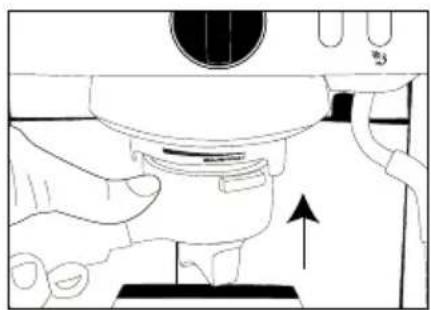
Line drawing of a hand operating a box with a ruler, no text or symbols present• Take out the group handle and remove the water tank.
natural_image
Line drawing of a mechanical assembly or mounting bracket with a tool inserted (no text or symbols)- Fill the water tank with fresh water and re-insert it.
EXTERNAL CLEANING
- Use a soft and moist cloth to clean the outer surfaces of the unit. Use a mild detergent in case of heavy soiling.
- Pull out the drip tray.
- Remove the drip plate.
• Empty the drip tray. - Clean both under running water.
- Then re-insert the drip tray and plate.
CLEANING TOOLS
natural_image
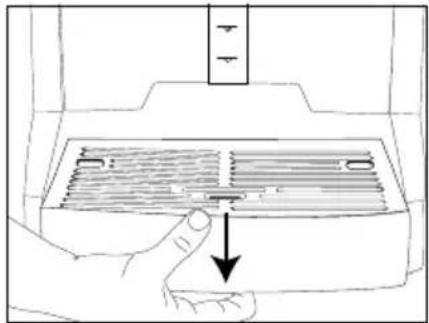
Hand pressing down on a grating device with a downward arrow indicating force or pressure (no text or symbols)- Remove the drip tray.
natural_image
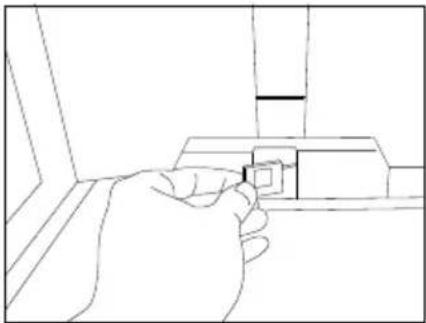
Line drawing of a hand holding a small object near a window (no text or symbols)- Remove the cleaning tool.
natural_image
Line drawing of a hand using a tool to press or inspect a circular object with horizontal lines (no text or symbols)- Using the thinner end of the cleaning tool, clean the holes of the filter inserts.
natural_image
Technical line drawing of a mechanical device with a textured base and measurement scale (no text or symbols)- Clean the steam distributor using a damp cloth.
natural_image
Line drawing of a hand using a tool to press or install a machine component (no text or symbols visible)- Using the thicker end of the cleaning tool, clean the pipe of the steam distributor.
GRAEF.
Art-Nr.: ES 702
230 V - 240 V \~ 1470 Watt - 1600 Watt
50 - 60 Hz
If your unit is defective, please contact your specialist dealer or the Graef customer service on +49 2932-9703688 or write an e-mail to service@graef.de
ACCESSORIES
Further accessories can be ordered in our online shop on haushalt.graef.de/shop or you can order it at your specialist dealer. You can also order some sorts of coffee in our online-shop.
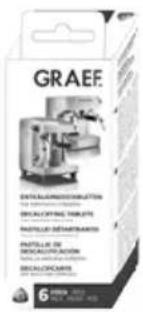
Descaling tablets, 6 pieces Article No. 145618
text_image
GRAEF DETROCALMATICISOLATION 10 mm/200mm x 500mm DECALORTINE TRAPUTE PAPITULO DETRAPHETICS HAPPLE DE DECALORTICUSION DESALCONARTS 6 REDER 2024 MINI 2024Cleaning tablets, 10 pieces Article No. 145614
text_image
GRAEF WATER FILTERS 10 L/minMilk jug Article No. 145627
natural_image
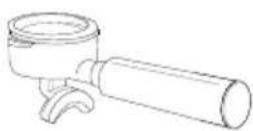
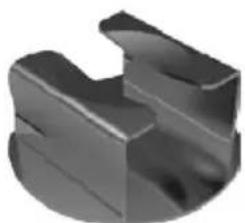
Metallic stainless steel pitcher with handle and spout (no text or symbols visible)Tamper station Article No. 145781
natural_image
3D rendered mechanical part with curved and angular features (no text or symbols)Used coffee tray (silver)Article No. 145612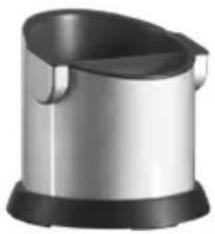 | single walled filter insertsArticle No. 145644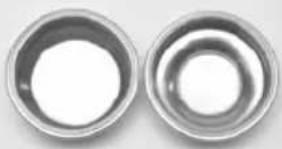 |
Cleaning brushArticle No. 13033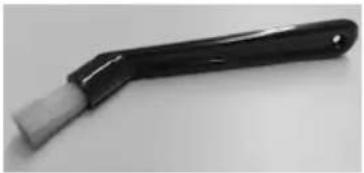 | Group handle with 1 outletArticle No. 145933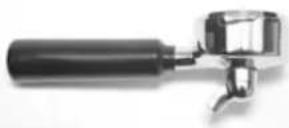 |
Filter insert for ESE PadsArticle No. 146203 | Group handle for capsule insertsArticle No. 146506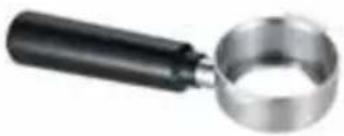 |
Capsule insert for Nescafé Dolce Gusto®*Article No. 146428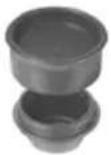 | Capsule insert for Tchibo Cafissimo*Article No. 146426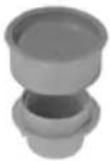 |
Capsule insert for Lavazza A Modo Mio*Article No. 146425 | Capsule insert for Nespresso®*Article No. 146427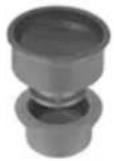 |

DISPOSAL
At the end of its service life, this product must not be disposed of with normal domestic waste, according to the symbol on the product and in the operation instructions. Reuse the materials according to their marking. By reusing, recycling or other applying other forms of use of old units, you render an important contribution to the protection of our environment. Please ask your municipal administration for the disposal point.
2 YEAR WARRANTY
As from the date of purchase we assume manufacturer warranty of twenty-four months for defects which can be traced back to manufacturing and material defect. Your legal warranty claim in conformity with Section 437 ff. of the German Civil Code (BGB) shall remain unaffected by this regulation. The guarantee does not cover any damage which is caused by incorrect handling or use as well as defects which only slightly influence the function or the value of the unit. Furthermore, we do not assume any liability for damages due to a lack of or insufficient descaling and care. In this case, the warranty will also become null and void. Use original Graef descaling and cleaning tablets only. Moreover, transport damage provided we are not responsible shall be excluded from the claims under guarantee. Guarantee shall be ruled out for damage, the repair of which has not been carried out by us or one of our representations. In case of justified complaints, we shall repair the defective product or replace it by a product without defects at our discretion.
Sommaire
Avant-propos....53
natural_image
Silhouette of a coffee cup with 'Espresso' text on the side (no other symbols or text)Doppio
natural_image
Line drawing of a measuring cup (no text or symbols)Cuillère
PORTE-FILTRES
PORTE-FILTRES DOUBLES
1 tasse
natural_image
Simple line drawing of a bowl (no text or symbols)2 tasses /
2 dosettes
natural_image
Simple line drawing of a bowl or container (no text or symbols)natural_image
Line drawing of a hand using a tool to lift a rectangular box (no text or symbols)natural_image
Simple line drawing of a mechanical component or tool interacting with a rectangular block (no text or symbols)text_image
STANDBY B3 Inatural_image
Technical line drawing of a mechanical assembly with no visible text or symbolsnatural_image
Line drawing of a hand using a computer to press a rectangular box (no text or symbols visible)natural_image
Line drawing of a robotic arm pouring liquid into a container (no text or symbols)natural_image
Illustration of a hand pouring liquid into a container with a lid, showing mechanical components (no text or symbols)natural_image
Diagram of a mechanical device with a rotating knob and piping (no text or symbols)natural_image
Technical line drawing of a mechanical assembly with a bucket and support structure (no text or symbols)natural_image
Simple line drawing of a mechanical device with a handle and base, no text or symbols presenttext_image
STANDARD 0 +5 +1natural_image
Line drawing of a hand cleaning a pipe with a cloth (no text or symbols)natural_image
Illustration of a hand pouring liquid into a microscope (no text or symbols)natural_image
Line drawing of hands holding a cup and a ring, no text or symbols presentnatural_image
Diagram of a kitchen sink with pipe and valve components, showing a rotating valve mechanism (no text or labels)natural_image
Line drawing of a coffee machine with two cups and a coffee cup, no text or symbols presentnatural_image
Line drawing of a hand using a tool to press or install a component, with no visible text or symbols.natural_image
Line drawing of a hand pouring liquid from a container into a pot (no text or symbols)natural_image
Line drawing of a hand using a microscope to clean or store items on a machine (no text or symbols)PRÉPARATION D'UN CAFÉ AVEC DOSETTES
natural_image
Line drawing of a hand cleaning a pipe with a cloth (no text or symbols)natural_image
Line drawing of a mechanical component with a downward arrow indicating force or direction (no text or symbols)natural_image
Diagram of a mechanical device with a rotating component and directional arrows indicating motion (no text or symbols)
natural_image
Line drawing of a coffee machine with two cups below (no text or symbols)text_image
STANDING 0 3/8natural_image
Line drawing of a hand using a tool to press or install a component, with no visible text or symbols.natural_image
Line drawing of a hand pouring liquid into a cooking pot (no text or symbols)natural_image
Line drawing of a hand using a vacuum cleaner to clean or store floor grilles (no text or symbols)text_image
B1/3 0 G e gtext_image
STANDSLEY 0 S S Snatural_image
Technical line drawing of a mechanical device with a pipe and ventilation grilles (no text or symbols)natural_image
Technical line drawing of a mechanical device with no visible text or symbolsnatural_image
Line drawing of a microwave oven with a hand pouring liquid into a mug (no text or symbols)natural_image
Line drawing of a milk煎机 with a glass of milk being poured into it (no text or symbols)natural_image
Line drawing of a washing machine with control panel and side buttons (no text or symbols)natural_image
Line drawing of a kitchen mixer with control panel and stand (no text or symbols)natural_image
Line drawing of a hand pump tool in a kitchen setting (no text or symbols)text_image
STRAWBY 3/8natural_image
Line drawing of a hand using a tool to adjust or install a rectangular box (no text or symbols present)natural_image
Line drawing of a hand using a tool to press or install a rectangular object (no text or symbols visible)natural_image
Line drawing of a laboratory setup with a beaker and a stand (no text or symbols)text_image
STRAWBY 8/13 0 6 8/13natural_image
Line drawing of a laboratory setup with a beaker and a stand, no text or symbols presentnatural_image
Line drawing of a laboratory setup with a container and a gas collection apparatus (no text or symbols)natural_image
Simple circular arrow symbol pointing right, no text or labels presentnatural_image
Line drawing of a hand using a tool to adjust or install a rectangular box (no text or symbols present)natural_image
Line drawing of a hand using a pipette to lift a rectangular object (no text or symbols)natural_image
Line drawing of a hand inserting a rectangular box into a rack (no text or symbols)natural_image
Line drawing of a mechanical press or printer with a cup and base, no text or symbols presentnatural_image
Simple line drawing of a laboratory setup with a beaker and a funnel (no text or symbols)text_image
STRAWB 3/12 0 0 0 23natural_image
Line drawing of a hand inserting a component into a box (no text or symbols)natural_image
Line drawing of a mechanical device with a tool inserted into a component (no text or symbols)natural_image
Line drawing of a hand operating a device with a ruler and handle (no text or symbols)natural_image
Illustration of a hand holding a cup with a lid above it, showing mechanical components (no text or symbols)text_image
Illustration showing a hand pouring liquid into a container with a product labeled 'GRAEF' in the background.natural_image
Line drawing of a hand using a sewing machine to press or install a component, with an upward arrow indicating motion (no text or symbols present)natural_image
Line drawing of a mechanical device with a bucket and housing (no text or symbols)text_image
B/13 STANOSY 0natural_image
Simple line drawing of a mortar and pestle in a beaker with liquid, no text or symbols presentnatural_image
Line drawing of a hand operating a box with a ruler, no text or symbols presentnatural_image
Simple line drawing of a mechanical device with a lever and base (no text or symbols)natural_image
Hand pressing down on a device panel with a downward arrow indicating compression (no text or symbols)natural_image
Line drawing of a hand holding a small object near a window (no text or symbols)natural_image
Line drawing of a hand using a tool to press or inspect a circular object with horizontal lines (no text or symbols)natural_image
Technical line drawing of a mechanical assembly with a textured base and measurement scale (no text or symbols)natural_image
Line drawing of a hand using a tool to press or install a machine component (no text or symbols visible)natural_image
Metallic stainless steel pitcher with handle and spout (no text or symbols visible)Station de tassage Article n° 145781