Kamado 13 - Barbecue Patton - Free user manual and instructions
Find the device manual for free Kamado 13 Patton in PDF.
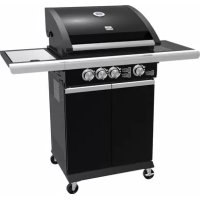
| Product type | Ceramic Kamado barbecue |
| Brand | Patton |
| Model | Kamado 13 |
| Cooking diameter | 33 cm (13 inches) |
| Main material | Ceramic |
| Usage | Outdoor only |
| Recommended fuel | Briquettes or lump charcoal |
| Maximum temperature | 370 °C |
| Functions | Grilling, smoking, slow cooking, roasting, high-temperature cooking |
| Vents | Adjustable lower and upper vents for draft control |
| Seal gasket | Gray felt around the lid perimeter |
| Included accessories | Chrome cooking grate, pizza stone (optional), ash tool, lifting handle |
| Maintenance and cleaning | Self-cleaning by heating to 260 °C for 30 min; exterior cleaning with damp cloth and mild detergent; chrome grate not dishwasher safe |
| Winter storage | Must be stored indoors (garage or garden shed) under protective cover |
| Warranty | 2 years on ceramic parts, 1 year on metal, stainless steel, cast iron, and wood parts |
| Repairability | Spare parts available: replacement felt, metal bands, thermometer, grate |
Frequently Asked Questions - Kamado 13 Patton
User questions about Kamado 13 Patton
0 question about this device. Answer the ones you know or ask your own.
Ask a new question about this device
Download the instructions for your Barbecue in PDF format for free! Find your manual Kamado 13 - Patton and take your electronic device back in hand. On this page are published all the documents necessary for the use of your device. Kamado 13 by Patton.
USER MANUAL Kamado 13 Patton
natural_image
Line drawing of a simple bamboo grill with three legs and a dome top (no text or symbols)PATTON B.V.
Veilingweg 2 NL 5301 KM Zaltbommel Holland
Website: www.patton.eu
PATTON
| NL, BE, LU | Gebruiksaanwijzing - 3 |
| FR, CH | Notice d'emploi - 12 |
| GB, IE | Operating instructions - 23 |
| DE, CH, AT | Gebrauchsanweisung - 33 |
natural_image
Line drawing of two wrench tools: a standard screwdriver and an adjustable wrench (no text or symbols present)DIT PRODUCT MOET IN DE WINTER BINNEN WORDEN BEWAARD.
HET UITERLIJK VAN DE KERAMIEK BEVAT SCHEUREN; DIT IS NORMAAL.
WAARSCHUWINGEN – LET OP!
natural_image
Technical line drawing of a mechanical support structure with mounting feet and bolt holes (no text or symbols)STAP 3

natural_image
Technical line drawing of a mechanical assembly with labeled components (no text or symbols)STAP 2
natural_image
Line drawing of a multi-tiered rice cooker with internal components (no text or symbols)STAP 4

natural_image
Line drawing of a simple bamboo grill with three legs and a dome top (no text or symbols)natural_image
Two line drawings of hand tools, one simple and one with a curved handle (no text or symbols)Klem
natural_image
Line drawing of a simple bamboo grill with lid, handles, and base (no text or symbols)Outils requis (non inclus)

natural_image
Line drawing of two wrench tools: a standard screwdriver and an adjustable wrench (no text or symbols present)natural_image
Technical line drawing of a mechanical support structure with mounting feet and bolt holes (no text or symbols)ÉTAPE 3

natural_image
Technical line drawing of a mechanical assembly with labeled components (no text or symbols)ÉTAPE 2

natural_image
Line drawing of a multi-tiered rice cooker with internal components (no text or symbols)ÉTAPE 4
natural_image
Line drawing of a simple bamboo grill with three legs and a dome top (no text or symbols)natural_image
Two line drawings of hand tools, one with a curved handle and the other a straight handle (no text or symbols)Pince
OPERATING AND ASSEMBLY INSTRUCTIONS
Kamado 13"
natural_image
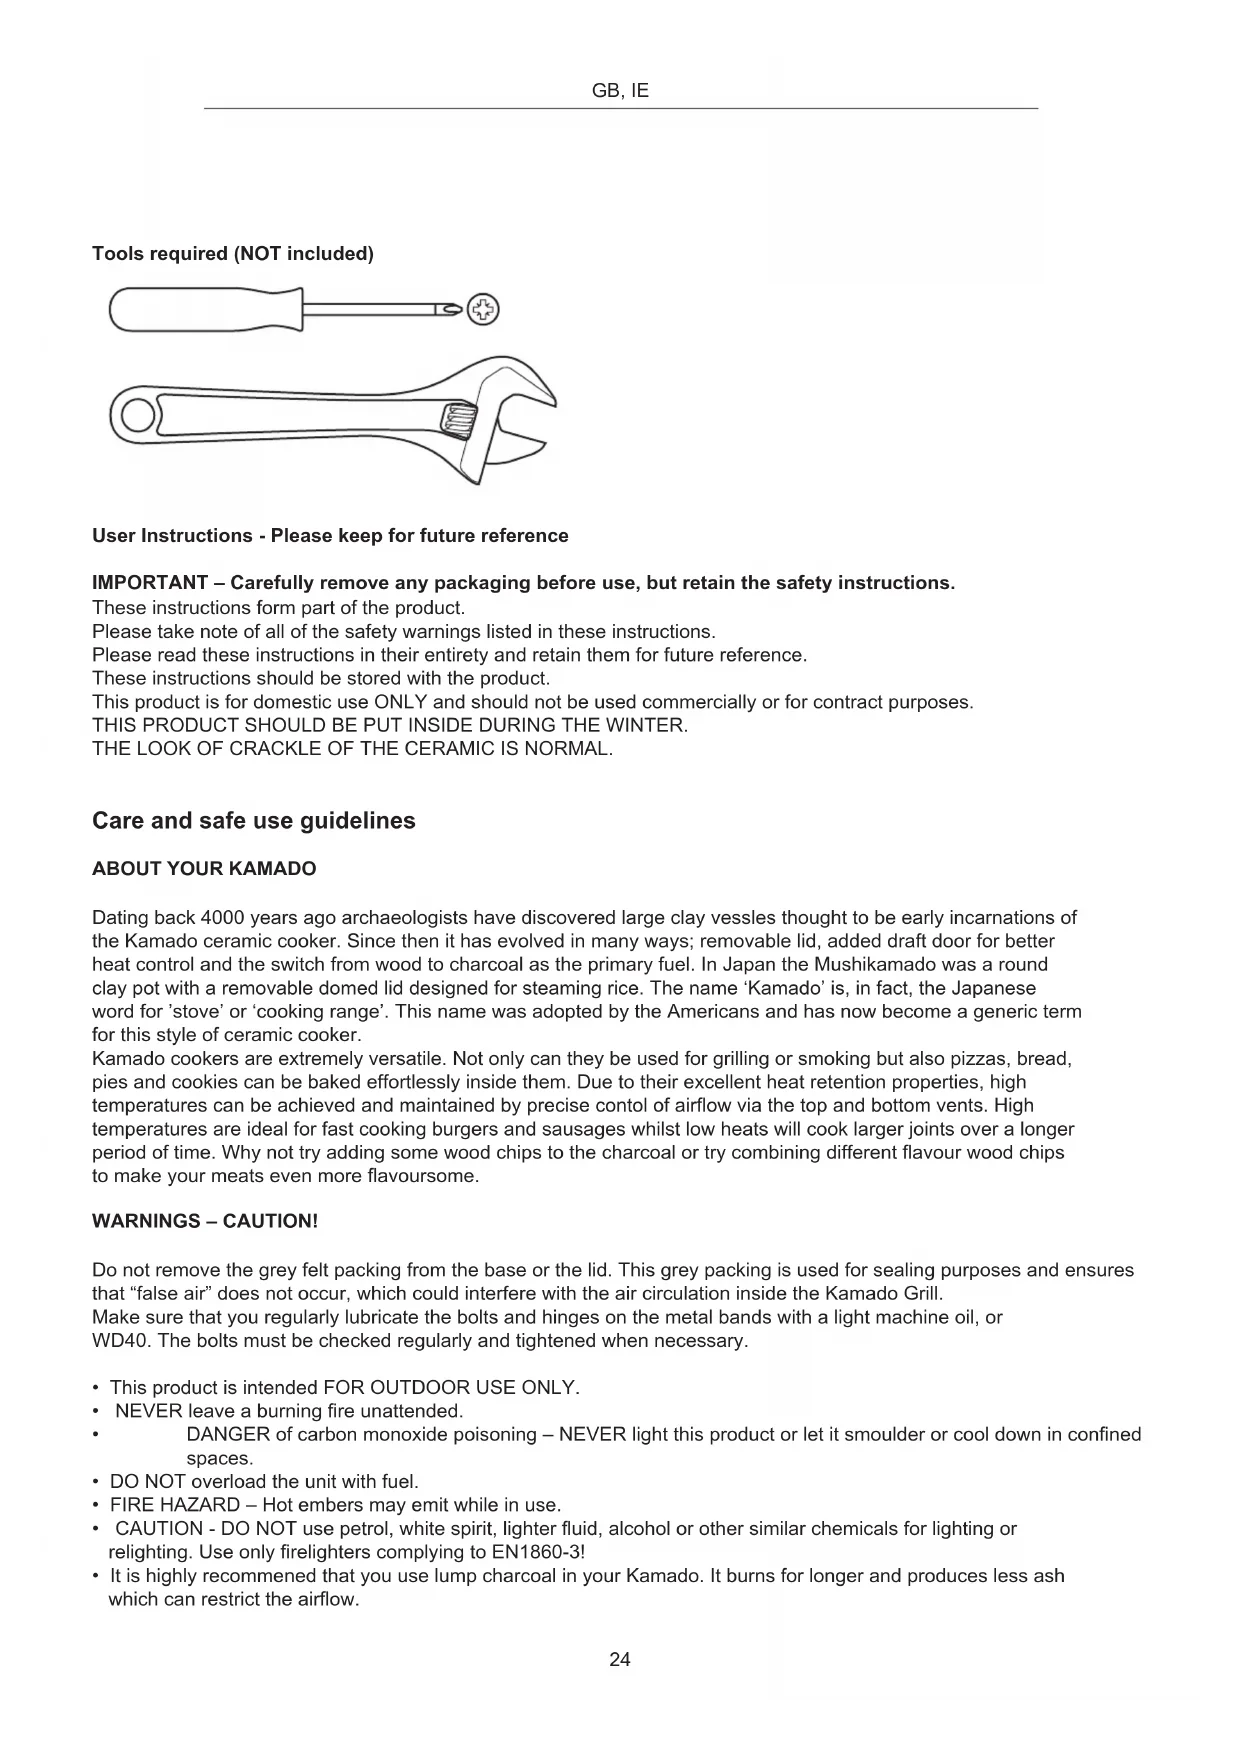
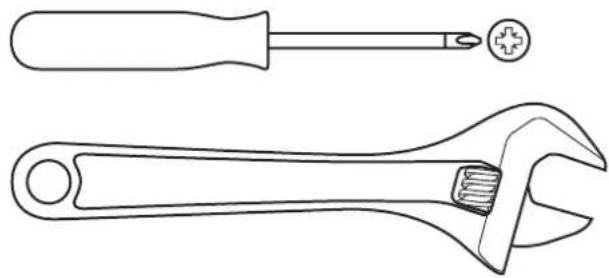
Line drawing of a simple bamboo grill with lid, handles, and base (no text or symbols)Tools required (NOT included)
natural_image
Line drawing of two wrench tools: a standard screwdriver and an adjustable wrench (no text or symbols present)User Instructions - Please keep for future reference
IMPORTANT – Carefully remove any packaging before use, but retain the safety instructions.
These instructions form part of the product.
Please take note of all of the safety warnings listed in these instructions.
Please read these instructions in their entirety and retain them for future reference.
These instructions should be stored with the product.
This product is for domestic use ONLY and should not be used commercially or for contract purposes.
THIS PRODUCT SHOULD BE PUT INSIDE DURING THE WINTER.
THE LOOK OF CRACKLE OF THE CERAMIC IS NORMAL.
Care and safe use guidelines
ABOUT YOUR KAMADO
Dating back 4000 years ago archaeologists have discovered large clay vessels thought to be early incarnations of the Kamado ceramic cooker. Since then it has evolved in many ways; removable lid, added draft door for better heat control and the switch from wood to charcoal as the primary fuel. In Japan the Mushikamado was a round clay pot with a removable domed lid designed for steaming rice. The name ‘Kamado’ is, in fact, the Japanese word for ‘stove’ or ‘cooking range’. This name was adopted by the Americans and has now become a generic term for this style of ceramic cooker.
Kamado cookers are extremely versatile. Not only can they be used for grilling or smoking but also pizzas, bread, pies and cookies can be baked effortlessly inside them. Due to their excellent heat retention properties, high temperatures can be achieved and maintained by precise control of airflow via the top and bottom vents. High temperatures are ideal for fast cooking burgers and sausages whilst low heats will cook larger joints over a longer period of time. Why not try adding some wood chips to the charcoal or try combining different flavour wood chips to make your meats even more flavoursome.
WARNINGS - CAUTION!
Do not remove the grey felt packing from the base or the lid. This grey packing is used for sealing purposes and ensures that "false air" does not occur, which could interfere with the air circulation inside the Kamado Grill.
Make sure that you regularly lubricate the bolts and hinges on the metal bands with a light machine oil, or WD40. The bolts must be checked regularly and tightened when necessary.
• This product is intended FOR OUTDOOR USE ONLY.
• NEVER leave a burning fire unattended.
• DANGER of carbon monoxide poisoning – NEVER light this product or let it smoulder or cool down in confined spaces.
• DO NOT overload the unit with fuel.
- FIRE HAZARD – Hot embers may emit while in use.
- CAUTION - DO NOT use petrol, white spirit, lighter fluid, alcohol or other similar chemicals for lighting or relighting. Use only firelighters complying to EN1860-3!
- It is highly recommended that you use lump charcoal in your Kamado. It burns for longer and produces less ash which can restrict the airflow.
- IMPORTANT: When opening the lid at high temperatures it is essential to lift the lid only slightly, allowing air to enter slowly and safely, preventing any backdraft or flare-ups that may cause injury.
- ALWAYS follow the FOOD COOKING INFORMATION stated on page 27 of this instruction manual.
- DO NOT use the Kamado on decking or any other flammable surfaces such as dry grass, wood chips, leaves or decorative bark.
- Ensure that the Kamado is positioned at least 2 metres away from flammable items.
• DO NOT use this Kamado as a furnace. - DO NOT handle or move the Kamado whilst alight as it will be hot.
- ALWAYS USE heat resistant gloves when handling hot ceramics or cooking surfaces.
- Allow the unit to cool down completely before moving or storing.
- ALWAYS keep children and pets at a safe distance from the oven when in use.
• Always inspect the unit prior to use for fatigue and damage and replace as and when necessary.
CURING THE KAMADO
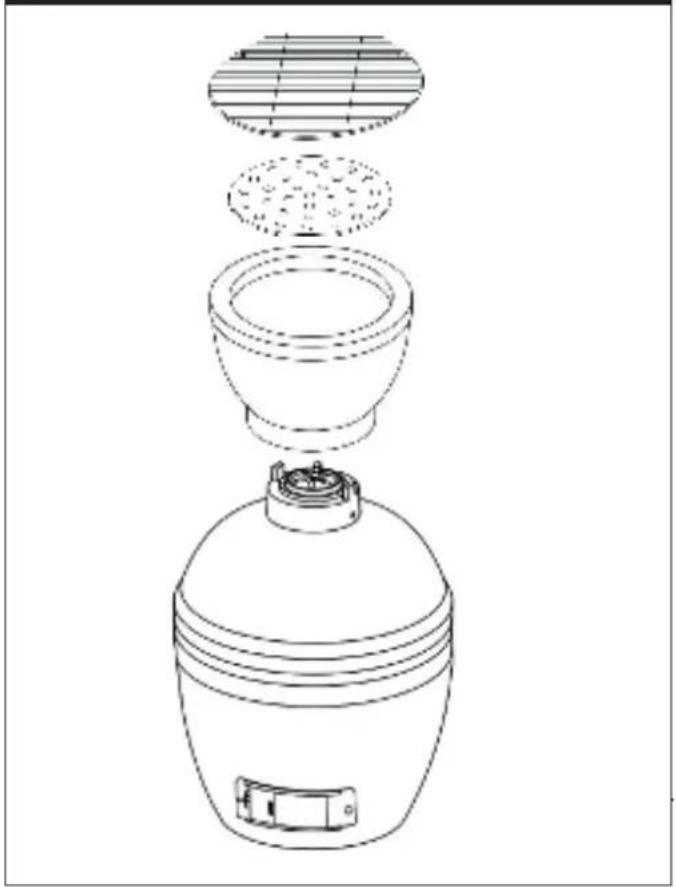
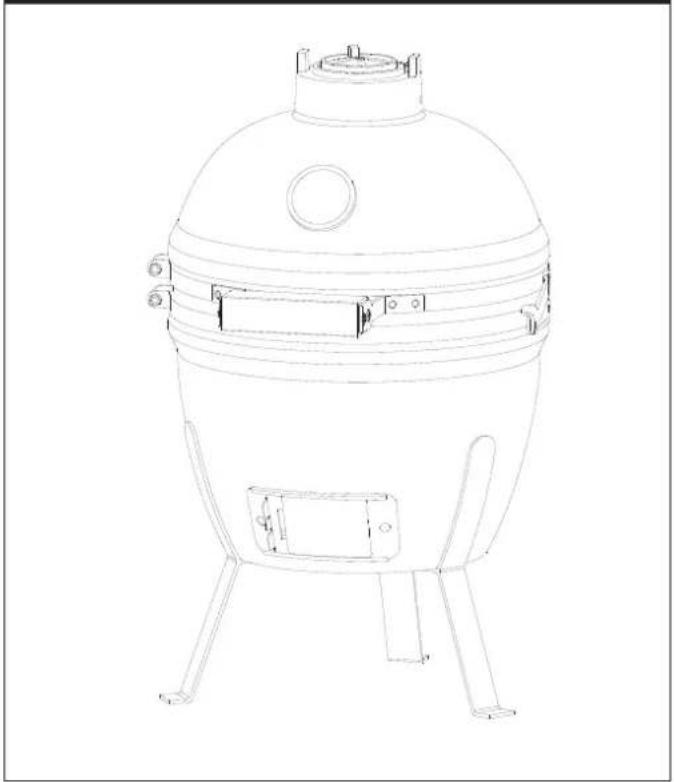
- To start a fire place rolled up newspaper with some lighter cubes or solid firelighters on the charcoal plate (7) in the base of the Kamado. Then place 2 or 3 handfuls of lump charcoal over the top of the newspaper.
• DO NOT use petrol, white spirit, lighter fluid, alcohol or other similar chemicals for lighting or relighting. - Open the bottom vent and light the newspaper using a long nosed lighter or safety matches.
- DO NOT overload the unit with fuel – if the fire is too intense this could damage the Kamado.
- Leave until all the fuel is used and extinguished.
• If the first burns are too high it could damage the felt gasket seal before it has had the chance to mature properly.
• After first use inspect all fasteners for tightness. The metal band connecting your lid to the base will expand from the heat and this could become loose. It is recommended you check and if necessary tighten the band with a spanner. - You can now use your Kamado as normal.
EXTINGUISHING
- To extinguish unit – stop adding fuel and close all the vents and the lid to allow the fire to die naturally.
- DO NOT use water to extinguish the charcoals as this could damage the ceramic Kamado.
STORAGE
- When not in use, and if stored outside, cover the Kamado once completely cooled with suitable rain cover
- The chrome plated cooking grill is NOT dishwasher safe; use a mild detergent with warm water.
- When using the Kamado push down on both of the locking wheels to stop the unit moving about during use.
- It is recommended the Kamado be stored under cover in a garage or shed over winter for complete protection.
CLEANING
- The Kamado is self cleaning. Heat it up to 260^ for 30 minutes and it will scorch off all of the food and debris.
- DO NOT use water or any other types of cleaning product to clean the inside of your Kamado. The walls are porous and will absorb any fluids used, this could cause the Kamado to crack. If the soot becomes excessive then use a wire brush or the supplied tool to scrape off the carbon remnants before the next use.
- To clean the grills and grates use a non-abrasive cleaner once the unit has fully cooled.
• To clean the outer surface wait until the Kamado is cool and use a damp cloth with a mild detergent.
MAINTENANCE
- Tighten the bands and oil the hinge 2 times a year or more if needed.
LIGHTING, USAGE AND CARE INFORMATION
- Ensure the Kamado is positioned on a permanent, flat, level, heat resistant non-flammable surface away from flammable items.
-
Ensure the Kamado has a minimum of 2m overhead clearance and has a minimum 2m clearance from other surrounding items.
-
To start a fire place rolled up newspaper with some lighter cubes or solid firelighters on the charcoal plate (7) in the base of the Kamado. Then place 2 or 3 handfuls of lump charcoal over the top of the newspaper.
• DO NOT use petrol, white spirit, lighter fluid, alcohol or other similar chemicals for lighting or relighting. - Open the bottom vent and light the newspaper using a long nosed lihter or safety matches. Once it has caught, leave the bottom vent and lid open for about 10 minutes to build a small bed of hot embers.
- Allow the charcoal to heat up and be kept red hot for at least 30 minutes prior to the first cooking on the Kamado. DO NOT cook before the fuel has a coating of ash.
- It is recommended you don't stoke or turn the coals once they are alight. This allows the charcoals to burn ore uniformly and efficient.
- Once alight ONLY use heat resistant gloves when handling hot ceramics or cooking surfaces.
• See below for cooking instructions depending on temperature and duration.
LOW TEMPERATURE COOKING GUIDE
• Light the lump charcoal according to the instructions above. DO NOT move or stoke the coals once lit.
- Open the bottom vent fully and leave the lid open for about 10 minutes to build a small bed of hot embers.
• Monitor the Kamado until it has risen to the desired temperature. See page 27 for a temperature cooking guide.
- Fully close the bottom vent to maintain the temperature.
- You are now ready to use the Kamado for cooking on.
- IMPORTANT: When opening the lid at high temperatures it is essential to lift the lid only slightly, allowing air to enter slowly and safely, preventing any backdraft or flare-ups that may cause injury.
- ALWAYS follow the FOOD COOKING INFORMATION stated on page 27 of this instruction manual.
- ALWAYS use heat resistant gloves when handling hot ceramics or cooking surfaces.
SMOKING GUIDE
- Follow the instructions above as if you were starting a slow cook.
• Monitor the Kamado until it has risen to the desired temperature. See page 27 for a temperature cooking guide. - Leave the bottom vent slightly open.
- Close the top vent and continue to check the tempertaute for a few more minutes.
- Using heat resistant gloves sprinkle the wood chips in a circle over the hot charcoal.
- You are now ready to use the Kamado to smoke on.
- TIP: Soak your wood chips or cooking planks in water for 15 minutes to prolong the smoking process.
- IMPORTANT: When opening the lid at high temperatures it is essential to lift the lid only slightly, allowing air to enter slowly and safely, preventing any backdraft or flare-ups that may cause injury.
- ALWAYS follow the FOOD COOKING INFORMATION stated on page 27 of this instruction manual.
- ALWAYS use heat resistant gloves when handling hot ceramics or cooking surfaces.
HIGH TEMPERATURE COOKING GUIDE
- Light the lump charcoal according to the instructions on page 26.
- Close the lid and fully open the top and bottom vents.
• Monitor the Kamado until it has risen to the desired temperature. See page 27 for a temperature cooking guide. - Close the top vent half way and continue to check the temperature for a few more minutes.
- You are now ready to use the Kamado for cooking on.
- IMPORTANT: When opening the lid at high temperatures it is essential to lift the lid only slightly, allowing air to enter slowly and safely, preventing any backdraft or flare-ups that may cause injury.
- ALWAYS follow the FOOD COOKING INFORMATION stated on page 27 of this instruction manual.
- ALWAYS use heat resistant gloves when handling hot ceramics or cooking surfaces.
FOOD COOKING INFORMATION
- Please read and follow this advice when cooking on your Kamado.
• Always wash your hands before and after handling uncooked meat and before eating.
• Always keep raw meat away from cooked meat and other foods. - Before cooking ensure grill surfaces and tools are clean and free of old food residues.
- DO NOT use the same utensils to handle cooked and uncooked foods.
- Ensure all meat is cooked thoroughly before eating.
- CAUTION – eating raw or under cooked meat can cause food poisoning (e.g. bacteria strains such as E.coli).
• To reduce the risk of under cooked meat cut open to ensure it is cooked all the way through internally.
- CAUTION – if the meat has been cooked sufficiently the meat juices should be clear and there should be no traces of pink/red juice or meat colouring.
- Pre-cooking larger pieces of meat and joints is recommended before finally cooking on your grill.
• After cooking on your Kamado always clean the grill cooking surfaces and utensils.
REFUELING
- With the vents closed, the Kamado stay at a high temperature for several hours. If you require a longer cooking time (e.g when roasting a whole joint or slow smoking), it may be necessary to add more charcoal. Just add some additional charcoal and continue as above.
REPLACING THE FELT PACKING ON THE KAMADO GRILL
Depending on how you use the Kamado Grill, the felt packing around the lid and the base should be replaced from time to time. This prevents “false air” from occurring. Carefully carry out the following:
Requirements:
- self adhesive felt packing
- open-ended spanner
- scraper and/or Stanley Knife
- pot scourer of abrasive pad
- acetone
-
masking tape
-
Remove the adjustable cut-off or ceramic lid cap. Unscrew the nuts on the top tensioning band with the spanner, then next, carefully lift off the lid and lay it upside down onto a protective layer on the floor. Make sure that you do not drop the lid!
-
Unscrew the bottom tensioning band and leave the ceramic base standing in the housing or on the table.
-
Using the Stanley Knife or scraper, cut or scrape off as much of the existing felt packing as possible. Remove the remaining bits of felt and glue with the acetone an the action of an abrasive pad or pot scourer
-
Now you must wait for about one hour until the acetone has evaporated.
-
Carefully stick the new (self adhesive) felt packing to the edge of the base and the lid. Make sure that the seams are not at exactly the same place again and allow the felt to overlap slightly on the outside, which is better than on the inside (because it will burn when the grill is lit once again). Allow a little play when sticking down the felt packing (therefore not too tight or stretched), so when warming up the felt packing is able to shrink a little. Neatly cut the felt packing at the seam. It you are using adhesive in place of self adhesive tape, please do as follows:
Apply the masking tape immediately under the edge of the base and the outside of the lid so that the adhesive does not stick to the Kamado Grill itself. Protect the inside of the grill with a piece of cardboard and then spray the edges with the adhesive. Follow the instruction for the adhesive and allow it to dry and then stick the felt packing onto the edges. Allow the glue to completely harden.
- Reassemble the Kamado Grill. Place the tensioning band against the base and tighten the nuts. Carefully put the lid into the top tensioning band and tighten the nuts. Check whether the lid and the tensioning bands are straight and then give the nuts a final tighten.
TERMS & CONDITIONS OF THE LIMITED GUARANTEE FOR THE PATTON KAMADO GRILL
Every Patton Kamado Grill ceramic cooker has a limited guarantee covering the materials and construction of all tyhe ceramic components (e.g. canopy, frame, flu with cut-off, fire basket and inner ring). This guarantee is effective for as long as the original purchaser remains in possession of the Patton Kamado Grill or the covered component.
The Patton Kamado Grill has a limited manufacturer's guarantee of 2 years for the original purchaser. The ceramic components are not covered for breakages caused by dropping or misuse. The components made from metal, stainless steel or cast iron on the Patton Kamado Grill (e.g. metal bands, hinging mechanism, metal covers with double function, grill, fire basket and regulating slide) have a limited manufacturer's guarantee of 1 year for the original purchaser. Patton endeavours to use only rustproof materials and paint that can resist high temperatures and is used on the metal surfaces. However, metal materials and protective finishing coats can be affected by surface cracking or exposure to various substances and circumstances over which Patton has no control.
Bleach, industrial vapours, chemicals, artificial fertiliser, extreme humidity, pesticides for the lawn and salt are but a few of the substances that can adversely affect paint and finishing materials on metal coverings. For this reason, the guarantee DOES NOT COVER RUST, OXIDISATION, FADING or any other DEFECTS to the metal, stainless steel and cast iron components, unless this also leads to the loss of the structural integrity or defects to the components on the Patton Kamado Grill. This product must be kept indoors during the winter period. The crackleware finish of the ceramics is part of the production process.
Wooden articles, such as bamboo side tables, have a limited manufacturer's guarantee of 1 year for the original purchaser. Wooden products are not covered against normal weathering or cracking unless this affects the structural integrity. The thermometer also has a limited manufacturer's guarantee of 1 year.
These guaranteed are based or the normal, reasonable domestic use and maintenance of the Patton Kamado Grill. Commercial use and similar applications are not covered by this guarantee. The guarantee does not apply to incidental or unforeseen damage or breakage, or damage caused by the following: transportation, dropping, incorrect assembly, incorrect support, attempts to support the Patton Kamado Grill using anything other than having a solid, inflammable base underneath, commercial use, making modifications or changes, negligence, incorrect maintenance, hazards on pathways/roads, normal wear & tear or natural disasters.
The guarantee does not cover scratches, dents, splinters, hair cracks or small cosmetic cracks appearing on the outer glazing that do not influence the normal operation of the Patton Kamado Grill.
Any modifications or changes made to the Patton Kamado Grill without receiving prior written consent from the manufacturer, render the guarantee null and void. This includes boring holes or altering components, or using spare parts not authorised for use on the Patton Kamado Grill, or using internal components in manner for which they were not designed by the manufacturer. Modifications or changes to internal components, such as the fire basket and the inner ring will render the guarantee null and void and Patton expressly rejects any liability for direct, indirect, incidental or consequential damages or losses that may result. Using fire lighter fluid or any other type of flammable mixture in a Patton Kamado Grill renders the guarantee null and void. This is a dangerous practice and can lead to damage and physical injury.
UP TO THE MAXIMUM EXTENT PERMITTED BY LAW, ALL STATUTORY PROVISIONS, EXPRESSLY OR IMPLIED GUARANTEES, INCLUDING IMPLIED GUARANTEES REGARDING THE SALEABILITY AND SUITABILITY FOR A SPECIFIC PURPOSE, WILL NOT EXCEED THIS GUARANTEE. LIABILITY FOR INCIDENTAL, SPECIFIC AND CONSEQUENTIAL DAMAGE IS EXCLUDED.
COOKING TEMPERATURE GUIDE
Slow cook / Smoke (110°C-135°C) Top vent Bottom vent
Beef Brisket 2 Hrs per lb.
Pulled Pork 2 Hrs per lb.
Whole Chicken 3 - 4 Hrs.
Ribs 3 - 5 Hrs.
Roasts 9+ Hrs.


Grill / Roast (160°C-180°C) Top vent Bottom vent
Fish 15-20 Min.
Pork Tenderloin 15-30 Min.
Chicken Pieces 30-45 Min.
Whole Chicken 1-1.5 Hrs.
Leg of lamb 3-4 Hrs.
Turkey 2-4 Hrs.
Ham 2-5 Hrs.


Sear (260°C-370°C) Top vent Bottom vent
Steak 5-8 Min.
Pork Chops 6-10 Min.
Burgers 6-10 Min.
Sausages 6-10 Min.


Open

Closed

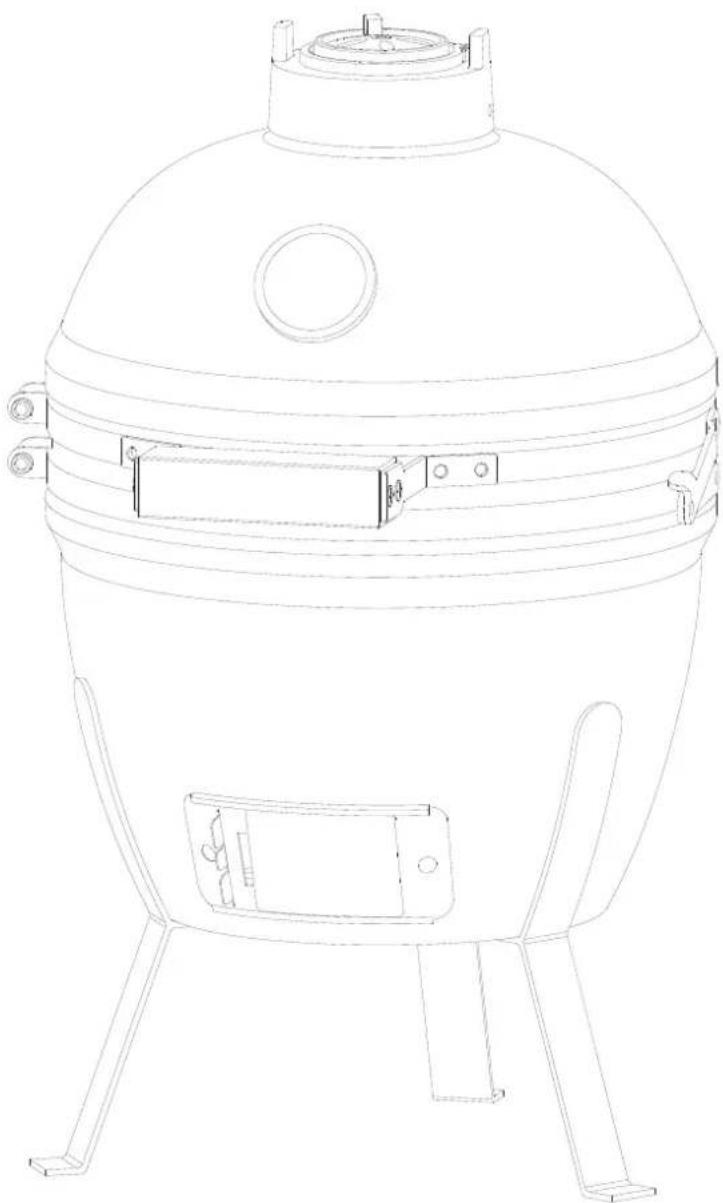
Assembly Instructions
Prior to Assembly: Read the instructions carefully. Check all parts against the parts list.
Carry out assembly on a soft surface to avoid scratching the paint. Please retain this information for future reference.
For ease of assembly on ly loosely tighten bolts and then tighten fully when assembly is complete.
WARNING - DO NOT over tighten bolts; only tighten with moderate pressure to avoid damaging the bolts or components of the Kamado Gril.
IMPORTANT - Remove any packaging before use, but retain the safety instructions and store them with this product.
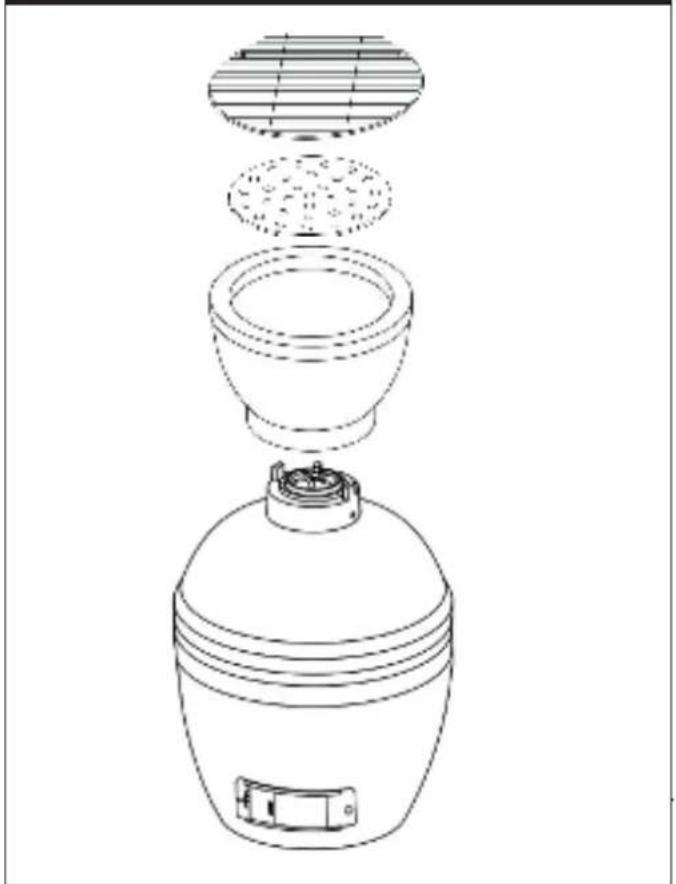
PARTS LIST
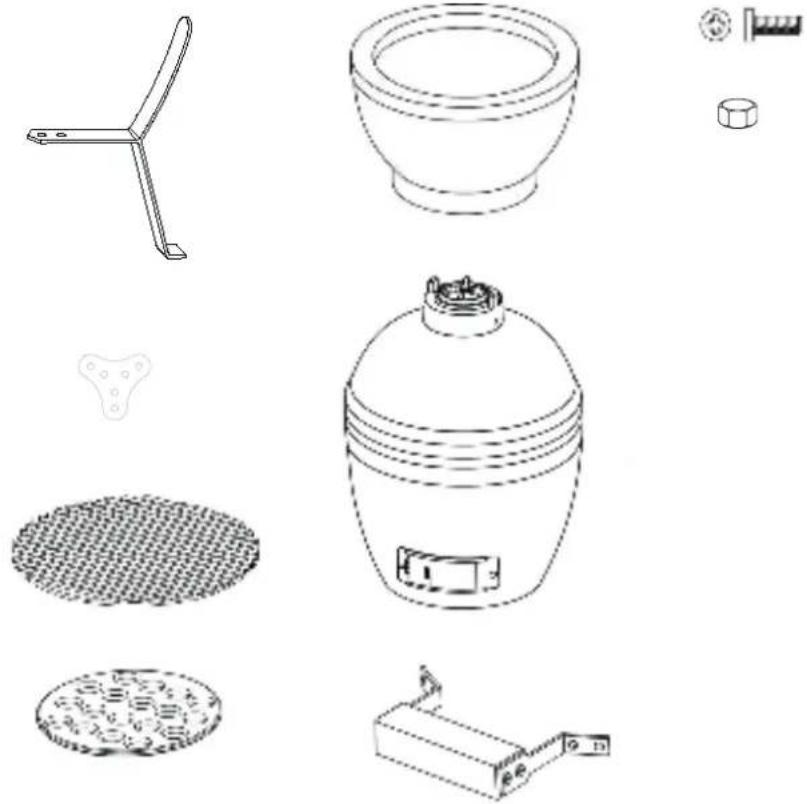
ASSEMBLY DIAGRAM
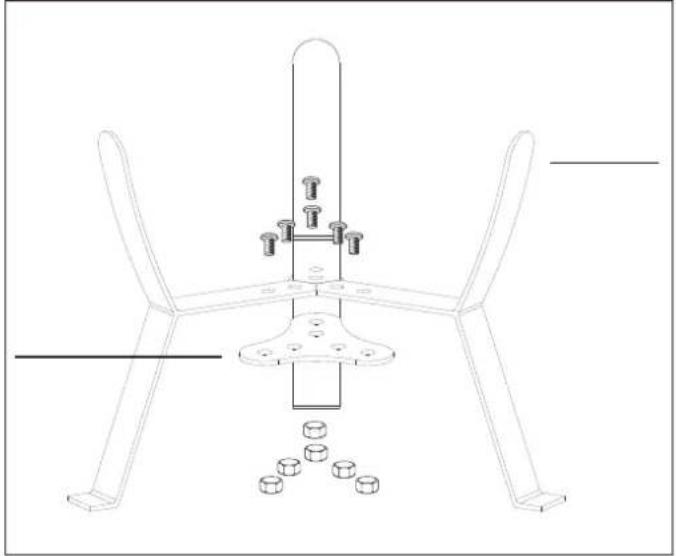
STEP 1
natural_image
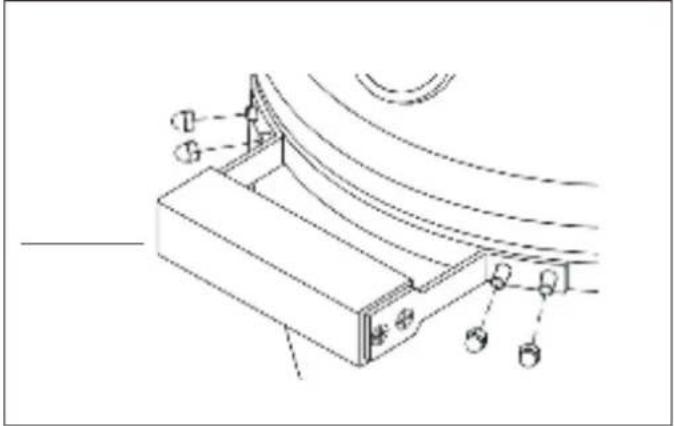
Technical line drawing of a mechanical support structure with mounting feet and bolt holes (no text or symbols)STEP 3

natural_image
Technical line drawing of a mechanical assembly with labeled components (no text or symbols)STEP 2

natural_image
Line drawing of a multi-tiered rice cooker with internal components (no text or symbols)STEP 4

natural_image
Line drawing of a simple bamboo grill with three legs and a dome top (no text or symbols)The Kamado Grill is now ready to use but please ensure you have read these instructions thoroughly prior to use.
OPTIONAL
natural_image
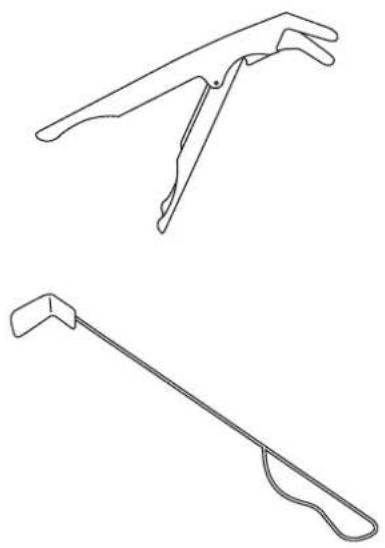
Two line drawings of hand tools, one simple and one with a curved handle (no text or symbols)Clip Tool
Allows you to lift the pizza stone or cooking grills when they are too hot to handle.
Ash Tool
Once your Kamado has burnt all its fuel and cooled down use this tool for removing the ash from the bottom.

PATTON
natural_image
Line drawing of a simple bamboo grill with three legs and a dome top (no text or symbols)natural_image
Line drawing of two wrench tools: a standard screwdriver and an adjustable wrench (no text or symbols present)natural_image
Technical line drawing of a mechanical support structure with mounting feet and bolt holes (no text or symbols)SCHRITT 3
natural_image
Technical line drawing of a mechanical assembly with labeled components (no text or symbols)SCHRITT 2
natural_image
Line drawing of a multi-tiered rice cooker with internal components (no text or symbols)SCHRITT 4