DO157A - Fan DOMO - Free user manual and instructions
Find the device manual for free DO157A DOMO in PDF.
| Features | Details |
|---|---|
| Product type | Fan |
| Power | 50 W |
| Number of speeds | 3 speeds |
| Blade diameter | 40 cm |
| Oscillation function | Yes |
| Weight | 2.5 kg |
| Dimensions | 40 x 40 x 120 cm |
| Usage | Indoor, ideal for living rooms |
| Maintenance | Regular cleaning of blades and filter |
| Safety | Overheat protection |
| Warranty | 2 years |
Frequently Asked Questions - DO157A DOMO
User questions about DO157A DOMO
0 question about this device. Answer the ones you know or ask your own.
Ask a new question about this device
Download the instructions for your Fan in PDF format for free! Find your manual DO157A - DOMO and take your electronic device back in hand. On this page are published all the documents necessary for the use of your device. DO157A by DOMO.
USER MANUAL DO157A DOMO
natural_image
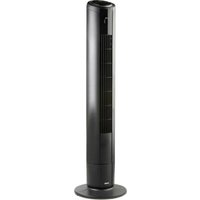
White and black vertical cylindrical device with ventilation grille and control panel (no visible text or symbols)DO157A
| Handleiding Air cooler | |
| Mode d'emploi Air cooler | |
| Gebrauchsanleitung Air cooler | |
| Instruction booklet Air cooler | |
| Manual de instrucciones Refrigerador de aire | |
| Istruzioni per l'uso Raffrescatore d'aria | |
| Návod k použití Mobilní ochlazovač | |
| Návod na použitie Mobilný ochladzovač |
natural_image
Two black-and-white icons: a warning triangle with an exclamation mark and an open book (no text or symbols)natural_image
Two blue flower-shaped objects with embossed markings, no visible text or symbols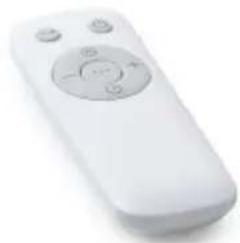
natural_image
White remote control with circular buttons and a gray interior (no visible text or symbols)CONTROLEPANEEL
natural_image
Diagram of three electronic components: a battery, two batteries with positive and negative charges, and a cylindrical device (no text or symbols)GEBRUIK
natural_image
Diagram of a device with a magnified inset showing a test tube and a separate component (no text or symbols)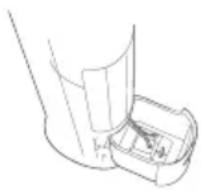

text_image
BC
natural_image
Diagram of a kitchen blender with a magnified inset showing a handle mechanism (no text or symbols)text_image
Prohibition sign with crossed-out trash bin and no text, indicating no waste disposal or restrictionnatural_image
Recycling symbol icon with three chasing arrows forming a triangle (no text or labels)natural_image
Two blue flower-shaped objects with embossed markings, no visible text or symbols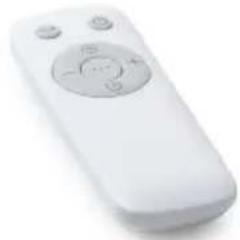
natural_image
White remote control with gray scroll and buttons (no visible text or symbols)PUPITRE DE COMMANDE
natural_image
Diagram of three electronic components: a battery, two batteries with positive and negative charges, and a mobile phone casing (no text or symbols)UTILISATION
natural_image
Diagram of a device with a magnified inset showing a close-up of a component (no text or symbols present)

text_image
BC
natural_image
Diagram of a blender with a magnified inset showing a rolled-up device (no text or symbols present)text_image
Prohibition sign with crossed-out trash bin and no text, indicating no waste or disposal restrictionnatural_image
Recycling symbol icon with three chasing arrows forming a triangle (no text or labels)natural_image
Two blue flower-shaped objects with embossed markings, no visible text or symbols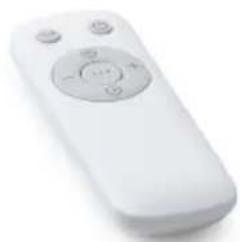
natural_image
White remote control with a circular button and three buttons (no visible text or symbols)BEDIENFELD
natural_image
Diagram of three battery types: one open, two solid, and one cylindrical (no text or symbols)GEBRAUCH
natural_image
Diagram of a hand mixer with a magnified view showing the internal components (no text or symbols present)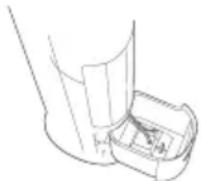

text_image
BC
natural_image
Diagram of a blender with a magnified inset showing a handle mechanism (no text or symbols)text_image
Prohibition sign with crossed-out trash bin and no text, indicating no waste or disposal.natural_image
Recycling symbol icon with three chasing arrows forming a triangle (no text or labels)All of our products are always submitted to a strict quality control before they are sold to you.
Should you nevertheless experience problems with your device, we sincerely regret this. In that case, we kindly request you to contact our customer service.
Our staff will gladly assist you.

+32 14 21 71 91

info@linea2000.be
Monday – Thursday: 8.30 – 12.00 and 13.00 – 17.00
Friday: 8.30 - 12.00 and 13.00 - 16.30
This appliance has a two year warranty period. During this period the manufacturer is responsible for any failures that are the direct result of construction failure. When these failures occur the appliance will be repaired or replaced if necessary. The warranty will not be valid when the damage to the appliance is caused by wrong use, not following the instructions or repairs executed by a third party. The guarantee is issued with the original till receipt. All parts, which are subject to wear, are excluded from the warranty. If your device breaks down within the 2-year warranty period, you can return the device together with your receipt to the shop where you purchased it.
The guarantee on accessories and components that are liable to wear-and-tear is only 6 months.
The guarantee and responsibility of the supplier and manufacturer lapse automatically in the following cases:
- If the instructions in this manual have not been followed.
· In case of incorrect connection, e.g., electrical voltage that is too high.
· In case of incorrect, rough or abnormal use.
· In case of insufficient or incorrect maintenance.
· In case of repairs or alterations to the device by the consumer or non-authorised third parties. - If the customer used parts or accessories that are not recommended or provided by the supplier / manufacturer.
SAFETY INSTRUCTIONS
When using electrical appliances, basic safety precautions should always be taken, including the following:
- Read all instructions carefully. Keep this manual for future reference.
- Make sure all packaging materials and promotional stickers have been removed before using the appliance for the first time. Make sure children cannot play with the packaging materials.
· This appliance is intended to be used in household and similar applications such as:
- staff kitchen areas in shops, offices and other working environments;
· farm houses; - by clients in hotels, motels and other residential type environments;
- bed and breakfast type environments.
· Children should be supervised to ensure that they do not play with the appliance.
This appliance can be used by children aged from 16 years and above and persons with reduced physical, sensory or mental capabilities or lack of experience and knowledge if they have been given
supervision or instruction concerning use of the appliance in a safe way and understand the hazards involved. Children shall not play with the appliance. Cleaning and user maintenance shall not be made by children unless they are older than 16 and supervised.
- Keep the appliance and its cord out of reach of children younger than 16 years.
· Attention: This appliance cannot be used with an external timer or a separate remote control.
- Before use, check if the voltage stated on the appliance corresponds with the voltage of the power net at your home.
- Never use the appliance when the cord or plug is damaged, after malfunction or when the appliance itself is damaged. In that case, take the appliance to the nearest qualified service center for check-up and repair.
- Close supervision is necessary when the appliance is used near or by children.
- The use of accessories that are not recommended or sold by the manufacturer can cause fire, electrical shock or injuries.
- Unplug the appliance when it is not in use, before assembling or disassembling any parts and before cleaning the appliance. Put all buttons and knobs into the 'off' position and unplug the appliance by grasping the plug. Never unplug by pulling the cord.
· Do not leave a working appliance unattended.
- Never place this appliance near a gas stove or electrical stove or in a place where it may come into contact with a warm appliance.
- Do not use the appliance outdoors.
- Only use the appliance for its intended use.
· Always use the appliance on a steady, dry and level surface.
- Only use the appliance for domestic use. The manufacturer can not be held responsible for accidents that result from improper use of the appliance or not following the instructions described in this manual.
· All repairs should be carried out by the manufacturer or its aftersales service.
· Never immerse the appliance, the cord or the plug in water or any other liquid.
- Make sure that children do not touch the cord or appliance.
- Keep the cord away from sharp edges and hot parts or other heat sources.
- Before use, remove all packaging materials and any promotional stickers.
- Do not insert any objects into the fan, as this may cause electric shock, injuries or damage to the appliance. Do not block or tamper with the fan when it is operating.
- Do not use this fan in any wet or humid areas. Do not place the fan too close to a bath tub or any other water container.
SAVE THESE INSTRUCTIONS.
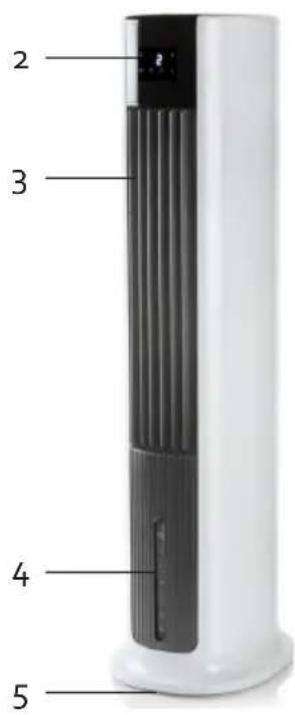
PARTS
- Control panel
- Display
- Vertical air vent
- Water level indication
- Wheels
- Handle
- Dust filter
- Honeycomb water filter
- Water tank
- Handle water tank
- Cord storage
- Refrigerating elements
- Remote control
text_image
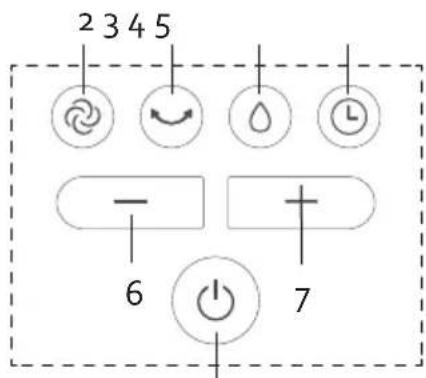
2 3 4 5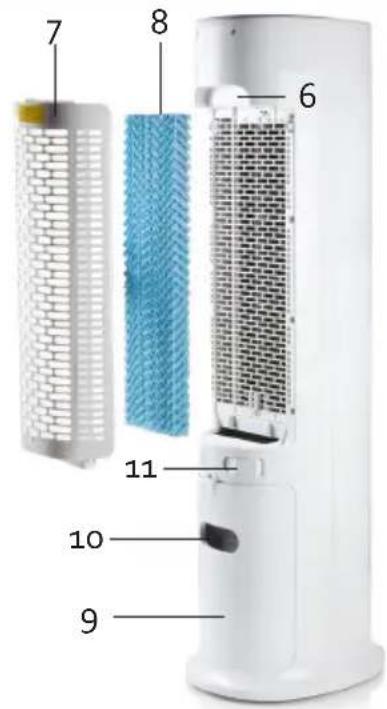
text_image
7 8 6 11 10 9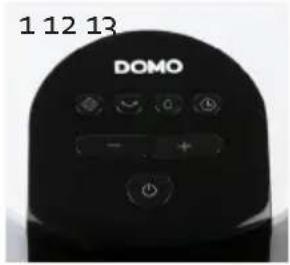
text_image
1 12 13 DOMO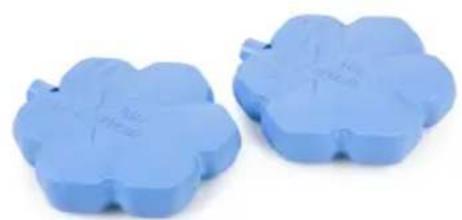
natural_image
Two blue flower-shaped objects with embossed markings, no visible text or symbols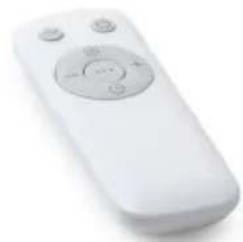
natural_image
White remote control with a circular dial and three buttons (no text or symbols visible)CONTROL PANEL
- On/Off button
- Mode knob
- Oscillation button
- Button for humidifier/cooler
- Timer button
- Button to decrease setting
- Button to increase setting
text_image
2 3 4 5 6 71
BEFORE THE FIRST USE
- Carefully remove the device from the packaging. Remove any promotional stickers.
- Clean the outside of the device with a soft damp cloth.
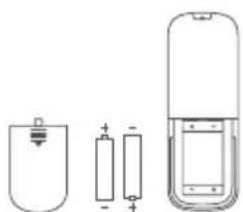
REMOTE CONTROL
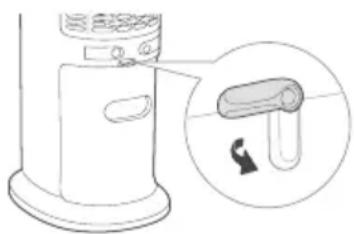
You can also operate the device with the included remote control. Insert 2 AAA batteries into the back of the remote control before use.
The remote control has a range of 5 metres.
natural_image
Diagram of three battery types: a small pot, two cylindrical batteries with negative charge, and a rectangular device (no text or symbols)USE
Plug the power cord into a socket. A beep indicates that the device is in standby mode. You can control the fan from the control panel or with the remote control. Each time a button is pressed, the device emits an audible signal. The desired setting appears on the display.
ON/OFF BUTTON

Press this button to turn the device on or off. The latest configuration will be applied automatically when the device is turned back on.
OSCILLATION BUTTON
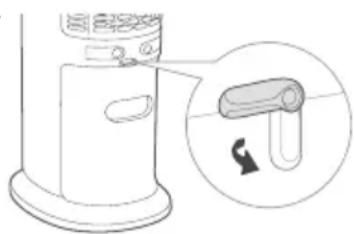
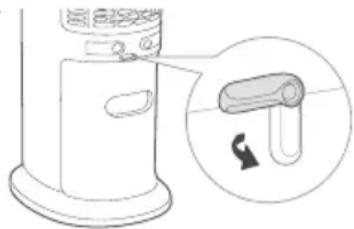
Press the oscillation button to rotate the vertical air vent left to right in order to distribute the air. The associated symbol appears on the display. Press this button again to deactivate the function.
HUMIDIFIER/COOLER
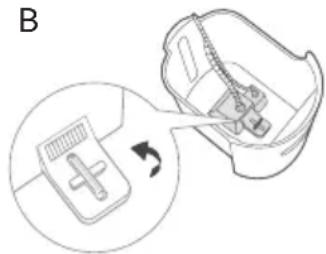
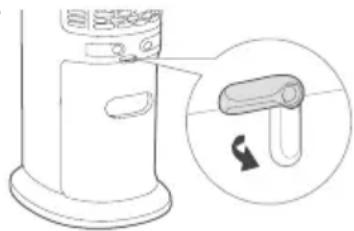
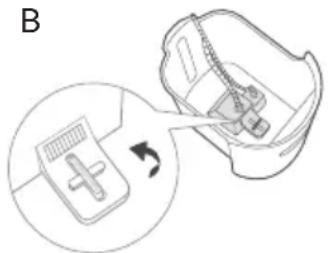
Press the humidifier/cooler button to activate this function. The associated symbol 🔔 appears on the display. Make sure the water reservoir contains water before activating this function. The water pump transports water to the honeycomb water filter in order to generate a cool air flow. Press this button again to deactivate the function. In order to do this, follow the steps below.
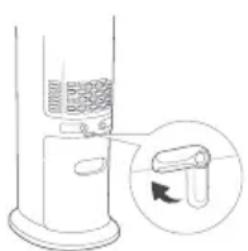
- Remove the water reservoir from the device (A). Fill the water reservoir with clean water. Make sure you do not exceed the maximum level (see maximum indicator at the front of the device). Make sure the pump is mounted correctly (B). Close the water reservoir (C).
A
natural_image
Diagram of a hand mixer with a close-up view showing the internal components (no text or symbols)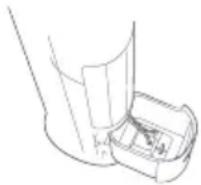
text_image
BC
natural_image
Diagram of a blender with a magnified inset showing a handle mechanism (no text or symbols)- Place the 2 refrigerating elements with water in the freezer until completely frozen. Attention: never open the refrigerating elements to prevent potential damage.
- Place 1 refrigerating element inside the water reservoir and close the water reservoir. The water temperature will remain around 6^ C lower than room temperature for around 4 hours, ensuring a chilled air flow. Attention: make sure the maximum level of the water reservoir is not exceeded after adding the refrigerating element.
- Add the second refrigerating element to lower the temperature even further. The 2 refrigerating elements are reusable. Alternatively, add ice cubes instead of the refrigerating elements, they will have a chilling effect as well.
MODE KNOB
This button allows you to configure three functions: ventilation, natural and sleep mode.
Ventilation
Press the button once to activate ventilation. A symbol appears on the display to indicate that this setting is activated. This setting allows for 4 speed configurations, to be controlled with the + and -. The selected speed appears on the display. The fan will maintain a constant speed in accordance with the speed configuration.
Natural
Press the mode knob twice to activate the natural mode. A symbol appears on the display to indicate that this mode is activated. The fan simulates a natural breeze. This mode offers 2 levels:
· 1: Medium-high speeds are alternated periodically.
· 2: High speeds are alternated periodically.
The selected level appears on the display.
Sleep mode
Press the mode knob three times to activate sleep mode. A symbol appears on the display to indicate that this mode is activated. The fan distributes a constant light breeze. This mode offers 2 levels:
1: The fan operates at speed 2 for the first 30 minutes and then switches to speed 1. The fan remains operating at this speed.
2: The fan operates at speed 3 for the first 30 minutes and then switches to speed 2 for the next 30 minutes. After that, the fan switches to speed 1.
The selected level appears on the display.
TIMER
You can set the timer between 30 minutes and 10 hours. Press the timer button. The associated symbol 📊 appears on the display. Use the plus and minus buttons on the control panel to set the desired time.
The numbers on the display will blink briefly so you can set the time. Once they stop blinking, the time has been set. You can set the timer per half hour up to 3 hours. If you wish to set the timer for more than 3 hours, increase/decrease per hour up to a maximum of 10 hours. Once the configured time has passed, the device will deactivate automatically.
Note: When setting the time on the remote control, use the timer button instead of the + and - buttons.
CLEANING AND MAINTENANCE
- Remove the plug from the socket before cleaning the appliance.
- Replace the honeycomb water filter every 1 to 2 months for optimal operation.
The dust filter can be cleaned with water and a soft brush. Dry thoroughly before placing it back. - Clean the water reservoir once a month for optimal and hygienic operation. Remove the water reservoir from the device and clean with some mild detergent and water. Empty the water reservoir, dry it off and return it to the device.
· Regularly vacuum the air vent at the front to remove dust. Or wipe clean with a damp cloth.
ENVIRONMENTAL GUIDELINES
text_image
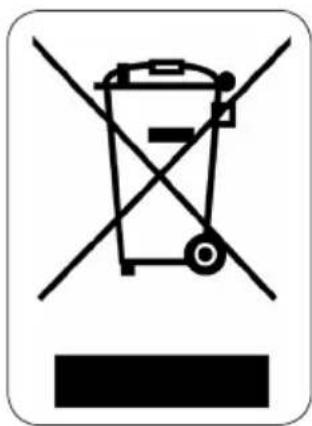
Prohibition sign depicting a trash bin crossed with a diagonal line, indicating no waste or discharge.This symbol on the product or on its packaging indicates that this product may not be treated as household waste. Instead it must be brought to the applicable collection point for recycling of electrical and electronic equipment. By ensuring this product is disposed of correctly, you will help prevent potential negative consequences for the environment and human health, which could otherwise be caused by inappropriate waste handling of this product. For more detailed information about recycling of this product, please contact your local city office, your household waste disposal service or the shop where you purchased the product.
natural_image
Recycling symbol icon with three chasing arrows forming a triangle (no text or labels)The packaging is recyclable. Please treat the packaging ecologically.
GARANTIA
natural_image
Two blue flower-shaped objects with embossed markings, no visible text or symbols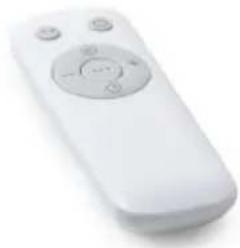
natural_image
White remote control with a circular button and three buttons (no visible text or symbols)PANEL DE CONTROL
natural_image
Diagram of three battery types: one with a small positive charge, two with negative charges, and a partially assembled cylindrical device (no text or symbols)USO
natural_image
Diagram of a device with a magnified inset showing a test tube inserted into a container (no text or symbols present)
natural_image
Line drawing of a mechanical component with a cylindrical shaft and internal housing (no text or symbols)
text_image
BC

natural_image
Diagram of a blender with a magnified inset showing a handle and scroll (no text or symbols)text_image
Prohibition sign with a trash bin crossed out and a black rectangle below, indicating no waste or plastic discharge.natural_image
Recycling symbol icon with three chasing arrows forming a triangle (no text or labels)natural_image
Two blue flower-shaped objects with embossed markings, no visible text or symbols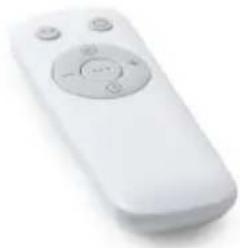
natural_image
White remote control with gray scroll button (no visible text or symbols)PANNELLO DI CONTROLLO
natural_image
Diagram of three different types of batteries: a battery, two stills with one positive charge, and a mobile phone (no text or symbols present)UTILIZZO
natural_image
Diagram of a device with a test tube inserted into a container, showing internal components and a close-up of the test tube (no text or symbols present)
natural_image
Line drawing of a mechanical component with a cylindrical shaft and internal housing (no text or symbols)
natural_image
Diagram showing a device being inserted into a container with a scroll, labeled B (no text or symbols present)C
natural_image
Line drawing of a kitchen blender with an inset showing a handle mechanism (no text or symbols)text_image
Prohibition sign depicting a trash bin crossed with a diagonal line, indicating no waste or discharge.natural_image
Recycling symbol icon with three chasing arrows forming a triangle (no text or labels)text_image
Diagram of a dual-camera air purifier with numbered parts labeled for identification.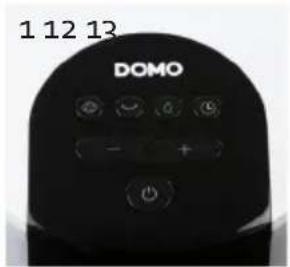
text_image
1 12 13 DOMO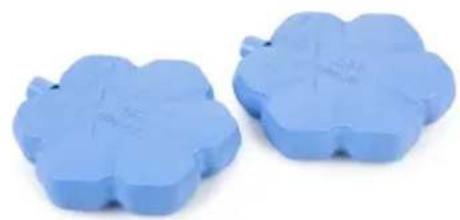
natural_image
Two blue flower-shaped objects with embossed markings, no visible text or symbols
natural_image
White remote control with circular buttons and a gray interior (no visible text or symbols)OVLÁDACÍ PANEL
natural_image
Diagram of three battery types: one open, two solid, and one cylindrical (no text or symbols)POUŽITÍ
natural_image
Diagram of a vacuum cleaner with a test tube inserted, showing internal components and a magnified view of the device (no text or symbols present)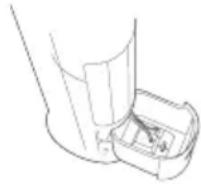

natural_image
Diagram showing a device being inserted into a housing, with an arrow indicating the process (no text or symbols present)C
natural_image
Diagram of a blender with an inset showing a plug and handle (no text or symbols)OHLED NA ŽÍVOTNÍ PROSTŘEDÍ

text_image
Prohibition sign for a trash bin with crossed and unexposed lines, indicating no waste or disposal.natural_image
Recycling symbol icon with three chasing arrows forming a triangle (no text or labels)natural_image
Two blue flower-shaped objects with embossed markings, no visible text or symbols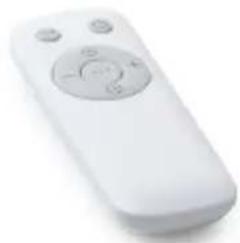
natural_image
White remote control with gray scroll and buttons (no visible text or symbols)OVLÁDACÍ PANEL
natural_image
Diagram of three electronic components: a battery, two batteries with positive and negative charge, and a mobile phone casing (no text or symbols)POUŽITIE
natural_image
Diagram of a device with a test tube inserted into a container, showing internal components and an inset view of the test tube (no text or symbols present)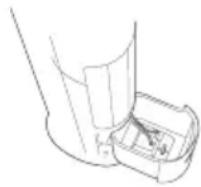
natural_image
Diagram showing a device being inserted into a housing, with an arrow indicating the process (no text or symbols present)C