ORC 330B - Hi-fi system OK - Free user manual and instructions
Find the device manual for free ORC 330B OK in PDF.
| Brand | OK |
| Model | ORC 330B |
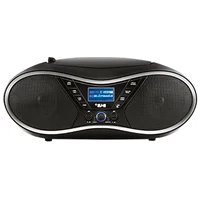
| Type | Hi-fi system with FM radio, CD player, USB port and AUX input |
| Mains power | 230 V~, 50 Hz (via power cord) |
| Battery power | 6 type C/R14 batteries (1.5 V, not included) |
| Power (estimated) | 2 × 10 W (built-in speakers) |
| Radio frequency range | FM 88–108 MHz |
| Radio memory | Up to 30 preset stations |
| Playable audio formats | Audio CD, CD-R/RW, MP3-CD, MP3 files via USB key (32–320 kbps) |
| Maximum USB capacity | 64 GB (FAT16/FAT32) |
| Playback | Single track, album repeat, all tracks repeat, random playback |
| Programmed playback | Up to 20 tracks (CD) / 99 tracks (MP3) |
| Special functions | Clock (12/24 h), sleep timer (up to 120 min), auto-off |
| Auxiliary input | 3.5 mm jack (AUX IN) |
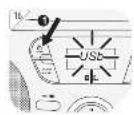
| Antenna | Telescopic, adjustable |
| Display | LED screen |
| Safety | Operates only with power cord or batteries, not simultaneously; laser class 1 label |
| Cleaning | Soft cloth slightly damp; no solvents or abrasive products |
| Dimensions (approx.) | 350 × 150 × 200 mm (unofficial) |
| Weight (approx.) | 2.5 kg (unofficial) |
Frequently Asked Questions - ORC 330B OK
User questions about ORC 330B OK
0 question about this device. Answer the ones you know or ask your own.
Ask a new question about this device
Download the instructions for your Hi-fi system in PDF format for free! Find your manual ORC 330B - OK and take your electronic device back in hand. On this page are published all the documents necessary for the use of your device. ORC 330B by OK.
USER MANUAL ORC 330B OK
M_ORC2308_180520(A)_V03


ORC 330-B
TRAGBARES STEREO RADIO CD // PORTABLE STEREO RADIO CD // RADIO ESTÉREO PORTÁTIL CD // RADIO STÉRÉO PORTABLE CD
natural_image
Black portable electronic device with dual speakers and a digital display (no visible text or symbols)125 CERDAICHENHRESUM
10. COLDERSHIP
10
E5 MANUAL DE INSTRUCCIONES IV
PR NODE DEVELOPMENT


CLASS I LASER PRODUCT
natural_image
Three-step line drawing showing hand holding a disc and a separate circular object (no text or symbols)DE
10
TECHNISCHE DATEN
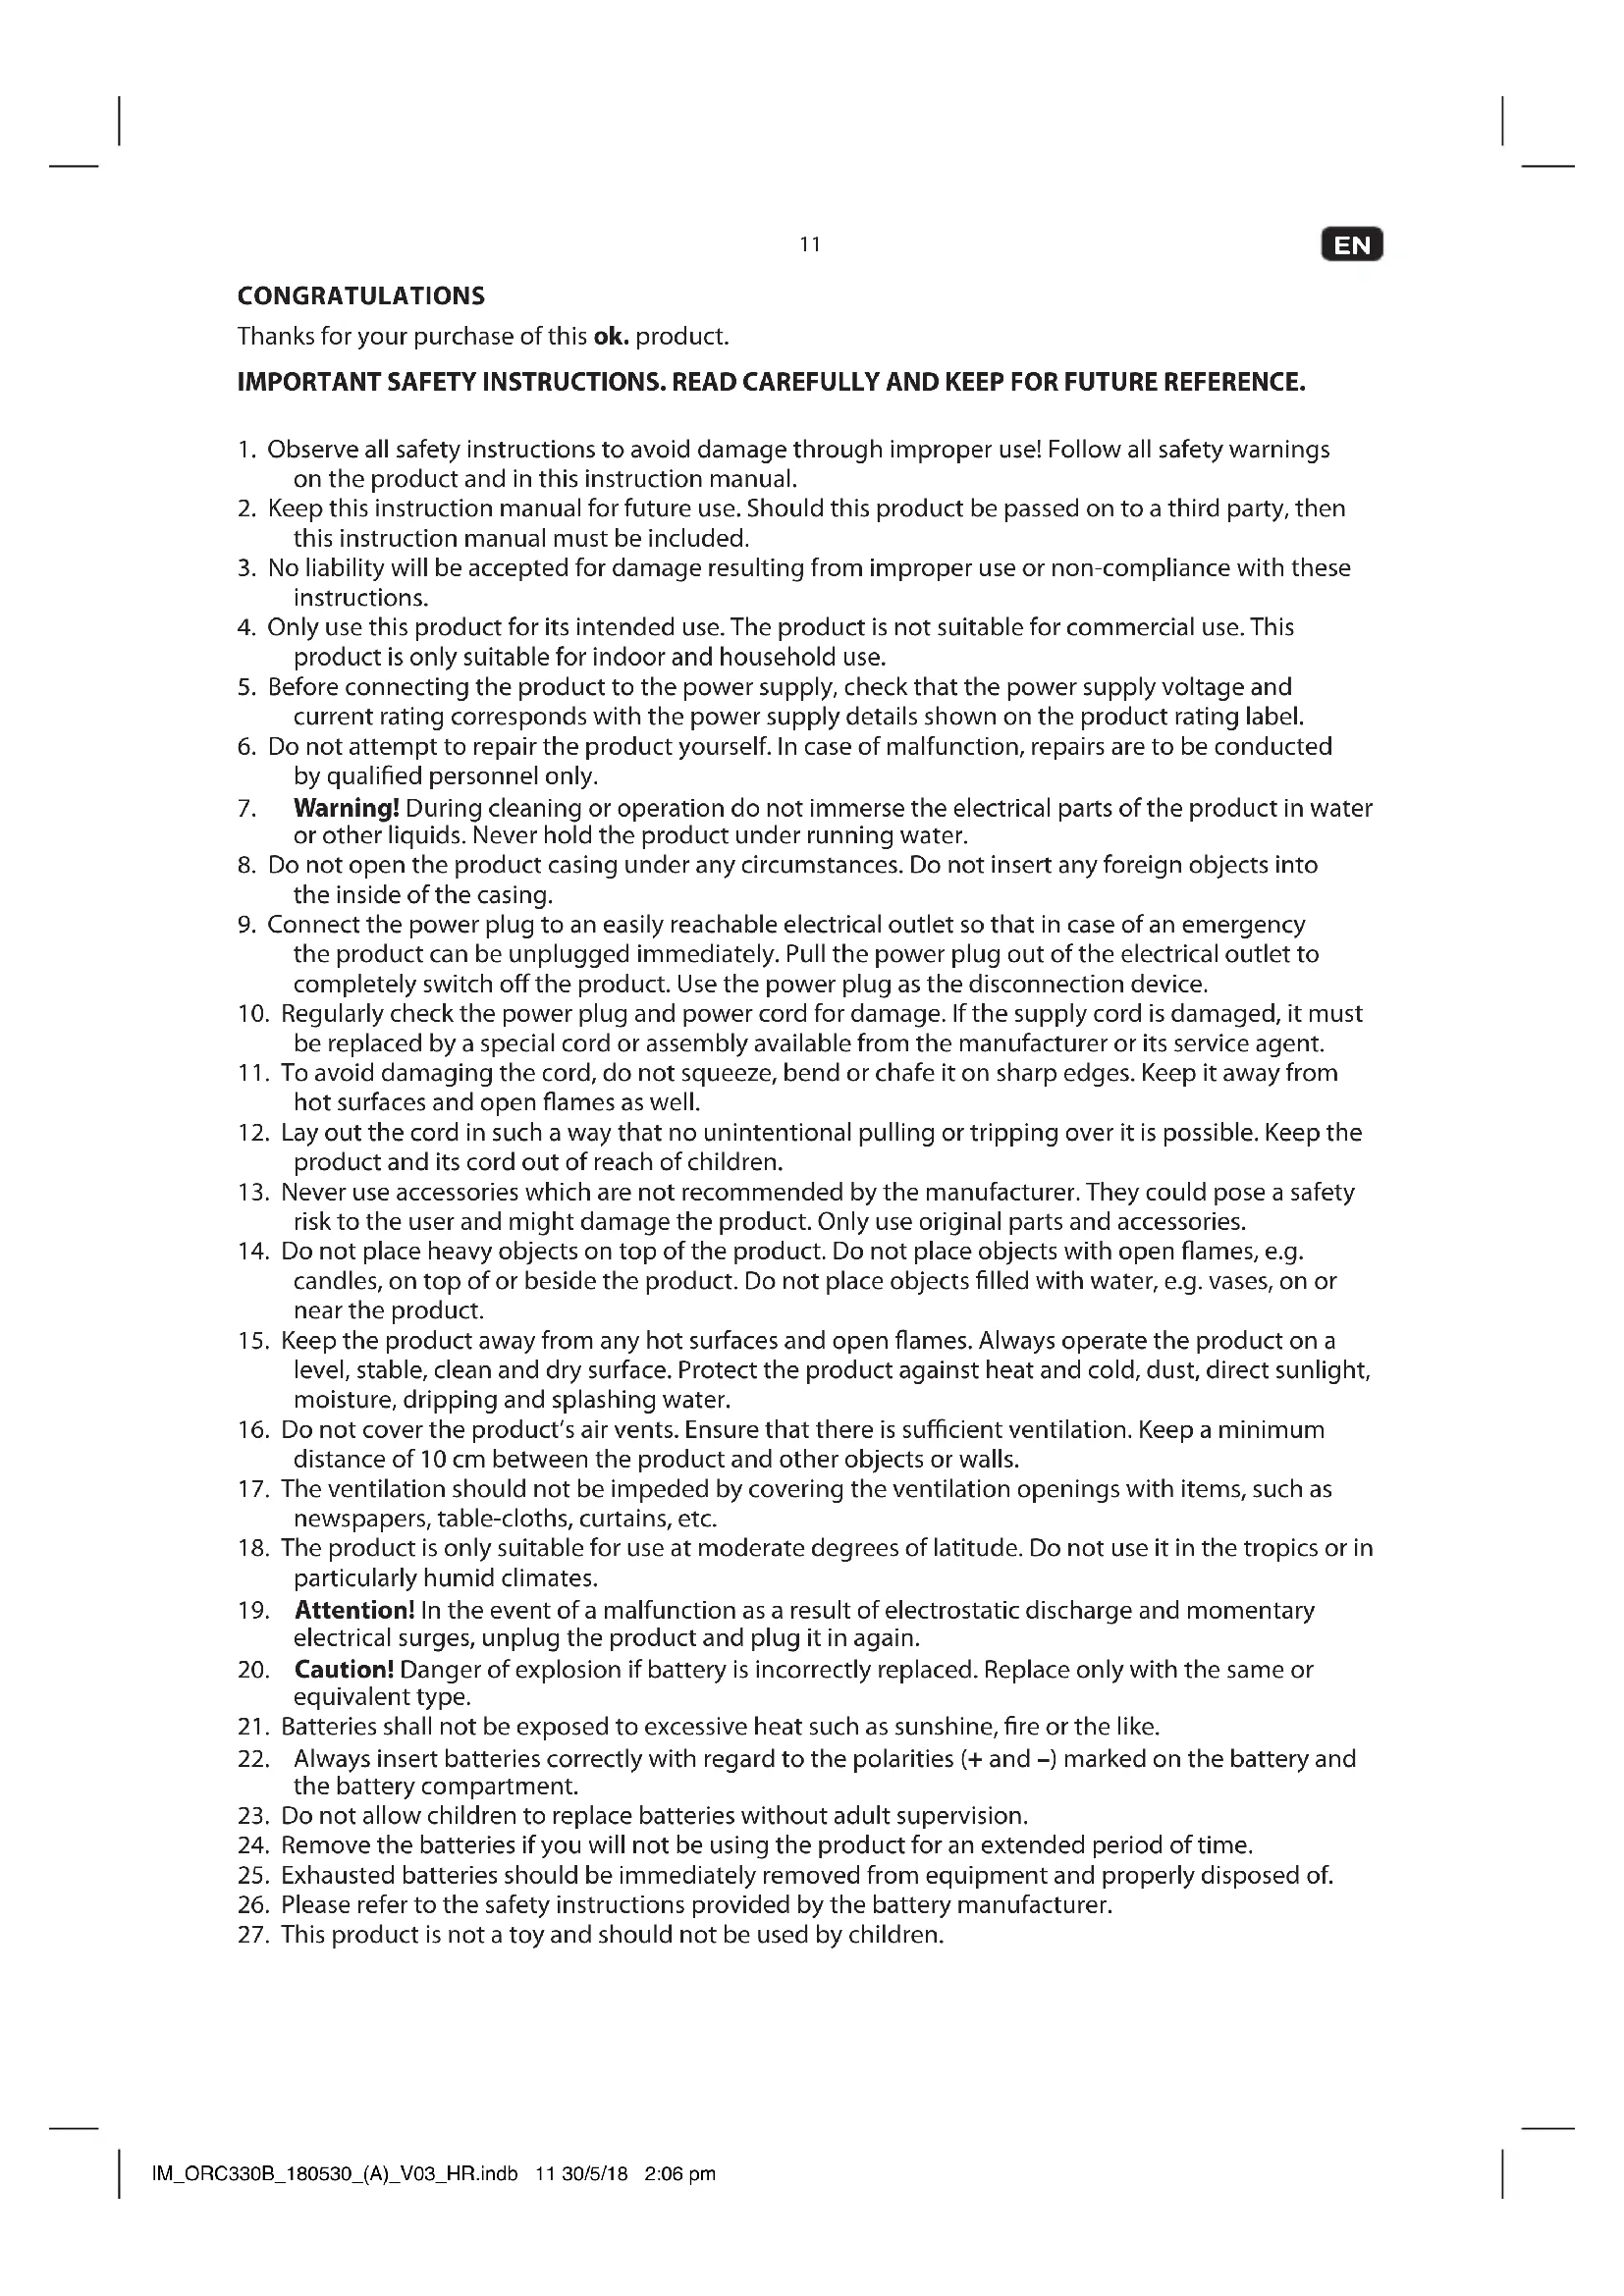
Thanks for your purchase of this ok. product.
IMPORTANT SAFETY INSTRUCTIONS. READ CAREFULLY AND KEEP FOR FUTURE REFERENCE.
- Observe all safety instructions to avoid damage through improper use! Follow all safety warnings on the product and in this instruction manual.
- Keep this instruction manual for future use. Should this product be passed on to a third party, then this instruction manual must be included.
- No liability will be accepted for damage resulting from improper use or non-compliance with these instructions.
- Only use this product for its intended use. The product is not suitable for commercial use. This product is only suitable for indoor and household use.
- Before connecting the product to the power supply, check that the power supply voltage and current rating corresponds with the power supply details shown on the product rating label.
- Do not attempt to repair the product yourself. In case of malfunction, repairs are to be conducted by qualified personnel only.
- Warning! During cleaning or operation do not immerse the electrical parts of the product in water or other liquids. Never hold the product under running water.
- Do not open the product casing under any circumstances. Do not insert any foreign objects into the inside of the casing.
- Connect the power plug to an easily reachable electrical outlet so that in case of an emergency the product can be unplugged immediately. Pull the power plug out of the electrical outlet to completely switch off the product. Use the power plug as the disconnection device.
- Regularly check the power plug and power cord for damage. If the supply cord is damaged, it must be replaced by a special cord or assembly available from the manufacturer or its service agent.
- To avoid damaging the cord, do not squeeze, bend or chafe it on sharp edges. Keep it away from hot surfaces and open flames as well.
- Lay out the cord in such a way that no unintentional pulling or tripping over it is possible. Keep the product and its cord out of reach of children.
- Never use accessories which are not recommended by the manufacturer. They could pose a safety risk to the user and might damage the product. Only use original parts and accessories.
- Do not place heavy objects on top of the product. Do not place objects with open flames, e.g. candles, on top of or beside the product. Do not place objects filled with water, e.g. vases, on or near the product.
- Keep the product away from any hot surfaces and open flames. Always operate the product on a level, stable, clean and dry surface. Protect the product against heat and cold, dust, direct sunlight, moisture, dripping and splashing water.
- Do not cover the product's air vents. Ensure that there is sufficient ventilation. Keep a minimum distance of 10cm between the product and other objects or walls.
- The ventilation should not be impeded by covering the ventilation openings with items, such as newspapers, table-cloths, curtains, etc.
- The product is only suitable for use at moderate degrees of latitude. Do not use it in the tropics or in particularly humid climates.
- Attention! In the event of a malfunction as a result of electrostatic discharge and momentary electrical surges, unplug the product and plug it in again.
- Caution! Danger of explosion if battery is incorrectly replaced. Replace only with the same or equivalent type.
- Batteries shall not be exposed to excessive heat such as sunshine, fire or the like.
- Always insert batteries correctly with regard to the polarities (+ and −) marked on the battery and the battery compartment.
- Do not allow children to replace batteries without adult supervision.
- Remove the batteries if you will not be using the product for an extended period of time.
- Exhausted batteries should be immediately removed from equipment and properly disposed of.
- Please refer to the safety instructions provided by the battery manufacturer.
- This product is not a toy and should not be used by children.
EN
- The information on the compact disc is read by a laser through an optical lens (do not touch). If you take the product from a cold to a warm room, moisture may condense on the lens, and the playback may be hampered. In this case leave the product for one hour at room temperature before use. Take the disc out of the product. Should the problem persist, have the product checked by qualified personnel.
CLASS I LASER PRODUCT
This label on the product informs the user that this is a class 1 laser product containing a laser component.
Do not touch the lens inside the disc compartment.
CAUTION! Use of controls or adjustments of procedures other than those specified herein may result in hazardous radiation exposure.
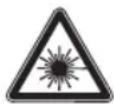
DANGER! Invisible laser radiation when open and safety interlock failed or defeated. Avoid direct exposure to the beam. Do not touch the lens.

CAUTION
RISK OF ELECTRIC SHOCK DO NOT OPEN

WARNING: SHOCK HAZARD - DO NOT OPEN AVIS: RISQUE DE CHOC ÉLECTRIQUE-NE PAS OUVRIR

The lightning flash with arrowhead within an equilateral triangle is intended to alert the user to the presence of uninsulated "dangerous voltage" inside the enclosure of this product, which may be of sufficient magnitude to constitute a risk of electric shock to persons and animals.

The exclamation point within an equilateral triangle is intended to alert the user to the presence of important operating and maintenance instructions in the literature accompanying this product.
INTENDED USE
This product is only intended for audio entertainment. This product is only suitable for private household use and it is not designed for commercial purpose. Every other type of use can lead to damage to the product or injury.
The Imtron GmbH assumes no liability for damage to the product, for property damage or for personal injury due to careless or improper usage of the product, or usage of product which does not meet the manufacturer's specified purpose.
BEFORE FIRST TIME USE
- Remove all packaging materials.
- Check for completeness and transport damage. In case of damages or incomplete delivery please contact your dealer.
- Clean the product Cleaning and care).
- Important! Before first use, remove the protective sheet from the disc compartment.
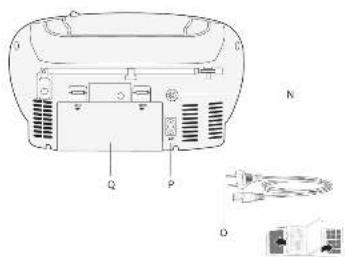
COMPONENTS
Fold out front and rear page for product illustrations.
A. Handle
N. AUX-IN jack
B. CD compartment lid
O. Power cable with plug
C. CD compartment opener
P. AC socket
D. AMS/MODE button
Q. Battery compartment
E. Speaker
R. Volume VOL-
F. SLEEP button
S. PRE-/Album button
G. PRE+/Album button
T. CLOCK/FM ST. button
H. Volume VOL+
U. Speaker
- Skip to next track
V. Power / FUNC. button
J. Stop button
W. Display
K. USB port
X. Telescopic antenna
L. Skip to previous track
M. Playback/Pause ▶||

POWER SUPPLY
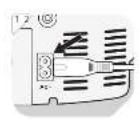
AC supply
Attention!
- Do not use this product with AC supply and battery operation simultaneously.
- Remove all of the batteries when operating this product via power supply.
- Disconnect the product before insert batteries.
1
Connect the power cable to the AC socket.
2
Connect the power plug to a suitable electrical outlet.
Note: Alternative you can use the product with batteries.
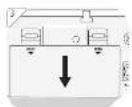
Battery operated
Attention!
- Do not use this product with AC supply and battery operation simultaneously.
• Unplug the product before inserting batteries.
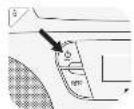
3
Remove the battery compartment cover.
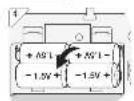
4
Insert 6 batteries (type C / R14, 1.5 V=, not included) in the battery compartment. Match the polarities + and -, as indicated on the batteries.
5
Close the battery compartment cover.
SETTING THE CLOCK
6
Press ⏻ button to turn off the product.
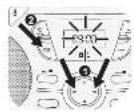
7
Activate clock setting mode: Press and hold CLOCK FM ST. for 2 seconds.
24H starts blinking on the display.
Press▶▶or◀◀ to choose between 12-hour/24-hour format. Press CLOCK FM ST. to confirm. The hour indicator starts blinking.
8
-
Press ▶▶ or ◀◀ to set the hour. Press CLOCK FM ST. to confirm. The minute indicator starts blinking.
-
Press▶▶ or▶◀ to set the minute. Press CLOCK FM ST. to confirm. The clock is now set and displayed.
Note: If the product is disconnected from power, the clock setting needs to be reset.
EN
OPERATION
Switching on and off
Press the ⏻ button to turn on/off the radio.
Mode selection
Press the FUNC. button to select a mode in following order AU (AUX-IN mode) > rAd (Radio mode) > cd (CD mode) > USb (USB mode).
Volume control
The volume can be easily controlled by pressing the buttons VOL+ or VOL-. The volume will be shown on display for a moment.
Sleep function
Press the SLEEP button shortly to adjust the sleep timer in 10 minutes steps from 120 minutes to 10 and 5 to OFF.
ALBUM
Press the button PRE+/- during playback of the MP3 file in order to select the next folder.
RADIO MODE
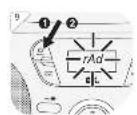
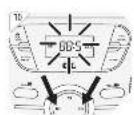
9
Press ⏻ button to turn on the product. Press FUNC. until "rAd" appears on the display.
10
Tuning
-
Select radio mode. Press /▶ button to search the whole frequency band.
-
For fine tuning, press the /▶ button shortly to change the frequency in steps of ± 0.1 MHz.
11
Memory preset
30 radio stations can be preset to program list.
- Set a station by tuning according to chapter Tuning.
- Press the AMS/MODE button to start the presetting process. Display will show "P01" flashing.
- Press the PRE -/+ button to select the desired preset station number.
- Press the AMS/MODE button again to save the actual station to the desired preset station number.
- Once all stations are preset, press PRE -/+ button to select your desired stations.
Notes:
For better FM reception: Fully extend the antenna. Or place the product on another place.
COMPATIBLE CDs
• Only use CD compact discs with digital audio signals.
- The making of unauthorized copies of copyright-protected material, including computer programs, files, broadcasts and sound recordings, may be an infringement of copyrights and constitute a criminal offence under your national law. This equipment should not be used for such purposes.
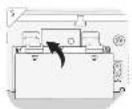
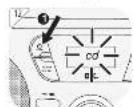
CD/USB MODE
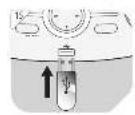
12 Press ⏻ button to turn on the product. Press FUNC. until "cd" appears on the display.
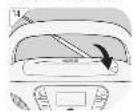
13 Open the CD compartment door and insert a CD with the label facing up.
14 Close the CD compartment door.
or
15 Connect a USB storage device to the USB port . Note
- Connect the USB device directly to the USB port of the product. Using an extension cable is not recommended and may cause interference and failure of data transfer.
• This product supports USB 1.1 and 2.0 up to 64 GB with file system FAT16 and FAT32.
• External devices cannot be charged via USB with this product.
16 Press ⏻ button to turn on the product. Press FUNC. until "USb" appears on the display.
Note: If no CD or USB storage is inserted, the display shows "no".
CD/USB PLAYBACK
17 1. Start or pause playback: Press . Impause mode the played time will flash on display.
- Stop playback: Press . ■ stop mode, total number of tracks will appear on the display.
- Skip to next track: Press . Press and hold to fast forward.
- Skip to previous track: Press . Press and hold to fast reverse.
- During playback, press AMS/MODE repeatedly to switch the playback modes as follows:
Press Display Result
1x REP Repeat one track. REP flashing in display
2x REP ALBUM Repeat album (only for MP3)
3x REP ALL Repeat all tracks
4x RAND Play a track randomly.
5x - Normal playback.
Notes:
• This product reads CD, CD-R/-RW and MP3-CD discs. Other discs are not supported.
- When playing CD-R/RW discs the playback quality might be influenced by the quality of the burned disc. When burning CD-R/RW disks with audio files we recommend using the slowest burning speed.
EN
PROGRAM PLAYBACK
Notes:
- Up to 20 CD tracks or up to 99 MP3 tracks can be programmed for a playback in any desired order.
- Programmed playback can only be made from one single source - it cannot include tracks from CD disc and USB storage at the same time.
18
- Stop playback: Press .
- Enter program settings: Press AMS/MODE . PROG and P01 will show on the display.
- Select desired track: Press o▶▶.I ◀◀◀
- Store selected track into the program memory: Press AMS/MODE again. P02 will now show on the display.
- Repeat step 3 and 4 to program additional tracks.
- After programming all the desired tracks, press to start program playback. PROG appears on the display.
- Stop playback: Press 1x .
- Cancel program playback: Press 2x ■ . PROG disappears from the display.
AUXILIARY (AUX) PLAYBACK
Warning!
Observe the relevant safety information for use with other devices when connecting an external device.
19
Press ⏻ button to turn on the product. Press FUNC. until "AU" appears on the display.
20
Connect auxiliary device to the AUX-IN socket using 3.5 mm jack audio cable (not included).
If an auxiliary device is connected, all playback functions of this device need to be used.
TROUBLESHOOTING
If there are any problems during operation, please refer to the following table. If problems cannot be solved as indicated under Solution, please contact your retailer.
| Problem Possible causes Solution | ||
| Product does not function | Interrupted power supplyDue to electrostatic discharge | Check the power supplyUnplug and plug it in again after a while |
| Poor Audio quality | CD is scratched | Insert a new CD |
| NO appears on display | CD not correctly insertedUSB not correctly connected | Re-insert the CDEnsure correct connection of USB stick |
| No radio reception | Poor radio reception | Place the product to another place and adjust the antenna again |
CLEANING AND CARE
- WARNING! Before cleaning, always switch off the product and disconnect the plug from power.
• Never immerse the product in water or other liquids. - Clean the product with a soft, slightly damp cloth. Make sure that no moisture is entering the product during cleaning.
- Never use corrosive detergents, wire brushes, abrasive scourers, metal or sharp implements to clean your product.
• Dry the product thoroughly after cleaning.
• Store the product in a cool, dry location, away from children and pets.
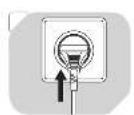
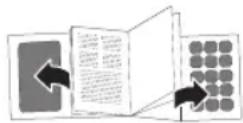
CD MAINTENANCE
- Small amount of dust or scratches will usually not have an impact on the quality of a disc. The discs should, however, be treated with care.
- Protect your compact discs from dust and scratches.
• Store your compact discs in their covers when not in use. - To maintain the original quality of sound, you should occasionally wipe your compact discs with a soft cloth, from the centre to the edge (not with circular movements). Never use gasoline or other solvents for cleaning.
• Only hold a compact disc by its edges!

natural_image
Three-step line drawing showing hand positioning of a circular object, no text or symbols presentEN
SPECIFICATIONS
Rated voltage: 230 V\~, 50 Hz
Rated power: 12 W
Battery: 9 V
---, 6 x 1.5 V = (type C / R14) (not supplied)
Supported formats: CD Audio, MP3/CD Audio, MP3
USB Port: supports up to 64 GB
Supported MP3 bitrates: 32 kbit/sec - 320 kbit/sec
Radio frequency band: 88 - 108 MHz (FM)
DECLARATION OF CONFORMITY
Hereby, [lmtron GmbH] declares that the radio equipment type [ORC 330-B] is in compliance with Directive 2014/53/EU. The full text of the EU declaration of conformity is available at the following internet address: http://de.ok-online.com/nc/de/suche.html
DISPOSAL

The crossed-out wheeled bin logo requires the separate collection of waste electric and electronic equipment (WEEE). Electric and electronic equipment may contain dangerous and hazardous substances. Do not dispose of this product as unsorted municipal waste. Return it to a designated collection point for the recycling of WEEE. By doing so, you will help to conserve resources and protect the environment. Contact your retailer or local authorities for more information.

Please dispose of batteries in an environmentally friendly manner. Do not put batteries into the household waste. Please use the return and collection systems in your community or contact the dealer where you purchased the product.
FELICIDADES
CLASS I LASER PRODUCT
natural_image
Three-step illustration showing hand holding a disc and a ring, with no text or symbols present.ES
26
ESPECIFICACIONES
CLASS I LASER PRODUCT
natural_image
Three-step line drawing showing hand holding a CD or DVD, with no text or symbols present.FR
CARACTERISTIqUES
DÉCLARATION DE CONFORMITÉ
CLASS I LASER PRODUCT
natural_image
Three-step line drawing showing hand holding a small object, no text or symbols presentGR
42
ΠΡΟΔΙΑΓΡΑΦΕΣ
Υποστηριζόμενα bitrates MP3: 32 kbit/sec - 320 kbit/sec
CLASS I LASER PRODUCT
natural_image
Three-step line drawing showing hand holding a small object, no text or symbols presentHU
50
SPECIFIKÁCIÓ
CLASS I LASER PRODUCT
natural_image
Three-step line drawing showing hand holding a small object, no text or symbols presentIT
58